No edit summary |
(Lore.jpg) |
||
| (23 intermediate revisions by 6 users not shown) | |||
| Line 1: | Line 1: | ||
{{NickBrawl2 Character Intro|char=Zim |full=Zim|short=Zim | {{NickBrawl2 Character Intro|char=Zim |full=[[File:NASB2_ZimStock.png|x30px]] Zim|short=Zim | ||
| franchise = Invader Zim | | franchise = Invader Zim | ||
| homestage = | | homestage = Irken Armada Invasion | ||
| weight = | | weight = 0.8 | ||
| fallspeed = | | fallspeed = 1.2 | ||
| gravity = | | gravity = 1.4 | ||
| runspeed = | | runspeed = 1.05 | ||
| airspeed = | | airspeed = 1 | ||
| placeholderone = | | placeholderone = | ||
| placeholdertwo = | | placeholdertwo = | ||
| Line 18: | Line 18: | ||
== About == | == About == | ||
'''''The Irken invader who plans on sowing DOOM on Earth!''''' | |||
Invader Zim is the protagonist of the show of the same name. A lowly soldier from the planet Irk, bent on dominating the entire universe, Zim often caused more trouble for his cause than good, and thus was banished to Earth by the Almighty Tallest. Not realizing his banishment, however, Zim resumes his mission and attempts to conquer Earth in the name of the Irkens, assisted by his bumbling and food-loving robotic servant, GIR. | |||
== Playstyle == | |||
Zim is a puppet-zoner character who's name of the game is stage control. Using GIR and his artillery of bombs, Zim can be a menace onstage. Zim also has a lot of surprisingly early kill options, such as Back Throw and Strong Neutral Air, and his setup game is deadly, being able to confirm from his bombs into any of his kill moves. | |||
If you like controlling the tempo of the match, and having all the land to yourself, Zim is your leader! | |||
== Metagame == | |||
Zim is ranked 11th out of 29 on the current [[Nickelodeon All-Star Brawl 2/FAQ|tier list]], in the A tier. This is a significant improvement over his 21st out of 25 placement in the first [[Nickelodeon All-Star Brawl]]. | |||
Zim's stage control is among the best in the game, with tools such as his Aerial Up Strong, his Down Special and GIR aiding him in controlling the pace of the match from any range. Zim also has a lot of control over GIR, being able to throw him and send him in multiple directions, which makes him a threat on any stage. Zim also has an arsenal of weapons that kill surprisingly early, such as his Back Throw and his Aerial Neutral Strong killing fairly early on small stages. Zim also has a very strong pressure game, demanding the opponent has a lot of patience if they want to counter his options. | |||
However, Zim does have some notable flaws. One of which is his weight: Zim is the lightest character in the game, (barring installs like Sugar Rush Garfield or Ghost Lucy) which makes him hilariously fragile if someone does get in on him. Zim also is much less threatening offstage: his recovery is very exploitable, and edgeguarding him isn't particularly difficult if GIR is not in play. This means Zim can flounder against rushdown characters or characters that can get in on his antics. | |||
Zim has historically been one of the more polarizing characters in the metagame. His tier placement has fluctuated from bottom tier all the way to top tier and back again, depending on the patch and opinions of the time. In recent times, however, he has become a much more favorable character, and is generally considered a high-tier character, with some even believing he may be even better than that. | |||
|content2= | |content2= | ||
| Line 29: | Line 43: | ||
}} | }} | ||
}} | }} | ||
---- | ---- | ||
{{ProConTable | {{ProConTable | ||
|pros= | |pros= | ||
* ''' | * '''Stage Control:''' With his Aerial Up Strong, his Neutral Special, his Down Special, and GIR, Zim is an absolute menace to get in on. Trying to recklessly approach him will often result in an early death. | ||
* ''' | * '''GIR:''' Zim's robot servant is a dangerous puppet who can even manage to kill opponents on the ledge. | ||
* ''' | * '''Annoying:''' Zim's pressure can wear down impatient opponents very easily. | ||
|cons= | |cons= | ||
* ''' | * '''Exploitable Recovery:''' Zim's recovery is very linear and slow, so if he gets caught offstage, he's a sitting duck. | ||
* '''Made of Glass:''' Zim is the lightest [base] character in the game. If you do manage to get in on him, he can be taken out in fairly short time. | |||
* ''' | |||
}} | }} | ||
---- | ---- | ||
== Moveset == | == Moveset == | ||
| Line 60: | Line 67: | ||
{{MoveData | {{MoveData | ||
|image= | |image= NASB2_Zim_LightNeutral-GermExterminator.png | ||
|caption= "So... much... filth!" | |||
|name= Germ Exterminator | |||
|input= Light | |||
|data= | |||
{{AttackData-NickBrawl2 | |||
|Damage=00% | |||
|Startup=0 | |||
|Active=0-0 | |||
|Total Frames=0 | |||
|Safety=-0 | |||
|description= | |||
* DESCRIPTION PLACEHOLDER | |||
* DESCRIPTION PLACEHOLDER | |||
}} | |||
}}<br> | |||
{{MoveData | |||
|image= NASB2_Zim_LightForward-PakAttack.png | |||
|caption= CAPTION PLACEHOLDER | |caption= CAPTION PLACEHOLDER | ||
|name= | |name= PAK Attack | ||
|input= | |input= Forward+Light | ||
|data= | |data= | ||
{{AttackData-NickBrawl2 | {{AttackData-NickBrawl2 | ||
| Line 78: | Line 103: | ||
{{MoveData | {{MoveData | ||
|image= | |image= NASB2_Zim_LightUp-PlungerOfDoom.png | ||
|caption= | |caption= It's not just any plunger. | ||
|name= | |name= Plunger of DOOM | ||
|input= | |input= Up+Light | ||
|data= | |data= | ||
{{AttackData-NickBrawl2 | {{AttackData-NickBrawl2 | ||
| Line 96: | Line 121: | ||
{{MoveData | {{MoveData | ||
|image= | |image= NASB2_Zim_LightDown-PlasmaSwirl.png | ||
|caption= CAPTION PLACEHOLDER | |caption= CAPTION PLACEHOLDER | ||
|name= | |name= Plasma Swirl | ||
|input= | |input= Down+Light | ||
|data= | |data= | ||
{{AttackData-NickBrawl2 | {{AttackData-NickBrawl2 | ||
| Line 114: | Line 139: | ||
{{MoveData | {{MoveData | ||
|image= | |image= NASB2_Zim_DashAttack-ImpendingDoom.png | ||
|caption= CAPTION PLACEHOLDER | |caption= CAPTION PLACEHOLDER | ||
|name= | |name= Impending DOOM | ||
|input= | |input= Light (Running) | ||
|data= | |data= | ||
{{AttackData-NickBrawl2 | {{AttackData-NickBrawl2 | ||
| Line 136: | Line 161: | ||
{{MoveData | {{MoveData | ||
|image= | |image= NASB2_Zim_LightNeutralAir-ElectricCircuit.png | ||
|caption= CAPTION PLACEHOLDER | |caption= CAPTION PLACEHOLDER | ||
|name= | |name= Electric Circuit | ||
|input= | |input= Light (Airborne) | ||
|data= | |data= | ||
{{AttackData-NickBrawl2 | {{AttackData-NickBrawl2 | ||
| Line 154: | Line 179: | ||
{{MoveData | {{MoveData | ||
|image= | |image= NASB2_Zim_LightForwardAir-Megabonk.png | ||
|caption= CAPTION PLACEHOLDER | |caption= CAPTION PLACEHOLDER | ||
|name= | |name= Megabonk | ||
|input= | |input= Forward+Light (Airborne) | ||
|data= | |data= | ||
{{AttackData-NickBrawl2 | {{AttackData-NickBrawl2 | ||
| Line 172: | Line 197: | ||
{{MoveData | {{MoveData | ||
|image= | |image= NASB2_Zim_LightBackAir-GardenGnomeCarnage.png | ||
|caption= CAPTION PLACEHOLDER | |caption= CAPTION PLACEHOLDER | ||
|name= | |name= Garden Gnome Carnage | ||
|input= | |input= Back+Light (Airborne) | ||
|data= | |data= | ||
{{AttackData-NickBrawl2 | {{AttackData-NickBrawl2 | ||
| Line 190: | Line 215: | ||
{{MoveData | {{MoveData | ||
|image= | |image= NASB2_Zim_LightUpAir-SpikeTrap.png | ||
|caption= CAPTION PLACEHOLDER | |caption= CAPTION PLACEHOLDER | ||
|name= | |name= Spike Trap | ||
|input= | |input= Up+Light (Airborne) | ||
|data= | |data= | ||
{{AttackData-NickBrawl2 | {{AttackData-NickBrawl2 | ||
| Line 208: | Line 233: | ||
{{MoveData | {{MoveData | ||
|image= | |image= NASB2_Zim_LightDownAir-DoomKick.png | ||
|caption= CAPTION PLACEHOLDER | |caption= CAPTION PLACEHOLDER | ||
|name= | |name= Doom Kick | ||
|input= | |input= Down+Light (Airborne) | ||
|data= | |data= | ||
{{AttackData-NickBrawl2 | {{AttackData-NickBrawl2 | ||
| Line 226: | Line 251: | ||
=== Ground | === Ground Strong Attacks === | ||
{{MoveData | {{MoveData | ||
|image= | |image= NASB2_Zim_ChargeForward-TheShocker.png | ||
|caption= | |caption= "Next, I test your electrical conductivity." | ||
|name= | |name= The Shocker | ||
|input= | |input= Strong | ||
|data= | |data= | ||
{{AttackData-NickBrawl2 | {{AttackData-NickBrawl2 | ||
| Line 248: | Line 273: | ||
{{MoveData | {{MoveData | ||
|image= | |image= NASB2_Zim_ChargeUp-DoomLaser.png | ||
|caption= CAPTION PLACEHOLDER | |caption= CAPTION PLACEHOLDER | ||
|name= | |name= Doom Laser | ||
|input= | |input= Up+Strong | ||
|data= | |data= | ||
{{AttackData-NickBrawl2 | {{AttackData-NickBrawl2 | ||
| Line 266: | Line 291: | ||
{{MoveData | {{MoveData | ||
|image= | |image= NASB2_Zim_ChargeDown-GuardianGnome.png | ||
|caption= CAPTION PLACEHOLDER | |caption= CAPTION PLACEHOLDER | ||
|name= | |name= Guardian Gnome | ||
|input= | |input= Down+Strong | ||
|data= | |data= | ||
{{AttackData-NickBrawl2 | {{AttackData-NickBrawl2 | ||
| Line 284: | Line 309: | ||
=== Air | === Air Strong Attacks === | ||
{{MoveData | {{MoveData | ||
|image= | |image= NASB2_Zim_ChargeForwardAir-LaserNova.png | ||
|caption= CAPTION PLACEHOLDER | |caption= CAPTION PLACEHOLDER | ||
|name= | |name= Laser Nova | ||
|input= | |input= Strong (Airborne) | ||
|data= | |data= | ||
{{AttackData-NickBrawl2 | {{AttackData-NickBrawl2 | ||
| Line 306: | Line 331: | ||
{{MoveData | {{MoveData | ||
|image= | |image= NASB2_Zim_ChargeUpAir-PlanetEraser.png | ||
|caption= "Eh. Okay. Here ya go." | |||
|name= Planet Eraser | |||
|input= Up+Strong (Airborne) | |||
|data= | |||
{{AttackData-NickBrawl2 | |||
|Damage=00% | |||
|Startup=0 | |||
|Active=0-0 | |||
|Total Frames=0 | |||
|Safety=-0 | |||
|description= | |||
* DESCRIPTION PLACEHOLDER | |||
* DESCRIPTION PLACEHOLDER | |||
}} | |||
}}<br> | |||
{{MoveData | |||
|image= NASB2_Zim_ChargeDownAir-StimtingSmityness.png | |||
|caption= "Minimoose, get in on this mayhem!" | |||
|name= Stimting Smityness | |||
|input= Down+Strong (Airborne) | |||
|data= | |||
{{AttackData-NickBrawl2 | |||
|Damage=00% | |||
|Startup=0 | |||
|Active=0-0 | |||
|Total Frames=0 | |||
|Safety=-0 | |||
|description= | |||
* DESCRIPTION PLACEHOLDER | |||
* DESCRIPTION PLACEHOLDER | |||
}} | |||
}}<br> | |||
=== Special Attacks === | |||
{{MoveData | |||
|image= NASB2_Zim_SpecialNeutral-PewPew.png | |||
|caption= CAPTION PLACEHOLDER | |caption= CAPTION PLACEHOLDER | ||
|name= | |name= Pew Pew! | ||
|input= | |input= Special | ||
|data= | |data= | ||
{{AttackData-NickBrawl2 | {{AttackData-NickBrawl2 | ||
| Line 318: | Line 382: | ||
|Safety=-0 | |Safety=-0 | ||
|description= | |description= | ||
* Zim uses his frontal PAK legs to shoot lasers diagonally downwards. | |||
* DESCRIPTION PLACEHOLDER | * DESCRIPTION PLACEHOLDER | ||
}} | |||
}}<br> | |||
{{MoveData | |||
|image= NASB2_Zim_SpecialForward-Gir.png | |||
|caption= "GIR, reporting fo duty!" | |||
|name= GIR! | |||
|input= Forward+Special | |||
|data= | |||
{{AttackData-NickBrawl2 | |||
|Damage=00% | |||
|Startup=0 | |||
|Active=0-0 | |||
|Total Frames=0 | |||
|Safety=-0 | |||
|description= | |||
* Zim sends out GIR, who attacks in coordination with Zim's actions. | |||
* DESCRIPTION PLACEHOLDER | * DESCRIPTION PLACEHOLDER | ||
}} | }} | ||
| Line 324: | Line 406: | ||
{{MoveData | {{MoveData | ||
|image= | |image= NASB2_Zim_SpecialDown-Expslowsion.png | ||
|caption= CAPTION PLACEHOLDER | |caption= CAPTION PLACEHOLDER | ||
|name= | |name= ExpSlowsion | ||
|input= | |input= Down+Special | ||
|data= | |data= | ||
{{AttackData-NickBrawl2 | {{AttackData-NickBrawl2 | ||
| Line 336: | Line 418: | ||
|Safety=-0 | |Safety=-0 | ||
|description= | |description= | ||
* Zim charges an explosion that can be thrown afterwards, dealing damage. | |||
* DESCRIPTION PLACEHOLDER | * DESCRIPTION PLACEHOLDER | ||
}} | |||
}}<br> | |||
{{MoveData | |||
|image= NASB2_Zim_SpecialUp-RocketHover.png | |||
|caption= CAPTION PLACEHOLDER | |||
|name= Rocket / Hover | |||
|input= Up+Special | |||
|data= | |||
{{AttackData-NickBrawl2 | |||
|Damage=00% | |||
|Startup=0 | |||
|Active=0-0 | |||
|Total Frames=0 | |||
|Safety=-0 | |||
|description= | |||
* Zim uses his PAK to propel himself upwards. | |||
* DESCRIPTION PLACEHOLDER | * DESCRIPTION PLACEHOLDER | ||
}} | }} | ||
| Line 342: | Line 442: | ||
=== | === Grab/Throws === | ||
{{MoveData | |||
|image= NASB2_Zim_Grab.png | |||
|caption= | |||
|name= Grab | |||
|input= Grab | |||
|data= | |||
{{AttackData-NickBrawl2 | |||
|Damage=00% | |||
|Startup=0 | |||
|Active=0-0 | |||
|Total Frames=0 | |||
|Safety=-0 | |||
|description= | |||
* DESCRIPTION PLACEHOLDER | |||
* DESCRIPTION PLACEHOLDER | |||
}} | |||
}}<br> | |||
{{MoveData | |||
|image= NASB2_Zim_DashGrab.png | |||
|caption= | |||
|name= Dash Grab | |||
|input= Grab (Running) | |||
|data= | |||
{{AttackData-NickBrawl2 | |||
|Damage=00% | |||
|Startup=0 | |||
|Active=0-0 | |||
|Total Frames=0 | |||
|Safety=-0 | |||
|description= | |||
* DESCRIPTION PLACEHOLDER | |||
* DESCRIPTION PLACEHOLDER | |||
}} | |||
}}<br> | |||
{{MoveData | |||
|image= NASB2_Zim_Pummel.png | |||
|caption= | |||
|name= Grab Pummel | |||
|input= Light (Grabbing) | |||
|data= | |||
{{AttackData-NickBrawl2 | |||
|Damage=00% | |||
|Startup=0 | |||
|Active=0-0 | |||
|Total Frames=0 | |||
|Safety=-0 | |||
|description= | |||
* DESCRIPTION PLACEHOLDER | |||
* DESCRIPTION PLACEHOLDER | |||
}} | |||
}}<br> | |||
{{MoveData | {{MoveData | ||
|image= | |image= NASB2_Zim_UpThrow.png | ||
|caption= | |caption= | ||
|name= | |name= Up Throw | ||
|input= | |input= Up (Grabbing) | ||
|data= | |data= | ||
{{AttackData-NickBrawl2 | {{AttackData-NickBrawl2 | ||
| Line 364: | Line 518: | ||
{{MoveData | {{MoveData | ||
|image= | |image= NASB2_Zim_ForwardThrow.png | ||
|caption= | |caption= | ||
|name= | |name= Forward Throw | ||
|input= | |input= Forward (Grabbing) | ||
|data= | |data= | ||
{{AttackData-NickBrawl2 | {{AttackData-NickBrawl2 | ||
| Line 382: | Line 536: | ||
{{MoveData | {{MoveData | ||
|image= | |image= NASB2_Zim_DownThrow.png | ||
|caption= | |caption= | ||
|name= | |name= Down Throw | ||
|input= | |input= Down (Grabbing) | ||
|data= | |data= | ||
{{AttackData-NickBrawl2 | {{AttackData-NickBrawl2 | ||
| Line 400: | Line 554: | ||
{{MoveData | {{MoveData | ||
|image= | |image= NASB2_Zim_BackThrow.png | ||
|caption= | |caption= | ||
|name= | |name= Back Throw | ||
|input= | |input= Back (Grabbing) | ||
|data= | |data= | ||
{{AttackData-NickBrawl2 | {{AttackData-NickBrawl2 | ||
| Line 422: | Line 576: | ||
{{MoveData | {{MoveData | ||
|image= | |image= NASB2_Zim_Super.png | ||
|caption= | |caption= "NYAH!" | ||
|name= | |name= Super | ||
|input= | |input= Slime+Light | ||
|data= | |data= | ||
{{AttackData-NickBrawl2 | {{AttackData-NickBrawl2 | ||
| Line 440: | Line 594: | ||
=== | === Taunts === | ||
{{MoveData | {{MoveData | ||
|image= | |image= NASB2_Zim_TauntNeutral.png | ||
|caption= CAPTION PLACEHOLDER | |caption= CAPTION PLACEHOLDER | ||
|name= | |name= Taunt | ||
|input= | |input= Taunt | ||
|data= | |||
{{AttackData-NickBrawl2 | |||
|Damage=00% | |||
|Startup=0 | |||
|Active=0-0 | |||
|Total Frames=0 | |||
|Safety=-0 | |||
|description= | |||
* DESCRIPTION PLACEHOLDER | |||
* DESCRIPTION PLACEHOLDER | |||
}} | |||
}}<br> | |||
{{MoveData | |||
|image= NASB2_Zim_TauntDown.png | |||
|caption= "AHAHAHAHA!" | |||
|name= Down Taunt | |||
|input= Down+Taunt | |||
|data= | |data= | ||
{{AttackData-NickBrawl2 | {{AttackData-NickBrawl2 | ||
| Line 461: | Line 633: | ||
}}<br> | }}<br> | ||
{{MoveData | |||
|image= NASB2_Zim_TauntUp.png | |||
|caption= "Witness my victory!" | |||
|name= Up Taunt | |||
|input= Up+Taunt | |||
|data= | |||
{{AttackData-NickBrawl2 | |||
|Damage=00% | |||
|Startup=0 | |||
|Active=0-0 | |||
|Total Frames=0 | |||
|Safety=-0 | |||
|description= | |||
* DESCRIPTION PLACEHOLDER | |||
* DESCRIPTION PLACEHOLDER | |||
}} | |||
}}<br> | |||
---- | ---- | ||
== | == Strategy == | ||
* PLACEHOLDER | * PLACEHOLDER | ||
| Line 475: | Line 664: | ||
== | == Techniques == | ||
* PLACEHOLDER | * PLACEHOLDER | ||
| Line 503: | Line 674: | ||
== | == Combos == | ||
* PLACEHOLDER | * PLACEHOLDER | ||
| Line 509: | Line 680: | ||
* PLACEHOLDER | * PLACEHOLDER | ||
---- | |||
== Matchups == | |||
{| class="wikitable" | |||
|- | |||
| '''+2''' || | |||
|- | |||
| '''+1''' || | |||
|- | |||
| '''0''' || [[File:NASB2_Sponge_Icon.png|x80px]] [[File:NASB2_Patrick_Icon.png|x80px]] [[File:NASB2_Squidward_Icon.png|x80px]] [[File:NASB2_Plankton_Icon.png|x80px]] [[File:NASB2_ElTigre_Icon.png|x80px]] [[File:NASB2_Rocko_Icon.png|x80px]] [[File:NASB2_Jimmy_Icon.png|x80px]] [[File:NASB2_Lucy_Icon.png|x80px]] [[File:NASB2_Beavers-Daggett_Icon.png|x80px]] [[File:NASB2_Beavers-Norbert_Icon.png|x80px]] [[File:NASB2_Garfield_Icon.png|x80px]] [[File:NASB2_Aang_Icon.png|x80px]] [[File:NASB2_Korra_Icon.png|x80px]] [[File:NASB2_Azula_Icon.png|x80px]] [[File:NASB2_Raphael_Icon.png|x80px]] [[File:NASB2_Donatello_Icon.png|x80px]] [[File:NASB2_April_Icon.png|x80px]] [[File:NASB2_Danny_Icon.png|x80px]] [[File:NASB2_Ember_Icon.png|x80px]] [[File:NASB2_Gertie_Icon.png|x80px]] [[File:NASB2_Gerald_Icon.png|x80px]] [[File:NASB2_Nigel_Icon.png|x80px]] [[File:NASB2_Zim_Icon.png|x80px]] [[File:NASB2_Jenny_Icon.png|x80px]] [[File:NASB2_Reptar_Icon.png|x80px]] [[File:NASB2_RenStimpy_Icon.png|x80px]] [[File:NASB2_Krabs_Icon.png|x80px]] [[File:NASB2_Zuko_Icon.png|x80px]] [[File:NASB2_Rocksteady_Icon.png|x80px]] | |||
|- | |||
| '''1''' || | |||
|- | |||
| '''2''' || | |||
|} | |||
---- | ---- | ||
| Line 518: | Line 705: | ||
* PLACEHOLDER | * PLACEHOLDER | ||
* PLACEHOLDER | * PLACEHOLDER | ||
=== Videos === | |||
PLACEHOLDER | |||
| Line 524: | Line 714: | ||
== Costumes == | == Costumes == | ||
<gallery> | |||
File:NASB2 Zim Costume00.png|500px|thumb|Zim's Default Outfit. | |||
File:NASB2 Zim Costume01.png|500px|thumb|Zim's Engineer Scientist disguise from issue #22 of the Invader ZIM comic book. | |||
File:NASB2 Zim Costume02.png|500px|thumb|Zim wearing his space suit from "Battle of the Planets". | |||
File:NASB2 Zim Costume03.png|500px|thumb|Zim in his human child disguise. (unlocked by having the Ultimate edition of NASB 2). | |||
File:NASB2 Zim Costume04.png|500px|thumb|Mind controlled Zim (unlocked by defeating Nigel twice in campaign mode). | |||
File:NASB2 Zim Costume05.png|500px|thumb|Zim's Ghost Clone (unlocked by defeating Nigel thrice in campaign mode). | |||
</gallery> | |||
{{Navbox-NickBrawl2}} | {{Navbox-NickBrawl2}} | ||
[[Category:Nickelodeon All-Star Brawl 2]] | [[Category:Nickelodeon All-Star Brawl 2]] | ||
Latest revision as of 00:02, 9 March 2025
About
The Irken invader who plans on sowing DOOM on Earth!
Invader Zim is the protagonist of the show of the same name. A lowly soldier from the planet Irk, bent on dominating the entire universe, Zim often caused more trouble for his cause than good, and thus was banished to Earth by the Almighty Tallest. Not realizing his banishment, however, Zim resumes his mission and attempts to conquer Earth in the name of the Irkens, assisted by his bumbling and food-loving robotic servant, GIR.
Playstyle
Zim is a puppet-zoner character who's name of the game is stage control. Using GIR and his artillery of bombs, Zim can be a menace onstage. Zim also has a lot of surprisingly early kill options, such as Back Throw and Strong Neutral Air, and his setup game is deadly, being able to confirm from his bombs into any of his kill moves.
If you like controlling the tempo of the match, and having all the land to yourself, Zim is your leader!
Metagame
Zim is ranked 11th out of 29 on the current tier list, in the A tier. This is a significant improvement over his 21st out of 25 placement in the first Nickelodeon All-Star Brawl.
Zim's stage control is among the best in the game, with tools such as his Aerial Up Strong, his Down Special and GIR aiding him in controlling the pace of the match from any range. Zim also has a lot of control over GIR, being able to throw him and send him in multiple directions, which makes him a threat on any stage. Zim also has an arsenal of weapons that kill surprisingly early, such as his Back Throw and his Aerial Neutral Strong killing fairly early on small stages. Zim also has a very strong pressure game, demanding the opponent has a lot of patience if they want to counter his options.
However, Zim does have some notable flaws. One of which is his weight: Zim is the lightest character in the game, (barring installs like Sugar Rush Garfield or Ghost Lucy) which makes him hilariously fragile if someone does get in on him. Zim also is much less threatening offstage: his recovery is very exploitable, and edgeguarding him isn't particularly difficult if GIR is not in play. This means Zim can flounder against rushdown characters or characters that can get in on his antics.
Zim has historically been one of the more polarizing characters in the metagame. His tier placement has fluctuated from bottom tier all the way to top tier and back again, depending on the patch and opinions of the time. In recent times, however, he has become a much more favorable character, and is generally considered a high-tier character, with some even believing he may be even better than that.
 | |
| Franchise |
Invader Zim |
|---|---|
| Home Stage |
Irken Armada Invasion |
| Weight |
0.8 |
| Fall Speed |
1.2 |
| Gravity |
1.4 |
| Run Speed |
1.05 |
| Air Speed |
1 |
| Strengths | Weaknesses |
|---|---|
|
|
Moveset
Ground Light Attacks
Light

| Damage | Startup | Active Frames | Total Frames | Safety | |
|---|---|---|---|---|---|
| 00% | 0 | 0-0 | 0 | -0 | |
| |||||
Forward+Light

| Damage | Startup | Active Frames | Total Frames | Safety | |
|---|---|---|---|---|---|
| 00% | 0 | 0-0 | 0 | -0 | |
| |||||
Up+Light

| Damage | Startup | Active Frames | Total Frames | Safety | |
|---|---|---|---|---|---|
| 00% | 0 | 0-0 | 0 | -0 | |
| |||||
Down+Light

| Damage | Startup | Active Frames | Total Frames | Safety | |
|---|---|---|---|---|---|
| 00% | 0 | 0-0 | 0 | -0 | |
| |||||
Light (Running)

| Damage | Startup | Active Frames | Total Frames | Safety | |
|---|---|---|---|---|---|
| 00% | 0 | 0-0 | 0 | -0 | |
| |||||
Air Light Attacks
Light (Airborne)

| Damage | Startup | Active Frames | Total Frames | Safety | |
|---|---|---|---|---|---|
| 00% | 0 | 0-0 | 0 | -0 | |
| |||||
Forward+Light (Airborne)

| Damage | Startup | Active Frames | Total Frames | Safety | |
|---|---|---|---|---|---|
| 00% | 0 | 0-0 | 0 | -0 | |
| |||||
Back+Light (Airborne)

| Damage | Startup | Active Frames | Total Frames | Safety | |
|---|---|---|---|---|---|
| 00% | 0 | 0-0 | 0 | -0 | |
| |||||
Up+Light (Airborne)

| Damage | Startup | Active Frames | Total Frames | Safety | |
|---|---|---|---|---|---|
| 00% | 0 | 0-0 | 0 | -0 | |
| |||||
Down+Light (Airborne)

| Damage | Startup | Active Frames | Total Frames | Safety | |
|---|---|---|---|---|---|
| 00% | 0 | 0-0 | 0 | -0 | |
| |||||
Ground Strong Attacks
Strong

| Damage | Startup | Active Frames | Total Frames | Safety | |
|---|---|---|---|---|---|
| 00% | 0 | 0-0 | 0 | -0 | |
| |||||
Up+Strong

| Damage | Startup | Active Frames | Total Frames | Safety | |
|---|---|---|---|---|---|
| 00% | 0 | 0-0 | 0 | -0 | |
| |||||
Down+Strong

| Damage | Startup | Active Frames | Total Frames | Safety | |
|---|---|---|---|---|---|
| 00% | 0 | 0-0 | 0 | -0 | |
| |||||
Air Strong Attacks
Strong (Airborne)

| Damage | Startup | Active Frames | Total Frames | Safety | |
|---|---|---|---|---|---|
| 00% | 0 | 0-0 | 0 | -0 | |
| |||||
Up+Strong (Airborne)

| Damage | Startup | Active Frames | Total Frames | Safety | |
|---|---|---|---|---|---|
| 00% | 0 | 0-0 | 0 | -0 | |
| |||||
Down+Strong (Airborne)

| Damage | Startup | Active Frames | Total Frames | Safety | |
|---|---|---|---|---|---|
| 00% | 0 | 0-0 | 0 | -0 | |
| |||||
Special Attacks
Special

| Damage | Startup | Active Frames | Total Frames | Safety | |
|---|---|---|---|---|---|
| 00% | 0 | 0-0 | 0 | -0 | |
| |||||
Forward+Special

| Damage | Startup | Active Frames | Total Frames | Safety | |
|---|---|---|---|---|---|
| 00% | 0 | 0-0 | 0 | -0 | |
| |||||
Down+Special

| Damage | Startup | Active Frames | Total Frames | Safety | |
|---|---|---|---|---|---|
| 00% | 0 | 0-0 | 0 | -0 | |
| |||||
Up+Special

| Damage | Startup | Active Frames | Total Frames | Safety | |
|---|---|---|---|---|---|
| 00% | 0 | 0-0 | 0 | -0 | |
| |||||
Grab/Throws
Grab

| Damage | Startup | Active Frames | Total Frames | Safety | |
|---|---|---|---|---|---|
| 00% | 0 | 0-0 | 0 | -0 | |
| |||||
Grab (Running)

| Damage | Startup | Active Frames | Total Frames | Safety | |
|---|---|---|---|---|---|
| 00% | 0 | 0-0 | 0 | -0 | |
| |||||
Light (Grabbing)

| Damage | Startup | Active Frames | Total Frames | Safety | |
|---|---|---|---|---|---|
| 00% | 0 | 0-0 | 0 | -0 | |
| |||||
Up (Grabbing)

| Damage | Startup | Active Frames | Total Frames | Safety | |
|---|---|---|---|---|---|
| 00% | 0 | 0-0 | 0 | -0 | |
| |||||
Forward (Grabbing)

| Damage | Startup | Active Frames | Total Frames | Safety | |
|---|---|---|---|---|---|
| 00% | 0 | 0-0 | 0 | -0 | |
| |||||
Down (Grabbing)

| Damage | Startup | Active Frames | Total Frames | Safety | |
|---|---|---|---|---|---|
| 00% | 0 | 0-0 | 0 | -0 | |
| |||||
Back (Grabbing)

| Damage | Startup | Active Frames | Total Frames | Safety | |
|---|---|---|---|---|---|
| 00% | 0 | 0-0 | 0 | -0 | |
| |||||
Super
Slime+Light

| Damage | Startup | Active Frames | Total Frames | Safety | |
|---|---|---|---|---|---|
| 00% | 0 | 0-0 | 0 | -0 | |
| |||||
Taunts
Taunt

| Damage | Startup | Active Frames | Total Frames | Safety | |
|---|---|---|---|---|---|
| 00% | 0 | 0-0 | 0 | -0 | |
| |||||
Down+Taunt

| Damage | Startup | Active Frames | Total Frames | Safety | |
|---|---|---|---|---|---|
| 00% | 0 | 0-0 | 0 | -0 | |
| |||||
Up+Taunt

| Damage | Startup | Active Frames | Total Frames | Safety | |
|---|---|---|---|---|---|
| 00% | 0 | 0-0 | 0 | -0 | |
| |||||
Strategy
- PLACEHOLDER
- PLACEHOLDER
- PLACEHOLDER
Techniques
- PLACEHOLDER
- PLACEHOLDER
- PLACEHOLDER
Combos
- PLACEHOLDER
- PLACEHOLDER
- PLACEHOLDER
Matchups
| +2 | |
| +1 | |
| 0 | |
| 1 | |
| 2 |
Other Resources
- PLACEHOLDER
- PLACEHOLDER
- PLACEHOLDER
Videos
PLACEHOLDER
Costumes

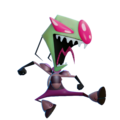
Zim's Default Outfit.

Zim's Engineer Scientist disguise from issue #22 of the Invader ZIM comic book.
Zim wearing his space suit from "Battle of the Planets".

Zim in his human child disguise. (unlocked by having the Ultimate edition of NASB 2).
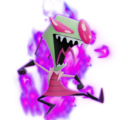
Mind controlled Zim (unlocked by defeating Nigel twice in campaign mode).
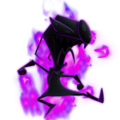
Zim's Ghost Clone (unlocked by defeating Nigel thrice in campaign mode).


