JtheSaltyy (talk | contribs) No edit summary |
RagingStormX (talk | contribs) |
||
| (6 intermediate revisions by 2 users not shown) | |||
| Line 49: | Line 49: | ||
<br><br> | <br><br> | ||
== Normal Moves == | == Normal Moves == | ||
| Line 107: | Line 105: | ||
| invul = - | | invul = - | ||
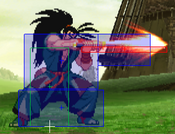
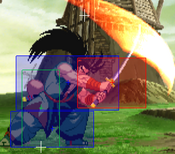
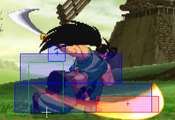
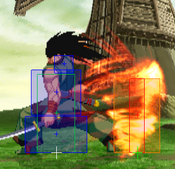
| description = One of your best pokes. It is a long reaching stab that is unpunishable with spacing. It's great to throw out for stopping jumps, interrupting buttons, and for controlling the mid screen space. The main drawback this button has is duration. It has a large 22f recovery, so things like rolls and jumps can punish this attack with ease. If it gets JD'd or parried a similar outcome will happen. You have to use it smartly in order to not get hurt for using this. | | description = One of your best pokes. It is a long reaching stab that is unpunishable with spacing. It's great to throw out for stopping jumps, interrupting buttons, and for controlling the mid screen space. The main drawback this button has is duration. It has a large 22f recovery, so things like rolls and jumps can punish this attack with ease. If it gets JD'd or parried a similar outcome will happen. You have to use it smartly in order to not get hurt for using this. | ||
If you guard break with this from a range you can always land far s.fp. | |||
}} | }} | ||
}} | }} | ||
| Line 135: | Line 135: | ||
| invul = - | | invul = - | ||
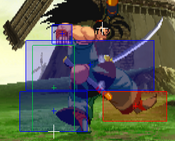
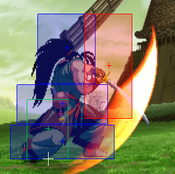
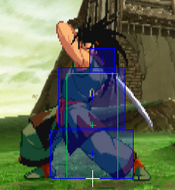
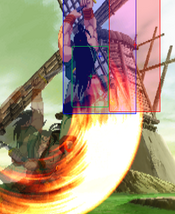
| description = Haohmaru's most famous attack, the "hard slash." A big, sluggish attack that deals by far the highest damage of any normal and even slows down the screen to let you know that the move hurt. Unfortunately, it is also the most unsafe normal in the game. If you space it, most moves in the game can't actually punish Haoh's 5HP on block because his hitbox reels back during his recovery, making most attempted punishes whiff, however instant supers like Gigaton Blow and Mega Psycho Crusher have no problems punishing it on block AND on hit. This will simultaneously win you games and lose you games, so be very careful when you use this attack. | | description = Haohmaru's most famous attack, the "hard slash." A big, sluggish attack that deals by far the highest damage of any normal and even slows down the screen to let you know that the move hurt. Unfortunately, it is also the most unsafe normal in the game. If you space it, most moves in the game can't actually punish Haoh's 5HP on block because his hitbox reels back during his recovery, making most attempted punishes whiff, however instant supers like Gigaton Blow and Mega Psycho Crusher have no problems punishing it on block AND on hit. This will simultaneously win you games and lose you games, so be very careful when you use this attack. | ||
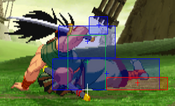
Because of the huge disjointed hitbox, this can be used at a very far range as anti-air vs neutral jumps and jump-back dive kicks, although it takes practice and timing to know the ranges, too close and will get beat clean. | |||
}} | }} | ||
}} | }} | ||
| Line 359: | Line 361: | ||
| advBlock = 0 | | advBlock = 0 | ||
| invul = - | | invul = - | ||
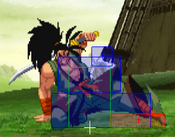
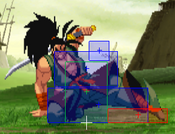
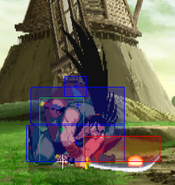
| description = A deceptively annoying move. Not only is it one of the very few 2LPs in the game that has a 2-frame startup, it is 0 on contact, so Haoh can repeatedly press 2LP and it will frame trap. Obviously reversals beat it but Haoh can simply block and then the opponent might find themselves eating a 5HP. Up close this is a very annoying tool for the opponent and a very good tool for Haohmaru. Poke and prod with it as much as you can up close. | | description = A deceptively annoying move, very strong defensively. Not only is it one of the very few 2LPs in the game that has a 2-frame startup, it is 0 on contact, so Haoh can repeatedly press 2LP and it will frame trap. Obviously reversals beat it but Haoh can simply block and then the opponent might find themselves eating a 5HP. Up close this is a very annoying tool for the opponent and a very good tool for Haohmaru. Poke and prod with it as much as you can up close. | ||
}} | }} | ||
}} | }} | ||
| Line 496: | Line 498: | ||
| recovery = 25 | | recovery = 25 | ||
| total = 49 | | total = 49 | ||
| advHit = | | advHit = KND | ||
| advBlock = -6 | | advBlock = -6 | ||
| invul = - | | invul = - | ||
| Line 509: | Line 511: | ||
| input = j.LP | | input = j.LP | ||
| subtitle = Jumping Light Punch | | subtitle = Jumping Light Punch | ||
| image = | | image = CVS2_Haoh_jLP.png | ||
| caption = | | caption = | ||
| linkname = j.LP | | linkname = j.LP | ||
| Line 516: | Line 518: | ||
| version = {{Motion|ub}}/{{Motion|u}}/{{Motion|uf}}+{{Icon-Capcom|LP}} | | version = {{Motion|ub}}/{{Motion|u}}/{{Motion|uf}}+{{Icon-Capcom|LP}} | ||
| subtitle = | | subtitle = | ||
| damage = | | damage = 600 | ||
| stun = | | stun = 6 | ||
| cancel = - | | cancel = - | ||
| guard = | | guard = High | ||
| parry = | | parry = High | ||
| startup = | | startup = 7 | ||
| active = | | active = 16 | ||
| recovery = - | | recovery = - | ||
| total = | | total = 23 | ||
| advHit = - | | advHit = - | ||
| advBlock = - | | advBlock = - | ||
| invul = - | | invul = - | ||
| description = | | description = A poor air to air attack. Don't use. | ||
}} | }} | ||
}} | }} | ||
| Line 537: | Line 539: | ||
| input = j.MP | | input = j.MP | ||
| subtitle = Jumping Medium Punch | | subtitle = Jumping Medium Punch | ||
| image = | | image = CVS2_Haoh_jMP.png | ||
| caption = | | caption = | ||
| linkname = j.MP | | linkname = j.MP | ||
| Line 544: | Line 546: | ||
| version = {{Motion|ub}}/{{Motion|u}}/{{Motion|uf}}+{{Icon-Capcom|MP}} | | version = {{Motion|ub}}/{{Motion|u}}/{{Motion|uf}}+{{Icon-Capcom|MP}} | ||
| subtitle = | | subtitle = | ||
| damage = | | damage = 1000 | ||
| stun = | | stun = 10 | ||
| cancel = - | | cancel = - | ||
| guard = | | guard = High | ||
| parry = | | parry = High | ||
| startup = | | startup = 4 | ||
| active = | | active = 8 | ||
| recovery = - | | recovery = - | ||
| total = | | total = 12 | ||
| advHit = - | | advHit = - | ||
| advBlock = - | | advBlock = - | ||
| invul = - | | invul = - | ||
| description = | | description = A good air-to-air, one of your usual options when meeting an opponent in the air. | ||
}} | }} | ||
}} | }} | ||
| Line 565: | Line 567: | ||
| input = j.HP | | input = j.HP | ||
| subtitle = Jumping Heavy Punch | | subtitle = Jumping Heavy Punch | ||
| image = | | image = CVS2_Haoh_jHP.png | ||
| caption = | | caption = | ||
| linkname = j.HP | | linkname = j.HP | ||
| Line 572: | Line 574: | ||
| version = {{Motion|ub}}/{{Motion|u}}/{{Motion|uf}}+{{Icon-Capcom|HP}} | | version = {{Motion|ub}}/{{Motion|u}}/{{Motion|uf}}+{{Icon-Capcom|HP}} | ||
| subtitle = | | subtitle = | ||
| damage = | | damage = 1600 | ||
| stun = | | stun = 16 | ||
| cancel = - | | cancel = - | ||
| guard = | | guard = High | ||
| parry = | | parry = High | ||
| startup = | | startup = 9 | ||
| active = | | active = 6 | ||
| recovery = - | | recovery = - | ||
| total = | | total = 15 | ||
| advHit = - | | advHit = - | ||
| advBlock = - | | advBlock = - | ||
| invul = - | | invul = - | ||
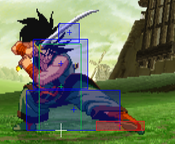
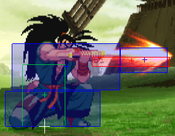
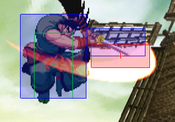
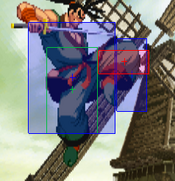
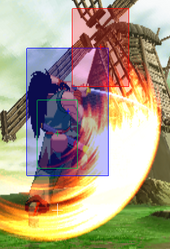
| description = | | description = A very good button. It has very large range, and deals very high damage. This is a dangerous button with grooves that allow shorthops, as it's a great overhead attack with very nice reward. Overall it is Haoh's best air button. In some matches, this can be heavily abused as a jump-in. | ||
}} | }} | ||
}} | }} | ||
| Line 593: | Line 595: | ||
| input = j.LK | | input = j.LK | ||
| subtitle = Jumping Light Kick | | subtitle = Jumping Light Kick | ||
| image = | | image = CVS2_Haoh_jLK.png | ||
| caption = | | caption = | ||
| linkname = j.LK | | linkname = j.LK | ||
| Line 600: | Line 602: | ||
| version = {{Motion|ub}}/{{Motion|u}}/{{Motion|uf}}+{{Icon-Capcom|LK}} | | version = {{Motion|ub}}/{{Motion|u}}/{{Motion|uf}}+{{Icon-Capcom|LK}} | ||
| subtitle = | | subtitle = | ||
| damage = | | damage = 500 | ||
| stun = | | stun = 5 | ||
| cancel = - | | cancel = - | ||
| guard = | | guard = High | ||
| parry = | | parry = High | ||
| startup = | | startup = 5 | ||
| active = | | active = 20 | ||
| recovery = - | | recovery = - | ||
| total = | | total = 25 | ||
| advHit = - | | advHit = - | ||
| advBlock = - | | advBlock = - | ||
| invul = - | | invul = - | ||
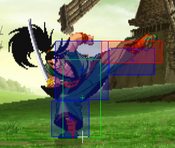
| description = | | description = A short ranged knee attack, usually it is best to use early when engaging in air to airs, since it is active for a long time. The reward is okay, but not anything to marvel at. | ||
}} | }} | ||
}} | }} | ||
| Line 621: | Line 623: | ||
| input = j.MK | | input = j.MK | ||
| subtitle = Jumping Medium Kick | | subtitle = Jumping Medium Kick | ||
| image = | | image = CVS2_Haoh_jMK.png | ||
| caption = | | caption = | ||
| linkname = j.MK | | linkname = j.MK | ||
| Line 628: | Line 630: | ||
| version = {{Motion|ub}}/{{Motion|u}}/{{Motion|uf}}+{{Icon-Capcom|MK}} | | version = {{Motion|ub}}/{{Motion|u}}/{{Motion|uf}}+{{Icon-Capcom|MK}} | ||
| subtitle = | | subtitle = | ||
| damage = | | damage = 800 | ||
| stun = | | stun = 8 | ||
| cancel = - | | cancel = - | ||
| guard = | | guard = High | ||
| parry = | | parry = High | ||
| startup = | | startup = 5 | ||
| active = | | active = 12 | ||
| recovery = - | | recovery = - | ||
| total = | | total = 17 | ||
| advHit = - | | advHit = - | ||
| advBlock = - | | advBlock = - | ||
| invul = - | | invul = - | ||
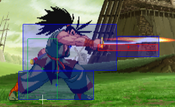
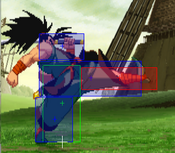
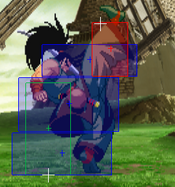
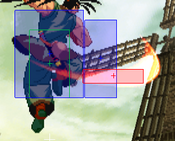
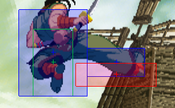
| description = | | description = Haoh's cross-up button. As you can see from the hitbox, it has potential to hit very deep, allowing for max damage confirms off of it. | ||
}} | }} | ||
}} | }} | ||
| Line 649: | Line 651: | ||
| input = j.HK | | input = j.HK | ||
| subtitle = Jumping Heavy Kick | | subtitle = Jumping Heavy Kick | ||
| image = | | image = CVS2_Haoh_jHK.png | ||
| caption = | | caption = | ||
| linkname = j.HK | | linkname = j.HK | ||
| Line 656: | Line 658: | ||
| version = {{Motion|ub}}/{{Motion|u}}/{{Motion|uf}}+{{Icon-Capcom|HK}} | | version = {{Motion|ub}}/{{Motion|u}}/{{Motion|uf}}+{{Icon-Capcom|HK}} | ||
| subtitle = | | subtitle = | ||
| damage = | | damage = 1100 | ||
| stun = | | stun = 11 | ||
| cancel = - | | cancel = - | ||
| guard = | | guard = High | ||
| parry = | | parry = High | ||
| startup = | | startup = 6 | ||
| active = | | active = 7 | ||
| recovery = - | | recovery = - | ||
| total = | | total = 13 | ||
| advHit = - | | advHit = - | ||
| advBlock = - | | advBlock = - | ||
| invul = - | | invul = - | ||
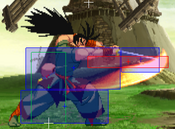
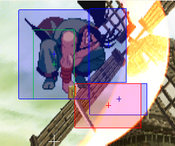
| description = | | description = A decent damage air-to-air. It is a frame slower than j.MK but has a hitbox that is more suitable to air to airs. | ||
}} | }} | ||
}} | }} | ||
== | == Throws == | ||
=== <span class="invisible-header"> | === <span class="invisible-header">Shoulder Slam</span> === | ||
{{MoveData | {{MoveData | ||
| name = | | name = Shoulder Slam | ||
| input = | | input = Near Opponent, 4/6HP | ||
| subtitle = | | subtitle = Punch Throw | ||
| image = | | image = CVS2_Haoh_Pthrow.png | ||
| caption = | | caption = | ||
| linkname = | | linkname = Shoulder Slam | ||
| data = | | data = | ||
{{AttackData-CvS2 | {{AttackData-CvS2 | ||
| version = - | | version = Close {{Motion|b}}/{{Motion|f}}+{{Icon-Capcom|HP}} | ||
| subtitle = | | subtitle = | ||
| damage = | | damage = 1900 | ||
| stun = - | | stun = - | ||
| cancel = - | | cancel = - | ||
| guard = - | | guard = - | ||
| parry = - | | parry = - | ||
| startup = | | startup = 3 | ||
| active = | | active = 1 | ||
| recovery = | | recovery = 13 | ||
| total = | | total = 17 | ||
| advHit = | | advHit = KND | ||
| advBlock = - | | advBlock = - | ||
| invul = - | | invul = - | ||
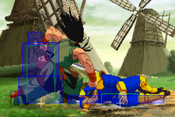
| description = | | description = Untechable throw that gives Haohmaru a great knockdown, it can set up either a left right mix or a meaty setup. This is generally his preferred throw, but due to close HP being a super unsafe button, using this button to throw can be pretty risky. | ||
}} | }} | ||
}} | }} | ||
=== <span class="invisible-header">Skull Crusher</span> === | |||
=== <span class="invisible-header"> | |||
{{MoveData | {{MoveData | ||
| name = | | name = Skull Crusher | ||
| input = Near Opponent, 4/ | | input = Near Opponent, 4/6HK | ||
| subtitle = | | subtitle = Kick Throw | ||
| image = | | image = CVS2_Haoh_Kthrow.png | ||
| caption = | | caption = | ||
| linkname = | | linkname = Skull Crusher | ||
| data = | | data = | ||
{{AttackData-CvS2 | {{AttackData-CvS2 | ||
| version = Close {{Motion|b}}/{{Motion|f}}+{{Icon-Capcom| | | version = Close {{Motion|b}}/{{Motion|f}}+{{Icon-Capcom|HK}} | ||
| subtitle = | | subtitle = | ||
| damage = 2100 | |||
| stun = - | |||
| cancel = - | |||
| guard = - | |||
| parry = - | |||
| startup = 5 | |||
| active = 1 | |||
| recovery = 13 | |||
| total = 19 | |||
| advHit = KND | |||
| advBlock = - | |||
| invul = - | |||
| description = Another untechable throw, however the knockdown is not as good. It only gives Haoh a meaty from the front. The 300 extra damage is nice to have, but punch throw is preferred. Attempting this throw takes less risk compared to punch throw, however, as whiffing that throw gives you close HK, a far safer button that can also catch most close jumps. | |||
}} | |||
}} | |||
== Special Moves == | |||
===== <span class="invisible-header">Senpuu Retsu Zan</span> ===== | |||
{{MoveData | |||
| name = Senpuu Retsu Zan | |||
| input = {{Motion|236}} + {{Icon-Capcom|P}} | |||
| subtitle = 236+P / QCF+P | |||
| image = CVS2_Haoh_236P.png | |||
| caption = | |||
| linkname = 236P | |||
| data = | |||
{{AttackData-CvS2 | |||
| version = LP | |||
| subtitle = {{Motion|236}} + {{Icon-Capcom|LP}} | |||
| damage = 1000 | |||
| stun = 10 | |||
| cancel = None | |||
| guard = Mid | |||
| parry = Mid | |||
| startup = 27 | |||
| active = - | |||
| recovery = 55 | |||
| total = 82 | |||
| advHit = KND | |||
| advBlock = -18 | |||
| invul = - | |||
| description = | |||
}} | |||
{{AttackData-CvS2 | |||
| header = no | |||
| version = MP | |||
| subtitle = {{Motion|236}} + {{Icon-Capcom|MP}} | |||
| damage = 1100 | |||
| stun = 11 | |||
| cancel = None | |||
| guard = Mid | |||
| parry = Mid | |||
| startup = 28 | |||
| active = - | |||
| recovery = 55 | |||
| total = 83 | |||
| advHit = KND | |||
| advBlock = -18 | |||
| invul = - | |||
| description = | |||
}} | |||
{{AttackData-CvS2 | |||
| header = no | |||
| version = HP | |||
| subtitle = {{Motion|236}} + {{Icon-Capcom|HP}} | |||
| damage = 1200 | |||
| stun = 12 | |||
| cancel = None | |||
| guard = Mid | |||
| parry = Mid | |||
| startup = 29 | |||
| active = - | |||
| recovery = 55 | |||
| total = 83 | |||
| advHit = KND | |||
| advBlock = -18 | |||
| invul = - | |||
| description = Haohmaru's fireball. It is a bit on the slower side compared to other characters. Unlike those fireballs, it has a nice reward on hit, blasting the opponent into the air. It gives Haohmaru a very good knockdown, so the opponent has to respect it knowing the consequences of them not doing so. In terms of fireball wars, this one usually won't win many. It is mainly used to keep control in neutral from a distance, having something on screen wouldn't hurt, and as said before usually the opponent will take action to try and not get hit by it due to the nice reward. You can juggle this fireball into a super, but the chances of that happening are slim to none in a real match. | |||
}} | |||
}} | |||
===== <span class="invisible-header">Feint Senpuu Retsu Zan</span> ===== | |||
{{MoveData | |||
| name = Feint Senpuu Retsu Zan | |||
| input = {{Motion|236}} + {{Icon-Capcom|K}} | |||
| subtitle = 236+K / QCF+K | |||
| image = CVS2_Haoh_236K.png | |||
| caption = | |||
| linkname = 236K | |||
| data = | |||
{{AttackData-CvS2 | |||
| version = LK | |||
| subtitle = {{Motion|236}} + {{Icon-Capcom|LK}} | |||
| damage = - | |||
| stun = - | |||
| cancel = - | |||
| guard = - | |||
| parry = - | |||
| startup = 26 | |||
| active = - | |||
| recovery = - | |||
| total = 26 | |||
| advHit = - | |||
| advBlock = - | |||
| invul = - | |||
| description = | |||
}} | |||
{{AttackData-CvS2 | |||
| header = no | |||
| version = MK | |||
| subtitle = {{Motion|236}} + {{Icon-Capcom|MK}} | |||
| damage = - | | damage = - | ||
| stun = - | | stun = - | ||
| Line 719: | Line 831: | ||
| guard = - | | guard = - | ||
| parry = - | | parry = - | ||
| startup = | | startup = 28 | ||
| active = - | | active = - | ||
| recovery = - | | recovery = - | ||
| total = | | total = 28 | ||
| advHit = - | | advHit = - | ||
| advBlock = - | | advBlock = - | ||
| invul = - | | invul = - | ||
| description = | | description = | ||
}} | }} | ||
{{AttackData-CvS2 | {{AttackData-CvS2 | ||
| version = | | header = no | ||
| version = HK | |||
| subtitle = {{Motion|236}} + {{Icon-Capcom|HK}} | |||
| damage = - | | damage = - | ||
| stun = - | | stun = - | ||
| Line 747: | Line 849: | ||
| guard = - | | guard = - | ||
| parry = - | | parry = - | ||
| startup = | | startup = 30 | ||
| active = - | | active = - | ||
| recovery = - | | recovery = - | ||
| total = | | total = 30 | ||
| advHit = - | | advHit = - | ||
| advBlock = - | | advBlock = - | ||
| invul = - | | invul = - | ||
| description = | | description = A feint of Haohmaru's fireball. He winds back like he is going to do the move, and even says "Senpuu" before interrupting himself. This is a pretty okay tool, the main use is to get the oppoennt to jump expecting a fireball and promptly hitting them with an anti air or air to air in response. Aside from that, it really isn't used for much else. | ||
}} | |||
}} | |||
===== <span class="invisible-header">Kougetsu Zan</span> ===== | |||
{{MoveData | |||
| name = Kougetsu Zan | |||
| input = {{Motion|623}} + {{Icon-Capcom|P}} | |||
| subtitle = 623+P / DP+P | |||
| image = CVS2_Haoh_623P.png | |||
| caption = | |||
| linkname = 623P | |||
| data = | |||
{{AttackData-CvS2 | |||
| version = LP | |||
| subtitle = {{Motion|623}} + {{Icon-Capcom|LP}} | |||
| damage = 1400 | |||
| stun = 14 | |||
| cancel = None | |||
| guard = Mid | |||
| parry = Mid | |||
| startup = 6 | |||
| active = 7 [9] 7 | |||
| recovery = 45 | |||
| total = 74 | |||
| advHit = KND | |||
| advBlock = -28 | |||
| invul = - | |||
| description = | |||
}} | |||
{{AttackData-CvS2 | |||
| header = no | |||
| version = MP | |||
| subtitle = {{Motion|623}} + {{Icon-Capcom|MP}} | |||
| damage = 900+600 | |||
| stun = 9+6 | |||
| cancel = None | |||
| guard = Mid | |||
| parry = Mid | |||
| startup = 6 | |||
| active = 7 [9] 7 | |||
| recovery = 56 | |||
| total = 85 | |||
| advHit = KND | |||
| advBlock = -39 | |||
| invul = - | |||
| description = | |||
}} | |||
{{AttackData-CvS2 | |||
| header = no | |||
| version = HP | |||
| subtitle = {{Motion|623}} + {{Icon-Capcom|HP}} | |||
| damage = 1000+600 | |||
| stun = 12 | |||
| cancel = None | |||
| guard = Mid | |||
| parry = Mid | |||
| startup = 6 | |||
| active = 7 [7] 8 | |||
| recovery = 65 | |||
| total = 93 | |||
| advHit = KND | |||
| advBlock = -49 | |||
| invul = - | |||
| description = Haohmaru's uppercut/DP. The two main uses this move has are that it is his best anti-air, and it is his only good meterless combo ender. The anti-air range of this DP is roughly a 50-60 degree angle jump, not too close but not too far. The hitbox will usually favor it, however this move has no i-frames of any kind, meaning that Haohmaru has no meterless reversal. Aside from those flaws, it is a good special move and one of the core parts of Haoh's kit. Stick to lp when using as anti-air. | |||
}} | |||
}} | |||
===== <span class="invisible-header">Resshin Zan</span> ===== | |||
{{MoveData | |||
| name = Resshin Zan | |||
| input = {{Motion|214}} + {{Icon-Capcom|P}} | |||
| subtitle = 214+P / QCB+P | |||
| image = CVS2_Haoh_214P.png | |||
| caption = | |||
| linkname = 214P | |||
| data = | |||
{{AttackData-CvS2 | |||
| version = LP | |||
| subtitle = {{Motion|214}} + {{Icon-Capcom|LP}} | |||
| damage = 1200 | |||
| stun = 12 | |||
| cancel = None | |||
| guard = High | |||
| parry = High | |||
| startup = 26 | |||
| active = 8 | |||
| recovery = 22 | |||
| total = 56 | |||
| advHit = KND | |||
| advBlock = -6 | |||
| invul = - | |||
| description = | |||
}} | |||
{{AttackData-CvS2 | |||
| header = no | |||
| version = MP | |||
| subtitle = {{Motion|214}} + {{Icon-Capcom|MP}} | |||
| damage = 1300 | |||
| stun = 13 | |||
| cancel = None | |||
| guard = High | |||
| parry = High | |||
| startup = 32 | |||
| active = 8 | |||
| recovery = 22 | |||
| total = 62 | |||
| advHit = KND | |||
| advBlock = -6 | |||
| invul = - | |||
| description = | |||
}} | |||
{{AttackData-CvS2 | |||
| header = no | |||
| version = HP | |||
| subtitle = {{Motion|214}} + {{Icon-Capcom|HP}} | |||
| damage = 1400 | |||
| stun = 14 | |||
| cancel = None | |||
| guard = High | |||
| parry = High | |||
| startup = 39 | |||
| active = 8 | |||
| recovery = 22 | |||
| total = 69 | |||
| advHit = KND | |||
| advBlock = -6 | |||
| invul = - | |||
| description = A flying flip ending in a powerful slash. This move causes a knockdown on hit, but it is a quick one and you only get a meaty. This move has 2 main uses: as a surprise mixup tool from a string of light attacks, and as a very niche fireball punish. The mixup can be pretty tricky, as you can go from low to overhead quickly from something like cr.LK or cr.MK, however the opponent can quickly adapt and block it easily the next time, so this should be used sparingly. It is -6 on block, so with spacing, it is hard to punish this move, and if it does get clipped it won't hurt too much. As a fireball punish, it's a read, doing it on reaction leads into the move getting blocked or anti aired entirely, so if you're certain the fireball will come, you can let it rip. Otherwise, just stick to using this move sparingly and catch the opponent off guard. | |||
}} | |||
}} | |||
== Super Moves == | |||
===== <span class="invisible-header">Tenha Fuujin Zan</span> ===== | |||
{{MoveData | |||
| name = Tenha Fuujin Zan | |||
| input = {{Motion|236}}{{Motion|236}} + {{Icon-Capcom|P}} | |||
| subtitle = 236236+P / QCF,QCF+P | |||
| image = CVS2_Haoh_236236P.png | |||
| caption = | |||
| linkname = 236236P | |||
| data = | |||
{{AttackData-CvS2 | |||
| version = LP | |||
| subtitle = {{Motion|236}}{{Motion|236}} + {{Icon-Capcom|LP}} | |||
| damage = 2300 | |||
| stun = 0 | |||
| cancel = None | |||
| guard = Mid | |||
| parry = Mid | |||
| startup = 8 | |||
| active = 6 [13] 6 [14] 6 [11] 21 | |||
| recovery = 54 | |||
| total = 139 | |||
| advHit = KND | |||
| advBlock = -48 | |||
| invul = 8f (Full) | |||
| description = | |||
}} | |||
{{AttackData-CvS2 | |||
| header = no | |||
| version = MP | |||
| subtitle = {{Motion|236}}{{Motion|236}} + {{Icon-Capcom|MP}} | |||
| damage = 4400 | |||
| stun = 0 | |||
| cancel = None | |||
| guard = Mid | |||
| parry = Mid | |||
| startup = 8 | |||
| active = 6 [13] 6 [14] 6 [14] 6 [11] 21 | |||
| recovery = 64 | |||
| total = 169 | |||
| advHit = KND | |||
| advBlock = -55 | |||
| invul = 8f (Full) | |||
| description = | |||
}} | |||
{{AttackData-CvS2 | |||
| header = no | |||
| version = HP | |||
| subtitle = {{Motion|236}}{{Motion|236}} + {{Icon-Capcom|HP}} | |||
| damage = 5800 | |||
| stun = 0 | |||
| cancel = None | |||
| guard = Mid | |||
| parry = Mid | |||
| startup = 8 | |||
| active = 6 [13] 6 [14] 6 [14] 6 [14] 6 [11] 21 | |||
| recovery = 75 | |||
| total = 204 | |||
| advHit = KND | |||
| advBlock = -65 | |||
| invul = 22f (Full) | |||
| description = Haohmaru's only tiered super. Unfortunately, it is also his only true reversal. This is a very risky move to pull out in those scenarios due to how unsafe it is. This is only really used as a combo ender, since you can bag some nice damage out of those confirms, however be mindful that the first uppercut of the super has shorter range, and whiffing that first part causes the combo to fall out. It is just a very risky super, with just okay reward. | |||
Another important thing to note, do NOT use this as an anti-air or a midscreen juggle. This move does not juggle properly and the opponent falls out of the super, and usually only 2-3 hits connect. On higher levels where Haohmaru spends more time doing uppercuts, he is actually punishable on HIT when connecting as an anti air. Unless you're certain the anti-air super will kill, do not use it against an aerial opponent. | |||
}} | |||
}} | |||
===== <span class="invisible-header">Tenha Senkou Zan</span> ===== | |||
{{MoveData | |||
| name = Tenha Senkou Zan | |||
| input = {{Motion|63214}}{{Motion|6}} + {{Icon-Capcom|P}} | |||
| subtitle = 632146+P / HCB,F+P | |||
| image = CVS2_Haoh_632146P.png | |||
| caption = Hard Slash on every PED known to man | |||
| linkname = 632146P | |||
| data = | |||
{{AttackData-CvS2 | |||
| version = | |||
| subtitle = {{Motion|63214}}{{Motion|6}} + {{Icon-Capcom|P}} | |||
| damage = 6700 | |||
| stun = 0 | |||
| cancel = None | |||
| guard = Mid | |||
| parry = High | |||
| startup = 42 | |||
| active = 2 | |||
| recovery = 60 | |||
| total = 104 | |||
| advHit = KND | |||
| advBlock = -34 | |||
| invul = 42f (Full) | |||
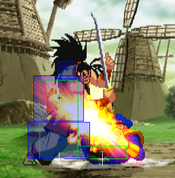
| description = Haohmaru's level 3 only super. A gigantic, powerful variant of his 5HP. When landed, this super does a ridiculous 6.7K damage. While that is some nice reward, good luck ever landing this super. It has a 42 frame startup and is easily avoidable. Unless the opponent is dizzied, they can easily escape on reaction. I guess you can punish moves that are -43 or more, but good luck doing that too. Despite the huge damage, it gets outdone by supers like Final Atomic Buster and Shun Goku Satsu, as those deal more damage and connect way more than this does. For as cool as this super is, unfortunately it is pretty useless. | |||
}} | }} | ||
}} | }} | ||
Latest revision as of 14:30, 11 April 2025
Introduction
Story
Haohmaru is a Ronin from Japan. He's a confident and highly skilled swordsman, and devoutly follows the path of the blade. It's assumed that he's always been like this, as one of the only things known about his early life is his challenge to the incredibly skilled Ronin Jubei Yagyu. Haohmaru lost of course, but Jubei sent him to train under Nicotine Caffeine, another powerful master. There, Haohmaru befriends Genjuro Kibagami, another orphan with a tragic and bloody past. Haohmaru and Genjuro train under Nicotine Caffeine for many years, and become very close friends and training partners. However, Genjuro is a power-hungry man, and Nicotine can see this. To put his students into one final test, Nicotine gives them a challenge to fight against a large group. The reward for whoever won was the legendary and powerful sword Fugudoku. Genjuro shows his true self, and brutally murders each of his opponents, calling them weak. Haohmaru simply fights until they all give up, ending no lives. Haohmaru wins clearly, and Genjuro leaves in a raging fuss, swearing to one day kill both Haohmaru and Nicotine.
Gameplay
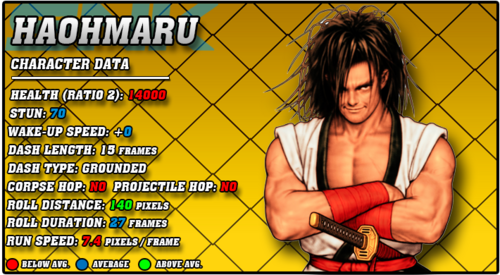
Haohmaru is a simple and straightforward character. In essence, he's just a guy with a sword. He has great normals for poking, solid pressure overall, and a useful fireball that knocks down at all ranges. He can even feint this fireball, a skill unique to him, which allows him to bait opponents jumping or mix how he does blockstrings. While he lacks mixups, he actually does fairly good when it comes to crushing guard bars thanks to his amazing LP normals and fireball feint mixups. While his 623P Kozetsuzan DP series aren't invincible, they still make solid anti-airs and combo enders.
What Haohmaru lacks is consistent defense and consistent damage output. His straightforward gameplan that revolves around simple neutral and fireball mindgames is about all he really has. His DP isn't invincible, he has decent but low reward buttons for mashing, and he has surprisingly low health overall, ranking in the same health tier as Dhalsim and Iori. His damage isn't the best either, as his only meterless combo ender is Kozetsuzan which likes to whiff at long range. He only has two supers as well, with one being a mediocre and level 3 only super, leaving him with a single way to viably spend meter. This too has a range issue, though not as bad, leaving Haohmaru struggling to get high damage from his pokes. If Haohmaru can garner respect from his opponent through solid neutral and smart usage of his fireball and feint, he can be very strong. He just has to get them to respect him first, and has no standout unbelievably strong tool to do so.
Groove Selection
Best - K/N/A: K-Groove is usually the most popular Groove for Haohmaru, and for good reason. JD lets him play a lot more offensively, and Rage ups the damage on his pokes by a huge margin. His level 3 Fujinzan super does notably good damage, which is a great buff for him in general. Hop and run let him play a lot more effective on the offensive as well. N-Haohmaru gets the more effective offense plus a roll on top of it, in exchange for no high damage peaks. Confirms into level 1 Fujinzan just aren't too damaging overall. Max Mode is an expensive but usually worthwhile buff however, as he gains a damage buff and a chance to do level 3 Fujinzan. A-Haohmaru is a popular beginner A-Groove pick, since his natural gameplan is very simple and rewarding in A-Groove. Alpha Counters give him a solid defensive tool, but the real juice is his simple and useful Custom Combo. Putting A-Haohmaru on the point of your A-Groove team isn't a bad idea if you don't want a difficult character on your point slot.
Useful - C: C-Haohmaru plays somewhat weaker than the other viable Grooves. While Haohmaru does have some fun level 2 cancels, they aren't very easy, and simply cancelling into his level 3 would do more damage overall making them less useful. Still, the ability to choose how much meter you spend is useful. C-Haohmaru can be seen as a more stable but less rewarding Groove overall.
Worst - P/S: P-Haohmaru lacks the scary meterless damage to make P-Groove good. A close range parry might get you a cl.HK > 623MP combo, but anything further out and your best punish tends to be just poking them. You'll rarely have a level 3, and even when you do, you likely won't get a chance to punish with it. S-Haohmaru is also fairly weak. Charging can put him in a bad spot, as good players will be looking for Haohmaru to whiff something big or throw a fireball, so leaving yourself open to a poke into super for big damage isn't worth the risk. His level 1 Fujinzan is underwhelming and only really useful for combos as well. S-Haohmaru gets very little overall.
|
Haohmaru is a swordsman with solid neutral buttons who uses an honest gameplan around his fireball mindgames to win. Relying on strong buttons and not much else, Haohmaru struggles in many other core areas of CvS2. Haohmaru is best in K-Groove, N-Groove, and A-Groove. Difficulty: MediumTier: C |
|
| Pros | Cons |
|
|
Players to Watch
| Name | Country | Groove | Accounts | Notes |
|---|---|---|---|---|
| Zenmai | Japan | K-Groove | N/A | Uses K-Haoh with a little more safety and likes to use smaller pokes before leading into large attacks. Sample Match |
| Yane | Japan | K-Groove | Twitter: @yanechudan | A strong pocket of Yane's, still uses him as good as anyone. Sample Match |
Normal Moves
Far Normals
5LP
5MP
5HP
5LK
5MK
5HK
clMP
clHP
clMK
clHK
Crouching Normals
2LP
2MP
2HP
2LK
2MK
2HK
Jumping Normals
j.LP
j.MP
j.HP
j.LK
j.MK
j.HK
Throws
Shoulder Slam
Skull Crusher
Special Moves
Senpuu Retsu Zan
Feint Senpuu Retsu Zan
Kougetsu Zan
Resshin Zan
Super Moves
Tenha Fuujin Zan
Tenha Senkou Zan
| Damage | Stun | Cancel | Guard | Parry | Startup | Active | Recovery | Total | Adv Hit | Adv Block | Invul |
|---|---|---|---|---|---|---|---|---|---|---|---|
| 6700 | 0 | None | Mid | High | 42 | 2 | 60 | 104 | KND | -34 | 42f (Full) |
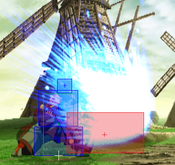
Haohmaru's level 3 only super. A gigantic, powerful variant of his 5HP. When landed, this super does a ridiculous 6.7K damage. While that is some nice reward, good luck ever landing this super. It has a 42 frame startup and is easily avoidable. Unless the opponent is dizzied, they can easily escape on reaction. I guess you can punish moves that are -43 or more, but good luck doing that too. Despite the huge damage, it gets outdone by supers like Final Atomic Buster and Shun Goku Satsu, as those deal more damage and connect way more than this does. For as cool as this super is, unfortunately it is pretty useless. | |||||||||||
Colors
