JtheSaltyy (talk | contribs) No edit summary |
No edit summary |
||
| (15 intermediate revisions by 3 users not shown) | |||
| Line 2: | Line 2: | ||
{{CvS2 Character Subnav|char=Bison|short=Bison}} | {{CvS2 Character Subnav|char=Bison|short=Bison}} | ||
<div> | <div> | ||
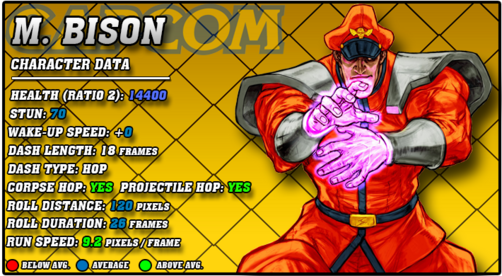
[[File:CVS2_Bison_Data.png|right|502px]] | |||
== Story == | == Story == | ||
'''M. Bison''', known in Japan as Vega, known as Dictator worldwide, is the big bad villain of the Street Fighter franchise. Almost nothing is known of his origin, not even what country he's from. All we know is that he grew up as a skilled martial artist learning an art called Soul Power. Bison saught more and more power however, and once he mastered Soul Power, he went on to kill his master. Before his masters death, he learned the secret art of Psycho Power from him. As Bisons strength grew, now infused with Psycho Power, he wanted to find all of the fighters in the world, defeat them, and learn their techniques. In his quest to do this, he formed Shadaloo, a criminal organization focused on money before anything else. Through Shadaloo, he finds and defeats many fighters. He fought Gouken, though he learned nothing as Gouken defeated him with simple strikes. He fought Charlie Nash, and defeated him. He fought Chun-Li and defeated her. He even beat Akuma up pretty badly. Even Ryu, in an epic showdown, lost to M. Bison. Ryu was then put under mind control, as the Satsui no Hado is a very similar power to Psycho Power. However, with the help of Ken, Sakura, and Sagat, who had changed his mind on working for Shadaloo after seeing M. Bison control Ryu, Ryu was freed and defeated M. Bison... for now. | '''M. Bison''', known in Japan as Vega, known as Dictator worldwide, is the big bad villain of the Street Fighter franchise. Almost nothing is known of his origin, not even what country he's from. All we know is that he grew up as a skilled martial artist learning an art called Soul Power. Bison saught more and more power however, and once he mastered Soul Power, he went on to kill his master. Before his masters death, he learned the secret art of Psycho Power from him. As Bisons strength grew, now infused with Psycho Power, he wanted to find all of the fighters in the world, defeat them, and learn their techniques. In his quest to do this, he formed Shadaloo, a criminal organization focused on money before anything else. Through Shadaloo, he finds and defeats many fighters. He fought Gouken, though he learned nothing as Gouken defeated him with simple strikes. He fought Charlie Nash, and defeated him. He fought Chun-Li and defeated her. He even beat Akuma up pretty badly. Even Ryu, in an epic showdown, lost to M. Bison. Ryu was then put under mind control, as the Satsui no Hado is a very similar power to Psycho Power. However, with the help of Ken, Sakura, and Sagat, who had changed his mind on working for Shadaloo after seeing M. Bison control Ryu, Ryu was freed and defeated M. Bison... for now. | ||
| Line 49: | Line 14: | ||
'''Best - A:''' While Bison isn't necessarily weak in other Grooves, his synergy with A-Groove makes A-Bison comfortably the best version of Bison. A-Groove already comes with plenty of versatile tools like roll and Alpha Counter, but Custom Combo is the real juice here. Bison's infamous CC, Paint the Fence, does ridiculous damage. If that wasn't enough, Bison has more ways to use this CC than any other character, giving him the best usage of an already incredibly powerful mechanic. If A-Bison has a full bar of meter, the opponent is scared for their life, regardless of the life lead or time remaining. A-Bison can always win with meter on his side. The threat of being hit by Bison's CC at any moment gives Bison really strong leverage in any given situation. | '''Best - A:''' While Bison isn't necessarily weak in other Grooves, his synergy with A-Groove makes A-Bison comfortably the best version of Bison. A-Groove already comes with plenty of versatile tools like roll and Alpha Counter, but Custom Combo is the real juice here. Bison's infamous CC, Paint the Fence, does ridiculous damage. If that wasn't enough, Bison has more ways to use this CC than any other character, giving him the best usage of an already incredibly powerful mechanic. If A-Bison has a full bar of meter, the opponent is scared for their life, regardless of the life lead or time remaining. A-Bison can always win with meter on his side. The threat of being hit by Bison's CC at any moment gives Bison really strong leverage in any given situation. | ||
'''Useful - C/K/N/P:''' To some extent, Bison is useful in all of these Grooves. C-Bison is probably the most useful besides A. Bison can utilize C-Grooves level 2 cancels very well, | '''Useful - C/K/N/P:''' To some extent, Bison is useful in all of these Grooves. C-Bison is probably the most useful besides A. Bison can utilize C-Grooves level 2 cancels very well, as HP Psycho Crusher is a good damage dealer in that department. He also has access to his very powerful Mega Pyscho Crusher super, which has several good albeit difficult optimal confirms into. He can also end in super fairly often thanks to C-Grooves versatile meter. K-Bison is a lot more unique, with a run and hop to make his offense a lot scarier. Bison has lots of ways to build charge while confirming, so it isn't impossible to link into normals for long enough to charge a Scissor Kick ender. Rage allows him to end in a level 3 Mega Psycho Crusher for massive damage. Lack of rolls removes some of his more annoying tools though. N-Bison gets the movement and the rolls, but his damage is a lot lower in exchange for more consistent super enders and arguably the best offense besides A-Bison. P-Bison seems weak, since he requires charge to punish anything, until you realize that his 2HK is incredibly fast and will likely reach in time to punish whatever you parried. Close parries can lead into more realistic hitconfirms into Scissor Kicks as well, but similar to N, his damage is notably lower than all the other Grooves, despite having access to Mega Psycho Crusher. | ||
'''Worst - S:''' S-Bison isn't necessarily bad, as it's still Bison. However, you have to grapple with S-Grooves limited mechanics, and Bison is | '''Worst - S:''' S-Bison isn't necessarily bad, as it's still Bison. However, you have to grapple with S-Grooves limited mechanics, and Bison's damage is not up to par with the other Grooves until he has low life. His dodge attacks are pretty good, and can definitely make use of run and short hop to get in some good pressure, but due to S-Groove's very limited subsystems, Bison cannot do as well as he can in other grooves, although he is still a very strong character and one of the best S-Groove characters available. | ||
{{StrengthsAndWeaknesses | {{StrengthsAndWeaknesses | ||
| Line 57: | Line 22: | ||
--------------------------- | --------------------------- | ||
'''M. Bison (Dictator)''' is a high damage combo character with incredible neutral tools that can annoy the opponent into a commital mistake, which he can punish with his best-in-class Custom Combo, Paint the Fence. His only real weakness is his reliance on meter for big damage. Bison is best played in '''A-Groove'''. | '''M. Bison (Dictator)''' is a high damage combo character with incredible neutral tools that can annoy the opponent into a commital mistake, which he can punish with his best-in-class Custom Combo, Paint the Fence. His only real weakness is his reliance on meter for big damage. Bison is best played in '''A-Groove'''. | ||
'''Difficulty''': Hard (A-Groove), Pretty Easy (Any other Groove)<br>'''Tier''': S | |||
|pros= | |pros= | ||
* '''Neutral:''' Between multiple strong buttons, a fast and high jump, plenty of annoying roll cancels, and more than enough ways to punish a fireball, Bison is a strong character in neutral | * '''Neutral:''' Between multiple strong buttons, a fast and high jump, plenty of annoying roll cancels, and more than enough ways to punish a fireball, Bison is a strong character in neutral | ||
* '''Combos:''' Bison has very consistent combo routes that can be confirmed into Custom Combo, and while the damage is low, they will always cause a knockdown | * '''Combos:''' Bison has very consistent combo routes that can be confirmed into Custom Combo, and while the damage is low, they will always cause a knockdown | ||
* '''Pressure:''' With the right spacing, Scissor Kicks | * '''Pressure:''' With the right spacing, Scissor Kicks can give Bison some great guard break pressure and can bully the opponent in the corner | ||
* '''Custom Combo:''' When it comes to Custom Combos, nobody does it better than Bison. His Paint the Fence combo does ridiculous damage, racking up to 10k in a lot of situations, and he has more than enough ways to combo into it. Not only is it damaging but it is more versatile than any other CC, as he can not only do it raw but can confirm into it from many different confirms and moves that leave the opponent remotely in the air | * '''Custom Combo:''' When it comes to Custom Combos, nobody does it better than Bison. His Paint the Fence combo does ridiculous damage, racking up to 10k in a lot of situations, and he has more than enough ways to combo into it. Not only is it damaging but it is more versatile than any other CC, as he can not only do it raw but can confirm into it from many different confirms and moves that leave the opponent remotely in the air | ||
* '''Supers:''' If Bison is not in A-Groove, he can still threaten very high damage. His | * '''Supers:''' If Bison is not in A-Groove, he can still threaten very high damage. His Mega Psycho Crusher does massive damage and can be confirmed into from many moves | ||
* '''Mobility:''' A fast walk, solid dash, good run, and a high and fast jump means getting Bison to sit still is a chore even other top tiers struggle with | * '''Mobility:''' A fast walk, solid dash, good run, and a high and fast jump means getting Bison to sit still is a chore even other top tiers struggle with | ||
|cons= | |cons= | ||
* '''Charge:''' Bison is reliant on having charge for any of his punishes, making it hard to be aggressive without good skill at charge buffering | * '''Charge:''' Bison is reliant on having charge for any of his punishes, making it hard to be aggressive without good skill at charge buffering. His supers also require high charge time, meaning that reaction confirms are a lot more difficult than confirms into specials | ||
* '''Meter Hungry:''' Without meter, Bison isn't bad at all, but he really shines when he has a Custom Combo stored. Without it, | * '''Meter Hungry:''' Without meter, Bison isn't bad at all, but he really shines when he has a Custom Combo stored. Without it, not only is his damage noticeably lower but his threat in neutral is not as high as it can be | ||
* '''High Execution:''' Not only does Bison require good use of neutral and knowing how to work with his floaty movement, if you want to optimally use Bison, | * '''High Execution:''' Not only does Bison require good use of neutral and knowing how to work with his floaty movement, but if you want to optimally use Bison, you have to learn his very advanced Custom Combo. Custom Combos generally aren't easy, and Bison's Paint the Fence is a lot of fast inputs back to back. Not only that, but if you want to confirm into CC from most combo enders and ranges, you need to have good situational and space awareness, as well you need to know what starters/routes you need to use to get the opponent in the right spot from any spot on the screen. | ||
}} | }} | ||
' | === Players to Watch === | ||
{| class="wikitable" | |||
|- | |||
! Name !! Country !! Groove !! Accounts !! Notes | |||
|- | |||
| Chari || Japan || C-Groove || N/A || Uses C-Bison very quick. No longer plays. <br> [https://youtu.be/rv0rqkb-kMo?t=78 Sample Match] | |||
|- | |||
| D44 BAS || Japan || A-Groove || Twitter: @ryo151 <br> Youtube: D44Bas <br> Discord: Bas#4095 || Nothing instills more fear in a player more than BAS' Bison. Made the Paint the Fence combo popular amongst people in all fighting game communities. <br> [https://youtu.be/i-SqNIWvhbE?t=108 Sample Match] | |||
|- | |||
| YSK || Japan || A-Groove || Twitter: @yosuke0815 || The pinnacle of the A-Sakura Bison Blanka team. His Bison being fundamentally perfect and scary with a CC at his disposal. <br> [https://youtu.be/dyAI1fS32_M?t=169 Sample Match] | |||
|- | |||
| Kodama || Japan || K-Groove || N/A || The only K-Bison user. Makes Bison's rage and short hop game worth respecting. <br> [https://youtu.be/8M99wzs_zOs?t=2 Sample Match] | |||
|- | |||
|} | |||
<br><br> | |||
== Normal Moves == | == Normal Moves == | ||
| Line 142: | Line 123: | ||
| input = 5HP / Far HP | | input = 5HP / Far HP | ||
| subtitle = Far Heavy Punch | | subtitle = Far Heavy Punch | ||
| image = | | image = CVS2_Dictator_5HP2.png | ||
| caption = | | caption = | ||
| linkname = 5HP | | linkname = 5HP | ||
| data = | | data = | ||
| Line 166: | Line 145: | ||
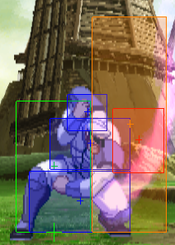
A slow Psycho Power infused uppercut. | A slow Psycho Power infused uppercut. | ||
* Not really used for anything other than anti-airs. It hits deceptively high and does great damage. | * Not really used for anything other than anti-airs. It hits deceptively high and does great damage. | ||
* Good in Bison's CCs, whether it be for corner carry or blockstrings. | |||
}} | }} | ||
}} | }} | ||
| Line 196: | Line 176: | ||
A fast midsection kick. | A fast midsection kick. | ||
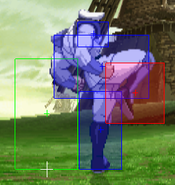
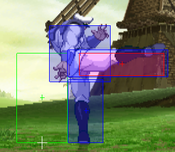
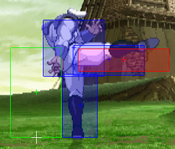
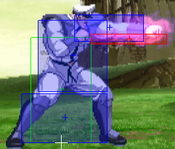
* Good frame trap normal, very fast and while slightly minus it doesn't offer big gaps. | * Good frame trap normal, very fast and while slightly minus it doesn't offer big gaps. | ||
* Unlike 5MP, 5LK can confirm into Scissor Kicks on crouchers, although it does less damage than the 2LK confirm and it cannot confirm into HK Scissors | * Unlike 5MP, 5LK can confirm into Scissor Kicks on all crouchers, although it does less damage than the 2LK confirm and it cannot confirm into HK Scissors. It can still confirm into Psycho Crusher fine though. | ||
}} | }} | ||
}} | }} | ||
| Line 256: | Line 236: | ||
| description = | | description = | ||
A slower long ranged toe kick. | A slower long ranged toe kick. | ||
* Same use as 5MK, although spacing is really important now since it is -11, but the damage is a lot better. | * Same use as 5MK, although spacing is really important now since it is -11, but the damage is a lot better. The range is considerably longer so it is easier to space. If the spacing is right this button can be used over 5MK, but if you're unsure you can still use 5MK. | ||
}} | }} | ||
}} | }} | ||
| Line 347: | Line 327: | ||
| description = | | description = | ||
A slow Psycho Power infused midsection punch. | A slow Psycho Power infused midsection punch. | ||
* Another good meaty button, | * Another good meaty button, it's only -2 and has very high damage, as well it has good startup and great active frames. | ||
* Also used a lot in CCs, most notably as the precursor move to the Psycho Banish reps during the actual painting of the fence. Once the opponent is juggled into the corner, most Bison players use this move to carry the opponent at the right height to mash DP. | * Also used a lot in CCs, most notably as the precursor move to the Psycho Banish reps during the actual painting of the fence. Once the opponent is juggled into the corner, most Bison players use this move to carry the opponent at the right height to mash DP. | ||
}} | }} | ||
| Line 439: | Line 419: | ||
A slower long ranged toe kick. | A slower long ranged toe kick. | ||
* Same as cl.MK. Not too much use for it, usually done if Bison doesn't get kick throw. | * Same as cl.MK. Not too much use for it, usually done if Bison doesn't get kick throw. | ||
* Can be used in the same way as cl.HP, that being it can be used in Bison's CCs as a move to juggle the opponent with before Painting the Fence. | |||
}} | }} | ||
}} | }} | ||
| Line 501: | Line 482: | ||
A slow Psycho Power infused low punch. | A slow Psycho Power infused low punch. | ||
* One of Bison's main pokes. It is slightly slower than 5MP, but it hits all crouchers, and is 0 on contact. It's also pretty fast, meaning Bison can counterpoke with it and not get killed for whiffing it. | * One of Bison's main pokes. It is slightly slower than 5MP, but it hits all crouchers, and is 0 on contact. It's also pretty fast, meaning Bison can counterpoke with it and not get killed for whiffing it. | ||
* Unlike 5MP, it is not used for combos but it can be used for blockstrings. | |||
}} | }} | ||
}} | }} | ||
| Line 531: | Line 513: | ||
A big Psycho Power infused low punch. | A big Psycho Power infused low punch. | ||
* Same as 2MP but there's a little more risk. It is unsafe and a lot slower, but deals great damage. Most times 2MP is used over this button but this is a great counterpoke and blockstring ender. | * Same as 2MP but there's a little more risk. It is unsafe and a lot slower, but deals great damage. Most times 2MP is used over this button but this is a great counterpoke and blockstring ender. | ||
* It might not look like it, but it is one of Bison's go-to anti-airs. It can beat some notable jump-ins clean like Sagat j.HK. | |||
}} | }} | ||
}} | }} | ||
| Line 660: | Line 643: | ||
=== <span class="invisible-header">nj.MP</span> === | === <span class="invisible-header">nj.MP</span> === | ||
{{MoveData | {{MoveData | ||
| name = Neutral Jump | | name = Neutral Jump Strong | ||
| input = nj.MP | | input = nj.MP | ||
| subtitle = Jumping | | subtitle = Jumping Medium Punch | ||
| image = CVS2_Dictator_jMP.png | | image = CVS2_Dictator_jMP.png | ||
| caption = | | caption = | ||
| Line 687: | Line 670: | ||
}} | }} | ||
}} | }} | ||
=== <span class="invisible-header">nj.HP</span> === | === <span class="invisible-header">nj.HP</span> === | ||
{{MoveData | {{MoveData | ||
| Line 810: | Line 794: | ||
| input = j.LP | | input = j.LP | ||
| subtitle = Jumping Light Punch | | subtitle = Jumping Light Punch | ||
| image = | | image = CVS2_Dictator_njLP.png | ||
| caption = | | caption = | ||
| linkname = j.LP | | linkname = j.LP | ||
| Line 861: | Line 845: | ||
| description = | | description = | ||
A slower aerial punch. | A slower aerial punch. | ||
* Has a unique property where if an aerial opponent gets hit it causes a hard knockdown, causing them to fall down instead of recover normally. In tandem with his Double Psycho Strike followup, Bison can confirm into CC, or | * Has a unique property where if an aerial opponent gets hit it causes a hard knockdown, causing them to fall down instead of recover normally. In tandem with his Double Psycho Strike followup, Bison can confirm into CC, or Mega Psycho Crusher if CC isn't available to him. | ||
}} | }} | ||
}} | }} | ||
| Line 1,014: | Line 998: | ||
* Can be done after j.MP without making contact, creating an extra move to protect Bison in his back jumps. | * Can be done after j.MP without making contact, creating an extra move to protect Bison in his back jumps. | ||
* Has the same air knockdown property as j.MP. | * Has the same air knockdown property as j.MP. | ||
* Usually confirms into either Custom Combo or | * Usually confirms into either Custom Combo or Mega Psycho Crusher depending on groove. | ||
}} | }} | ||
}} | }} | ||
== Throws == | == Throws == | ||
=== <span class="invisible-header"> | === <span class="invisible-header">Overhead Heave</span> === | ||
{{MoveData | {{MoveData | ||
| name = | | name = Overhead Heave | ||
| input = Near Opponent, 4/6HP | | input = Near Opponent, 4/6HP | ||
| subtitle = Punch Throw | | subtitle = Punch Throw | ||
| image = | | image = CVS2_Dictator_Rangethrow.png | ||
| caption = | | caption = Throw Range | ||
| linkname = | | image2 = CVS2_Dictator_Pthrow.png | ||
| caption2 = Overhead Heave | |||
| linkname = Overhead Heave | |||
| data = | | data = | ||
{{AttackData-CvS2 | {{AttackData-CvS2 | ||
| version = Close {{Motion|b}}/{{Motion|f}}+{{Icon-Capcom|HP}} | | version = Close {{Motion|b}}/{{Motion|f}}+{{Icon-Capcom|HP}} | ||
| subtitle = | | subtitle = | ||
| damage = | | damage = 1900 | ||
| stun = | | stun = 19 | ||
| cancel = | | cancel = None | ||
| guard = - | | guard = - | ||
| parry = - | | parry = - | ||
| startup = | | startup = 3 | ||
| active = | | active = 1 | ||
| recovery = | | recovery = 13 | ||
| total = | | total = 17 | ||
| advHit = - | | advHit = - | ||
| advBlock = - | | advBlock = - | ||
| invul = | | invul = None | ||
| description = | | description = | ||
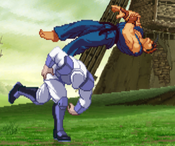
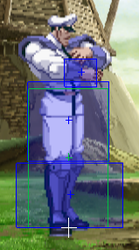
Bison tosses his opponent over his shoulder. | |||
* Bison's preferred throw. Has average range and good damage. | |||
}} | }} | ||
}} | }} | ||
=== <span class="invisible-header"> | === <span class="invisible-header">Scissor Toss</span> === | ||
{{MoveData | {{MoveData | ||
| name = | | name = Scissor Toss | ||
| input = Near Opponent, 4/6HK | | input = Near Opponent, 4/6HK | ||
| subtitle = Kick Throw | | subtitle = Kick Throw | ||
| image = | | image = CVS2_Dictator_Rangethrow.png | ||
| caption = | | caption = Throw Range | ||
| linkname = | | image2 = CVS2_Dictator_Kthrow.png | ||
| caption2 = Scissor Toss | |||
| linkname = Scissor Toss | |||
| data = | | data = | ||
{{AttackData-CvS2 | {{AttackData-CvS2 | ||
| version = Close {{Motion|b}}/{{Motion|f}}+{{Icon-Capcom|HK}} | | version = Close {{Motion|b}}/{{Motion|f}}+{{Icon-Capcom|HK}} | ||
| subtitle = | | subtitle = | ||
| damage = | | damage = 2000 | ||
| stun = | | stun = 20 | ||
| cancel = | | cancel = None | ||
| guard = - | | guard = - | ||
| parry = - | | parry = - | ||
| startup = | | startup = 5 | ||
| active = | | active = 1 | ||
| recovery = | | recovery = 13 | ||
| total = | | total = 19 | ||
| advHit = - | | advHit = - | ||
| advBlock = - | | advBlock = - | ||
| invul = | | invul = None | ||
| description = | | description = | ||
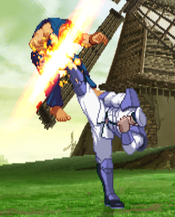
Bison kicks his opponent twice, then throws them with his leg. | |||
* While a cooler looking throw, the extra 2 frames means that opponents might jump or poke out easier. Use the punch throw. | |||
}} | }} | ||
}} | }} | ||
| Line 1,088: | Line 1,080: | ||
| version = LP | | version = LP | ||
| subtitle = Charge {{Motion|b}},{{Motion|f}}+{{Icon-Capcom|LP}} | | subtitle = Charge {{Motion|b}},{{Motion|f}}+{{Icon-Capcom|LP}} | ||
| damage = | | damage = 1300 | ||
| stun = | | stun = 13 | ||
| cancel = None | | cancel = None | ||
| guard = Mid | | guard = Mid | ||
| Line 1,098: | Line 1,090: | ||
| total = 64 | | total = 64 | ||
| advHit = HKND | | advHit = HKND | ||
| advBlock = - | | advBlock = -24 | ||
| invul = | | invul = None | ||
| description = | | description = | ||
Bison does a forward moving drill attack while being coated in Psycho Power. | Bison does a forward moving drill attack while being coated in Psycho Power. | ||
* | * Only really useful as an RC anti-air. It's slow, so it won't go under the opponent like MP and HP would, and it would give Bison a close knockdown. | ||
* Can be spaced for pressure purposes but it's difficult to do so. | |||
}} | }} | ||
{{AttackData-CvS2 | {{AttackData-CvS2 | ||
| Line 1,108: | Line 1,101: | ||
| version = MP | | version = MP | ||
| subtitle = Charge {{Motion|b}},{{Motion|f}}+{{Icon-Capcom|MP}} | | subtitle = Charge {{Motion|b}},{{Motion|f}}+{{Icon-Capcom|MP}} | ||
| damage = | | damage = 1400 | ||
| stun = | | stun = 14 | ||
| cancel = None | | cancel = None | ||
| guard = Mid | | guard = Mid | ||
| Line 1,118: | Line 1,111: | ||
| total = 74 | | total = 74 | ||
| advHit = HKND | | advHit = HKND | ||
| advBlock = - | | advBlock = -52 | ||
| invul = | | invul = None | ||
| description = | | description = | ||
Bison does a forward moving drill attack while being coated in Psycho Power. | Bison does a forward moving drill attack while being coated in Psycho Power. | ||
* | * The same as LP. Travels faster, meaning it's more difficult to anti-air but it's even more unsafe and very hard to space. | ||
}} | }} | ||
{{AttackData-CvS2 | {{AttackData-CvS2 | ||
| Line 1,128: | Line 1,121: | ||
| version = HP | | version = HP | ||
| subtitle = Charge {{Motion|b}},{{Motion|f}}+{{Icon-Capcom|HP}} | | subtitle = Charge {{Motion|b}},{{Motion|f}}+{{Icon-Capcom|HP}} | ||
| damage = | | damage = 1500 | ||
| stun = | | stun = 15 | ||
| cancel = None | | cancel = None | ||
| guard = Mid | | guard = Mid | ||
| Line 1,138: | Line 1,131: | ||
| total = Varies | | total = Varies | ||
| advHit = HKND | | advHit = HKND | ||
| advBlock = - | | advBlock = -47 | ||
| invul = | | invul = None | ||
| description = | | description = | ||
Bison does a forward moving drill attack while being coated in Psycho Power. | Bison does a forward moving drill attack while being coated in Psycho Power. | ||
* | * Usually the version Bison players use. With a near instant 2-frame startup this is a very powerful reversal. | ||
* Good combo ender, but it depends on if you want damage or oki. If you're in the corner, use this move to end combos, but if you're not, then you can choose to either get damage but no oki with this move, or less damage but you get oki with Scissor Kicks. | |||
* On block, this move can chip, but if it doesn't kill, then the opponent has a free punish, as pretty much every character in the game has an answer for a blocked Psycho Crusher. Sure, it may be a single hit, but getting punished like that shouldn't happen too often. | |||
* It travels so fast that Bison doesn't stop until he reaches one of the corners. This makes it a very nice corner escape tactic, just note that some moves can punish it on it's way out. | |||
}} | |||
}} | |||
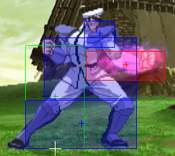
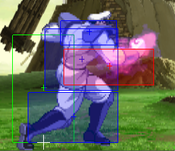
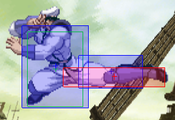
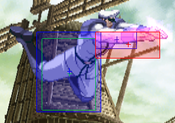
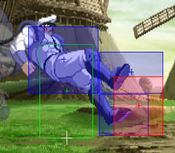
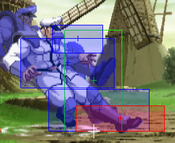
===== <span class="invisible-header">Scissor Kick</span> ===== | |||
{{MoveData | |||
| name = Scissor Kick | |||
| subtitle = aka Knee Press<br>[4]6+K / Charge B, F+K | |||
| input = Charge {{Motion|b}},{{Motion|f}}+{{Icon-Capcom|K}} | |||
| image = CVS2_Dictator_46K1.png | |||
| caption = First Hit | |||
| image2 = CVS2_Dictator_46K2.png | |||
| caption2 = Second Hit | |||
| linkname = Scissor Kick | |||
| data = | |||
{{AttackData-CvS2 | |||
| version = LK | |||
| subtitle = Charge {{Motion|b}},{{Motion|f}}+{{Icon-Capcom|LK}} | |||
| damage = 700+500 | |||
| stun = 7+5 | |||
| cancel = None | |||
| guard = Mid | |||
| parry = High | |||
| startup = 11 | |||
| active = 4+6 | |||
| recovery = 16 | |||
| total = 37 | |||
| advHit = HKND | |||
| advBlock = -7 | |||
| invul = None | |||
| description = | |||
Bison does a flipping knee press. | |||
* Usually done in neutral or blockstrings. When spaced, this move is very hard to punish, although it is not completely unpunishable. | |||
* Gives Bison the best oki on his combo enders, but the weak damage means that it is better to just use the other versions as their oki is only marginally worse. | |||
}} | |||
{{AttackData-CvS2 | |||
| header = no | |||
| version = MK | |||
| subtitle = Charge {{Motion|b}},{{Motion|f}}+{{Icon-Capcom|MK}} | |||
| damage = 700+600 | |||
| stun = 7+6 | |||
| cancel = None | |||
| guard = Mid | |||
| parry = High | |||
| startup = 13 | |||
| active = 4+9 | |||
| recovery = 16 | |||
| total = 42 | |||
| advHit = HKND | |||
| advBlock = -10 | |||
| invul = None | |||
| description = | |||
Bison does a flipping knee press. | |||
* The preferred combo ender if you want oki from lights. Can also be spaced to be made a little safer but LK is better for pressure purposes. | |||
* Good RC anti-air for closer jumps. | |||
}} | |||
{{AttackData-CvS2 | |||
| header = no | |||
| version = HK | |||
| subtitle = Charge {{Motion|b}},{{Motion|f}}+{{Icon-Capcom|HK}} | |||
| damage = 800+700 | |||
| stun = 8+7 | |||
| cancel = None | |||
| guard = Mid | |||
| parry = High | |||
| startup = 15 | |||
| active = 4+12 | |||
| recovery = 16 | |||
| total = 47 | |||
| advHit = HKND | |||
| advBlock = -13 | |||
| invul = None | |||
| description = | |||
Bison does a flipping knee press. | |||
* Good damage combo ender. It can be confirmed into from 5MP and 2MK. | |||
* Can blow through fireballs as an RC and can anti air as well, although for closer jumps it can miss on them. | |||
* Incredibly hard to space, using it raw without RC will most likely get punished. | |||
}} | |||
}} | |||
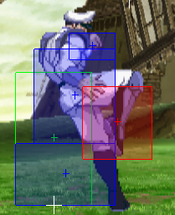
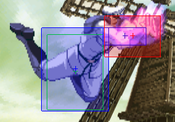
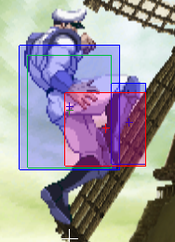
===== <span class="invisible-header">Head Stomp</span> ===== | |||
{{MoveData | |||
| name = Head Stomp | |||
| subtitle = [2]8+K / Charge D, U+K | |||
| input = Charge {{Motion|d}},{{Motion|u}}+{{Icon-Capcom|K}} | |||
| image = CVS2_Dictator_28K1.png | |||
| caption = | |||
| linkname = Head Stomp | |||
| data = | |||
{{AttackData-CvS2 | |||
| version = | |||
| subtitle = Charge {{Motion|d}},{{Motion|u}}+{{Icon-Capcom|K}} | |||
| damage = 1400 | |||
| stun = 14 | |||
| cancel = None | |||
| guard = High | |||
| parry = High | |||
| startup = 29 | |||
| active = Until Landing | |||
| recovery = 14 | |||
| total = Variable | |||
| advHit = - | |||
| advBlock = - | |||
| invul = None | |||
| description = | |||
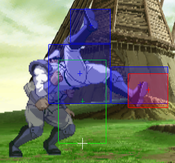
Bison leaps in the air and stomps on the opponent's head if he's close. | |||
* The distance Bison goes is determined by the opponent's position during the input. He cannot lock onto the opponent if they choose to move after the input. | |||
* After the Stomp connects, Bison can control his horizontal movement by holding forward or backward, which can make him safe or mix the opponent up a little bit depending on what you want to do afterwards. | |||
* A move that some characters can handle and some that can't. There are certain anti-airs that destroy this move, like invincible DPs or anti-airs with a lot of disjoint. The opponent can also move out of the way and punish the long landing recovery. If the opponent is not expecting it, using stomp can throw them off, and it always keeps them on their toes. | |||
}} | |||
}} | |||
===== <span class="invisible-header">Skull Diver</span> ===== | |||
{{MoveData | |||
| name = Skull Diver | |||
| subtitle = any Punch (after Head Stomp) | |||
| input = {{Icon-Capcom|P}} | |||
| image = CVS2_Dictator_njLP.png | |||
| caption = | |||
| linkname = Skull Diver | |||
| data = | |||
{{AttackData-CvS2 | |||
| version = | |||
| subtitle = Charge {{Motion|d}},{{Motion|u}}+{{Icon-Capcom|P}} | |||
| damage = 1500 | |||
| stun = 15 | |||
| cancel = None | |||
| guard = High | |||
| parry = High | |||
| startup = 22 | |||
| active = Until Landing | |||
| recovery = 14 | |||
| total = Variable | |||
| advHit = +4 | |||
| advBlock = +4 | |||
| invul = None | |||
| description = | |||
Bison quickly does a double handed aerial strike. | |||
* After Stomp connects, Bison can do an additional attack afterwards by simply pressing any punch button. | |||
* Can hit opponents who are trying to anti-air the stomp after blocking or getting hit by it. Makes for a good way to give Stomp some protection. Also plus on block. | |||
}} | |||
}} | |||
===== <span class="invisible-header">Devil Reverse</span> ===== | |||
{{MoveData | |||
| name = Devil Reverse | |||
| subtitle = [2]8+K / Charge D, U+P | |||
| input = Charge {{Motion|d}},{{Motion|u}}+{{Icon-Capcom|P}} | |||
| image = CVS2_Dictator_28P1.png | |||
| caption = Jump Hitbox | |||
| image2 = CVS2_Dictator_28P2.png | |||
| caption2 = Attack Hitbox | |||
| linkname = Devil Reverse | |||
| data = | |||
{{AttackData-CvS2 | |||
| version = | |||
| subtitle = Charge {{Motion|d}},{{Motion|u}}+{{Icon-Capcom|P}} | |||
| damage = 1300 | |||
| stun = 13 | |||
| cancel = None | |||
| guard = High | |||
| parry = High | |||
| startup = 54 (Initial Jump) 40 (Attack Startup) | |||
| active = Until Landing | |||
| recovery = 14 | |||
| total = Variable | |||
| advHit = HKND | |||
| advBlock = 0 | |||
| invul = None | |||
| description = | |||
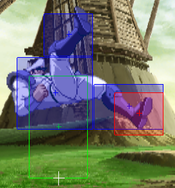
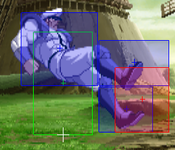
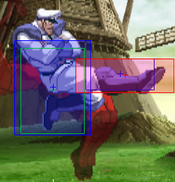
Bison leaps in the air and then does a somersault aerial strike. | |||
* The distance Bison jumps is the same as Head Stomp. By pressing punch, Bison will jump back and do an additional attack which can also be directed with forward and backward. | |||
* Against someone who is weak to stomps or uses very committing anti-airs as answers to stomps using Devil Reverse works here. It can also cross-up and create some weird interactions. It can avoid anti-airs well because of Bison's back jump but it's not completely invincible. Don't use it too much if you find yourself getting anti-aired a lot from it. | |||
}} | |||
}} | |||
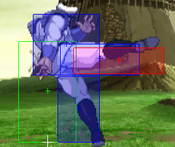
===== <span class="invisible-header">Psycho Banish</span> ===== | |||
{{MoveData | |||
| name = Psycho Banish | |||
| subtitle = 623+P / DP+P | |||
| input = {{Motion|623}}+{{Icon-Capcom|P}} | |||
| image = CVS2_Dictator_623P1.png | |||
| caption = First Hit | |||
| image2 = CVS2_Dictator_623P2.png | |||
| caption2 = Last Hit | |||
| linkname = Psycho Banish | |||
| data = | |||
{{AttackData-CvS2 | |||
| version = LP | |||
| subtitle = {{Motion|623}}+{{Icon-Capcom|LP}} | |||
| damage = 900 | |||
| stun = 9 | |||
| cancel = None | |||
| guard = Mid | |||
| parry = High | |||
| startup = 12 | |||
| active = 2+3+4 | |||
| recovery = 23 | |||
| total = 44 | |||
| advHit = -1 | |||
| advBlock = -1 | |||
| invul = None | |||
| description = | |||
}} | |||
{{AttackData-CvS2 | |||
| header = no | |||
| version = MP | |||
| subtitle = {{Motion|623}}+{{Icon-Capcom|MP}} | |||
| damage = 1200 | |||
| stun = 12 | |||
| cancel = None | |||
| guard = Mid | |||
| parry = High | |||
| startup = 14 | |||
| active = 2+2+2+2 | |||
| recovery = 23 | |||
| total = 44 | |||
| advHit = +1 | |||
| advBlock = +1 | |||
| invul = None | |||
| description = | |||
}} | |||
{{AttackData-CvS2 | |||
| header = no | |||
| version = HP | |||
| subtitle = {{Motion|623}}+{{Icon-Capcom|HP}} | |||
| damage = 1500 | |||
| stun = 15 | |||
| cancel = None | |||
| guard = Mid | |||
| parry = High | |||
| startup = 16 | |||
| active = 2+2+2+2+2 | |||
| recovery = 21 | |||
| total = 47 | |||
| advHit = +1 | |||
| advBlock = +1 | |||
| invul = None | |||
| description = | |||
Bison swipes his fist downwards while creating a wall of Psycho Power. | |||
* Most known for being the reason why Bison's Custom Combo is called Paint the Fence (the motion of the move itself is similar to that of repeatedly painting a fence). When mashed, HP Psycho Banish does insane damage when done repeatedly in a CC. It's also used in Bison's blocked CC as well, and does great guard damage. | |||
* Safe on block but cannot be comboed into (without CC of course). | |||
* LP version is a good meterbuild option. | |||
* Good guard damage and damage overall. | |||
* Also eats fireballs if you need some anti-fireball tools without RCs. Super fireballs won't get absorbed. | |||
}} | |||
}} | |||
===== <span class="invisible-header">Bison Warp</span> ===== | |||
{{MoveData | |||
| name = Bison Warp | |||
| subtitle = aka Teleport<br>623/421+2P/2K / DP/RDP+2P/2K | |||
| input = {{Motion|623}}/{{Motion|421}}+{{Icon-Capcom|P}}{{Icon-Capcom|P}}/{{Icon-Capcom|K}}{{Icon-Capcom|K}} | |||
| image = CVS2_Dictator_TP1.png | |||
| caption = Startup | |||
| image2 = CVS2_Dictator_TP2.png | |||
| caption2 = Recovery | |||
| linkname = Bison Warp | |||
| data = | |||
{{AttackData-CvS2 | |||
| version = Any | |||
| subtitle = {{Motion|623}}/{{Motion|421}}+{{Icon-Capcom|P}}{{Icon-Capcom|P}}/{{Icon-Capcom|K}}{{Icon-Capcom|K}} | |||
| damage = - | |||
| stun = - | |||
| cancel = None | |||
| guard = - | |||
| parry = - | |||
| startup = 61 | |||
| active = - | |||
| recovery = 17 | |||
| total = 78 | |||
| advHit = - | |||
| advBlock = - | |||
| invul = 16 Frames (full body) | |||
| description = | |||
Bison takes a pose then teleports. | |||
* Using a regular DP motion will make Bison teleport forwards, and using a reverse DP motion teleports him backwards. Using 2 punches will make him travel a short distance forward and using 2 kicks will make him travel to the other side of the screen. | |||
* Good for escaping the corner/pressure, Bison has startup invul and it lasts until the main recovery of the teleport. However, it can be punished hard if the opponent reads where you will go. | |||
}} | }} | ||
}} | }} | ||
| Line 1,150: | Line 1,418: | ||
{{MoveData | {{MoveData | ||
| name = Scissor Kick Nightmare | | name = Scissor Kick Nightmare | ||
| input = Charge {{Motion|b}},{{Motion|f}}{{Motion|b}}{{Motion|f}}+{{Icon-Capcom| | | input = Charge {{Motion|b}},{{Motion|f}}{{Motion|b}}{{Motion|f}}+{{Icon-Capcom|K}} | ||
| subtitle = [4]646+ | | subtitle = [4]646+K / Charge B, F, B, F+K | ||
| image = CVS2_Dictator_4646K1.png | | image = CVS2_Dictator_4646K1.png | ||
| caption = First Hit | | caption = First Hit | ||
| Line 1,163: | Line 1,431: | ||
| data = | | data = | ||
{{AttackData-CvS2 | {{AttackData-CvS2 | ||
| version = Charge {{Motion|b}},{{Motion|f}}{{Motion|b}}{{Motion|f}}+{{Icon-Capcom| | | version = Charge {{Motion|b}},{{Motion|f}}{{Motion|b}}{{Motion|f}}+{{Icon-Capcom|LK}} | ||
| subtitle = | | subtitle = | ||
| damage = | | damage = 2800 | ||
| stun = 0 | | stun = 0 | ||
| cancel = None | | cancel = None | ||
| Line 1,171: | Line 1,439: | ||
| parry = High | | parry = High | ||
| startup = 8 | | startup = 8 | ||
| active = | | active = 4+11 [16] 4+5 | ||
| recovery = | | recovery = 22 | ||
| total = | | total = 70 | ||
| advHit = HKND | | advHit = HKND | ||
| advBlock = | | advBlock = -3 | ||
| invul = | | invul = 5 (Full) | ||
| description = | | description = | ||
Bison performs two Scissor Kicks. | Bison performs two Scissor Kicks. | ||
* | * Alright combo ender. Bison is pretty hard to punish at -3, but if he is in A-Groove he wants to preserve that meter for Custom Combo. | ||
* Decent desperation super, not a true reversal but it can deal higher damage for combo enders. | |||
}} | }} | ||
{{AttackData-CvS2 | {{AttackData-CvS2 | ||
| header = no | | header = no | ||
| version = Charge {{Motion|b}},{{Motion|f}}{{Motion|b}}{{Motion|f}}+{{Icon-Capcom| | | version = Charge {{Motion|b}},{{Motion|f}}{{Motion|b}}{{Motion|f}}+{{Icon-Capcom|MK}} | ||
| subtitle = | | subtitle = | ||
| damage = | | damage = 4000 | ||
| stun = 0 | | stun = 0 | ||
| cancel = SP/SU | | cancel = SP/SU | ||
| Line 1,191: | Line 1,460: | ||
| parry = High | | parry = High | ||
| startup = 8 | | startup = 8 | ||
| active = | | active = 4+11 [16] 4+5 [6] 18 | ||
| recovery = | | recovery = 8 | ||
| total = | | total = 70 | ||
| advHit = HKND | | advHit = HKND | ||
| advBlock = | | advBlock = -2 | ||
| invul = | | invul = 14 (Full) | ||
| description = | | description = | ||
Bison performs two Scissor Kicks and ends in a slide. | Bison performs two Scissor Kicks and ends in a slide. | ||
* | * Good super for catching someone off guard. It is a true reversal and deals good damage with level 2 cancels. | ||
* Optimal Lvl.2 Cancel is an HP Psycho Crusher right after the slide ender. | |||
}} | }} | ||
{{AttackData-CvS2 | {{AttackData-CvS2 | ||
| header = no | | header = no | ||
| version = Charge {{Motion|b}},{{Motion|f}}{{Motion|b}}{{Motion|f}}+{{Icon-Capcom| | | version = Charge {{Motion|b}},{{Motion|f}}{{Motion|b}}{{Motion|f}}+{{Icon-Capcom|HK}} | ||
| subtitle = | | subtitle = | ||
| damage = | | damage = 5800 | ||
| stun = 0 | | stun = 0 | ||
| cancel = None | | cancel = None | ||
| Line 1,211: | Line 1,481: | ||
| parry = High | | parry = High | ||
| startup = 8 | | startup = 8 | ||
| active = | | active = 4+11 [16] 4+5 [6] 2 [8] 2+2+2 [8] 5 | ||
| recovery = | | recovery = 52 | ||
| total = | | total = 135 | ||
| advHit = HKND | | advHit = HKND | ||
| advBlock = | | advBlock = -13 | ||
| invul = | | invul = 22 (Full) | ||
| description = | | description = | ||
Bison performs two Scissor Kicks and ends by kicking the opponent away. | Bison performs two Scissor Kicks and ends by kicking the opponent away. | ||
* | * Really good damage but not Bison's best level 3. | ||
* Easy to punish unlike the other two levels. | |||
}} | |||
}} | |||
=== <span class="invisible-header">Mega Psycho Crusher</span> === | |||
{{MoveData | |||
| name = Mega Psycho Crusher | |||
| input = Charge {{Motion|b}},{{Motion|f}}{{Motion|b}}{{Motion|f}}+{{Icon-Capcom|P}} | |||
| subtitle = [4]646+P / Charge B, F, B, F+P | |||
| image = CVS2_Dictator_4646P.png | |||
| caption = | |||
| linkname = Mega Psycho Crusher | |||
| data = | |||
{{AttackData-CvS2 | |||
| version = Level 3/MAX Only<br>Charge {{Motion|b}},{{Motion|f}}{{Motion|b}}{{Motion|f}}+{{Icon-Capcom|P}} | |||
| subtitle = | |||
| damage = 6400 | |||
| stun = 0 | |||
| cancel = None | |||
| guard = Mid | |||
| parry = High | |||
| startup = 8 | |||
| active = Until Bison Reaches the Corner | |||
| recovery = 16 | |||
| total = Varies | |||
| advHit = HKND | |||
| advBlock = -40 | |||
| invul = 22 (Full) | |||
| description = | |||
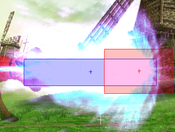
Bison performs a far more powerful Psycho Crusher. | |||
* Deals massive damage, if you can land this super then the round will be turned in your favor. It's a little difficult to confirm into however and it is very unsafe on block. | |||
* Has very high charge time, so reaction confirms are pretty difficult, but it can be confirmed into from lights, mediums and Double Psycho Strike. It can also be juggled into from an anti-air Scissor Kick and Devil Reverse, but both are so situational that they are not worth fishing for. | |||
}} | }} | ||
}} | }} | ||
Latest revision as of 02:37, 8 March 2025
Introduction
Story
M. Bison, known in Japan as Vega, known as Dictator worldwide, is the big bad villain of the Street Fighter franchise. Almost nothing is known of his origin, not even what country he's from. All we know is that he grew up as a skilled martial artist learning an art called Soul Power. Bison saught more and more power however, and once he mastered Soul Power, he went on to kill his master. Before his masters death, he learned the secret art of Psycho Power from him. As Bisons strength grew, now infused with Psycho Power, he wanted to find all of the fighters in the world, defeat them, and learn their techniques. In his quest to do this, he formed Shadaloo, a criminal organization focused on money before anything else. Through Shadaloo, he finds and defeats many fighters. He fought Gouken, though he learned nothing as Gouken defeated him with simple strikes. He fought Charlie Nash, and defeated him. He fought Chun-Li and defeated her. He even beat Akuma up pretty badly. Even Ryu, in an epic showdown, lost to M. Bison. Ryu was then put under mind control, as the Satsui no Hado is a very similar power to Psycho Power. However, with the help of Ken, Sakura, and Sagat, who had changed his mind on working for Shadaloo after seeing M. Bison control Ryu, Ryu was freed and defeated M. Bison... for now.
Gameplay
Bison is one of the most infamous top tiers in CvS2. His powerful control of neutral, strong mobility, scary pressure, great hitconfirms, and annoying roll cancels make dealing with him a pain. He has great pokes and footsies buttons, like his 2MK, 5MP, 2MP, 2HP, and his infamous 2HK slide. Psycho Crusher, Scissor Kicks, and Head Stomp all make for very annoying and powerful roll cancels to force the opponent to deal with. Bison also doesn't lack in damage, with plenty of confirms into Scissor Kicks or into his supers.
What truly makes Bison scary though is his amazing synergy with the best Groove in the game, A-Groove. Bison has the most versatile and useful tools for Custom Combo in the game, and his infamous Paint the Fence Custom Combo deals ridiculously high damage and can secure a round or just a life lead quickly. Bison can use CC as a reversal, as an offensive mixup with his throw, as a combo extender after Scissor Kicks, and as a situational combo extender. He has more ways to utilize CC than anyone else, and likely has the best CC in the game as well. Mixed with the above strengths, M. Bison is a mainstay on every high level A-Groove team, and is a terrifyingly powerful top tier.
Groove Selection
Best - A: While Bison isn't necessarily weak in other Grooves, his synergy with A-Groove makes A-Bison comfortably the best version of Bison. A-Groove already comes with plenty of versatile tools like roll and Alpha Counter, but Custom Combo is the real juice here. Bison's infamous CC, Paint the Fence, does ridiculous damage. If that wasn't enough, Bison has more ways to use this CC than any other character, giving him the best usage of an already incredibly powerful mechanic. If A-Bison has a full bar of meter, the opponent is scared for their life, regardless of the life lead or time remaining. A-Bison can always win with meter on his side. The threat of being hit by Bison's CC at any moment gives Bison really strong leverage in any given situation.
Useful - C/K/N/P: To some extent, Bison is useful in all of these Grooves. C-Bison is probably the most useful besides A. Bison can utilize C-Grooves level 2 cancels very well, as HP Psycho Crusher is a good damage dealer in that department. He also has access to his very powerful Mega Pyscho Crusher super, which has several good albeit difficult optimal confirms into. He can also end in super fairly often thanks to C-Grooves versatile meter. K-Bison is a lot more unique, with a run and hop to make his offense a lot scarier. Bison has lots of ways to build charge while confirming, so it isn't impossible to link into normals for long enough to charge a Scissor Kick ender. Rage allows him to end in a level 3 Mega Psycho Crusher for massive damage. Lack of rolls removes some of his more annoying tools though. N-Bison gets the movement and the rolls, but his damage is a lot lower in exchange for more consistent super enders and arguably the best offense besides A-Bison. P-Bison seems weak, since he requires charge to punish anything, until you realize that his 2HK is incredibly fast and will likely reach in time to punish whatever you parried. Close parries can lead into more realistic hitconfirms into Scissor Kicks as well, but similar to N, his damage is notably lower than all the other Grooves, despite having access to Mega Psycho Crusher.
Worst - S: S-Bison isn't necessarily bad, as it's still Bison. However, you have to grapple with S-Grooves limited mechanics, and Bison's damage is not up to par with the other Grooves until he has low life. His dodge attacks are pretty good, and can definitely make use of run and short hop to get in some good pressure, but due to S-Groove's very limited subsystems, Bison cannot do as well as he can in other grooves, although he is still a very strong character and one of the best S-Groove characters available.
|
M. Bison (Dictator) is a high damage combo character with incredible neutral tools that can annoy the opponent into a commital mistake, which he can punish with his best-in-class Custom Combo, Paint the Fence. His only real weakness is his reliance on meter for big damage. Bison is best played in A-Groove. Difficulty: Hard (A-Groove), Pretty Easy (Any other Groove)Tier: S |
|
| Pros | Cons |
|
|
Players to Watch
| Name | Country | Groove | Accounts | Notes |
|---|---|---|---|---|
| Chari | Japan | C-Groove | N/A | Uses C-Bison very quick. No longer plays. Sample Match |
| D44 BAS | Japan | A-Groove | Twitter: @ryo151 Youtube: D44Bas Discord: Bas#4095 |
Nothing instills more fear in a player more than BAS' Bison. Made the Paint the Fence combo popular amongst people in all fighting game communities. Sample Match |
| YSK | Japan | A-Groove | Twitter: @yosuke0815 | The pinnacle of the A-Sakura Bison Blanka team. His Bison being fundamentally perfect and scary with a CC at his disposal. Sample Match |
| Kodama | Japan | K-Groove | N/A | The only K-Bison user. Makes Bison's rage and short hop game worth respecting. Sample Match |
Normal Moves
Far Normals
5LP
5MP
5HP
5LK
5MK
5HK
Close Standing Normals
clLP
clMP
clHP
clLK
clMK
clHK
Crouching Normals
2LP
2MP
2HP
2LK
2MK
2HK
Jumping Normals
nj.LP
nj.MP
nj.HP
nj.LK
nj.MK
nj.HK
j.LP
j.MP
j.HP
j.LK
j.MK
j.HK
Command Normals
Double Psycho Strike
Throws
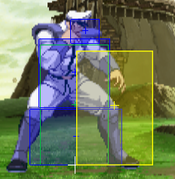
Overhead Heave
Scissor Toss
Special Moves
Psycho Crusher
Scissor Kick
Head Stomp
| Damage | Stun | Cancel | Guard | Parry | Startup | Active | Recovery | Total | Adv Hit | Adv Block | Invul |
|---|---|---|---|---|---|---|---|---|---|---|---|
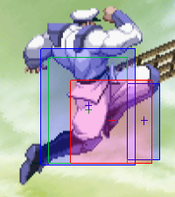
| 1400 | 14 | None | High | High | 29 | Until Landing | 14 | Variable | - | - | None |
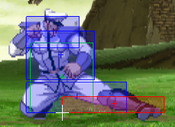
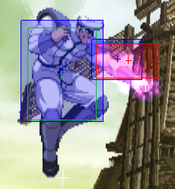
Bison leaps in the air and stomps on the opponent's head if he's close.
| |||||||||||
Skull Diver
| Damage | Stun | Cancel | Guard | Parry | Startup | Active | Recovery | Total | Adv Hit | Adv Block | Invul |
|---|---|---|---|---|---|---|---|---|---|---|---|
| 1500 | 15 | None | High | High | 22 | Until Landing | 14 | Variable | +4 | +4 | None |
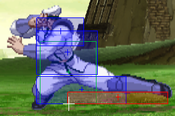
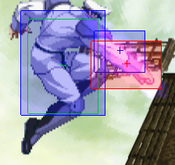
Bison quickly does a double handed aerial strike.
| |||||||||||
Devil Reverse
| Damage | Stun | Cancel | Guard | Parry | Startup | Active | Recovery | Total | Adv Hit | Adv Block | Invul |
|---|---|---|---|---|---|---|---|---|---|---|---|
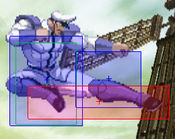
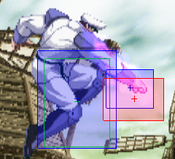
| 1300 | 13 | None | High | High | 54 (Initial Jump) 40 (Attack Startup) | Until Landing | 14 | Variable | HKND | 0 | None |
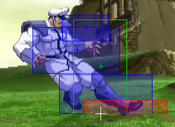
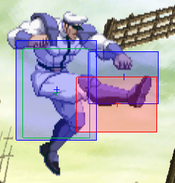
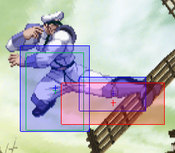
Bison leaps in the air and then does a somersault aerial strike.
| |||||||||||
Psycho Banish
Bison Warp
Super Moves
Scissor Kick Nightmare
Mega Psycho Crusher
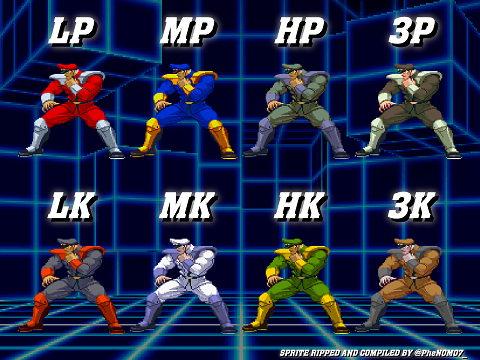
Colors
