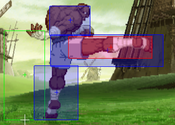
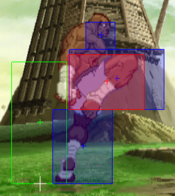
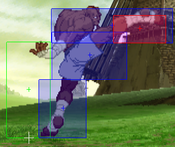
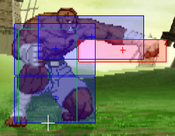
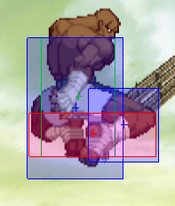
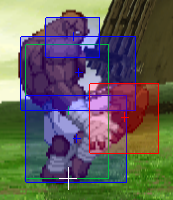
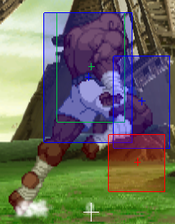
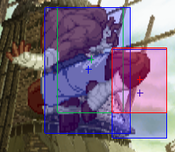
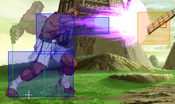
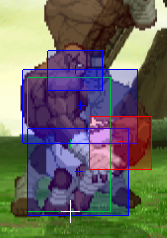
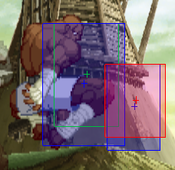
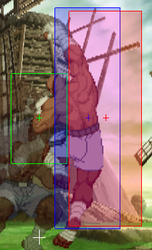
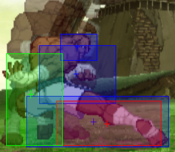
JtheSaltyy (talk | contribs) |
m (Update the headers of the 2P pages to fix the menu) |
||
| (12 intermediate revisions by 2 users not shown) | |||
| Line 2: | Line 2: | ||
{{CvS2 Character Subnav|char=Sagat|short=Sagat}} | {{CvS2 Character Subnav|char=Sagat|short=Sagat}} | ||
<div> | <div> | ||
{| class="wikitable" style=" | {| class="wikitable floatright" border=1 style="border-collapse: collapse; width: 300px" | ||
|- | |- | ||
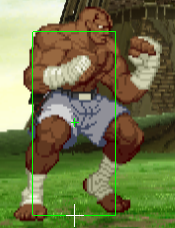
| colspan= | | colspan = 2 | [[File:CVS2 Sagat Data.png|center|250px]] | ||
{| class="wikitable" border=1 style="border-collapse: collapse; width: 300px" | |||
|+ style="text-align:center;" | [[Capcom_vs_SNK_2/System#Life_Chart | Vital Data]] | |||
|- | |- | ||
| | ! style="width:150px;" | Health | ||
| style="width:150px; text-align:center;" | <span style="color: #00ff00">14800</span> | |||
|- | |- | ||
| | ! style="width:150px;" | Stun | ||
| style="width:150px; text-align:center;" | <span style="color: #ffff00">70</span> | |||
|- | |- | ||
| | ! style="width:150px;" | Stun Modifier | ||
| style="width:150px; text-align:center;" | <span style="color: #ffff00">+0 Seconds</span> | |||
|- | |- | ||
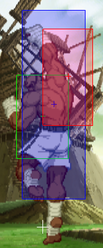
| | ! style="width:150px;" | Crouch Height | ||
| style="width:150px; text-align:center;" | <span style="color: #cc0000">77 px</span> | |||
|- | |- | ||
| | ! style="width:150px;" | Wake-up Speed | ||
| style="width:150px; text-align:center;" | <span style="color: #ffff00">+0f</span> | |||
|- | |- | ||
| | ! style="width:150px;" | Throw Range | ||
| style="width:150px; text-align:center;" | Punch: <span style="color: #ffff00">52px</span><br>Kick: <span style="color: #ffff00">52px</span> | |||
|- | |- | ||
| | |} | ||
{| class="wikitable" border=1 style="border-collapse: collapse; width: 300px" | |||
|+ style="text-align:center;" | [[Capcom_vs_SNK_2/Groove_Subsystems#Dash_Data_Chart | Movement Data]] | |||
|- | |- | ||
| | ! style="width:150px;" | Front Dash Distance | ||
| style="width:150px; text-align:center;" | X: 64 px<br>Y: 0 px | |||
|- | |- | ||
| | ! style="width:150px;" | Backdash Distance | ||
| style="width:150px; text-align:center;" | X: 85 px<br>Y: 11.3 px | |||
|- | |- | ||
| 7.2 | ! style="width:150px;" | Run Speed | ||
| style="width:150px; text-align:center;" | <span style="color: #ff3300">7.2 px</span> | |||
|- | |- | ||
| | |} | ||
{| class="wikitable" border=1 style="border-collapse: collapse; width: 300px" | |||
|+ style="text-align:center;" | [[Capcom_vs_SNK_2/Groove_Subsystems#Roll_Data_Chart | Roll Data]] | |||
|- | |- | ||
| | ! style="width:150px;" | Recovery | ||
| style="width:150px; text-align:center;" | <span style="color: #009933">3f</span> | |||
|- | |- | ||
| | ! style="width:150px;" | Distance | ||
| style="width:150px; text-align:center;" | 112 px | |||
|- | |- | ||
| | ! style="width:150px;" | Duration | ||
| style="width:150px; text-align:center;" | 30f | |||
|- | |- | ||
| | |} | ||
|} | |} | ||
| Line 51: | Line 67: | ||
Sagat is generally regarded as the king of CvS2. He is at the very top of every tierlist, usually listed as the best character in the whole game in multiple grooves. He's a great character in any groove you throw him on. He is all about playing neutral and using his big buttons to confirm into big damage. He has it all: high health, high damage output, good defensive options, great pressure, the best buttons in the game, you can't ask for anything more in a character. He's relatively easy to play if you know when to use each of his buttons, since they serve a variety of uses. | Sagat is generally regarded as the king of CvS2. He is at the very top of every tierlist, usually listed as the best character in the whole game in multiple grooves. He's a great character in any groove you throw him on. He is all about playing neutral and using his big buttons to confirm into big damage. He has it all: high health, high damage output, good defensive options, great pressure, the best buttons in the game, you can't ask for anything more in a character. He's relatively easy to play if you know when to use each of his buttons, since they serve a variety of uses. | ||
Unfortunately, while a majority of this cast becomes much better thanks to | Unfortunately, while a majority of this cast becomes much better thanks to Roll Cancels, Sagat doesn't get too much from it, outside of RC Tiger Knee, there's no need to RC any of his specials. They won't offer much in the long run as they serve only a couple uses, but overall in neutral these specials don't serve much purpose at all. | ||
Most if not all top CvS2 players have Sagat on their main C and K groove team, usually as their R2 guy in the back. If he is on a team, should be there, since he is just too strong to be passed up on, and as said before, he's not that hard of a character to learn in any groove | Most if not all top CvS2 players have Sagat on their main C and K groove team, usually as their R2 guy in the back. If he is on a team, he should be there, since he is just too strong to be passed up on, and as said before, he's not that hard of a character to learn in any groove. Even in grooves like S and P, he's the best character available for those grooves. | ||
Generally the best spot you want to be in is either in neutral or pressuring up close. While Sagat's defensive options are great, it might get difficult to deal with rushdown heavy characters due to Sagat's sluggish speed and above average size, so it's best he's in a position where his speed isn't a part of the equation. You'll chip away at the opponent's health in neutral, but your main source of damage is from a confirm into super. It bags massive damage, as Sagat has the most reliable supers to give him that burst damage. | Generally the best spot you want to be in is either in neutral or pressuring up close. While Sagat's defensive options are great, it might get difficult to deal with rushdown heavy characters due to Sagat's sluggish speed and above average size, so it's best he's in a position where his speed isn't a part of the equation. You'll chip away at the opponent's health in neutral, but your main source of damage is from a confirm into super. It bags massive damage, as Sagat has the most reliable supers to give him that burst damage. | ||
=== Groove Selection === | === Groove Selection === | ||
'''Best - K/C:''' While Sagat performs well in every Groove, he still favors some more than others. K-Sagat is the best of them, and is the best character in the game. Rage benefits Sagat a ton, as his already ridiculous damage skyrockets. He can easily confirm into a Tiger Cannon for great damage as well. Run and shorthop legitimize his mixup game, and JD gives him a solid defensive option to deal with rushdown, and even has a true 50/50 when raged. C-Sagat is likely right behind. C-Groove gives Sagat an even better defensive tool in Alpha Counter, which more than makes up for the mobility loss, and air blocking can give Sagat more room to jump. Sagat also has a great level 2 combo, and since he has such great meter build he can do it often. While his roll isn't stellar, it's still a roll, and it can get him out of sticky situations when he needs it. | '''Best - K/C:''' While Sagat performs well in every Groove, he still favors some more than others. K-Sagat is the best of them, and is the best character in the game. Rage benefits Sagat a ton, as his already ridiculous damage skyrockets. He can easily confirm into a [[#Low Tiger Cannon|Tiger Cannon]] for great damage as well. Run and shorthop legitimize his mixup game, and JD gives him a solid defensive option to deal with rushdown, and even has a [[#Tiger Raid|true 50/50]] when raged. C-Sagat is likely right behind. C-Groove gives Sagat an even better defensive tool in Alpha Counter, which more than makes up for the mobility loss, and air blocking can give Sagat more room to jump. Sagat also has a great level 2 combo, and since he has such great meter build he can do it often. While his roll isn't stellar, it's still a roll, and it can get him out of sticky situations when he needs it. | ||
'''Useful - N/A/S/P:''' N-Sagat is his third best Groove. He gets access to the mobility of K-Sagat with a lot more chances to cancel into a level 1 super for good damage. He doesn't like guard cancel roll as much since his roll isn't the best, but it's more than welcome as a defensive option. Sagat doesn't like having to get into Max Mode for his level 3s however, and his meterbuild isn't as stellar since N-Groove has to build a bigger bar. A-Sagat, while on paper would sound like his best Groove, falls flat a bit. His CC isn't as good as you might hope, and while activation is still a ridiculously powerful mechanic and Sagat gets a lot of mileage from it, he just can't convert with it as well as other A-Groove characters. He would rather spend meter on a level 3 super usually, as those are more common for him and more reliable. Still, A-Sagat can make a nice battery character. S-Sagat is the best S-Groove character, and it still isn't the best Groove for him. He retains shorthop and run, which are inherently great for him, and at low health he can replace his Tiger Shots with Tiger Cannons. However, lack of supers often and unreliable sources of meter make it hard to do well with him until you reach low health. P-Sagat loses the run, but shorthop is more important for him anyway. Parries are a useful tool for him, as he can parry into a simple punish for decent damage, but he will rarely have a super to make that scary. | '''Useful - N/A/S/P:''' N-Sagat is his third best Groove. He gets access to the mobility of K-Sagat with a lot more chances to cancel into a level 1 super for good damage. He doesn't like guard cancel roll as much since his roll isn't the best, but it's more than welcome as a defensive option. Sagat doesn't like having to get into Max Mode for his level 3s however, and his meterbuild isn't as stellar since N-Groove has to build a bigger bar. A-Sagat, while on paper would sound like his best Groove, falls flat a bit. His CC isn't as good as you might hope, and while activation is still a ridiculously powerful mechanic and Sagat gets a lot of mileage from it, he just can't convert with it as well as other A-Groove characters. He would rather spend meter on a level 3 super usually, as those are more common for him and more reliable. Still, A-Sagat can make a nice battery character. S-Sagat is the best S-Groove character, and it still isn't the best Groove for him. He retains shorthop and run, which are inherently great for him, and at low health he can replace his Tiger Shots with Tiger Cannons. However, lack of supers often and unreliable sources of meter make it hard to do well with him until you reach low health. P-Sagat loses the run, but shorthop is more important for him anyway. Parries are a useful tool for him, as he can parry into a simple punish for decent damage, but he will rarely have a super to make that scary. | ||
| Line 68: | Line 84: | ||
--------------------------- | --------------------------- | ||
'''Sagat''' is the best character in CvS2, and is a beast in every situation he is in. Simple and unbelievably strong, there's little reason not to play him. Sagat is best in '''K-Groove''' and '''C-Groove''', but famously works in every Groove well | '''Sagat''' is the best character in CvS2, and is a beast in every situation he is in. Simple and unbelievably strong, there's little reason not to play him. Sagat is best in '''K-Groove''' and '''C-Groove''', but famously works in every Groove well | ||
'''Difficulty''': Easy<br>'''Tier''': S+ | |||
|pros= | |pros= | ||
* '''Normals:''' Arguably the best set of normals in the game, giving him untouched ability in neutral | * '''Normals:''' Arguably the best set of normals in the game, giving him untouched ability in neutral | ||
| Line 74: | Line 92: | ||
* '''Great Supers:''' Very versatile supers that help him out greatly, like the Tiger Cannons and Tiger Raid | * '''Great Supers:''' Very versatile supers that help him out greatly, like the Tiger Cannons and Tiger Raid | ||
* '''Simple:''' Pretty easy execution and easy to understand gameplan make him a character you can learn in little time | * '''Simple:''' Pretty easy execution and easy to understand gameplan make him a character you can learn in little time | ||
* '''Groove Friendly:''' | * '''Groove Friendly:''' Sagat is the clear-cut best pick for every groove outside of A-Groove, and even then he's one of the stronger picks for that groove. | ||
|cons= | |cons= | ||
* '''Big:''' He is tall and somewhat slow, dealing with good rushdown can be a bit of a struggle | * '''Big:''' He is tall and somewhat slow, dealing with good rushdown can be a bit of a struggle | ||
| Line 81: | Line 99: | ||
}} | }} | ||
' | === Players to Watch === | ||
{| class="wikitable" | |||
|- | |||
! Name !! Country !! Groove !! Accounts !! Notes | |||
|- | |||
| Kiku || Japan || C-Groove || N/A || A dominant C-Groover. Plays a textbook footsies Sagat. <br> [https://youtu.be/wfCMAaRVOq4 Sample Match] | |||
|- | |||
| Towel || Japan || C-Groove || Twitter: @TowelManX || After playing for so long, Towel's game sense and fundamentals are near perfect, and this is displayed most in his Sagat. <br> [https://youtu.be/obM2I8MAL74?t=287 Sample Match] | |||
|- | |||
| Wei || Japan || P-Groove || N/A || Also known as "P-Groove Guy." Dominates neutral through parries and pokes and lands a level 3 combo with ease. <br> [https://youtu.be/PeUNHW8Pu4M?t=1435 Sample Match] | |||
|- | |||
| P-Rugal || Japan || P-Groove || Twitter: @oyasuminecalli || Does not lean on parries for damage, rather he uses dominating neutral and only uses parries in tight situations. Eventually he swapped Sagat for Vice. <br> [https://youtu.be/x56WAJ-CmDA?t=64 Sample Match] | |||
|- | |||
| Izumi || Japan || S-Groove || Twitter: @IzumiSgroove || Incorporates his great S-Groove fundamentals into his play, which turns his Sagat into a character that you cannot throw bad pokes at in neutral. <br> [https://youtu.be/MmpDnT9b1lc?t=125 Sample Match] | |||
|- | |||
| Tsugunosuke || Japan || N-Groove || N/A || Uses a more aggressive Sagat. Makes great use of threatening short hops during max mode and capitalizes off of his hit confirms. <br> [https://youtu.be/PQyzhC8mRNc?t=320 Sample Match] | |||
|- | |||
| Bocchan || Japan || K-Groove || N/A || The original CBS user. His anchor Sagat is as terrifying as his other two characters. <br> [https://youtu.be/wfCMAaRVOq4 Sample Match] | |||
|- | |||
| Yane || Japan || K-Groove || Twitter: @yanechudan || A great K-Groover overall, very strong JD game. <br> [https://youtu.be/ddu4KLKTdG4?t=552 Sample Match] | |||
|- | |||
| Rai || Japan || K-Groove || Twitter: @raikapibara || In the words of many Japanese players, "Rai is Crazy." <br> [https://youtu.be/t0ksALEdnD0 Sample Match] | |||
|- | |||
|} | |||
<br><br> | |||
== Normal Moves == | == Normal Moves == | ||
| Line 177: | Line 220: | ||
* Amazing button. It has insane priority, making it able to beat out almost every poke in the game. | * Amazing button. It has insane priority, making it able to beat out almost every poke in the game. | ||
* Also a really good anti air, as it has a lot of active frames and it can beat a fair amount of jump-in attacks, especially short hop jump-ins, making dealing with N and K groove characters far easier for Sagat. | * Also a really good anti air, as it has a lot of active frames and it can beat a fair amount of jump-in attacks, especially short hop jump-ins, making dealing with N and K groove characters far easier for Sagat. | ||
* Mainly use this button as a whiff punish, button stuff and anti air. The only problem with this move is that it can easily get crouched under, however there's another poke Sagat has that fixes this issue. | * Mainly use this button as a whiff punish, button stuff and anti air. The only problem with this move is that it can easily get crouched under, however there's [[#2HP|another poke]] Sagat has that fixes this issue. | ||
}} | }} | ||
}} | }} | ||
| Line 210: | Line 253: | ||
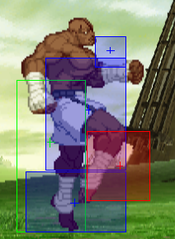
A slow uppercut-like punch. | A slow uppercut-like punch. | ||
* Sagat's anti-crossup tool. Can be done pretty easily on reation and the very fast startup makes it able to do it's job easily. | * Sagat's anti-crossup tool. Can be done pretty easily on reation and the very fast startup makes it able to do it's job easily. | ||
* Is also a great damaging cancel into Tiger Uppercut and super, and can be linked into from 2LK for max damage light confirms. | * Is also a great damaging cancel into Tiger Uppercut and super, and can be linked into from [[#2LK|2LK]] for max damage light confirms. | ||
* If it connects on the ground, cancel into something because it's very unsafe on contact. | * If it connects on the ground, cancel into something because it's very unsafe on contact. | ||
}} | }} | ||
| Line 310: | Line 353: | ||
| description = | | description = | ||
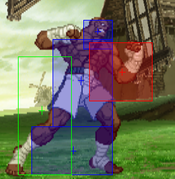
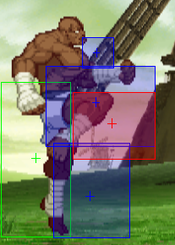
A very high heavy kick. | A very high heavy kick. | ||
* By design this button is your go-to anti air, however 5HP is more practical for short hops. When it comes to basic anti airs outside of short hop rushdown, use this button instead, since it also has high priority and even higher vertical range to boot. | * By design this button is your go-to anti air, however [[#5HP|5HP]] is more practical for short hops. When it comes to basic anti airs outside of short hop rushdown, use this button instead, since it also has high priority and even higher vertical range to boot. | ||
* Quick startup for a heavy, can be done in reaction to jumps pretty easily, but note that the lack of disjoint means it may trade at times. | * Quick startup for a heavy, can be done in reaction to jumps pretty easily, but note that the lack of disjoint means it may trade at times. | ||
}} | }} | ||
}} | }} | ||
<span class="invisible-header">2LP</span> | === <span class="invisible-header">2LP</span> === | ||
{{MoveData | {{MoveData | ||
| name = Crouch Jab | | name = Crouch Jab | ||
| Line 341: | Line 384: | ||
| description = | | description = | ||
A sluggish low punch | A sluggish low punch | ||
* Just a far more gimped version of 5LP. Not only is it a very slow jab, it does not even hit low, so there's no real situations where this move warrants use over 5LP. | * Just a far more gimped version of [[#5LP|5LP]]. Not only is it a very slow jab, it does not even hit low, so there's no real situations where this move warrants use over 5LP. | ||
* If you want a poke that could hit every crouching character, which is the main weakness of 5LP, then use 2LK. Just ignore this button for the most part. | * If you want a poke that could hit every crouching character, which is the main weakness of 5LP, then use 2LK. Just ignore this button for the most part. | ||
}} | }} | ||
}} | }} | ||
<span class="invisible-header">2MP</span> | === <span class="invisible-header">2MP</span> === | ||
{{MoveData | {{MoveData | ||
| name = Crouch Strong | | name = Crouch Strong | ||
| Line 377: | Line 420: | ||
}} | }} | ||
<span class="invisible-header">2HP</span> | === <span class="invisible-header">2HP</span> === | ||
{{MoveData | {{MoveData | ||
| name = Crouch Fierce | | name = Crouch Fierce | ||
| Line 383: | Line 426: | ||
| subtitle = Crouching Heavy Punch | | subtitle = Crouching Heavy Punch | ||
| image = CVS2_Sagat_2HP.png | | image = CVS2_Sagat_2HP.png | ||
| caption = | | caption = "my footsies game is so clean" | ||
| linkname = 2HP | | linkname = 2HP | ||
| data = | | data = | ||
| Line 403: | Line 446: | ||
| description = | | description = | ||
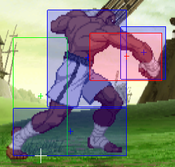
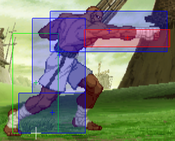
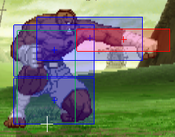
Sagat does a huge low straight punch | Sagat does a huge low straight punch | ||
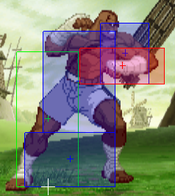
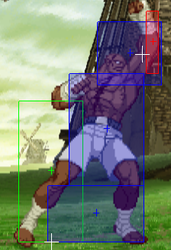
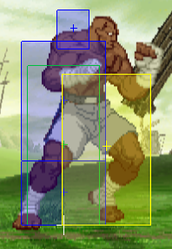
* The | * The button Sagat is known for. It's 5HP but he is lower to the ground. It still retains the same functionality (minus anti-airs), and it will be one of your go-to confirms into super (mainly Low Tiger Cannon) and it bags massive damage. | ||
* | * One of your main pokes, deals a huge 1500 damage, the second highest single button damage in the game. Despite having no special cancels, it's still a very rewarding poke to land by itself, and does even more damage with a super cancel. | ||
* Don't spam this button too much, as some characters have answers for Sagats who like using this button alone in neutral. If you have variety in your neutral pokes, then it's going to be very difficult for the opponent to challenge Sagat. | |||
}} | }} | ||
}} | }} | ||
| Line 435: | Line 479: | ||
A quick low kick. | A quick low kick. | ||
* Decent button. It comes out very fast, and it can link into itself. This is going to be your main combo starter, as it confirms into Tiger Knee fairly easily. | * Decent button. It comes out very fast, and it can link into itself. This is going to be your main combo starter, as it confirms into Tiger Knee fairly easily. | ||
* It also works as a frame trap normal and a tool for guard crush strings, as it can link into 5LP and 2MK, however since it is a 1-frame link 2MK more a frame trap/string. | * It also works as a frame trap normal and a tool for guard crush strings, as it can link into 5LP and [[#2MK|2MK]], however since it is a 1-frame link 2MK more a frame trap/string. | ||
}} | }} | ||
}} | }} | ||
| Line 595: | Line 639: | ||
=== <span class="invisible-header">j.LK</span> === | === <span class="invisible-header">j.LK</span> === | ||
{{MoveData | {{MoveData | ||
| name = | | name = Jump Short | ||
| input = j.LK | | input = j.LK | ||
| subtitle = Jumping Light Kick | | subtitle = Jumping Light Kick | ||
| Line 649: | Line 693: | ||
| description = | | description = | ||
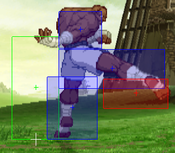
An outstretched leg kick. | An outstretched leg kick. | ||
* Not a useful button. It has a big hitbox below Sagat's body that makes it very weak to anti airs, even bad ones. Ignore in favor of j.LP, j.HP and j.HK for air-to-airs. | * Not a useful button. It has a big hitbox below Sagat's body that makes it very weak to anti airs, even bad ones. Ignore in favor of [[#j.LP|j.LP]], [[#j.HP|j.HP]] and [[#j.HK|j.HK]] for air-to-airs. | ||
}} | }} | ||
}} | }} | ||
| Line 721: | Line 765: | ||
| input = Near Opponent, 4/6HP | | input = Near Opponent, 4/6HP | ||
| subtitle = Punch Throw | | subtitle = Punch Throw | ||
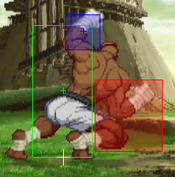
| image = | | image = CVS2_Sagat_Throwrange.png | ||
| caption = Throw Range | | caption = Throw Range | ||
| image2 = CVS2_Sagat_Pthrow.png | | image2 = CVS2_Sagat_Pthrow.png | ||
| Line 753: | Line 797: | ||
| input = Near Opponent, 4/6HK | | input = Near Opponent, 4/6HK | ||
| subtitle = Kick Throw | | subtitle = Kick Throw | ||
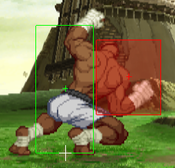
| image = | | image = CVS2_Sagat_Throwrange.png | ||
| caption = Throw Range | | caption = Throw Range | ||
| image2 = CVS2_Sagat_Kthrow.png | | image2 = CVS2_Sagat_Kthrow.png | ||
| Line 854: | Line 898: | ||
* For fireball wars, it's best to predict when the opponent will commit to a jump or a reposition. Light Tiger Shot has the least recovery, and it entices the opponent to try something since the fireball is so slow, so get the anti-airs ready or if they're empty jumping and fishing for a JD/Parry then throws or cancels from the anti-airs can work. | * For fireball wars, it's best to predict when the opponent will commit to a jump or a reposition. Light Tiger Shot has the least recovery, and it entices the opponent to try something since the fireball is so slow, so get the anti-airs ready or if they're empty jumping and fishing for a JD/Parry then throws or cancels from the anti-airs can work. | ||
* The main drawback with this move is that it can be easily crouched. This is where you have to know when to use Low Tiger Shot and High Tiger Shot. If noticeable amounts of screen space is being taken by the opponent from repeated High Tiger Shots, it wouldn't hurt to throw some low ones, but the main takeaway with those is that they can be easily jumped over. There is a time and a place for each, and even if the space is closed a bit if it's a midrange game then Sagat has the major advantage as his neutral is very strong. | * The main drawback with this move is that it can be easily crouched. This is where you have to know when to use [[#Low Tiger Shot|Low Tiger Shot]] and High Tiger Shot. If noticeable amounts of screen space is being taken by the opponent from repeated High Tiger Shots, it wouldn't hurt to throw some low ones, but the main takeaway with those is that they can be easily jumped over. There is a time and a place for each, and even if the space is closed a bit if it's a midrange game then Sagat has the major advantage as his neutral is very strong. | ||
* For zoning, again, try to read when the opponent is going to commit to closing space. Zoning isn't exactly the main gameplan for Sagat but against characters who are weak to zoning like Zangief, it is something Sagat will try a little more frequently. Changing the variations of fireballs can be both good and bad. If it is messing with their jump or anti fireball timings, then it is good, but if the opponent is deliberately exploiting a change in fireball speed to their advantage, then it's not that good. If zoning hurts Sagat more than it helps him in a particular matchup, it's best to stop playing the zoning game and crush them in neutral. | * For zoning, again, try to read when the opponent is going to commit to closing space. Zoning isn't exactly the main gameplan for Sagat but against characters who are weak to zoning like Zangief, it is something Sagat will try a little more frequently. Changing the variations of fireballs can be both good and bad. If it is messing with their jump or anti fireball timings, then it is good, but if the opponent is deliberately exploiting a change in fireball speed to their advantage, then it's not that good. If zoning hurts Sagat more than it helps him in a particular matchup, it's best to stop playing the zoning game and crush them in neutral. | ||
| Line 934: | Line 978: | ||
<br> | <br> | ||
'''Strategy''' <br> | '''Strategy''' <br> | ||
In tandem with High Tiger Shot, Sagat can zone pretty well with Low Tiger Shot as well. <br> | In tandem with [[#Tiger Shot|High Tiger Shot]], Sagat can zone pretty well with Low Tiger Shot as well. <br> | ||
* Low Tiger Shot is a very risky move to use in fireball wars. While it cannot be crouched like High Tiger Shot can, it can be very easily jumped over, but if you know that they will jump over, then get the anti-air ready, and as mentioned before, if they are fishing for parry/JD, mess with their timing or just throw them. | * Low Tiger Shot is a very risky move to use in fireball wars. While it cannot be crouched like High Tiger Shot can, it can be very easily jumped over, but if you know that they will jump over, then get the anti-air ready, and as mentioned before, if they are fishing for parry/JD, mess with their timing or just throw them. | ||
| Line 1,355: | Line 1,399: | ||
| total = 77 | | total = 77 | ||
| advHit = HKND | | advHit = HKND | ||
| advBlock = - | | advBlock = -7 | ||
| invul = 8 (Full) | | invul = 8 (Full) | ||
| description = | | description = | ||
| Line 1,376: | Line 1,420: | ||
| total = 86 | | total = 86 | ||
| advHit = HKND | | advHit = HKND | ||
| advBlock = - | | advBlock = -2 | ||
| invul = 14 (Full) | | invul = 14 (Full) | ||
| description = | | description = | ||
Sagat does a Tiger Knee and follows up with a Tiger Uppercut. | Sagat does a Tiger Knee and follows up with a Tiger Uppercut. | ||
* Arguably Sagat's best level 2. When cancelled into | * Arguably Sagat's best level 2. When cancelled into an [[#Tiger Uppercut|HP Tiger Uppercut]], the damage on this super is great. The only problem is that the move has limited range, but if you find yourself at a distance where this super will land, hitconfirming into a Lvl.2 Tiger Raid is not a bad option at all, it's probably the best one available for damage and resource management. | ||
* Also has the same startup tech as the level 3 version (see level 3), but to a slightly lesser degree. If the opponent switches from stand block to crouch block within around 2 frames of the super freeze, they will block the move. If they don't, then even if they hold down-back they are getting hit. This is because while Lvl.3 Tiger Raid is basically a 0f move, Lvl.2 Tiger Raid is a 2f move, so if the opponent holds downback within the 2 frames, their input will be registered, but afterwards, their input will not be registered and will get hit by the attack. In terms of mixups, it's still viable but not nearly as powerful as the level 3 version, as well Sagat doesn't have a shorthop in C groove so the high-low isn't as scary in neutral but it can still be effective, especially in okizeme situations. | * Also has the same startup tech as the level 3 version (see level 3), but to a slightly lesser degree. If the opponent switches from stand block to crouch block within around 2 frames of the super freeze, they will block the move. If they don't, then even if they hold down-back they are getting hit. This is because while Lvl.3 Tiger Raid is basically a 0f move, Lvl.2 Tiger Raid is a 2f move, so if the opponent holds downback within the 2 frames, their input will be registered, but afterwards, their input will not be registered and will get hit by the attack. In terms of mixups, it's still viable but not nearly as powerful as the level 3 version, as well Sagat doesn't have a shorthop in C groove so the high-low isn't as scary in neutral but it can still be effective, especially in okizeme situations. | ||
* If blocked, the move itself is -2 so Sagat usually won't get punished too hard for it, at worst he gets hit by a reversal special or super after attempting a followup attack. | * If blocked, the move itself is -2 so Sagat usually won't get punished too hard for it, at worst he gets hit by a reversal special or super after attempting a followup attack. | ||
| Line 1,398: | Line 1,442: | ||
| total = 88 | | total = 88 | ||
| advHit = HKND | | advHit = HKND | ||
| advBlock = - | | advBlock = -4 | ||
| invul = 22 (Full) | | invul = 22 (Full) | ||
| description = | | description = | ||
Latest revision as of 07:51, 17 June 2025
Introduction
| |||||||||||||||||||||||||
Story
Sagat is a Muai Thai practitioner from Thailand. He is considered the "Emperor of Muai Thai" because of how unstoppable he was when he fought. Nobody could defeat him, and soon became the strongest fighter in the world. He uses typical Muai Thai moves like fierce kicks, stiff knees and devastating punches, however he also has the ability to shoot projectiles (Tiger Shot), and uses a variation of Ryu's Shoryuken (Tiger Blow / Tiger Uppercut) as payback for Ryu scarring him. He dedicates his life to the martial arts, and works hard every day to make sure he retains his status as the best Muai Thai fighter to ever live, and that hard work payed off well as when he is at full strength, nothing can stop him. He is a proud and humble individual who knows and appreciates the work he and his opponents put into every fight.
Sagat used to be one of the key antagonists of Street Fighter, first starting out as the final boss of the first Street Fighter. Once he lost to Ryu, he let his hate and anger lead him down to dark paths. He became one of the main members of the crime syndicate Shadaloo, becoming one of the 4 Heavenly Kings and Dictator's personal bodyguard. After Dictator brainwashed Ryu during the events of Street Fighter Alpha 3, Sagat realized the moral wrongdoings of Shadaloo. He left the organization, and soon became one of the protagonists of the game.
In a majority of Street Fighter games Sagat has made an appearance in, he was usually an incredibly strong character and remained near or at the very top of the tier lists. Old Sagat from Super Turbo and SFIV Vanilla Sagat are notable examples of really strong variants of Sagat. In each game he appears in, he's very strong for a different reason. O. Sagat was strong because of his zoning, SFIV Vanilla Sagat is strong because of his insane damage output, and you'll see why CvS2 Sagat is right up there with them.
Overview
Sagat is generally regarded as the king of CvS2. He is at the very top of every tierlist, usually listed as the best character in the whole game in multiple grooves. He's a great character in any groove you throw him on. He is all about playing neutral and using his big buttons to confirm into big damage. He has it all: high health, high damage output, good defensive options, great pressure, the best buttons in the game, you can't ask for anything more in a character. He's relatively easy to play if you know when to use each of his buttons, since they serve a variety of uses.
Unfortunately, while a majority of this cast becomes much better thanks to Roll Cancels, Sagat doesn't get too much from it, outside of RC Tiger Knee, there's no need to RC any of his specials. They won't offer much in the long run as they serve only a couple uses, but overall in neutral these specials don't serve much purpose at all.
Most if not all top CvS2 players have Sagat on their main C and K groove team, usually as their R2 guy in the back. If he is on a team, he should be there, since he is just too strong to be passed up on, and as said before, he's not that hard of a character to learn in any groove. Even in grooves like S and P, he's the best character available for those grooves.
Generally the best spot you want to be in is either in neutral or pressuring up close. While Sagat's defensive options are great, it might get difficult to deal with rushdown heavy characters due to Sagat's sluggish speed and above average size, so it's best he's in a position where his speed isn't a part of the equation. You'll chip away at the opponent's health in neutral, but your main source of damage is from a confirm into super. It bags massive damage, as Sagat has the most reliable supers to give him that burst damage.
Groove Selection
Best - K/C: While Sagat performs well in every Groove, he still favors some more than others. K-Sagat is the best of them, and is the best character in the game. Rage benefits Sagat a ton, as his already ridiculous damage skyrockets. He can easily confirm into a Tiger Cannon for great damage as well. Run and shorthop legitimize his mixup game, and JD gives him a solid defensive option to deal with rushdown, and even has a true 50/50 when raged. C-Sagat is likely right behind. C-Groove gives Sagat an even better defensive tool in Alpha Counter, which more than makes up for the mobility loss, and air blocking can give Sagat more room to jump. Sagat also has a great level 2 combo, and since he has such great meter build he can do it often. While his roll isn't stellar, it's still a roll, and it can get him out of sticky situations when he needs it.
Useful - N/A/S/P: N-Sagat is his third best Groove. He gets access to the mobility of K-Sagat with a lot more chances to cancel into a level 1 super for good damage. He doesn't like guard cancel roll as much since his roll isn't the best, but it's more than welcome as a defensive option. Sagat doesn't like having to get into Max Mode for his level 3s however, and his meterbuild isn't as stellar since N-Groove has to build a bigger bar. A-Sagat, while on paper would sound like his best Groove, falls flat a bit. His CC isn't as good as you might hope, and while activation is still a ridiculously powerful mechanic and Sagat gets a lot of mileage from it, he just can't convert with it as well as other A-Groove characters. He would rather spend meter on a level 3 super usually, as those are more common for him and more reliable. Still, A-Sagat can make a nice battery character. S-Sagat is the best S-Groove character, and it still isn't the best Groove for him. He retains shorthop and run, which are inherently great for him, and at low health he can replace his Tiger Shots with Tiger Cannons. However, lack of supers often and unreliable sources of meter make it hard to do well with him until you reach low health. P-Sagat loses the run, but shorthop is more important for him anyway. Parries are a useful tool for him, as he can parry into a simple punish for decent damage, but he will rarely have a super to make that scary.
Worst - None: Sagat excels in every Groove and every team, regardless of your team composition.
|
Sagat is the best character in CvS2, and is a beast in every situation he is in. Simple and unbelievably strong, there's little reason not to play him. Sagat is best in K-Groove and C-Groove, but famously works in every Groove well Difficulty: EasyTier: S+ |
|
| Pros | Cons |
|
|
Players to Watch
| Name | Country | Groove | Accounts | Notes |
|---|---|---|---|---|
| Kiku | Japan | C-Groove | N/A | A dominant C-Groover. Plays a textbook footsies Sagat. Sample Match |
| Towel | Japan | C-Groove | Twitter: @TowelManX | After playing for so long, Towel's game sense and fundamentals are near perfect, and this is displayed most in his Sagat. Sample Match |
| Wei | Japan | P-Groove | N/A | Also known as "P-Groove Guy." Dominates neutral through parries and pokes and lands a level 3 combo with ease. Sample Match |
| P-Rugal | Japan | P-Groove | Twitter: @oyasuminecalli | Does not lean on parries for damage, rather he uses dominating neutral and only uses parries in tight situations. Eventually he swapped Sagat for Vice. Sample Match |
| Izumi | Japan | S-Groove | Twitter: @IzumiSgroove | Incorporates his great S-Groove fundamentals into his play, which turns his Sagat into a character that you cannot throw bad pokes at in neutral. Sample Match |
| Tsugunosuke | Japan | N-Groove | N/A | Uses a more aggressive Sagat. Makes great use of threatening short hops during max mode and capitalizes off of his hit confirms. Sample Match |
| Bocchan | Japan | K-Groove | N/A | The original CBS user. His anchor Sagat is as terrifying as his other two characters. Sample Match |
| Yane | Japan | K-Groove | Twitter: @yanechudan | A great K-Groover overall, very strong JD game. Sample Match |
| Rai | Japan | K-Groove | Twitter: @raikapibara | In the words of many Japanese players, "Rai is Crazy." Sample Match |
Normal Moves
5LP
5MP
5HP
| Version | Damage | Stun | Cancel | Guard | Parry | Startup | Active | Recovery | Total | Adv Hit | Adv Block | Invul |
|---|---|---|---|---|---|---|---|---|---|---|---|---|
| Far |
1600 | 16 | SU | Mid | High | 6 | 8 | 20 | 34 | -4 | -4 | None |
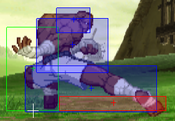
Sagat does a huge straight punch.
| ||||||||||||
cl5HP
| Version | Damage | Stun | Cancel | Guard | Parry | Startup | Active | Recovery | Total | Adv Hit | Adv Block | Invul |
|---|---|---|---|---|---|---|---|---|---|---|---|---|
| Close |
1300 / 1100 | 13 / 11 | SP/SU (1st Hit Only) | Mid | High | 3 | 8 | 27 | 38 | -13 | -13 | None |
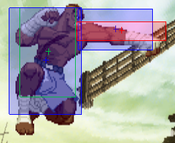
A slow uppercut-like punch.
| ||||||||||||
5LK
5MK
5HK
| Version | Damage | Stun | Cancel | Guard | Parry | Startup | Active | Recovery | Total | Adv Hit | Adv Block | Invul |
|---|---|---|---|---|---|---|---|---|---|---|---|---|
| 500+1300 | 5+13 | SP/SU (1st Hit Only) | Mid | High | 6 | 10 | 24 | 40 | -7 | -7 | None | |
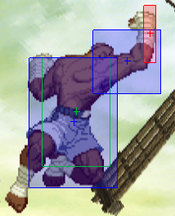
A very high heavy kick.
| ||||||||||||
2LP
| Version | Damage | Stun | Cancel | Guard | Parry | Startup | Active | Recovery | Total | Adv Hit | Adv Block | Invul |
|---|---|---|---|---|---|---|---|---|---|---|---|---|
| 400 | 4 | SP/SU | Mid | Low | 5 | 4 | 8 | 17 | +3 | +3 | None | |
A sluggish low punch
| ||||||||||||
2MP
2HP
2LK
| Version | Damage | Stun | Cancel | Guard | Parry | Startup | Active | Recovery | Total | Adv Hit | Adv Block | Invul |
|---|---|---|---|---|---|---|---|---|---|---|---|---|
| 400 | 4 | SP/SU | Low | Low | 3 | 4 | 6 | 13 | +5 | +5 | - | |
A quick low kick.
| ||||||||||||
2MK
2HK
j.LP
j.MP
j.HP
j.LK
j.MK
dj.MK
j.HK
Throws
Tiger Toss
King's Clutch
Special Moves
Tiger Shot
| Version | Damage | Stun | Cancel | Guard | Parry | Startup | Active | Recovery | Total | Adv Hit | Adv Block | Invul |
|---|---|---|---|---|---|---|---|---|---|---|---|---|
| LP |
800 | 8 | None | Mid | Mid | 10 | - | 44 | 54 | -11 | -11 | - |
Zoning fireball.
| ||||||||||||
| MP |
900 | 9 | None | Mid | Mid | 10 | - | 45 | 55 | -12 | -12 | - |
A little bit of both.
| ||||||||||||
| HP |
1000 | 10 | None | Mid | Mid | 10 | - | 46 | 56 | -13 | -13 | - |
Anti-air fireball.
| ||||||||||||
Low Tiger Shot
| Version | Damage | Stun | Cancel | Guard | Parry | Startup | Active | Recovery | Total | Adv Hit | Adv Block | Invul |
|---|---|---|---|---|---|---|---|---|---|---|---|---|
| LK |
700 | 7 | None | Mid | Mid | 10 | - | 45 | 55 | -12 | -12 | - |
Another zoning fireball.
| ||||||||||||
| MK |
800 | 8 | None | Mid | Mid | 10 | - | 46 | 56 | -13 | -13 | - |
| ||||||||||||
| HK |
900 | 9 | None | Mid | Mid | 10 | - | 47 | 57 | -14 | -14 | - |
| ||||||||||||
Tiger Uppercut
Tiger Crush
Super Moves
Tiger Cannon
Low Tiger Cannon
Tiger Genocide
Tiger Raid
| Version | Damage | Stun | Cancel | Guard | Parry | Startup | Active | Recovery | Total | Adv Hit | Adv Block | Invul |
|---|---|---|---|---|---|---|---|---|---|---|---|---|
| 2700 | 0 | None | Low (First Hit), Mid | Low (First Hit), High | 8 | 2 [10] 4 [16] 2+2+2+2 | 29 | 77 | HKND | -7 | 8 (Full) | |
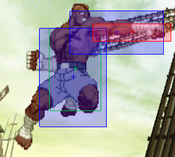
Sagat does a sweep followed by a midsection kick and ends with a flying outward kick.
| ||||||||||||
| 4000 | 0 | SP/SU | Low (First Hit), Mid | Low (First Hit), High | 8 | 2 [10] 4 [10] 4 [16] 2+2+2+2 | 24 | 86 | HKND | -2 | 14 (Full) | |
Sagat does a Tiger Knee and follows up with a Tiger Uppercut.
| ||||||||||||
| 5700 | 0 | None | Low (First Hit), Mid | Low (First Hit), High | 8 | 2 [10] 4 [10] 4 [16] 2+2+2+2 | 26 | 88 | HKND | -4 | 22 (Full) | |
Sagat does a Tiger Knee and follows up with a Tiger Uppercut.
| ||||||||||||
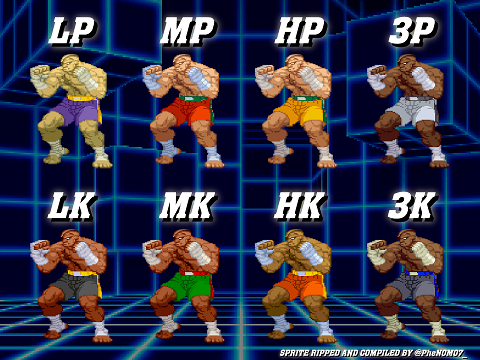
Colors

