Callie Rose (talk | contribs) m (→Fireball) |
RagingStormX (talk | contribs) |
||
| (12 intermediate revisions by 3 users not shown) | |||
| Line 3: | Line 3: | ||
{{CvS2 Character Subnav|char=Iori|short=Iori}} | {{CvS2 Character Subnav|char=Iori|short=Iori}} | ||
<div> | <div> | ||
[[File:CVS2_Iori_Data.png|right|500px]] | |||
== Story == | == Story == | ||
Iori Yagami (Japanese: 八神 庵, Hepburn: Yagami Iori) is a character from SNK's The King of Fighters video game series. The character first appeared in The King of Fighters '95 as the leader of the Rivals Team, as the initial enemy and later rival of Kyo Kusanagi. Iori is the heir of the Yagami clan, who use pyrokinetic powers and sealed the Orochi devil along with the Kusanagi and Yata clans. Iori suffers from a curse – "The Riot of the Blood" (血の暴走, Chi no Bōso) – under which he becomes faster, stronger and wilder, exhibiting a deadly tendency to indiscriminately attack everyone in close proximity. In this state, Iori is commonly called "Wild Iori" or "Orochi Iori" (月の夜大蛇の血に狂う庵, Tsuki no Yoru Orochi no Chi ni Kuruu Iori, lit. Insane Iori with Blood of Orochi Under the Night of the Moon).[3] Aside from the main series, Iori appears in several other media series, including spin-offs, crossover video games and comic adaptations of the series. | Iori Yagami (Japanese: 八神 庵, Hepburn: Yagami Iori) is a character from SNK's The King of Fighters video game series. The character first appeared in The King of Fighters '95 as the leader of the Rivals Team, as the initial enemy and later rival of Kyo Kusanagi. Iori is the heir of the Yagami clan, who use pyrokinetic powers and sealed the Orochi devil along with the Kusanagi and Yata clans. Iori suffers from a curse – "The Riot of the Blood" (血の暴走, Chi no Bōso) – under which he becomes faster, stronger and wilder, exhibiting a deadly tendency to indiscriminately attack everyone in close proximity. In this state, Iori is commonly called "Wild Iori" or "Orochi Iori" (月の夜大蛇の血に狂う庵, Tsuki no Yoru Orochi no Chi ni Kuruu Iori, lit. Insane Iori with Blood of Orochi Under the Night of the Moon).[3] Aside from the main series, Iori appears in several other media series, including spin-offs, crossover video games and comic adaptations of the series. | ||
| Line 77: | Line 42: | ||
'''Useful - A/K:''' A-Groove is a little behind, and Iori is usually ran on point. Custom Combo is powerful and useful, and Iori has a decent one. Lack of run or hop hurts his offense a bit, but it isn't a huge tradeoff, and he still has roll. K-Iori is a higher risk Iori, with a major downside in the missing roll. Rage makes him scary though, as one good hit confirms into level 3 Maiden Masher for big damage, and he can usually punish something after a JD. | '''Useful - A/K:''' A-Groove is a little behind, and Iori is usually ran on point. Custom Combo is powerful and useful, and Iori has a decent one. Lack of run or hop hurts his offense a bit, but it isn't a huge tradeoff, and he still has roll. K-Iori is a higher risk Iori, with a major downside in the missing roll. Rage makes him scary though, as one good hit confirms into level 3 Maiden Masher for big damage, and he can usually punish something after a JD. | ||
'''Worst - P/S:''' P-Iori isn't bad, he gets good meterless reward after all. However, just like K-Iori, the missing roll is very hard to deal with as it's important to his gameplan. S-Groove | '''Worst - P/S:''' P-Iori isn't bad, he gets good meterless reward after all. However, just like K-Iori, the missing roll is very hard to deal with as it's important to his gameplan. S-Groove isn't that bad for Iori, but it does make him lose his much needed roll and Level 3 super confirms for damage because of the constant need for charge, while he has the basics in run, hop, and dodge. Just that you will almost never have meter for a Level 3 Maiden Masher, but still; even getting a Level 1 Maiden Masher from any hitconfirm can be nice while Iori is in desperation mode. | ||
{{StrengthsAndWeaknesses | {{StrengthsAndWeaknesses | ||
| Line 83: | Line 48: | ||
--------------------------- | --------------------------- | ||
'''Iori''' is a powerful rushdown vortex character, with great mixups from his hard knockdown rekkas. His neutral is also solid, with good pokes and one of the best RC specials in rekkas. He just has to be in range to utilize them. Iori is best in '''N-Groove''' and '''C-Groove'''. | '''Iori''' is a powerful rushdown vortex character, with great mixups from his hard knockdown rekkas. His neutral is also solid, with good pokes and one of the best RC specials in rekkas. He just has to be in range to utilize them. Iori is best in '''N-Groove''' and '''C-Groove'''. | ||
'''Difficulty''': Medium<br>'''Tier''': A+ | |||
|pros= | |pros= | ||
* '''Vortex:''' Amazing rushdown and mixup, with overheads, a command grab, a great low confirm, and a dedicated crossup command normal that all lead into a hard knockdown and another mixup | * '''Vortex:''' Amazing rushdown and mixup, with overheads, a command grab, a great low confirm, and a dedicated crossup command normal that all lead into a hard knockdown and another mixup | ||
| Line 95: | Line 62: | ||
}} | }} | ||
== Normal Moves == | === Players to Watch === | ||
=== Far Standing Normals === | {| class="wikitable" | ||
=== <span class="invisible-header">5LP</span> === | |- | ||
! Name !! Country !! Groove !! Accounts !! Notes | |||
|- | |||
| GAO || Japan || C-Groove || N/A || One of the best players in the world. His Iori isn't insanely nuts like his Ryu, but he consistently closes games with him easily. <br> [https://youtu.be/yqYmRUZRnys?t=83 Sample Match] | |||
|- | |||
| UWB || Japan || C-Groove || N/A || Fundamentally sound and never makes a big mistake. <br> [https://youtu.be/U5leNkllmKQ Sample Match] | |||
|- | |||
| GAN || Japan || A-Groove || N/A || A player who even gives BAS a run for his money. Lands Iori's customs like it's no challenge at all. Evo Japan 2019 Champion. <br> [https://youtu.be/irMShwUkLUI Sample Match] | |||
|- | |||
| Gene Wong || USA || A-Groove || Twitter: @genexiii <br> Discord: + 𝔇𝔢𝔩𝔭𝔥𝔦𝔫𝔬 +#1838 || Once a prodigy of the game taught by John Choi. His execution makes you think that there might be robots living in our world. <br> [https://youtu.be/ZwOQSRt2vEE Sample Match] | |||
|- | |||
| Izumi || Japan || P-Groove || Twitter: @IzumiSgroove || Izumi uses P-Iori with extremely strong fundamentals despite no roll. Has a threatening shorthop game and strong parry punishes. <br> [https://youtu.be/6ROyIkPZpTs Sample Match] | |||
|- | |||
| Tsugunosuke || Japan || N-Groove || N/A || The best N-Groover in Japan with a dominant Iori to match. Plays very aggressively. <br> [https://youtu.be/PQyzhC8mRNc Sample Match] | |||
|- | |||
| Buktooth || USA || N-Groove || Discord: buktooth#8799 || Old school player, one of the OGs. Wrote the original CvS2 FAQs. <br> [https://youtu.be/dOkWrLKTeB0 Sample Match] | |||
|- | |||
| Yane || Japan || K-Groove || Twitter: @yanechudan || A secret weapon of his. Though Iori is not a consistent mainstay on his team, he still uses K-Iori extremely well. <br> [https://youtu.be/mBrxMUIUlpE?t=430 Sample Match] | |||
|- | |||
|} | |||
<br><br> | |||
== Normal Moves == | |||
=== Far Standing Normals === | |||
=== <span class="invisible-header">5LP</span> === | |||
{{MoveData | {{MoveData | ||
| name = Stand Jab | | name = Stand Jab | ||
| Line 1,051: | Line 1,043: | ||
Outside of its obvious use in combos, the rekka ken doesn't have much use. Start RCing it, though, and you have a different beast entirely. The result is a high priority (invincible, even), high damage (2200 if you get all 3), long range (Iori's longest ranged move, farther than his standing/low roundhouses) poke that enables Iori to compete with the Sagats and Cammys of the world. | Outside of its obvious use in combos, the rekka ken doesn't have much use. Start RCing it, though, and you have a different beast entirely. The result is a high priority (invincible, even), high damage (2200 if you get all 3), long range (Iori's longest ranged move, farther than his standing/low roundhouses) poke that enables Iori to compete with the Sagats and Cammys of the world. | ||
The catch? The move carries a ton of risk behind it. As much as a fireball, even. The move is most easily punished by either a straight up jump (which results in a full jump in combo since Iori conveniently moves right under them) or a well timed roll. The move can also be baited into whiffing and then easily punished also. As if that weren't enough, the move isn't even totally safe if blocked! As you can see from the data above, the move carries a -5 frame disadvantage, enough for a few characters to get a low forward combo in. However, the move is mostly safe if blocked around max distance, though. You can actually punish attempts to hit a well-ranged RC rekka ken with... another RC rekka ken! DO NOT fall into the habit of doing RC rekka ken, then another RC rekka ken, though. It's killed me more times than I care to remember. | The catch? The move carries a ton of risk behind it. As much as a fireball, even. The move is most easily punished by either a straight up jump (which results in a full jump in combo since Iori conveniently moves right under them) or a well timed roll. The move can also be baited into whiffing and then easily punished also, this can be negated by completing the entire rekka set and leaving you far from your opponent, hard to punish if they are ready for it. As if that weren't enough, the move isn't even totally safe if blocked! As you can see from the data above, the move carries a -5 frame disadvantage, enough for a few characters to get a low forward combo in. However, the move is mostly safe if blocked around max distance, though. You can actually punish attempts to hit a well-ranged RC rekka ken with... another RC rekka ken! DO NOT fall into the habit of doing RC rekka ken, then another RC rekka ken, though. It's killed me more times than I care to remember. | ||
If your rekka ken is rolled through, try to get away from the opponent by doing the second and third rekkas. This works well if you're in the middle of field, but if you're opponent was in the corner you're not going anywhere. | If your rekka ken is rolled through, try to get away from the opponent by doing the second and third rekkas. This works well if you're in the middle of field, but if you're opponent was in the corner you're not going anywhere. | ||
| Line 1,070: | Line 1,062: | ||
6/13/03 - Something to keep in mind: If you roll after knocking the opponent down with rekka kens and end up in FRONT of your opponent, you have a slight advantage since your roll ended just before your opponent gets up. However, if the roll ends up BEHIND the opponent, the opponent can actually throw you for free since it takes a bit longer to get to that distance. Mix it up. If you end up in front of your opponent and he's mashing on throw, you can easily get counter hit jabs/shorts into a combo. | 6/13/03 - Something to keep in mind: If you roll after knocking the opponent down with rekka kens and end up in FRONT of your opponent, you have a slight advantage since your roll ended just before your opponent gets up. However, if the roll ends up BEHIND the opponent, the opponent can actually throw you for free since it takes a bit longer to get to that distance. Mix it up. If you end up in front of your opponent and he's mashing on throw, you can easily get counter hit jabs/shorts into a combo. | ||
Iori's rekkas (as well as Kyo's) do very little stun damage. A full triple-hit series gets you 2200 damage, but only does 9 stun damage on the opponent. This is one of the few moves that is the exception to CvS2's "stun = damage/100" rule. | |||
PUNISHES ON REKKA | |||
Some characters are able to punish Iori rekka on block consistently when done off lights or close range when RC, most rely on Lvl 3 super: | |||
Balrog- Gigaton | |||
Vega - Red Impact | |||
Cammy - Lvl 3 Spin Drive Smasher | |||
M.Bison - Super Pyscho Crusher | |||
Rock - Lvl 3 Shine Knuckle | |||
Sagat - Lvl 2/3 Tiger Raid, Lvl 3 High Tiger Cannon | |||
Yun - LP Lunge punch, lvl 2/3 rush punch super | |||
Hibiki - c.lp xx Slash will punish, but very unlikely due to being frame perfect. | |||
}} | }} | ||
}} | }} | ||
| Line 1,143: | Line 1,154: | ||
| invul = 6 full/ 7 lower | | invul = 6 full/ 7 lower | ||
| description = Most Damage DP | | description = Most Damage DP | ||
* This is the damage DP. Perfectly usable as anti air or reversals, but only when the opponent is point blank. Also the recovery is so bad, Iori loses okizeme opportunities by using it. | * This is the damage DP. Perfectly usable as anti air or reversals, but only when the opponent is point blank. Also the recovery is so bad, Iori loses okizeme opportunities by using it. Combo into this when it will stun. | ||
}} | }} | ||
}} | }} | ||
| Line 1,286: | Line 1,297: | ||
Another use for this move is to chip somebody to death. If you're not within fierce uppercut range to chip somebody (fierce uppercut does 325 points of chip damage), the next best option is to f+strong into Running Grab, as that does 300 chip damage. 2 Rekka kens only do 200 damage, and a fireball does 100. 300 damage from the running grab is enough to insure that you never fall victim to the "Magic Pixel" that has claimed many a player. | Another use for this move is to chip somebody to death. If you're not within fierce uppercut range to chip somebody (fierce uppercut does 325 points of chip damage), the next best option is to f+strong into Running Grab, as that does 300 chip damage. 2 Rekka kens only do 200 damage, and a fireball does 100. 300 damage from the running grab is enough to insure that you never fall victim to the "Magic Pixel" that has claimed many a player. | ||
RCing the move can be useful from time to time, like when you REALLY need that chip damage to kill the opponent but can't find a way to f+strong them, or to punish somebody buffering moves into a fireball. You could theoretically use an RC Running Grab as an anti-air from afar, but I wouldn't recommend it since the move comes out pretty slow. | RCing the move can be useful from time to time, like when you REALLY need that chip damage to kill the opponent but can't find a way to f+strong them, or to punish somebody buffering moves into a fireball. You could theoretically use an RC Running Grab as an anti-air from afar, but I wouldn't recommend it since the move comes out pretty slow. | ||
}} | |||
}} | |||
=== <span class="invisible-header">Scum Gale</span> === | |||
{{MoveData | |||
| name = Kukukaze | |||
| input = 632146+P | |||
| subtitle = Scum Gale | |||
| image = CVS2_Iori_632146Pwhiff.png | |||
| caption = Whiffed | |||
| image2 = CVS2_Iori_632146Phit.png | |||
| caption2 = Landed | |||
| linkname = ScumGale | |||
| data = | |||
{{AttackData-CvS2 | |||
| subtitle = | |||
| damage = 0 | |||
| stun = 0 | |||
| cancel = None | |||
| guard = N/A | |||
| parry = N/A | |||
| startup = 8 | |||
| active = 1 | |||
| recovery = 32 | |||
| total = 41 | |||
| advHit = +12 | |||
| advBlock = N/A | |||
| invul = N/A | |||
| description = | |||
Iori's famous side-switching command grab. This special is what makes Iori's offense so deadly. It's not only an unblockable command grab, but the opponent is stuck in hit stun after the grab, allowing you to combo off of it. This move is deadly because Iori has a very rewarding strike/throw mixup, as both lead to a good knockdown and damage. Mix that up with his crazy good jab and his roll and this move becomes very powerful. The only weakness this move has outside of having fairly lengthy startup for a command grab (8F) is that it switches sides, so you give up the corner for a mixup. It's still around 3.7K damage you're getting so it's not too bad. You can even try to command grab them again after they recover from the hitstun of the previous command grab, although in most contexts you just want to get the damage. | |||
There are usually two main follow-ups from the command grab, a max damage one and a safe fall bait one. | |||
'''Max Damage Route''': (Grab), 5MP > 6MP xx Rekkas / Ranbu <br> | |||
This is the optimal damage follow-up on a command grab, utilizing Iori's 5MP > 6MP target combo. It's really easy as well. If you have the resources, you can also combo into Iori's ranbu super off of this. | |||
'''Safe Fall Bait Route''': (Grab), Microwalk 5MP xx LP DP, 2HK if opponent safe falls <br> | |||
This is a route that's usually done to specifically kill safe falls. LP DP gives Iori enough time to walk forward and do a sweep if the opponent safe falls, but of course in the corner he gets a better punish. Against non safe-fall grooves always go for optimal damage, but even in the case of safe fall grooves this should only be used if the opponent is just spamming safe falls. | |||
}} | }} | ||
}} | }} | ||
| Line 1,434: | Line 1,483: | ||
| invul = 1~23 (Full) | | invul = 1~23 (Full) | ||
| description = | | description = | ||
Iori tosses a fireball that then explodes into pillars. Each level gets more pillars, with level 1 only getting one and not traveling far, level 2 getting 4 and traveling a little over a third of the screen, and level 3 getting 8 pillars and traveling well beyond fullscreen. On hit, these cause a unique flame freeze effect. The opponent will be coated in Iori's signature purple fire, and will slowly take hits of damage. The level 1 version hits 4 times before knocking down, the level 2 version hits 5 times, and the level 3 version hits 6 times. During this frozen time, Iori can hit with any move, though this will instantly end the freeze. You always want to wait a few hits to maximize the damage, preferably until the last hit that doesn't knock down. This super can also be charged, hence the double value on the startup time. However, regardless of minimal charge or not, comboing into this is impossible in most situations. It lacks much neutral utility outside of gimmicky callouts, and the cost is fairly high. Maiden Masher is overall a MUCH more useful super in almost every situation, and you would almost always rather save the meter for that than spend it on this. | Iori tosses a fireball that then explodes into pillars. Each level gets more pillars, with level 1 only getting one and not traveling far, level 2 getting 4 and traveling a little over a third of the screen, and level 3 getting 8 pillars and traveling well beyond fullscreen. On hit, these cause a unique flame freeze effect. The opponent will be coated in Iori's signature purple fire, and will slowly take hits of damage. The level 1 version hits 4 times before knocking down, the level 2 version hits 5 times, and the level 3 version hits 6 times. During this frozen time, Iori can hit with any move, though this will instantly end the freeze. You always want to wait a few hits to maximize the damage, preferably until the last hit that doesn't knock down. This super can also be charged, hence the double value on the startup time. However, regardless of minimal charge or not, comboing into this is impossible in most situations outside A-Groove. It lacks much neutral utility outside of gimmicky callouts, and the cost is fairly high. Maiden Masher is overall a MUCH more useful super in almost every situation, and you would almost always rather save the meter for that than spend it on this. | ||
Note: The opponent can mash to leave the freeze state faster, you can't get a jump in combo on a level 1 grounded freeze if mashed. | |||
}} | }} | ||
}} | }} | ||
Latest revision as of 14:53, 11 April 2025
Introduction
Story
Iori Yagami (Japanese: 八神 庵, Hepburn: Yagami Iori) is a character from SNK's The King of Fighters video game series. The character first appeared in The King of Fighters '95 as the leader of the Rivals Team, as the initial enemy and later rival of Kyo Kusanagi. Iori is the heir of the Yagami clan, who use pyrokinetic powers and sealed the Orochi devil along with the Kusanagi and Yata clans. Iori suffers from a curse – "The Riot of the Blood" (血の暴走, Chi no Bōso) – under which he becomes faster, stronger and wilder, exhibiting a deadly tendency to indiscriminately attack everyone in close proximity. In this state, Iori is commonly called "Wild Iori" or "Orochi Iori" (月の夜大蛇の血に狂う庵, Tsuki no Yoru Orochi no Chi ni Kuruu Iori, lit. Insane Iori with Blood of Orochi Under the Night of the Moon).[3] Aside from the main series, Iori appears in several other media series, including spin-offs, crossover video games and comic adaptations of the series.
Iori was created as Kyo's rival; his name and abilities were designed to relate him with the legend of Yamata no Orochi. The designers ended up liking him so much they are careful of the character's development as the series expands. As a result, Iori sometimes helps Kyo to have the opportunity to fight him. Finding his design appealing, new outfits presented the SNK staff with difficulties as they devised new appearances for the character that would retain his popularity.
Video game journalists have praised Iori Yagami as one of the most powerful characters in the series. Reviewers have also cited Iori as one of the best characters from the games, labeling him as a veteran character and praising his appearance as one of SNK's best creations. "Miss X", Iori's crossdressing form from SNK Gals' Fighters and the additional female one of SNK Heroines: Tag Team Frenzy, also received attention for its humor. A series of collectible items based on Iori's likeness, including key chains and figurines, have been manufactured.
Gameplay
Iori is a very versatile character whose moveset lends him to a rush-down/mixup style with damage mainly coming from his Rekka combos. Coupled with that, he has very serviceable pokes, good anti air, and a good reversal DP for use in defense and neutral situations. He also has one of the best poke RCs in the game with his Rekka, is the shortest character in the game, and has the best roll in the game.
His drawbacks are getting in against dominant "big button" characters (Sagat, Blanka, Cammy, etc), a relatively low ceiling of one shot burst damage (his supers aren't very strong), and characters who duck and outpoke his Stand Roundhouse.
In CvS2, he is often considered a "high" tier character, just below the established top tiers. He is a staple on N groove teams, as well as one of the Best SNK characters in the game. Conventional wisdom is that he is one of the easiest characters to use, and recent Japanese tourney play features him on two of the best players' teams. In C and A grooves, even.
Iori's what? Since people play better and more focused when they have a set goal in mind rather than "uh...imma just hit guy and win! And do combos!", it's good to know what your character's main objective is before playing. A kind of a fighting game thesis, if you will.
Iori's objective is to get within point blank range of his opponent.
(Simple, right? It's supposed to be)
Why?
Simple. When you're up close you have the threat of the Scum Gale grab, which lends itself to high damage 50/50 mix ups, all of which knock down the opponent and set up another mix up.
How is this objective accomplished? In order of best method to worst method: 1) Knocking the opponent down 2) Getting 3/4ths to full screen, throwing a jab fireball and running after it 3) Establishing Iori's strong mid-range ground game, which drains the opponent's guard bar. The draining of your opponent's guard bar entices him to make mistakes that enable you to achieve method 1). 4) By trying to roll through or jump/low jump over your opponent's moves.
Since 1) is hard to do on a good opponent and the distance for 2) can be difficult to establish, Iori spends most of his time doing 3).
Groove Selection
Best - N/C: N-Groove is Iori's best Groove for a few reasons. Iori has one of the best rolls in the game, and a great special to roll cancel with his rekkas. N-Groove gives him run and hop to aid his mixup and rushdown, and while the meter isn't great, level 1 Maiden Masher is an easy and simple confirm for a damage increase anyway. C-Groove is only a little behind, as while he gives up run and hop, he gets a very damaging level 2 combo in exchange that can be easily combo'd into. Air block and Alpha Counters are also helpful in a lot of situations.
Useful - A/K: A-Groove is a little behind, and Iori is usually ran on point. Custom Combo is powerful and useful, and Iori has a decent one. Lack of run or hop hurts his offense a bit, but it isn't a huge tradeoff, and he still has roll. K-Iori is a higher risk Iori, with a major downside in the missing roll. Rage makes him scary though, as one good hit confirms into level 3 Maiden Masher for big damage, and he can usually punish something after a JD.
Worst - P/S: P-Iori isn't bad, he gets good meterless reward after all. However, just like K-Iori, the missing roll is very hard to deal with as it's important to his gameplan. S-Groove isn't that bad for Iori, but it does make him lose his much needed roll and Level 3 super confirms for damage because of the constant need for charge, while he has the basics in run, hop, and dodge. Just that you will almost never have meter for a Level 3 Maiden Masher, but still; even getting a Level 1 Maiden Masher from any hitconfirm can be nice while Iori is in desperation mode.
|
Iori is a powerful rushdown vortex character, with great mixups from his hard knockdown rekkas. His neutral is also solid, with good pokes and one of the best RC specials in rekkas. He just has to be in range to utilize them. Iori is best in N-Groove and C-Groove. Difficulty: MediumTier: A+ |
|
| Pros | Cons |
|
|
Players to Watch
| Name | Country | Groove | Accounts | Notes |
|---|---|---|---|---|
| GAO | Japan | C-Groove | N/A | One of the best players in the world. His Iori isn't insanely nuts like his Ryu, but he consistently closes games with him easily. Sample Match |
| UWB | Japan | C-Groove | N/A | Fundamentally sound and never makes a big mistake. Sample Match |
| GAN | Japan | A-Groove | N/A | A player who even gives BAS a run for his money. Lands Iori's customs like it's no challenge at all. Evo Japan 2019 Champion. Sample Match |
| Gene Wong | USA | A-Groove | Twitter: @genexiii Discord: + 𝔇𝔢𝔩𝔭𝔥𝔦𝔫𝔬 +#1838 |
Once a prodigy of the game taught by John Choi. His execution makes you think that there might be robots living in our world. Sample Match |
| Izumi | Japan | P-Groove | Twitter: @IzumiSgroove | Izumi uses P-Iori with extremely strong fundamentals despite no roll. Has a threatening shorthop game and strong parry punishes. Sample Match |
| Tsugunosuke | Japan | N-Groove | N/A | The best N-Groover in Japan with a dominant Iori to match. Plays very aggressively. Sample Match |
| Buktooth | USA | N-Groove | Discord: buktooth#8799 | Old school player, one of the OGs. Wrote the original CvS2 FAQs. Sample Match |
| Yane | Japan | K-Groove | Twitter: @yanechudan | A secret weapon of his. Though Iori is not a consistent mainstay on his team, he still uses K-Iori extremely well. Sample Match |
Normal Moves
Far Standing Normals
5LP
5MP
5HP
5LK
5MK
5HK
Close Standing Normals
cl5LP
cl5MP
cl5HP
cl5LK
cl5MK
cl5HK
Crouching Normals
2LP
2MP
2HP
2LK
2MK
2HK
Air Normals
8LP
8MP
8HP
8LK
8MK
8HK
Throws
Sakahagi (Punch)
Sakahagi (Kick)
Command Normals
Ge Shiki: Yumebiki
Ge Shiki: Gofu-in 'Shinigami'
Ge Shiki: Yurioki
Special Moves
Rekka Kens
Dragon Punch
Fireball
Running Grab
Scum Gale
| Damage | Stun | Cancel | Guard | Parry | Startup | Active | Recovery | Total | Adv Hit | Adv Block | Invul |
|---|---|---|---|---|---|---|---|---|---|---|---|
| 0 | 0 | None | N/A | N/A | 8 | 1 | 32 | 41 | +12 | N/A | N/A |
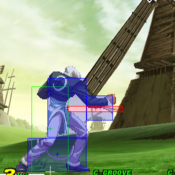
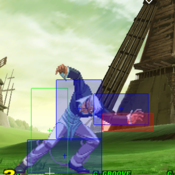
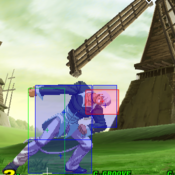
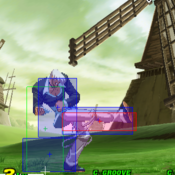
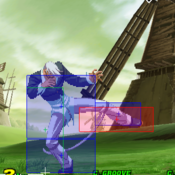
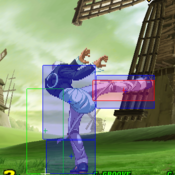
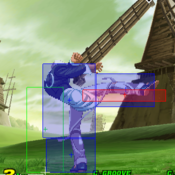
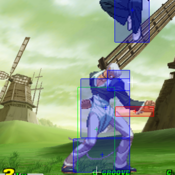
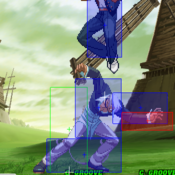
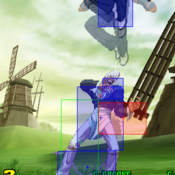
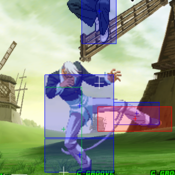
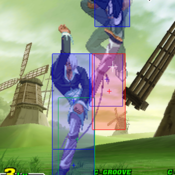
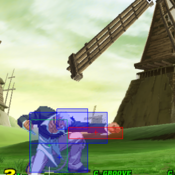
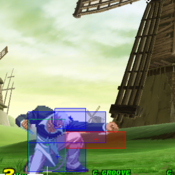
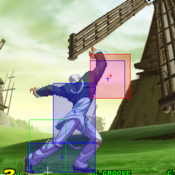
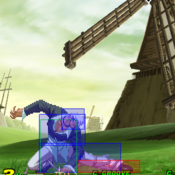
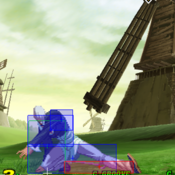
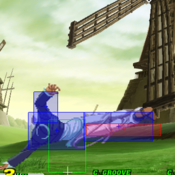
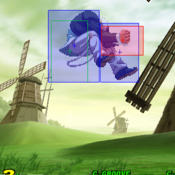
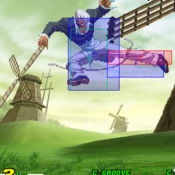
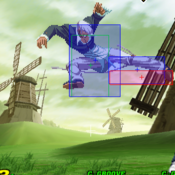
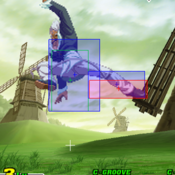
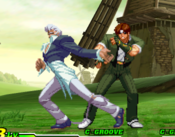
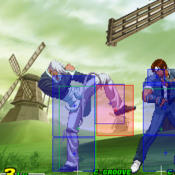
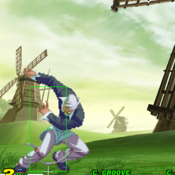
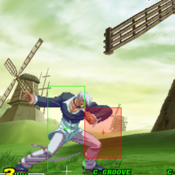
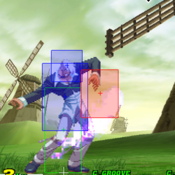
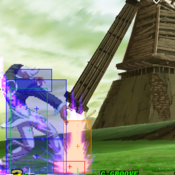
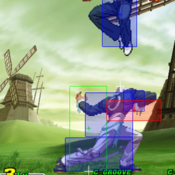
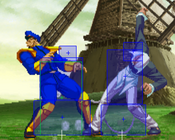
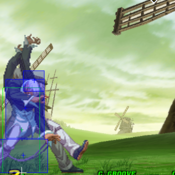
Iori's famous side-switching command grab. This special is what makes Iori's offense so deadly. It's not only an unblockable command grab, but the opponent is stuck in hit stun after the grab, allowing you to combo off of it. This move is deadly because Iori has a very rewarding strike/throw mixup, as both lead to a good knockdown and damage. Mix that up with his crazy good jab and his roll and this move becomes very powerful. The only weakness this move has outside of having fairly lengthy startup for a command grab (8F) is that it switches sides, so you give up the corner for a mixup. It's still around 3.7K damage you're getting so it's not too bad. You can even try to command grab them again after they recover from the hitstun of the previous command grab, although in most contexts you just want to get the damage. There are usually two main follow-ups from the command grab, a max damage one and a safe fall bait one. Max Damage Route: (Grab), 5MP > 6MP xx Rekkas / Ranbu Safe Fall Bait Route: (Grab), Microwalk 5MP xx LP DP, 2HK if opponent safe falls | |||||||||||
Super Moves
Maiden Masher
"One-For-The-Road" Blast
Colors
