Callie Rose (talk | contribs) mNo edit summary |
JtheSaltyy (talk | contribs) No edit summary |
||
| (16 intermediate revisions by 3 users not shown) | |||
| Line 1: | Line 1: | ||
= Introduction = | == Introduction == | ||
{| | {{CvS2 Character Subnav|char=Akuma|short=Akuma}} | ||
<div> | |||
[[File:CVS2_Akuma_Data.png|right|500px]] | |||
== Story == | == Story == | ||
Akuma, called Gouki in Japan, is one of the most powerful warriors in the Street Fighter universe. He is emotionless, and trains hard to master the dark power known as the Satsui no Hado. In his younger years, he trained together with his brother Gouken under a master named Goutetsu who taught them a nameless fighting style made for killing. They also learned the Shun Goku Satsu, usually called Raging Demon, which is a life-threatening move with notable strength. As Akuma and Gouken learned, they began to dispute over the true nature of their learnings, with Gouken unable to accept the Satsui no Hado and the violent nature of what they learned. Gouken left to create his own dojo with what he learned, while Akuma continued to train under Goutetsu and accepted the emotionless nature of Satsui no Hado into himself. Akuma left to train on an island alone to learn the Shun Goku Satsu, and while there, gave in fully to the Satsui no Hado. He became inhuman, obsessed with fighting to the death. When he returned, he challenged his master to a death match, which he won. His master died happily knowing he had trained such a powerful pupil, and Akuma still wears his masters prayer beads around his neck | Akuma, called Gouki in Japan, is one of the most powerful warriors in the Street Fighter universe. He is emotionless, and trains hard to master the dark power known as the Satsui no Hado. In his younger years, he trained together with his brother Gouken under a master named Goutetsu who taught them a nameless fighting style made for killing. They also learned the Shun Goku Satsu, usually called Raging Demon, which is a life-threatening move with notable strength. As Akuma and Gouken learned, they began to dispute over the true nature of their learnings, with Gouken unable to accept the Satsui no Hado and the violent nature of what they learned. Gouken left to create his own dojo with what he learned, while Akuma continued to train under Goutetsu and accepted the emotionless nature of Satsui no Hado into himself. Akuma left to train on an island alone to learn the Shun Goku Satsu, and while there, gave in fully to the Satsui no Hado. He became inhuman, obsessed with fighting to the death. When he returned, he challenged his master to a death match, which he won. His master died happily knowing he had trained such a powerful pupil, and Akuma still wears his masters prayer beads around his neck. | ||
== Gameplay == | == Gameplay == | ||
| Line 49: | Line 16: | ||
=== Groove Choice === | === Groove Choice === | ||
Akuma has one Groove clearly above the rest with N-Groove. N-Akuma has everything he needs, from run and hop to easy access to roll cancel specials, and a way to store his level 3 Raging Demon and hide the input for scarier mixups using the animation for activating Max Mode. Max Mode in general makes him scary, as his damage gets much higher, and the threat of a Raging Demon command grab mixup means the opponent will be scared into getting hit more often. Akuma also benefits from rolls, and guard cancel roll is a very powerful defensive mechanic that can help turn the tides back in Akuma's favor. | '''Best - N:''' Akuma has one Groove clearly above the rest with N-Groove. N-Akuma has everything he needs, from run and hop to easy access to roll cancel specials, and a way to store his level 3 Raging Demon and hide the input for scarier mixups using the animation for activating Max Mode. Max Mode in general makes him scary, as his damage gets much higher, and the threat of a Raging Demon command grab mixup means the opponent will be scared into getting hit more often. Akuma also benefits from rolls, and guard cancel roll is a very powerful defensive mechanic that can help turn the tides back in Akuma's favor. | ||
K-Groove Akuma is slightly behind N-Groove. K-Akuma maintains the scary mixup and mobility of N-Akuma, and Rage makes for a similar situation to Max Mode where he has the threat of a Demon to let him land more hits. Rage also increases the damage more than Max Mode, making it a bit more powerful. K-Akuma gives up rolls and the defensive guard cancel roll or offensive roll cancel specials however, and K-Groove meter only builds when getting hit or performing a JD, making it harder for K-Akuma to build enough meter without risking his life. C-Akuma and A-Akuma are both right behind K-Akuma, with both making a major sacrifice with no run or hop in exchange for high damage level 2 combos in C-Groove or powerful Custom Combos in A-Groove. Lacking run or hop really hurts C-Akuma and A-Akuma however. | '''Useful - K/P/C/A:''' K-Groove Akuma is slightly behind N-Groove. K-Akuma maintains the scary mixup and mobility of N-Akuma, and Rage makes for a similar situation to Max Mode where he has the threat of a Demon to let him land more hits. Rage also increases the damage more than Max Mode, making it a bit more powerful. K-Akuma gives up rolls and the defensive guard cancel roll or offensive roll cancel specials however, and K-Groove meter only builds when getting hit or performing a JD, making it harder for K-Akuma to build enough meter without risking his life. P-Akuma makes a pretty large mobility sacrifice, but in exchange gets parries. With one good parrry, P-Akuma can turn the tide in his favor using a tatsu combo, and while he won't always have a super and will basically never have Raging Demon, he doesn't entirely need them to succeed in P-Groove. Lack of run and any defensive escape hurts however. C-Akuma and A-Akuma are both right behind K-Akuma, with both making a major sacrifice with no run or hop in exchange for high damage level 2 combos in C-Groove or powerful Custom Combos in A-Groove. Lacking run or hop really hurts C-Akuma and A-Akuma however. | ||
'''Worst:''' S-Groove is the worst Akuma, as S-Akuma has to actively give up space and aggression in neutral to build any meter. S-Akuma also only gets access to a Demon at low health, which is a massive risk for him, and the infinite level 1 supers don't exactly give him much more than damage increases in combos. | |||
{{StrengthsAndWeaknesses | {{StrengthsAndWeaknesses | ||
|intro= | |intro= | ||
--------------------------- | |||
'''Akuma''' is a scary glass cannon with great offense and mixup, but massive risk in his low health. Akuma is best in '''N-Groove'''. | '''Akuma''' is a scary glass cannon with great offense and mixup, but massive risk in his low health. Akuma is best in '''N-Groove'''. | ||
'''Difficulty''': Pretty Hard<br>'''Tier''': B+ | |||
|pros= | |pros= | ||
* '''Shoto:''' Versatile toolset allows him to zone, play footsies, and especially rush opponents down | * '''Shoto:''' Versatile toolset allows him to zone, play footsies, and especially rush opponents down | ||
| Line 69: | Line 39: | ||
}} | }} | ||
= Normal Moves = | === Players to Watch === | ||
== Far Normals == | {| class="wikitable" | ||
|- | |||
! Name !! Country !! Groove !! Accounts !! Notes | |||
|- | |||
| John Choi || USA || C-Groove || Discord: ChoiBoy#8363 || The best Akuma in the US. Manages to land ridiculous Raging Demon setups with consistency. <br> [https://youtu.be/qxbkHhL6LFk Sample Match] | |||
|- | |||
| Ankoku || Japan || P-Groove || Twitter: @ankokuPruga || Plays Akuma much slower and capitalizes big off of parries. <br> [https://youtu.be/PA8sWxJfJsE Sample Match] | |||
|- | |||
| Daidouraku || Japan || N/A-Groove || Twitter: @DAIDOURAKU || A skilled N-Groover who plays Akuma very well. Also uses him in A-Groove. <br> [https://youtu.be/z8iespNtuGg N-Groove Sample Match] <br> [https://youtu.be/K39Ld6fZ1bA A-Groove Sample Match] | |||
|- | |||
| Sakamoto || Japan || K-Groove || Twitter: @sakomotee || The quintessential hyper aggressive Akuma player. Plays with no regard for the opponent's guard bar. <br> [https://youtu.be/2BLEhBUlWss Sample Match] | |||
|- | |||
|} | |||
<br><br> | |||
== Normal Moves == | |||
=== Far Normals === | |||
=== <span class="invisible-header">5LP</span> === | === <span class="invisible-header">5LP</span> === | ||
{{MoveData | {{MoveData | ||
| Line 245: | Line 232: | ||
}} | }} | ||
== Close Normals == | === Close Normals === | ||
=== <span class="invisible-header">clLP</span> === | === <span class="invisible-header">clLP</span> === | ||
{{MoveData | {{MoveData | ||
| Line 309: | Line 296: | ||
| input = cl.HP / Close HP | | input = cl.HP / Close HP | ||
| subtitle = Close Heavy Punch | | subtitle = Close Heavy Punch | ||
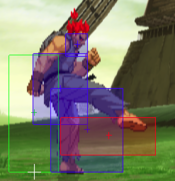
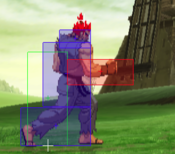
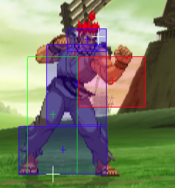
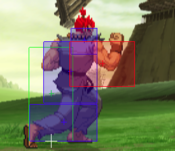
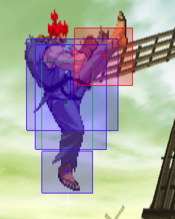
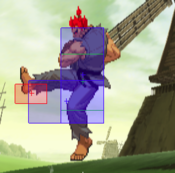
| image = | | image = CVS2_Akuma_clHP_First.PNG | ||
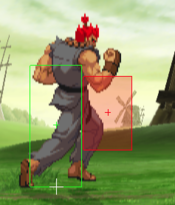
| caption = | | caption = First Hitbox | ||
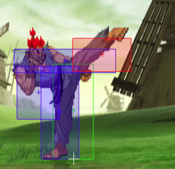
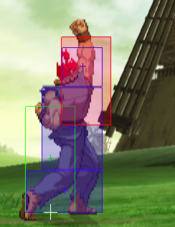
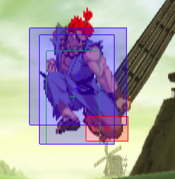
| image2 = CVS2_Akuma_clHP_Second.PNG | |||
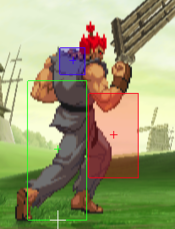
| caption2 = Second Hitbox | |||
| linkname = cl.HP | | linkname = cl.HP | ||
| data = | | data = | ||
| Line 396: | Line 385: | ||
| input = cl.HK / Close HK | | input = cl.HK / Close HK | ||
| subtitle = Close Heavy Kick | | subtitle = Close Heavy Kick | ||
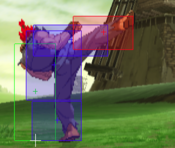
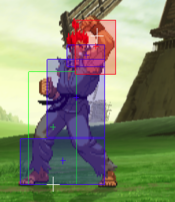
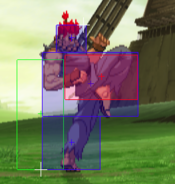
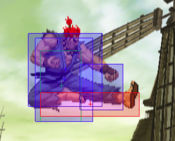
| image = | | image = CVS2_Akuma_clHK_First.PNG | ||
| caption = | | caption = First Hitbox | ||
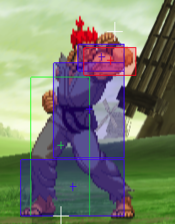
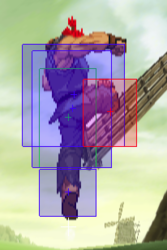
| image2 = CVS2_Akuma_clHK_Second.PNG | |||
| caption2 = Second Hitbox | |||
| linkname = cl.HK | | linkname = cl.HK | ||
| data = | | data = | ||
| Line 420: | Line 411: | ||
}} | }} | ||
== Crouching Normals == | === Crouching Normals === | ||
=== <span class="invisible-header">2LP</span> === | === <span class="invisible-header">2LP</span> === | ||
{{MoveData | {{MoveData | ||
| Line 482: | Line 473: | ||
| input = 2HP / cr.HP | | input = 2HP / cr.HP | ||
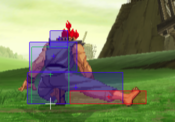
| subtitle = Crouching Heavy Punch | | subtitle = Crouching Heavy Punch | ||
| image = | | image = CVS2_Akuma_2HP_First.PNG | ||
| caption = | | caption = First Hitbox | ||
| image2 = CVS2_Akuma_2HP_Second.PNG | |||
| caption2 = Second Hitbox | |||
| linkname = 2HP | | linkname = 2HP | ||
| data = | | data = | ||
| Line 589: | Line 582: | ||
}} | }} | ||
== Jumping Normals == | === Jumping Normals === | ||
=== <span class="invisible-header">8LP</span> === | === <span class="invisible-header">8LP</span> === | ||
{{MoveData | {{MoveData | ||
| Line 651: | Line 644: | ||
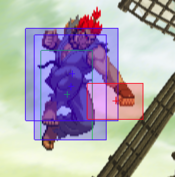
| input = j.HP / 8HP | | input = j.HP / 8HP | ||
| subtitle = Jumping Heavy Punch | | subtitle = Jumping Heavy Punch | ||
| image = | | image = CVS2_Akuma_jHP.PNG | ||
| caption = | | caption = | ||
| linkname = j.HP | | linkname = j.HP | ||
| Line 773: | Line 766: | ||
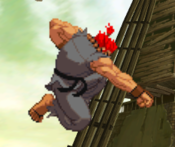
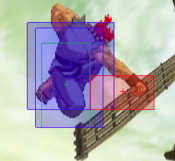
| input = j.HK / 8HK | | input = j.HK / 8HK | ||
| subtitle = Jumping Heavy Kick | | subtitle = Jumping Heavy Kick | ||
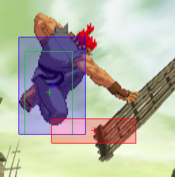
| image = | | image = CVS2_Akuma_njHK_First.PNG | ||
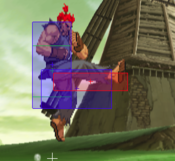
| caption = Neutral Jump | | caption = First Hitbox, Neutral Jump | ||
| image2 = | | image2 = CVS2_Akuma_njHP_Second.PNG | ||
| caption2 = Diagonal Jump | | caption2 = Second Hitbox, Neutral Jump | ||
| image3 = CVS2_Akuma_jHK.PNG | |||
| caption3 = Diagonal Jump | |||
| linkname = j.HK | | linkname = j.HK | ||
| data = | | data = | ||
| Line 839: | Line 834: | ||
| advHit = -DWN | | advHit = -DWN | ||
| advBlock = Grab | | advBlock = Grab | ||
| description = Akuma tosses the opponent over his shoulder. Both of his grabs give mediocre okizeme, so the only difference is the damage and startup. Punch throw is 3 frames of startup but does 300 less damage, making it better for situations where speed is preferable like punishes or | | description = Akuma tosses the opponent over his shoulder. Both of his grabs give mediocre okizeme, so the only difference is the damage and startup. Punch throw is 3 frames of startup but does 300 less damage, making it better for situations where speed is preferable like punishes or tick throws. | ||
}} | }} | ||
}} | }} | ||
| Line 1,059: | Line 1,054: | ||
| subtitle = Red Fireballs | | subtitle = Red Fireballs | ||
| image = CVS2_Akuma_63214P_First.PNG | | image = CVS2_Akuma_63214P_First.PNG | ||
| caption = | | caption = | ||
| linkname = 63214P | | linkname = 63214P | ||
| data = | | data = | ||
| Line 1,122: | Line 1,115: | ||
| input = 623P | | input = 623P | ||
| subtitle = Uppercut, DP | | subtitle = Uppercut, DP | ||
| image = | | image = CVS2_Akuma_623HP_First.PNG | ||
| caption = | | caption = 623HP Invincible Startup | ||
| image2 = CVS2_Akuma_623HP_Second | |||
| caption2 = | |||
| image3 = CVS2_Akuma_623LP_First.PNG | |||
| caption3 = 623LP/MP Lower Body Invuln | |||
| linkname = 623P | | linkname = 623P | ||
| data = | | data = | ||
| Line 1,184: | Line 1,181: | ||
| input = 214K | | input = 214K | ||
| subtitle = Tatsu | | subtitle = Tatsu | ||
| image = | | image = CVS2_Akuma_214K_First.PNG | ||
| caption = | | caption = | ||
| image2 = CVS2_Akuma_214K_Second.PNG | |||
| caption2 = | |||
| linkname = 214K | | linkname = 214K | ||
| data = | | data = | ||
| Line 1,613: | Line 1,612: | ||
| input = 23623P | | input = 23623P | ||
| subtitle = Uppercut Super | | subtitle = Uppercut Super | ||
| image = | | image = CVS2_Akuma_23623P_First.PNG | ||
| caption = | | caption = | ||
| image2 = CVS2_Akuma_23623P_Second.PNG | |||
| caption2 = | |||
| linkname = 23623P | | linkname = 23623P | ||
| data = | | data = | ||
| Line 1,759: | Line 1,760: | ||
}} | }} | ||
}} | }} | ||
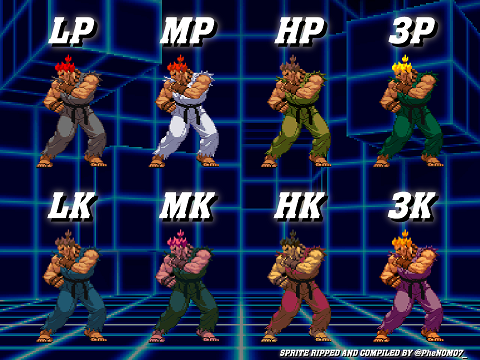
== Color List == | == Color List == | ||
Latest revision as of 15:47, 9 July 2023
Introduction
Story
Akuma, called Gouki in Japan, is one of the most powerful warriors in the Street Fighter universe. He is emotionless, and trains hard to master the dark power known as the Satsui no Hado. In his younger years, he trained together with his brother Gouken under a master named Goutetsu who taught them a nameless fighting style made for killing. They also learned the Shun Goku Satsu, usually called Raging Demon, which is a life-threatening move with notable strength. As Akuma and Gouken learned, they began to dispute over the true nature of their learnings, with Gouken unable to accept the Satsui no Hado and the violent nature of what they learned. Gouken left to create his own dojo with what he learned, while Akuma continued to train under Goutetsu and accepted the emotionless nature of Satsui no Hado into himself. Akuma left to train on an island alone to learn the Shun Goku Satsu, and while there, gave in fully to the Satsui no Hado. He became inhuman, obsessed with fighting to the death. When he returned, he challenged his master to a death match, which he won. His master died happily knowing he had trained such a powerful pupil, and Akuma still wears his masters prayer beads around his neck.
Gameplay
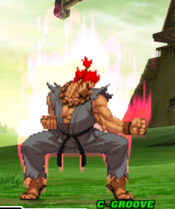
In CvS2, Akuma is a glass cannon rushdown character. Akuma has powerful rushdown and mixup capabilities, especially in Grooves where he has a run and hop. While he possesses the same basic kit as the other shotos, Ken and Ryu, most of his tools are more geared towards high damage combos and great ability to maintain knockdowns. His normal fireball can knock down when close, and his red fireball knocks down at any range. His air fireballs don't stall or change his air momentum, and have very little landing lag allowing him to combo after them. He also has great neutral, with a powerful DP anti-air and useful normals for close range poking. All of these tools give Akuma a very simple gameplan that he can apply in many ways: get a knockdown, maintain your pressure, and loop mixups until they die.
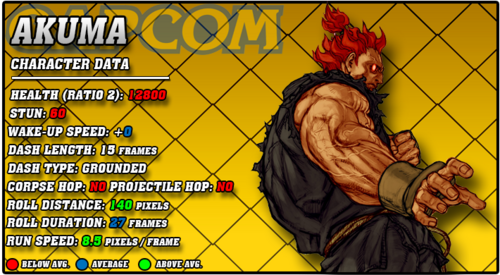
Akuma has one massive issue however, which is what makes him such a glass cannon. His health is the lowest base health value, only beaten by Claw without a mask, and his stun is the absolute lowest in the game. This means that if the opponent escapes his onslaught long enough to put him on the backfoot, it can very quickly spiral into a loss. While he does have two reversals in his DP and his teleport, these can be baited and punished for huge damage. Just like a few wrong guesses gets Akuma the win, a few right guesses from the opponent means Akuma will always lose. His matches will almost always be heavily one-sided because of this, but when Akuma wins he wins convincingly.
Groove Choice
Best - N: Akuma has one Groove clearly above the rest with N-Groove. N-Akuma has everything he needs, from run and hop to easy access to roll cancel specials, and a way to store his level 3 Raging Demon and hide the input for scarier mixups using the animation for activating Max Mode. Max Mode in general makes him scary, as his damage gets much higher, and the threat of a Raging Demon command grab mixup means the opponent will be scared into getting hit more often. Akuma also benefits from rolls, and guard cancel roll is a very powerful defensive mechanic that can help turn the tides back in Akuma's favor.
Useful - K/P/C/A: K-Groove Akuma is slightly behind N-Groove. K-Akuma maintains the scary mixup and mobility of N-Akuma, and Rage makes for a similar situation to Max Mode where he has the threat of a Demon to let him land more hits. Rage also increases the damage more than Max Mode, making it a bit more powerful. K-Akuma gives up rolls and the defensive guard cancel roll or offensive roll cancel specials however, and K-Groove meter only builds when getting hit or performing a JD, making it harder for K-Akuma to build enough meter without risking his life. P-Akuma makes a pretty large mobility sacrifice, but in exchange gets parries. With one good parrry, P-Akuma can turn the tide in his favor using a tatsu combo, and while he won't always have a super and will basically never have Raging Demon, he doesn't entirely need them to succeed in P-Groove. Lack of run and any defensive escape hurts however. C-Akuma and A-Akuma are both right behind K-Akuma, with both making a major sacrifice with no run or hop in exchange for high damage level 2 combos in C-Groove or powerful Custom Combos in A-Groove. Lacking run or hop really hurts C-Akuma and A-Akuma however.
Worst: S-Groove is the worst Akuma, as S-Akuma has to actively give up space and aggression in neutral to build any meter. S-Akuma also only gets access to a Demon at low health, which is a massive risk for him, and the infinite level 1 supers don't exactly give him much more than damage increases in combos.
|
Akuma is a scary glass cannon with great offense and mixup, but massive risk in his low health. Akuma is best in N-Groove. Difficulty: Pretty HardTier: B+ |
|
| Pros | Cons |
|
|
Players to Watch
| Name | Country | Groove | Accounts | Notes |
|---|---|---|---|---|
| John Choi | USA | C-Groove | Discord: ChoiBoy#8363 | The best Akuma in the US. Manages to land ridiculous Raging Demon setups with consistency. Sample Match |
| Ankoku | Japan | P-Groove | Twitter: @ankokuPruga | Plays Akuma much slower and capitalizes big off of parries. Sample Match |
| Daidouraku | Japan | N/A-Groove | Twitter: @DAIDOURAKU | A skilled N-Groover who plays Akuma very well. Also uses him in A-Groove. N-Groove Sample Match A-Groove Sample Match |
| Sakamoto | Japan | K-Groove | Twitter: @sakomotee | The quintessential hyper aggressive Akuma player. Plays with no regard for the opponent's guard bar. Sample Match |
