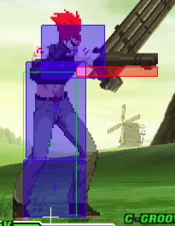
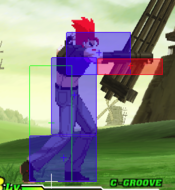
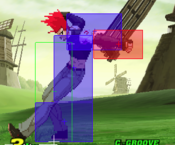
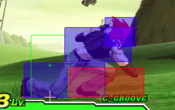
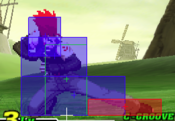
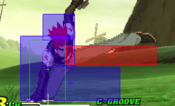
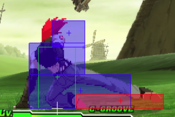
Callie Rose (talk | contribs) |
RagingStormX (talk | contribs) |
||
| (34 intermediate revisions by 5 users not shown) | |||
| Line 1: | Line 1: | ||
= Introduction = | == Introduction == | ||
=== | {{CvS2 Character Subnav|char=Benimaru|short=Benimaru}} | ||
<div> | |||
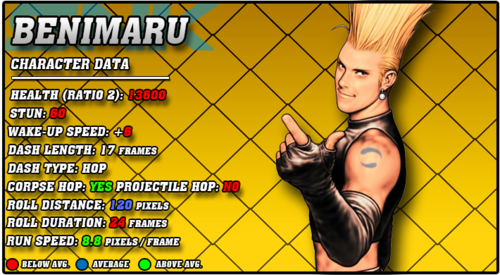
[[File:CVS2_Benimaru_Data.png|right|500px]] | |||
== Story == | |||
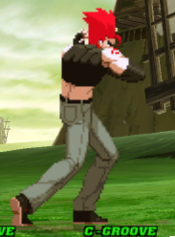
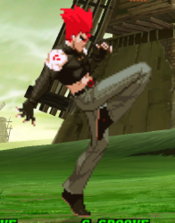
Benimaru Nikaido is many things. He's the son of a rich family, with a Japanese father and American mother. He's a star of the fashion world. He's Kyo Kusanagi's friend and rival. He's an electric wielding martial artist with powerful kicks. Most importantly, though: he's gorgeous. He keeps his hair styled and straight using his electric abilities. | Benimaru Nikaido is many things. He's the son of a rich family, with a Japanese father and American mother. He's a star of the fashion world. He's Kyo Kusanagi's friend and rival. He's an electric wielding martial artist with powerful kicks. Most importantly, though: he's gorgeous. He keeps his hair styled and straight using his electric abilities. | ||
== Gameplay == | |||
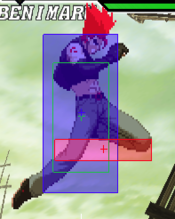
Benimaru in CvS2 is widely regarded as one of the worst characters for a variety of reasons. His health is very low, and his damage output without meter isn't much better either. His longest range options pose no threat to most characters while not even really having that much range. His anti-airs are only strong when you add roll cancels behind them as well. On top of all that, he has one of the absolute floatiest jumps, making anti-airing him a breeze even with his divekick. If you plan on using him, have one or two top tiers on your team to help out, cuz he won't be doing much. | Benimaru in CvS2 is widely regarded as one of the worst characters for a variety of reasons. His health is very low, and his damage output without meter isn't much better either. His longest range options pose no threat to most characters while not even really having that much range. His anti-airs are only strong when you add roll cancels behind them as well. On top of all that, he has one of the absolute floatiest jumps, making anti-airing him a breeze even with his divekick. If you plan on using him, have one or two top tiers on your team to help out, cuz he won't be doing much. | ||
While he has a lot holding him back, Benimaru does have a few strengths. His mixup and general close range game is fairly strong, with lots of ways to generate frame advantage and many strong normals for interrupting opponents trying to escape. His mixup is powerful too, especially with meter, since he can access his level 1 Electrigger command grab which is a damaging 1 frame grab. The fear of being grabbed will make opponents move around and try to escape more, which is when you can take advantage of his strong close-range normals to catch them moving and hopefully secure a knockdown. Beni also doesn't lack in having lots of combo potential, with lots of links for long confirms and a super with very lenient juggle properties. He isn't the scariest close range brawler by any means, but he has a few tools and tricks to keep himself in the game and make the opponent think twice about not learning the matchup. | |||
=== Groove Selection === | |||
'''Best - A/N:''' A-Benimaru gets access to the powerful mechanics of A-Groove, namely Custom Combos. Benimaru's punishes are lackluster, but his CC isn't, and the threat of a CC punish makes him a bit scarier. Activation mixups become a big part of his gameplan as well, mixing between his command grab and activating CC. He loses access to his supers however, which hurts a lot. N-Benimaru makes up for this by having plenty of level 1 supers, making his damage and mixup a lot more stable between his Rai-Kou Ken and Den'ei Spark, and his frame 1 command grab Electrigger. The better movement helps a lot as well, as Benimari is slow and floaty in general. However, without meter, N-Benimaru still has weak punishes. Both give him roll, which he needs desperately to make his anti-air game better and to make his defense a bit stronger. | |||
'''Useful - S/C:''' S-Benimaru is surprisingly useful. Benimaru already has lacking damage in general, so the lack of super doesn't really matter to him much. Once Benimaru does hit low health, infinite level 1 Electrigger mixed with his other infinite level 1 supers makes his strike/throw game much scarier overall, and ups his damage a lot as Rai-Kou Ken juggles in the corner do surprisingly respectable damage. The enhanced movement also helps him quite a lot. Still, he has to contend with S-Grooves mechanics overall, which holds back what would otherwise be his best Groove. C-Benimaru gets access to his supers a lot more often, and a solid defensive tool with Alpha Counters. Air block helps with his horrible jump as well. The lack of movement and his still underwhelming super punishes makes it a worse pick than A-Groove however, and more importantly, Benimaru cannot abuse level 2 cancels: Den'ei Spark causes a hard knockdown, Electrigger can't be combo'd out of, and Rai-Kou Ken already allows for juggles, although now you can get three of them. | |||
=== | '''Worst - K/P:''' K-Benimaru is pretty bad. Lack of rolls immediately hurts, as his anti-airs become incredibly inconsistent and his defense is weakened. JD isn't very strong, as his punishes aren't that great, and only having one super is worse for Benimaru who would rather have multiple level 1's than one level 3. Rage is a decent buff, but it turns weak punishes into mediocre ones, and isn't worth the super loss overall. P-Benimaru is similar to K-Benimaru, but has even less tools. Parry is meaningless on a character with such weak meterless punishes, you'll rarely have a super, and you have no defensive options to help you out. P-Benimaru is essentially useless, go with any other Groove. | ||
[ | |||
{{StrengthsAndWeaknesses | |||
|intro= | |||
--------------------------- | |||
'''Benimaru''' is a mixup oriented character, but suffers heavily from low damage, bad combos, and low health. Still, solid supers and normals keep him from being among the bottom tiers. Benimaru is best in '''A-Groove'''. | |||
'''Difficulty''': Pretty Hard<br>'''Tier''': D | |||
|pros= | |||
* Good mixup with meter, his 1 frame command grab super makes his strike mixup a bit scarier | |||
* Solid and useful supers overall | |||
* Some surprisingly useful buttons | |||
|cons= | |||
* Super low health means a few mistakes can kill him | |||
* Low damage output, even with meter | |||
* Mediocre or bad meterless combos that either sacrifice knockdown or damage | |||
* Slow and floaty jump mixed with a mediocre walkspeed makes his threat in neutral very low | |||
* Bad defense, with a slow DP and bad anti-airs in general | |||
}} | |||
=== Players to Watch === | |||
{| class="wikitable" | |||
|- | |||
! Name !! Country !! Groove !! Accounts !! Notes | |||
|- | |||
| Izumi || Japan || S-Groove || Twitter: @IzumiSgroove || The infamous S-Benimaru. Izumi pioneered getting wins with such a weird character through his vortex in desperation mode and generally having great S-Groove game sense. <br> [https://youtu.be/MmpDnT9b1lc?t=68 Sample Match] | |||
|- | |||
|} | |||
<br><br> | |||
== Normal Moves == | == Normal Moves == | ||
=== Far Standing Normals === | === Far Standing Normals === | ||
<span class="invisible-header">5LP</span> | === <span class="invisible-header">5LP</span> === | ||
{{MoveData | {{MoveData | ||
| name = Far Jab | | name = Far Jab | ||
| input = 5LP / Far LP | | input = 5LP / Far LP | ||
| subtitle = | | subtitle = Light Punch | ||
| image = CVS2_Benimaru_5LP.PNG | | image = CVS2_Benimaru_5LP.PNG | ||
| caption = | | caption = | ||
| Line 45: | Line 81: | ||
}} | }} | ||
<span class="invisible-header">5MP</span> | === <span class="invisible-header">5MP</span> === | ||
{{MoveData | {{MoveData | ||
| name = Far Strong | | name = Far Strong | ||
| Line 74: | Line 110: | ||
}} | }} | ||
<span class="invisible-header">5HP</span> | === <span class="invisible-header">5HP</span> === | ||
{{MoveData | {{MoveData | ||
| name = Far Fierce | | name = Far Fierce | ||
| Line 103: | Line 139: | ||
}} | }} | ||
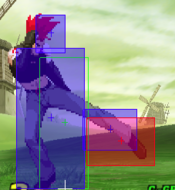
<span class="invisible-header">5LK</span> | === <span class="invisible-header">5LK</span> === | ||
{{MoveData | {{MoveData | ||
| name = Far Short | | name = Far Short | ||
| Line 132: | Line 168: | ||
}} | }} | ||
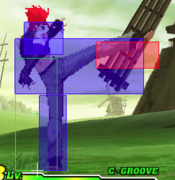
<span class="invisible-header">5MK</span> | === <span class="invisible-header">5MK</span> === | ||
{{MoveData | {{MoveData | ||
| name = Far Forward | | name = Far Forward | ||
| Line 161: | Line 197: | ||
}} | }} | ||
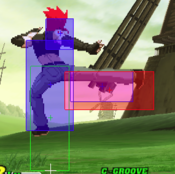
<span class="invisible-header">5HK</span> | === <span class="invisible-header">5HK</span> === | ||
{{MoveData | {{MoveData | ||
| name = Far Roundhouse | | name = Far Roundhouse | ||
| Line 192: | Line 228: | ||
=== Close Normals === | === Close Normals === | ||
=== <span class="invisible-header">clLP</span> === | |||
<span class="invisible-header"> | |||
{{MoveData | {{MoveData | ||
| name = Close Jab | | name = Close Jab | ||
| input = | | input = cl.LP / cl5LP | ||
| subtitle = Close Light Punch | | subtitle = Close Light Punch | ||
| image = | | image = CVS2_Benimaru_clLP.PNG | ||
| caption = | | caption = | ||
| linkname = | | linkname = cl.LP | ||
| data = | | data = | ||
{{AttackData-CvS2 | {{AttackData-CvS2 | ||
| Line 223: | Line 257: | ||
}} | }} | ||
<span class="invisible-header"> | === <span class="invisible-header">clMP</span> === | ||
{{MoveData | {{MoveData | ||
| name = Close Strong | | name = Close Strong | ||
| input = | | input = cl.MP / cl5MP | ||
| subtitle = Close Medium Punch | | subtitle = Close Medium Punch | ||
| image = | | image = CVS2_Benimaru_clMP.PNG | ||
| caption = | | caption = | ||
| linkname = | | linkname = cl.MP | ||
| data = | | data = | ||
{{AttackData-CvS2 | {{AttackData-CvS2 | ||
| Line 252: | Line 286: | ||
}} | }} | ||
<span class="invisible-header"> | === <span class="invisible-header">clHP</span> === | ||
{{MoveData | |||
| name = Close Fierce | |||
| input = cl.HP / Close HP | |||
| subtitle = Close Heavy Punch | |||
| image = CVS2_Benimaru_5HP.PNG | |||
| caption = | |||
| linkname = cl.HP | |||
| data = | |||
{{AttackData-CvS2 | |||
| version = Close {{Icon-Capcom|HP}} | |||
| subtitle = | |||
| damage = 1200 | |||
| stun = 12 | |||
| cancel = SU | |||
| guard = Mid | |||
| parry = High | |||
| startup = 7 | |||
| active = 6 | |||
| recovery = 28 | |||
| total = 41 | |||
| advHit = -8 | |||
| advBlock = -8 | |||
| invul = | |||
| description = Identical to 5HP. | |||
}} | |||
}} | |||
=== <span class="invisible-header">clLK</span> === | |||
{{MoveData | |||
| name = Close Short | |||
| input = cl.LK / Close LK | |||
| subtitle = Close Light Kick | |||
| image = CVS2_Benimaru_5LK.PNG | |||
| caption = | |||
| linkname = cl.LK | |||
| data = | |||
{{AttackData-CvS2 | |||
| version = Close {{Icon-Capcom|LK}} | |||
| subtitle = | |||
| damage = 400 | |||
| stun = 4 | |||
| cancel = SP/SU | |||
| guard = Mid | |||
| parry = Low | |||
| startup = 4 | |||
| active = 4 | |||
| recovery = 9 | |||
| total = 17 | |||
| advHit = +2 | |||
| advBlock = +2 | |||
| invul = | |||
| description = Identical to 5LK. | |||
* | |||
}} | |||
}} | |||
=== <span class="invisible-header">clMK</span> === | |||
{{MoveData | {{MoveData | ||
| name = Close Forward | | name = Close Forward | ||
| input = | | input = cl.MK / cl5MK | ||
| subtitle = Close Medium Kick | | subtitle = Close Medium Kick | ||
| image = | | image = CVS2_Benimaru_clMK.PNG | ||
| caption = Close Forward | | caption = Close Forward | ||
| linkname = | | linkname = cl.MK | ||
| data = | | data = | ||
{{AttackData-CvS2 | {{AttackData-CvS2 | ||
| Line 277: | Line 368: | ||
| invul = | | invul = | ||
| description = A knee at about chest height. Similar in usage to close strong, but does 100 more damage in exchange for being a bit slower. Your highest damage special cancel tool. | | description = A knee at about chest height. Similar in usage to close strong, but does 100 more damage in exchange for being a bit slower. Your highest damage special cancel tool. | ||
* | |||
}} | |||
}} | |||
=== <span class="invisible-header">clHK</span> === | |||
{{MoveData | |||
| name = Close Roundhouse | |||
| input = cl.HK / cl5HK | |||
| subtitle = Stand Roundhouse / Heavy Kick | |||
| image = CVS2_Benimaru_5HK.PNG | |||
| caption = | |||
| linkname = cl.HK | |||
| data = | |||
{{AttackData-CvS2 | |||
| version = Close {{Icon-Capcom|HK}} | |||
| subtitle = | |||
| damage = 1100 | |||
| stun = 11 | |||
| cancel = None | |||
| guard = Mid | |||
| parry = High | |||
| startup = 10 | |||
| active = 4 | |||
| recovery = 21 | |||
| total = 35 | |||
| advHit = -1 | |||
| advBlock = -1 | |||
| invul = Low | |||
| description = Identical to 5HK. | |||
* | * | ||
}} | }} | ||
| Line 283: | Line 403: | ||
=== Crouching Normals === | === Crouching Normals === | ||
<span class="invisible-header">2LP</span> | === <span class="invisible-header">2LP</span> === | ||
{{MoveData | {{MoveData | ||
| name = Crouching Jab | | name = Crouching Jab | ||
| Line 312: | Line 432: | ||
}} | }} | ||
<span class="invisible-header">2MP</span> | === <span class="invisible-header">2MP</span> === | ||
{{MoveData | {{MoveData | ||
| name = Crouching Strong | | name = Crouching Strong | ||
| Line 341: | Line 461: | ||
}} | }} | ||
<span class="invisible-header">2HP</span> | === <span class="invisible-header">2HP</span> === | ||
{{MoveData | {{MoveData | ||
| name = Crouch Fierce | | name = Crouch Fierce | ||
| Line 370: | Line 490: | ||
}} | }} | ||
<span class="invisible-header">2LK</span> | === <span class="invisible-header">2LK</span> === | ||
{{MoveData | {{MoveData | ||
| name = Crouch Short | | name = Crouch Short | ||
| Line 399: | Line 519: | ||
}} | }} | ||
<span class="invisible-header">2MK</span> | === <span class="invisible-header">2MK</span> === | ||
{{MoveData | {{MoveData | ||
| name = Crouch Forward | | name = Crouch Forward | ||
| Line 423: | Line 543: | ||
| advBlock = -2 | | advBlock = -2 | ||
| invul = | | invul = | ||
| description = A long reaching low poke. Useful in long link combos because of the reach, where the super cancel allows you very long confirms into super. Not special cancellable so it isn't as useful as a shoto low forward, but still is a very good ground button to control space. | | description = A long reaching low poke. Useful in long link combos because of the reach, where the super cancel allows you very long confirms into super. Not special cancellable so it isn't as useful as a shoto low forward, but still is a very good ground button to control space. | ||
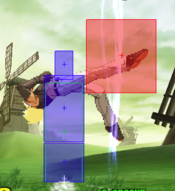
This normal beats most moves in the game and works very well vs long-range low jumps/normal jumps, as most of the hitbox is invincible with no hurtbox. This move will always combo to rush super and will link from light attacks. | |||
* | * | ||
}} | }} | ||
}} | }} | ||
<span class="invisible-header">2HK</span> | === <span class="invisible-header">2HK</span> === | ||
{{MoveData | {{MoveData | ||
| name = Crouch Roundhouse | | name = Crouch Roundhouse | ||
| Line 459: | Line 581: | ||
=== Jumping Normals === | === Jumping Normals === | ||
<span class="invisible-header">8LP</span> | === <span class="invisible-header">8LP</span> === | ||
{{MoveData | {{MoveData | ||
| name = Jump Jab | | name = Jump Jab | ||
| Line 488: | Line 610: | ||
}} | }} | ||
<span class="invisible-header">8MP</span> | === <span class="invisible-header">8MP</span> === | ||
{{MoveData | {{MoveData | ||
| name = Jump Strong | | name = Jump Strong | ||
| Line 517: | Line 639: | ||
}} | }} | ||
<span class="invisible-header">8HP</span> | === <span class="invisible-header">8HP</span> === | ||
{{MoveData | {{MoveData | ||
| name = Jump Fierce | | name = Jump Fierce | ||
| Line 548: | Line 670: | ||
}} | }} | ||
<span class="invisible-header">8LK</span> | === <span class="invisible-header">8LK</span> === | ||
{{MoveData | {{MoveData | ||
| name = Jump Short | | name = Jump Short | ||
| Line 572: | Line 694: | ||
| advBlock = | | advBlock = | ||
| invul = | | invul = | ||
| description = A weak knee. Benimaru's only crossup, and a decent one at that. | | description = A weak knee. Benimaru's only crossup, and a decent one at that. Very good hitbox to the front, beating many air to air normals. | ||
* | * | ||
}} | }} | ||
}} | }} | ||
<span class="invisible-header">8MK</span> | === <span class="invisible-header">8MK</span> === | ||
{{MoveData | {{MoveData | ||
| name = Jump Forward | | name = Jump Forward | ||
| Line 606: | Line 728: | ||
}} | }} | ||
<span class="invisible-header">8HK</span> | === <span class="invisible-header">8HK</span> === | ||
{{MoveData | {{MoveData | ||
| name = Jump Roundhouse | | name = Jump Roundhouse | ||
| Line 637: | Line 759: | ||
== Command Normals == | == Command Normals == | ||
<span class="invisible-header">Jackknife Kick</span> | === <span class="invisible-header">Jackknife Kick</span> === | ||
{{MoveData | {{MoveData | ||
| name = Jackknife Kick | | name = Jackknife Kick | ||
| Line 670: | Line 792: | ||
}} | }} | ||
<span class="invisible-header">Flying Drill</span> | === <span class="invisible-header">Flying Drill</span> === | ||
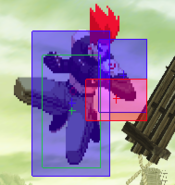
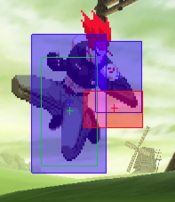
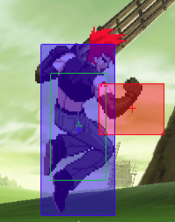
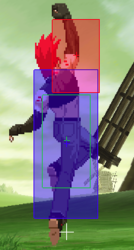
{{MoveData | {{MoveData | ||
| name = Flying Drill | | name = Flying Drill | ||
| Line 762: | Line 884: | ||
| invul = None | | invul = None | ||
| description = Close range electric punches. At first glance these look like zoning and poking tools, but moreso they're good for pressure and safely ending combos, as Beni is left very vulnerable for a long time if they whiff. If they connect or get blocked, they stop immediately, making them safe and decent chip tools. | | description = Close range electric punches. At first glance these look like zoning and poking tools, but moreso they're good for pressure and safely ending combos, as Beni is left very vulnerable for a long time if they whiff. If they connect or get blocked, they stop immediately, making them safe and decent chip tools. | ||
His overall safest move, requiring 3 JDs or parries. Be aware when using or roll canceling that it will whiff if too close to the opponent. | |||
* | * | ||
}} | }} | ||
| Line 894: | Line 1,018: | ||
| invul = None | | invul = None | ||
| description = A knee to the chest. Despite not giving a knockdown, this is your most consistent and safest combo ender. Since the heavy version will combo from lights and does the most damage/is the most plus, stick to the heavy version in combos. The followup Inazuma Sandan-Geri gives a knockdown but requires Iai Geri to hit very close. | | description = A knee to the chest. Despite not giving a knockdown, this is your most consistent and safest combo ender. Since the heavy version will combo from lights and does the most damage/is the most plus, stick to the heavy version in combos. The followup Inazuma Sandan-Geri gives a knockdown but requires Iai Geri to hit very close. | ||
His best RC "get off me" move, being plus regardless of distance. Be aware it becomes extremely unsafe if just defended. | |||
* | * | ||
}} | }} | ||
}} | }} | ||
=== <span class="invisible-header">Iai Geri</span> === | === <span class="invisible-header">Iai Geri</span> === | ||
{{MoveData | {{MoveData | ||
| Line 1,047: | Line 1,174: | ||
| invul = 6 (Full) | | invul = 6 (Full) | ||
| description = Beni's kick DPs. Not great as anti-airs, despite being faster than 623P, since the first hitbox is low to the ground meaning it's very prone to trading. Just like 623P, roll cancelling can help with that, which is nice since the second hitbox does reach quite high and anti-air well when it can. Just like 623P, a successful anti-air connect can confirm to 236236P or Custom Combo. | | description = Beni's kick DPs. Not great as anti-airs, despite being faster than 623P, since the first hitbox is low to the ground meaning it's very prone to trading. Just like 623P, roll cancelling can help with that, which is nice since the second hitbox does reach quite high and anti-air well when it can. Just like 623P, a successful anti-air connect can confirm to 236236P or Custom Combo. | ||
Similar to Kyo, this DP will always trade if it connects with a jump ins active frames. This is because the invincibility runs out the frames before the moves first active frame, so the DP will always beat the opponents jump in or trade at worst. Use this to your advantage by juggling a Lvl 3 super lightning fist or CC post trade. | |||
On the other sides of things, if don't very early it will beat most jumps clean due to the giant second hit box, but it is air lockable. | |||
This move becomes very hard for some characters to punish at max range, and vs fatties it can be done from further out and pushed back even more. | |||
* | * | ||
}} | }} | ||
| Line 1,061: | Line 1,194: | ||
| caption2 = Turnaround | | caption2 = Turnaround | ||
| image3 = CVS2_Benimaru_63214K_Third.PNG | | image3 = CVS2_Benimaru_63214K_Third.PNG | ||
| caption3 = | | caption3 = The Benimaru Blender™ | ||
| linkname = Breakdance | | linkname = Breakdance | ||
| data = | | data = | ||
| Line 1,123: | Line 1,256: | ||
{{MoveData | {{MoveData | ||
| name = Benimaru Collider | | name = Benimaru Collider | ||
| input = | | input = 632146P | ||
| subtitle = Command Grab | | subtitle = Command Grab | ||
| image = CVS2_Benimaru_632146P.PNG | | image = CVS2_Benimaru_632146P.PNG | ||
| Line 1,247: | Line 1,380: | ||
| advBlock = -2 | | advBlock = -2 | ||
| invul = 23 (Full) | | invul = 23 (Full) | ||
| description = Beni's electric fist super. Easy to juggle into, and a decent reversal. You can loop these in the corner to rack up damage even outside of C groove. Even sweep will juggle into this. On all that it's also safe on block! Not as useful after long links however. | | description = Beni's electric fist super. Easy to juggle into, and a decent reversal. You can loop these in the corner to rack up damage even outside of C groove. Even sweep will juggle into this. On all that it's also safe on block! Not as useful after long links however. Best to use sweep when punishing with this since other normals push him out of range from far out. Can juggle after the level one into another lvl 1 or lvl 2 in the corner as long as you didn't use sweep. | ||
* | * | ||
}} | }} | ||
}} | }} | ||
=== <span class="invisible-header"> | === <span class="invisible-header">Lightning Spark</span> === | ||
{{MoveData | {{MoveData | ||
| name = | | name = Lightning Spark | ||
| input = 236236K | | input = 236236K | ||
| subtitle = Rush Super | | subtitle = Rush Super | ||
| Line 1,312: | Line 1,445: | ||
| advBlock = -48 | | advBlock = -48 | ||
| invul = 22 (Full) | | invul = 22 (Full) | ||
| description = A forward moving rush super. Lots of invuln and decent damage makes it seem like a fireball punish, but it travels very slow meaning it only works for this in very close range. Normally you'll mostly just use the level 1 version for long hitconfirms into super, | | description = A forward moving rush super. Lots of invuln and decent damage makes it seem like a fireball punish, but it travels very slow meaning it only works for this in very close range. Normally you'll mostly just use the level 1 version for long hitconfirms into super, since canceling the level 2 version loses a ton of damage, and it's usually better for Beni to save meter than spend on the level 3 version of this. | ||
This gives Beni the best knockdown for oki with rolls, low jumps, or corpse hops. | |||
* | * | ||
}} | }} | ||
| Line 1,319: | Line 1,454: | ||
=== <span class="invisible-header">Electrigger</span> === | === <span class="invisible-header">Electrigger</span> === | ||
{{MoveData | {{MoveData | ||
| name = | | name = Electrigger | ||
| input = 6321463214P | | input = 6321463214P | ||
| subtitle = Super Command Grab | | subtitle = Super Command Grab | ||
| Line 1,382: | Line 1,517: | ||
}} | }} | ||
= | == Strategy == | ||
== Combos == | |||
* c.lk, c.lk, c.lk xx HK knee | |||
* c.lk, s.mk xx HK Knee/HK break dance/LP fireball | |||
* c.lk, s.lk xx HK DP (fatties only) | |||
* c.lk, c.lk, c.lk, c.mk xx any Lvl rush super | |||
* c.lk, c.lk xx Lvl 2/3 Super fireball | |||
* c.hk xx Lvl 2 super fireball xx DP+HP, Lvl Super fireball (corner only) | |||
* HK DP (TRADE), Lvl 2/3 Super fireball or AA CC | |||
* HK Knee (Point blank), Link Lvl 3 Rush Super, 1 frame link. | |||
=== | == Custom Combos == | ||
[https://docs.google.com/presentation/d/1nbEmE7qUiasfwPIhYZIg7Ijt5jld9o1KfhMs3tJfREo/edit?slide=id.g74222b65db_0_0#slide=id.g74222b65db_0_0 Gunterjpn's A-Benimaru combos] | |||
* Custom Combo (Standing) - s.hp x8 xx MP fireball xx HP fireball until meter almost out, f+mk xx grab super (If not near corner continue s.hp until corner, then fireball) | |||
* Custom Combo (Crouching) - c.lk xx HK Knee xx s.fp xx f+mk xx s.hp x5 xx MP fireball xx HP fireball until meter almost out, f+mk xx grab super (If not near corner continue s.hp until corner, then fireball) | |||
* Custom Combo (Anti-air) - Activate, HK DP xx whiff s.lk, super jump HP til corner, repeated j.hp until meter almost out, rush super | |||
= | * Custom Combo (Guard Crush) - Activate, c.lk xx c.fp xx c.hk xx HK break dancexN xx Super Electric Fist (guard breaks), c.lk xx knee xx u, d+k | ||
== Colors == | |||
[[File:Benimaru_CvS2_colors.png]] | |||
{{Navbox-CvS2}} | {{Navbox-CvS2}} | ||
[[Category:Capcom vs SNK 2]] | [[Category:Capcom vs SNK 2]] | ||
[[Category:Benimaru]] | |||
Latest revision as of 19:15, 4 May 2025
Introduction
Story
Benimaru Nikaido is many things. He's the son of a rich family, with a Japanese father and American mother. He's a star of the fashion world. He's Kyo Kusanagi's friend and rival. He's an electric wielding martial artist with powerful kicks. Most importantly, though: he's gorgeous. He keeps his hair styled and straight using his electric abilities.
Gameplay
Benimaru in CvS2 is widely regarded as one of the worst characters for a variety of reasons. His health is very low, and his damage output without meter isn't much better either. His longest range options pose no threat to most characters while not even really having that much range. His anti-airs are only strong when you add roll cancels behind them as well. On top of all that, he has one of the absolute floatiest jumps, making anti-airing him a breeze even with his divekick. If you plan on using him, have one or two top tiers on your team to help out, cuz he won't be doing much.
While he has a lot holding him back, Benimaru does have a few strengths. His mixup and general close range game is fairly strong, with lots of ways to generate frame advantage and many strong normals for interrupting opponents trying to escape. His mixup is powerful too, especially with meter, since he can access his level 1 Electrigger command grab which is a damaging 1 frame grab. The fear of being grabbed will make opponents move around and try to escape more, which is when you can take advantage of his strong close-range normals to catch them moving and hopefully secure a knockdown. Beni also doesn't lack in having lots of combo potential, with lots of links for long confirms and a super with very lenient juggle properties. He isn't the scariest close range brawler by any means, but he has a few tools and tricks to keep himself in the game and make the opponent think twice about not learning the matchup.
Groove Selection
Best - A/N: A-Benimaru gets access to the powerful mechanics of A-Groove, namely Custom Combos. Benimaru's punishes are lackluster, but his CC isn't, and the threat of a CC punish makes him a bit scarier. Activation mixups become a big part of his gameplan as well, mixing between his command grab and activating CC. He loses access to his supers however, which hurts a lot. N-Benimaru makes up for this by having plenty of level 1 supers, making his damage and mixup a lot more stable between his Rai-Kou Ken and Den'ei Spark, and his frame 1 command grab Electrigger. The better movement helps a lot as well, as Benimari is slow and floaty in general. However, without meter, N-Benimaru still has weak punishes. Both give him roll, which he needs desperately to make his anti-air game better and to make his defense a bit stronger.
Useful - S/C: S-Benimaru is surprisingly useful. Benimaru already has lacking damage in general, so the lack of super doesn't really matter to him much. Once Benimaru does hit low health, infinite level 1 Electrigger mixed with his other infinite level 1 supers makes his strike/throw game much scarier overall, and ups his damage a lot as Rai-Kou Ken juggles in the corner do surprisingly respectable damage. The enhanced movement also helps him quite a lot. Still, he has to contend with S-Grooves mechanics overall, which holds back what would otherwise be his best Groove. C-Benimaru gets access to his supers a lot more often, and a solid defensive tool with Alpha Counters. Air block helps with his horrible jump as well. The lack of movement and his still underwhelming super punishes makes it a worse pick than A-Groove however, and more importantly, Benimaru cannot abuse level 2 cancels: Den'ei Spark causes a hard knockdown, Electrigger can't be combo'd out of, and Rai-Kou Ken already allows for juggles, although now you can get three of them.
Worst - K/P: K-Benimaru is pretty bad. Lack of rolls immediately hurts, as his anti-airs become incredibly inconsistent and his defense is weakened. JD isn't very strong, as his punishes aren't that great, and only having one super is worse for Benimaru who would rather have multiple level 1's than one level 3. Rage is a decent buff, but it turns weak punishes into mediocre ones, and isn't worth the super loss overall. P-Benimaru is similar to K-Benimaru, but has even less tools. Parry is meaningless on a character with such weak meterless punishes, you'll rarely have a super, and you have no defensive options to help you out. P-Benimaru is essentially useless, go with any other Groove.
|
Benimaru is a mixup oriented character, but suffers heavily from low damage, bad combos, and low health. Still, solid supers and normals keep him from being among the bottom tiers. Benimaru is best in A-Groove. Difficulty: Pretty HardTier: D |
|
| Pros | Cons |
|
|
Players to Watch
| Name | Country | Groove | Accounts | Notes |
|---|---|---|---|---|
| Izumi | Japan | S-Groove | Twitter: @IzumiSgroove | The infamous S-Benimaru. Izumi pioneered getting wins with such a weird character through his vortex in desperation mode and generally having great S-Groove game sense. Sample Match |
Normal Moves
Far Standing Normals
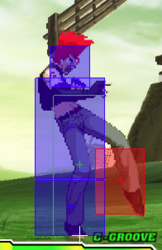
5LP
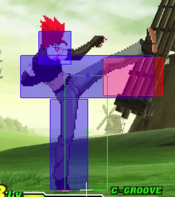
5MP
5HP
5LK
5MK
5HK
Close Normals
clLP
clMP
clHP
clLK
clMK
clHK
Crouching Normals
2LP
2MP
2HP
2LK
2MK
2HK
Jumping Normals
8LP
8MP
8HP
8LK
8MK
8HK
Command Normals
Jackknife Kick
Flying Drill
Special Moves
Raijinken
Anti-Air Raijinken
Iai Geri
Iai Geri
Jinrai Kick
Shinku Katate Koma
Benimaru Collider
Super Moves
Rai-Kou Ken
Lightning Spark
Electrigger
Strategy
Combos
- c.lk, c.lk, c.lk xx HK knee
- c.lk, s.mk xx HK Knee/HK break dance/LP fireball
- c.lk, s.lk xx HK DP (fatties only)
- c.lk, c.lk, c.lk, c.mk xx any Lvl rush super
- c.lk, c.lk xx Lvl 2/3 Super fireball
- c.hk xx Lvl 2 super fireball xx DP+HP, Lvl Super fireball (corner only)
- HK DP (TRADE), Lvl 2/3 Super fireball or AA CC
- HK Knee (Point blank), Link Lvl 3 Rush Super, 1 frame link.
Custom Combos
- Custom Combo (Standing) - s.hp x8 xx MP fireball xx HP fireball until meter almost out, f+mk xx grab super (If not near corner continue s.hp until corner, then fireball)
- Custom Combo (Crouching) - c.lk xx HK Knee xx s.fp xx f+mk xx s.hp x5 xx MP fireball xx HP fireball until meter almost out, f+mk xx grab super (If not near corner continue s.hp until corner, then fireball)
- Custom Combo (Anti-air) - Activate, HK DP xx whiff s.lk, super jump HP til corner, repeated j.hp until meter almost out, rush super
- Custom Combo (Guard Crush) - Activate, c.lk xx c.fp xx c.hk xx HK break dancexN xx Super Electric Fist (guard breaks), c.lk xx knee xx u, d+k
Colors
