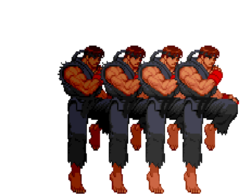
| (52 intermediate revisions by 3 users not shown) | |||
| Line 5: | Line 5: | ||
{{CharacterOverview-SFA2 | {{CharacterOverview-SFA2 | ||
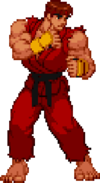
|overview=Essentially a non-canon version of Ryu with some new moves, and slight differences on some existing moves. A mix of Akuma and Ryu, in other words. | |overview=Essentially a non-canon version of Ryu with some new moves, and slight differences on some existing moves. A mix of Akuma and Ryu, in other words. | ||
'''Players to watch:''' | |||
[https://www.fightcade.com/id/PezMan81 PezMan81] | |||
<br><br> | <br><br> | ||
<center>'''Moveset'''</center> | |||
<center><div style="width:100%;max-width:450px;"><youtube>hAiyU343-98</youtube></div></center> | <center><div style="width:100%;max-width:450px;"><youtube>hAiyU343-98</youtube></div></center> | ||
====Differences From Ryu==== | ====Differences From Ryu==== | ||
| Line 28: | Line 32: | ||
* Excellent zoning with the best fireball in the game | * Excellent zoning with the best fireball in the game | ||
* Tatsu knocks down, making it great against fireballs | * Tatsu knocks down, making it great against fireballs | ||
* DP is the best meterless | * DP is the best meterless AA against jump-in CCs | ||
* Infinite CC blowout range and interrupt | * Infinite CC blowout range and interrupt | ||
|cons= | |cons= | ||
* Lowest defense rating in the game, resulting in more damage taken | * Lowest defense rating in the game, resulting in more damage taken | ||
* DP is multi-hitting | * DP is multi-hitting | ||
* Raging Demon is terrible, used only for flashiness | |||
|name=Evil Ryu | |name=Evil Ryu | ||
|image=SFA2_EvilRyu_Portrait.png | |image=SFA2_EvilRyu_Portrait.png | ||
|health=144 | |health=144 | ||
|rating=- | |rating=-4 | ||
|stun=40 | |stun=40 | ||
|fSpeed=300 | |fSpeed=300 | ||
| Line 66: | Line 71: | ||
|data= | |data= | ||
{{AttackData-SFA2 | {{AttackData-SFA2 | ||
|Damage= 5 | |Damage= 5<sup>[0]</sup> | ||
|Stun= 3 | |Stun= 3 | ||
|Startup= 4 | |Startup= 4 | ||
| Line 75: | Line 80: | ||
|Properties=[[File:Rpdfire.png]][[File:Chaincancel.png]]<br>[[File:Specialcancel.png]][[File:Supercancel.png]] | |Properties=[[File:Rpdfire.png]][[File:Chaincancel.png]]<br>[[File:Specialcancel.png]][[File:Supercancel.png]] | ||
}} | }} | ||
|description= Quick jab, with small frames advantage, you can walk and do these on any opponent that can’t crouch them. | |description=*Can rapid fire into itself or chain cancelled into: st.{{lk}}, cr.{{lp}} & cr.{{lk}}. | ||
Quick jab, with small frames advantage, you can walk and do these on any opponent that can’t crouch them. | |||
}} | }} | ||
| Line 89: | Line 95: | ||
|data= | |data= | ||
{{AttackData-SFA2 | {{AttackData-SFA2 | ||
|Damage= 11 | |Damage= 11<sup>[1]</sup>, 6<sup>[0]</sup> | ||
|Stun= 6, 6 | |Stun= 6, 6 | ||
|Startup= 4 | |Startup= 4 | ||
| Line 112: | Line 118: | ||
|data= | |data= | ||
{{AttackData-SFA2 | {{AttackData-SFA2 | ||
|Damage= 17 | |Damage= 17<sup>[2]</sup> | ||
|Stun= 8 | |Stun= 8 | ||
|Startup= 8 | |Startup= 8 | ||
| Line 133: | Line 139: | ||
|data= | |data= | ||
{{AttackData-SFA2 | {{AttackData-SFA2 | ||
|Damage= 5 | |Damage= 5<sup>[0]</sup> | ||
|Stun= 3 | |Stun= 3 | ||
|Startup= 7 | |Startup= 7 | ||
| Line 156: | Line 162: | ||
|data= | |data= | ||
{{AttackData-SFA2 | {{AttackData-SFA2 | ||
|Damage= 8 | |Damage= 8<sup>[1]</sup>, 9<sup>[0]</sup> | ||
|Stun= 4, 2 | |Stun= 4, 2 | ||
|Startup= 6 | |Startup= 6 | ||
| Line 179: | Line 185: | ||
|data= | |data= | ||
{{AttackData-SFA2 | {{AttackData-SFA2 | ||
|Damage= 14 | |Damage= 14<sup>[0]</sup> | ||
|Stun= 4 | |Stun= 4 | ||
|Startup= 10 | |Startup= 10 | ||
| Line 201: | Line 207: | ||
|data= | |data= | ||
{{AttackData-SFA2 | {{AttackData-SFA2 | ||
|Damage= 5 | |Damage= 5<sup>[0]</sup> | ||
|Stun= 1 | |Stun= 1 | ||
|Startup= 4 | |Startup= 4 | ||
| Line 210: | Line 216: | ||
|Properties=[[File:Rpdfire.png]][[File:Chaincancel.png]]<br>[[File:Specialcancel.png]][[File:Supercancel.png]] | |Properties=[[File:Rpdfire.png]][[File:Chaincancel.png]]<br>[[File:Specialcancel.png]][[File:Supercancel.png]] | ||
}} | }} | ||
|description= Little jab to the shin, not really all that great range wise. | |description=*Can rapid fire into itself or chain cancelled into: st.{{lp}}, st.{{lk}} & cr.{{lk}}. | ||
Little jab to the shin, not really all that great range wise. | |||
}} | }} | ||
| Line 222: | Line 229: | ||
|data= | |data= | ||
{{AttackData-SFA2 | {{AttackData-SFA2 | ||
|Damage= 10 | |Damage= 10<sup>[1]</sup> | ||
|Stun= 6 | |Stun= 6 | ||
|Startup= 5 | |Startup= 5 | ||
| Line 245: | Line 252: | ||
|data= | |data= | ||
{{AttackData-SFA2 | {{AttackData-SFA2 | ||
|Damage= 15 | |Damage= 15<sup>[2]</sup>, 13<sup>[0]</sup> | ||
|Stun= 8, 6 | |Stun= 8, 6 | ||
|Startup= 5 | |Startup= 5 | ||
| Line 269: | Line 276: | ||
|data= | |data= | ||
{{AttackData-SFA2 | {{AttackData-SFA2 | ||
|Damage= 5 | |Damage= 5<sup>[0]</sup> | ||
|Stun= 3 | |Stun= 3 | ||
|Startup= 5 | |Startup= 5 | ||
| Line 278: | Line 285: | ||
|Properties=[[File:Rpdfire.png]][[File:Chaincancel.png]]<br>[[File:Specialcancel.png]][[File:Supercancel.png]] | |Properties=[[File:Rpdfire.png]][[File:Chaincancel.png]]<br>[[File:Specialcancel.png]][[File:Supercancel.png]] | ||
}} | }} | ||
|description= Quick kick to the foot, combo starter. | |description=*Can rapid fire into itself or chain cancelled into: st.{{lp}}, st.{{lk}} & cr.{{lp}}. | ||
Quick kick to the foot, combo starter. | |||
}} | }} | ||
| Line 290: | Line 298: | ||
|data= | |data= | ||
{{AttackData-SFA2 | {{AttackData-SFA2 | ||
|Damage= 9 | |Damage= 9<sup>[1]</sup> | ||
|Stun= 1 | |Stun= 1 | ||
|Startup= 6 | |Startup= 6 | ||
| Line 311: | Line 319: | ||
|data= | |data= | ||
{{AttackData-SFA2 | {{AttackData-SFA2 | ||
|Damage= 14 | |Damage= 14<sup>[2]</sup> | ||
|Stun= 8 | |Stun= 8 | ||
|Startup= 7 | |Startup= 7 | ||
| Line 334: | Line 342: | ||
|data= | |data= | ||
{{AttackData-SFA2 | {{AttackData-SFA2 | ||
|Damage= 9 | |Damage= 9<sup>[0]</sup> | ||
|Stun= 3 | |Stun= 3 | ||
|Startup= 6 | |Startup= 6 | ||
| Line 355: | Line 363: | ||
|data= | |data= | ||
{{AttackData-SFA2 | {{AttackData-SFA2 | ||
|Damage= 10 | |Damage= 10<sup>[1]</sup> | ||
|Stun= 6 | |Stun= 6 | ||
|Startup= 6 | |Startup= 6 | ||
| Line 376: | Line 384: | ||
|data= | |data= | ||
{{AttackData-SFA2 | {{AttackData-SFA2 | ||
|Damage= 13 | |Damage= 13<sup>[2]</sup> | ||
|Stun= 8 | |Stun= 8 | ||
|Startup= 9 | |Startup= 9 | ||
| Line 397: | Line 405: | ||
|data= | |data= | ||
{{AttackData-SFA2 | {{AttackData-SFA2 | ||
|Damage= 10 | |Damage= 10<sup>[0]</sup> | ||
|Stun= 3 | |Stun= 3 | ||
|Startup= 5 | |Startup= 5 | ||
| Line 418: | Line 426: | ||
|data= | |data= | ||
{{AttackData-SFA2 | {{AttackData-SFA2 | ||
|Damage= 11 | |Damage= 11<sup>[1]</sup> | ||
|Stun= 6 | |Stun= 6 | ||
|Startup= 5 | |Startup= 5 | ||
| Line 439: | Line 447: | ||
|data= | |data= | ||
{{AttackData-SFA2 | {{AttackData-SFA2 | ||
|Damage= 14 | |Damage= 14<sup>[2]</sup> | ||
|Stun= 8 | |Stun= 8 | ||
|Startup= 13 | |Startup= 13 | ||
| Line 462: | Line 470: | ||
|data= | |data= | ||
{{AttackData-SFA2 | {{AttackData-SFA2 | ||
|Damage= 9 | |Damage= 9<sup>[0]</sup> | ||
|Stun= 3 | |Stun= 3 | ||
|Startup= 6 | |Startup= 6 | ||
| Line 485: | Line 493: | ||
|data= | |data= | ||
{{AttackData-SFA2 | {{AttackData-SFA2 | ||
|Damage= 8, 6 | |Damage= 8<sup>[0]</sup>, 6<sup>[0]</sup> | ||
|Stun= 3, 3 | |Stun= 3, 3 | ||
|Startup= 10 | |Startup= 10 | ||
| Line 507: | Line 515: | ||
|data= | |data= | ||
{{AttackData-SFA2 | {{AttackData-SFA2 | ||
|Damage= 13 | |Damage= 13<sup>[2]</sup> | ||
|Stun= 1 | |Stun= 1 | ||
|Startup= 6 | |Startup= 6 | ||
| Line 528: | Line 536: | ||
|data= | |data= | ||
{{AttackData-SFA2 | {{AttackData-SFA2 | ||
|Damage= 9 | |Damage= 9<sup>[0]</sup> | ||
|Stun= 3 | |Stun= 3 | ||
|Startup= 8 | |Startup= 8 | ||
| Line 549: | Line 557: | ||
|data= | |data= | ||
{{AttackData-SFA2 | {{AttackData-SFA2 | ||
|Damage= 10 | |Damage= 10<sup>[1]</sup> | ||
|Stun= 6 | |Stun= 6 | ||
|Startup= 8 | |Startup= 8 | ||
| Line 570: | Line 578: | ||
|data= | |data= | ||
{{AttackData-SFA2 | {{AttackData-SFA2 | ||
|Damage= 13 | |Damage= 13<sup>[2]</sup> | ||
|Stun= 8 | |Stun= 8 | ||
|Startup= 7 | |Startup= 7 | ||
| Line 591: | Line 599: | ||
|caption= | |caption= | ||
|name=Sakatsu Wari | |name=Sakatsu Wari | ||
|subtitle=Overhead | |subtitle=Overhead, Collarbone Breaker | ||
|input=[[File:F.png]]+ [[File:Mp.png]] | |input=[[File:F.png]]+ [[File:Mp.png]] | ||
|data= | |data= | ||
{{AttackData-SFA2 | {{AttackData-SFA2 | ||
|Damage= 5 | |Damage= 5<sup>[1]</sup>, 14<sup>[0]</sup> | ||
|Stun= 6, 2 | |Stun= 6, 2 | ||
|Startup= 23 | |Startup= 23 | ||
| Line 615: | Line 623: | ||
|imageSize=250px | |imageSize=250px | ||
|caption= | |caption= | ||
|name= | |name=Senpukyaku | ||
|subtitle=Hop Kick | |subtitle=Hop Kick | ||
|input=[[File:F.png]]+ [[File:Mk.png]] | |input=[[File:F.png]]+ [[File:Mk.png]] | ||
|data= | |data= | ||
{{AttackData-SFA2 | {{AttackData-SFA2 | ||
|Damage= 11 | |Damage= 11<sup>[1]</sup> | ||
|Stun= 6 | |Stun= 6 | ||
|Startup= 20 | |Startup= 20 | ||
| Line 636: | Line 644: | ||
{{MoveData-SFA2 | {{MoveData-SFA2 | ||
|image= | |image=A2_EvilRyu_ThrowRange.png | ||
|imageSize=250px | |imageSize=250px | ||
|image2= | |image2=A2_EvilRyu_PThrow_1.png | ||
|imageSize2=250px | |imageSize2=250px | ||
|image3=A2_EvilRyu_PThrow_2.png | |||
|imageSize3=250px | |||
|caption= | |caption= | ||
|name=Seoi Nage | |name=Seoi Nage | ||
|subtitle= | |subtitle=Punch Throw | ||
|input=[[File:B.png]] | |input=[[File:B.png]]/[[File:F.png]] + [[File:Mp.png]]/[[File:Hp.png]] | ||
|data= | |data= | ||
{{AttackData-SFA2 | {{AttackData-SFA2 | ||
|Damage= 19 | |Damage= 19<sup>[0]</sup> | ||
|Stun= 0 | |Stun= 0 | ||
|Startup= | |Startup= 1 | ||
|Active= N/A | |Active= N/A | ||
|Frame Adv= N/A | |Frame Adv= N/A | ||
| Line 660: | Line 670: | ||
{{MoveData-SFA2 | {{MoveData-SFA2 | ||
|image= | |image=A2_EvilRyu_ThrowRange.png | ||
|imageSize=250px | |imageSize=250px | ||
|image2= | |image2=A2_EvilRyu_KThrow_1.png | ||
|imageSize2=250px | |imageSize2=250px | ||
|image3=A2_EvilRyu_KThrow_2.png | |||
|imageSize3=250px | |||
|caption= | |caption= | ||
|name=Tomoe Nage | |name=Tomoe Nage | ||
|subtitle= | |subtitle=Kick Throw | ||
|input=[[File:B.png]] | |input=[[File:B.png]]/[[File:F.png]] + [[File:Mk.png]]/[[File:Hk.png]] | ||
|data= | |data= | ||
{{AttackData-SFA2 | {{AttackData-SFA2 | ||
|Damage= 19 | |Damage= 19<sup>[0]</sup> | ||
|Stun= 0 | |Stun= 0 | ||
|Startup= | |Startup= 1 | ||
|Active= N/A | |Active= N/A | ||
|Frame Adv= N/A | |Frame Adv= N/A | ||
| Line 693: | Line 705: | ||
|caption= | |caption= | ||
|name=Punch Alpha Counter | |name=Punch Alpha Counter | ||
|subtitle= | |subtitle= | ||
|input=(while in blockstun)[[File:Qcd.png]]+ [[File:P.png]] | |input=(while in blockstun)[[File:Qcd.png]]+ [[File:P.png]] | ||
|data= | |data= | ||
{{AttackData-SFA2 | {{AttackData-SFA2 | ||
|Damage= 18 | |Damage= 18<sup>[1]</sup>, 16<sup>[0]</sup>, 4<sup>[0]</sup> | ||
|Stun= 8, 6, 6 | |Stun= 8, 6, 6 | ||
|Startup= 4 | |Startup= 4 | ||
| Line 706: | Line 718: | ||
|Properties= [[File:Startupinv.png]]<br>[[File:Hardknockdown.png]] | |Properties= [[File:Startupinv.png]]<br>[[File:Hardknockdown.png]] | ||
}} | }} | ||
|description= Used vs jump-ins and when opponent is extremely close. Does have a tendency to whiff vs deep jump-ins. | |description= *Hits 1 time. | ||
Used vs jump-ins and when opponent is extremely close. Does have a tendency to whiff vs deep jump-ins. | |||
}} | }} | ||
| Line 714: | Line 727: | ||
|caption= | |caption= | ||
|name=Kick Alpha Counter | |name=Kick Alpha Counter | ||
|subtitle= | |subtitle= | ||
|input=(while in blockstun)[[File:Qcd.png]]+ [[File:K.png]] | |input=(while in blockstun)[[File:Qcd.png]]+ [[File:K.png]] | ||
|data= | |data= | ||
{{AttackData-SFA2 | {{AttackData-SFA2 | ||
|Damage= 15 | |Damage= 15<sup>[2]</sup> | ||
|Stun= 8 | |Stun= 8 | ||
|Startup= | |Startup= 4 | ||
|Active= 6 | |Active= 6 | ||
|Frame Adv= -9 | |Frame Adv= -9 | ||
| Line 744: | Line 757: | ||
{{AttackData-SFA2 | {{AttackData-SFA2 | ||
|version=[[File:Lp.png]] | |version=[[File:Lp.png]] | ||
|Damage= | |Damage= 15<sup>[5]</sup>, 14<sup>[6]</sup> | ||
|Stun= 8, 12 | |Stun= 8, 12 | ||
|Startup= 12 | |Startup= 12 | ||
|Active= 3 | |Active= 3(0)inf | ||
|Frame Adv= -11 | |Frame Adv= -11 | ||
|Meter= 4/5/7 | |Meter= 4/5/7 | ||
| Line 756: | Line 769: | ||
|header= no | |header= no | ||
|version=[[File:Mp.png]] | |version=[[File:Mp.png]] | ||
|Damage= | |Damage= 16<sup>[6]</sup>, 14<sup>[6]</sup> | ||
|Stun= 10, 12 | |Stun= 10, 12 | ||
|Startup= 12 | |Startup= 12 | ||
|Active= 3 | |Active= 3(0)inf | ||
|Frame Adv= -12 | |Frame Adv= -12 | ||
|Meter= 4/5/7 | |Meter= 4/5/7 | ||
| Line 768: | Line 781: | ||
|header= no | |header= no | ||
|version=[[File:Hp.png]] | |version=[[File:Hp.png]] | ||
|Damage= | |Damage= 18<sup>[9]</sup>, 14<sup>[6]</sup> | ||
|Stun= 12, 12 | |Stun= 12, 12 | ||
|Startup= 12 | |Startup= 12 | ||
|Active= 3 | |Active= 3(0)inf | ||
|Frame Adv= -13 | |Frame Adv= -13 | ||
|Meter= 4/5/7 | |Meter= 4/5/7 | ||
| Line 807: | Line 820: | ||
{{AttackData-SFA2 | {{AttackData-SFA2 | ||
|version=[[File:Lp.png]] | |version=[[File:Lp.png]] | ||
|Damage= | |Damage= 14<sup>[7]</sup>, 8<sup>[8]</sup>, 4<sup>[7]</sup> | ||
|Stun= 8, 8, 2 | |Stun= 8, 8, 2 | ||
|Startup= 4 | |Startup= 4 | ||
| Line 819: | Line 832: | ||
|header= no | |header= no | ||
|version=[[File:Mp.png]] | |version=[[File:Mp.png]] | ||
|Damage= 8 | |Damage= 10<sup>[8]</sup>, 8<sup>[8]</sup>, 4<sup>[8]</sup> | ||
|Stun= 8, 2, 2 | |Stun= 8, 2, 2 | ||
|Startup= 4 | |Startup= 4 | ||
| Line 831: | Line 844: | ||
|header= no | |header= no | ||
|version=[[File:Hp.png]] | |version=[[File:Hp.png]] | ||
|Damage= 5 | |Damage= 5<sup>[10]</sup>, 11<sup>[8]</sup>, 9<sup>[7]</sup>, 4<sup>[8]</sup> | ||
|Stun= 8, | |Stun= 8, 2x3 | ||
|Startup= 3 | |Startup= 3 | ||
|Active= 1(0)4(0)8(0)10 | |Active= 1(0)4(0)8(0)10 | ||
| Line 841: | Line 854: | ||
}} | }} | ||
|description= | |description= | ||
*'''Unscaled damage in CC.''' | |||
----- | ----- | ||
{{lp}} | {{lp}} - ''[Hitboxes pictured]'' | ||
*3 frames of startup invul; 0 of which while active. | *3 frames of startup invul; 0 of which while active. | ||
*Can't be air-blocked until frame 17. | |||
*Hits 1 time max. | *Hits 1 time max. | ||
Best used as an invincible anti-air. Will also anti-air jump-in CCs. Not a great reversal because of the lower hurtbox during the first hit; it will trade with low attacks. Amazing way to build meter from full-screen when kara-canceled with cr.hk (11 units). | Best used as an invincible anti-air. Will also anti-air jump-in CCs. Not a great reversal because of the lower hurtbox during the first hit; it will trade with low attacks. Amazing way to build meter from full-screen when kara-canceled with cr.hk (11 units). | ||
| Line 849: | Line 864: | ||
{{mp}} | {{mp}} | ||
*7 frames of startup invul; 4 of which while active. | *7 frames of startup invul; 4 of which while active. | ||
*Can't be air-blocked until frame 10. | |||
*Hits 2 time max. | *Hits 2 time max. | ||
Best used as a reversal. Not the best version to anit-air with because it's not invincible after the first hit. | Best used as a reversal. Not the best version to anit-air with because it's not invincible after the first hit. | ||
| Line 854: | Line 870: | ||
{{hp}} | {{hp}} | ||
*7 frames of startup invul; 5 of which while active. | *7 frames of startup invul; 5 of which while active. | ||
*Can't be air-blocked until frame 10. | |||
*Hits 3 time max. | *Hits 3 time max. | ||
Hp dp is best used as a reversal. Not the best version to anit-air with because it's not invincible after the first hit. | Hp dp is best used as a reversal. Not the best version to anit-air with because it's not invincible after the first hit. | ||
| Line 865: | Line 882: | ||
|caption= | |caption= | ||
|name=Tatsumaki Senpukyaku | |name=Tatsumaki Senpukyaku | ||
|subtitle=Hurricane Kick | |subtitle=Hurricane Kick, Tatsu | ||
|input=[[File:Qcb.png]] + [[File:K.png]] | |input=[[File:Qcb.png]] + [[File:K.png]] | ||
|data= | |data= | ||
{{AttackData-SFA2 | {{AttackData-SFA2 | ||
|version=[[File:Lk.png]] | |version=[[File:Lk.png]] | ||
|Damage= 12 | |Damage= 12<sup>[4]</sup>, 12<sup>[4]</sup> | ||
|Stun= 2, 2 | |Stun= 2, 2 | ||
|Startup= 12 | |Startup= 12 | ||
| Line 883: | Line 900: | ||
|header= no | |header= no | ||
|version=[[File:Mk.png]] | |version=[[File:Mk.png]] | ||
|Damage= | |Damage= 14<sup>[5]</sup>, 7<sup>[5]</sup>x4 | ||
|Stun= 2x5 | |Stun= 2x5 | ||
|Startup= 3 | |Startup= 3 | ||
|Active= 2(7)3(3) | |Active= 2(7)[3(3)x3]3 | ||
|Frame Adv= -5 | |Frame Adv= -5 | ||
|Meter= 6/6+1 per hit/6+2 per hit | |Meter= 6/6+1 per hit/6+2 per hit | ||
| Line 895: | Line 912: | ||
|header= no | |header= no | ||
|version=[[File:Hk.png]] | |version=[[File:Hk.png]] | ||
|Damage= | |Damage= 16<sup>[8]</sup>, 7<sup>[8]</sup>x6 | ||
|Stun= 2x7 | |Stun= 2x7 | ||
|Startup= 3 | |Startup= 3 | ||
| Line 904: | Line 921: | ||
|Properties=[[File:Softknockdown.png]] | |Properties=[[File:Softknockdown.png]] | ||
}} | }} | ||
|description= | |description=Used for mobility and to punish fireballs, use {{lk}} version to pass fireballs when you cant use {{hk}} version to hit opponent. | ||
----- | ----- | ||
{{ | {{lk}} | ||
*Hits 1 time max. | *Hits 1 time max. | ||
----- | ----- | ||
{{ | {{mk}} | ||
*Hits 2 time max. | *Hits 2 time max. | ||
----- | ----- | ||
{{ | {{hk}} | ||
*Hits 2 time max. | *Hits 2 time max. | ||
}} | }} | ||
| Line 923: | Line 940: | ||
|caption= | |caption= | ||
|name=(air)Tatsumaki Senpukyaku | |name=(air)Tatsumaki Senpukyaku | ||
|subtitle=(air)Hurricane Kick | |subtitle=(air)Hurricane Kick, (air)Tatsu | ||
|input=(in air)[[File:Qcb.png]] + [[File:K.png]] | |input=(in air)[[File:Qcb.png]] + [[File:K.png]] | ||
|data= | |data= | ||
{{AttackData-SFA2 | {{AttackData-SFA2 | ||
|version=[[File:Lk.png]] | |version=[[File:Lk.png]] | ||
|Damage= | |Damage= 11<sup>[7]</sup> | ||
|Stun= 1 | |Stun= 1 | ||
|Startup= 7 | |Startup= 7 | ||
| Line 940: | Line 957: | ||
|header= no | |header= no | ||
|version=[[File:Mk.png]] | |version=[[File:Mk.png]] | ||
|Damage= | |Damage= 7<sup>[7]</sup>, 7<sup>[7]</sup> | ||
|Stun= 1, 1 | |Stun= 1, 1 | ||
|Startup= 7 | |Startup= 7 | ||
| Line 952: | Line 969: | ||
|header= no | |header= no | ||
|version=[[File:Hk.png]] | |version=[[File:Hk.png]] | ||
|Damage= | |Damage= 7<sup>[8]</sup>x3 | ||
|Stun= 1x3 | |Stun= 1x3 | ||
|Startup= 7 | |Startup= 7 | ||
| Line 961: | Line 978: | ||
|Properties=[[File:Softknockdown.png]] | |Properties=[[File:Softknockdown.png]] | ||
}} | }} | ||
|description= | |description= If connected against a grounded opponent allows for a juggle with dj.{{mp}}, DP or supers. | ||
----- | ----- | ||
{{ | {{mk}} | ||
*Hits 2 | *Hits 2 times. | ||
----- | ----- | ||
{{ | {{hk}} | ||
*Hits 2 times max. | *Hits 2 times max. | ||
}} | }} | ||
| Line 986: | Line 1,003: | ||
|Meter= 0/-/- | |Meter= 0/-/- | ||
|Block= N/A | |Block= N/A | ||
|Properties= | |Properties=[[File:Counterhit.png]] | ||
}} | }} | ||
|description= Ryu will use his fireball animation where nothing comes out, but it has very fast recovery and can catch foes off-guard during a fireball war. Not used often due to the placement of the start button can vary depending on your controller setup, and a inputting it incorrectly will give you a regular taunt instead, which can be dangerous. | |description=*'''Receives 125% damage when [[Street_Fighter_Alpha_2/System#Counter_Hits|counter hit]].''' | ||
Ryu will use his fireball animation where nothing comes out, but it has very fast recovery and can catch foes off-guard during a fireball war. Not used often due to the placement of the start button can vary depending on your controller setup, and a inputting it incorrectly will give you a regular taunt instead, which can be dangerous. | |||
}} | }} | ||
| Line 1,012: | Line 1,031: | ||
|Meter= 2/-/- | |Meter= 2/-/- | ||
|Block= N/A | |Block= N/A | ||
|Properties= [[File:Startupinv.png]] | |Properties= [[File:Startupinv.png]][[File:Counterhit.png]] | ||
}} | }} | ||
{{AttackData-SFA2 | {{AttackData-SFA2 | ||
| Line 1,024: | Line 1,043: | ||
|Meter= 2/-/- | |Meter= 2/-/- | ||
|Block= N/A | |Block= N/A | ||
|Properties= [[File:Startupinv.png]] | |Properties= [[File:Startupinv.png]][[File:Counterhit.png]] | ||
}} | }} | ||
|description=Good to avoid chip ccs, or use as wake-up. Useful in blocked cc. | |description=*'''Receives 125% damage when [[Street_Fighter_Alpha_2/System#Counter_Hits|counter hit]].''' | ||
Good to avoid chip ccs, or use as wake-up. Useful in blocked cc. | |||
*Invul on first frame. | |||
----- | ----- | ||
{{p}} | {{p}} | ||
*25-66 frames of invul. forward | *25-66 frames of invul. forward | ||
* | *23-66 frames of invul. backward | ||
*10 frames of recovery | *10 frames of recovery | ||
Teleport that travels a little over full-screen. | Teleport that travels a little over full-screen. | ||
| Line 1,036: | Line 1,057: | ||
{{k}} | {{k}} | ||
*27-51 frames of invul. forward | *27-51 frames of invul. forward | ||
* | *24-51 frames of invul. backward | ||
*10 frames of recovery | *10 frames of recovery | ||
Teleport that travels a little under half-screen. | Teleport that travels a little under half-screen. | ||
| Line 1,044: | Line 1,065: | ||
Startup Invulnerability Notes: | Startup Invulnerability Notes: | ||
*At the end of a super screen freeze, projectiles will start moving before the opponent's character is unfrozen, giving the supers more projectile invul. frames than hit invul. frames. | *At the end of a super screen freeze, projectiles will start moving before the opponent's character is unfrozen, giving the supers more projectile invul. frames than hit invul. frames. | ||
{{MoveData-SFA2 | {{MoveData-SFA2 | ||
|image=A2_EvilRyu_FireballSuper_1.png | |image=A2_EvilRyu_FireballSuper_1.png | ||
| Line 1,058: | Line 1,078: | ||
|version= Level 1 | |version= Level 1 | ||
|subtitle= [[File:P.png]] | |subtitle= [[File:P.png]] | ||
|Damage= | |Damage= 12<sup>[12]</sup>, 11<sup>[12]</sup>, 5<sup>[12]</sup> | ||
|Stun= 0, 2, 2 | |Stun= 0, 2, 2 | ||
|Startup= 5 | |Startup= 5+0 | ||
|Active= 9 | |Active= 9(0)inf | ||
|Frame Adv= -13 | |Frame Adv= -13 | ||
|Meter= 0/0/0 | |Meter= 0/0/0 | ||
| Line 1,071: | Line 1,091: | ||
|version= Level 2 | |version= Level 2 | ||
|subtitle= [[File:P.png]][[File:P.png]] | |subtitle= [[File:P.png]][[File:P.png]] | ||
|Damage= | |Damage= 15<sup>[12]</sup>, 12<sup>[12]</sup>, 7<sup>[12]</sup>, 6<sup>[12]</sup> | ||
|Stun= 0, | |Stun= 0, 1x3 | ||
|Startup= 5 | |Startup= 5+0 | ||
|Active= 9 | |Active= 9(0)inf | ||
|Frame Adv= -10 | |Frame Adv= -10 | ||
|Meter= 0/0/0 | |Meter= 0/0/0 | ||
| Line 1,084: | Line 1,104: | ||
|version= Level 3 | |version= Level 3 | ||
|subtitle= [[File:3p.png]] | |subtitle= [[File:3p.png]] | ||
|Damage= | |Damage= 20<sup>[12]</sup>, 12<sup>[12]</sup>, 10<sup>[12]</sup>, 6<sup>[12]</sup>, 6<sup>[12]</sup> | ||
|Stun= 0, 0, | |Stun= 0, 0, 1x3 | ||
|Startup= 5 | |Startup= 5+0 | ||
|Active= 9 | |Active= 9(0)inf | ||
|Frame Adv= -7 | |Frame Adv= -7 | ||
|Meter= 0/0/0 | |Meter= 0/0/0 | ||
| Line 1,094: | Line 1,114: | ||
}} | }} | ||
|description=Only real use is to blow thru fireballs, sucks as a AA at any lvl other than 1, and you have better choices anyway. Can combo off light attacks. Lvl 1 does does not knock down, and if to close can be hit. | |description=Only real use is to blow thru fireballs, sucks as a AA at any lvl other than 1, and you have better choices anyway. Can combo off light attacks. Lvl 1 does does not knock down, and if to close can be hit. | ||
*'''Cannot be air blocked.''' | |||
----- | ----- | ||
{{AttackColor-SF | {{AttackColor-SF | ||
| Line 1,133: | Line 1,154: | ||
|version= Level 1 | |version= Level 1 | ||
|subtitle= [[File:K.png]] | |subtitle= [[File:K.png]] | ||
|Damage= | |Damage= 11<sup>[13]</sup>, 9<sup>[13]</sup>, 6<sup>[13]</sup>x3 | ||
|Stun= 0x4, 3 | |Stun= 0x4, 3 | ||
|Startup= | |Startup= 5+0 | ||
|Active= 3[(3)3x4] | |Active= 3[(3)3x4] | ||
|Frame Adv= 0 | |Frame Adv= 0 | ||
| Line 1,146: | Line 1,167: | ||
|version= Level 2 | |version= Level 2 | ||
|subtitle= [[File:K.png]][[File:K.png]] | |subtitle= [[File:K.png]][[File:K.png]] | ||
|Damage= | |Damage= 11<sup>[13]</sup>, 9<sup>[13]</sup>, 4<sup>[13]</sup>x7 | ||
|Stun= 0x8, 3 | |Stun= 0x8, 3 | ||
|Startup= | |Startup= 5+0 | ||
|Active= 3[(3)3x8] | |Active= 3[(3)3x8] | ||
|Frame Adv= +1 | |Frame Adv= +1 | ||
| Line 1,159: | Line 1,180: | ||
|version= Level 3 | |version= Level 3 | ||
|subtitle= [[File:3k.png]] | |subtitle= [[File:3k.png]] | ||
|Damage= | |Damage= 5<sup>[13]</sup>x13 | ||
|Stun= 0x12, 3 | |Stun= 0x12, 3 | ||
|Startup= | |Startup= 5+0 | ||
|Active= 3[(3)3x12] | |Active= 3[(3)3x12] | ||
|Frame Adv= +2 | |Frame Adv= +2 | ||
| Line 1,168: | Line 1,189: | ||
|Properties=[[File:Startupinv.png]]<br>[[File:Lowerbodyinv.png]] | |Properties=[[File:Startupinv.png]]<br>[[File:Lowerbodyinv.png]] | ||
}} | }} | ||
|description=Probably the best wake-up super in the game, best used defensively than offensively. Completely safe on block, good chip damage, and good damage. Good anti-cross up when knocked down. Ryu's pushbox is removed throughout the duration of the super. | |description= *A full 2 quarter-circles isn't required. Required inputs: {{d}}{{db}}{{b}}{{d}}{{db}} + {{k}} | ||
Probably the best wake-up super in the game, best used defensively than offensively. Completely safe on block, good chip damage, and good damage. Good anti-cross up when knocked down. Ryu's pushbox is removed throughout the duration of the super. | |||
----- | ----- | ||
{{AttackColor-SF | {{AttackColor-SF | ||
| Line 1,207: | Line 1,229: | ||
|version= Level 1 | |version= Level 1 | ||
|subtitle= [[File:K.png]] | |subtitle= [[File:K.png]] | ||
|Damage= | |Damage= 13<sup>[13]</sup>, 9<sup>[13]</sup>, 12<sup>[13]</sup>, 6<sup>[13]</sup> | ||
|Stun= 0, 0, 2, 2 | |Stun= 0, 0, 2, 2 | ||
|Startup= 5 | |Startup= 5+0 | ||
|Active= 4(0)8(13)5(0)26 | |Active= 4(0)8(13)5(0)26 | ||
|Frame Adv= -30 | |Frame Adv= -30 | ||
| Line 1,220: | Line 1,242: | ||
|version= Level 2 | |version= Level 2 | ||
|subtitle= [[File:K.png]][[File:K.png]] | |subtitle= [[File:K.png]][[File:K.png]] | ||
|Damage= | |Damage= 15<sup>[13]</sup>, 10<sup>[13]</sup>, 8<sup>[13]</sup>, 10<sup>[13]</sup>, 4<sup>[13]</sup>, 4<sup>[13]</sup> | ||
|Stun= | |Stun= 0x3, 1x3 | ||
|Startup= 5 | |Startup= 5+0 | ||
|Active= 4(0)8(13)5(0)26 | |Active= 4(0)8(13)5(0)26 | ||
|Frame Adv= -31 | |Frame Adv= -31 | ||
| Line 1,233: | Line 1,255: | ||
|version= Level 3 | |version= Level 3 | ||
|subtitle= [[File:3k.png]] | |subtitle= [[File:3k.png]] | ||
|Damage= | |Damage= 15<sup>[13]</sup>, 8<sup>[13]</sup>, 11<sup>[13]</sup>, 9<sup>[13]</sup>, 5<sup>[13]</sup>, 9<sup>[13]</sup>, 8<sup>[13]</sup>, 6<sup>[13]</sup> | ||
|Stun= 0x5, | |Stun= 0x5, 1x3 | ||
|Startup= 5 | |Startup= 5+0 | ||
|Active= 4(0)8(13)4(0)8(13)5(0)26 | |Active= 4(0)8(13)4(0)8(13)5(0)26 | ||
|Frame Adv= -37 | |Frame Adv= -37 | ||
| Line 1,243: | Line 1,265: | ||
}} | }} | ||
|description=*The first two hits occur before the super screen freeze ends. | |description=*The first two hits occur before the super screen freeze ends. | ||
*A full 2 quarter-circles isn't required. Required inputs: {{d}}{{df}}{{f}}{{d}}{{df}} + {{k}} | |||
Range is bad, but this thing hurts. Combo 2 point blank lks. | Range is bad, but this thing hurts. Combo 2 point blank lks. | ||
----- | ----- | ||
| Line 1,282: | Line 1,305: | ||
|Damage= 72 | |Damage= 72 | ||
|Stun= 0 | |Stun= 0 | ||
|Startup= | |Startup= 5+7 | ||
|Active= | |Active= 47 | ||
|Frame Adv= N/A | |Frame Adv= N/A | ||
|Meter= 0/ | |Meter= 0/-/0 | ||
|Block= N/A | |Block= N/A | ||
|Properties= [[File:Startupinv.png]][[File:Throw.png]]<br>[[File:Hardknockdown.png]] | |Properties= [[File:Startupinv.png]][[File:Throw.png]]<br>[[File:Hardknockdown.png]] | ||
| Line 1,292: | Line 1,315: | ||
*6 frames of startup projectile invul. | *6 frames of startup projectile invul. | ||
*Note: Requires 3 bars of meter. | *Note: Requires 3 bars of meter. | ||
Command grab that travels a little less than 2/ | Command grab that travels a little less than 2/3 screen. | ||
Horrible in this game, you can be point blank and they can jump. Go for it at your own risk, definite style points if you land it. | Horrible in this game, you can be point blank and they can jump. Go for it at your own risk, definite style points if you land it. | ||
}} | }} | ||
| Line 1,334: | Line 1,357: | ||
=Combos= | =Combos= | ||
----- | ----- | ||
These combos are exclusive only to Evil Ryu, for more combos that both Evil Ryu and regular Ryu can do, click [https://wiki.supercombo.gg/w/Street_Fighter_Alpha_2/Ryu#Combos here] | |||
{{Content Box-SFA2 | {{Content Box-SFA2 | ||
|padding=yes | |padding=yes | ||
| Line 1,342: | Line 1,367: | ||
(standing or crouching) | (standing or crouching) | ||
c.fp xx hadouken | c.fp xx hadouken | ||
c.lk x2 or c. mk xx any lvl shoryureppa | |||
c.lk x3 or c.mk xx any lvl shinku hadouken | |||
'''Standing Chars Only''' | |||
j.{{mp}} , cr.{{mk}} xx {{hp}} Hadouken OR Any Level Shinkuu Hadou OR Any Level Shoryureppa (End with Reppa for the most damaging combo) | |||
'''Corner Only''' | |||
c.fp xx hk hurricane (hurts sagat bad) | c.fp xx hk hurricane (hurts sagat bad) | ||
j. mp xx Any Level Reppa (Timing is slightly later against smaller characters like Chun) | |||
<div style="width:100%;max-width:450px;"><youtube>chCru88njIM</youtube></div> | <div style="width:100%;max-width:450px;"><youtube>chCru88njIM</youtube></div> | ||
Latest revision as of 20:46, 15 May 2025
| Evil Ryu | |
|---|---|
| |
| Health: | 144 |
| Defensive Rating: | -4 |
| Stun: | 40 |
| Walk Speed Forward: | 300 |
| Walk Speed Backward: | 200 |
| Jump Backward: | 51f (3+48+0) |
| Neutral Backward: | 50f (3+47+0) |
| Jump Forward: | 49f (3+46+0) |
| Wake-Up: | 51f |
| Quick Rise: | 20f |
| Throw Range: | 20 |
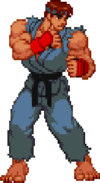
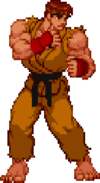
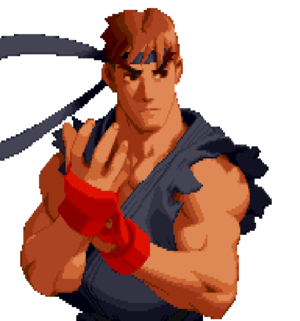
Essentially a non-canon version of Ryu with some new moves, and slight differences on some existing moves. A mix of Akuma and Ryu, in other words.
Players to watch:
PezMan81
Differences From Ryu
Hadoken: All strengths are red fireballs and knockdown at close range. ![]() and
and ![]() fireball do more stun.
fireball do more stun.
Shoryuken: ![]() and
and ![]() versions are multi-hitting which may result in dropped combos if not done up close. This causes them to do less damage and stun as an anti-air, but more damage on the ground, and gives him new juggle abilities(similar to Akuma).
versions are multi-hitting which may result in dropped combos if not done up close. This causes them to do less damage and stun as an anti-air, but more damage on the ground, and gives him new juggle abilities(similar to Akuma).
Tatsu: ![]() and
and ![]() versions are multi-hitting and have an additional hitbox on the way up (similar to Akuma/Ken). This results in new juggle abilities(similar to Akuma), but all versions do less damage and stun.
versions are multi-hitting and have an additional hitbox on the way up (similar to Akuma/Ken). This results in new juggle abilities(similar to Akuma), but all versions do less damage and stun.
Air Tatsu: ![]() and
and ![]() versions are multi-hitting. All versions do less damage(unless getting all hits) and stun.
versions are multi-hitting. All versions do less damage(unless getting all hits) and stun.
Teleport: New move (similar to Akuma).
Messatsu Goshoryu: New move (similar to Akuma/Ken).
Raging Demon: New move (similar to Akuma).
Infinite CC Blowout Range: CC blowout has no range restriction, will hit full-screen and will blowout even active normals. This is unique to Evil Ryu and results in a much wider range of CC usage and new ways to combo into CC.
Defense Modifier: Has a lower defense modifier, which results in Evil Ryu taking more damage (similar to Akuma).
| Strengths | Weaknesses |
|---|---|
|
|
Normal Moves
| SFA2 Framedata Glossary | |
|---|---|
| Damage |
Units of base damage inflicted by the move (100% life bar = 144 units of health). Most moves have a damage range; the number inside the square brackets indicates which Random Damage Table the move uses to look up any additional damage and the % chance of doing so. |
| Stun |
Units of stun inflicted by the move. |
| Startup |
The frame the move hits on (1st active frame). Super moves with a screen freeze will separate pre- and post-screen freeze startup frames by a '+' (Ex: 5+0). |
| Active |
The portion of a move that can hit. How many frames a move remains active for. ()=Inactive frames in-between active frames. [xN]=Repeated sequences. |
| Frame Adv |
The frame advantage values when the attack is blocked. (Add +1 frame to all OnBlockAdv values for the move's OnHitAdv value; Ex: +2oB/+3oH, -4oB/-3oH) |
| Meter |
The units of meter gained on whiff/block/hit. (48, 96, and 144 units of meter are required for 1, 2, and 3 bars of meter respectively) |
| Block |
Low attacks must be blocked crouching. High attacks must be blocked standing. Mid attacks can be blocked either way. |
| Properties |
|
| Frames |
All framedata collected with the game speed set to normal, where the game tickrate and framerate are the same(60fps). |
| Speed |
All framedata collected with the game speed set to normal. |
| Hitboxes |
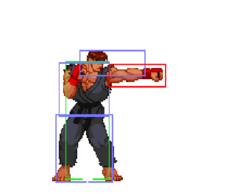
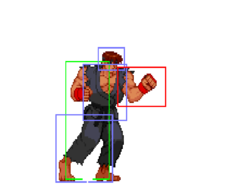
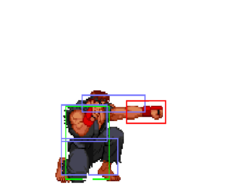
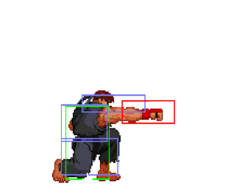
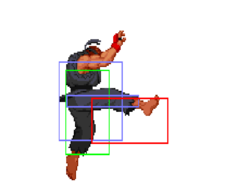
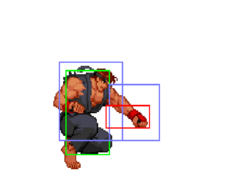
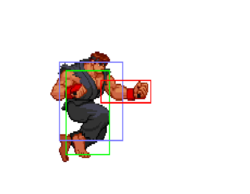
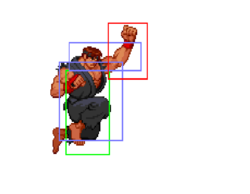
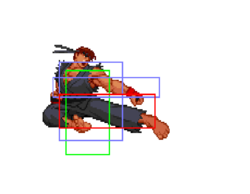
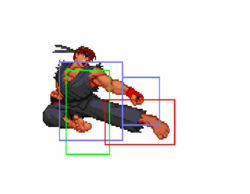
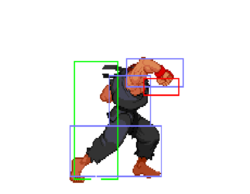
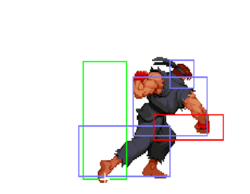
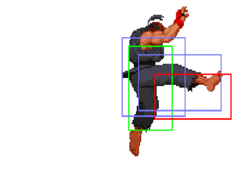
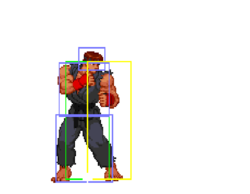
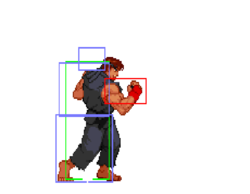
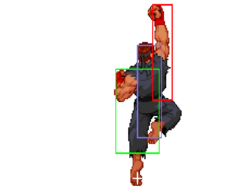
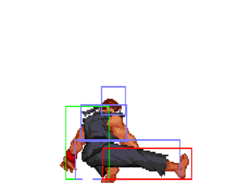
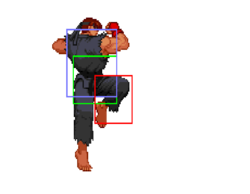
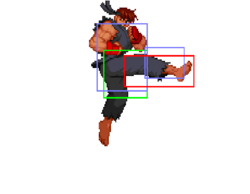
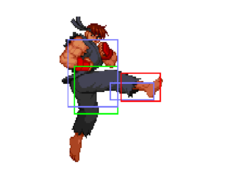
All hitbox images have the character standing/jumping in the exact same position, so hitbox distances can be easily compared.
|
| Credit | Damage, stun, framedata, meter, and updated hitboxes collected by |
Standing
Crouching
| Damage | Stun | Startup | Active | Frame Adv | Meter | Block | Properties |
|---|---|---|---|---|---|---|---|
| 15[2], 13[0] | 8, 6 | 5 | 4(0)8 | -2 | 2/5/9 |
- First hit is cancelable.
- Hits 1 time.
- First hit has to be blocked low if hit at max range against some characters.
Uppercut, probably one of the best normal anti-airs in the game. Also this is a super meaty, allowing link after ward.
Neutral Jumping
Diagonal Jumping
Command Normals
Sakatsu Wari
Overhead, Collarbone Breaker![]() +
+ ![]()
| Damage | Stun | Startup | Active | Frame Adv | Meter | Block | Properties |
|---|---|---|---|---|---|---|---|
| 5[1], 14[0] | 6, 2 | 23 | 4(0)4 | -7 | 1/2,2/3,3 | - |
- Hits 2 times
- Unsafe; can be punished by CC and fast normals.
- Punishable on hit.
- Tied for 2nd fastest overhead in the game. (Alpha2Overheads).
A overhead with very good range.
Normal Throws
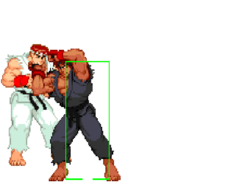
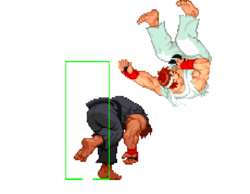
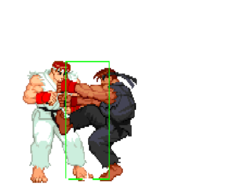
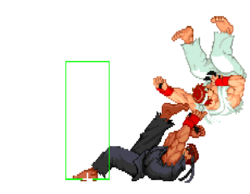
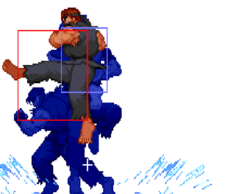
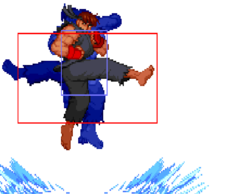
| Damage | Stun | Startup | Active | Frame Adv | Meter | Block | Properties |
|---|---|---|---|---|---|---|---|
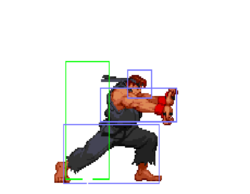
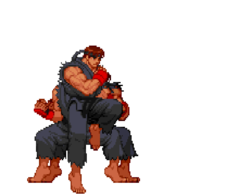
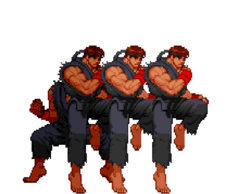
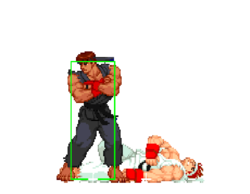
| 19[0] | 0 | 1 | N/A | N/A | -/-/3 | N/A |
- Deals 9 damage when opponent tech throws.
- Ryu has the 2rd best throw range in the game (Alpha2ThrowRanges).
Alpha Counters
Punch Alpha Counter
(while in blockstun)![]() +
+ ![]()
Kick Alpha Counter
(while in blockstun)![]() +
+ ![]()
Special Moves
| Version | Damage | Stun | Startup | Active | Frame Adv | Meter | Block | Properties |
|---|---|---|---|---|---|---|---|---|
| 15[5], 14[6] | 8, 12 | 12 | 3(0)inf | -11 | 4/5/7 | |||
| 16[6], 14[6] | 10, 12 | 12 | 3(0)inf | -12 | 4/5/7 | |||
| 18[9], 14[6] | 12, 12 | 12 | 3(0)inf | -13 | 4/5/7 |
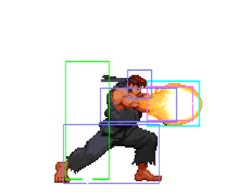
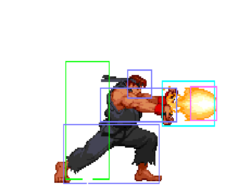
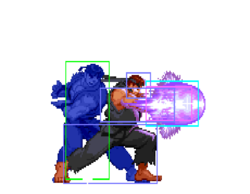
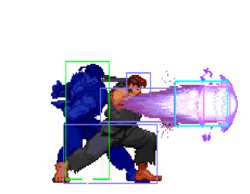
Shakunetsu Hadoken aka Red Fireball A fireball. His best poke, good release speed and damage. Throw a hell of alot of these but be smart with it. Throwing smart fireballs will annoy your opponent, just tossing them out will get you killed.
![]()
- Softknockdown when hit within the first 3 frames.
- Speed: 300 pixels per 100 frames; slowest fireball in the game (Alpha2Fireballs).
![]()
- Softknockdown when hit within the first 3 frames.
- Speed: 375 pixels per 100 frames (Alpha2Fireballs).
![]()
- Softknockdown when hit within the first 4 frames.
- Speed: 450 pixels per 100 frames; 4th fastest fireball in the game (Alpha2Fireballs).
Shoryuken
Dragon Punsh, Uppercut![]() +
+ ![]()
- Unscaled damage in CC.
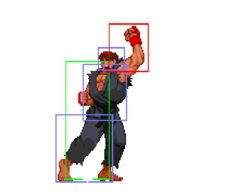
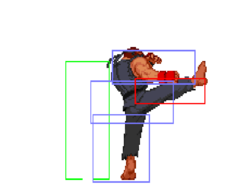
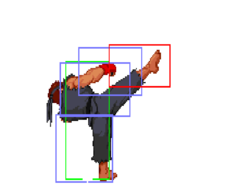
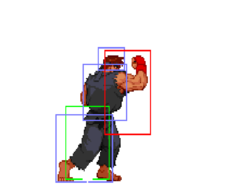
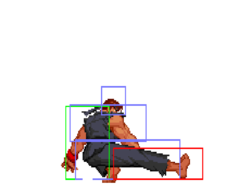
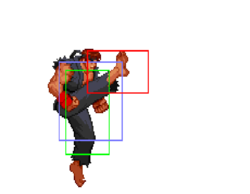
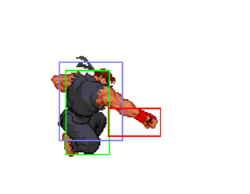
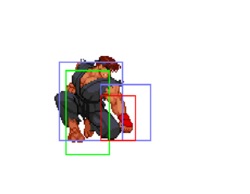
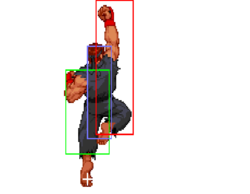
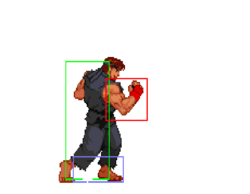
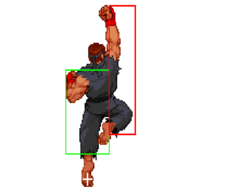
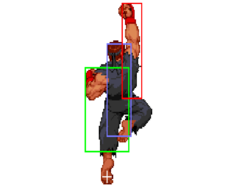
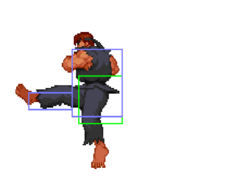
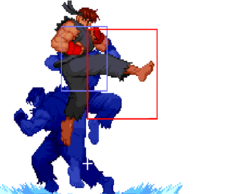
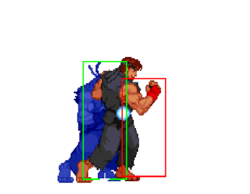
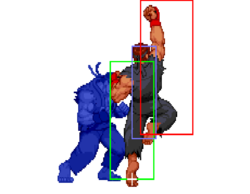
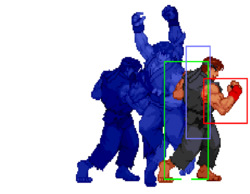
![]() - [Hitboxes pictured]
- [Hitboxes pictured]
- 3 frames of startup invul; 0 of which while active.
- Can't be air-blocked until frame 17.
- Hits 1 time max.
Best used as an invincible anti-air. Will also anti-air jump-in CCs. Not a great reversal because of the lower hurtbox during the first hit; it will trade with low attacks. Amazing way to build meter from full-screen when kara-canceled with cr.hk (11 units).
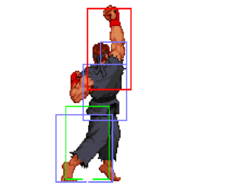
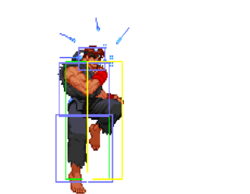
![]()
- 7 frames of startup invul; 4 of which while active.
- Can't be air-blocked until frame 10.
- Hits 2 time max.
Best used as a reversal. Not the best version to anit-air with because it's not invincible after the first hit.
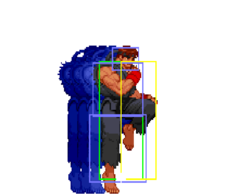
![]()
- 7 frames of startup invul; 5 of which while active.
- Can't be air-blocked until frame 10.
- Hits 3 time max.
Hp dp is best used as a reversal. Not the best version to anit-air with because it's not invincible after the first hit.
Tatsumaki Senpukyaku
Hurricane Kick, Tatsu![]() +
+ ![]()
Used for mobility and to punish fireballs, use ![]() version to pass fireballs when you cant use
version to pass fireballs when you cant use ![]() version to hit opponent.
version to hit opponent.
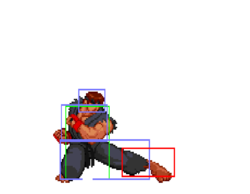
![]()
- Hits 1 time max.
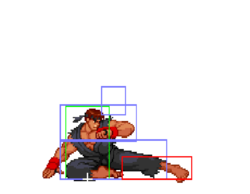
![]()
- Hits 2 time max.
![]()
- Hits 2 time max.
(air)Tatsumaki Senpukyaku
(air)Hurricane Kick, (air)Tatsu
(in air)![]() +
+ ![]()
| Version | Damage | Stun | Startup | Active | Frame Adv | Meter | Block | Properties |
|---|---|---|---|---|---|---|---|---|
| 11[7] | 1 | 7 | 3 | - | 6/7/8 | |||
| 7[7], 7[7] | 1, 1 | 7 | 3(15)3 | - | 6/6+1 per hit/6+2 per hit | |||
| 7[8]x3 | 1x3 | 7 | 3(9)3(9)3 | - | 6/6+1 per hit/6+2 per hit |
If connected against a grounded opponent allows for a juggle with dj.![]() , DP or supers.
, DP or supers.
![]()
- Hits 2 times.
![]()
- Hits 2 times max.
Hado no Kamae
Fake Fireball![]() + Taunt (Start)
+ Taunt (Start)
| Damage | Stun | Startup | Active | Frame Adv | Meter | Block | Properties |
|---|---|---|---|---|---|---|---|
| N/A | N/A | N/A | N/A | N/A | 0/-/- | N/A |
- Receives 125% damage when counter hit.
Ryu will use his fireball animation where nothing comes out, but it has very fast recovery and can catch foes off-guard during a fireball war. Not used often due to the placement of the start button can vary depending on your controller setup, and a inputting it incorrectly will give you a regular taunt instead, which can be dangerous.
| Version | Damage | Stun | Startup | Active | Frame Adv | Meter | Block | Properties |
|---|---|---|---|---|---|---|---|---|
| N/A | N/A | N/A | N/A | N/A | 2/-/- | N/A | ||
| N/A | N/A | N/A | N/A | N/A | 2/-/- | N/A |
- Receives 125% damage when counter hit.
Good to avoid chip ccs, or use as wake-up. Useful in blocked cc.
- Invul on first frame.
![]()
- 25-66 frames of invul. forward
- 23-66 frames of invul. backward
- 10 frames of recovery
Teleport that travels a little over full-screen.
![]()
- 27-51 frames of invul. forward
- 24-51 frames of invul. backward
- 10 frames of recovery
Teleport that travels a little under half-screen.
Super Moves
Startup Invulnerability Notes:
- At the end of a super screen freeze, projectiles will start moving before the opponent's character is unfrozen, giving the supers more projectile invul. frames than hit invul. frames.
Shinku Hadoken
Fireball Super![]()
![]() +
+ ![]()
Only real use is to blow thru fireballs, sucks as a AA at any lvl other than 1, and you have better choices anyway. Can combo off light attacks. Lvl 1 does does not knock down, and if to close can be hit.
- Cannot be air blocked.
Level 1
- 4 frames of startup hit invul.; 0 of which while active.
- 6 frames of startup projectile invul.
- Hits 3 times.
- Punishable on hit.
Level 2
- 4 frames of startup hit invul.; 0 of which while active.
- 6 frames of startup projectile invul.
- Hits 4 times.
Level 3
- 4 frames of startup hit invul.; 0 of which while active.
- 6 frames of startup projectile invul.
- Hits 5 times.
Shinku Tatsumaki Senpukyaku
Hurricane Kick Super![]()
![]() +
+ ![]()
- A full 2 quarter-circles isn't required. Required inputs:


 +
+ 
Probably the best wake-up super in the game, best used defensively than offensively. Completely safe on block, good chip damage, and good damage. Good anti-cross up when knocked down. Ryu's pushbox is removed throughout the duration of the super.
Level 1
- 5 frames of startup hit invul.; 0 of which while active.
- 15 frames of startup projectile invul.
- Hits 5 times.
Level 2
- 6 frames of startup hit invul.; 1 of which while active.
- 16 frames of startup projectile invul.
- Hits 9 times.
Level 3
- 7 frames of startup hit invul.; 2 of which while active.
- 17 frames of startup projectile invul.
- Hits 13 times.
Messatsu Goshoryu
Dragon Punch Super![]()
![]() +
+ ![]()
- The first two hits occur before the super screen freeze ends.
- A full 2 quarter-circles isn't required. Required inputs:


 +
+ 
Range is bad, but this thing hurts. Combo 2 point blank lks.
Level 1
- 5 frames of startup hit invul.; 1 of which while active.
- 10 frames of startup projectile invul.
- Hits 4 times.
Level 2
- 5 frames of startup hit invul.; 1 of which while active.
- 14 frames of startup projectile invul.
- Hits 6 times.
Level 3
- 5 frames of startup hit invul.; 1 of which while active.
- 18 frames of startup projectile invul.
- Hits 8 times.
| Damage | Stun | Startup | Active | Frame Adv | Meter | Block | Properties |
|---|---|---|---|---|---|---|---|
| 72 | 0 | 5+7 | 47 | N/A | 0/-/0 | N/A |
- 6 frames of startup hit invul.; 0 of which while active.
- 6 frames of startup projectile invul.
- Note: Requires 3 bars of meter.
Command grab that travels a little less than 2/3 screen. Horrible in this game, you can be point blank and they can jump. Go for it at your own risk, definite style points if you land it.
The Basics
I like to zone with ryu, fireball away, build meter, cc for chip whatever. E. Ryu is scary cause its hard to rush him when he has meter, after a few eaten ccs your opponent wont rush you so much. This is in you favor since his fireball is so good. Some matches I burn a lvl 1 cc as soon as I get it just to push them back or do some mix up, which is effective to an extent. AC’s hurt E. Ryu, but you can also do his cc mix-up to bait it out. If you are getting rushed, no other super should be used other than hurricane kick super for wake up, or cc.
Advanced Strategy
Lvl 1 cc mix-up:
Activate, 4 lp fireballs, PPP teleport
Now this put you in a shield of Fireballs, the teleport instantly recovers in cc, and if your opponent is blocking this you can:
Throw them, you can actually throw then in between fireball hits. Overhead, depend when you hit this you can sometimes combo after due to the fireballs hitting. Nothing, let them AC and block, they just wasted some meter. What to do it you hit them with blowout:
Well if within or a little outside sweep range go for his cc:
c.rh xx lk hurricane xN, fp dp
Hadouken Knockdown
After a c.mk xx fireball knockdown, hold uf, j.lk at the last second. Its a safe jump in and if it hits go into c.lk x2 fireball. Alot of times they try to throw which leads to c.lk x2 xx fireball another knockdown into the same situation. Repeat til j.lk and c.lk is blocked.
From the blocked c.lk, go for throw, or c.mk xx fireball if you think they expected your throw attempt. If they jump at you when you have meter, cc them with s.mp/c.mp xx lk hurricanes xN, end with hp dp. If they jump from afar, actiavte, s.fp xx hk hurricane into lk hurricanes, end with dp.
C.fp is one of the best meaties and if it hits you can link a c.mk or sweep, if blocked walk forward and throw, or go for a counter hit. S.mk is a really good anti cross up, hitting instantly above his head.
Combos
These combos are exclusive only to Evil Ryu, for more combos that both Evil Ryu and regular Ryu can do, click here
(next to opponent standing) c.mk (or c.lk x2) xx lk hurricane, fp dp
(standing or crouching) c.fp xx hadouken
c.lk x2 or c. mk xx any lvl shoryureppa
c.lk x3 or c.mk xx any lvl shinku hadouken
Standing Chars Only
j.![]() , cr.
, cr.![]() xx
xx ![]() Hadouken OR Any Level Shinkuu Hadou OR Any Level Shoryureppa (End with Reppa for the most damaging combo)
Hadouken OR Any Level Shinkuu Hadou OR Any Level Shoryureppa (End with Reppa for the most damaging combo)
Corner Only
c.fp xx hk hurricane (hurts sagat bad)
j. mp xx Any Level Reppa (Timing is slightly later against smaller characters like Chun)
Custom Combos
UPDATED: Better Customs at lvl 3
c.rh xx lk hurricane x3, fp dp x2 c.rh xx lk hurricane x2, lp dp, lp dp, hp dp c.rh xx lk hurricane x3, hp fireball x4, hp dp c.rh xx hp dp, hp dp, lp dp, hp dp. Neat lvl 1:
s.mp xN xx lp dp, lk hurricane, lp dp Note in CC mode E. Ryu’s specials are like regular Ryu’s.
Now thats not it. Due to infinite blowout E. Ryu can COMBO into CC. How? Here’s How:
c.mp meaty c.fp meaty c.fp c.lp any jump in
Activating after any of these let to continue to combo in CC, starting with a c.rh.
BUT WAIT THERE’S MORE!
Tired of people jumping on you, well then just anti-air cc. Shoto’s have probably the best AA ccs. If no cc is available, used c.fp or s.mp (cancel into hurricane to move close or hadouken to push back). S.mk works as a anti-cross up.
Activate, s.mp xx lk hurricane xN, fp dp
Now if they jump from afar…
Activate, s.fp xx rh hurricane, fp dp
Congrats! You just made you opponent think twice about jumping on you which leads to more hadouken and cc mix-up fun! This is just a quick overview if you have any in depth question feel free to ask.
Also vs fireballers, if you hit a air hurricane kick…
immeadiately jump activate, j.mp xx hurricane, land, continue hurricane kick juggle, end with fp dp.
Match-ups
I think the best Anti Rose character possibly could be E. Ryu. His blow out custom is really useful against Rose’s low strong… Just my opinion. -ShinryuX
Miscellaneous
Move the cursor to Ryu, press START, move the cursor this order: Right (Adon), Up (Akuma), and down (Adon), left (back to Ryu). Press and HOLD start, then press a punch or kick without releasing start.
Evil Ryu is only in the US versions of the game, while his CC activation can cause hit stun from anywhere on screen, he doesn't completely overpower the regular cast. The character is legal unless noted by the tournament organizer.
