| (57 intermediate revisions by 5 users not shown) | |||
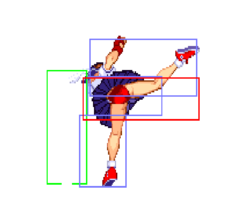
| Line 1: | Line 1: | ||
<templatestyles src="CharacterPage-SFA2/styles.css"/> | |||
{{TOClimit}} | |||
{{HiddenTOCHeader | |||
|header= =Overview=}} | |||
{{CharacterOverview-SFA2 | |||
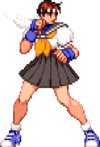
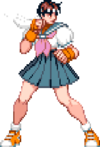
|overview=Sakura has an unusual interest in street fighting. Most high school girls don't walk down the street looking to pick a fight, but ever since her run-in with three college men, she has sought to take her revenge. | |||
'''Players to watch:''' | |||
[https://www.fightcade.com/id/Hokuto Hokuto], [https://www.fightcade.com/id/VickiViperZabel VickiViper] | |||
<br><br> | |||
<center>'''Moveset'''</center> | |||
[[File: | <center><div style="width:100%;max-width:450px;"><youtube>TmY1DhxKJjs</youtube></div></center> | ||
<br> | |||
Sakura is very high in the tier list, and for a good reason, being right there with Gief in the high tier group, right under the big 4. She is very difficult to fight, and one knockdown can win her the round. While not extremely damaging, she has some great tools that give her the ability to win against a lot of characters. Her main goal should be to get close to her opponent and use her punch throw to set up her most damaging mixups. Her quick walk speed and good grounded normals give her some tools that can allow her to do just that with smart play. | |playstyle=[[File:A2_Icon_Sakura.png|30px]] Sakura, is very high in the tier list, and for a good reason, being right there with Gief in the high tier group, right under the big 4. She is very difficult to fight, and one knockdown can win her the round. While not extremely damaging, she has some great tools that give her the ability to win against a lot of characters. Her main goal should be to get close to her opponent and use her punch throw to set up her most damaging mixups. Her quick walk speed and good grounded normals give her some tools that can allow her to do just that with smart play.'' | ||
|pros=*Very good pokes | |||
*Very good pokes | |||
*Builds meter fast | *Builds meter fast | ||
* | *Great ambiguous cross-up that loops | ||
*Damaging combos | *Damaging combos | ||
*BnB leads to | *High damage and stun BnB that leads to a ambiguous cross-up loop | ||
*Punch throw leads to | *Punch throw leads to ambiguous cross-up loop | ||
*Only character who can (easily) combo after | *ACs lead to ambiguous cross-up loop | ||
*Only character who can (easily) combo after an overhead | |||
|cons=*Can be hard to get in | |||
*Can be hard to get in | |||
*No reversal outside cc/super | *No reversal outside cc/super | ||
* | *Negative defensive rating; takes slightly more damage on high damage attacks (>15 damage) | ||
|name=Sakura | |||
|image=SFA2_Sakura_Portrait.png | |||
|health=144 | |||
|rating=-2 | |||
|stun=40 | |||
|fSpeed=300 | |||
|bSpeed=250 | |||
|bJump=51f (3+48+0) | |||
|nJump=50f (3+47+0) | |||
|fJump=49f (3+46+0) | |||
|wakeupNormal=51f | |||
|wakeupQuick=20f | |||
|throw=17 | |||
|colorsName=Sakura | |||
|old=no | |||
}} | |||
[[File: | {{HiddenTOCHeader | ||
|header= =Move List=}} | |||
== Normal Moves == | |||
<center>{{FrameDataKey-SFA2 | |||
|credit=Damage, stun, framedata, meter, and updated hitboxes collected by [[File:A2_Icon_ChunLi.png]][[User:Veri7as|Veri7as]], July 2022 | |||
}}</center> | |||
===Standing=== | |||
{{MoveData-SFA2 | |||
|image=A2_Sakura_st.lp.png | |||
|imageSize=250px | |||
|caption= | |||
|name= | |||
|subtitle= | |||
|input=st.[[File:Lp.png]] | |||
|data= | |||
{{AttackData-SFA2 | |||
|Damage= 5<sup>[0]</sup> | |||
|Stun= 3 | |||
|Startup= 3 | |||
|Active= 4 | |||
|Frame Adv= +3 | |||
|Meter= 0/1/2 | |||
|Block=[[File:Mid.png]] | |||
|Properties=[[File:Rpdfire.png]][[File:Chaincancel.png]]<br>[[File:Specialcancel.png]][[File:Supercancel.png]] | |||
}} | |||
|description=*Can rapid fire into itself or chain cancelled into: st.{{lk}}, cr.{{lp}} & cr.{{lk}}. | |||
Good frame advantage and cant be ducked by most characters, annoying poke tool up close. | |||
}} | |||
{{MoveData-SFA2 | |||
|image=A2_Sakura_st.mp.png | |||
|imageSize=250px | |||
|caption= | |||
|name= | |||
|subtitle= | |||
|input=st.[[File:Mp.png]] | |||
|data= | |||
{{AttackData-SFA2 | |||
|Damage= 10<sup>[2]</sup> | |||
|Stun= 5 | |||
|Startup= 6 | |||
|Active= 3 | |||
|Frame Adv= +5 | |||
|Meter= 1/3/6 | |||
|Block=[[File:Mid.png]] | |||
|Properties=[[File:Specialcancel.png]]<br>[[File:Supercancel.png]] | |||
}} | |||
|description= Good frame advantage and priority, use to stuff attacks like you would shotos c.mp. | |||
}} | |||
{{MoveData-SFA2 | |||
|image=A2_Sakura_st.hp_1.png | |||
|imageSize=250px | |||
|image2=A2_Sakura_st.hp_2.png | |||
|imageSize2=250px | |||
|caption= | |||
|name= | |||
|subtitle= | |||
|input=st.[[File:Hp.png]] | |||
|data= | |||
{{AttackData-SFA2 | |||
|Damage= 12<sup>[2]</sup>, 11<sup>[2]</sup> | |||
|Stun= 6, 6 | |||
|Startup= 7 | |||
|Active= 4(0)4 | |||
|Frame Adv= -9 | |||
|Meter= 2/5/9 | |||
|Block=[[File:Mid.png]] | |||
|Properties=[[File:Specialcancel.png]]<br>[[File:Supercancel.png]] | |||
}} | |||
|description= *Hits 1 time. | |||
*First hit is cancellable. | |||
Great range and good poke cancelled into fireball or hk hurricane. | |||
}} | |||
{{MoveData-SFA2 | |||
|image=A2_Sakura_st.lk.png | |||
|imageSize=250px | |||
|caption= | |||
|name= | |||
|subtitle= | |||
|input=st.[[File:Lk.png]] | |||
|data= | |||
{{AttackData-SFA2 | |||
|Damage= 6<sup>[0]</sup> | |||
|Stun= 3 | |||
|Startup= 7 | |||
|Active= 6 | |||
|Frame Adv= -4 | |||
|Meter= 0/1/2 | |||
|Block=[[File:Mid.png]] | |||
|Properties=[[File:Specialcancel.png]]<br>[[File:Supercancel.png]] | |||
}} | |||
|description= Good range, mainly used to combo into hp shou’oken. | |||
}} | |||
{{MoveData-SFA2 | |||
|image=A2_Sakura_st.mk.png | |||
|imageSize=250px | |||
|caption= | |||
|name= | |||
|subtitle= | |||
|input=st.[[File:Mk.png]] | |||
|data= | |||
{{AttackData-SFA2 | |||
|Damage= 10<sup>[2]</sup> | |||
|Stun= 5 | |||
|Startup= 9 | |||
|Active= 4 | |||
|Frame Adv= 0 | |||
|Meter= 1/3/6 | |||
|Block=[[File:Mid.png]] | |||
|Properties=- | |||
}} | |||
|description= Very good anti-air, not used as much as cr.fp. Very good angle to it, similar to Adon’s df+mk. | |||
}} | |||
{{MoveData-SFA2 | |||
|image=A2_Sakura_st.hk.png | |||
|imageSize=250px | |||
|caption= | |||
|name= | |||
|subtitle= | |||
|input=st.[[File:Hk.png]] | |||
|data= | |||
{{AttackData-SFA2 | |||
|Damage= 11<sup>[2]</sup> | |||
|Stun= 7 | |||
|Startup= 8 | |||
|Active= 5 | |||
|Frame Adv= +2 | |||
|Meter= 2/5/9 | |||
|Block=[[File:Mid.png]] | |||
|Properties= - | |||
}} | |||
|description= Sakura’s main poke, good range, priority. | |||
}} | |||
[[File: | ===Crouching=== | ||
{{MoveData-SFA2 | |||
|image=A2_Sakura_cr.lp.png | |||
|imageSize=250px | |||
|caption= | |||
|name= | |||
|subtitle= | |||
|input=cr.[[File:Lp.png]] | |||
|data= | |||
{{AttackData-SFA2 | |||
|Damage= 5<sup>[0]</sup> | |||
|Stun= 1 | |||
|Startup= 4 | |||
|Active= 3 | |||
|Frame Adv= +3 | |||
|Meter= 0/1/2 | |||
|Block=[[File:Low.png]] | |||
|Properties=[[File:Rpdfire.png]][[File:Chaincancel.png]]<br>[[File:Specialcancel.png]][[File:Supercancel.png]] | |||
}} | |||
|description= *Can rapid fire into itself or chain cancelled into: st.{{lp}}, st.{{lk}} & cr.{{lk}}. | |||
}} | |||
{{MoveData-SFA2 | |||
|image=A2_Sakura_cr.mp_1.png | |||
|imageSize=250px | |||
|image2=A2_Sakura_cr.mp_2.png | |||
|imageSize2=250px | |||
|caption= | |||
|name= | |||
|subtitle= | |||
|input=cr.[[File:Mp.png]] | |||
|data= | |||
{{AttackData-SFA2 | |||
|Damage= 10<sup>[1]</sup>, 11<sup>[1]</sup> | |||
|Stun= 6, 6 | |||
|Startup= 7 | |||
|Active= 2(0)4 | |||
|Frame Adv= -7, -5 | |||
|Meter= 1/3/6 | |||
|Block=[[File:Low.png]] | |||
|Properties=[[File:Specialcancel.png]]<br>[[File:Supercancel.png]] | |||
}} | |||
|description= *Hits 1 time. | |||
*Second hit is not special cancellable. | |||
}} | |||
Startup | {{MoveData-SFA2 | ||
|image=A2_Sakura_cr.hp_1.png | |||
|imageSize=250px | |||
|image2=A2_Sakura_cr.hp_2.png | |||
|imageSize2=250px | |||
|caption= | |||
|name= | |||
|subtitle= | |||
|input=cr.[[File:Hp.png]] | |||
|data= | |||
{{AttackData-SFA2 | |||
|Damage= 13<sup>[2]</sup>, 12<sup>[2]</sup> | |||
|Stun= 8, 6 | |||
|Startup= 5 | |||
|Active= 4(0)4 | |||
|Frame Adv= -7 | |||
|Meter= 2/5/9 | |||
|Block=[[File:Low.png]] | |||
|Properties=[[File:Specialcancel.png]]<br>[[File:Supercancel.png]] | |||
}} | |||
|description= *Hits 1 time. | |||
*Second hit is not special cancellable. | |||
Great anti-air. | |||
}} | |||
{{MoveData-SFA2 | |||
|image=A2_Sakura_cr.lk.png | |||
|imageSize=250px | |||
|caption= | |||
|name= | |||
|subtitle= | |||
|input=cr.[[File:Lk.png]] | |||
|data= | |||
{{AttackData-SFA2 | |||
|Damage= 5<sup>[0]</sup> | |||
|Stun= 3 | |||
|Startup= 3 | |||
|Active= 4 | |||
|Frame Adv= +3 | |||
|Meter= 0/1/2 | |||
|Block=[[File:Low.png]] | |||
|Properties=[[File:Rpdfire.png]][[File:Chaincancel.png]]<br>[[File:Specialcancel.png]][[File:Supercancel.png]] | |||
}} | |||
|description=*Can rapid fire into itself or chain cancelled into: st.{{lp}}, st.{{lk}} & cr.{{lp}}. | |||
Her best normal up close, leading to her BnB and tick throws. | |||
}} | |||
cr.[[File: | {{MoveData-SFA2 | ||
|image=A2_Sakura_cr.mk.png | |||
|imageSize=250px | |||
|caption= | |||
|name= | |||
|subtitle= | |||
|input=cr.[[File:Mk.png]] | |||
|data= | |||
{{AttackData-SFA2 | |||
|Damage= 11<sup>[1]</sup> | |||
|Stun= 1 | |||
|Startup= 5 | |||
|Active= 4 | |||
|Frame Adv= -7 | |||
|Meter= 1/3/6 | |||
|Block=[[File:Low.png]] | |||
|Properties=- | |||
}} | |||
|description= Good range and priority. | |||
}} | |||
[[File: | {{MoveData-SFA2 | ||
|image=A2_Sakura_cr.hk.png | |||
|imageSize=250px | |||
|caption= | |||
|name= | |||
|subtitle= | |||
|input=cr.[[File:Hk.png]] | |||
|data= | |||
{{AttackData-SFA2 | |||
|Damage= 13<sup>[2]</sup> | |||
|Stun= 7 | |||
|Startup= 8 | |||
|Active= 3 | |||
|Frame Adv= -6 | |||
|Meter= 2/5/9 | |||
|Block=[[File:Low.png]] | |||
|Properties=[[File:Softknockdown.png]] | |||
}} | |||
|description= | |||
}} | |||
{{MoveData-SFA2 | |||
|image=A2_Sakura_Taunt.png | |||
|imageSize=250px | |||
|caption= | |||
|name=Taunt | |||
|subtitle= | |||
|input=(Start) | |||
|data= | |||
{{AttackData-SFA2 | |||
|Damage= 1<sup>[0]</sup>x4 | |||
|Stun= 0x4 | |||
|Startup= 13 | |||
|Active= [6(6)x3]6 | |||
|Frame Adv= -47 | |||
|Meter= 0/0/1 | |||
|Block=[[File:Mid.png]] | |||
|Properties= | |||
}} | |||
|description= *'''Punishable on hit.''' | |||
Sakura's taunt has a hitbox and is possible to kill with. She can taunt multiple times during a CC, but only once per round outside of CC. | |||
}} | |||
===Neutral Jumping=== | |||
{{MoveData-SFA2 | |||
|image=A2_Sakura_nj.lp.png | |||
|imageSize=250px | |||
|caption= | |||
|name= | |||
|subtitle= | |||
|input=nj.[[File:Lp.png]] | |||
|data= | |||
{{AttackData-SFA2 | |||
|Damage= 9<sup>[0]</sup> | |||
|Stun= 3 | |||
|Startup= 4 | |||
|Active= 11 | |||
|Frame Adv= | |||
|Meter= 0/1/2 | |||
|Block=[[File:High.png]] | |||
|Properties= | |||
}} | |||
|description= | |||
}} | |||
{{MoveData-SFA2 | |||
|image=A2_Sakura_nj.mp.png | |||
|imageSize=250px | |||
|caption= | |||
|name= | |||
|subtitle= | |||
|input=nj.[[File:Mp.png]] | |||
|data= | |||
{{AttackData-SFA2 | |||
|Damage= 10<sup>[1]</sup> | |||
|Stun= 6 | |||
|Startup= 4 | |||
|Active= 8 | |||
|Frame Adv= | |||
|Meter= 1/3/6 | |||
|Block=[[File:High.png]] | |||
|Properties= | |||
}} | |||
|description= Great air-to-air. | |||
}} | |||
[[File: | {{MoveData-SFA2 | ||
|image=A2_Sakura_nj.hp_1.png | |||
|imageSize=250px | |||
|image2=A2_Sakura_nj.hp_2.png | |||
|imageSize2=250px | |||
|caption= | |||
|name= | |||
|subtitle= | |||
|input=nj.[[File:Hp.png]] | |||
|data= | |||
{{AttackData-SFA2 | |||
|Damage= 12<sup>[2]</sup>, 11<sup>[2]</sup> | |||
|Stun= 8, 8 | |||
|Startup= 8 | |||
|Active= 2(0)6 | |||
|Frame Adv= | |||
|Meter= 2/5/9 | |||
|Block=[[File:High.png]] | |||
|Properties= | |||
}} | |||
|description= *Hits 1 time. | |||
Very good air-to-ground move. | |||
}} | |||
{{MoveData-SFA2 | |||
|image=A2_Sakura_nj.lk.png | |||
|imageSize=250px | |||
|caption= | |||
|name= | |||
|subtitle= | |||
|input=nj.[[File:Lk.png]] | |||
|data= | |||
{{AttackData-SFA2 | |||
|Damage= 8<sup>[0]</sup> | |||
|Stun= 3 | |||
|Startup= 5 | |||
|Active= 12 | |||
|Frame Adv= | |||
|Meter= 0/1/2 | |||
|Block=[[File:High.png]] | |||
|Properties= | |||
}} | |||
|description= | |||
}} | |||
Startup | {{MoveData-SFA2 | ||
|image=A2_Sakura_nj.mk.png | |||
|imageSize=250px | |||
|caption= | |||
|name= | |||
|subtitle= | |||
|input=nj.[[File:Mk.png]] | |||
|data= | |||
{{AttackData-SFA2 | |||
|Damage= 9<sup>[1]</sup> | |||
|Stun= 6 | |||
|Startup= 5 | |||
|Active= 8 | |||
|Frame Adv= | |||
|Meter= 1/3/6 | |||
|Block=[[File:High.png]] | |||
|Properties= | |||
}} | |||
|description= | |||
}} | |||
{{MoveData-SFA2 | |||
|image=A2_Sakura_nj.hk.png | |||
|imageSize=250px | |||
|caption= | |||
|name= | |||
|subtitle= | |||
|input=nj.[[File:Hk.png]] | |||
|data= | |||
{{AttackData-SFA2 | |||
|Damage= 13<sup>[2]</sup> | |||
|Stun= 8 | |||
|Startup= 11 | |||
|Active= 5 | |||
|Frame Adv= | |||
|Meter= 2/5/9 | |||
|Block=[[File:High.png]] | |||
|Properties= | |||
}} | |||
|description= | |||
}} | |||
===Diagonal Jumping=== | |||
[[File: | {{MoveData-SFA2 | ||
|image=A2_Sakura_dj.lp.png | |||
|imageSize=250px | |||
|caption= | |||
|name= | |||
|subtitle= | |||
|input=dj.[[File:Lp.png]] | |||
|data= | |||
{{AttackData-SFA2 | |||
|Damage= 8<sup>[0]</sup> | |||
|Stun= 3 | |||
|Startup= 4 | |||
|Active= 11 | |||
|Frame Adv= | |||
|Meter= 0/1/2 | |||
|Block=[[File:High.png]] | |||
|Properties= | |||
}} | |||
|description= | |||
}} | |||
{{MoveData-SFA2 | |||
|image=A2_Sakura_dj.mp.png | |||
|imageSize=250px | |||
|caption= | |||
|name= | |||
|subtitle= | |||
|input=dj.[[File:Mp.png]] | |||
|data= | |||
{{AttackData-SFA2 | |||
|Damage= 9<sup>[1]</sup> | |||
|Stun= 5 | |||
|Startup= 4 | |||
|Active= 11 | |||
|Frame Adv= | |||
|Meter= 1/3/6 | |||
|Block=[[File:High.png]] | |||
|Properties= | |||
}} | |||
|description= Great air-to-air. | |||
}} | |||
Startup | {{MoveData-SFA2 | ||
|image=A2_Sakura_dj.hp_1.png | |||
|imageSize=250px | |||
|image2=A2_Sakura_dj.hp_2.png | |||
|imageSize2=250px | |||
|caption= | |||
|name= | |||
|subtitle= | |||
|input=dj.[[File:Hp.png]] | |||
|data= | |||
{{AttackData-SFA2 | |||
|Damage= 12<sup>[2]</sup>, 10<sup>[2]</sup> | |||
|Stun= 1, 1 | |||
|Startup= 8 | |||
|Active= 2(0)6 | |||
|Frame Adv= | |||
|Meter= 2/5/9 | |||
|Block=[[File:High.png]] | |||
|Properties= | |||
}} | |||
|description= *Hits 1 time. | |||
Very good air-to-ground move. | |||
}} | |||
{{MoveData-SFA2 | |||
|image=A2_Sakura_dj.lk.png | |||
|imageSize=250px | |||
|caption= | |||
|name= | |||
|subtitle= | |||
|input=dj.[[File:Lk.png]] | |||
|data= | |||
{{AttackData-SFA2 | |||
|Damage= 8<sup>[0]</sup> | |||
|Stun= 3 | |||
|Startup= 5 | |||
|Active= 12 | |||
|Frame Adv= | |||
|Meter= 0/1/2 | |||
|Block=[[File:High.png]] | |||
|Properties= | |||
}} | |||
|description= Great air-to-air and great ranged jump in. | |||
}} | |||
{{MoveData-SFA2 | |||
|image=A2_Sakura_dj.mk_1.png | |||
|imageSize=250px | |||
|image2=A2_Sakura_dj.mk_2.png | |||
|imageSize2=250px | |||
|caption= | |||
|name= | |||
|subtitle= | |||
|input=dj.[[File:Mk.png]] | |||
|data= | |||
{{AttackData-SFA2 | |||
|Damage= 7<sup>[1]</sup>, 9<sup>[2]</sup> | |||
|Stun= 6, 6 | |||
|Startup= 5 | |||
|Active= 4(0)4 | |||
|Frame Adv= | |||
|Meter= 1/3/6 | |||
|Block=[[File:High.png]] | |||
|Properties= Cross-up | |||
}} | |||
|description= Sakura's amazing cross-up and can hit either in front or behind even though you are crossing your opponent up. If timed correctly after a knockdown this move may be unblockable [See Below]. | |||
}} | |||
[[File: | {{MoveData-SFA2 | ||
|image=A2_Sakura_dj.hk.png | |||
|imageSize=250px | |||
|caption= | |||
|name= | |||
|subtitle= | |||
|input=dj.[[File:Hk.png]] | |||
|data= | |||
{{AttackData-SFA2 | |||
|Damage= 12<sup>[2]</sup> | |||
|Stun= 6 | |||
|Startup= 11 | |||
|Active= 5 | |||
|Frame Adv= | |||
|Meter= 2/5/9 | |||
|Block=[[File:High.png]] | |||
|Properties= | |||
}} | |||
|description= Great angled jump in. | |||
}} | |||
== Command Normals == | |||
Startup | {{MoveData-SFA2 | ||
|image=A2_Sakura_f.mk.png | |||
|imageSize=250px | |||
|caption= | |||
|name=Flower Kick | |||
|subtitle=Overhead | |||
|input=[[File:F.png]] + [[File:Mk.png]] | |||
|data= | |||
{{AttackData-SFA2 | |||
|Damage= 15<sup>[1]</sup> | |||
|Stun= 3 | |||
|Startup= 28 | |||
|Active= 4 | |||
|Frame Adv= +4 | |||
|Meter= 0/2/5 | |||
|Block=[[File:High.png]] | |||
|Properties= | |||
}} | |||
|description= One of the best overheads in the game. Great range and frame advantage allowing for combos after, does not even have to be meaty, but does have to be point blank, very good when done after a cross-up. | |||
}} | |||
== Normal Throws == | |||
{{MoveData-SFA2 | |||
|image=A2_Sakura_ThrowRange.png | |||
|imageSize=250px | |||
|image2=A2_Sakura_PThrow_2.png | |||
|imageSize2=250px | |||
|image3=A2_Sakura_PThrow_3.png | |||
|imageSize3=250px | |||
|caption= | |||
|name=Sakura Jime | |||
|subtitle=Punch Throw | |||
|input=[[File:B.png]]/[[File:F.png]] + [[File:Mp.png]]/[[File:Hp.png]] | |||
|data= | |||
{{AttackData-SFA2 | |||
|Damage= 8<sup>[0]</sup>+1<sup>[0]</sup>xN+3<sup>[0]</sup> = 12-17 | |||
|Stun= 0 | |||
|Startup= 1 | |||
|Active= N/A | |||
|Frame Adv= N/A | |||
|Meter= -/-/3 | |||
|Block= N/A | |||
|Properties= [[File:Throw.png]][[File:Mash.png]]<br>[[File:Hardknockdown.png]] | |||
}} | |||
|description= *Mashable throw from both sides to add or reduce the number of hits. With a min of 3 and a max of 8 hits. | |||
*Always switches sides. | |||
*Deals 10 damage when opponent tech throws. | |||
*Sakura has average throw range ([[Street_Fighter_Alpha_2/System#Regular_Throw_Ranges|Alpha2ThrowRanges]]). | |||
The only throw you should be using. This throw does decent damage and allows for a perfect cross-up. | |||
}} | |||
{{MoveData-SFA2 | |||
|image=A2_Sakura_ThrowRange.png | |||
|imageSize=250px | |||
|image2=A2_Sakura_KThrow_1.png | |||
|imageSize2=250px | |||
|image3=A2_Sakura_KThrow_2.png | |||
|imageSize3=250px | |||
|caption= | |||
|name=Sailor Shot | |||
|subtitle=Kick Throw | |||
|input=[[File:B.png]]/[[File:F.png]] + [[File:Mk.png]]/[[File:Hk.png]] | |||
|data= | |||
{{AttackData-SFA2 | |||
|Damage= 17<sup>[0]</sup> | |||
|Stun= 0 | |||
|Startup= 1 | |||
|Active= N/A | |||
|Frame Adv= N/A | |||
|Meter= -/-/3 | |||
|Block= N/A | |||
|Properties= [[File:Throw.png]]<br>[[File:Hardknockdown.png]] | |||
}} | |||
|description= *Deals 8 damage when opponent tech throws. | |||
*Sakura has average throw range ([[Street_Fighter_Alpha_2/System#Regular_Throw_Ranges|Alpha2ThrowRanges]]). | |||
}} | |||
== Alpha Counters == | |||
{{MoveData-SFA2 | |||
|image=A2_Sakura_PAC_1.png | |||
|imageSize=250px | |||
|image2=A2_Sakura_PAC_2.png | |||
|imageSize2=250px | |||
|caption= | |||
|name=Punch Alpha Counter | |||
|subtitle= | |||
|input=(while in blockstun)[[File:Qcd.png]]+ [[File:P.png]] | |||
|data= | |||
{{AttackData-SFA2 | |||
|Damage= 17<sup>[1]</sup>, 15<sup>[0]</sup>, 5<sup>[0]</sup> | |||
|Stun= 8x3 | |||
|Startup= 4 | |||
|Active= 2(0)2(0)10 | |||
|Frame Adv= -32 | |||
|Meter= 0/0/0 | |||
|Block=[[File:Mid.png]] | |||
|Properties= [[File:Startupinv.png]]<br>[[File:Hardknockdown.png]] | |||
}} | |||
|description= *Hits 1 time. | |||
Sets up ambiguous cross-up. | |||
}} | |||
{{MoveData-SFA2 | |||
|image=A2_Sakura_KAC.png | |||
|imageSize=250px | |||
|caption= | |||
|name=Kick Alpha Counter | |||
|subtitle= | |||
|input=(while in blockstun)[[File:Qcd.png]]+ [[File:K.png]] | |||
|data= | |||
{{AttackData-SFA2 | |||
|Damage= 14<sup>[2]</sup> | |||
|Stun= 8 | |||
|Startup= 4 | |||
|Active= 3 | |||
|Frame Adv= 0 | |||
|Meter= 0/0/0 | |||
|Block=[[File:Mid.png]] | |||
|Properties= [[File:Startupinv.png]]<br>[[File:Hardknockdown.png]] | |||
}} | |||
|description= Sets up ambiguous cross-up. | |||
}} | |||
== | |||
= | |||
[[File: | |||
= | |||
== Special Moves == | == Special Moves == | ||
{{MoveData-SFA2 | |||
|image=A2_Sakura_Fireball_1.png | |||
|imageSize=250px | |||
|image2=A2_Sakura_Fireball_2.png | |||
|imageSize2=250px | |||
|image3=A2_Sakura_Fireball_3.png | |||
|imageSize3=250px | |||
|image4=A2_Sakura_Fireball_4.png | |||
|imageSize4=250px | |||
|caption= | |||
|name=Hadoken | |||
|subtitle=Fireball | |||
|input=[[File:Qcf.png]] + [[File:P.png]] | |||
|data= | |||
{{AttackData-SFA2 | |||
|version=[[File:P.png]] | |||
|Damage= 13<sup>[7]</sup>, 9<sup>[6]</sup> | |||
|Stun= 8, 8 | |||
|Startup= 21 | |||
|Active= 3(0)32 | |||
|Frame Adv= -7 | |||
|Meter= 4/6/9 | |||
|Block=[[File:Mid.png]] | |||
|Properties=[[File:Proj.png]] | |||
}} | |||
[[File: | {{AttackData-SFA2 | ||
|header= no | |||
[[File: | |version=[[File:P.png]], [[File:P.png]] | ||
|Damage= 15<sup>[8]</sup>, 11<sup>[7]</sup> | |||
|Stun= 10, 10 | |||
|Startup= 33 | |||
|Active= 3(0)20 | |||
|Frame Adv= -7 | |||
|Meter= 5/7/10 | |||
|Block=[[File:Mid.png]] | |||
|Properties=[[File:Proj.png]] | |||
}} | |||
[[File: | {{AttackData-SFA2 | ||
|header= no | |||
|version=[[File:P.png]], [[File:P.png]], [[File:P.png]] | |||
[[File: | |Damage= 17<sup>[11]</sup>, 13<sup>[10]</sup> | ||
|Stun= 12, 12 | |||
|Startup= 45 | |||
|Active= 3(0)12 | |||
|Frame Adv= -7 | |||
|Meter= 6/8/11 | |||
|Block=[[File:Mid.png]] | |||
|Properties=[[File:Proj.png]] | |||
== | }} | ||
|description= *'''Punishable on hit.''' | |||
*Punch strength has no impact on the fireball. | |||
This move can be charged by pressing punch, which also builds more meter. Kara-cancel cr.hp into this for meter. | |||
[[File: | |||
[[File: | |||
Startup | |||
[[File: | |||
= | |||
* | |||
----- | |||
{{p}} - ''[Hitboxes pictured 1st & 2nd]'' | |||
*Speed: 450 pixels per 100 frames; 4th fastest fireball in the game ([https://srk.shib.live/w/Street_Fighter_Alpha_2/System#Fireballs Alpha2Fireballs]). | |||
Very good zoning tool from afar. Release speed isnt great, recovery is good. | |||
----- | |||
{{p}}, {{p}} - ''[Hitboxes pictured 3rd]'' | |||
----- | |||
{{p}}, {{p}}, {{p}} - ''[Hitboxes pictured 4th]'' | |||
Best used as an anti air, normally in fireball fights. Has a huge hitbox, so if you expect them to jump, charge then release. At worst the hadoken will trade, and does good damage. | |||
}} | |||
< | {{MoveData-SFA2 | ||
|image=A2_Sakura_DP_1.png | |||
|imageSize=250px | |||
|image2=A2_Sakura_DP_2.png | |||
|imageSize2=250px | |||
|caption= | |||
|name=Shouoken | |||
|subtitle=Dragon Punch, Uppercut | |||
|input=[[File:Dp.png]] + [[File:P.png]] | |||
|data= | |||
{{AttackData-SFA2 | |||
|version=[[File:Lp.png]] | |||
|Damage= 18<sup>[7]</sup>, 15<sup>[7]</sup> | |||
|Stun= 5, 3 | |||
|Startup= 5 | |||
|Active= 2(0)4 | |||
|Frame Adv= -22, -20 | |||
|Meter= 7/7+1 per hit/9 | |||
|Block=[[File:Mid.png]] | |||
|Properties= | |||
}} | |||
{{AttackData-SFA2 | |||
|header= no | |||
|version=[[File:Mp.png]] | |||
|Damage= 11<sup>[7]</sup>, 6<sup>[7]</sup>, 3<sup>[7]</sup>, 0^<sup>[7]</sup> | |||
|Stun= 5, 1x3 | |||
|Startup= 9 | |||
|Active= [2(0)x3]8 | |||
|Frame Adv= -28, -24 | |||
|Meter= 7/7+1 per hit/7+2 per hit | |||
|Block=[[File:Mid.png]] | |||
|Properties= | |||
}} | |||
{{AttackData-SFA2 | |||
|header= no | |||
|version=[[File:Hp.png]] | |||
|Damage= 13<sup>[7]</sup>, 7<sup>[2]</sup>, 0^<sup>[2]</sup>x4 | |||
|Stun= 5, 1x5 | |||
|Startup= 13 | |||
|Active= 4(0)[2(0)x4]10 | |||
|Frame Adv= -36, -32 | |||
|Meter= 7/7+1 per hit/7+2 per hit | |||
|Block=[[File:Mid.png]] | |||
|Properties= | |||
}} | |||
|description= ^Base damage is technically 0 but the game has a minimum damage of 1. | |||
Not an anti-air despite its looks. | |||
----- | |||
{{lp}} - ''[Hitboxes pictured]'' | |||
*Hits 1 time max. | |||
----- | |||
{{mp}} | |||
*Hits 4 times max. | |||
----- | |||
{{hp}} | |||
*Hits 6 times max. | |||
Her main combo move that sets up an ambiguous cross-up. | |||
}} | |||
== | {{MoveData-SFA2 | ||
|image=A2_Sakura_Tatsu_1.png | |||
|imageSize=250px | |||
|image2=A2_Sakura_Tatsu_2.png | |||
|imageSize2=250px | |||
|caption= | |||
|name=Shunpukyaku | |||
|subtitle=Hurricane Kick, Tatsu | |||
|input=[[File:Qcb.png]] + [[File:K.png]] | |||
|data= | |||
{{AttackData-SFA2 | |||
|version=[[File:Lk.png]] | |||
|Damage= 15<sup>[2]</sup> | |||
|Stun= 6 | |||
|Startup= 17 | |||
|Active= 3 | |||
|Frame Adv= -10oB/+15oH | |||
|Meter= 6/7/8 | |||
|Block=[[File:Mid.png]] | |||
|Properties=Flip Out | |||
}} | |||
{{AttackData-SFA2 | |||
|header= no | |||
|version=[[File:Mk.png]] | |||
|Damage= 16<sup>[2]</sup>x3 | |||
|Stun= 8x3 | |||
|Startup= 17 | |||
|Active= 3(3)3(3)3 | |||
|Frame Adv= -9oB/+4oH, -9oB/+16oH | |||
|Meter= 6/7+1 per hit/8 | |||
|Block=[[File:Mid.png]] | |||
|Properties=Flip Out | |||
}} | |||
{{AttackData-SFA2 | |||
|header= no | |||
|version=[[File:Hk.png]] | |||
|Damage= 17<sup>[2]</sup>x5 | |||
|Stun= 10x5 | |||
|Startup= 17 | |||
|Active= [3(3)x4]3 | |||
|Frame Adv= -7oB/-8oH, 0oB/+16oH | |||
|Meter= 6/7+1 per hit/8 | |||
|Block=[[File:Mid.png]] | |||
|Properties=Flip Out | |||
}} | |||
|description= *Hits 1 time max. | |||
Different than the Shotos' Tatsu, she actually travels in a arc, going higher and farther the stronger the button pressed. | |||
----- | |||
{{lk}} | |||
----- | |||
{{mk}} - ''[Hitboxes pictured]'' | |||
----- | |||
{{hk}} | |||
*'''Punishable on hit when the first hit lands.''' | |||
Goes over fireballs. | |||
}} | |||
== Super Moves == | |||
Startup Invulnerability Notes: | |||
*At the end of a super screen freeze, projectiles will start moving before the opponent's character is unfrozen, giving the supers more projectile invul. frames than hit invul. frames. | |||
<br> | |||
{{MoveData-SFA2 | |||
|image=A2_Sakura_FireballSuper_1.png | |||
|imageSize=250px | |||
|image2=A2_Sakura_FireballSuper_2.png | |||
|imageSize2=250px | |||
|image3=A2_Sakura_FireballSuper_3.png | |||
|imageSize3=250px | |||
|image4=A2_Sakura_FireballSuper_4.png | |||
|imageSize4=250px | |||
|caption= | |||
|name=Shinku Hadoken | |||
|subtitle=Fireball Super | |||
|input=[[File:Qcf.png]][[File:Qcf.png]] + [[File:P.png]] | |||
|data= | |||
{{AttackData-SFA2 | |||
|version= Level 1 | |||
|subtitle= [[File:P.png]] | |||
|Damage= Closest: 10<sup>[12]</sup>, 9<sup>[12]</sup>, 5<sup>[12]</sup><br>Furthest: 6<sup>[12]</sup>, 5<sup>[12]</sup>, 3<sup>[12]</sup> | |||
|Stun= 1x3 | |||
|Startup= 6+0 | |||
|Active= 15(0)16(0)16(0)17 | |||
|Frame Adv= -19 | |||
|Meter= 0/0/0 | |||
|Block=[[File:Mid.png]] | |||
|Properties=[[File:Startupinv.png]]<br>[[File:Proj.png]]<br>[[File:Hardknockdown.png]] | |||
}} | |||
{{AttackData-SFA2 | |||
|header= no | |||
|version= Level 2 | |||
|subtitle= [[File:P.png]][[File:P.png]] | |||
|Damage= Closest: 13<sup>[12]</sup>, 10<sup>[12]</sup>, 7<sup>[12]</sup>, 6<sup>[12]</sup><br>Furthest: 9<sup>[12]</sup>, 6<sup>[12]</sup>, 3<sup>[12]</sup>, 3<sup>[12]</sup> | |||
|Stun= 0, 1x3 | |||
|Startup= 6+0 | |||
|Active= 15(0)16(0)16(0)17 | |||
|Frame Adv= -17 | |||
|Meter= 0/0/0 | |||
|Block=[[File:Mid.png]] | |||
|Properties=[[File:Startupinv.png]]<br>[[File:Proj.png]]<br>[[File:Hardknockdown.png]] | |||
}} | |||
{{AttackData-SFA2 | |||
|header= no | |||
|version= Level 3 | |||
|subtitle= [[File:3p.png]] | |||
|Damage= Closest: 19<sup>[12]</sup>, 12<sup>[12]</sup>, 10<sup>[12]</sup>, 7<sup>[12]</sup>, 7<sup>[12]</sup><br>Furthest: 15<sup>[12]</sup>, 8<sup>[12]</sup>, 6<sup>[12]</sup>, 3<sup>[12]</sup>, 3<sup>[12]</sup> | |||
|Stun= 0, 0, 1x3 | |||
|Startup= 6+0 | |||
|Active= 15(0)16(0)16(0)17 | |||
|Frame Adv= -15 | |||
|Meter= 0/0/0 | |||
|Block=[[File:Mid.png]] | |||
|Properties=[[File:Startupinv.png]]<br>[[File:Proj.png]]<br>[[File:Hardknockdown.png]] | |||
}} | |||
|description=Pretty much worthless super. Not safe on block & weak damage. Yes it can anti-air, but that's meter you could have used for an anti-air custom combo. | |||
*Damage decreases with distance. | |||
*'''Cannot be air blocked.''' | |||
----- | |||
{{AttackColor-SF | |||
|strength=light | |||
|content=Level 1}} | |||
*5 frames of startup hit invul.; 0 of which while active. | |||
*9 frames of startup projectile invul. | |||
*Hits 3 times. | |||
----- | |||
{{AttackColor-SF | |||
|strength=medium | |||
|content=Level 2}} | |||
*5 frames of startup hit invul.; 0 of which while active. | |||
*9 frames of startup projectile invul. | |||
*Hits 4 times. | |||
----- | |||
{{AttackColor-SF | |||
|strength=heavy | |||
|content=Level 3}} | |||
*5 frames of startup hit invul.; 0 of which while active. | |||
*9 frames of startup projectile invul. | |||
*Hits 5 times. | |||
}} | |||
[[File: | {{MoveData-SFA2 | ||
|image=A2_Sakura_DPSuper_1.png | |||
|imageSize=250px | |||
|image2=A2_Sakura_DPSuper_2.png | |||
|imageSize2=250px | |||
|image3=A2_Sakura_DPSuper_3.png | |||
|imageSize3=250px | |||
|image4=A2_Sakura_DPSuper_4.png | |||
|imageSize4=250px | |||
|caption= | |||
|name=Midare Zakura | |||
|subtitle=Dragon Punch Super | |||
|input=[[File:Qcf.png]][[File:Qcf.png]] + [[File:K.png]] | |||
|data= | |||
{{AttackData-SFA2 | |||
|version= Level 1 | |||
|subtitle= [[File:K.png]] | |||
|Damage= 11<sup>[13]</sup>, 8<sup>[13]</sup>, 10<sup>[13]</sup>, 5<sup>[13]</sup> | |||
|Stun= 0 | |||
|Startup= 5+0 | |||
|Active= 4(0)4(15)5(0)26 | |||
|Frame Adv= -23 | |||
|Meter= 0/0/0 | |||
|Block=[[File:Mid.png]] | |||
|Properties=[[File:Startupinv.png]]<br>[[File:Hardknockdown.png]] | |||
}} | |||
{{AttackData-SFA2 | |||
|header= no | |||
|version= Level 2 | |||
|subtitle= [[File:K.png]][[File:K.png]] | |||
|Damage= 12<sup>[13]</sup>, 9<sup>[13]</sup>, 8<sup>[13]</sup>, 9<sup>[13]</sup>, 4<sup>[13]</sup>, 4<sup>[13]</sup> | |||
|Stun= 0 | |||
|Startup= 5+0 | |||
|Active= 6(0)4(12)8(0)26 | |||
|Frame Adv= -28 | |||
|Meter= 0/0/0 | |||
|Block=[[File:Mid.png]] | |||
|Properties=[[File:Startupinv.png]]<br>[[File:Hardknockdown.png]] | |||
}} | |||
{{AttackData-SFA2 | |||
|header= no | |||
|version= Level 3 | |||
|subtitle= [[File:3k.png]] | |||
|Damage= 16<sup>[13]</sup>, 13<sup>[13]</sup>, 15<sup>[13]</sup>, 7<sup>[13]</sup>, 7<sup>[13]</sup>, 3<sup>[13]</sup>, 3<sup>[13]</sup> | |||
|Stun= 0 | |||
|Startup= 5+0 | |||
|Active= 1(0)4(12)1(0)4(12)3(0)31 | |||
|Frame Adv= -34 | |||
|Meter= 0/0/0 | |||
|Block=[[File:Mid.png]] | |||
|Properties=[[File:Startupinv.png]]<br>[[File:Hardknockdown.png]] | |||
}} | |||
|description= *The first two hits occur before the super screen freeze ends. | |||
*A full 2 quarter-circles isn't required. Required inputs: {{d}}{{df}}{{f}}{{d}}{{df}} + {{k}} | |||
----- | |||
{{AttackColor-SF | |||
|strength=light | |||
|content=Level 1}} - ''[Hitboxes pictured]'' | |||
*5 frames of startup hit invul.; 1 of which while active. | |||
*12 frames of startup projectile invul. | |||
*Hits 4 times. | |||
Doesn't do much more damage than her BnB. May not be worth the meter. | |||
----- | |||
{{AttackColor-SF | |||
|strength=medium | |||
|content=Level 2}} | |||
*6 frames of startup hit invul.; 2 of which while active. | |||
*16 frames of startup projectile invul. | |||
*Hits 6 times. | |||
----- | |||
{{AttackColor-SF | |||
|strength=heavy | |||
|content=Level 3}} | |||
*10 frames of startup hit invul.; 1 of which while active. | |||
*20 frames of startup projectile invul. | |||
*Hits 7 times. | |||
Good damage, worth comboing into. | |||
}} | |||
{{MoveData-SFA2 | |||
|image=A2_Sakura_KickSuper_1.png | |||
|imageSize=250px | |||
|image2=A2_Sakura_KickSuper_2.png | |||
|imageSize2=250px | |||
|image3=A2_Sakura_KickSuper_3.png | |||
|imageSize3=250px | |||
|image4=A2_Sakura_KickSuper_4.png | |||
|imageSize4=250px | |||
|caption= | |||
|name=Haru Ichiban | |||
|subtitle=Kick Super | |||
|input=[[File:Qcb.png]][[File:Qcb.png]] + [[File:K.png]] | |||
|data= | |||
{{AttackData-SFA2 | |||
|version= Level 1 | |||
|subtitle= [[File:K.png]] | |||
|Damage= 7<sup>[13]</sup>x4, 12<sup>[13]</sup> | |||
|Stun= 0x3, 1, 1 | |||
|Startup= 4+0 | |||
|Active= [2(6)x3]2(10)5 | |||
|Frame Adv= +3 | |||
|Meter= 0/0/0 | |||
|Block=[[File:Low.png]] | |||
|Properties=[[File:Startupinv.png]]<br>[[File:Hardknockdown.png]] | |||
}} | |||
{{AttackData-SFA2 | |||
|header= no | |||
|version= Level 2 | |||
|subtitle= [[File:K.png]][[File:K.png]] | |||
|Damage= 8<sup>[13]</sup>x5, 13<sup>[13]</sup> | |||
|Stun= 0x4, 1, 1 | |||
|Startup= 4+0 | |||
|Active= [2(6)x4]2(11)5 | |||
|Frame Adv= +3 | |||
|Meter= 0/0/0 | |||
|Block=[[File:Low.png]] | |||
|Properties=[[File:Startupinv.png]]<br>[[File:Hardknockdown.png]] | |||
}} | |||
{{AttackData-SFA2 | |||
|header= no | |||
|version= Level 3 | |||
|subtitle= [[File:3k.png]] | |||
|Damage= 9<sup>[13]</sup>x6, 15<sup>[13]</sup> | |||
|Stun= 0x5, 1, 1 | |||
|Startup= 4+0 | |||
|Active= [2(6)x5]2(11)5 | |||
|Frame Adv= +3 | |||
|Meter= 0/0/0 | |||
|Block=[[File:Low.png]] | |||
|Properties=[[File:Startupinv.png]]<br>[[File:Hardknockdown.png]] | |||
}} | |||
|description= Instant low (need to be blocking before the super freeze) and puts opponent in blockstun after super is over, letting you continue the pressure. Can be comboed into, good damage. | |||
*A full 2 quarter-circles isn't required. Required inputs: {{d}}{{db}}{{b}}{{d}}{{db}} + {{k}} | |||
----- | |||
{{AttackColor-SF | |||
|strength=light | |||
|content=Level 1}} | |||
*3 frames of startup hit invul.; 0 of which while active. | |||
*11 frames of startup projectile invul. | |||
*Hits 5 times. | |||
----- | |||
{{AttackColor-SF | |||
|strength=medium | |||
|content=Level 2}} | |||
*4 frames of startup hit invul.; 1 of which while active. | |||
*12 frames of startup projectile invul. | |||
*Hits 6 times. | |||
----- | |||
{{AttackColor-SF | |||
|strength=heavy | |||
|content=Level 3}} | |||
*4 frames of startup hit invul.; 1 of which while active. | |||
*13 frames of startup projectile invul. | |||
*Hits 7 times. | |||
}} | |||
=The Basics= | |||
----- | |||
{{Content Box-SFA2 | |||
|padding=yes | |||
|header= | |||
|content= | |||
===== What does Sakura want? ===== | |||
The shoto-specialist, Sakura craves setplay. | |||
Sakura has one of the SFA2's most infamous win conditions. On most knockdowns, Sakura can put the opponent in a looping 50/50 mixup. On a throw setup, there is no mix. Her crossup can be genuinely [https://www.youtube.com/watch?v=R90T989-zxg unblockable.] Her incredible normals and devastating hit confirms are a means to this end; Sakura steals rounds '''constantly.''' | |||
===== Notes ===== | |||
= | |||
Knock down. Cross up. Combo. Repeat. Thats what it breaks down to, but you have a few options when you get up close and they are blocking. You want to try to keep close to land BnBs. | Knock down. Cross up. Combo. Repeat. Thats what it breaks down to, but you have a few options when you get up close and they are blocking. You want to try to keep close to land BnBs. | ||
| Line 418: | Line 1,178: | ||
walk up throw | walk up throw | ||
If successful, you have a free cross-up. If they blocked your cross up, start back at c.lk x2. Another thing to do is empty jump into BnB. | If successful, you have a free cross-up. If they blocked your cross up, start back at c.lk x2. Another thing to do is empty jump into BnB. | ||
In general, Sakura gets an ambiguous j.MK crossup after alpha counter and HP DP knockdown. Setups after a throw vary depending on the opponent's character. | |||
Escaping throw > jumping mk crossup:<BR> | Escaping throw > jumping mk crossup:<BR> | ||
'''Akuma | '''Akuma''' | ||
Teleport, Roll | |||
'''Adon''' | '''Adon''' | ||
DP | DP | ||
'''Birdie''' | '''Birdie''' | ||
Jump | Jump (due to his wakeup speed) | ||
'''Dictator''' | '''Dictator''' | ||
Teleport, | Teleport, Walk Forward (due to his wakeup speed) | ||
'''Charlie Nash''' | '''Charlie Nash''' | ||
'''Dan''' | '''Dan''' | ||
'''Chun-Li''' | '''Chun-Li''' | ||
Upkicks | |||
'''Dhalsim''' | '''Dhalsim''' | ||
| Line 445: | Line 1,205: | ||
'''Gen''' | '''Gen''' | ||
DP can trade with it or escape if it goes the wrong way | DP can trade with it or escape if it goes the wrong way, Crane (3K) c.mk | ||
'''Guy''' | '''Guy''' | ||
Crouch | Crouch | ||
'''Ken''' | '''Ken''' | ||
'''Rolento''' | '''Rolento''' | ||
'''Rose''' | '''Rose''' | ||
Slide, but Sakura can punish it | |||
'''Ryu''' | '''Ryu''' | ||
'''Sagat''' | '''Sagat''' | ||
Tiger Knee | |||
'''Sakura''' | '''Sakura''' | ||
'''Sodom''' | '''Sodom''' | ||
Tengu Walk | |||
'''Zangief''' | '''Zangief''' | ||
Lariat | Punch Lariat (Trades) | ||
| Line 491: | Line 1,247: | ||
Basically, try to stay on your opponent to land combos or grab. Her acs arent great but if hit they are non-rollable so, in some cases, a free cross up. | Basically, try to stay on your opponent to land combos or grab. Her acs arent great but if hit they are non-rollable so, in some cases, a free cross up. | ||
}} | |||
=Advanced Strategy= | |||
----- | |||
{{Content Box-SFA2 | |||
|padding=yes | |||
|header= | |||
|content= | |||
}} | |||
= | =Combos= | ||
----- | |||
{{Content Box-SFA2 | |||
|padding=yes | |||
|header= | |||
|content='''cr.lk x3, st.lk xx hp dp''' | |||
This is your main combos, easy to hit confirm, great stun, and damage. Anytime you land a c.lk, it shoud end in a s.lk xx hp dp. Best BnB in the game hands down. Learn it, love it, live or gtfo. More on this in general strat. | |||
*st.hp xx hp dp (use to punish) | |||
*cr.lk x2, super | |||
*st.hp xx hurricane kick (Hk vesion) | |||
*f.mk, link cr.lk xx hp dp | |||
*f.mk, link cr.lk xx qcb x2+k | |||
*st.mp, link cr.lk xx hp dp | |||
*st.mp, link cr.lk xx super | |||
*cr.LK x2, st.LK, HP SOK | |||
f.MK, cr.LK, HP SOK | |||
lvl 3- | Cr.HP, HP SOK or Lvl3 H.Ichiban | ||
f.mk, cr.lk xx hurricane super | |||
<div style="width:100%;max-width:450px;"><youtube>qx9jn-Oh524</youtube></div> | |||
<div style="width:100%;max-width:450px;"><youtube>fHr70aXZ3FM</youtube></div> | |||
}} | |||
=Custom Combos= | |||
----- | |||
{{Content Box-SFA2 | |||
|padding=yes | |||
|header= | |||
|content=Sakura doesn’t have the strongest customs, but still good damage and tool to have. | |||
Lvl 1- cr.hk xx hk hurricane, hp dp | |||
cr.hk xx hp dp, hp dp | |||
lvl 2- cr.hk xx hp dp x3 | |||
cr.hk xx hk hurricane, hp dp x2 | |||
lvl 3- cr.hk xx hk hurricane, hp dp x3 | |||
Anti air CC- | Anti air CC- | ||
st.lp or st.mp xx hp dps (for lvl 3 use mp dps, end with hp dp) | |||
For her ground custom, getting all hp dps can be hard to time, you can make it easier by: | For her ground custom, getting all hp dps can be hard to time, you can make it easier by: | ||
| Line 520: | Line 1,316: | ||
Lv1: | Lv1: | ||
[CC] | [CC]cr.HK,HK SK,HP SOK[/CC] | ||
[CC] | [CC]cr.HK,HP SOKx2[/CC] | ||
Lv3: | Lv3: | ||
[CC] | [CC]cr.HK,HK SK,HP SOK,MK SK,HP SOK[/CC] | ||
[CC] | [CC]cr.HK,HP SOK,LK SKx2,HP SOKx2[/CC] | ||
[CC] | [CC]st.MP,HP SOKx3[/CC] | ||
= | <div style="width:100%;max-width:450px;"><youtube>54vFkCeUSmM</youtube></div> | ||
}} | |||
= Match-ups = | |||
----- | |||
{{MatchUp-SFA2 | |||
|padding=yes | |||
|header=[[File:A2_Icon_Adon.png]] '''Vs. Adon:''' | |||
|content=[Loading match-up info...] | |||
}} | |||
Vs. Akuma: | {{MatchUp-SFA2 | ||
|padding=yes | |||
|header=[[File:A2_Icon_Akuma.png]] '''Vs. Akuma:''' | |||
|content=[Loading match-up info...] | |||
}} | |||
Vs. | {{MatchUp-SFA2 | ||
|padding=yes | |||
|header=[[File:A2_Icon_Birdie.png]] '''Vs. Birdie:''' | |||
|content=[Loading match-up info...] | |||
}} | |||
{{MatchUp-SFA2 | |||
|padding=yes | |||
|header=[[File:A2_Icon_Charlie.png]] '''Vs. Charlie-Nash:''' | |||
|content=[Loading match-up info...] | |||
}} | |||
Vs. | {{MatchUp-SFA2 | ||
|padding=yes | |||
|header=[[File:A2_Icon_ChunLi.png]] '''Vs. Chun-Li:''' | |||
|content=[Loading match-up info...] | |||
}} | |||
{{MatchUp-SFA2 | |||
|padding=yes | |||
|header=[[File:A2_Icon_Dan.png]] '''Vs. Dan:''' | |||
|content=[Loading match-up info...] | |||
}} | |||
Vs. | {{MatchUp-SFA2 | ||
|padding=yes | |||
|header=[[File:A2_Icon_Dhalsim.png]] '''Vs. Dhalsim:''' | |||
|content=[Loading match-up info...] | |||
}} | |||
{{MatchUp-SFA2 | |||
|padding=yes | |||
|header=[[File:A2_Icon_Akuma.png]] '''Vs. Evil Ryu:''' | |||
|content=[Loading match-up info...] | |||
}} | |||
Vs. | {{MatchUp-SFA2 | ||
|padding=yes | |||
|header=[[File:A2_Icon_Gen.png]] '''Vs. Gen:''' | |||
|content=[Loading match-up info...] | |||
}} | |||
You pretty much just have to out play him. It’s not too horrible though because she’s real small so she can duck his s.fp and even his hurricane most of the time. So you’re both missing chunks of your offense. If you wanna beat him air to air use j.lk or j.mp, should work fine. Jump in with mainly j.fp or j.rh since you can’t really cross him up so no need for j.mk, except deep corner. | {{MatchUp-SFA2 | ||
|padding=yes | |||
|header=[[File:A2_Icon_Guy.png]] '''Vs. Guy:''' 6-4 Sakura's favor | |||
|content=You pretty much just have to out play him. It’s not too horrible though because she’s real small so she can duck his s.fp and even his hurricane most of the time. So you’re both missing chunks of your offense. If you wanna beat him air to air use j.lk or j.mp, should work fine. Jump in with mainly j.fp or j.rh since you can’t really cross him up so no need for j.mk, except deep corner. | |||
Just play basic mindgames: | Just play basic mindgames: | ||
| Line 572: | Line 1,402: | ||
s.fp help alot in that match also cause it beast hurricane.- RSX | s.fp help alot in that match also cause it beast hurricane.- RSX | ||
}} | |||
{{MatchUp-SFA2 | |||
|padding=yes | |||
|header=[[File:A2_Icon_Ken.png]] '''Vs. Ken:''' | |||
|content=[Loading match-up info...] | |||
}} | |||
{{MatchUp-SFA2 | |||
|padding=yes | |||
|header=[[File:A2_Icon_Bison.png]] '''Vs. M. Bison (dictator):''' | |||
Vs. M. Bison (dictator): | |content=[Loading match-up info...] | ||
}} | |||
{{MatchUp-SFA2 | |||
|padding=yes | |||
|header=[[File:A2_Icon_Rolento.png]] '''Vs. Rolento:''' | |||
|content=[Loading match-up info...] | |||
}} | |||
Vs. | {{MatchUp-SFA2 | ||
|padding=yes | |||
|header=[[File:A2_Icon_Rose.png]] '''Vs. Rose:''' | |||
|content=[Loading match-up info...] | |||
}} | |||
{{MatchUp-SFA2 | |||
|padding=yes | |||
|header=[[File:A2_Icon_Ryu.png]] '''Vs. Ryu:''' | |||
|content=[Loading match-up info...] | |||
}} | |||
{{MatchUp-SFA2 | |||
|padding=yes | |||
|header=[[File:A2_Icon_Sagat.png]] '''Vs. Sagat:''' 3-7 Sagat's favor | |||
|content=This is Sakura's worst matchup because Sagat can easily win in the fireball war due to Sakura's fireball not going fullscreen, and High Tiger Cannon can punish Sak on her fireball recovery. He's too tall to perform the ambigious crossup when he's standing. Not to mention Sagat's anti air options which he can completely shut you down with. In order to win, Sakura HAS to build meter, and HAS to take risks. | |||
Vs. Sagat: 3-7 | |||
Once meter is built: there's two ways to go at this MU: | |||
*If the player is defensive: Slowly inch your way towards Sagat by jumping in properly into CC activation, level 3 Shinkuu Hadou just to give you some real estate, or if you're really brave, walk forward and play solid footsies with Cr MK/St HK. | *If the player is defensive: Slowly inch your way towards Sagat by jumping in properly into CC activation, level 3 Shinkuu Hadou just to give you some real estate, or if you're really brave, walk forward and play solid footsies with Cr MK/St HK. | ||
| Line 601: | Line 1,445: | ||
*If the player is offensive: Use your Alpha Counters, Cr HP as an anti-air, make it top priority to knock Sagat down so that you can take the offensive with your BnB combos, tick throws, etc. | *If the player is offensive: Use your Alpha Counters, Cr HP as an anti-air, make it top priority to knock Sagat down so that you can take the offensive with your BnB combos, tick throws, etc. | ||
-SpryteMix | |||
}} | |||
Vs. Sakura ( | {{MatchUp-SFA2 | ||
|padding=yes | |||
|header=[[File:A2_Icon_Sakura.png]] '''Vs. Sakura (mirror):''' | |||
|content=[Loading match-up info...] | |||
}} | |||
Vs. Sodom: | {{MatchUp-SFA2 | ||
|padding=yes | |||
|header=[[File:A2_Icon_Sodom.png]] '''Vs. Sodom:''' | |||
|content=[Loading match-up info...] | |||
}} | |||
{{MatchUp-SFA2 | |||
|padding=yes | |||
|header=[[File:A2_Icon_Zangief.png]] '''Vs. Zangief:''' | |||
|content=[Loading match-up info...] | |||
}} | |||
= Miscellaneous = | |||
{{HiddenTOCHeader | |||
|header= ==Unblockable Cross-Up==}} | |||
{{Content Box-SFA2 | |||
|padding=yes | |||
|header=Unblockable Cross-Up | |||
|content=<center><div style="width:100%;max-width:450px;"><youtube>R90T989-zxg</youtube></div></center> | |||
}} | |||
{{Navbox-SFA2}} | {{Navbox-SFA2}} | ||
[[Category:Sakura]] | |||
[[Category:Street Fighter Alpha Series]] | [[Category:Street Fighter Alpha Series]] | ||
[[Category:Street Fighter Alpha 2]] | [[Category:Street Fighter Alpha 2]] | ||
Latest revision as of 18:53, 13 June 2025
| Sakura | |
|---|---|
| |
| Health: | 144 |
| Defensive Rating: | -2 |
| Stun: | 40 |
| Walk Speed Forward: | 300 |
| Walk Speed Backward: | 250 |
| Jump Backward: | 51f (3+48+0) |
| Neutral Backward: | 50f (3+47+0) |
| Jump Forward: | 49f (3+46+0) |
| Wake-Up: | 51f |
| Quick Rise: | 20f |
| Throw Range: | 17 |
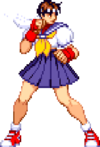
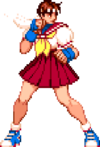
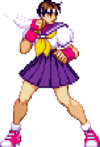
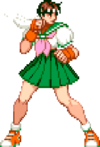
Sakura has an unusual interest in street fighting. Most high school girls don't walk down the street looking to pick a fight, but ever since her run-in with three college men, she has sought to take her revenge.
Players to watch:
Hokuto, VickiViper
Normal Moves
| SFA2 Framedata Glossary | |
|---|---|
| Damage |
Units of base damage inflicted by the move (100% life bar = 144 units of health). Most moves have a damage range; the number inside the square brackets indicates which Random Damage Table the move uses to look up any additional damage and the % chance of doing so. |
| Stun |
Units of stun inflicted by the move. |
| Startup |
The frame the move hits on (1st active frame). Super moves with a screen freeze will separate pre- and post-screen freeze startup frames by a '+' (Ex: 5+0). |
| Active |
The portion of a move that can hit. How many frames a move remains active for. ()=Inactive frames in-between active frames. [xN]=Repeated sequences. |
| Frame Adv |
The frame advantage values when the attack is blocked. (Add +1 frame to all OnBlockAdv values for the move's OnHitAdv value; Ex: +2oB/+3oH, -4oB/-3oH) |
| Meter |
The units of meter gained on whiff/block/hit. (48, 96, and 144 units of meter are required for 1, 2, and 3 bars of meter respectively) |
| Block |
Low attacks must be blocked crouching. High attacks must be blocked standing. Mid attacks can be blocked either way. |
| Properties |
|
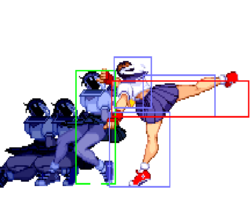
| Frames |
All framedata collected with the game speed set to normal, where the game tickrate and framerate are the same(60fps). |
| Speed |
All framedata collected with the game speed set to normal. |
| Hitboxes |
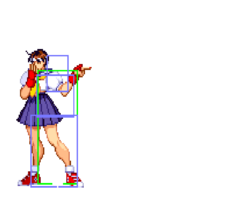
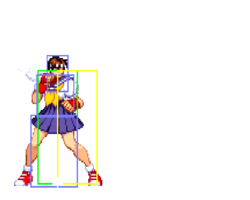
All hitbox images have the character standing/jumping in the exact same position, so hitbox distances can be easily compared.
|
| Credit | Damage, stun, framedata, meter, and updated hitboxes collected by |
Standing
Crouching
Taunt
(Start)
Neutral Jumping
Diagonal Jumping
Command Normals
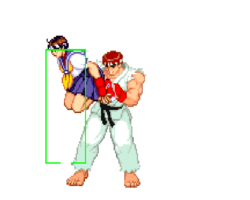
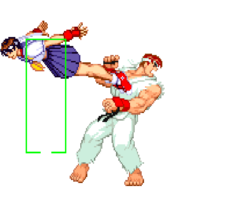
Normal Throws
| Damage | Stun | Startup | Active | Frame Adv | Meter | Block | Properties |
|---|---|---|---|---|---|---|---|
| 8[0]+1[0]xN+3[0] = 12-17 | 0 | 1 | N/A | N/A | -/-/3 | N/A |
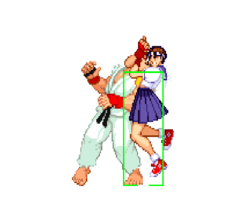
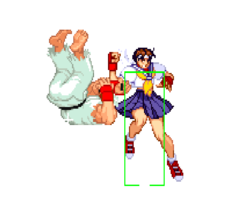
- Mashable throw from both sides to add or reduce the number of hits. With a min of 3 and a max of 8 hits.
- Always switches sides.
- Deals 10 damage when opponent tech throws.
- Sakura has average throw range (Alpha2ThrowRanges).
The only throw you should be using. This throw does decent damage and allows for a perfect cross-up.
| Damage | Stun | Startup | Active | Frame Adv | Meter | Block | Properties |
|---|---|---|---|---|---|---|---|
| 17[0] | 0 | 1 | N/A | N/A | -/-/3 | N/A |
- Deals 8 damage when opponent tech throws.
- Sakura has average throw range (Alpha2ThrowRanges).
Alpha Counters
Punch Alpha Counter
(while in blockstun)![]() +
+ ![]()
Kick Alpha Counter
(while in blockstun)![]() +
+ ![]()
Special Moves
| Version | Damage | Stun | Startup | Active | Frame Adv | Meter | Block | Properties |
|---|---|---|---|---|---|---|---|---|
| 13[7], 9[6] | 8, 8 | 21 | 3(0)32 | -7 | 4/6/9 | |||
| 15[8], 11[7] | 10, 10 | 33 | 3(0)20 | -7 | 5/7/10 | |||
| 17[11], 13[10] | 12, 12 | 45 | 3(0)12 | -7 | 6/8/11 |
- Punishable on hit.
- Punch strength has no impact on the fireball.
This move can be charged by pressing punch, which also builds more meter. Kara-cancel cr.hp into this for meter.
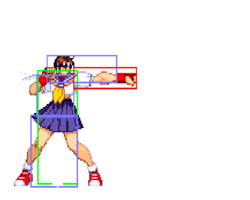
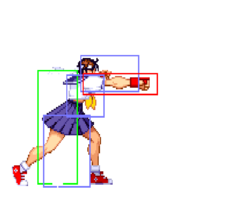
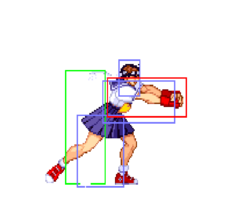
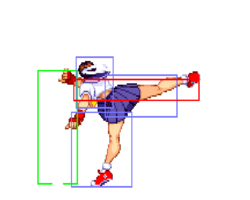
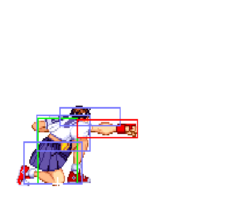
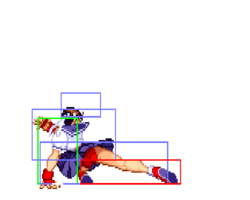
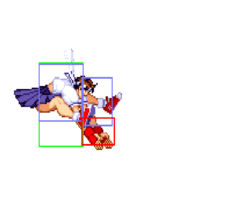
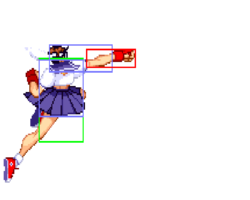
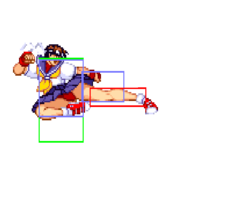
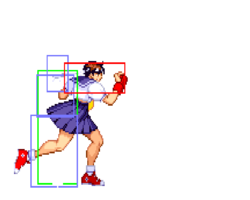
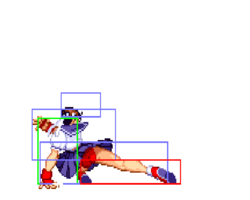
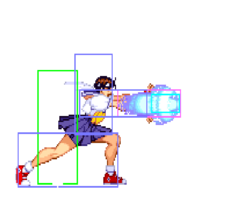
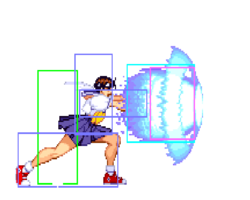
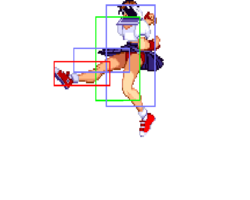
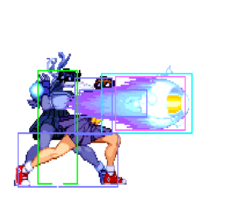
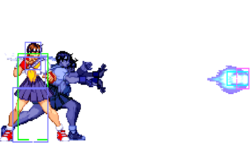
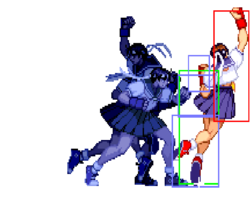
![]() - [Hitboxes pictured 1st & 2nd]
- [Hitboxes pictured 1st & 2nd]
- Speed: 450 pixels per 100 frames; 4th fastest fireball in the game (Alpha2Fireballs).
Very good zoning tool from afar. Release speed isnt great, recovery is good.
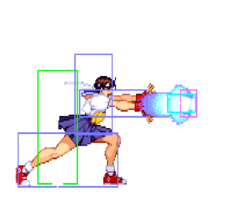
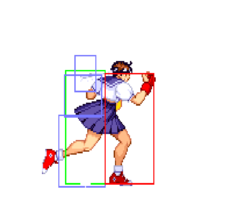
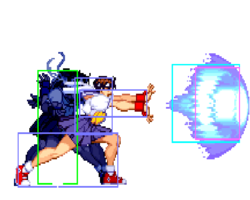
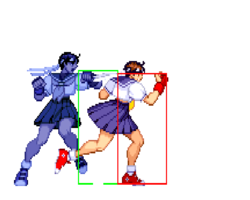
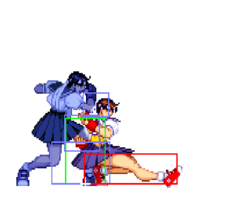
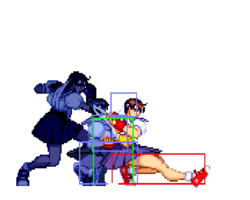
![]() ,
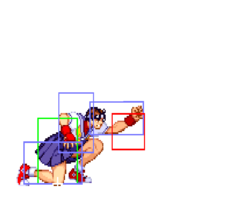
, ![]() - [Hitboxes pictured 3rd]
- [Hitboxes pictured 3rd]
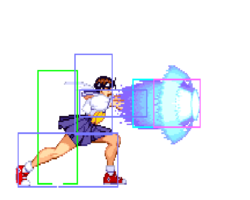
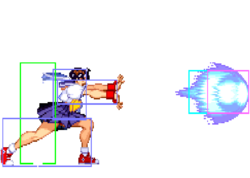
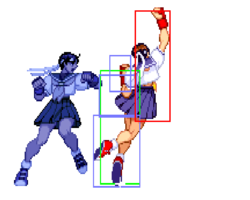
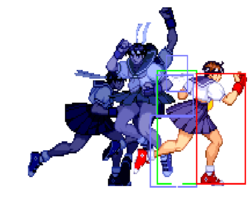
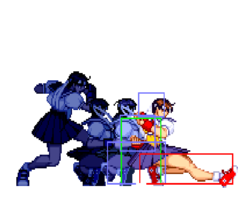
![]() ,
, ![]() ,
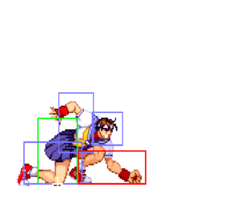
, ![]() - [Hitboxes pictured 4th]
- [Hitboxes pictured 4th]
Best used as an anti air, normally in fireball fights. Has a huge hitbox, so if you expect them to jump, charge then release. At worst the hadoken will trade, and does good damage.
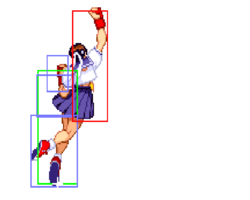
Shouoken
Dragon Punch, Uppercut![]() +
+ ![]()
^Base damage is technically 0 but the game has a minimum damage of 1. Not an anti-air despite its looks.
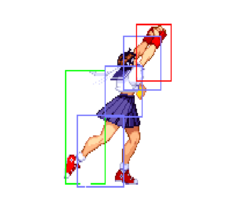
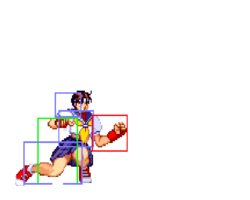
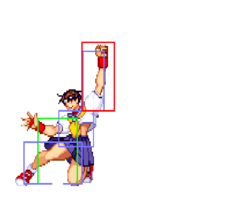
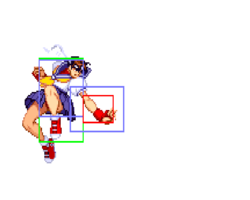
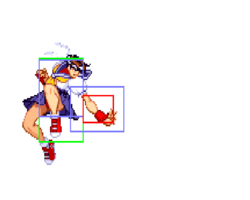
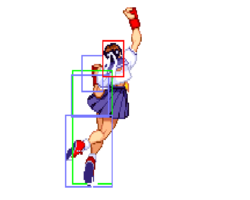
![]() - [Hitboxes pictured]
- [Hitboxes pictured]
- Hits 1 time max.
![]()
- Hits 4 times max.
![]()
- Hits 6 times max.
Her main combo move that sets up an ambiguous cross-up.
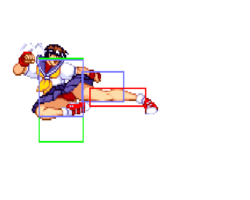
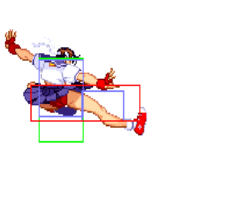
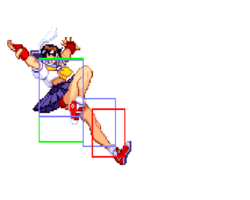
Shunpukyaku
Hurricane Kick, Tatsu![]() +
+ ![]()
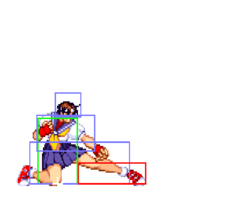
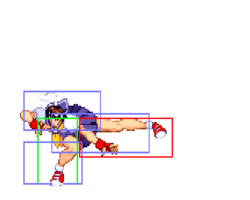
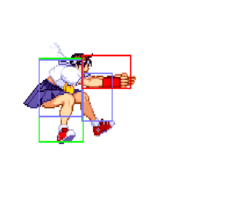
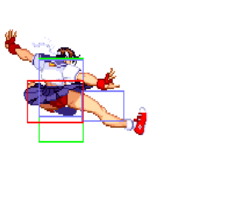
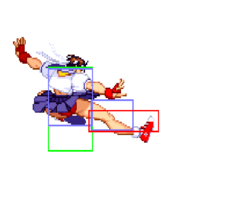
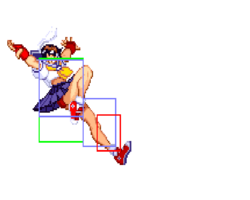
- Hits 1 time max.
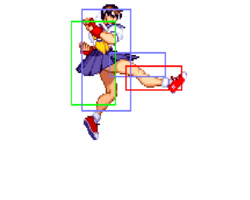
Different than the Shotos' Tatsu, she actually travels in a arc, going higher and farther the stronger the button pressed.
![]()
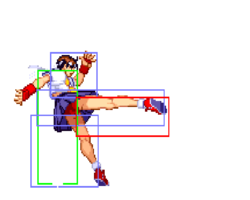
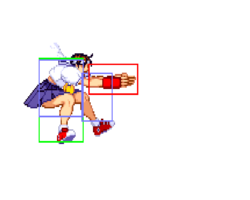
![]() - [Hitboxes pictured]
- [Hitboxes pictured]
![]()
- Punishable on hit when the first hit lands.
Goes over fireballs.
Super Moves
Startup Invulnerability Notes:
- At the end of a super screen freeze, projectiles will start moving before the opponent's character is unfrozen, giving the supers more projectile invul. frames than hit invul. frames.
Shinku Hadoken
Fireball Super![]()
![]() +
+ ![]()
Pretty much worthless super. Not safe on block & weak damage. Yes it can anti-air, but that's meter you could have used for an anti-air custom combo.
- Damage decreases with distance.
- Cannot be air blocked.
Level 1
- 5 frames of startup hit invul.; 0 of which while active.
- 9 frames of startup projectile invul.
- Hits 3 times.
Level 2
- 5 frames of startup hit invul.; 0 of which while active.
- 9 frames of startup projectile invul.
- Hits 4 times.
Level 3
- 5 frames of startup hit invul.; 0 of which while active.
- 9 frames of startup projectile invul.
- Hits 5 times.
Midare Zakura
Dragon Punch Super![]()
![]() +
+ ![]()
- The first two hits occur before the super screen freeze ends.
- A full 2 quarter-circles isn't required. Required inputs:


 +
+ 
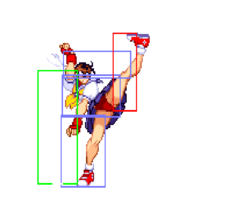
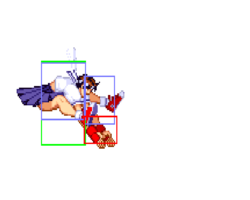
Level 1 - [Hitboxes pictured]
- 5 frames of startup hit invul.; 1 of which while active.
- 12 frames of startup projectile invul.
- Hits 4 times.
Doesn't do much more damage than her BnB. May not be worth the meter.
Level 2
- 6 frames of startup hit invul.; 2 of which while active.
- 16 frames of startup projectile invul.
- Hits 6 times.
Level 3
- 10 frames of startup hit invul.; 1 of which while active.
- 20 frames of startup projectile invul.
- Hits 7 times.
Good damage, worth comboing into.
Instant low (need to be blocking before the super freeze) and puts opponent in blockstun after super is over, letting you continue the pressure. Can be comboed into, good damage.
- A full 2 quarter-circles isn't required. Required inputs:


 +
+ 
Level 1
- 3 frames of startup hit invul.; 0 of which while active.
- 11 frames of startup projectile invul.
- Hits 5 times.
Level 2
- 4 frames of startup hit invul.; 1 of which while active.
- 12 frames of startup projectile invul.
- Hits 6 times.
Level 3
- 4 frames of startup hit invul.; 1 of which while active.
- 13 frames of startup projectile invul.
- Hits 7 times.
The Basics
What does Sakura want?
The shoto-specialist, Sakura craves setplay.
Sakura has one of the SFA2's most infamous win conditions. On most knockdowns, Sakura can put the opponent in a looping 50/50 mixup. On a throw setup, there is no mix. Her crossup can be genuinely unblockable. Her incredible normals and devastating hit confirms are a means to this end; Sakura steals rounds constantly.
Notes
Knock down. Cross up. Combo. Repeat. Thats what it breaks down to, but you have a few options when you get up close and they are blocking. You want to try to keep close to land BnBs.
Starter, c.lk x2
If hit continue to BnB.
If blocked you can do a couple things:
walk up throw If successful, you have a free cross-up. If they blocked your cross up, start back at c.lk x2. Another thing to do is empty jump into BnB.
In general, Sakura gets an ambiguous j.MK crossup after alpha counter and HP DP knockdown. Setups after a throw vary depending on the opponent's character.
Escaping throw > jumping mk crossup:
Akuma
Teleport, Roll
Adon DP
Birdie Jump (due to his wakeup speed)
Dictator Teleport, Walk Forward (due to his wakeup speed)
Charlie Nash
Dan
Chun-Li Upkicks
Dhalsim Yoga Teleport
Gen DP can trade with it or escape if it goes the wrong way, Crane (3K) c.mk
Guy Crouch
Ken
Rolento
Rose Slide, but Sakura can punish it
Ryu
Sagat Tiger Knee
Sakura
Sodom Tengu Walk
Zangief Punch Lariat (Trades)
walk up, counter hit c.lk, s.lk
Do this to counter them trying to throw you. If blocked, walk up throw or go for cross up.
Cross-up j.mk If blocked go back to c.lk x2, or hesistate then throw, or f+mk into combo.
counter hit c.rh Do this if you think they are mashing then go for cross up, if blocked match is reset.
5.counter hit s.fp xx hadouken
This will push you back out.
Basically, try to stay on your opponent to land combos or grab. Her acs arent great but if hit they are non-rollable so, in some cases, a free cross up.
Advanced Strategy
Combos
cr.lk x3, st.lk xx hp dp
This is your main combos, easy to hit confirm, great stun, and damage. Anytime you land a c.lk, it shoud end in a s.lk xx hp dp. Best BnB in the game hands down. Learn it, love it, live or gtfo. More on this in general strat.
- st.hp xx hp dp (use to punish)
- cr.lk x2, super
- st.hp xx hurricane kick (Hk vesion)
- f.mk, link cr.lk xx hp dp
- f.mk, link cr.lk xx qcb x2+k
- st.mp, link cr.lk xx hp dp
- st.mp, link cr.lk xx super
- cr.LK x2, st.LK, HP SOK
f.MK, cr.LK, HP SOK
Cr.HP, HP SOK or Lvl3 H.Ichiban
f.mk, cr.lk xx hurricane super
Custom Combos
Sakura doesn’t have the strongest customs, but still good damage and tool to have.
Lvl 1- cr.hk xx hk hurricane, hp dp cr.hk xx hp dp, hp dp
lvl 2- cr.hk xx hp dp x3 cr.hk xx hk hurricane, hp dp x2
lvl 3- cr.hk xx hk hurricane, hp dp x3
Anti air CC-
st.lp or st.mp xx hp dps (for lvl 3 use mp dps, end with hp dp)
For her ground custom, getting all hp dps can be hard to time, you can make it easier by:
1. Replacing 1 hp dp with mp dp
or
2. Using mk hurricane instead on hk hurricane.
Lv1:
[CC]cr.HK,HK SK,HP SOK[/CC]
[CC]cr.HK,HP SOKx2[/CC]
Lv3:
[CC]cr.HK,HK SK,HP SOK,MK SK,HP SOK[/CC]
[CC]cr.HK,HP SOK,LK SKx2,HP SOKx2[/CC]
[CC]st.MP,HP SOKx3[/CC]
Match-ups
You pretty much just have to out play him. It’s not too horrible though because she’s real small so she can duck his s.fp and even his hurricane most of the time. So you’re both missing chunks of your offense. If you wanna beat him air to air use j.lk or j.mp, should work fine. Jump in with mainly j.fp or j.rh since you can’t really cross him up so no need for j.mk, except deep corner.
Just play basic mindgames:
c.lk, throw c.lk, wait half a second, c.lk, s.lk xx DP overhead, s.lk xx DP Cross over empty jump, duck hurricane, combo. Etc.- Dreamfire
s.fp help alot in that match also cause it beast hurricane.- RSX
This is Sakura's worst matchup because Sagat can easily win in the fireball war due to Sakura's fireball not going fullscreen, and High Tiger Cannon can punish Sak on her fireball recovery. He's too tall to perform the ambigious crossup when he's standing. Not to mention Sagat's anti air options which he can completely shut you down with. In order to win, Sakura HAS to build meter, and HAS to take risks.
Once meter is built: there's two ways to go at this MU:
- If the player is defensive: Slowly inch your way towards Sagat by jumping in properly into CC activation, level 3 Shinkuu Hadou just to give you some real estate, or if you're really brave, walk forward and play solid footsies with Cr MK/St HK.
- If the player is offensive: Use your Alpha Counters, Cr HP as an anti-air, make it top priority to knock Sagat down so that you can take the offensive with your BnB combos, tick throws, etc.
-SpryteMix
