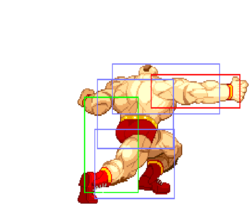
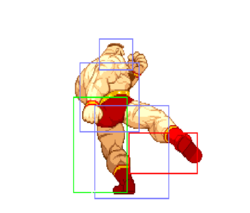
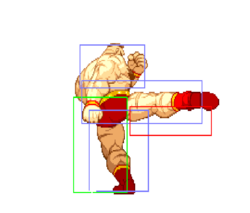
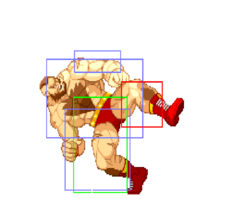
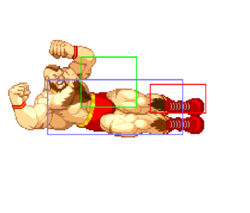
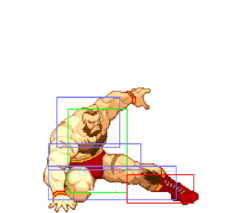
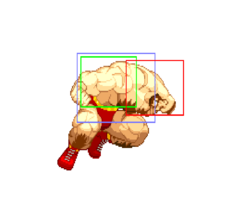
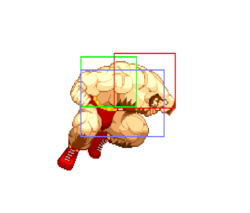
| (54 intermediate revisions by 7 users not shown) | |||
| Line 1: | Line 1: | ||
<templatestyles src="CharacterPage-SFA2/styles.css"/> | |||
{{TOClimit}} | |||
{{HiddenTOCHeader | |||
|header= =Overview=}} | |||
{{CharacterOverview-SFA2 | |||
|overview=Pro wrestlers cower before his Piledriver. Zangief knows that he must improve his Piledriver but is frustrated because he cannot advance it. A sudden storm sends Zangief spinning to earth head-first. He drops to the ground with a great thud. Seconds later, great laughter breaks out across the land; Zangief has found his inspiration! | |||
'''Players to watch:''' | |||
[https://www.fightcade.com/id/RagingStormX RagingStormX], [https://www.fightcade.com/id/Shadowonlive Shadowonlive] | |||
<br><br> | |||
<center>'''Moveset'''</center> | |||
<center><div style="width:100%;max-width:450px;"><youtube>gAxl8OIN2u8</youtube></div></center> | |||
<br> | |||
|playstyle=[[File:A2_Icon_Zangief.png|30px]] Zangief, is the big Russian grappler who everyone loves to fight like he has cooties. He is very good in Alpha 2, having a tick-throw game on par with his other incarnations. He's high tier, right below the top 4. This is the only game outside of the SF2 series where Gief is pretty much going to pile drive you when he gets close.'' | |||
|pros=*Command grabs are very damaging with instant startup | |||
*{{3p}} Lariat is an awesome anti-air, {{3k}} Lariat is great vs ground moves and as a reversal | |||
*Solid normals with highest damage in the game | |||
*Amazing jumping attacks | |||
*Good jump arc | |||
*Damaging and long reaching CC | |||
*"Magic Grab": His command grabs are not affected by the opponent's throw invul on their wake-up or while coming out of block/hit-stun | |||
*Highest defensive rating in the game, resulting in less damage taken | |||
*Highest stun in the game | |||
|cons=*Gigantic hurtbox | |||
*Slow walk speed | |||
*Can have trouble getting in on some characters, notably ones with strong/invincible anti-airs | |||
|name=Zangief | |||
|image=SFA2_Zangief_Portrait.png | |||
|health=144 | |||
|rating=+4 | |||
|stun=50 | |||
|fSpeed=225 | |||
|bSpeed=112.5 | |||
|bJump=48f (6+42+0) | |||
|nJump=46f (6+40+0) | |||
|fJump=45f (6+39+0) | |||
|wakeupNormal=51f | |||
|wakeupQuick=29f | |||
|throw=19 | |||
|colorsName=Zangief | |||
|old=no | |||
}} | |||
= | {{HiddenTOCHeader | ||
|header= =Move List=}} | |||
= | |||
== Normal Moves == | == Normal Moves == | ||
<center>{{FrameDataKey-SFA2 | |||
|credit=Damage, stun, framedata, meter, and updated hitboxes collected by [[File:A2_Icon_ChunLi.png]][[User:Veri7as|Veri7as]], September 2022 | |||
}}</center> | |||
===Standing=== | |||
{{MoveData-SFA2 | |||
|image=A2_Zangief_st.lp.png | |||
|imageSize=250px | |||
|caption= | |||
|name= | |||
|subtitle= | |||
|input=st.[[File:Lp.png]] | |||
|data= | |||
{{AttackData-SFA2 | |||
|Damage= 8<sup>[0]</sup> | |||
|Stun= 3 | |||
|Startup= 7 | |||
|Active= 2 | |||
|Frame Adv= -5 | |||
|Meter= 0/1/2 | |||
|Block=[[File:Mid.png]] | |||
|Properties=[[File:Specialcancel.png]]<br>[[File:Supercancel.png]] | |||
}} | |||
|description= | |||
}} | |||
[[File: | {{MoveData-SFA2 | ||
|image=A2_Zangief_st.mp.png | |||
|imageSize=250px | |||
|caption= | |||
|name= | |||
|subtitle= | |||
|input=st.[[File:Mp.png]] | |||
|data= | |||
{{AttackData-SFA2 | |||
|Damage= 14<sup>[9]</sup> | |||
|Stun= 6 | |||
|Startup= 13 | |||
|Active= 3 | |||
|Frame Adv= -5 | |||
|Meter= 1/3/6 | |||
|Block=[[File:Mid.png]] | |||
|Properties= - | |||
}} | |||
|description= | |||
}} | |||
[[File: | {{MoveData-SFA2 | ||
|image=A2_Zangief_st.hp.png | |||
|imageSize=250px | |||
|caption= | |||
|name= | |||
|subtitle= | |||
|input=st.[[File:Hp.png]] | |||
|data= | |||
{{AttackData-SFA2 | |||
|Damage= 20<sup>[14]</sup> | |||
|Stun= 8 | |||
|Startup= 15 | |||
|Active= 3 | |||
|Frame Adv= -4 | |||
|Meter= 2/5/9 | |||
|Block=[[File:Mid.png]] | |||
|Properties= - | |||
}} | |||
|description= | |||
}} | |||
[[File: | {{MoveData-SFA2 | ||
|image=A2_Zangief_st.lk.png | |||
|imageSize=250px | |||
|caption= | |||
|name= | |||
|subtitle= | |||
|input=st.[[File:Lk.png]] | |||
|data= | |||
{{AttackData-SFA2 | |||
|Damage= 9<sup>[4]</sup> | |||
|Stun= 3 | |||
|Startup= 8 | |||
|Active= 5 | |||
|Frame Adv= -5 | |||
|Meter= 0/1/2 | |||
|Block=[[File:Mid.png]] | |||
|Properties=[[File:Specialcancel.png]]<br>[[File:Supercancel.png]] | |||
}} | |||
|description= | |||
}} | |||
[[File: | {{MoveData-SFA2 | ||
|image=A2_Zangief_st.mk.png | |||
|imageSize=250px | |||
|caption= | |||
|name= | |||
|subtitle= | |||
|input=st.[[File:Mk.png]] | |||
|data= | |||
{{AttackData-SFA2 | |||
|Damage= 12<sup>[0]</sup> | |||
|Stun= 6 | |||
|Startup= 8 | |||
|Active= 6 | |||
|Frame Adv= -6 | |||
|Meter= 1/3/6 | |||
|Block=[[File:Mid.png]] | |||
|Properties= - | |||
}} | |||
|description= | |||
}} | |||
[[File: | {{MoveData-SFA2 | ||
|image=A2_Zangief_st.hk_1.png | |||
|imageSize=250px | |||
|image2=A2_Zangief_st.hk_2.png | |||
|imageSize2=250px | |||
|caption= | |||
|name= | |||
|subtitle= | |||
|input=st.[[File:Hk.png]] | |||
|data= | |||
{{AttackData-SFA2 | |||
|Damage= 13<sup>[0]</sup>, 8<sup>[0]</sup> | |||
|Stun= 4, 4 | |||
|Startup= 13 | |||
|Active= 2(0)4 | |||
|Frame Adv= -13, -11 | |||
|Meter= 2/4+1/6+3 | |||
|Block=[[File:Mid.png]] | |||
|Properties= - | |||
}} | |||
|description= *Hits 2 times. | |||
}} | |||
[[File: | ===Crouching=== | ||
{{MoveData-SFA2 | |||
|image=A2_Zangief_cr.lp.png | |||
|imageSize=250px | |||
|caption= | |||
|name= | |||
|subtitle= | |||
|input=cr.[[File:Lp.png]] | |||
|data= | |||
{{AttackData-SFA2 | |||
|Damage= 5<sup>[0]</sup> | |||
|Stun= 3 | |||
|Startup= 5 | |||
|Active= 4 | |||
|Frame Adv= -5 | |||
|Meter= 0/1/2 | |||
|Block=[[File:Mid.png]] | |||
|Properties=[[File:Rpdfire.png]][[File:Chaincancel.png]]<br>[[File:Specialcancel.png]][[File:Supercancel.png]] | |||
}} | |||
|description=*Can rapid fire into itself or chain cancelled into: st.{{lp}}, st.{{lk}}, & cr.{{lk}}. | |||
}} | |||
[[File: | {{MoveData-SFA2 | ||
|image=A2_Zangief_cr.mp.png | |||
|imageSize=250px | |||
|caption= | |||
|name= | |||
|subtitle= | |||
|input=cr.[[File:Mp.png]] | |||
|data= | |||
{{AttackData-SFA2 | |||
|Damage= 14<sup>[0]</sup> | |||
|Stun= 6 | |||
|Startup= 11 | |||
|Active= 4 | |||
|Frame Adv= -8 | |||
|Meter= 1/3/6 | |||
|Block=[[File:Mid.png]] | |||
|Properties= - | |||
}} | |||
|description= | |||
}} | |||
[[File: | {{MoveData-SFA2 | ||
|image=A2_Zangief_cr.hp.png | |||
|imageSize=250px | |||
|caption= | |||
|name= | |||
|subtitle= | |||
|input=cr.[[File:Hp.png]] | |||
|data= | |||
{{AttackData-SFA2 | |||
|Damage= 20<sup>[0]</sup> | |||
|Stun= 8 | |||
|Startup= 13 | |||
|Active= 4 | |||
|Frame Adv= -3 | |||
|Meter= 2/5/9 | |||
|Block=[[File:Mid.png]] | |||
|Properties= - | |||
}} | |||
|description= | |||
}} | |||
[[File: | {{MoveData-SFA2 | ||
|image=A2_Zangief_cr.lk.png | |||
|imageSize=250px | |||
|caption= | |||
|name= | |||
|subtitle= | |||
|input=cr.[[File:Lk.png]] | |||
|data= | |||
{{AttackData-SFA2 | |||
|Damage= 9<sup>[2]</sup> | |||
|Stun= 3 | |||
|Startup= 6 | |||
|Active= 4 | |||
|Frame Adv= -5 | |||
|Meter= 0/1/2 | |||
|Block=[[File:Low.png]] | |||
|Properties=[[File:Specialcancel.png]]<br>[[File:Supercancel.png]] | |||
}} | |||
|description= | |||
}} | |||
[[File: | {{MoveData-SFA2 | ||
|image=A2_Zangief_cr.mk.png | |||
|imageSize=250px | |||
|caption= | |||
|name= | |||
|subtitle= | |||
|input=cr.[[File:Mk.png]] | |||
|data= | |||
{{AttackData-SFA2 | |||
|Damage= 13<sup>[0]</sup> | |||
|Stun= 6 | |||
|Startup= 10 | |||
|Active= 3 | |||
|Frame Adv= -8 | |||
|Meter= 1/3/6 | |||
|Block=[[File:Low.png]] | |||
|Properties= - | |||
}} | |||
|description= | |||
}} | |||
[[File:Hk.png]]- | {{MoveData-SFA2 | ||
|image=A2_Zangief_cr.hk.png | |||
|imageSize=250px | |||
|caption= | |||
|name= | |||
|subtitle= | |||
|input=cr.[[File:Hk.png]] | |||
|data= | |||
{{AttackData-SFA2 | |||
|Damage= 15<sup>[0]</sup> | |||
|Stun= 6 | |||
|Startup= 12 | |||
|Active= 3 | |||
|Frame Adv= -12 | |||
|Meter= 2/5/9 | |||
|Block=[[File:Low.png]] | |||
|Properties=[[File:Softknockdown.png]] | |||
}} | |||
|description= | |||
}} | |||
===Neutral Jumping=== | |||
{{MoveData-SFA2 | |||
|image=A2_Zangief_nj.lp.png | |||
|imageSize=250px | |||
|caption= | |||
|name= | |||
|subtitle= | |||
|input=nj.[[File:Lp.png]] | |||
|data= | |||
{{AttackData-SFA2 | |||
|Damage= 11<sup>[0]</sup> | |||
|Stun= 3 | |||
|Startup= 6 | |||
|Active= 8 | |||
|Frame Adv= | |||
|Meter= 0/1/2 | |||
|Block=[[File:High.png]] | |||
|Properties= | |||
}} | |||
|description= | |||
}} | |||
{{MoveData-SFA2 | |||
|image=A2_Zangief_nj.mp.png | |||
|imageSize=250px | |||
|caption= | |||
|name= | |||
|subtitle= | |||
|input=nj.[[File:Mp.png]] | |||
|data= | |||
{{AttackData-SFA2 | |||
|Damage= 12<sup>[0]</sup> | |||
|Stun= 6 | |||
|Startup= 9 | |||
|Active= 4 | |||
|Frame Adv= | |||
|Meter= 1/3/6 | |||
|Block=[[File:High.png]] | |||
|Properties= | |||
}} | |||
|description= | |||
}} | |||
[[File: | {{MoveData-SFA2 | ||
|image=A2_Zangief_nj.hp.png | |||
|imageSize=250px | |||
|caption= | |||
|name= | |||
|subtitle= | |||
|input=nj.[[File:Hp.png]] | |||
|data= | |||
{{AttackData-SFA2 | |||
|Damage= 14<sup>[0]</sup> | |||
|Stun= 8 | |||
|Startup= 11 | |||
|Active= 4 | |||
|Frame Adv= | |||
|Meter= 2/5/9 | |||
|Block=[[File:High.png]] | |||
|Properties= | |||
}} | |||
|description= | |||
}} | |||
{{MoveData-SFA2 | |||
|image=A2_Zangief_nj.lk.png | |||
|imageSize=250px | |||
|caption= | |||
|name= | |||
|subtitle= | |||
|input=nj.[[File:Lk.png]] | |||
|data= | |||
{{AttackData-SFA2 | |||
|Damage= 10<sup>[0]</sup> | |||
|Stun= 3 | |||
|Startup= 7 | |||
|Active= 10 | |||
|Frame Adv= | |||
|Meter= 0/1/2 | |||
|Block=[[File:High.png]] | |||
|Properties= | |||
}} | |||
|description= | |||
}} | |||
[[File: | {{MoveData-SFA2 | ||
|image=A2_Zangief_nj.mk.png | |||
|imageSize=250px | |||
|caption= | |||
|name= | |||
|subtitle= | |||
|input=nj.[[File:Mk.png]] | |||
|data= | |||
{{AttackData-SFA2 | |||
|Damage= 12<sup>[0]</sup> | |||
|Stun= 6 | |||
|Startup= 9 | |||
|Active= 8 | |||
|Frame Adv= | |||
|Meter= 1/3/6 | |||
|Block=[[File:High.png]] | |||
|Properties= Chip Damage | |||
}} | |||
|description= *Deals 2 damage on block. | |||
}} | |||
{{MoveData-SFA2 | |||
|image=A2_Zangief_nj.hk.png | |||
|imageSize=250px | |||
|caption= | |||
|name= | |||
|subtitle= | |||
|input=nj.[[File:Hk.png]] | |||
|data= | |||
{{AttackData-SFA2 | |||
|Damage= 14<sup>[0]</sup> | |||
|Stun= 8 | |||
|Startup= 11 | |||
|Active= 4 | |||
|Frame Adv= | |||
|Meter= 2/5/9 | |||
|Block=[[File:High.png]] | |||
|Properties= | |||
}} | |||
|description= | |||
}} | |||
===Diagonal Jumping=== | |||
{{MoveData-SFA2 | |||
|image=A2_Zangief_dj.lp.png | |||
|imageSize=250px | |||
|caption= | |||
|name= | |||
|subtitle= | |||
|input=dj.[[File:Lp.png]] | |||
|data= | |||
{{AttackData-SFA2 | |||
|Damage= 11<sup>[0]</sup> | |||
|Stun= 3 | |||
|Startup= 6 | |||
|Active= 8 | |||
|Frame Adv= | |||
|Meter= 0/1/2 | |||
|Block=[[File:High.png]] | |||
|Properties= | |||
}} | |||
|description= | |||
}} | |||
[[File: | {{MoveData-SFA2 | ||
|image=A2_Zangief_dj.mp.png | |||
|imageSize=250px | |||
|caption= | |||
|name= | |||
|subtitle= | |||
|input=dj.[[File:Mp.png]] | |||
|data= | |||
{{AttackData-SFA2 | |||
|Damage= 12<sup>[0]</sup> | |||
|Stun= 6 | |||
|Startup= 9 | |||
|Active= 4 | |||
|Frame Adv= | |||
|Meter= 1/3/6 | |||
|Block=[[File:High.png]] | |||
|Properties= | |||
}} | |||
|description= | |||
}} | |||
{{MoveData-SFA2 | |||
|image=A2_Zangief_dj.hp.png | |||
|imageSize=250px | |||
|caption= | |||
|name= | |||
|subtitle= | |||
|input=dj.[[File:Hp.png]] | |||
|data= | |||
{{AttackData-SFA2 | |||
|Damage= 15<sup>[2]</sup> | |||
|Stun= 8 | |||
|Startup= 11 | |||
|Active= 6 | |||
|Frame Adv= | |||
|Meter= 2/5/9 | |||
|Block=[[File:High.png]] | |||
|Properties= | |||
}} | |||
|description= | |||
}} | |||
[[File: | {{MoveData-SFA2 | ||
|image=A2_Zangief_dj.lk.png | |||
|imageSize=250px | |||
|caption= | |||
|name= | |||
|subtitle= | |||
|input=dj.[[File:Lk.png]] | |||
|data= | |||
{{AttackData-SFA2 | |||
|Damage= 10<sup>[0]</sup> | |||
|Stun= 3 | |||
|Startup= 7 | |||
|Active= 8 | |||
|Frame Adv= | |||
|Meter= 0/1/2 | |||
|Block=[[File:High.png]] | |||
|Properties= | |||
}} | |||
|description= | |||
}} | |||
{{MoveData-SFA2 | |||
|image=A2_Zangief_dj.mk.png | |||
|imageSize=250px | |||
|caption= | |||
|name= | |||
|subtitle= | |||
|input=dj.[[File:Mk.png]] | |||
|data= | |||
{{AttackData-SFA2 | |||
|Damage= 12<sup>[0]</sup> | |||
|Stun= 6 | |||
|Startup= 9 | |||
|Active= 6 | |||
|Frame Adv= | |||
|Meter= 1/3/6 | |||
|Block=[[File:High.png]] | |||
|Properties= | |||
}} | |||
|description= | |||
}} | |||
[[File: | {{MoveData-SFA2 | ||
|image=A2_Zangief_dj.hk.png | |||
|imageSize=250px | |||
|caption= | |||
|name= | |||
|subtitle= | |||
|input=dj.[[File:Hk.png]] | |||
|data= | |||
{{AttackData-SFA2 | |||
|Damage= 14<sup>[0]</sup> | |||
|Stun= 6 | |||
|Startup= 11 | |||
|Active= 4 | |||
|Frame Adv= | |||
|Meter= 2/5/9 | |||
|Block=[[File:High.png]] | |||
|Properties= | |||
}} | |||
|description= | |||
}} | |||
== Command Normals == | |||
{{MoveData-SFA2 | |||
|image=A2_Zangief_db.mk.png | |||
|imageSize=250px | |||
|caption= | |||
|name=Dynamite Kick | |||
|subtitle= | |||
|input=[[File:Db.png]] + [[File:Mk.png]] | |||
|data= | |||
{{AttackData-SFA2 | |||
|Damage= 11<sup>[0]</sup> | |||
|Stun= 6 | |||
|Startup= 8 | |||
|Active= 4 | |||
|Frame Adv= -2 | |||
|Meter= 0/2/5 | |||
|Block=[[File:Low.png]] | |||
|Properties= - | |||
}} | |||
|description= | |||
}} | |||
[[File: | {{MoveData-SFA2 | ||
|image=A2_Zangief_db.hk.png | |||
|imageSize=250px | |||
|caption= | |||
|name=Russian Kick | |||
|subtitle= | |||
|input=[[File:Db.png]] + [[File:Hk.png]] | |||
|data= | |||
{{AttackData-SFA2 | |||
|Damage= 13<sup>[0]</sup> | |||
|Stun= 6 | |||
|Startup= 10 | |||
|Active= 4 | |||
|Frame Adv= 0 | |||
|Meter= 0/3/7 | |||
|Block=[[File:Low.png]] | |||
|Properties=[[File:Softknockdown.png]] | |||
}} | |||
|description= | |||
}} | |||
nj.[[File:Mp.png]]- | {{MoveData-SFA2 | ||
|image=A2_Zangief_Headbutt_mp.png | |||
|imageSize=250px | |||
|image2=A2_Zangief_Headbutt_hp.png | |||
|imageSize2=250px | |||
|caption= | |||
|name=Kuchu Headbutt | |||
|subtitle= | |||
|input=nj.[[File:U.png]] + [[File:Mp.png]]/[[File:Hp.png]] | |||
|data= | |||
{{AttackData-SFA2 | |||
|version=[[File:Mp.png]] | |||
|Damage= 21<sup>[0]</sup> | |||
|Stun= 20 | |||
|Startup= 5 | |||
|Active= 6 | |||
|Frame Adv= | |||
|Meter= 2/4/7 | |||
|Block=[[File:High.png]] | |||
}} | |||
{{AttackData-SFA2 | |||
|header= no | |||
|version=[[File:Hp.png]] | |||
|Damage= 21<sup>[0]</sup> | |||
|Stun= 20 | |||
|Startup= 5 | |||
|Active= 6 | |||
|Frame Adv= | |||
|Meter= 3/6/10 | |||
|Block=[[File:High.png]] | |||
}} | |||
|description= *Can be done with any up direction: {{ub}}, {{u}}, or {{uf}} | |||
[ | ----- | ||
{{mp}} - ''[Hitboxes pictured top]'' | |||
[ | ----- | ||
{{hp}} - ''[Hitboxes pictured bottom]'' | |||
}} | |||
[[File: | {{MoveData-SFA2 | ||
|image=A2_Zangief_BodyPress.png | |||
|imageSize=250px | |||
|caption= | |||
|name=Body Press | |||
|subtitle= | |||
|input=dj.[[File:D.png]] + [[File:Hp.png]] | |||
|data= | |||
{{AttackData-SFA2 | |||
|Damage= 13<sup>[0]</sup> | |||
|Stun= 8 | |||
|Startup= 8 | |||
|Active= 28 | |||
|Frame Adv= | |||
|Meter= 3/6/10 | |||
|Block=[[File:High.png]] | |||
|Properties= Cross-up | |||
}} | |||
|description= *Can be done with any down direction: {{db}}, {{d}}, or {{df}} | |||
}} | |||
{{MoveData-SFA2 | |||
|image=A2_Zangief_KneeDrop_lk.png | |||
|imageSize=250px | |||
|image2=A2_Zangief_KneeDrop_mk.png | |||
|imageSize2=250px | |||
|caption= | |||
|name=Double Knee Drop | |||
|subtitle= | |||
|input=dj.[[File:D.png]] + [[File:Lk.png]]/[[File:Mk.png]] | |||
|data= | |||
{{AttackData-SFA2 | |||
|version=[[File:Lk.png]] | |||
|Damage= 10<sup>[0]</sup> | |||
|Stun= 6 | |||
|Startup= 8 | |||
|Active= 31 | |||
|Frame Adv= | |||
|Meter= 1/2/3 | |||
|Block=[[File:High.png]] | |||
}} | |||
{{AttackData-SFA2 | |||
|header= no | |||
|version=[[File:Mk.png]] | |||
|Damage= 12<sup>[0]</sup> | |||
|Stun= 6 | |||
|Startup= 8 | |||
|Active= 31 | |||
|Frame Adv= | |||
|Meter= 2/4/7 | |||
|Block=[[File:High.png]] | |||
}} | |||
|description= *Can be done with any down direction: {{db}}, {{d}}, or {{df}} | |||
[ | ----- | ||
{{lk}} - ''[Hitboxes pictured top]'' | |||
[ | ----- | ||
{{mk}} - ''[Hitboxes pictured bottom]'' | |||
MK Kneedrop is one of Zangief's best aerial tools. It gets him in, ticks for an SPD, and at worst trades with most normal anti-airs. New Zangief players will be amazed at just how much Kneedrop can beat. | |||
}} | |||
== Normal Throws == | |||
{{MoveData-SFA2 | |||
|image=A2_Zangief_ThrowRange.png | |||
|imageSize=250px | |||
|image2=A2_Zangief_PThrow_1.png | |||
|imageSize2=250px | |||
|caption= | |||
|name=Back Drop | |||
|subtitle=Punch Throw | |||
|input=[[File:B.png]]/[[File:F.png]] + [[File:Mp.png]]/[[File:Hp.png]] | |||
|data= | |||
{{AttackData-SFA2 | |||
|Damage= 20<sup>[0]</sup> | |||
|Stun= 0 | |||
|Startup= 1 | |||
|Active= N/A | |||
|Frame Adv= N/A | |||
|Meter= -/-/3 | |||
|Block= N/A | |||
|Properties= [[File:Throw.png]]<br>[[File:Hardknockdown.png]] | |||
}} | |||
|description= *Deals full damage even when opponent tech throws. | |||
*Zangief has above average throw range ([[Street_Fighter_Alpha_2/System#Regular_Throw_Ranges|Alpha2ThrowRanges]]). | |||
}} | |||
{{MoveData-SFA2 | |||
|image=A2_Zangief_df.PThrowRange.png | |||
|imageSize=250px | |||
|image2=A2_Zangief_df.PThrow_1.png | |||
|imageSize2=250px | |||
|caption= | |||
|name=Stomach Claw | |||
|subtitle= | |||
|input=[[File:Df.png]] + [[File:Mp.png]]/[[File:Hp.png]] | |||
|data= | |||
{{AttackData-SFA2 | |||
|Damage= 13<sup>[0]</sup>+1<sup>[0]</sup>xN = 15-18 | |||
|Stun= 0 | |||
|Startup= 1 | |||
|Active= N/A | |||
|Frame Adv= N/A | |||
|Meter= -/-/3 | |||
|Block= N/A | |||
|Properties= [[File:Throw.png]][[File:Mash.png]]<br>[[File:Hardknockdown.png]] | |||
}} | |||
|description=*Mashable throw from both sides to add or reduce the number of hits. With a min of 2 and a max of 5 hits. | |||
*Does not side switch. | |||
*Deals 14 damage when opponent tech throws. | |||
*Zangief has above average throw range ([[Street_Fighter_Alpha_2/System#Regular_Throw_Ranges|Alpha2ThrowRanges]]). | |||
}} | |||
{{MoveData-SFA2 | |||
|image=A2_Zangief_ThrowRange.png | |||
|imageSize=250px | |||
|image2=A2_Zangief_KThrow_1.png | |||
|imageSize2=250px | |||
|caption= | |||
|name=Kamitsuki | |||
|subtitle=Kick Throw | |||
|input=[[File:B.png]]/[[File:F.png]] + [[File:Mk.png]]/[[File:Hk.png]] | |||
|data= | |||
{{AttackData-SFA2 | |||
|Damage= 12<sup>[0]</sup>+1<sup>[0]</sup>xN = 14-17 | |||
|Stun= 0 | |||
|Startup= 1 | |||
|Active= N/A | |||
|Frame Adv= N/A | |||
|Meter= -/-/3 | |||
|Block= N/A | |||
|Properties= [[File:Throw.png]][[File:Mash.png]]<br>[[File:Hardknockdown.png]] | |||
}} | |||
|description=*Mashable throw from both sides to add or reduce the number of hits. With a min of 2 and a max of 5 hits. | |||
*Does not side switch. | |||
*Deals 13 damage when opponent tech throws. | |||
*Zangief has above average throw range ([[Street_Fighter_Alpha_2/System#Regular_Throw_Ranges|Alpha2ThrowRanges]]). | |||
}} | |||
== Alpha Counters == | |||
{{MoveData-SFA2 | |||
|image=A2_Zangief_PAC_1.png | |||
|imageSize=250px | |||
|image2=A2_Zangief_PAC_2.png | |||
|imageSize2=250px | |||
|image3=A2_Zangief_PAC_3.png | |||
|imageSize3=250px | |||
|caption= | |||
|name=Punch Alpha Counter | |||
|subtitle= | |||
|input=(while in blockstun)[[File:Qcd.png]]+ [[File:P.png]] | |||
|data= | |||
{{AttackData-SFA2 | |||
|Damage= 19<sup>[4]</sup> | |||
|Stun= 0 | |||
|Startup= 4 | |||
|Active= 1 | |||
|Frame Adv= N/A | |||
|Meter= 0/-/0 | |||
|Block=N/A | |||
|Properties=[[File:Startupinv.png]][[File:Throw.png]]<br>[[File:Hardknockdown.png]] | |||
}} | |||
|description= Only to be used against ground based attacks and very deep jump-in attacks up close to gief. If the opponent gets AC'ed into the corner, you should be able to follow up with a magic grab. | |||
}} | |||
[[File: | {{MoveData-SFA2 | ||
|image=A2_Zangief_KAC.png | |||
|imageSize=250px | |||
|caption= | |||
|name=Kick Alpha Counter | |||
|subtitle= | |||
|input=(while in blockstun)[[File:Qcd.png]]+ [[File:K.png]] | |||
|data= | |||
{{AttackData-SFA2 | |||
|Damage= 15<sup>[0]</sup> | |||
|Stun= 8 | |||
|Startup= 4 | |||
|Active= 6 | |||
|Frame Adv= +3 | |||
|Meter= 0/0/0 | |||
|Block=[[File:Mid.png]] | |||
|Properties=[[File:Startupinv.png]]<br>[[File:Hardknockdown.png]] | |||
}} | |||
|description= His best option as an anti-air and most ground attacks. If the opponent jumps in with an early attack, try to AC at the first frames of block stun so you can get quicker recovery from the AC and alot of times you can walk forward a second, jump forward and magic grab as they get up. | |||
}} | |||
== Special Moves == | |||
== | |||
[[File: | {{MoveData-SFA2 | ||
|image=A2_Zangief_GreenHand_lp.png | |||
|imageSize=250px | |||
|image2=A2_Zangief_GreenHand_mp.png | |||
|imageSize2=250px | |||
|image3=A2_Zangief_GreenHand_hp.png | |||
|imageSize3=250px | |||
|caption= | |||
|name=Banishing Flat | |||
|subtitle=Green Hand | |||
|input=[[File:Dp.png]] + [[File:P.png]] | |||
|data= | |||
{{AttackData-SFA2 | |||
|version=[[File:Lp.png]] | |||
|Damage= 12<sup>[5]</sup> | |||
|Stun= 4 | |||
|Startup= 15 | |||
|Active= 8 | |||
|Frame Adv= -4 | |||
|Meter= 7/8/9 | |||
|Block=[[File:Mid.png]] | |||
|Properties=[[File:Projnull.png]] | |||
}} | |||
{{AttackData-SFA2 | |||
|header= no | |||
|version=[[File:Mp.png]] | |||
|Damage= 14<sup>[5]</sup> | |||
|Stun= 10 | |||
|Startup= 16 | |||
|Active= 10 | |||
|Frame Adv= -5 | |||
|Meter= 7/8/9 | |||
|Block=[[File:Mid.png]] | |||
|Properties=[[File:Projnull.png]] | |||
}} | |||
{{AttackData-SFA2 | |||
|header= no | |||
|version=[[File:Hp.png]] | |||
|Damage= 15<sup>[5]</sup> | |||
|Stun= 12 | |||
|Startup= 17 | |||
|Active= 12 | |||
|Frame Adv= -8 | |||
|Meter= 7/8/9 | |||
|Block=[[File:Mid.png]] | |||
|Properties=[[File:Projnull.png]] | |||
}} | |||
|description= This move is helpful to advance and nullifies normal fireballs and 1 hit of super fireballs. Depending how close you negate a fireball, you can SPD after. | |||
----- | |||
[ | {{lp}} - ''[Hitboxes pictured top]'' | ||
----- | |||
[ | {{mp}} - ''[Hitboxes pictured middle]'' | ||
----- | |||
[ | {{hp}} - ''[Hitboxes pictured bottom]'' | ||
}} | |||
[[File:360.png]]+[[File: | {{MoveData-SFA2 | ||
|image=A2_Zangief_SPD_lp.png | |||
|imageSize=250px | |||
|image2=A2_Zangief_SPD_mp.png | |||
|imageSize2=250px | |||
|image3=A2_Zangief_SPD_hp.png | |||
|imageSize3=250px | |||
|caption= | |||
|name=Spinning Pile Driver | |||
|subtitle=SPD | |||
|input=[[File:r360.png]]/[[File:360.png]] + [[File:P.png]] | |||
|data= | |||
{{AttackData-SFA2 | |||
|version=[[File:Lp.png]] | |||
|Damage= 25<sup>[0]</sup> | |||
|Stun= 0 | |||
|Startup= 1 | |||
|Active= 1 | |||
|Frame Adv= N/A | |||
|Meter= 5/-/25 | |||
|Block= N/A | |||
|Properties=[[File:Throw.png]]<br>[[File:Hardknockdown.png]] | |||
}} | |||
{{AttackData-SFA2 | |||
|header= no | |||
|version=[[File:Mp.png]] | |||
|Damage= 29<sup>[0]</sup> | |||
|Stun= 0 | |||
|Startup= 1 | |||
|Active= 1 | |||
|Frame Adv= N/A | |||
|Meter= 5/-/25 | |||
|Block= N/A | |||
|Properties=[[File:Throw.png]]<br>[[File:Hardknockdown.png]] | |||
}} | |||
{{AttackData-SFA2 | |||
|header= no | |||
|version=[[File:Hp.png]] | |||
|Damage= 35 | |||
|Stun= 0 | |||
|Startup= 1 | |||
|Active= 1 | |||
|Frame Adv= N/A | |||
|Meter= 5/-/25 | |||
|Block= N/A | |||
|Properties=[[File:Throw.png]]<br>[[File:Hardknockdown.png]] | |||
}} | |||
|description= *'''Unscaled damage in CC.''' | |||
*Is not affected by the opponent's throw invul on their wake-up or while coming out of block/hit-stun. | |||
*Jumps straight up if Zangief is in the 1st half of the screen. | |||
*Jumps backwards if Zangief is in the 2nd half of the screen. | |||
*A full 360 isn't required. Required inputs: {{f}}{{d}}{{b}}{{u}} + {{p}} starting with any direction. | |||
This is Gief's signature grapple. This move is very very strong, and does great damage. This is the move to use on a character's wake up since it grabs them on the first frame of their recovery, thus the "Magic grab" more on this later. | |||
----- | |||
{{lp}} - ''[Hitboxes pictured top]'' | |||
Has the farthest grab range. | |||
[ | ----- | ||
{{mp}} - ''[Hitboxes pictured middle]'' | |||
[ | ----- | ||
{{hp}} - ''[Hitboxes pictured bottom]'' | |||
Has the shortest grab range. | |||
}} | |||
[[File: | {{MoveData-SFA2 | ||
|image=A2_Zangief_SuplexThrowRange_1.png | |||
|imageSize=250px | |||
|image2=A2_Zangief_SuplexThrowRange_2.png | |||
|imageSize2=250px | |||
|caption= | |||
|name=Atomic Suplex, Flying Powerbomb | |||
|subtitle=Suplex, Running Bear Grab | |||
|input=[[File:r360.png]]/[[File:360.png]] + [[File:K.png]] | |||
|data= | |||
{{AttackData-SFA2 | |||
|version=[[File:Lk.png]] | |||
|Damage= 6<sup>[0]</sup>+25, 16 | |||
|Stun= 0+0, 0 | |||
|Startup= 1 | |||
|Active= 1(11)16 | |||
|Frame Adv= N/A | |||
|Meter= 5/-/25, 5/-/17 | |||
|Block= N/A | |||
|Properties=[[File:Throw.png]]<br>[[File:Hardknockdown.png]] | |||
}} | |||
{{AttackData-SFA2 | |||
|header= no | |||
|version=[[File:Mk.png]] | |||
|Damage=7<sup>[0]</sup>+31, 17 | |||
|Stun= 0+0, 0 | |||
|Startup= 1 | |||
|Active= 1(11)16 | |||
|Frame Adv= N/A | |||
|Meter= 5/-/25, 5/-/17 | |||
|Block= N/A | |||
|Properties=[[File:Throw.png]]<br>[[File:Hardknockdown.png]] | |||
}} | |||
{{AttackData-SFA2 | |||
|header= no | |||
|version=[[File:Hk.png]] | |||
|Damage= 8<sup>[0]</sup>+26, 18 | |||
|Stun= 0+0, 0 | |||
|Startup= 1 | |||
|Active= 1(11)16 | |||
|Frame Adv= N/A | |||
|Meter= 5/-/25, 5/-/17 | |||
|Block= N/A | |||
|Properties=[[File:Throw.png]]<br>[[File:Hardknockdown.png]] | |||
}} | |||
|description= *'''Unscaled damage in CC.''' | |||
*First active frame preforms the Atomic Suplex. | |||
*Second set of active frames preforms the Flying Powerbomb. | |||
*A full 360 isn't required. Required inputs: {{f}}{{d}}{{b}}{{u}} + {{k}} starting with any direction. | |||
----- | |||
'''Atomic Suplex''' | |||
*Not affected by the opponent's throw invul on their wake-up or while coming out of block/hit-stun. | |||
Gief will grab and do a suplex then slam. No reason to use this grab mid-screen since the range isnt good and does less damage than a SPD. This grab, however, is awesome when it is done when opponent is near the corner. | |||
----- | |||
'''Flying Powerbomb''' | |||
Gief will do a running grab. Not much use for this outside the corner. Can loop indefinitely on another Zangief in the corner by jumping forward and performing as soon as you land. | |||
}} | |||
[[File: | {{MoveData-SFA2 | ||
|image=A2_Zangief_PLariat_1.png | |||
|imageSize=250px | |||
|image2=A2_Zangief_PLariat_2.png | |||
|imageSize2=250px | |||
|image3=A2_Zangief_PLariat_7.png | |||
|imageSize3=250px | |||
|image4=A2_Zangief_PLariat_8.png | |||
|imageSize4=250px | |||
|caption= | |||
|name=Double Lariat | |||
|subtitle=Punch Lariat | |||
|input=[[File:3p.png]] (move [[File:B.png]]/[[File:F.png]]) | |||
|data= | |||
{{AttackData-SFA2 | |||
|Damage= 18<sup>[8]</sup>, 10<sup>[8]</sup>x9 | |||
|Stun= 10, 5x9 | |||
|Startup= 5 | |||
|Active= 2(4)4(0)3(3)3(0)4(4)4(0)4(5)5(0)5(5)6 | |||
|Frame Adv= -49 at worst<br>+6 at best | |||
|Meter= 6/6+1 per hit/8 | |||
|Block=[[File:Mid.png]] | |||
|Properties=[[File:Upperbodyinv.png]]<br>[[File:Softknockdown.png]] | |||
}} | |||
|description= *All 3 punches need to be pressed on the same exact frame. | |||
*Can be preformed with negative edge. | |||
*Hits 1 time. | |||
His main anti-air. For best result, duck right before to get a clean hit. Good move to avoid fireballs but Quick Double Lariat is the safer option. | |||
}} | |||
[[File: | {{MoveData-SFA2 | ||
|image=A2_Zangief_KLariat_1.png | |||
|imageSize=250px | |||
|image2=A2_Zangief_KLariat_2.png | |||
|imageSize2=250px | |||
|image3=A2_Zangief_KLariat_6.png | |||
|imageSize3=250px | |||
|image4=A2_Zangief_KLariat_7.png | |||
|imageSize4=250px | |||
|caption= | |||
|name=Quick Double Lariat | |||
|subtitle=Kick Lariat | |||
|input=[[File:3k.png]] (move [[File:B.png]]/[[File:F.png]]) | |||
|data= | |||
{{AttackData-SFA2 | |||
|Damage= 16<sup>[8]</sup>, 8<sup>[8]</sup> | |||
|Stun= 10, 5x5 | |||
|Startup= 5 | |||
|Active= 2(4)4(0)3(3)3(0)4(4)5 | |||
|Frame Adv= -23 at worst<br>+4 at best | |||
|Meter= 6/6+1 per hit/8 | |||
|Block=[[File:Mid.png]] | |||
|Properties=[[File:Startupinv.png]][[File:Lowerbodyinv.png]]<br>[[File:Softknockdown.png]] | |||
}} | |||
|description= *All 3 kicks need to be pressed on the same exact frame. | |||
*Can be preformed with negative edge. | |||
*Hits 1 time. | |||
Useful vs ground moves, counter AC's, and to build meter. Good move to avoid fireballs. | |||
}} | |||
== Super Moves == | == Super Moves == | ||
[[File:360.png]][[File:360.png]]+[[File:P.png]]- | Startup Invulnerability Notes: | ||
*At the end of a super screen freeze, projectiles will start moving before the opponent's character is unfrozen, giving the supers more projectile invul. frames than hit invul. frames. | |||
{{MoveData-SFA2 | |||
|image=A2_Zangief_AtomicBusterRange.png | |||
|imageSize=250px | |||
|caption= | |||
|name=Final Atomic Buster | |||
|subtitle=720 | |||
|input=[[File:r360.png]][[File:r360.png]]/[[File:360.png]][[File:360.png]] + [[File:P.png]] | |||
|data= | |||
{{AttackData-SFA2 | |||
|version= Level 1 | |||
|subtitle= [[File:P.png]] | |||
|Damage= 15<sup>[0]</sup>+25<sup>[0]</sup> = 40 | |||
|Stun= 0 | |||
|Startup= 5+0 | |||
|Active= 1 | |||
|Frame Adv= N/A | |||
|Meter= 0/-/0 | |||
|Block= N/A | |||
|Properties=[[File:Startupinv.png]][[File:Throw.png]]<br>[[File:Hardknockdown.png]] | |||
}} | |||
{{AttackData-SFA2 | |||
|header= no | |||
|version= Level 2 | |||
|subtitle= [[File:P.png]][[File:P.png]] | |||
|Damage= 13<sup>[0]</sup>+15<sup>[0]</sup>+26<sup>[0]</sup> = 54 | |||
|Stun= 0 | |||
|Startup= 5+0 | |||
|Active= 1 | |||
|Frame Adv= N/A | |||
|Meter= 0/-/0 | |||
|Block= N/A | |||
|Properties=[[File:Startupinv.png]][[File:Throw.png]]<br>[[File:Hardknockdown.png]] | |||
}} | |||
{{AttackData-SFA2 | |||
|header= no | |||
|version= Level 3 | |||
|subtitle= [[File:3p.png]] | |||
|Damage= 15<sup>[0]</sup>+17<sup>[0]</sup>+21<sup>[0]</sup>+32<sup>[0]</sup> = 85 | |||
|Stun= 0 | |||
|Startup= 5+0 | |||
|Active= 1 | |||
|Frame Adv= N/A | |||
|Meter= 0/-/0 | |||
|Block= N/A | |||
|Properties=[[File:Startupinv.png]][[File:Throw.png]]<br>[[File:Hardknockdown.png]] | |||
}} | |||
|description=*Is not affected by the opponent's throw invul on their wake-up or while coming out of block/hit-stun. | |||
*A full 720 isn't required. Required inputs: {{f}}{{d}}{{b}}{{u}}{{f}}{{d}}{{b}}{{u}} + {{p}} starting with any direction. | |||
----- | |||
{{AttackColor-SF | |||
|strength=light | |||
|content=Level 1}} | |||
*5 frames of startup hit invul.; 1 of which while active. | |||
*5 frames of startup projectile invul. | |||
Not worth the meter since it only does 5 more damage than a {{hp}} SPD. | |||
----- | |||
{{AttackColor-SF | |||
|strength=medium | |||
|content=Level 2}} | |||
*5 frames of startup hit invul.; 1 of which while active. | |||
*5 frames of startup projectile invul. | |||
----- | |||
{{AttackColor-SF | |||
|strength=heavy | |||
|content=Level 3}} | |||
*5 frames of startup hit invul.; 1 of which while active. | |||
*5 frames of startup projectile invul. | |||
The most damaging super in the game. Well worth the meter usage. | |||
}} | |||
{{MoveData-SFA2 | |||
|image=A2_Zangief_RussianSlamRange.png | |||
|imageSize=250px | |||
|caption= | |||
|name=Aerial Russian Slam | |||
|subtitle= | |||
|input=[[File:Qcf.png]][[File:Qcf.png]] + [[File:K.png]] | |||
|data= | |||
{{AttackData-SFA2 | |||
|version= Level 1 | |||
|subtitle= [[File:K.png]] | |||
|Damage= 34 | |||
|Stun= 0 | |||
|Startup= 9+0 | |||
|Active= 24 | |||
|Frame Adv= N/A | |||
|Meter= 0/-/0 | |||
|Block= N/A | |||
|Properties=[[File:Startupinv.png]][[File:Airthrow.png]]<br>[[File:Hardknockdown.png]] | |||
}} | |||
{{AttackData-SFA2 | |||
|header= no | |||
|version= Level 2 | |||
|subtitle= [[File:K.png]][[File:K.png]] | |||
|Damage= 45 | |||
|Stun= 0 | |||
|Startup= 9+0 | |||
|Active= 23 | |||
|Frame Adv= N/A | |||
|Meter= 0/-/0 | |||
|Block= N/A | |||
|Properties=[[File:Startupinv.png]][[File:Airthrow.png]]<br>[[File:Hardknockdown.png]] | |||
}} | |||
{{AttackData-SFA2 | |||
|header= no | |||
|version= Level 3 | |||
|subtitle= [[File:3k.png]] | |||
|Damage= 62 | |||
|Stun= 0 | |||
|Startup= 9+0 | |||
|Active= 24 | |||
|Frame Adv= N/A | |||
|Meter= 0/-/0 | |||
|Block= N/A | |||
|Properties=[[File:Startupinv.png]][[File:Airthrow.png]]<br>[[File:Hardknockdown.png]] | |||
}} | |||
|description= Worthless super at all levels because of its terrible throwbox and lack of invul. | |||
*A full 2 quarter-circles isn't required. Required inputs: {{d}}{{df}}{{f}}{{d}}{{df}} + {{k}} | |||
----- | |||
{{AttackColor-SF | |||
|strength=light | |||
|content=Level 1}} - ''[Hitboxes pictured]'' | |||
*8 frames of startup hit invul.; 0 of which while active. | |||
*12 frames of startup projectile invul. | |||
*Travels 1/4 screen. | |||
----- | |||
{{AttackColor-SF | |||
|strength=medium | |||
|content=Level 2}} | |||
*8 frames of startup hit invul.; 0 of which while active. | |||
*12 frames of startup projectile invul. | |||
*Travels 1/2 screen. | |||
----- | |||
{{AttackColor-SF | |||
|strength=heavy | |||
|content=Level 3}} | |||
*8 frames of startup hit invul.; 0 of which while active. | |||
*12 frames of startup projectile invul. | |||
*Travels 3/4 screen. | |||
}} | |||
=The Basics= | |||
----- | |||
{{Content Box-SFA2 | |||
|padding=yes | |||
|header= | |||
|content= | |||
===== What does Zangief want? ===== | |||
As the Grappler God of Alpha 2, Zangief demands respect. | |||
Big damage, looping pressure, and high health let Zangief play a risky, explosive game. His opponents, however, must approach the matchup slowly and carefully. Regardless of playstyle, Zangief players want to get close to capitalize on a juicy knockdown. | |||
= | Zangief is an Oki monster. Kneedrop and Body Splash blow through normal anti airs and tick into SPD on block. Magic Grabs (See below) let Zangief loop dangerous pressure in the corner. For some characters, these Magic Grab sequences are literally inescapable. | ||
===== Notes ===== | |||
Tick/SPD stuff | Tick/SPD stuff | ||
| Line 206: | Line 1,254: | ||
Meaty c.mk/smk SPD, c.lp x2 into SPD, c.lk into SPD, these are the most common and useful. Meaty long low forward or low strong , standing forward, standing short all work as well. I tend to not tick too much against higher skilled opponents as its common to be reversed so use sparingly.' | Meaty c.mk/smk SPD, c.lp x2 into SPD, c.lk into SPD, these are the most common and useful. Meaty long low forward or low strong , standing forward, standing short all work as well. I tend to not tick too much against higher skilled opponents as its common to be reversed so use sparingly.' | ||
Build meter no matter what. Any moment you have to build meter you should. Mostly by kick | Build meter no matter what. Any moment you have to build meter you should. Mostly by kick lariats and jab gloves and even if you get hit while building by sonic booms, fbs, ect. I will gladly eat a few projectiles in order to build a bar or so of meter because his CC is the equalizer and its sometimes worth taking those hits to gain it just don't get overzealous and get dizzy from it. | ||
-Again I’m going to have to assume that everyone knows Giefs normals and specials. I refer to them as spd’s, gloves,lariets and rbg(running bear grabs). | -Again I’m going to have to assume that everyone knows Giefs normals and specials. I refer to them as spd’s, gloves,lariets and rbg(running bear grabs). | ||
| Line 258: | Line 1,306: | ||
Air normals. I’d say Gief more then any other has best array of air normal uses. each one has a great use for angles and for stuffing air to air moves ect. only one i’d say is not needed is jumping short knees, no specific use that forward knees don’t cover. jumping strong is giefs best long range air normal to hit far and keep gief compact in the air to get over projectiles . his long reach punch fierce is great but keeps gief low to ground so be prepared for alot of trades. (usually in giefs favor) | Air normals. I’d say Gief more then any other has best array of air normal uses. each one has a great use for angles and for stuffing air to air moves ect. only one i’d say is not needed is jumping short knees, no specific use that forward knees don’t cover. jumping strong is giefs best long range air normal to hit far and keep gief compact in the air to get over projectiles . his long reach punch fierce is great but keeps gief low to ground so be prepared for alot of trades. (usually in giefs favor) | ||
Style points. knock opponent down with low rh then taunt, taunt recovers just in time for magic grab as they get up. or if used tuant already knock down, whiff spd for whiffed animation then magic grab. | Style points. knock opponent down with low rh then taunt, taunt recovers just in time for magic grab as they get up. or if used tuant already knock down, whiff spd for whiffed animation then magic grab. | ||
}} | |||
= Advanced Strategy = | =Advanced Strategy= | ||
----- | |||
*The '''MAGIC''' Grab: | {{Content Box-SFA2 | ||
|padding=yes | |||
|header= | |||
|content=*The '''MAGIC''' Grab: | |||
This is a big reason of why Gief is so good. It allows him to grab his opponent the first frame out of block stun or get up. When done right you can do this on your oppoents wake up and they can hold up and they still get grabbed. This can be done with SPD or Russian Suplex or Running Bear Grab which can allow for another set of mixing up. With that being said there are few characters that are STUCK into eating a SPD for free damage if they have no super meter, Rose has no wake up reversals without meter, nor does Sakura, Birdie, Sodom, or Rolento. Bison and Dhalsim don't either other then their teleports. So against them do this FOR free when they have no meter. It is hard to reverse and can lead to big damage. Here are some things you can do: | This is a big reason of why Gief is so good. It allows him to grab his opponent the first frame out of block stun or get up. When done right you can do this on your oppoents wake up and they can hold up and they still get grabbed. This can be done with SPD or Russian Suplex or Running Bear Grab which can allow for another set of mixing up. With that being said there are few characters that are STUCK into eating a SPD for free damage if they have no super meter, Rose has no wake up reversals without meter, nor does Sakura, Birdie, Sodom, or Rolento. Bison and Dhalsim don't either other then their teleports. So against them do this FOR free when they have no meter. It is hard to reverse and can lead to big damage. Here are some things you can do: | ||
| Line 278: | Line 1,330: | ||
*Corner: | *Corner: | ||
If your opponent is cornered it is possible to land the | If your opponent is cornered it is possible to land the TRIFECTA on your opponent. Knock opponent down, time it so that you do a SHORT RBG(does not toss gief back as far as other kick variations) as they are getting up. the RBG will grab them throw them back in corner, land take brief walk forward and jump towards them, you should land right next to them on their first frame of getting up(different timings for different characters wake up times vary) do Russian Suplex (close one) the 2nd part of this grab will put Gief into the corner and therefore removing his normal push back that normally happens allowing Gief to recover then jump back toward opponent a 3rd time as they're getting up and be in range for a punch spd, and even after THAT 3rd spd you COULD throw in the run up CC into spd for quads. lol. bunch of variations. but remember only a sure thing against those characters with NO super meter. All this stuff can be reversed (though hard) with wake up specials etc. but thats where the fun starts because if you know your opponent is good and will try to wake up DP your spd attempt just let them and block, then activate CC for max damage or spd them if no meter. | ||
Fun thing to do against Gief opponent is to do repeated short RBG's in corner, Gief cannot get out of this other then to wake up spd as a reversal. A2 infinite of some sort. | Fun thing to do against Gief opponent is to do repeated short RBG's in corner, Gief cannot get out of this other then to wake up spd as a reversal. A2 infinite of some sort. | ||
| Line 293: | Line 1,345: | ||
Knock opponent down with c.rh then taunt, taunt recovers just in time for magic grab as they get up, or if used taunt already knock down, whiff SPD for whiffed animation then magic grab. | Knock opponent down with c.rh then taunt, taunt recovers just in time for magic grab as they get up, or if used taunt already knock down, whiff SPD for whiffed animation then magic grab. | ||
}} | |||
== | =Combos= | ||
----- | |||
{{Content Box-SFA2 | |||
|padding=yes | |||
|header= | |||
|content= | |||
There are 2 variations of Zangief's custom: | }} | ||
=Custom Combos= | |||
----- | |||
{{Content Box-SFA2 | |||
|padding=yes | |||
|header= | |||
|content=There are 2 variations of Zangief's custom: | |||
df+rh xx jab glove xN, PPP lariet ender | df+rh xx jab glove xN, PPP lariet ender | ||
| Line 320: | Line 1,384: | ||
aa cc: kkk, lp gloves xN, ppp | aa cc: kkk, lp gloves xN, ppp | ||
<youtube>zZ9at4KRgyk</youtube> | <div style="width:100%;max-width:450px;"><youtube>zZ9at4KRgyk</youtube></div> | ||
}} | |||
= Match-ups = | = Match-ups = | ||
----- | |||
{{MatchUp-SFA2 | |||
|padding=yes | |||
|header=[[File:A2_Icon_Adon.png]] '''Vs. Adon:''' | |||
|content=[Loading match-up info...] | |||
}} | |||
{{MatchUp-SFA2 | |||
|padding=yes | |||
|header=[[File:A2_Icon_Akuma.png]] '''Vs. Akuma:''' | |||
|content=[Loading match-up info...] | |||
}} | |||
Vs. | |||
{{MatchUp-SFA2 | |||
|padding=yes | |||
|header=[[File:A2_Icon_Birdie.png]] '''Vs. Birdie:''' | |||
|content=[Loading match-up info...] | |||
}} | |||
Vs. | {{MatchUp-SFA2 | ||
|padding=yes | |||
|header=[[File:A2_Icon_Charlie.png]] '''Vs. Charlie-Nash:''' | |||
|content=[Loading match-up info...] | |||
}} | |||
{{MatchUp-SFA2 | |||
|padding=yes | |||
|header=[[File:A2_Icon_ChunLi.png]] '''Vs. Chun-Li:''' | |||
|content=[Loading match-up info...] | |||
}} | |||
Vs. | {{MatchUp-SFA2 | ||
|padding=yes | |||
|header=[[File:A2_Icon_Dan.png]] '''Vs. Dan:''' | |||
|content=[Loading match-up info...] | |||
}} | |||
{{MatchUp-SFA2 | |||
|padding=yes | |||
|header=[[File:A2_Icon_Dhalsim.png]] '''Vs. Dhalsim:''' | |||
|content=[Loading match-up info...] | |||
}} | |||
Vs. | {{MatchUp-SFA2 | ||
|padding=yes | |||
|header=[[File:A2_Icon_Akuma.png]] '''Vs. Evil Ryu:''' | |||
|content=[Loading match-up info...] | |||
}} | |||
{{MatchUp-SFA2 | |||
|padding=yes | |||
|header=[[File:A2_Icon_Gen.png]] '''Vs. Gen:''' | |||
|content=[Loading match-up info...] | |||
}} | |||
Vs. | {{MatchUp-SFA2 | ||
|padding=yes | |||
|header=[[File:A2_Icon_Guy.png]] '''Vs. Guy:''' | |||
|content=[Loading match-up info...] | |||
}} | |||
{{MatchUp-SFA2 | |||
|padding=yes | |||
|header=[[File:A2_Icon_Ken.png]] '''Vs. Ken:''' | |||
|content=[Loading match-up info...] | |||
}} | |||
Vs. | {{MatchUp-SFA2 | ||
|padding=yes | |||
|header=[[File:A2_Icon_Bison.png]] '''Vs. M. Bison (dictator):''' | |||
|content=[Loading match-up info...] | |||
}} | |||
{{MatchUp-SFA2 | |||
|padding=yes | |||
|header=[[File:A2_Icon_Rolento.png]] '''Vs. Rolento:''' | |||
|content=[Loading match-up info...] | |||
}} | |||
Vs. | {{MatchUp-SFA2 | ||
|padding=yes | |||
|header=[[File:A2_Icon_Rose.png]] '''Vs. Rose:''' | |||
|content=His forward double knee drop can beat Rose’s anti-air attempts. Her crouching fierce and her level 1 throw super gets hit by it. Basically, Rose has to do something like jump up strong or fierce. | |||
}} | |||
{{MatchUp-SFA2 | |||
|padding=yes | |||
|header=[[File:A2_Icon_Ryu.png]] '''Vs. Ryu:''' | |||
|content=[Loading match-up info...] | |||
}} | |||
Vs. | {{MatchUp-SFA2 | ||
|padding=yes | |||
|header=[[File:A2_Icon_Sagat.png]] '''Vs. Sagat:''' | |||
|content=[Loading match-up info...] | |||
}} | |||
{{MatchUp-SFA2 | |||
|padding=yes | |||
|header=[[File:A2_Icon_Sakura.png]] '''Vs. Sakura:''' | |||
|content=[Loading match-up info...] | |||
}} | |||
Vs. Sodom: | {{MatchUp-SFA2 | ||
|padding=yes | |||
|header=[[File:A2_Icon_Sodom.png]] '''Vs. Sodom:''' | |||
|content=[Loading match-up info...] | |||
}} | |||
{{MatchUp-SFA2 | |||
|padding=yes | |||
|header=[[File:A2_Icon_Zangief.png]] '''Vs. Zangief (mirror):''' | |||
|content=[Loading match-up info...] | |||
}} | |||
{{ | {{Navbox-SFA2}} | ||
[[Category:Zangief]] | |||
[[Category:Street Fighter Alpha Series]] | [[Category:Street Fighter Alpha Series]] | ||
[[Category:Street Fighter Alpha 2]] | [[Category:Street Fighter Alpha 2]] | ||
Latest revision as of 18:49, 13 June 2025
| Zangief | |
|---|---|
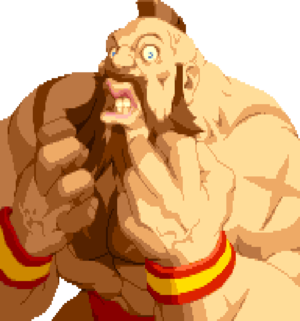
| |
| Health: | 144 |
| Defensive Rating: | +4 |
| Stun: | 50 |
| Walk Speed Forward: | 225 |
| Walk Speed Backward: | 112.5 |
| Jump Backward: | 48f (6+42+0) |
| Neutral Backward: | 46f (6+40+0) |
| Jump Forward: | 45f (6+39+0) |
| Wake-Up: | 51f |
| Quick Rise: | 29f |
| Throw Range: | 19 |
Pro wrestlers cower before his Piledriver. Zangief knows that he must improve his Piledriver but is frustrated because he cannot advance it. A sudden storm sends Zangief spinning to earth head-first. He drops to the ground with a great thud. Seconds later, great laughter breaks out across the land; Zangief has found his inspiration!
Players to watch:
RagingStormX, Shadowonlive
Normal Moves
| SFA2 Framedata Glossary | |
|---|---|
| Damage |
Units of base damage inflicted by the move (100% life bar = 144 units of health). Most moves have a damage range; the number inside the square brackets indicates which Random Damage Table the move uses to look up any additional damage and the % chance of doing so. |
| Stun |
Units of stun inflicted by the move. |
| Startup |
The frame the move hits on (1st active frame). Super moves with a screen freeze will separate pre- and post-screen freeze startup frames by a '+' (Ex: 5+0). |
| Active |
The portion of a move that can hit. How many frames a move remains active for. ()=Inactive frames in-between active frames. [xN]=Repeated sequences. |
| Frame Adv |
The frame advantage values when the attack is blocked. (Add +1 frame to all OnBlockAdv values for the move's OnHitAdv value; Ex: +2oB/+3oH, -4oB/-3oH) |
| Meter |
The units of meter gained on whiff/block/hit. (48, 96, and 144 units of meter are required for 1, 2, and 3 bars of meter respectively) |
| Block |
Low attacks must be blocked crouching. High attacks must be blocked standing. Mid attacks can be blocked either way. |
| Properties |
|
| Frames |
All framedata collected with the game speed set to normal, where the game tickrate and framerate are the same(60fps). |
| Speed |
All framedata collected with the game speed set to normal. |
| Hitboxes |
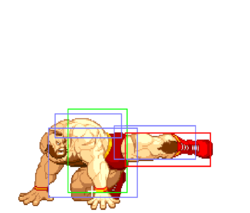
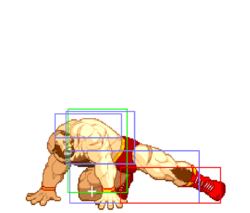
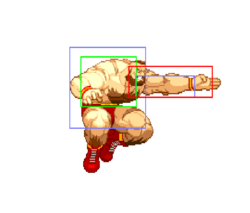
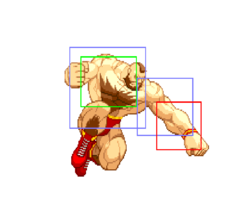
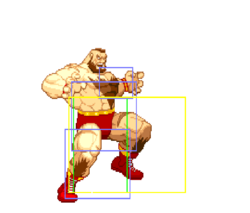
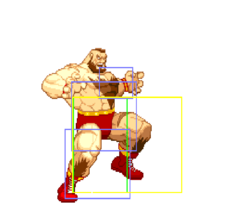
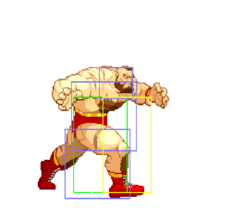
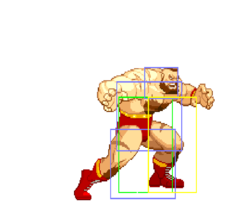
All hitbox images have the character standing/jumping in the exact same position, so hitbox distances can be easily compared.
|
| Credit | Damage, stun, framedata, meter, and updated hitboxes collected by |
Standing
Crouching
Neutral Jumping
Diagonal Jumping
Command Normals
| Version | Damage | Stun | Startup | Active | Frame Adv | Meter | Block | Properties |
|---|---|---|---|---|---|---|---|---|
| 10[0] | 6 | 8 | 31 | - | 1/2/3 | - | ||
| 12[0] | 6 | 8 | 31 | - | 2/4/7 | - |
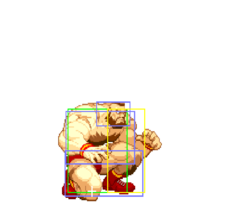
- Can be done with any down direction:
 ,
,  , or
, or 
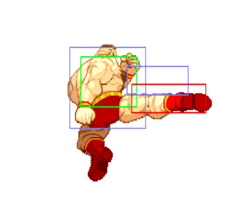
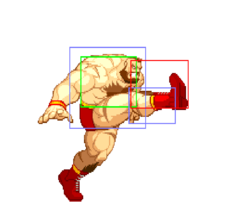
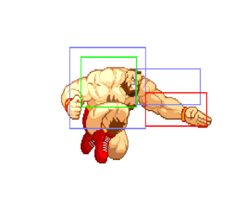
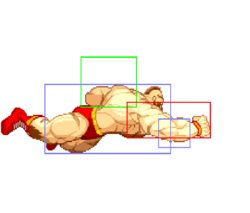
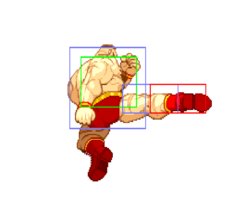
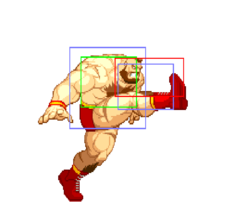
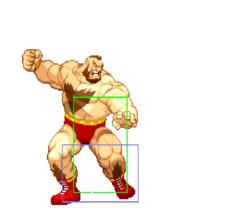
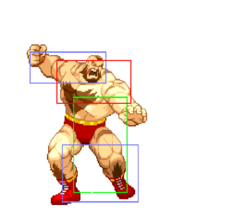
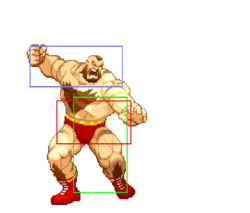
![]() - [Hitboxes pictured top]
- [Hitboxes pictured top]
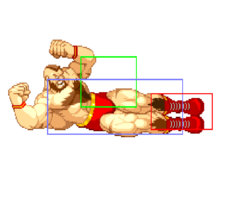
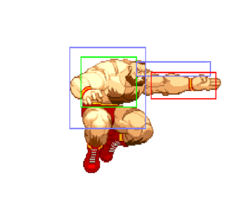
![]() - [Hitboxes pictured bottom]
- [Hitboxes pictured bottom]
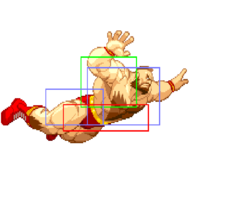
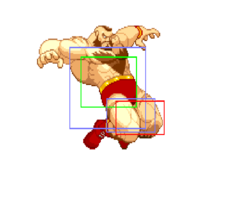
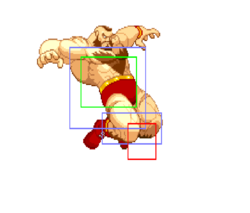
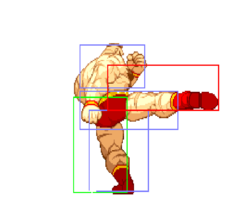
MK Kneedrop is one of Zangief's best aerial tools. It gets him in, ticks for an SPD, and at worst trades with most normal anti-airs. New Zangief players will be amazed at just how much Kneedrop can beat.
Normal Throws
| Damage | Stun | Startup | Active | Frame Adv | Meter | Block | Properties |
|---|---|---|---|---|---|---|---|
| 20[0] | 0 | 1 | N/A | N/A | -/-/3 | N/A |
- Deals full damage even when opponent tech throws.
- Zangief has above average throw range (Alpha2ThrowRanges).
| Damage | Stun | Startup | Active | Frame Adv | Meter | Block | Properties |
|---|---|---|---|---|---|---|---|
| 13[0]+1[0]xN = 15-18 | 0 | 1 | N/A | N/A | -/-/3 | N/A |
- Mashable throw from both sides to add or reduce the number of hits. With a min of 2 and a max of 5 hits.
- Does not side switch.
- Deals 14 damage when opponent tech throws.
- Zangief has above average throw range (Alpha2ThrowRanges).
| Damage | Stun | Startup | Active | Frame Adv | Meter | Block | Properties |
|---|---|---|---|---|---|---|---|
| 12[0]+1[0]xN = 14-17 | 0 | 1 | N/A | N/A | -/-/3 | N/A |
- Mashable throw from both sides to add or reduce the number of hits. With a min of 2 and a max of 5 hits.
- Does not side switch.
- Deals 13 damage when opponent tech throws.
- Zangief has above average throw range (Alpha2ThrowRanges).
Alpha Counters
Punch Alpha Counter
(while in blockstun)![]() +
+ ![]()
Kick Alpha Counter
(while in blockstun)![]() +
+ ![]()
| Damage | Stun | Startup | Active | Frame Adv | Meter | Block | Properties |
|---|---|---|---|---|---|---|---|
| 15[0] | 8 | 4 | 6 | +3 | 0/0/0 |
His best option as an anti-air and most ground attacks. If the opponent jumps in with an early attack, try to AC at the first frames of block stun so you can get quicker recovery from the AC and alot of times you can walk forward a second, jump forward and magic grab as they get up.
Special Moves
| Version | Damage | Stun | Startup | Active | Frame Adv | Meter | Block | Properties |
|---|---|---|---|---|---|---|---|---|
| 12[5] | 4 | 15 | 8 | -4 | 7/8/9 | |||
| 14[5] | 10 | 16 | 10 | -5 | 7/8/9 | |||
| 15[5] | 12 | 17 | 12 | -8 | 7/8/9 |
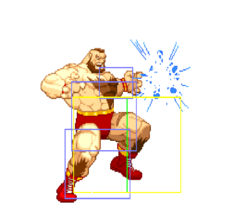
This move is helpful to advance and nullifies normal fireballs and 1 hit of super fireballs. Depending how close you negate a fireball, you can SPD after.
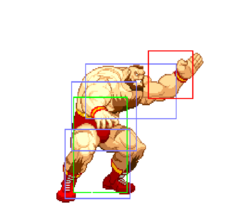
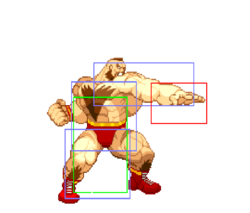
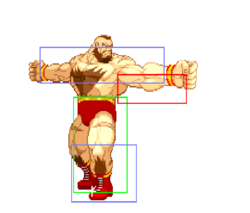
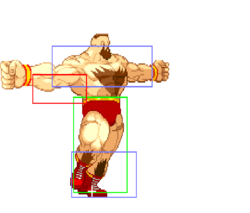
![]() - [Hitboxes pictured top]
- [Hitboxes pictured top]
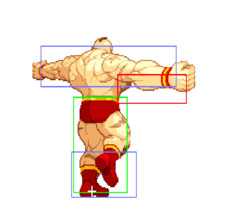
![]() - [Hitboxes pictured middle]
- [Hitboxes pictured middle]
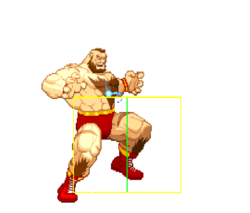
![]() - [Hitboxes pictured bottom]
- [Hitboxes pictured bottom]
| Version | Damage | Stun | Startup | Active | Frame Adv | Meter | Block | Properties |
|---|---|---|---|---|---|---|---|---|
| 25[0] | 0 | 1 | 1 | N/A | 5/-/25 | N/A | ||
| 29[0] | 0 | 1 | 1 | N/A | 5/-/25 | N/A | ||
| 35 | 0 | 1 | 1 | N/A | 5/-/25 | N/A |
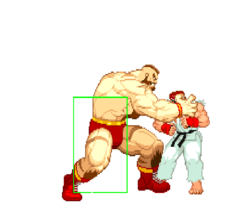
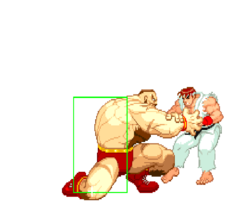
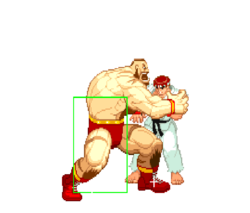
- Unscaled damage in CC.
- Is not affected by the opponent's throw invul on their wake-up or while coming out of block/hit-stun.
- Jumps straight up if Zangief is in the 1st half of the screen.
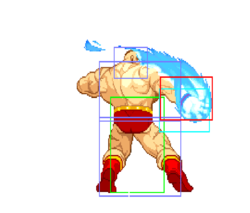
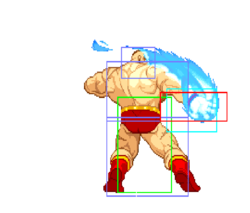
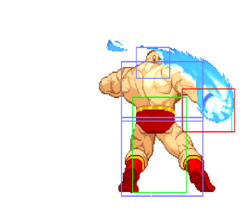
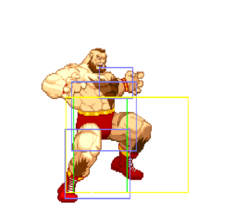
- Jumps backwards if Zangief is in the 2nd half of the screen.
- A full 360 isn't required. Required inputs:


 +
+  starting with any direction.
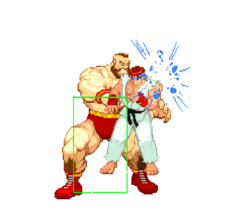
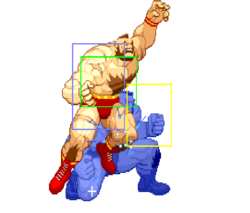
This is Gief's signature grapple. This move is very very strong, and does great damage. This is the move to use on a character's wake up since it grabs them on the first frame of their recovery, thus the "Magic grab" more on this later.
![]() - [Hitboxes pictured top]
- [Hitboxes pictured top]
Has the farthest grab range.
![]() - [Hitboxes pictured middle]
- [Hitboxes pictured middle]
![]() - [Hitboxes pictured bottom]
- [Hitboxes pictured bottom]
Has the shortest grab range.
Atomic Suplex, Flying Powerbomb
Suplex, Running Bear Grab![]() /
/![]() +
+ ![]()
- Unscaled damage in CC.
- First active frame preforms the Atomic Suplex.
- Second set of active frames preforms the Flying Powerbomb.
- A full 360 isn't required. Required inputs:


 +
+  starting with any direction.
Atomic Suplex
- Not affected by the opponent's throw invul on their wake-up or while coming out of block/hit-stun.
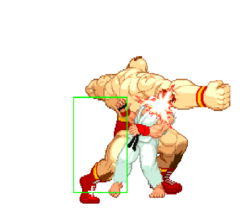
Gief will grab and do a suplex then slam. No reason to use this grab mid-screen since the range isnt good and does less damage than a SPD. This grab, however, is awesome when it is done when opponent is near the corner.
Flying Powerbomb
Gief will do a running grab. Not much use for this outside the corner. Can loop indefinitely on another Zangief in the corner by jumping forward and performing as soon as you land.
Double Lariat
Punch Lariat![]() (move
(move ![]() /
/![]() )
)
| Damage | Stun | Startup | Active | Frame Adv | Meter | Block | Properties |
|---|---|---|---|---|---|---|---|
| 18[8], 10[8]x9 | 10, 5x9 | 5 | 2(4)4(0)3(3)3(0)4(4)4(0)4(5)5(0)5(5)6 | -49 at worst +6 at best |
6/6+1 per hit/8 |
- All 3 punches need to be pressed on the same exact frame.
- Can be preformed with negative edge.
- Hits 1 time.
His main anti-air. For best result, duck right before to get a clean hit. Good move to avoid fireballs but Quick Double Lariat is the safer option.
Quick Double Lariat
Kick Lariat![]() (move
(move ![]() /
/![]() )
)
| Damage | Stun | Startup | Active | Frame Adv | Meter | Block | Properties |
|---|---|---|---|---|---|---|---|
| 16[8], 8[8] | 10, 5x5 | 5 | 2(4)4(0)3(3)3(0)4(4)5 | -23 at worst +4 at best |
6/6+1 per hit/8 |
- All 3 kicks need to be pressed on the same exact frame.
- Can be preformed with negative edge.
- Hits 1 time.
Useful vs ground moves, counter AC's, and to build meter. Good move to avoid fireballs.
Super Moves
Startup Invulnerability Notes:
- At the end of a super screen freeze, projectiles will start moving before the opponent's character is unfrozen, giving the supers more projectile invul. frames than hit invul. frames.
- Is not affected by the opponent's throw invul on their wake-up or while coming out of block/hit-stun.
- A full 720 isn't required. Required inputs:


 +
+  starting with any direction.
Level 1
- 5 frames of startup hit invul.; 1 of which while active.
- 5 frames of startup projectile invul.
Not worth the meter since it only does 5 more damage than a ![]() SPD.
SPD.
Level 2
- 5 frames of startup hit invul.; 1 of which while active.
- 5 frames of startup projectile invul.
Level 3
- 5 frames of startup hit invul.; 1 of which while active.
- 5 frames of startup projectile invul.
The most damaging super in the game. Well worth the meter usage.
| Version | Damage | Stun | Startup | Active | Frame Adv | Meter | Block | Properties |
|---|---|---|---|---|---|---|---|---|
| Level 1 |
34 | 0 | 9+0 | 24 | N/A | 0/-/0 | N/A | |
| Level 2 |
45 | 0 | 9+0 | 23 | N/A | 0/-/0 | N/A | |
| Level 3 |
62 | 0 | 9+0 | 24 | N/A | 0/-/0 | N/A |
Worthless super at all levels because of its terrible throwbox and lack of invul.
- A full 2 quarter-circles isn't required. Required inputs:


 +
+ 
Level 1 - [Hitboxes pictured]
- 8 frames of startup hit invul.; 0 of which while active.
- 12 frames of startup projectile invul.
- Travels 1/4 screen.
Level 2
- 8 frames of startup hit invul.; 0 of which while active.
- 12 frames of startup projectile invul.
- Travels 1/2 screen.
Level 3
- 8 frames of startup hit invul.; 0 of which while active.
- 12 frames of startup projectile invul.
- Travels 3/4 screen.
The Basics
What does Zangief want?
As the Grappler God of Alpha 2, Zangief demands respect.
Big damage, looping pressure, and high health let Zangief play a risky, explosive game. His opponents, however, must approach the matchup slowly and carefully. Regardless of playstyle, Zangief players want to get close to capitalize on a juicy knockdown.
Zangief is an Oki monster. Kneedrop and Body Splash blow through normal anti airs and tick into SPD on block. Magic Grabs (See below) let Zangief loop dangerous pressure in the corner. For some characters, these Magic Grab sequences are literally inescapable.
Notes
Tick/SPD stuff
Landing a SPD with Gief should be as normal to you as landing a normal attack. Good ticks for a SPD are jumping forward knees or fierce splash into SPD (his bread n butter).
Meaty c.mk/smk SPD, c.lp x2 into SPD, c.lk into SPD, these are the most common and useful. Meaty long low forward or low strong , standing forward, standing short all work as well. I tend to not tick too much against higher skilled opponents as its common to be reversed so use sparingly.'
Build meter no matter what. Any moment you have to build meter you should. Mostly by kick lariats and jab gloves and even if you get hit while building by sonic booms, fbs, ect. I will gladly eat a few projectiles in order to build a bar or so of meter because his CC is the equalizer and its sometimes worth taking those hits to gain it just don't get overzealous and get dizzy from it.
-Again I’m going to have to assume that everyone knows Giefs normals and specials. I refer to them as spd’s, gloves,lariets and rbg(running bear grabs).
Gief has been one of my favorite A2 char’s for quite some time now. He has a variety of options and mix up games all of which can usually lead to tons of damage. MOST of which can come through (drumroll please…) yep u guessed it the Ol’ favorite. the CC. Giefs BnB CC is sweep followed up by repeated jab gloves, then ending with a lariet at the end. A level 1 should net you around 35 to 45% http://ggpo.net/dojo/replays/watch/204523/(couple level 1’s in that vid) A full level 3 can lead to sometimes 80% damage if done correctly. I’ll be the first to tell ya. its not easy. I’m either on it or not. alot of times timing is off and i end of with quite a few useless jab chops so practice the CC timing and know your opponents juggle weight. each char falls at different speeds http://ggpo.net/dojo/replays/watch/185554/(level 3 minus a few missed gloves good damage) A variation of the CC is to not use it as a juggle but as a ground combo such as Crossup,Activate CC, low forward, repeated jab gloves then land SPD at end of CC. but IMO this is risky as messing up the CC as a ground combo will leave you open where as starting with a trip (or coutnering a missed dragon punch ) lets you juggle with the gloves and if you DO miss time it you can always rely on lariets for extra damage and a sure knockdown. 2nd use of a CC is to use as anti air. Activate CC and immediatly start Punch lariets for juggle. The advanced tatic way would to be cc then start with kick lariet , pause slight sec, then juggle with jab gloves then end with last sec. lariet for max damage. also there are few other good anti airs with CC, if opponent is jumping at certain angles especially away when you activate, run towards them then quickly hit rh for his anti air rh into repeated gloves, 3rd use of the CC is a RUN button SPD someone, land then immediatly activate CC (don’t hit anything and let gief run up to the opponent so that you be next to them as they get up. AT this point you can start guessing games when opponent gets up you can spd them (AKA magic grab) as they get up IF you think they will try to hit button or do some move , if they don’t the spd will whiff cuz remember IN a CC the spd has properties as a HIT not a throw. Next mix up is to spd, activate CC , get next to opponent and if you think they’ll try to throw u on wake up or if opponent has a shitty wake up reversal activate kick lariet to stuff it, at worse they’ll be forced to block first few hits till CC ends Again i would only recommend these run up tatics at no more then 1.5 super meter filled or else you will be in trouble if left with more meter after kick lariet ends ect. If you do find yourself with more meter try keepng your opponent blocking with standing shorts so you can Tick into a SPD once the CC ends.
Supers… again not a great use of super meter for A2 gief. Level 1 spd is pretty much a waste of meter. why try to do twice as much for 5% more damage then a normal spd (if that)level 2 meter, eh… somewhat decent. Level 3’s are well worth it. Doing them as magic grabs is a great set up(See magic grab section) Also using it as a AC reversal is very tight. standing short is easiest. Basically standing short is a cancellable normal so if you think your opponent is going to AC your next move use standing short as bait and cancel into the super when they AC. If you did the motion slow enough and they DID AC the super will come out. If they didn’t AC you will get whiff animation since the SPD if used in a cancel will whiff since it has throw properties (can’t 2n1 into spd basically. only as a link-tick ) hope someone understands that. makes sense in my head heh.
Kick super (aka SUPERMAN) yep another useless waste of meter. go for it on style points. level 1 and 2 have NO priority and level 3 has minimal. use it as a anticipation tatic and/or you are sure u have your opponent beat.
Alpha counters Punch AC Pretty much only to be used against ground based attacks and very deep jump in attacks up CLOSE to gief. Very quick and good damage. If opponent gets AC’ed into corner you should be able to follow up with magic grab. Do not use this move against multi hitting attacks such as akumas dp ect as it will get beat. http://ggpo.net/dojo/replays/watch/204649/ (example of spd follow up after AC) Kick AC is pretty much his best option for anti air and most ground attacks. If oppoent jumps in with early attack try to AC at the first frames of block stun so you can get quicker recovery from the AC and alot of times you can walk forward a sec, jump forward and magic grab as they get up(character dependent) again if ground based and you hit oppoent toward corner you should be able to magic grab when they get up.
Anti air stuff
Pretty much other then the CC stuff gief best anti air is of course the lariet but its just not as simple as that. The trick is to DUCK right before you activate lariet so that it hits deep and counters most jump ins that way. done without the duck it will usually result in a stuff or a trade. remember to do this in the CC also. crouching strong is also a pretty good anti air but I tend to stay away from this when they have meter since its bait for people to activate CC and drop through the move and counter with a high damage CC. Some people swear to giefs standing jab but I’ve played with it quite a bit, its just not Sims or ST gief properties so i tend to stay away. there are also certain matchups that giefs jumping moves are his best anti air, like against bison and rolento, jump away jumping jabs and shorts are key.
MAGIC GRAB section. Gief can spd or kick spd or RBG run spd a opponent on their first frame of waking up which can allow for another set of mixing up. The timing is tight but if done correctly the only way out of it is for opponent to wake up with a Reveral such as a DP, super,or CC. Opponent cannot wake up and jump out of it if you timed it correctly. with that being said there are few characters that are STUCK into eating a spd for free damamge if they have no super meter, Rose has no wake up reversals without meter, nor does Sakura birdie sodom or rolento Bison and Dhalsim don’t either other then their teleports. so against them do this FOR free when they have no meter. If your oppoent is cornered it is possible to land the TRIFECTOR on your opponnent. knock opponent down, time it so that you do aSHORT RBG(does not toss gief back as far as other kick variations) as they are getting up. the RBG will grab them throw them back in corner, land take brief walk forward and jump towrads them, you should land right next to them on their first frame of getting up(different timings for different characters wake up times vary)do kick spd (close one)the 2nd part of this spd will put gief into the corner and therefore removing his normal push back that normally happens allowing gief to recover then jump back toward opponent a 3rd time as they’re getting up and be in range for a punch spd. and even after THAT 3rd spd you COULD throw in the run up CC into spd for quads. lol. bunch of variations. http://ggpo.net/dojo/replays/watch/185541/ (here is one of them) but remember only a sure thing against those char’s with NO super meter. All this stuff can be reversed (though hard) with wake up specials ect. but thats where the fun starts cuz if you know your opponent is good and will try to wake up DP your spd attempt just um…let them and block, then activate CC for max damage or spd them if no meter. Fun thing to do against a shitty gief opponent is to do repeated short RBG’s in corner, Gief cannot get out of this other then to wake up spd as a reversal. A2 infinite of some sort haha.
Other random notes. Build meter no matter what. Any moment you have to build meter you should. mostly by kick lariets and jab gloves and even if you get hit while building by sonic booms, fbs, ect. who cares. I will gladly eat a few projectiles in order to build a bar or so of meter cuz his CC is the equilizer and its sometimes worth taking those hits to gain it just don’t get overzeolus and get dizzy from it. Another thing , this goes to any char. not just gief but people need to learn meter managment. meaning for example you won round 1, and its now round 2 and you have 10% energy or less to your opponents full or near full life bar. Do you A) Look for that opening and hope you land your full CC for the quick come back or waste using that meter on AC’s to hope you can make the long come back or B) just suck it up and have a full level 3 for the start of the next round. IMO answer should almost always be B so do what you can to get yerself in the best shape for the following round. Build your meter and make them use theirs to kill you. Most people don’t think that far ahead and just worry about the kill on that round and will waste meter to do it. Landing a Spd followed by landing and doing 2 quick (and safe) jab gloves ='s a full 1 meter
AC reversals. Gief really isn’t made for Delayed AC reversals so his best bet is to do like crouching short or jab in hopes they are going to AC it(specially if they’re waking up and you do it meaty)if they AC it you should jam 3kick lariet for the reversal. Against blocked gloves CC if you see them AC during CC immediatly switch to kick lariet for the reversal of the AC(good against shoto kick AC specially)
CC reversals. Most people don’t realize but if your opponent has activated a CC you have like 1 or maybe 2(not sure) frames to counter it before they can land a Valle type cc. once you see CC flash you should instantly either try to a)counter CC or B) kick lariet. countering a CC with kick lariets are pretty much for free if they’re up close if you practice it. It will knock them right out of CC its instant.
http://ggpo.net/dojo/replays/watch/185541/ has an example of option select at end of 2nd round. you’ll see i went for a tick low short as he was getting up but noticed he woke up with a super hurricane after i had already started the crouching short, so knowing that short can be cancelled i quickly tapped all 3 kick to cancel the short and buffer into the kick lariet for the counter.
also doing kick lariet right as they get up is a great counter to most peoples wake up attempt as it has great priority against alot of moves.
Tick/SPD stuff landing a spd with gief should be as normal to you as landing a normal attack. good ticks for a spd are jumping forward knees or fierce splash into spd(his bread n butter) meaty low forward spd, low jab (or x2)into spd, low short into spd, these are the most common and useful. hell he can do meaty long low forward or low strong , standing forward, standing short. I tend to not tick too much against higher skilled opponents as its common to be reversed so use sparringly.
Air normals. I’d say Gief more then any other has best array of air normal uses. each one has a great use for angles and for stuffing air to air moves ect. only one i’d say is not needed is jumping short knees, no specific use that forward knees don’t cover. jumping strong is giefs best long range air normal to hit far and keep gief compact in the air to get over projectiles . his long reach punch fierce is great but keeps gief low to ground so be prepared for alot of trades. (usually in giefs favor)
Style points. knock opponent down with low rh then taunt, taunt recovers just in time for magic grab as they get up. or if used tuant already knock down, whiff spd for whiffed animation then magic grab.
Advanced Strategy
- The MAGIC Grab:
This is a big reason of why Gief is so good. It allows him to grab his opponent the first frame out of block stun or get up. When done right you can do this on your oppoents wake up and they can hold up and they still get grabbed. This can be done with SPD or Russian Suplex or Running Bear Grab which can allow for another set of mixing up. With that being said there are few characters that are STUCK into eating a SPD for free damage if they have no super meter, Rose has no wake up reversals without meter, nor does Sakura, Birdie, Sodom, or Rolento. Bison and Dhalsim don't either other then their teleports. So against them do this FOR free when they have no meter. It is hard to reverse and can lead to big damage. Here are some things you can do:
c.rh or df+rh, jump, land, SPD
point blank c.mk or s.mk, SPD
c.lp, s.lk x SPD
any jump in, SPD
c.rh or df+rh (close), SPD on wake up
- Corner:
If your opponent is cornered it is possible to land the TRIFECTA on your opponent. Knock opponent down, time it so that you do a SHORT RBG(does not toss gief back as far as other kick variations) as they are getting up. the RBG will grab them throw them back in corner, land take brief walk forward and jump towards them, you should land right next to them on their first frame of getting up(different timings for different characters wake up times vary) do Russian Suplex (close one) the 2nd part of this grab will put Gief into the corner and therefore removing his normal push back that normally happens allowing Gief to recover then jump back toward opponent a 3rd time as they're getting up and be in range for a punch spd, and even after THAT 3rd spd you COULD throw in the run up CC into spd for quads. lol. bunch of variations. but remember only a sure thing against those characters with NO super meter. All this stuff can be reversed (though hard) with wake up specials etc. but thats where the fun starts because if you know your opponent is good and will try to wake up DP your spd attempt just let them and block, then activate CC for max damage or spd them if no meter.
Fun thing to do against Gief opponent is to do repeated short RBG's in corner, Gief cannot get out of this other then to wake up spd as a reversal. A2 infinite of some sort.
Lk Running Bear Grab, walk forward then jump, Russian Suplex, FP green glove or jump/land, SPD or lvl 3 FAB (character specific)
- Custom Combo to tick:
One thing you can do when the opponent has no meter is to cc withing range and s.mk, then s.lks, SPD when cc ends. This is very good vs opponents with no reversal, especially for the kill.
Note that SPD in CC counts as a hit so if your opponent is attacking it will grab.
Style Points
Knock opponent down with c.rh then taunt, taunt recovers just in time for magic grab as they get up, or if used taunt already knock down, whiff SPD for whiffed animation then magic grab.
Combos
Custom Combos
There are 2 variations of Zangief's custom:
df+rh xx jab glove xN, PPP lariet ender
This is his best version cause the massive range for the valle cc and is very damaging.
c.mk xx fp glove xN, SPD ender
This cc hurts like a mofo, but c.mk has no range and must be done close, but damage is well worth it. End with Russian Suplex in the corner so you can get a magic grab SPD after the cc. Ouch.
AA CC:
KKK lariet, jab gloves xN, PPP ender
Yeah, good damage XD
Gief: any lvl: df+rh xx lp gloves xN, ppp
any lvl: c.mk xx fp gloves xN, 360
aa cc: kkk, lp gloves xN, ppp
Match-ups
His forward double knee drop can beat Rose’s anti-air attempts. Her crouching fierce and her level 1 throw super gets hit by it. Basically, Rose has to do something like jump up strong or fierce.
