JtheSaltyy (talk | contribs) No edit summary |
|||
| (22 intermediate revisions by 4 users not shown) | |||
| Line 1: | Line 1: | ||
= Introduction = | == Introduction == | ||
[[File: | {{CvS2 Character Subnav|char=Chang|short=Chang}} | ||
<div> | |||
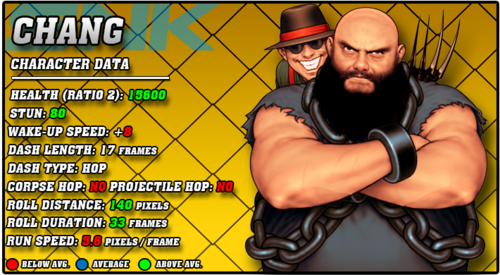
[[File:CVS2_Chang_Data.png|right|500px]] | |||
== Story == | |||
'''Chang Koehan''' and '''Choi Bounge''' are a pair of convicted felons from South Korea who, one day, escaped from prison easily. While they had no issue from the police, the justice warrior Kim Kaphwan defeated them swiftly. In an effort to rehabilitate them, he started his Rehabilitation Process, where he would teach them to use their skills for justice and not for crime. Also, he would teach them taekwondo. Neither Chang nor Choi are fans of this idea, and constantly look to escape their harsh teacher. However, Kim's teachings are taking hold. Chang has mellowed out from a terrifying criminal to a silly and goofy man, and Choi has went from unbearable to just mildly unpleasant. In the KOF series, both character's can perform Kim's signature Hienzan, however they don't bring this skill to CvS2. | |||
== Gameplay == | |||
Chang is a very interesting character. He's not a puppet character, rather an assist character, using Choi to create a wall of pressure. Chang himself has very high damage output and serviceable tools, like his swinging ball special. His buttons are okay at best, meaning that Chang in neutral relies on Choi to give him a good mixup. With RCs, Chang is a decent character. RC Choi moves means that attempts to hit Chang out of the start-up of the Choi attacks will whiff. With the threat of Choi on the screen, you can pick and choose what to do, either push a block string/mixup, or get away and zone. | |||
It's crucial to always have Choi available for any situation in neutral. Choi's tornado special is a great anti-air, his drill special is a great combo tool and more important a way to give Chang free space, and Choi himself has his own hurtbox, meaning he can be hit out of any move he is doing. Luckily, there is no setback to this aside from a small cooldown, and single hitting attacks get their hit absorbed, so Chang can still safely push pressure. | |||
When Chang has the opponent cornered, he can really show off his strength. His corner pressure with Choi is extremely oppressive and hard to escape. With Choi essentially also acting as a shield, single hitting attacks will be absorbed by Choi, giving Chang a free punish. Chang has some very swaggy corner combos that deal very high damage, but they are difficult to land. Overall, Chang is pretty difficult to use since you always have to use Choi when available and working around that, but he can put in work. | |||
=== Groove Selection === | |||
'''Best - C/N:''' Chang is surprisingly versatile between Grooves. Generally, C-Chang and N-Chang are considered his strongest Grooves. C-Chang gets strong neutral, and consistent access to his supers. While Chang struggles to get consistent knockdowns meterless, his super helps with this a lot, and Choi super is very strong as a way to chip out opponents and force mixups. His level 2 to level 1 cancel does insane damage as well, making it a much scarier punish. Roll also gives him RC Ball and RC Choi specials, which are very useful. N-Groove maintains his access to supers and rolls, but gives him extra movement ability which greatly enhances his mixup. In exchange, he loses the high damage level 2 cancel and access to airblock. | |||
'''Useful - K/A/S:''' K-Chang, A-Chang, and S-Chang are all very viable Grooves as well. K-Chang loses roll and consistent super access for scarier movement, and JD lets him punish things using his command grab or super more often. Rage can be scary, as Chang's damage becomes much more respectable, but you lose access to rolls and basically never use Choi super. A-Chang never supers in general, but gets access to one of the highest damage CC's in the game, and has a lot of versatile ways to use it. CC mixed with Choi pressure is especially scary, but you sacrifice using supers at all. S-Chang gets as many supers as he wants at low health, and this isn't a huge risk for a top tier health character. He can safely charge in neutral as well, and throwing out Choi can cover his charge making it much safer than the usual S-Groove character. Infinite Choi super is scary, but you lose out on consistent meter gain and have to deal with S-Groove mechanics in general. | |||
'''Worst - P:''' P-Chang is much, much worse in comparison. Parries are useful, but they are the only benefit, and Chang isn't a scary punish character so they don't benefit him much at all. Lack of supers, weak meter build, and no real defensive or offensive options besides parry makes P-Chang easily the worst. | |||
{{StrengthsAndWeaknesses | |||
|intro= | |||
--------------------------- | |||
'''Chang''' is a unique tanky assist character, with Chang piloting and Choi giving assists. Powerful mixups, guard crush strings, and scary pressure mixed with tanky defense and big buttons make them scary. You have to deal with Chang's slow movement and poor combo potential however. Chang's best groove is '''C-Groove'''. | |||
'''Difficulty''': Hard<br>'''Tier''': B- | |||
|pros= | |||
* '''Pressure and Mixups:''' Chang can force you to block Choi's actions, and can punish your response to them. This puts you in the situation of blocking Choi again, where he can either command grab you or just do more Choi specials and destroy your guard bar | |||
* '''Tanky:''' Chang has very high health, allowing him to take a lot more hits and still keep going | |||
* '''Solid Normals:''' Chang's Wrecking Ball gives him great reach and lets him beat a lot of buttons or movement options | |||
* '''Good Supers:''' Chang's super is a powerful combo ender with high damage potential, especially in C-Groove, while Choi's super is an extremely plus chip-out and mixup tool | |||
|cons= | |||
* '''Slow:''' Chang is one of the slowest characters in the game, regardless of what Groove he's in. Since he wants to be aggressive, dealing with this is a major issue | |||
* '''Big:''' He is also one of the biggest characters, making him much easier to hit, and also meaning he can't crouch under some pokes or fireballs like everyone else | |||
* '''Meter Hungry:''' Without his supers, Chang does low damage and rarely gets knockdowns | |||
* '''Corner Reliant:''' Choi pressure is alright midscreen, but only reaches terrifying when you put them in the corner. Learn to bully your opponents into the corner so you can abuse Choi pressure more | |||
}} | |||
=== Players to Watch === | |||
{| class="wikitable" | |||
|- | |||
! Name !! Country !! Groove !! Accounts !! Notes | |||
|- | |||
| 178 || Japan || C-Groove || Twitter: @chandesogeese || Skilled with many weird characters, 178 employs a lot of good fundamentals and using Choi to shadow his very sluggish movement. <br> [https://youtu.be/t0TNum-0fxU?t=169 Sample Match] | |||
|- | |||
| Tobari || Japan || C-Groove || Twitter: @cvs2event_Tobari || Lands ridiculous Chang combos. Mostly known for his Zangief and Rolento. <br> [https://youtu.be/twgAlyIrl3c?t=116 Sample Match] | |||
|- | |||
| SilentScope88 || USA || K-Groove || Twitter: @silentscope88 <br> Youtube: silentscope88 <br> Discord: Silentscope88#7008 || USA's low tier hero. Puts in a ton of work with his odd K team and runs very scary offense with Chang's low jumps. <br> [https://youtu.be/6px7-q7o9yU Sample Match] | |||
|- | |||
| Chari || Japan || K-Groove || N/A || Though he is mostly known for his C-Groove play, Chari has a very strong K-Chang and uses his offensive capabilities to it's fullest. <br> [https://youtu.be/WXKTfRHfjXU Sample Match] | |||
|- | |||
|} | |||
<br><br> | |||
== Far Normals == | |||
=== <span class="invisible-header">5LP</span> === | |||
{{MoveData | |||
| name = Far Jab | |||
| input = 5LP / Far LP | |||
| subtitle = Far Light Punch | |||
| image = CVS2_Chang_5LP.PNG | |||
| caption = | |||
| linkname = 5LP | |||
| data = | |||
{{AttackData-CvS2 | |||
| version = Far {{Icon-Capcom|LP}} | |||
| subtitle = | |||
| damage = 400 | |||
| stun = 4 | |||
| cancel = SP/SU | |||
| guard = Mid | |||
| parry = High | |||
| startup = 4 | |||
| active = 4 | |||
| recovery = 11 | |||
| total = 19 | |||
| advHit = 0 | |||
| advBlock = 0 | |||
| invul = None | |||
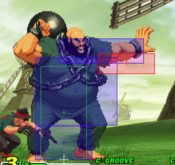
| description = A simple slap on the head. Solid range for a jab, but doesn't lead to much reward. Not a bad move to check opponents with in neutral, but 2LP might fare better. | |||
}} | |||
}} | |||
=== <span class="invisible-header">5MP</span> === | |||
{{MoveData | |||
| name = Far Strong | |||
| input = 5MP / Far MP | |||
| subtitle = Far Medium Punch | |||
| image = CVS2_Chang_5MP.PNG | |||
| caption = | |||
| linkname = 5MP | |||
| data = | |||
{{AttackData-CvS2 | |||
| version = Far {{Icon-Capcom|MP}} | |||
| subtitle = | |||
| damage = 1100 | |||
| stun = 11 | |||
| cancel = None | |||
| guard = Mid | |||
| parry = High | |||
| startup = 12 | |||
| active = 6 | |||
| recovery = 21 | |||
| total = 39 | |||
| advHit = -9 | |||
| advBlock = -9 | |||
| invul = None | |||
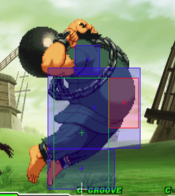
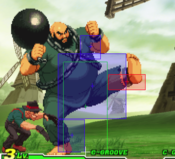
| description = A forward moving belly flop. Strange normal, the main purpose is to approach while maintaining charge for a Ball Swing, but it isn't like that special is a core necessity for Chang anyway. You can use this to approach in general with a hitbox out, which is better if you have Choi covering you, but generally not much use. | |||
}} | |||
}} | |||
=== <span class="invisible-header">5HP</span> === | |||
{{MoveData | |||
| name = Far Fierce | |||
| input = 5HP / Far HP | |||
| subtitle = Far Heavy Punch | |||
| image = CVS2_Chang_5HP.PNG | |||
| caption = | |||
| linkname = 5HP | |||
| data = | |||
{{AttackData-CvS2 | |||
| version = Far {{Icon-Capcom|HP}} | |||
| subtitle = | |||
| damage = 1500 | |||
| stun = 15 | |||
| cancel = None | |||
| guard = Mid | |||
| parry = High | |||
| startup = 10 | |||
| active = 4 | |||
| recovery = 39 | |||
| total = 53 | |||
| advHit = -15 | |||
| advBlock = -15 | |||
| invul = None | |||
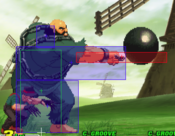
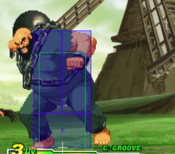
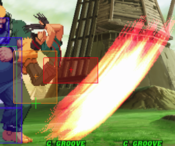
| description = A far reaching swing of Chang's ball. High damage and long reach but almost a full second of total duration, most of which is recovery. Even if it does hit, you're -15 and punishable by a lot of the cast unless you space this very far out. High risk, mediocre reward: don't use this too often. | |||
}} | |||
}} | |||
=== <span class="invisible-header">5LK</span> === | |||
{{MoveData | |||
| name = Far Short | |||
| input = 5LK | |||
| subtitle = Far Light Kick | |||
| image = CVS2_Chang_5LK.PNG | |||
| caption = | |||
| linkname = 5LK | |||
| data = | |||
{{AttackData-CvS2 | |||
| version = Far {{Icon-Capcom|LK}} | |||
| subtitle = | |||
| damage = 400 | |||
| stun = 4 | |||
| cancel = SP/SU | |||
| guard = Mid | |||
| parry = High | |||
| startup = 4 | |||
| active = 4 | |||
| recovery = 10 | |||
| total = 18 | |||
| advHit = +1 | |||
| advBlock = +1 | |||
| invul = None | |||
| description = A short kick. Low range but one of your few cancellable normals, good for close range confirms into supers. Other than that, this is outranged by almost every other Chang normal, so not much use. | |||
}} | |||
}} | |||
=== <span class="invisible-header">5MK</span> === | |||
{{MoveData | |||
| name = Far Forward | |||
| input = 5MK / Far MK | |||
| subtitle = Far Medium Kick | |||
| image = CVS2_Chang_5MK.PNG | |||
| caption = Every cute character needs the butt attack | |||
| linkname = 5MK | |||
| data = | |||
{{AttackData-CvS2 | |||
| version = Far {{Icon-Capcom|MK}} | |||
| subtitle = | |||
| damage = 1000 | |||
| stun = 10 | |||
| cancel = None | |||
| guard = Mid | |||
| parry = High | |||
| startup = 6 | |||
| active = 8 | |||
| recovery = 30 | |||
| total = 44 | |||
| advHit = -18 | |||
| advBlock = -18 | |||
| invul = None | |||
| description = A forward moving butt attack. Similar uses to 5MP, but a few differences. It has less startup and total duration, and has a super cancel for combos into Chang Super or setup into Choi Super. On the downside, it travels only about half the distance, and is a massive -18 on block and on hit. This means the opponent can basically always punish this if you don't cancel into a super. Because of the two big downsides, you will use this even less than 5MP. | |||
}} | |||
}} | |||
=== <span class="invisible-header">5HK</span> === | |||
{{MoveData | |||
| name = Far Roundhouse | |||
| input = 5HK / Far HK | |||
| subtitle = Far Heavy Kick | |||
| image = CVS2_Chang_5HK.PNG | |||
| caption = | |||
| linkname = 5HK | |||
| data = | |||
{{AttackData-CvS2 | |||
| version = Far {{Icon-Capcom|HK}} | |||
| subtitle = | |||
| damage = 1200 | |||
| stun = 12 | |||
| cancel = None | |||
| guard = Mid | |||
| parry = High | |||
| startup = 12 | |||
| active = 6 | |||
| recovery = 28 | |||
| total = 46 | |||
| advHit = -4 | |||
| advBlock = -4 | |||
| invul = None | |||
| description = A far reaching kick to the shins. Great poke and check normal, reaches very far and hits pretty hard. No cancel possible sadly, but it still isn't bad to toss out once in a while. | |||
}} | |||
}} | |||
= | == Close Normals == | ||
=== <span class="invisible-header">clLP</span> === | |||
{{MoveData | |||
| name = Close Jab | |||
| input = cl.LP / cl5LP | |||
| subtitle = Close Light Punch | |||
| image = CVS2_Chang_clLP.PNG | |||
| caption = | |||
| linkname = cl.LP | |||
| data = | |||
{{AttackData-CvS2 | |||
| version = Close {{Icon-Capcom|LP}} | |||
| subtitle = | |||
| damage = 400 | |||
| stun = 4 | |||
| cancel = SP/SU | |||
| guard = Mid | |||
| parry = High | |||
| startup = 4 | |||
| active = 4 | |||
| recovery = 11 | |||
| total = 19 | |||
| advHit = 0 | |||
| advBlock = 0 | |||
| invul = None | |||
| description = A quick backhand punch. Essentially identical to 5LP. | |||
}} | |||
}} | |||
== | === <span class="invisible-header">clMP</span> === | ||
{{MoveData | |||
| name = Close Strong | |||
| input = cl.MP / cl5MP | |||
| subtitle = Close Medium Punch | |||
| image = CVS2_Chang_5MP.PNG | |||
| caption = | |||
| linkname = cl.MP | |||
| data = | |||
{{AttackData-CvS2 | |||
| version = Close {{Icon-Capcom|MP}} | |||
| subtitle = | |||
| damage = 1100 | |||
| stun = 11 | |||
| cancel = None | |||
| guard = Mid | |||
| parry = High | |||
| startup = 12 | |||
| active = 6 | |||
| recovery = 21 | |||
| total = 39 | |||
| advHit = -9 | |||
| advBlock = -9 | |||
| invul = None | |||
| description = Identical to 5MP, which makes it useless and risky up close. | |||
}} | |||
}} | |||
== | === <span class="invisible-header">clHP</span> === | ||
{{MoveData | |||
| name = Close Fierce | |||
| input = cl.HP / cl5HP | |||
| subtitle = Close Heavy Punch | |||
| image = CVS2_Chang_clHP.PNG | |||
| caption = | |||
| linkname = cl.HP | |||
| data = | |||
{{AttackData-CvS2 | |||
| version = Close {{Icon-Capcom|HP}} | |||
| subtitle = | |||
| damage = 1600 | |||
| stun = 16 | |||
| cancel = None | |||
| guard = Mid | |||
| parry = High | |||
| startup = 12 | |||
| active = 6 | |||
| recovery = 21 | |||
| total = 39 | |||
| advHit = -6 | |||
| advBlock = -6 | |||
| invul = None | |||
| description = A downward swing with Chang's ball. High damage but no real reward since you can't cancel. Not entirely punishable, but still negative which means your turn ends. | |||
}} | |||
}} | |||
=== <span class="invisible-header">clLK</span> === | |||
{{MoveData | |||
| name = Close Short | |||
| input = cl.LK / cl5LK | |||
| subtitle = Close Light Kick | |||
| image = CVS2_Chang_5LK.PNG | |||
| caption = | |||
| linkname = cl.LK | |||
| data = | |||
{{AttackData-CvS2 | |||
| version = Close {{Icon-Capcom|LK}} | |||
| subtitle = | |||
| damage = 400 | |||
| stun = 4 | |||
| cancel = SP/SU | |||
| guard = Mid | |||
| parry = High | |||
| startup = 4 | |||
| active = 4 | |||
| recovery = 10 | |||
| total = 18 | |||
| advHit = +1 | |||
| advBlock = +1 | |||
| invul = None | |||
| description = Identical to 5LK. Useful in the exact same way. | |||
}} | |||
}} | |||
=== <span class="invisible-header">clMK</span> === | |||
{{MoveData | |||
| name = Close Forward | |||
| input = cl.MK / cl5MK | |||
| subtitle = Close Medium Kick | |||
| image = CVS2_Chang_5MK.PNG | |||
| caption = | |||
| linkname = cl.MK | |||
| data = | |||
{{AttackData-CvS2 | |||
| version = Close {{Icon-Capcom|MK}} | |||
| subtitle = | |||
| damage = 1000 | |||
| stun = 10 | |||
| cancel = None | |||
| guard = Mid | |||
| parry = High | |||
| startup = 6 | |||
| active = 8 | |||
| recovery = 30 | |||
| total = 44 | |||
| advHit = -18 | |||
| advBlock = -18 | |||
| invul = None | |||
| description = Identical to 5MK, which means you should never do this in close range ever. | |||
}} | |||
}} | |||
=== <span class="invisible-header">5HK</span> === | |||
- | {{MoveData | ||
Chang | | name = Close Roundhouse | ||
| input = cl.HK / cl5HK | |||
| subtitle = Close Heavy Kick | |||
| image = CVS2_Chang_clHK.PNG | |||
| caption = | |||
| linkname = cl.HK | |||
| data = | |||
{{AttackData-CvS2 | |||
| version = Close {{Icon-Capcom|HK}} | |||
| subtitle = | |||
| damage = 1400 | |||
| stun = 14 | |||
| cancel = SP/SU | |||
| guard = Mid | |||
| parry = High | |||
| startup = 9 | |||
| active = 6 | |||
| recovery = 20 | |||
| total = 35 | |||
| advHit = -2 | |||
| advBlock = -2 | |||
| invul = None | |||
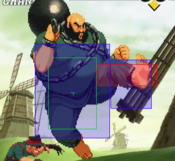
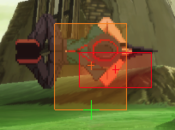
| description = Chang kicks up in the air with an awkward looking kick. A high damage close normal, but it sadly whiffs on crouchers. Stick to 2HP in combos and anti-air. | |||
}} | |||
}} | |||
== Crouching Normals == | |||
- | === <span class="invisible-header">2LP</span> === | ||
A | {{MoveData | ||
| name = Crouch Jab | |||
| input = 2LP / cr.LP | |||
| subtitle = Crouching Light Punch | |||
| image = CVS2_Chang_2LP.PNG | |||
| caption = | |||
| linkname = 2LP | |||
| data = | |||
{{AttackData-CvS2 | |||
| version = {{Motion|d}}+{{Icon-Capcom|LP}} | |||
| subtitle = | |||
| damage = 300 | |||
| stun = 3 | |||
| cancel = RF/SP/SU | |||
| guard = Mid | |||
| parry = Mid | |||
| startup = 4 | |||
| active = 4 | |||
| recovery = 10 | |||
| total = 18 | |||
| advHit = +3 | |||
| advBlock = +3 | |||
| invul = None | |||
| description = A fast elbow low to the ground. Very good 2LP with lots of range, and important to Chang since it is his only normal for confirms into super. It combos into Ball Spin fairly easily as well, and is a nice normal to mash on defense and offense. +3 on block makes it great to implement alongside Choi pressure. Just a good 2LP, use it a lot. | |||
}} | |||
}} | |||
=== <span class="invisible-header">2MP</span> === | |||
- | {{MoveData | ||
| name = Crouch Strong | |||
| input = 2MP / cr.MP | |||
| subtitle = Crouching Medium Punch | |||
| image = CVS2_Chang_2MP.PNG | |||
| caption = | |||
| linkname = 2MP | |||
| data = | |||
{{AttackData-CvS2 | |||
| version = {{Motion|d}}+{{Icon-Capcom|MP}} | |||
| subtitle = | |||
| damage = 1000 | |||
| stun = 10 | |||
| cancel = SU | |||
| guard = Mid | |||
| parry = Mid | |||
| startup = 6 | |||
| active = 6 | |||
| recovery = 17 | |||
| total = 29 | |||
| advHit = -3 | |||
| advBlock = -3 | |||
| invul = None | |||
| description = A low backhand punch. Fast and good for stuffing approach, but low reward without a super, and you can't confirm the super. Negative on block too so it ends your turn. Still a solid poke and check normal. | |||
}} | |||
}} | |||
Choi | === <span class="invisible-header">2HP</span> === | ||
{{MoveData | |||
| name = Crouch Fierce | |||
| input = 2HP / cr.HP | |||
| subtitle = Crouching Heavy Punch | |||
| image = CVS2_Chang_2HP_First.PNG | |||
| caption = First Hitbox | |||
| image2 = CVS2_Chang_2HP_Second.PNG | |||
| caption2 = Second Hitbox | |||
| linkname = 2HP | |||
| data = | |||
{{AttackData-CvS2 | |||
| version = {{Motion|d}}+{{Icon-Capcom|HP}} | |||
| subtitle = | |||
| damage = 1400/1200 | |||
| stun = 14/12 | |||
| cancel = SP/SU | |||
| guard = Mid | |||
| parry = High | |||
| startup = 9 | |||
| active = 8 | |||
| recovery = 31 | |||
| total = 48 | |||
| advHit = -11 | |||
| advBlock = -11 | |||
| invul = None | |||
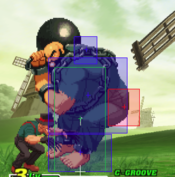
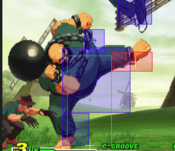
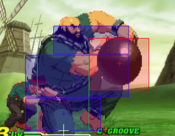
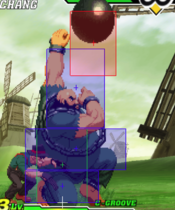
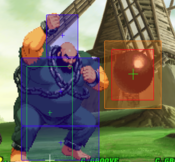
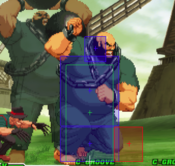
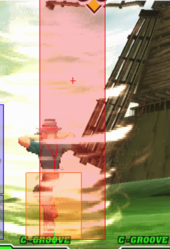
| description = A big upward ball swing. Your main anti-air and close normal for combos, as the first hit cancels. Big hitbox in the air makes it good for knocking people trying to jump out of Choi pressure or jump in on you whiffing a button. Careful not to whiff yourself, and always try to cancel. If you get the early hitbox on an anti-air connect, you can cancel into Choi and get a bit of pressure. | |||
}} | |||
}} | |||
=== <span class="invisible-header">2LK</span> === | |||
- | {{MoveData | ||
| name = Crouch Short | |||
| input = 2LK / cr.LK | |||
| subtitle = Crouching Light Kick | |||
| image = CVS2_Chang_2LK.PNG | |||
| caption = | |||
| linkname = 2LK | |||
| data = | |||
{{AttackData-CvS2 | |||
| version = {{Motion|d}}+{{Icon-Capcom|LK}} | |||
| subtitle = | |||
| damage = 300 | |||
| stun = 3 | |||
| cancel = SU | |||
| guard = Low | |||
| parry = Low | |||
| startup = 5 | |||
| active = 4 | |||
| recovery = 14 | |||
| total = 23 | |||
| advHit = +1 | |||
| advBlock = +1 | |||
| invul = None | |||
| description = Chang kicks their feet. Your main low mixup, but not the best one really since you can't confirm the super after. Still, in hop Grooves you can do empty hop pressure into 2LK while they block Choi. If you just want pressure and plus frames, stick to 2LP. | |||
}} | |||
}} | |||
=== <span class="invisible-header">2MK</span> === | |||
- | {{MoveData | ||
| name = Crouch Forward | |||
| input = 2MK / cr.MK | |||
| subtitle = Crouching Medium Kick | |||
| image = CVS2_Chang_2LK.PNG | |||
| caption = | |||
| linkname = 2MK | |||
| data = | |||
{{AttackData-CvS2 | |||
| version = {{Motion|d}}+{{Icon-Capcom|MK}} | |||
| subtitle = | |||
| damage = 900 | |||
| stun = 9 | |||
| cancel = SU | |||
| guard = Low | |||
| parry = Low | |||
| startup = 6 | |||
| active = 4 | |||
| recovery = 18 | |||
| total = 28 | |||
| advHit = +2 | |||
| advBlock = +2 | |||
| invul = None | |||
| description = A longer reaching but slower 2LK. Generally preferable since it has better range and is +2 instead of +1. A bit slower on whiff, but still fast overall. Can also be a nice poke or whiff punish into super. | |||
}} | |||
}} | |||
=== <span class="invisible-header">2HK</span> === | |||
- | {{MoveData | ||
| name = Crouch Roundhouse | |||
| input = 2HK / cr.HK | |||
| subtitle = Crouching Heavy Kick | |||
| image = CVS2_Chang_2HK.PNG | |||
| caption = | |||
| linkname = 2HK | |||
| data = | |||
{{AttackData-CvS2 | |||
| version = {{Motion|d}}+{{Icon-Capcom|HK}} | |||
| subtitle = | |||
| damage = 1500 | |||
| stun = 15 | |||
| cancel = None | |||
| guard = Low | |||
| parry = Low | |||
| startup = 10 | |||
| active = 4 | |||
| recovery = 33 | |||
| total = 47 | |||
| advHit = -DWN | |||
| advBlock = -9 | |||
| invul = None | |||
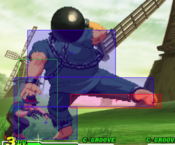
| description = A low to the ground ball sweep. Risky but not as risky as some of Chang's other normals, and is much higher reward. Useful as a surprise low, whiff punish, poke, etc. Just don't whiff this, the total duration is very bad. | |||
}} | |||
}} | |||
== Jumping Normals == | |||
=== <span class="invisible-header">jLP</span> === | |||
{{MoveData | |||
| name = Jump Jab | |||
| input = j.LP / 8LP | |||
| subtitle = Jumping Light Punch | |||
| image = CVS2_Chang_jLP.PNG | |||
| caption = | |||
| linkname = j.LP | |||
| data = | |||
{{AttackData-CvS2 | |||
| version = {{Motion|ub}}/{{Motion|u}}/{{Motion|uf}}+{{Icon-Capcom|LP}} | |||
| subtitle = | |||
| damage = 600 | |||
| stun = 6 | |||
| cancel = None | |||
| guard = High | |||
| parry = High | |||
| startup = 4 | |||
| active = 18 | |||
| recovery = 0 | |||
| total = 22 | |||
| advHit = Varies | |||
| advBlock = Varies | |||
| invul = None | |||
| description = An active punch in the air. General use j.LP, you can interrupt opponents in the air with it. You would always rather just 2HP however. | |||
}} | |||
}} | |||
== | === <span class="invisible-header">jMP</span> === | ||
{{MoveData | |||
| name = Jump Strong | |||
| input = j.MP / 8MP | |||
| subtitle = Jumping Medium Punch | |||
| image = CVS2_Chang_jMP.PNG | |||
| caption = | |||
| linkname = j.MP | |||
| data = | |||
{{AttackData-CvS2 | |||
| version = {{Motion|ub}}/{{Motion|u}}/{{Motion|uf}}+{{Icon-Capcom|MP}} | |||
| subtitle = | |||
| damage = 1000 | |||
| stun = 10 | |||
| cancel = None | |||
| guard = High | |||
| parry = High | |||
| startup = 4 | |||
| active = 10 | |||
| recovery = 0 | |||
| total = 14 | |||
| advHit = Varies | |||
| advBlock = Varies | |||
| invul = None | |||
| description = A fast punch with the same animation as j.LP. Not much purpose, but it does some decent damage. | |||
}} | |||
}} | |||
=== <span class="invisible-header">jHP</span> === | |||
- | {{MoveData | ||
Chang | | name = Jump Fierce | ||
| input = j.HP / 8HP | |||
| subtitle = Jumping Heavy Punch | |||
| image = CVS2_Chang_jHP.PNG | |||
| caption = | |||
| linkname = j.HP | |||
| data = | |||
{{AttackData-CvS2 | |||
| version = {{Motion|ub}}/{{Motion|u}}/{{Motion|uf}}+{{Icon-Capcom|HP}} | |||
| subtitle = | |||
| damage = 1400 | |||
| stun = 14 | |||
| cancel = None | |||
| guard = High | |||
| parry = High | |||
| startup = 10 | |||
| active = 4 | |||
| recovery = 0 | |||
| total = 14 | |||
| advHit = Varies | |||
| advBlock = Varies | |||
| invul = None | |||
| description = Chang swats the air with his wrecking ball. Great air-to-air, slow but massive reach. With good timing you can knock opponents out of the air with this for a chunk of damage and some good neutral control. Hard to do this on reaction, but 2HP saves the day there. | |||
}} | |||
}} | |||
=== <span class="invisible-header">jLK</span> === | |||
- | {{MoveData | ||
| name = Jump Short | |||
| input = j.LK / 8LK | |||
| subtitle = Jumping Light Kick | |||
| image = CVS2_Chang_jLK.PNG | |||
| caption = | |||
| linkname = j.LK | |||
| data = | |||
{{AttackData-CvS2 | |||
| version = {{Motion|ub}}/{{Motion|u}}/{{Motion|uf}}+{{Icon-Capcom|LK}} | |||
| subtitle = | |||
| damage = 500 | |||
| stun = 5 | |||
| cancel = None | |||
| guard = High | |||
| parry = High | |||
| startup = 5 | |||
| active = 17 | |||
| recovery = 0 | |||
| total = 22 | |||
| advHit = Varies | |||
| advBlock = Varies | |||
| invul = None | |||
| description = Chang sticks out his foot like 5LK. Not much purpose in comparison to either j.LP or j.MK. | |||
}} | |||
}} | |||
= | == <span class="invisible-header">jMK</span> == | ||
{{MoveData | |||
| name = Jump Forward | |||
| input = j.MK / 8MK | |||
| subtitle = Jumping Medium Kick | |||
| image = CVS2_Chang_jMK.PNG | |||
| caption = | |||
| linkname = j.MK | |||
| data = | |||
{{AttackData-CvS2 | |||
| version = {{Motion|ub}}/{{Motion|u}}/{{Motion|uf}}+{{Icon-Capcom|MK}} | |||
| subtitle = | |||
| damage = 900 | |||
| stun = 9 | |||
| cancel = None | |||
| guard = High | |||
| parry = High | |||
| startup = 6 | |||
| active = 18 | |||
| recovery = 0 | |||
| total = 24 | |||
| advHit = Varies | |||
| advBlock = Varies | |||
| invul = None | |||
| description = Same animation as j.LK, but slightly longer startup and active time. Decent air-to-air because of how active it is, and being a medium normal helps as it hits a bit harder. You would still rather j.HP for an air-to-air but if you need startup it's either this or j.LP. | |||
}} | |||
}} | |||
= | === <span class="invisible-header">jHK</span> === | ||
{{MoveData | |||
| name = Jump Roundhouse | |||
| input = j.HK / 8HK | |||
| subtitle = Jumping Heavy Kick | |||
| image = CVS2_Chang_jHK.PNG | |||
| caption = | |||
| linkname = j.HK | |||
| data = | |||
{{AttackData-CvS2 | |||
| version = {{Motion|ub}}/{{Motion|u}}/{{Motion|uf}}+{{Icon-Capcom|HK}} | |||
| subtitle = | |||
| damage = 1300 | |||
| stun = 13 | |||
| cancel = None | |||
| guard = High | |||
| parry = High | |||
| startup = 6 | |||
| active = 4 | |||
| recovery = 0 | |||
| total = 10 | |||
| advHit = Varies | |||
| advBlock = Varies | |||
| invul = None | |||
| description = A downward axe kick. Does a bit less damage than j.HP, but the hitbox is better suited as a jump-in. If you jumped a fireball or something similar, go for this. | |||
}} | |||
}} | |||
''' | == Command Normals == | ||
=== <span class="invisible-header">Hit and Run</span> === | |||
{{MoveData | |||
| name = Hit and Run | |||
| input = 3HP | |||
| subtitle = Slide | |||
| image = CVS2_Chang_3HP.PNG | |||
| caption = | |||
| linkname = 3HP | |||
| data = | |||
{{AttackData-CvS2 | |||
| version = {{Motion|df}}+{{Icon-Capcom|HP}} | |||
| subtitle = | |||
| damage = 1300 | |||
| stun = 13 | |||
| cancel = None | |||
| guard = Low | |||
| parry = Low | |||
| startup = 10 | |||
| active = 6 | |||
| recovery = 28 | |||
| total = 44 | |||
| advHit = -DWN | |||
| advBlock = -9 | |||
| invul = None | |||
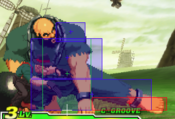
| description = Chang slides across the ground with his wrecking ball out in front of him. One of your more reliable knockdowns, and has a decent bit of range. Pretty risky due to the long total duration and -9 on block frame data, but fairly fast startup and decently low. If this gets blocked, you'll eat a throw or a 2LP/2LK punish usually. Still, not bad to throw out from time to time. Pretty low profile for Chang's size. You can space this to be safe from punishment as well, but it isn't super easy. | |||
}} | |||
}} | |||
== Throws == | |||
=== <span class="invisible-header">Hagan Geki</span> === | |||
{{MoveData | |||
| name = Hagan Geki | |||
| input = Near Opponent, 4/6HP | |||
| subtitle = Punch Throw | |||
| image = CVS2_Chang_PThrow.PNG | |||
| caption = | |||
| linkname = Hagan Geki | |||
| data = | |||
{{AttackData-CvS2 | |||
| version = Close {{Motion|b}}/{{Motion|f}}+{{Icon-Capcom|HP}} | |||
| subtitle = | |||
| damage = 2000 | |||
| stun = 0 | |||
| cancel = None | |||
| guard = Grab | |||
| parry = Grab | |||
| startup = 3 | |||
| active = 1 | |||
| recovery = 13 | |||
| total = 17 | |||
| advHit = -DWN | |||
| advBlock = Grab | |||
| invul = None | |||
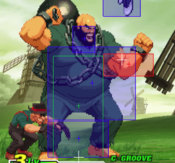
| description = Chang snatches up the opponent before headbutting them with his shiny bald head. 2000 damage punch throw, great for punishes and tic throws as it does a lot more damage than the usual 2 frame throw. Only real weakness is that the knockdown is much worse, but it's overall a strong throw, mostly just to make up for his kick throws unique properties. | |||
}} | |||
}} | |||
=== <span class="invisible-header">Kusari Jime</span> === | |||
{{MoveData | |||
| name = Kusari Jime | |||
| input = Near Opponent, 4/6HK | |||
| subtitle = Kick Throw | |||
| image = CVS2_Chang_KThrow.PNG | |||
| caption = Without Choi | |||
| image2 = CVS2_Chang_KThrow_Choi.PNG | |||
| caption2 = With Choi | |||
| linkname = Kusari Jime | |||
| data = | |||
{{AttackData-CvS2 | |||
| version = Close {{Motion|b}}/{{Motion|f}}+{{Icon-Capcom|HK}} | |||
| subtitle = Without Choi | |||
| damage = 1600 | |||
| stun = 0 | |||
| cancel = None | |||
| guard = Grab | |||
| parry = Grab | |||
| startup = 5 | |||
| active = 1 | |||
| recovery = 13 | |||
| total = 19 | |||
| advHit = -DWN | |||
| advBlock = Grab | |||
| invul = None | |||
}} | |||
{{AttackData-CvS2 | |||
| version = Close {{Motion|b}}/{{Motion|f}}+{{Icon-Capcom|HK}} | |||
| subtitle = With Choi | |||
| damage = 1600+400 | |||
| stun = 0 | |||
| cancel = None | |||
| guard = Grab | |||
| parry = Grab | |||
| startup = 5 | |||
| active = 1 | |||
| recovery = 13 | |||
| total = 19 | |||
| advHit = -DWN | |||
| advBlock = Grab | |||
| invul = None | |||
| description = A unique and good kick throw. When Choi isn't in proximity, or is busy doing a special, this is a weak throw that does less damage and forces a sideswap every time. However, if Choi is in proximity of you, Choi catches them with his claws. This turns a weak throw into a very very strong throw. The Choi version cannot sideswap, meaning Chang can hold backwards to block a DP and still threaten a throw that keeps the corner. It gives a much better knockdown, one of Chang's best knockdowns in general. It does the same amount of damage as his punch throw however, but all of the other upsides make it very scary when Choi is nearby. | |||
}} | |||
}} | |||
''' | == Special Moves == | ||
=== <span class="invisible-header">Tekkyu Daikaiten</span> === | |||
{{MoveData | |||
| name = Tekkyu Daikaiten | |||
| input = Mash P, PPP to cancel | |||
| subtitle = Ball Spin | |||
| image = CVS2_Chang_PPP.PNG | |||
| caption = Yes, the active data is real | |||
| linkname = Tekkyu Daikaiten | |||
| data = | |||
{{AttackData-CvS2 | |||
| version = Mash {{Icon-Capcom|LP}} | |||
| subtitle = | |||
| damage = 1100 | |||
| stun = 0 | |||
| cancel = {{Icon-Capcom|P}}{{Icon-Capcom|P}}{{Icon-Capcom|P}} to cancel | |||
| guard = Mid | |||
| parry = High | |||
| startup = 5 | |||
| active = 5~130 | |||
| recovery = 32 | |||
| total = 167 | |||
| advHit = -DWN | |||
| advBlock = -4 | |||
| invul = None | |||
}} | |||
{{AttackData-CvS2 | |||
| header = no | |||
| version = Mash {{Icon-Capcom|MP}} | |||
| subtitle = | |||
| damage = 1100 | |||
| stun = 0 | |||
| cancel = {{Icon-Capcom|P}}{{Icon-Capcom|P}}{{Icon-Capcom|P}} to cancel | |||
| guard = Mid | |||
| parry = High | |||
| startup = 5 | |||
| active = 5~190 | |||
| recovery = 32 | |||
| total = 227 | |||
| advHit = -DWN | |||
| advBlock = -4 | |||
| invul = None | |||
}} | |||
{{AttackData-CvS2 | |||
| header = no | |||
| version = Mash {{Icon-Capcom|HP}} | |||
| subtitle = | |||
| damage = 1100 | |||
| stun = 0 | |||
| cancel = {{Icon-Capcom|P}}{{Icon-Capcom|P}}{{Icon-Capcom|P}} to cancel | |||
| guard = Mid | |||
| parry = High | |||
| startup = 5 | |||
| active = 5~250 | |||
| recovery = 32 | |||
| total = 287 | |||
| advHit = -DWN | |||
| advBlock = -4 | |||
| invul = None | |||
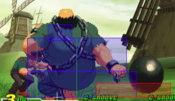
| description = Chang spins his wrecking ball above his head for an unreasonably long time. You can cancel these at any point by pressing all 3 punches. Great specials for neutral, anti-air, anti-zoning, combos, pressure, you name it. In neutral, these function as hard to contest active tools that Chang can cancel at any point and block. They're hard to hit while Chang is spinning, and since you can't always tell when he cancels them, punishing the recovery is hard. They also delete projectiles, and good Chang players will roll cancel these (input as {{Icon-Capcom|HP}}, {{Icon-Capcom|MP}}, {{Icon-Capcom|LP}}, {{Icon-Capcom|LP}}+{{Icon-Capcom|LK}}, {{Icon-Capcom|HP}}) to make them fully invulnerable and even more annoying. In pressure you can use these to chip opponents out, and get a mixup as a scared opponent won't challenge them. If roll cancelled, there's very little they can do about this. Also, these function as meterless combo enders from Chang's 2LP and 2HP. | |||
}} | |||
}} | |||
=== <span class="invisible-header">Tekkyu Funsai Geki</span> === | |||
{{MoveData | |||
| name = Tekkyu Funsai Geki | |||
| input = [4]6P | |||
| subtitle = Ball Throw | |||
| image = CVS2_Chang_46P_First.PNG | |||
| caption = The Windup | |||
| image2 = CVS2_Chang_46P_Second.PNG | |||
| caption2 = The Toss | |||
| linkname = | |||
| data = | |||
{{AttackData-CvS2 | |||
| version = Charge {{Motion|b}},{{Motion|f}}+{{Icon-Capcom|LP}} | |||
| subtitle = | |||
| damage = 1500 | |||
| stun = 15 | |||
| cancel = None | |||
| guard = Mid | |||
| parry = High | |||
| startup = 36 | |||
| active = 4 | |||
| recovery = 32 | |||
| total = 72 | |||
| advHit = -DWN | |||
| advBlock = -12 | |||
| invul = 7~22 (Full) | |||
}} | |||
{{AttackData-CvS2 | |||
| header = no | |||
| version = Charge {{Motion|b}},{{Motion|f}}+{{Icon-Capcom|MP}} | |||
| subtitle = | |||
| damage = 1600 | |||
| stun = 16 | |||
| cancel = None | |||
| guard = Mid | |||
| parry = High | |||
| startup = 38 | |||
| active = 4 | |||
| recovery = 32 | |||
| total = 74 | |||
| advHit = -DWN | |||
| advBlock = -12 | |||
| invul = 7~24 (Full) | |||
}} | |||
{{AttackData-CvS2 | |||
| header = no | |||
| version = Charge {{Motion|b}},{{Motion|f}}+{{Icon-Capcom|HP}} | |||
| subtitle = | |||
| damage = 1700 | |||
| stun = 17 | |||
| cancel = None | |||
| guard = Mid | |||
| parry = High | |||
| startup = 40 | |||
| active = 4 | |||
| recovery = 32 | |||
| total = 76 | |||
| advHit = -DWN | |||
| advBlock = -12 | |||
| invul = 7~26 (Full) | |||
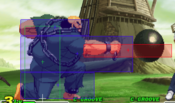
| description = Chang reels back and tosses the wrecking ball. Not much use really: the invincibility is short and isn't reversal, and the long startup makes it hard to punish anything with it. Functional fireball punish when you have charge, but needs to be done with a bit of specific timing, and you would rather RC Ball Spin for that if you can. Very risky on whiff, and pretty bad on block as well. Avoid using these often. | |||
}} | |||
}} | |||
=== <span class="invisible-header">Dai Hakai Nage</span> === | |||
{{MoveData | |||
| name = Dai Hakai Nage | |||
| input = 632146P | |||
| subtitle = Command Grab | |||
| image = CVS2_Chang_632146P.PNG | |||
| caption = | |||
| linkname = Dai Hakai Nage | |||
| data = | |||
{{AttackData-CvS2 | |||
| version = {{Motion|63214}}{{Motion|f}}+{{Icon-Capcom|LP}} | |||
| subtitle = | |||
| damage = 200x7+800 | |||
| stun = 0 | |||
| cancel = None | |||
| guard = Grab | |||
| parry = Grab | |||
| startup = 5 | |||
| active = 1 | |||
| recovery = 20 | |||
| total = 26 | |||
| advHit = -DWN | |||
| advBlock = Grab | |||
| invul = None | |||
}} | |||
{{AttackData-CvS2 | |||
| header = no | |||
| version = {{Motion|63214}}{{Motion|f}}+{{Icon-Capcom|MP}} | |||
| subtitle = | |||
| damage = 200x7+900 | |||
| stun = 0 | |||
| cancel = None | |||
| guard = Grab | |||
| parry = Grab | |||
| startup = 5 | |||
| active = 1 | |||
| recovery = 20 | |||
| total = 26 | |||
| advHit = -DWN | |||
| advBlock = Grab | |||
| invul = None | |||
}} | |||
{{AttackData-CvS2 | |||
| header = no | |||
| version = {{Motion|63214}}{{Motion|f}}+{{Icon-Capcom|HP}} | |||
| subtitle = | |||
| damage = 200x7+1000 | |||
| stun = 0 | |||
| cancel = None | |||
| guard = Grab | |||
| parry = Grab | |||
| startup = 5 | |||
| active = 1 | |||
| recovery = 20 | |||
| total = 26 | |||
| advHit = -DWN | |||
| advBlock = Grab | |||
| invul = None | |||
| description = Chang grabs the opponent and slams them around a comical amount of times. Damaging and useful command grab, as while it isn't the fastest in the game, Choi pressure makes it much more of a threat. The LP version does the least damage, but has 88 pixels of range. The MP version has 80 pixels, and the HP version does the most damage but only has 72 pixels of range. You'll usually stick to the LP version for punishes and the HP version for mixups. Punishing with this isn't bad, as it gives a good knockdown and does alright damage. | |||
}} | |||
}} | |||
''' | === <span class="invisible-header">Tatsumaki Shippuzan</span> === | ||
{{MoveData | |||
| name = Tatsumaki Shippuzan | |||
| input = 63214K | |||
| subtitle = Spin, Tornado | |||
| image = CVS2_Chang_63214K.PNG | |||
| caption = | |||
| linkname = Tatsumaki Shippuzan | |||
| data = | |||
{{AttackData-CvS2 | |||
| version = {{Motion|63214}}+{{Icon-Capcom|LK}} | |||
| subtitle = | |||
| damage = 400x2 | |||
| stun = 4x2 | |||
| cancel = None | |||
| guard = Mid | |||
| parry = High | |||
| startup = 4 | |||
| active = Traveling | |||
| recovery = 34 | |||
| total = 38 | |||
| advHit = -DWN | |||
| advBlock = +2 | |||
| invul = None | |||
}} | |||
{{AttackData-CvS2 | |||
| header = no | |||
| version = {{Motion|63214}}+{{Icon-Capcom|MK}} | |||
| subtitle = | |||
| damage = 300x3 | |||
| stun = 3x3 | |||
| cancel = None | |||
| guard = Mid | |||
| parry = High | |||
| startup = 6 | |||
| active = Traveling | |||
| recovery = 32 | |||
| total = 38 | |||
| advHit = -DWN | |||
| advBlock = +4 | |||
| invul = None | |||
}} | |||
{{AttackData-CvS2 | |||
| header = no | |||
| version = {{Motion|63214}}+{{Icon-Capcom|HK}} | |||
| subtitle = | |||
| damage = 300x4 | |||
| stun = 3x4 | |||
| cancel = None | |||
| guard = Mid | |||
| parry = High | |||
| startup = 8 | |||
| active = Traveling | |||
| recovery = 36 | |||
| total = 44 | |||
| advHit = -DWN | |||
| advBlock = +6 | |||
| invul = None | |||
| description = Choi runs forward and spins his way up into the sky. The different versions send Choi up at different angles, with the LK being a bit closer to Chang and the HK being farther away. Key special for Chang, and largely the basis of Choi pressure as a whole. This move is quite plus on block, and the rising active hitbox catches a lot of escape routes. You really want them to block this, as you can go in and do a mixup or get pressure/chip damage. Has only one drawback in that it's a long total duration where you can't use Choi, but the chip is usually worth it and Choi recovers fast enough to still continue pressure usually. Also a solid tool to cover Chang's approach in neutral, anti-air, zone with, etc etc etc. Very versatile and powerful special, use and abuse this. | |||
}} | |||
}} | |||
=== <span class="invisible-header">Shisso Kuretsuzan</span> === | |||
{{MoveData | |||
| name = Shisso Kuretsuzan | |||
| input = 623K | |||
| subtitle = Slash | |||
| image = CVS2_Chang_623K.PNG | |||
| caption = | |||
| linkname = Shisso Kuretsuzan | |||
| data = | |||
{{AttackData-CvS2 | |||
| version = {{Motion|623}}+{{Icon-Capcom|LK}} | |||
| subtitle = | |||
| damage = 1100 | |||
| stun = 11 | |||
| cancel = None | |||
| guard = Mid | |||
| parry = High | |||
| startup = 23 | |||
| active = Traveling | |||
| recovery = 15 | |||
| total = 38 | |||
| advHit = -DWN | |||
| advBlock = +23 | |||
| invul = None | |||
}} | |||
{{AttackData-CvS2 | |||
| header = no | |||
| version = {{Motion|623}}+{{Icon-Capcom|MK}} | |||
| subtitle = | |||
| damage = 1200 | |||
| stun = 12 | |||
| cancel = None | |||
| guard = Mid | |||
| parry = High | |||
| startup = 23 | |||
| active = 23~40 | |||
| recovery = 15 | |||
| total = 38~78 | |||
| advHit = -DWN | |||
| advBlock = +23 | |||
| invul = None | |||
}} | |||
{{AttackData-CvS2 | |||
| header = no | |||
| version = {{Motion|623}}+{{Icon-Capcom|HK}} | |||
| subtitle = | |||
| damage = 1300 | |||
| stun = 13 | |||
| cancel = None | |||
| guard = Mid | |||
| parry = High | |||
| startup = 23 | |||
| active = 23~55 | |||
| recovery = 15 | |||
| total = 38~93 | |||
| advHit = -DWN | |||
| advBlock = +23 | |||
| invul = None | |||
| description = Chang sends Choi running forward. The LK version is a fixed distance move, but the MK and HK versions will either activate once in proximity of the opponent or run to a fixed distance. LK is right in front of Chang, MK is halfscreen, HK is fullscreen. The other extremely useful summon. Functions almost like a fireball, as Choi runs forward and threatens to catch the opponent while Chang can sit back for a bit or approach behind him. VERY plus on block, and recover fast, making them good in Choi pressure. Only a single hit however, and much worse at catching jumps and buttons since the hitbox around Choi isn't as big or active. Use these to zone, approach, and run another mixup. | |||
}} | |||
}} | |||
=== <span class="invisible-header">Hisho Kuretsuzan</span> === | |||
{{MoveData | |||
| name = Hisho Kuretsuzan | |||
| input = 41236K | |||
| subtitle = Dive | |||
| image = CVS2_Chang_41236K.PNG | |||
| caption = | |||
| linkname = Hisho Kuretsuzan | |||
| data = | |||
{{AttackData-CvS2 | |||
| version = {{Motion|41236}}+{{Icon-Capcom|LK}} | |||
| subtitle = | |||
| damage = 1000 | |||
| stun = 10 | |||
| cancel = None | |||
| guard = Mid | |||
| parry = High | |||
| startup = 36+2 | |||
| active = Traveling | |||
| recovery = - | |||
| total = 38+ | |||
| advHit = +68~ | |||
| advBlock = +68~ | |||
| invul = None | |||
}} | |||
{{AttackData-CvS2 | |||
| header = no | |||
| version = {{Motion|41236}}+{{Icon-Capcom|MK}} | |||
| subtitle = | |||
| damage = 1100 | |||
| stun = 11 | |||
| cancel = None | |||
| guard = Mid | |||
| parry = High | |||
| startup = 36+2 | |||
| active = Traveling | |||
| recovery = - | |||
| total = 38+ | |||
| advHit = +68~ | |||
| advBlock = +68~ | |||
| invul = None | |||
}} | |||
{{AttackData-CvS2 | |||
| header = no | |||
| version = {{Motion|41236}}+{{Icon-Capcom|HK}} | |||
| subtitle = | |||
| damage = 1200 | |||
| stun = 12 | |||
| cancel = None | |||
| guard = Mid | |||
| parry = High | |||
| startup = 36+2 | |||
| active = Traveling | |||
| recovery = - | |||
| total = 38+ | |||
| advHit = +70~ | |||
| advBlock = +70~ | |||
| invul = None | |||
| description = A strange special where Choi jumps to the wall behind Chang and then dives forward, drilling his claws into the opponent. The startup is 36 frames to reach the wall and 2 frames to launch. No matter where Chang is, Choi has this exact startup time. Situationally useful, but because of the far backward movement it's a lot harder to use in pressure. It leaves a much larger gap than the other two summon specials, which gives your opponent a better chance to escape. It also only hits once, and doesn't do much in the way of chip damage or guard damage. Instead, use this when Chang is in the corner as an escape, or as a way to bully people respecting the other two summons too much. This is also the only summon that won't knock down, so you can combo this into a super or a 2HK or 3HP. | |||
}} | |||
}} | |||
= | == Supers == | ||
=== <span class="invisible-header">Tekkyu Dai Bousou</span> === | |||
{{MoveData | |||
| name = Tekkyu Dai Bousou | |||
| input = 2363214P | |||
| subtitle = Rush Super, Chang Super | |||
| image = CVS2_Chang_2363214P.PNG | |||
| caption = | |||
| linkname = Tekkyu Dai Bousou | |||
| data = | |||
{{AttackData-CvS2 | |||
| version = {{Motion|236}}{{Motion|63214}}+{{Icon-Capcom|LP}} | |||
| subtitle = | |||
| damage = 3300~4000 | |||
| stun = 0 | |||
| cancel = None | |||
| guard = Mid | |||
| parry = High | |||
| startup = 4:4 | |||
| active = 6 | |||
| recovery = 70 | |||
| total = 84 | |||
| advHit = -DWN | |||
| advBlock = -47 | |||
| invul = 8 (Full) | |||
}} | |||
{{AttackData-CvS2 | |||
| header = no | |||
| version = {{Motion|236}}{{Motion|63214}}+{{Icon-Capcom|MP}} | |||
| subtitle = | |||
| damage = 3900~4600 | |||
| stun = 0 | |||
| cancel = SP/SU | |||
| guard = Mid | |||
| parry = High | |||
| startup = 4:4 | |||
| active = 16 | |||
| recovery = 70 | |||
| total = 80 | |||
| advHit = -DWN | |||
| advBlock = -47 | |||
| invul = 14 (Full) | |||
}} | |||
{{AttackData-CvS2 | |||
| header = no | |||
| version = {{Motion|236}}{{Motion|63214}}+{{Icon-Capcom|HP}} | |||
| subtitle = | |||
| damage = 5200 | |||
| stun = 0 | |||
| cancel = None | |||
| guard = Mid | |||
| parry = High | |||
| startup = 4:4 | |||
| active = 26 | |||
| recovery = 70 | |||
| total = 90 | |||
| advHit = -DWN | |||
| advBlock = -47 | |||
| invul = 22 (Full) | |||
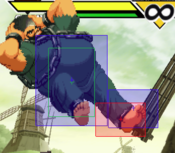
| description = Chang attempts a bellyflop on the opponent. If it hits, he goes into a long string of moves with a random ender. Different enders have different damage, but it is complete RNG which one you get. This is a great utility for Chang, as it can be surprisingly easy to combo into and gives him a much higher damage ender and a great knockdown. Should you land a 2LP or a 2HP or a 5LK, confirm into this. Notably, the level 2 to level 1 cancel of this does a large chunk of damage and is very threatening, which is nice since Chang is usually played in C-Groove. This is also nice if you get a guard crush. You can use the reeling punish window of a guard crush and go right into this for great damage. | |||
}} | |||
}} | |||
= | === <span class="invisible-header">Shin! Chouzetsu Tatsumaki Sinkuuzan</span> === | ||
{{MoveData | |||
| name = Shin! Chouzetsu Tatsumaki Sinkuuzan | |||
| input = 6321463214K | |||
| subtitle = Tornado Super, Choi Super | |||
| image = CVS2_Chang_6321463214K.PNG | |||
| caption = You used to have a guard bar | |||
| linkname = Shin! Chouzetsu Tatsumaki Sinkuuzan | |||
| data = | |||
{{AttackData-CvS2 | |||
| version = {{Motion|63214}}{{Motion|63214}}+{{Icon-Capcom|LK}} | |||
| subtitle = | |||
| damage = 2800 | |||
| stun = 0 | |||
| cancel = None | |||
| guard = Mid | |||
| parry = High | |||
| startup = 4:40 | |||
| active = Traveling | |||
| recovery = 100 | |||
| total = 144 | |||
| advHit = -DWN | |||
| advBlock = +46 | |||
| invul = 8 (Full) | |||
}} | |||
{{AttackData-CvS2 | |||
| header = no | |||
| version = {{Motion|63214}}{{Motion|63214}}+{{Icon-Capcom|MK}} | |||
| subtitle = | |||
| damage = 4000 | |||
| stun = 0 | |||
| cancel = None | |||
| guard = Mid | |||
| parry = High | |||
| startup = 4:40 | |||
| active = Traveling | |||
| recovery = 100 | |||
| total = 144 | |||
| advHit = -DWN | |||
| advBlock = +46 | |||
| invul = 14 (Full) | |||
}} | |||
{{AttackData-CvS2 | |||
| header = no | |||
| version = {{Motion|63214}}{{Motion|63214}}+{{Icon-Capcom|HK}} | |||
| subtitle = | |||
| damage = 5600 | |||
| stun = 0 | |||
| cancel = None | |||
| guard = Mid | |||
| parry = High | |||
| startup = 4:40 | |||
| active = Traveling | |||
| recovery = 100 | |||
| total = 144 | |||
| advHit = -DWN | |||
| advBlock = +46 | |||
| invul = 22 (Full) | |||
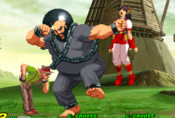
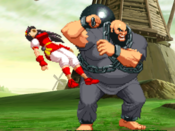
| description = Chang does a very silly pose and sends Choi out to do a massive tornado spin. Puts the opponent in blockstun for a few years, and makes their guard bar cry. Does enough in chip to make it almost a combo on it's own as well. The listed frame data is 4 frame superflash, 40 frams for Choi to start spinning, and Chang is stuck in the total duration. You'll set this up meaty usually, since cancelling into it leaves a very reactable and large gap to hit Chang out of. Not only does this destroy the guard bar, but Chang recovers in time to do whatever he wants, usually a jump mixup. Basically, while they block the tornado, you jump. You either do j.HK, 2HP, HP Spinning Ball, or you land and do a low hit or 2LP, 2LP, LP Spinning Ball for chip and guard crush. You can also always tick throw, and run another mixup after that. Being able to save the super for this as a meaty and Chang Super when you get a punish is a big reason C-Chang is the best. | |||
}} | |||
}} | |||
== Colors == | |||
[[File:Chang_CvS2_colors.png]] | |||
{{Navbox-CvS2}} | |||
[[Category:Capcom vs SNK 2]] | [[Category:Capcom vs SNK 2]] | ||
[[Category:Chang]] | |||
Latest revision as of 01:53, 10 July 2023
Introduction
Story
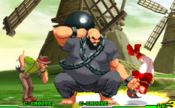
Chang Koehan and Choi Bounge are a pair of convicted felons from South Korea who, one day, escaped from prison easily. While they had no issue from the police, the justice warrior Kim Kaphwan defeated them swiftly. In an effort to rehabilitate them, he started his Rehabilitation Process, where he would teach them to use their skills for justice and not for crime. Also, he would teach them taekwondo. Neither Chang nor Choi are fans of this idea, and constantly look to escape their harsh teacher. However, Kim's teachings are taking hold. Chang has mellowed out from a terrifying criminal to a silly and goofy man, and Choi has went from unbearable to just mildly unpleasant. In the KOF series, both character's can perform Kim's signature Hienzan, however they don't bring this skill to CvS2.
Gameplay
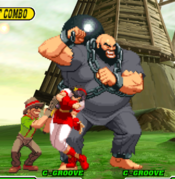
Chang is a very interesting character. He's not a puppet character, rather an assist character, using Choi to create a wall of pressure. Chang himself has very high damage output and serviceable tools, like his swinging ball special. His buttons are okay at best, meaning that Chang in neutral relies on Choi to give him a good mixup. With RCs, Chang is a decent character. RC Choi moves means that attempts to hit Chang out of the start-up of the Choi attacks will whiff. With the threat of Choi on the screen, you can pick and choose what to do, either push a block string/mixup, or get away and zone.
It's crucial to always have Choi available for any situation in neutral. Choi's tornado special is a great anti-air, his drill special is a great combo tool and more important a way to give Chang free space, and Choi himself has his own hurtbox, meaning he can be hit out of any move he is doing. Luckily, there is no setback to this aside from a small cooldown, and single hitting attacks get their hit absorbed, so Chang can still safely push pressure.
When Chang has the opponent cornered, he can really show off his strength. His corner pressure with Choi is extremely oppressive and hard to escape. With Choi essentially also acting as a shield, single hitting attacks will be absorbed by Choi, giving Chang a free punish. Chang has some very swaggy corner combos that deal very high damage, but they are difficult to land. Overall, Chang is pretty difficult to use since you always have to use Choi when available and working around that, but he can put in work.
Groove Selection
Best - C/N: Chang is surprisingly versatile between Grooves. Generally, C-Chang and N-Chang are considered his strongest Grooves. C-Chang gets strong neutral, and consistent access to his supers. While Chang struggles to get consistent knockdowns meterless, his super helps with this a lot, and Choi super is very strong as a way to chip out opponents and force mixups. His level 2 to level 1 cancel does insane damage as well, making it a much scarier punish. Roll also gives him RC Ball and RC Choi specials, which are very useful. N-Groove maintains his access to supers and rolls, but gives him extra movement ability which greatly enhances his mixup. In exchange, he loses the high damage level 2 cancel and access to airblock.
Useful - K/A/S: K-Chang, A-Chang, and S-Chang are all very viable Grooves as well. K-Chang loses roll and consistent super access for scarier movement, and JD lets him punish things using his command grab or super more often. Rage can be scary, as Chang's damage becomes much more respectable, but you lose access to rolls and basically never use Choi super. A-Chang never supers in general, but gets access to one of the highest damage CC's in the game, and has a lot of versatile ways to use it. CC mixed with Choi pressure is especially scary, but you sacrifice using supers at all. S-Chang gets as many supers as he wants at low health, and this isn't a huge risk for a top tier health character. He can safely charge in neutral as well, and throwing out Choi can cover his charge making it much safer than the usual S-Groove character. Infinite Choi super is scary, but you lose out on consistent meter gain and have to deal with S-Groove mechanics in general.
Worst - P: P-Chang is much, much worse in comparison. Parries are useful, but they are the only benefit, and Chang isn't a scary punish character so they don't benefit him much at all. Lack of supers, weak meter build, and no real defensive or offensive options besides parry makes P-Chang easily the worst.
|
Chang is a unique tanky assist character, with Chang piloting and Choi giving assists. Powerful mixups, guard crush strings, and scary pressure mixed with tanky defense and big buttons make them scary. You have to deal with Chang's slow movement and poor combo potential however. Chang's best groove is C-Groove. Difficulty: HardTier: B- |
|
| Pros | Cons |
|
|
Players to Watch
| Name | Country | Groove | Accounts | Notes |
|---|---|---|---|---|
| 178 | Japan | C-Groove | Twitter: @chandesogeese | Skilled with many weird characters, 178 employs a lot of good fundamentals and using Choi to shadow his very sluggish movement. Sample Match |
| Tobari | Japan | C-Groove | Twitter: @cvs2event_Tobari | Lands ridiculous Chang combos. Mostly known for his Zangief and Rolento. Sample Match |
| SilentScope88 | USA | K-Groove | Twitter: @silentscope88 Youtube: silentscope88 Discord: Silentscope88#7008 |
USA's low tier hero. Puts in a ton of work with his odd K team and runs very scary offense with Chang's low jumps. Sample Match |
| Chari | Japan | K-Groove | N/A | Though he is mostly known for his C-Groove play, Chari has a very strong K-Chang and uses his offensive capabilities to it's fullest. Sample Match |
Far Normals
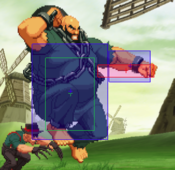
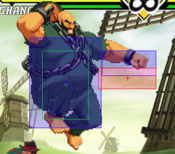
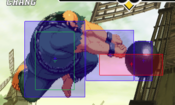
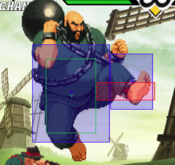
5LP
5MP
5HP
5LK
5MK
5HK
Close Normals
clLP
clMP
clHP
clLK
clMK
5HK
Crouching Normals
2LP
2MP
2HP
2LK
2MK
2HK
Jumping Normals
jLP
jMP
jHP
jLK
jMK
jHK
Command Normals
Hit and Run
Throws
Hagan Geki
Kusari Jime
Special Moves
Tekkyu Daikaiten
Tekkyu Funsai Geki
Dai Hakai Nage
Tatsumaki Shippuzan
Shisso Kuretsuzan
Hisho Kuretsuzan
Supers
Tekkyu Dai Bousou
Shin! Chouzetsu Tatsumaki Sinkuuzan
Colors
