m (→Special Moves) |
|||
| (37 intermediate revisions by 4 users not shown) | |||
| Line 1: | Line 1: | ||
<templatestyles src="CharacterPage-SFA2/styles.css"/> | |||
{{TOClimit}} | |||
{{HiddenTOCHeader | |||
= | |header= =Overview=}} | ||
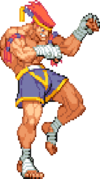
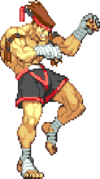
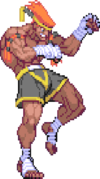
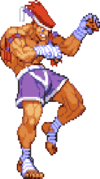
Drawing from the speed and cunning of the majestic jaguar, Adon's style has been known to mesmerize victims. A master of Muay Thai, Adon trained with Sagat, but when the latter was defeated by Ryu, Adon believed Sagat to be a disgrace. Adon now seeks Sagat to become the Muay Thai leader once and for all. | {{CharacterOverview-SFA2 | ||
|overview= Drawing from the speed and cunning of the majestic jaguar, Adon's style has been known to mesmerize victims. A master of Muay Thai, Adon trained with Sagat, but when the latter was defeated by Ryu, Adon believed Sagat to be a disgrace. Adon now seeks Sagat to become the Muay Thai leader once and for all. | |||
[[File: | <br><br> | ||
<center>'''Moveset'''</center> | |||
<center><div style="width:100%;max-width:450px;"><youtube>GKCUqK5h6IE</youtube></div></center> | |||
Adon is pretty good in A2, of course he has a few flaws, but he is blessed with | <br> | ||
|playstyle=[[File:A2_Icon_Adon.png|30px]] Adon is pretty good in A2, of course he has a few flaws, but he is blessed with great normals and a damaging CC. When Adon hits, he hits hard.'' | |||
|pros=*Great set of normals, cr.mp is great | |||
*Great set of normals, | *All levels of Custom Combos do amazing damage | ||
*Great cross-up | |||
*Custom | *Great set of supers | ||
*Long reaching pokes | |||
*Great set of supers | *Jaguar tooth mind games | ||
*Long | |||
* | |||
*Awesome anti-airs | *Awesome anti-airs | ||
|cons=*Jaguar Kick is unsafe, even on hit | |||
*Jaguar Tooth can be CC'd or AC'd pretty easily | |||
* | *Sweep is slow and punishable | ||
*Punch AC has a tendency to not connect fully | |||
* | |||
*Sweep is | |||
* | |||
|name=Adon | |||
|image=SFA2_Adon_Portrait.png | |||
|health=144 | |||
|rating=0 | |||
|stun=40 | |||
|fSpeed=300 | |||
|bSpeed=200 | |||
|bJump=45f (3+42+0) | |||
|nJump=45f (3+42+0) | |||
|fJump=45f (3+42+0) | |||
|wakeupNormal=47f | |||
|wakeupQuick=20f | |||
|throw=17 | |||
|colorsName=Adon | |||
|old=no | |||
}} | |||
{{HiddenTOCHeader | |||
|header= =Move List=}} | |||
== Normal Moves == | |||
<center>{{FrameDataKey-SFA2 | |||
|credit=Damage, stun, framedata, meter, and updated hitboxes collected by [[File:A2_Icon_ChunLi.png]][[User:Veri7as|Veri7as]], April 2022 | |||
}}</center> | |||
===Standing=== | |||
{{MoveData-SFA2 | |||
|image=A2_Adon_st.lp.png | |||
|imageSize=250px | |||
|caption= | |||
|name= | |||
|subtitle= | |||
|input=st.[[File:Lp.png]] | |||
|data= | |||
{{AttackData-SFA2 | |||
|Damage= 5<sup>[0]</sup> | |||
|Stun= 3 | |||
|Startup= 8 | |||
|Active= 4 | |||
|Frame Adv= +4 | |||
|Meter= 0/1/2 | |||
|Block=[[File:Mid.png]] | |||
|Properties=[[File:Specialcancel.png]]<br>[[File:Supercancel.png]] | |||
}} | |||
|description= Quick little elbow, alot of characters cant duck it, ok normal not great. | |||
}} | |||
[[File: | {{MoveData-SFA2 | ||
|image=A2_Adon_st.mp.png | |||
|imageSize=250px | |||
|caption= | |||
|name= | |||
|subtitle= | |||
|input=st.[[File:Mp.png]] | |||
|data= | |||
{{AttackData-SFA2 | |||
|Damage= 9<sup>[1]</sup> | |||
|Stun= 6 | |||
|Startup= 5 | |||
|Active= 4 | |||
|Frame Adv= +5 | |||
|Meter= 1/3/6 | |||
|Block=[[File:Mid.png]] | |||
|Properties=[[File:Specialcancel.png]]<br>[[File:Supercancel.png]] | |||
}} | |||
|description= Decent far anti-air, st.{{mp}} xx {{hk}} dp juggles. | |||
}} | |||
{{MoveData-SFA2 | |||
|image=A2_Adon_st.hp.png | |||
|imageSize=250px | |||
|caption= | |||
|name= | |||
|subtitle= | |||
|input=st.[[File:Hp.png]] | |||
|data= | |||
{{AttackData-SFA2 | |||
|Damage= 16<sup>[2]</sup> | |||
|Stun= 8 | |||
|Startup= 11 | |||
|Active= 6 | |||
|Frame Adv= -5 | |||
|Meter= 2/5/9 | |||
|Block=[[File:Mid.png]] | |||
|Properties= - | |||
}} | |||
|description= | |||
}} | |||
{{MoveData-SFA2 | |||
|image=A2_Adon_st.lk.png | |||
|imageSize=250px | |||
|caption= | |||
|name= | |||
|subtitle= | |||
|input=st.[[File:Lk.png]] | |||
|data= | |||
{{AttackData-SFA2 | |||
|Damage= 6<sup>[0]</sup> | |||
|Stun= 3 | |||
|Startup= 5 | |||
|Active= 5 | |||
|Frame Adv= -3 | |||
|Meter= 0/1/2 | |||
|Block=[[File:Mid.png]] | |||
|Properties=[[File:Specialcancel.png]]<br>[[File:Supercancel.png]] | |||
}} | |||
|description= | |||
}} | |||
[[File: | {{MoveData-SFA2 | ||
|image=A2_Adon_st.mk.png | |||
|imageSize=250px | |||
|caption= | |||
|name= | |||
|subtitle= | |||
|input=st.[[File:Mk.png]] | |||
|data= | |||
{{AttackData-SFA2 | |||
|Damage= 11<sup>[1]</sup> | |||
|Stun= 6 | |||
|Startup= 9 | |||
|Active= 6 | |||
|Frame Adv= 0 | |||
|Meter= 1/3/6 | |||
|Block=[[File:Mid.png]] | |||
|Properties=[[File:Supercancel.png]] | |||
}} | |||
|description= A mid hit knee with good priority and limted anti-air abilities, good poke. | |||
}} | |||
{{MoveData-SFA2 | |||
|image=A2_Adon_st.hk.png | |||
|imageSize=250px | |||
|caption= | |||
|name= | |||
|subtitle= | |||
|input=st.[[File:Hk.png]] | |||
|data= | |||
{{AttackData-SFA2 | |||
|Damage= 11<sup>[2]</sup> | |||
|Stun= 3 | |||
|Startup= 9 | |||
|Active= 8 | |||
|Frame Adv= -2 | |||
|Meter= 2/5/9 | |||
|Block=[[File:Mid.png]] | |||
|Properties= - | |||
}} | |||
|description= Long poke, not duckable, very very good zoning tool. | |||
}} | |||
===Crouching=== | |||
{{MoveData-SFA2 | |||
|image=A2_Adon_cr.lp.png | |||
|imageSize=250px | |||
|caption= | |||
|name= | |||
|subtitle= | |||
|input=cr.[[File:Lp.png]] | |||
|data= | |||
{{AttackData-SFA2 | |||
|Damage= 5<sup>[0]</sup> | |||
|Stun= 3 | |||
|Startup= 4 | |||
|Active= 4 | |||
|Frame Adv= +4 | |||
|Meter= 0/1/2 | |||
|Block=[[File:Mid.png]] | |||
|Properties=[[File:Specialcancel.png]]<br>[[File:Supercancel.png]] | |||
}} | |||
|description= Links into itself, cr.{{mp}}, or cr.{{lk}}. | |||
}} | |||
[[File: | {{MoveData-SFA2 | ||
|image=A2_Adon_cr.mp.png | |||
|imageSize=250px | |||
|caption= | |||
|name= | |||
|subtitle= | |||
|input=cr.[[File:Mp.png]] | |||
|data= | |||
{{AttackData-SFA2 | |||
|Damage= 10<sup>[1]</sup> | |||
|Stun= 6 | |||
|Startup= 5 | |||
|Active= 6 | |||
|Frame Adv= +4 | |||
|Meter= 1/3/6 | |||
|Block=[[File:Low.png]] | |||
|Properties=[[File:Specialcancel.png]]<br>[[File:Supercancel.png]] | |||
}} | |||
|description= Very abusable poke that stuffs a lot of moves and links into itself. | |||
}} | |||
{{MoveData-SFA2 | |||
|image=A2_Adon_cr.hp.png | |||
|imageSize=250px | |||
|caption= | |||
|name= | |||
|subtitle= | |||
|input=cr.[[File:Hp.png]] | |||
|data= | |||
{{AttackData-SFA2 | |||
|Damage= 12<sup>[2]</sup> | |||
|Stun= 8 | |||
|Startup= 11 | |||
|Active= 6 | |||
|Frame Adv= -3 | |||
|Meter= 2/5/9 | |||
|Block=[[File:Mid.png]] | |||
|Properties=- | |||
}} | |||
|description= Very good anti-air, long reach, very good poke as well. | |||
}} | |||
{{MoveData-SFA2 | |||
|image=A2_Adon_cr.lk.png | |||
|imageSize=250px | |||
|caption= | |||
|name= | |||
|subtitle= | |||
|input=cr.[[File:Lk.png]] | |||
|data= | |||
{{AttackData-SFA2 | |||
|Damage= 6<sup>[0]</sup> | |||
|Stun= 3 | |||
|Startup= 4 | |||
|Active= 4 | |||
|Frame Adv= +2 | |||
|Meter= 0/1/2 | |||
|Block=[[File:Low.png]] | |||
|Properties=[[File:Specialcancel.png]]<br>[[File:Supercancel.png]] | |||
}} | |||
|description= | |||
}} | |||
[[File: | {{MoveData-SFA2 | ||
|image=A2_Adon_cr.mk.png | |||
|imageSize=250px | |||
|caption= | |||
|name= | |||
|subtitle= | |||
|input=cr.[[File:Mk.png]] | |||
|data= | |||
{{AttackData-SFA2 | |||
|Damage= 10<sup>[1]</sup> | |||
|Stun= 1 | |||
|Startup= 7 | |||
|Active= 6 | |||
|Frame Adv= 0 | |||
|Meter= 1/3/6 | |||
|Block=[[File:Low.png]] | |||
|Properties=[[File:Specialcancel.png]]<br>[[File:Supercancel.png]] | |||
}} | |||
|description= Very good low poke with good range. | |||
}} | |||
{{MoveData-SFA2 | |||
|image=A2_Adon_cr.hk.png | |||
|imageSize=250px | |||
|caption= | |||
|name= | |||
|subtitle= | |||
|input=cr.[[File:Hk.png]] | |||
|data= | |||
{{AttackData-SFA2 | |||
|Damage= 13<sup>[2]</sup> | |||
|Stun= 1 | |||
|Startup= 9 | |||
|Active= 6 | |||
|Frame Adv= -11 | |||
|Meter= 2/5/9 | |||
|Block=[[File:Low.png]] | |||
|Properties=[[File:Softknockdown.png]] | |||
}} | |||
|description= Long reaching sweep, but slow. CC starter. | |||
}} | |||
===Neutral Jumping=== | |||
[[File: | {{MoveData-SFA2 | ||
|image=A2_Adon_nj.lp.png | |||
|imageSize=250px | |||
|caption= | |||
|name= | |||
|subtitle= | |||
|input=nj.[[File:Lp.png]] | |||
|data= | |||
{{AttackData-SFA2 | |||
|Damage= 9<sup>[0]</sup> | |||
|Stun= 3 | |||
|Startup= 5 | |||
|Active= 10 | |||
|Frame Adv= | |||
|Meter= 0/1/2 | |||
|Block=[[File:High.png]] | |||
|Properties= | |||
}} | |||
|description= | |||
}} | |||
{{MoveData-SFA2 | |||
|image=A2_Adon_nj.mp.png | |||
|imageSize=250px | |||
|caption= | |||
|name= | |||
|subtitle= | |||
|input=nj.[[File:Mp.png]] | |||
|data= | |||
{{AttackData-SFA2 | |||
|Damage= 12<sup>[1]</sup> | |||
|Stun= 6 | |||
|Startup= 5 | |||
|Active= 8 | |||
|Frame Adv= | |||
|Meter= 1/3/6 | |||
|Block=[[File:High.png]] | |||
|Properties= | |||
}} | |||
|description= Very good air-to-air. | |||
}} | |||
[[File: | {{MoveData-SFA2 | ||
|image=A2_Adon_nj.hp.png | |||
|imageSize=250px | |||
|caption= | |||
|name= | |||
|subtitle= | |||
|input=nj.[[File:Hp.png]] | |||
|data= | |||
{{AttackData-SFA2 | |||
|Damage= 15<sup>[2]</sup> | |||
|Stun= 8 | |||
|Startup= 9 | |||
|Active= 6 | |||
|Frame Adv= | |||
|Meter= 2/5/9 | |||
|Block=[[File:High.png]] | |||
|Properties= | |||
}} | |||
|description= Slow but great air-to-air. | |||
}} | |||
{{MoveData-SFA2 | |||
|image=A2_Adon_nj.lk.png | |||
|imageSize=250px | |||
|caption= | |||
|name= | |||
|subtitle= | |||
|input=nj.[[File:Lk.png]] | |||
|data= | |||
{{AttackData-SFA2 | |||
|Damage= 10<sup>[0]</sup> | |||
|Stun= 3 | |||
|Startup= 4 | |||
|Active= 10 | |||
|Frame Adv= | |||
|Meter= 0/1/2 | |||
|Block=[[File:High.png]] | |||
|Properties= | |||
}} | |||
|description= Good air-to-air. | |||
}} | |||
{{MoveData-SFA2 | |||
|image=A2_Adon_nj.mk.png | |||
|imageSize=250px | |||
|caption= | |||
|name= | |||
|subtitle= | |||
|input=nj.[[File:Mk.png]] | |||
|data= | |||
{{AttackData-SFA2 | |||
|Damage= 12<sup>[1]</sup> | |||
|Stun= 6 | |||
|Startup= 7 | |||
|Active= 8 | |||
|Frame Adv= | |||
|Meter= 1/3/6 | |||
|Block=[[File:High.png]] | |||
|Properties= | |||
}} | |||
|description= | |||
}} | |||
[[File: | {{MoveData-SFA2 | ||
|image=A2_Adon_nj.hk.png | |||
|imageSize=250px | |||
|caption= | |||
|name= | |||
|subtitle= | |||
|input=nj.[[File:Hk.png]] | |||
|data= | |||
{{AttackData-SFA2 | |||
|Damage= 16<sup>[2]</sup> | |||
|Stun= 8 | |||
|Startup= 13 | |||
|Active= 6 | |||
|Frame Adv= | |||
|Meter= 2/5/9 | |||
|Block=[[File:High.png]] | |||
|Properties= | |||
}} | |||
|description= | |||
}} | |||
===Diagonal Jumping=== | |||
{{MoveData-SFA2 | |||
|image=A2_Adon_dj.lp.png | |||
|imageSize=250px | |||
|caption= | |||
|name= | |||
|subtitle= | |||
|input=dj.[[File:Lp.png]] | |||
|data= | |||
{{AttackData-SFA2 | |||
|Damage= 9<sup>[0]</sup> | |||
|Stun= 3 | |||
|Startup= 5 | |||
|Active= 10 | |||
|Frame Adv= | |||
|Meter= 0/1/2 | |||
|Block=[[File:High.png]] | |||
|Properties= | |||
}} | |||
|description= | |||
}} | |||
[[File: | {{MoveData-SFA2 | ||
|image=A2_Adon_dj.mp.png | |||
|imageSize=250px | |||
|caption= | |||
|name= | |||
|subtitle= | |||
|input=dj.[[File:Mp.png]] | |||
|data= | |||
{{AttackData-SFA2 | |||
|Damage= 12<sup>[1]</sup> | |||
|Stun= 6 | |||
|Startup= 5 | |||
|Active= 8 | |||
|Frame Adv= | |||
|Meter= 1/3/6 | |||
|Block=[[File:High.png]] | |||
|Properties= | |||
}} | |||
|description= | |||
}} | |||
{{MoveData-SFA2 | |||
|image=A2_Adon_dj.hp.png | |||
|imageSize=250px | |||
|caption= | |||
|name= | |||
|subtitle= | |||
|input=dj.[[File:Hp.png]] | |||
|data= | |||
{{AttackData-SFA2 | |||
|Damage= 15<sup>[2]</sup> | |||
|Stun= 8 | |||
|Startup= 9 | |||
|Active= 6 | |||
|Frame Adv= | |||
|Meter= 2/5/9 | |||
|Block=[[File:High.png]] | |||
|Properties= | |||
}} | |||
|description= | |||
}} | |||
{{MoveData-SFA2 | |||
|image=A2_Adon_dj.lk.png | |||
|imageSize=250px | |||
|caption= | |||
|name= | |||
|subtitle= | |||
|input=dj.[[File:Lk.png]] | |||
|data= | |||
{{AttackData-SFA2 | |||
|Damage= 9<sup>[0]</sup> | |||
|Stun= 3 | |||
|Startup= 4 | |||
|Active= 10 | |||
|Frame Adv= | |||
|Meter= 0/1/2 | |||
|Block=[[File:High.png]] | |||
|Properties= | |||
}} | |||
|description= | |||
}} | |||
[[File: | {{MoveData-SFA2 | ||
|image=A2_Adon_dj.mk_1.png | |||
|imageSize=250px | |||
|image2=A2_Adon_dj.mk_2.png | |||
|imageSize2=250px | |||
|caption= | |||
|name= | |||
|subtitle= | |||
|input=dj.[[File:Mk.png]] | |||
|data= | |||
{{AttackData-SFA2 | |||
|Damage= 11<sup>[1]</sup>, 6<sup>[1]</sup> | |||
|Stun= 6, 6 | |||
|Startup= 7 | |||
|Active= 2(0)8 | |||
|Frame Adv= | |||
|Meter= 1/3/5,6 | |||
|Block=[[File:High.png]] | |||
|Properties= Cross-up | |||
}} | |||
|description= Extremely good cross-up and decent jump in. | |||
}} | |||
{{MoveData-SFA2 | |||
|image=A2_Adon_dj.hk.png | |||
|imageSize=250px | |||
|caption= | |||
|name= | |||
|subtitle= | |||
|input=dj.[[File:Hk.png]] | |||
|data= | |||
{{AttackData-SFA2 | |||
|Damage= 14<sup>[2]</sup> | |||
|Stun= 8 | |||
|Startup= 9 | |||
|Active= 6 | |||
|Frame Adv= | |||
|Meter= 2/5/9 | |||
|Block=[[File:High.png]] | |||
|Properties= | |||
}} | |||
|description= Very good jump in or jump back move, with great range. | |||
}} | |||
== Command Normals == | |||
[[File: | {{MoveData-SFA2 | ||
|image=A2_Adon_f.mp_1.png | |||
|imageSize=250px | |||
|image2=A2_Adon_f.mp_2.png | |||
|imageSize2=250px | |||
|caption= | |||
|name=Jaguar Crunch | |||
|subtitle=Overhead | |||
|input=[[File:F.png]] + [[File:Mp.png]] | |||
|data= | |||
{{AttackData-SFA2 | |||
|Damage= 10<sup>[1]</sup>, 8<sup>[1]</sup> | |||
|Stun= 4, 4 | |||
|Startup= 29 | |||
|Active= 3(2)3 | |||
|Frame Adv= -2, -7 | |||
|Meter= 1/1+1 per hit/4+2 | |||
|Block=[[File:High.png]] | |||
|Properties= | |||
}} | |||
|description= Far reaching overhead, great on opponent wake-up. | |||
}} | |||
{{MoveData-SFA2 | |||
|image=A2_Adon_df.mk.png | |||
|imageSize=250px | |||
|caption= | |||
|name=Jutting Kick | |||
|subtitle= | |||
|input=[[File:Df.png]] + [[File:Mk.png]] | |||
|data= | |||
{{AttackData-SFA2 | |||
|Damage= 11<sup>[1]</sup> | |||
|Stun= 8 | |||
|Startup= 7 | |||
|Active= 4 | |||
|Frame Adv= -3 | |||
|Meter= 0/2/5 | |||
|Block=[[File:Mid.png]] | |||
|Properties= | |||
}} | |||
|description= Great anti-air. | |||
}} | |||
== Normal Throws == | |||
[[File: | {{MoveData-SFA2 | ||
|image=A2_Adon_ThrowRange.png | |||
|imageSize=250px | |||
|image2=A2_Adon_PThrow_1.png | |||
|imageSize2=250px | |||
|image3=A2_Adon_PThrow_3.png | |||
|imageSize3=250px | |||
|caption= | |||
|name=Jaguar Carry | |||
|subtitle=Punch Throw | |||
|input=[[File:B.png]]/[[File:F.png]] + [[File:Mp.png]]/[[File:Hp.png]] | |||
|data= | |||
{{AttackData-SFA2 | |||
|Damage= 17<sup>[0]</sup> | |||
|Stun= 0 | |||
|Startup= 1 | |||
|Active= N/A | |||
|Frame Adv= N/A | |||
|Meter= -/-/3 | |||
|Block= N/A | |||
|Properties= [[File:Throw.png]]<br>[[File:Hardknockdown.png]] | |||
}} | |||
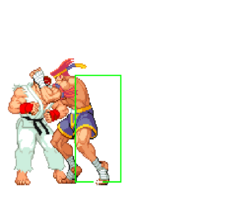
|description= *Deals 8 damage when opponent tech throws. | |||
*Adon has average throw range ([[Street_Fighter_Alpha_2/System#Regular_Throw_Ranges|Alpha2ThrowRanges]]). | |||
}} | |||
== | {{MoveData-SFA2 | ||
|image=A2_Adon_ThrowRange.png | |||
|imageSize=250px | |||
|image2=A2_Adon_KThrow_1.png | |||
|imageSize2=250px | |||
|image3=A2_Adon_KThrow_3.png | |||
|imageSize3=250px | |||
|caption= | |||
|name=Jaguar Slam | |||
|subtitle=Kick Throw | |||
|input=[[File:B.png]]/[[File:F.png]] + [[File:Mk.png]]/[[File:Hk.png]] | |||
|data= | |||
{{AttackData-SFA2 | |||
|Damage= 17<sup>[0]</sup> | |||
|Stun= 0 | |||
|Startup= 1 | |||
|Active= N/A | |||
|Frame Adv= N/A | |||
|Meter= -/-/3 | |||
|Block= N/A | |||
|Properties= [[File:Throw.png]]<br>[[File:Hardknockdown.png]] | |||
}} | |||
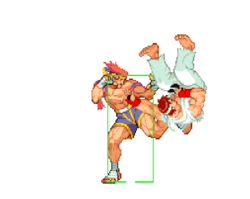
|description= *Deals 8 damage when opponent tech throws. | |||
*Adon has average throw range ([[Street_Fighter_Alpha_2/System#Regular_Throw_Ranges|Alpha2ThrowRanges]]). | |||
}} | |||
== Alpha Counters == | |||
{{MoveData-SFA2 | |||
|image=A2_Adon_PAC_1.png | |||
|imageSize=250px | |||
|image2=A2_Adon_PAC_2.png | |||
|imageSize2=250px | |||
|image3=A2_Adon_PAC_3.png | |||
|imageSize3=250px | |||
|image4=A2_Adon_PAC_4.png | |||
|imageSize4=250px | |||
|caption= | |||
|name=Punch Alpha Counter | |||
|subtitle= | |||
|input=(while in blockstun)[[File:Qcd.png]]+ [[File:P.png]] | |||
|data= | |||
{{AttackData-SFA2 | |||
|Damage= 6<sup>[0]</sup>x4 | |||
|Stun= 1x4 | |||
|Startup= 1 | |||
|Active= [2(1)x3]2 | |||
|Frame Adv= +7 | |||
|Meter= 0/0/0 | |||
|Block=[[File:Mid.png]] | |||
|Properties= [[File:Startupinv.png]][[File:Unblockable.png]]<br>[[File:Hardknockdown.png]] | |||
}} | |||
|description= *'''First 3 hits are unblockable.''' | |||
*Only the last hit results in a knockdown. | |||
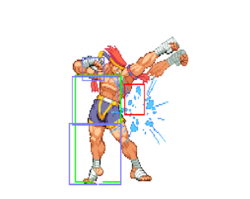
*Note: The USA revision (960430), Adon's Punch AC hits the opponent very easily during a fixed animation frame (even if it is a weak attack), making it a slight buff. Special thanks to Raf for the finding! | |||
Adon rapid fists the opponent as an anti-air, and sends them almost fullscreen. | |||
}} | |||
{{MoveData-SFA2 | |||
|image=A2_Adon_KAC.png | |||
|imageSize=250px | |||
|caption= | |||
|name=Kick Alpha Counter | |||
=== | |subtitle= | ||
|input=(while in blockstun)[[File:Qcd.png]]+ [[File:K.png]] | |||
|data= | |||
{{AttackData-SFA2 | |||
' | |Damage= 13<sup>[1]</sup> | ||
|Stun= 8 | |||
|Startup= 4 | |||
|Active= 18 | |||
|Frame Adv= -36 | |||
|Meter= 0/0/0 | |||
|Block=[[File:Mid.png]] | |||
|Properties= [[File:Startupinv.png]]<br>[[File:Hardknockdown.png]] | |||
}} | |||
|description= Adon's Kick AC also acts as an anti-air and sends the opponent about 1/4 screen away from you. | |||
}} | |||
== Special Moves == | == Special Moves == | ||
[[File: | {{MoveData-SFA2 | ||
|image=A2_Adon_JagKick_1.png | |||
[[File: | |imageSize=250px | ||
|image2=A2_Adon_JagKick_2.png | |||
[[File:Hk.png]] | |imageSize2=250px | ||
|image3=A2_Adon_JagKick_3.png | |||
|imageSize3=250px | |||
|caption= | |||
|name=Jaguar Kick | |||
|subtitle=Axe Kick | |||
|input=[[File:Qcf.png]] + [[File:K.png]] | |||
|data= | |||
{{AttackData-SFA2 | |||
|version=[[File:Lk.png]] | |||
|Damage= 14<sup>[4]</sup>, 11<sup>[4]</sup> | |||
|Stun= 8, 8 | |||
|Startup= 22 | |||
|Active= 2(0)2 | |||
|Frame Adv= -10, -8 | |||
|Meter= 9/12/15 | |||
|Block=[[File:Mid.png]] | |||
|Properties= | |||
}} | |||
{{AttackData-SFA2 | |||
|header= no | |||
|version=[[File:Mk.png]] | |||
|Damage= 15<sup>[5]</sup>, 12<sup>[5]</sup> | |||
|Stun= 10, 8 | |||
|Startup= 27 | |||
|Active= 2(0)3 | |||
|Frame Adv= -10, -8 | |||
|Meter= 9/12/15 | |||
|Block=[[File:Mid.png]] | |||
|Properties= | |||
}} | |||
{{AttackData-SFA2 | |||
|header= no | |||
|version=[[File:Hk.png]] | |||
|Damage= 16<sup>[8]</sup>, 13<sup>[8]</sup> | |||
|Stun= 12, 10 | |||
|Startup= 28 | |||
|Active= 2(0)7 | |||
|Frame Adv= N/A, -12 | |||
|Meter= 9/12/15 | |||
|Block=[[File:Mid.png]] | |||
|Properties= | |||
}} | |||
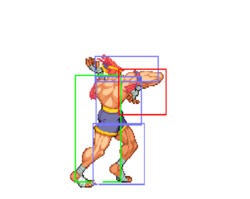
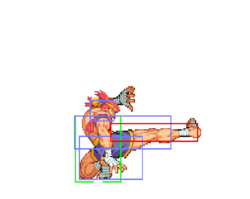
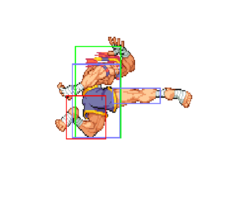
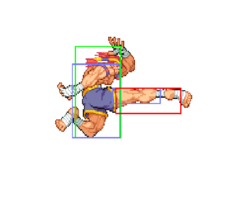
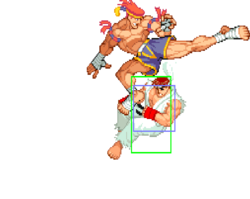
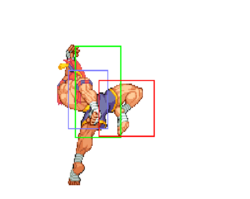
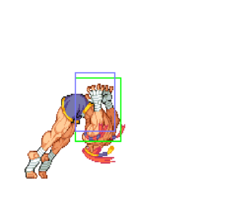
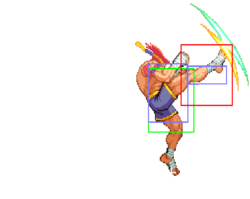
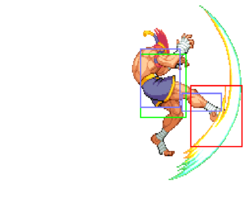
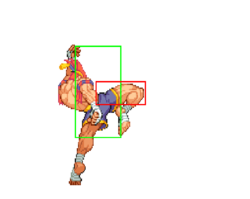
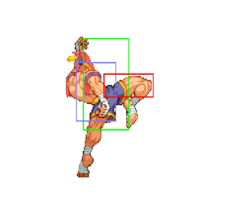
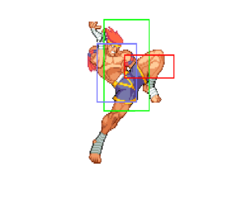
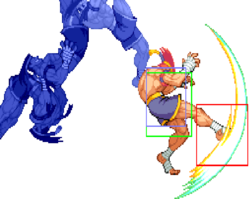
|description=Great air-to-air but is a very unsafe move. On hit they can still do a CC or cr.{{mk}} xx special. Only time it is safe is by distance, example is hitting Ryu's hand with a {{mk}} jag kick at max distance. Using this move wrong will get you killed very fast. Jaguar Kick has slightly better frame advantage if blocked crouching, but is still punishable. | |||
*'''Punishable on hit.''' | |||
----- | |||
{{lk}} | |||
''' | ----- | ||
{{mk}} - ''[Hitboxes pictured]'' | |||
Best version to use to punish fireballs, leaving you far away. | |||
----- | |||
{{hk}} | |||
}} | |||
{{MoveData-SFA2 | |||
|image=A2_Adon_RisingJag_1.png | |||
|imageSize=250px | |||
|image2=A2_Adon_RisingJag_2.png | |||
|imageSize2=250px | |||
|image3=A2_Adon_RisingJag_3.png | |||
|imageSize3=250px | |||
|caption= | |||
|name=Rising Jaguar | |||
|subtitle=Dragon Punch, Uppercut | |||
|input=[[File:Dp.png]] + [[File:K.png]] | |||
|data= | |||
{{AttackData-SFA2 | |||
|version=[[File:Lk.png]] | |||
|Damage= 15<sup>[4]</sup>, 4<sup>[4]</sup> | |||
|Stun= 8, 6 | |||
|Startup= 3 | |||
|Active= 2(2)10 | |||
|Frame Adv= -17 | |||
|Meter= 7/7+1 per hit/10 | |||
|Block=[[File:Mid.png]] | |||
|Properties=[[File:Startupinv.png]]<br>[[File:Softknockdown.png]] | |||
}} | |||
{{AttackData-SFA2 | |||
|header= no | |||
|version=[[File:Mk.png]] | |||
|Damage= 17<sup>[5]</sup>, 5<sup>[5]</sup> | |||
|Stun= 8, 4 | |||
|Startup= 5 | |||
|Active= 5(2)9 | |||
|Frame Adv= -23 | |||
|Meter= 7/7+1/7 | |||
|Block=[[File:Mid.png]] | |||
|Properties=[[File:Softknockdown.png]] | |||
}} | |||
{{AttackData-SFA2 | |||
|header= no | |||
|version=[[File:Hk.png]] | |||
|Damage= 16<sup>[8]</sup>, 4<sup>[8]</sup> | |||
|Stun= 6, 6 | |||
|Startup= 5 | |||
|Active= 8(4)6 | |||
|Frame Adv= -28 | |||
|Meter= 7/7/7+3 | |||
|Block=[[File:Mid.png]] | |||
|Properties=[[File:Softknockdown.png]] | |||
}} | |||
|description= Rising Jaguar has slightly better frame advantage if blocked standing, but is still punishable. | |||
*'''Cannot be air blocked.''' | |||
*'''Unscaled damage in CC.''' | |||
----- | |||
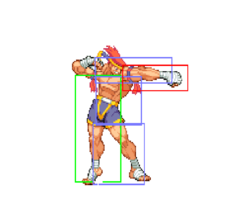
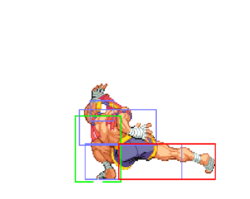
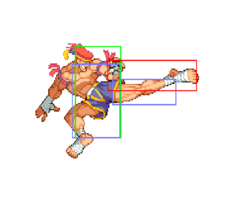
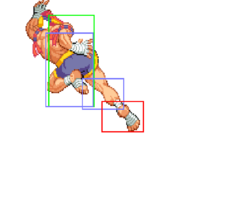
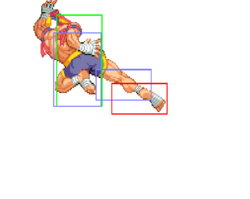
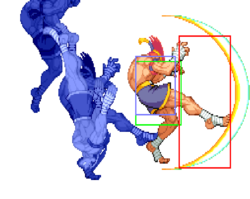
{{lk}} - ''[Hitboxes pictured]'' | |||
*3 frames of startup invul; 1 of which while active. | |||
*Hits 1 time max. | |||
Good anit-air. Only version with any invul. | |||
----- | |||
{{mk}} | |||
*0 frames of startup invul. | |||
*Hits 1 time max. | |||
----- | |||
{{hk}} | |||
*0 frames of startup invul. | |||
*Hits 2 times max. | |||
}} | |||
[[File: | {{MoveData-SFA2 | ||
|image=A2_Adon_JagTooth.lk.png | |||
[[File:Mk.png]] | |imageSize=250px | ||
|image2=A2_Adon_JagTooth.mk.png | |||
[[File:Hk.png]] | |imageSize2=250px | ||
|caption= | |||
|name=Jaguar Tooth | |||
|subtitle=Wall Dive, Divekick | |||
|input=[[File:Hcb.png]] + [[File:K.png]] | |||
|data= | |||
{{AttackData-SFA2 | |||
|version=[[File:Lk.png]] | |||
|Damage= 15<sup>[7]</sup> | |||
|Stun= 8 | |||
|Startup= 43-47 | |||
|Active= 10 | |||
|Frame Adv= -2 | |||
|Meter= 2/4/6 | |||
|Block=[[File:High.png]] | |||
|Properties= | |||
}} | |||
{{AttackData-SFA2 | |||
|header= no | |||
|version=[[File:Mk.png]] | |||
|Damage= 15<sup>[8]</sup> | |||
|Stun= 10 | |||
|Startup= 43-47 | |||
|Active= 13 | |||
|Frame Adv= -3 | |||
|Meter= 2/4/6 | |||
|Block=[[File:High.png]] | |||
|Properties= | |||
}} | |||
{{AttackData-SFA2 | |||
|header= no | |||
|version=[[File:Hk.png]] | |||
|Damage= 15<sup>[10]</sup> | |||
|Stun= 12 | |||
|Startup= 43-47 | |||
|Active= 17 | |||
|Frame Adv= -7 | |||
|Meter= 2/4/6 | |||
|Block=[[File:High.png]] | |||
|Properties= | |||
}} | |||
|description=Nice for mind games, but very easy to CC and alpha counter. Use to make your opponent whiff a move and punish with a CC. Doing this on reaction to a fireball will get you DP'd or CC'd. | |||
*Startup depends on the distance to the wall behind Adon. | |||
*Better frame advantage the lower Jaguar Tooth hits or is blocked. Can give positive frame advantage. | |||
*'''Unscaled damage in CC.''' | |||
----- | |||
{{lk}} - ''[Hitbox pictured top]'' | |||
*Travels about half screen. | |||
----- | |||
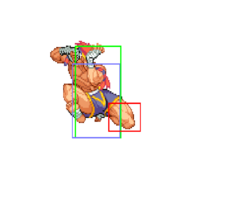
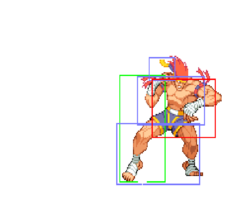
{{mk}} - ''[Hitbox pictured bottom]'' | |||
*Travels about 3/4ths screen. | |||
----- | |||
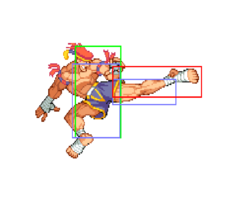
{{hk}} - ''[Hitbox pictured bottom]'' | |||
*Travels about full screen. | |||
*'''Punishable on hit.''' | |||
}} | |||
== Super Moves == | == Super Moves == | ||
' | Startup Invulnerability Notes: | ||
*At the end of a super screen freeze, projectiles will start moving before the opponent's character is unfrozen, giving the supers more projectile invul. frames than hit invul. frames. | |||
<br> | |||
{{MoveData-SFA2 | |||
|image=A2_Adon_AssaultSuper_1.png | |||
|imageSize=250px | |||
|image2=A2_Adon_AssaultSuper_2.png | |||
|imageSize2=250px | |||
|image3=A2_Adon_AssaultSuper_3.png | |||
|imageSize3=250px | |||
|image5=A2_Adon_AssaultSuper_5.png | |||
|imageSize5=250px | |||
|caption= | |||
|name=Jaguar Varied Assault | |||
|subtitle=Punch Super | |||
|input=[[File:Qcf.png]][[File:Qcf.png]] + [[File:P.png]] | |||
|data= | |||
{{AttackData-SFA2 | |||
|version= Level 1 | |||
|subtitle= [[File:P.png]] | |||
|Damage= 12<sup>[12]</sup>, 10<sup>[12]</sup>, 8<sup>[12]</sup>, 5<sup>[12]</sup> | |||
|Stun= 0, 1x3 | |||
|Startup= 6+0 | |||
|Active= 10[(4)9x3] | |||
|Frame Adv= -2 | |||
|Meter= 0/0/0 | |||
|Block=[[File:Mid.png]] | |||
|Properties=[[File:Startupinv.png]]<br>[[File:Hardknockdown.png]] | |||
}} | |||
{{AttackData-SFA2 | |||
|header= no | |||
|version= Level 2 | |||
|subtitle= [[File:P.png]][[File:P.png]] | |||
|Damage= 14<sup>[12]</sup>, 12<sup>[12]</sup>, 10<sup>[12]</sup>, 7<sup>[12]</sup>, 5<sup>[12]</sup>, 9<sup>[12]</sup> | |||
|Stun= 0x5, 3 | |||
|Startup= 6+0 | |||
|Active= 12[(4)9x3](4)10(6)8 | |||
|Frame Adv= -37 | |||
|Meter= 0/0/0 | |||
|Block=[[File:Mid.png]] | |||
|Properties=[[File:Startupinv.png]]<br>[[File:Hardknockdown.png]] | |||
}} | |||
{{AttackData-SFA2 | |||
|header= no | |||
|version= Level 3 | |||
|subtitle= [[File:3p.png]] | |||
|Damage= 17<sup>[12]</sup>, 16<sup>[12]</sup>, 14<sup>[12]</sup>, 14<sup>[12]</sup>, 5<sup>[12]</sup>, 9<sup>[12]</sup> | |||
|Stun= 0x5, 3 | |||
|Startup= 6+0 | |||
|Active= 12[(4)9x3](4)10(6)8 | |||
|Frame Adv= -39 | |||
|Meter= 0/0/0 | |||
|Block=[[File:Mid.png]] | |||
|Properties=[[File:Startupinv.png]]<br>[[File:Hardknockdown.png]] | |||
}} | |||
|description=Combo into this after a cross up. | |||
*A full 2 quarter-circles isn't required. Required inputs: {{d}}{{df}}{{f}}{{d}}{{df}} + {{p}}. | |||
----- | |||
{{AttackColor-SF | |||
|strength=light | |||
|content=Level 1}} | |||
*5 frames of startup hit invul.; 0 of which while active. | |||
*7 frames of startup projectile invul. | |||
*Hits 4 times. | |||
----- | |||
{{AttackColor-SF | |||
|strength=medium | |||
|content=Level 2}} | |||
*6 frames of startup hit invul.; 1 of which while active. | |||
*10 frames of startup projectile invul. | |||
*Hits 6 times. | |||
----- | |||
{{AttackColor-SF | |||
|strength=heavy | |||
|content=Level 3}} | |||
*6 frames of startup hit invul.; 1 of which while active. | |||
*13 frames of startup projectile invul. | |||
*Hits 6 times. | |||
Good wake-up super. Mash {{k}} at the end to get a stronger version (Jaguar Assassin), mash {{p}} if it is blocked (Jaguar Thousand). | |||
}} | |||
{{MoveData-SFA2 | |||
|image=A2_Adon_ThousandSuper_1.png | |||
|imageSize=250px | |||
|image2=A2_Adon_ThousandSuper_2.png | |||
|imageSize2=250px | |||
|image3=A2_Adon_ThousandSuper_3.png | |||
|imageSize3=250px | |||
|image4=A2_Adon_ThousandSuper_4.png | |||
|imageSize4=250px | |||
|caption= | |||
|name=Jaguar Varied Assault (Level 3) -> Jaguar Thousand | |||
|subtitle=Punch Ender | |||
|input=[[File:Qcf.png]][[File:Qcf.png]] + [[File:3p.png]], [[File:P.png]] (rapidly) | |||
|data= | |||
{{AttackData-SFA2 | |||
|Damage= 17<sup>[12]</sup>, 16<sup>[12]</sup>, 14<sup>[12]</sup>, 14<sup>[12]</sup>, 5<sup>[12]</sup>x11 | |||
|Stun= 0x4, 1x5 | |||
|Startup= 6+0 | |||
|Active= 12[(4)9x3](4)[2(1)x10]1 | |||
|Frame Adv= -12 | |||
|Meter= 0/0/0 | |||
|Block=[[File:Mid.png]] | |||
|Properties=[[File:Startupinv.png]]<br>[[File:Hardknockdown.png]] | |||
}} | |||
|description= *6 frames of startup hit invul.; 1 of which while active. | |||
*13 frames of startup projectile invul. | |||
*Hits 9 times max. | |||
}} | |||
[[File: | {{MoveData-SFA2 | ||
|image=A2_Adon_AssassinSuper_1.png | |||
|imageSize=250px | |||
|image2=A2_Adon_AssassinSuper_2.png | |||
|imageSize2=250px | |||
|image3=A2_Adon_AssassinSuper_3.png | |||
|imageSize3=250px | |||
|caption= | |||
|name=Jaguar Varied Assault (Level 3) -> Jaguar Assassin | |||
|subtitle=Kick Ender | |||
|input=[[File:Qcf.png]][[File:Qcf.png]] + [[File:3p.png]], [[File:K.png]] (rapidly) | |||
|data= | |||
{{AttackData-SFA2 | |||
|Damage= 17<sup>[12]</sup>, 16<sup>[12]</sup>, 14<sup>[12]</sup>, 14<sup>[12]</sup>, 7<sup>[12]</sup>, 6<sup>[12]</sup>, 9<sup>[12]</sup> | |||
|Stun= 0x4, 1x3 | |||
|Startup= 6+0 | |||
|Active= 12(4)9(4)9(4)8(3)3(2)3(2)10 | |||
|Frame Adv= -26 | |||
|Meter= 0/0/0 | |||
|Block=[[File:Mid.png]] | |||
|Properties=[[File:Startupinv.png]]<br>[[File:Hardknockdown.png]] | |||
}} | |||
|description= *6 frames of startup hit invul.; 1 of which while active. | |||
*13 frames of startup projectile invul. | |||
*Hits 7 times max. | |||
}} | |||
{{MoveData-SFA2 | |||
|image=A2_Adon_RevolverSuper_1.png | |||
|imageSize=250px | |||
|image2=A2_Adon_RevolverSuper_2.png | |||
|imageSize2=250px | |||
|image3=A2_Adon_RevolverSuper_3.png | |||
|imageSize3=250px | |||
|caption= | |||
|name=Jaguar Revolver | |||
|subtitle=Axe Kick Super | |||
|input=[[File:Qcf.png]][[File:Qcf.png]] + [[File:K.png]] | |||
|data= | |||
{{AttackData-SFA2 | |||
|version= Level 1 | |||
|subtitle= [[File:K.png]] | |||
|Damage= 13<sup>[13]</sup>, 13<sup>[13]</sup>, 10<sup>[13]</sup> | |||
|Stun= 0, 2, 2 | |||
|Startup= 6+18 | |||
|Active= 3(0)3(16)1 | |||
|Frame Adv= +7 | |||
|Meter= 0/0/0 | |||
|Block=[[File:Mid.png]] | |||
|Properties=[[File:Startupinv.png]]<br>[[File:Hardknockdown.png]] | |||
}} | |||
{{AttackData-SFA2 | |||
|header= no | |||
|version= Level 2 | |||
|subtitle= [[File:K.png]][[File:K.png]] | |||
|Damage= 15<sup>[13]</sup>, 11<sup>[13]</sup>, 12<sup>[13]</sup>, 9<sup>[13]</sup> | |||
|Stun= 0, 1x3 | |||
|Startup= 6+18 | |||
|Active= 3(0)3(15)1(0)1 | |||
|Frame Adv= +7 | |||
|Meter= 0/0/0 | |||
|Block=[[File:Mid.png]] | |||
|Properties=[[File:Startupinv.png]]<br>[[File:Hardknockdown.png]] | |||
}} | |||
{{AttackData-SFA2 | |||
|header= no | |||
|version= Level 3 | |||
|subtitle= [[File:3k.png]] | |||
|Damage= 17<sup>[13]</sup>, 11<sup>[13]</sup>x3, 10<sup>[13]</sup>, 7<sup>[13]</sup> | |||
|Stun= 0x3, 1x3 | |||
|Startup= 6+18 | |||
|Active= 3(0)3(14)1(0)1(18)1(0)1 | |||
|Frame Adv= +7 | |||
|Meter= 0/0/0 | |||
|Block=[[File:Mid.png]] | |||
|Properties=[[File:Startupinv.png]]<br>[[File:Hardknockdown.png]] | |||
}} | |||
|description= Very good move to punish fireballs at lvl 1. Works w/ lvl 2 and 3, but I would CC instead thru the fireball. Use this super to punish cr.{{mk}} or cr.{{hk}} xx fireball pokes. | |||
*A full 2 quarter-circles isn't required. Required inputs: {{d}}{{df}}{{f}}{{d}}{{df}} + {{k}}. | |||
----- | |||
{{AttackColor-SF | |||
|strength=light | |||
|content=Level 1}} | |||
*23 frames of startup hit invul.; 0 of which while active. | |||
*33 frames of startup projectile invul. | |||
*Hits 3 times. | |||
----- | |||
{{AttackColor-SF | |||
|strength=medium | |||
|content=Level 2}} | |||
*26 frames of startup hit invul.; 3 of which while active. | |||
*36 frames of startup projectile invul. | |||
*Hits 4 times. | |||
----- | |||
{{AttackColor-SF | |||
|strength=heavy | |||
|content=Level 3}} | |||
*29 frames of startup hit invul.; 6 of which while active. | |||
*39 frames of startup projectile invul. | |||
*Hits 6 times. | |||
}} | |||
[[File: | =The Basics= | ||
----- | |||
{{Content Box-SFA2 | |||
|padding=yes | |||
|header= | |||
|content=You wanna force your opponent to mess up and punish hard. His cross up is very good, and should be done after any knock down. Adon want to zone the oppoent and be smart with jag tooths to make them jumpy. cr.[[File:Mp.png]] is your friend, but dont under use his other normal cause they are very good, especially cr.[[File:Mk.png]], cr.[[File:Hp.png]], [[File:Hk.png]]. His overhead has good range but use it sparingly since it is slow and can be cc'ed; best used after knocking them down. Just remember: hit hard, always look for a opening to land his cc. | |||
}} | |||
= | =Advanced Strategy= | ||
----- | |||
{{Content Box-SFA2 | |||
|padding=yes | |||
|header= | |||
|content= | |||
}} | |||
=Combos= | |||
----- | |||
cr.[[File:Mp.png]], cr.[[File:Mp.png]] | {{Content Box-SFA2 | ||
|padding=yes | |||
|header= | |||
|content=cr.[[File:Mp.png]], cr.[[File:Mp.png]] | |||
cr.[[File:Lk.png]]/[[File:Mp.png]]xx [[File:Hk.png]] Jaguar Kick | cr.[[File:Lk.png]]/[[File:Mp.png]]xx [[File:Hk.png]] Jaguar Kick | ||
| Line 273: | Line 1,141: | ||
cr.[[File:Lp.png]] x2 xx Jaguar Varied Assault | cr.[[File:Lp.png]] x2 xx Jaguar Varied Assault | ||
== Custom Combos == | <div style="width:100%;max-width:450px;"><youtube>4YtdI6c8nn8</youtube></div> | ||
These ccs can be at any lvl, just watch the meter and end with dp. | }} | ||
=Custom Combos= | |||
----- | |||
{{Content Box-SFA2 | |||
|padding=yes | |||
|header= | |||
|content=These ccs can be at any lvl, just watch the meter and end with dp. | |||
1. cr.[[File:Hk.png]] xx [[File:Lk.png]] jag kick xN, [[File:Hk.png]] dp | 1. cr.[[File:Hk.png]] xx [[File:Lk.png]] jag kick xN, [[File:Hk.png]] dp | ||
| Line 307: | Line 1,182: | ||
lvl 3- c.mp xx lk jag kick x5, s.mp or s.lk in hk dp (must be standing) | lvl 3- c.mp xx lk jag kick x5, s.mp or s.lk in hk dp (must be standing) | ||
<youtube>YO-09ACdmCo/youtube> | <div style="width:100%;max-width:450px;"><youtube>YO-09ACdmCo</youtube></div> | ||
}} | |||
= Match-ups = | = Match-ups = | ||
----- | |||
{{MatchUp-SFA2 | |||
|padding=yes | |||
|header=[[File:A2_Icon_Adon.png]] '''Vs. Adon(mirror):''' | |||
|content=[Loading match-up info...] | |||
}} | |||
{{MatchUp-SFA2 | |||
|padding=yes | |||
|header=[[File:A2_Icon_Akuma.png]] '''Vs. Akuma:''' 4-6 Akuma's favor | |||
|content=[Loading match-up info...] | |||
}} | |||
Vs. | |||
{{MatchUp-SFA2 | |||
|padding=yes | |||
|header=[[File:A2_Icon_Birdie.png]] '''Vs. Birdie:''' 6-4 Adon's favor | |||
|content=You can anti-air him with any of your normal aa's (Rising Jaguar, df+mk, cr. hp (far), and just AC as well) and that will take a lot of his game away. Don't ever jaguar kick unless you want to die or you're absolutely sure you're far enough away to be safe. This match is basically just building meter and trying to outpoke each other, then land the CC. | |||
Standing roundhouse and cr.mp are obviously tough for Birdie to deal with, but remember his cr.hp will AA just about anything. | |||
}} | |||
{{MatchUp-SFA2 | |||
|padding=yes | |||
|header=[[File:A2_Icon_Charlie.png]] '''Vs. Charlie-Nash:''' 4-6 Charlie's favor | |||
|content=[Loading match-up info...] | |||
}} | |||
Vs. | {{MatchUp-SFA2 | ||
|padding=yes | |||
|header=[[File:A2_Icon_ChunLi.png]] '''Vs. Chun-Li:''' 4-6 Chun-Li's favor | |||
|content=[Loading match-up info...] | |||
}} | |||
{{MatchUp-SFA2 | |||
|padding=yes | |||
|header=[[File:A2_Icon_Dan.png]] '''Vs. Dan:''' 7-3 Adon's favor | |||
|content=[Loading match-up info...] | |||
}} | |||
Vs. | {{MatchUp-SFA2 | ||
|padding=yes | |||
|header=[[File:A2_Icon_Dhalsim.png]] '''Vs. Dhalsim:''' 4-6 Dhalsim's favor | |||
|content=[Loading match-up info...] | |||
}} | |||
{{MatchUp-SFA2 | |||
|padding=yes | |||
|header=[[File:A2_Icon_Akuma.png]] '''Vs. Evil Ryu:''' | |||
|content=[Loading match-up info...] | |||
}} | |||
Vs. | {{MatchUp-SFA2 | ||
|padding=yes | |||
|header=[[File:A2_Icon_Gen.png]] '''Vs. Gen:''' 7-3 Adon's favor | |||
|content=[Loading match-up info...] | |||
}} | |||
{{MatchUp-SFA2 | |||
|padding=yes | |||
|header=[[File:A2_Icon_Guy.png]] '''Vs. Guy:''' 5-5 Even match-up | |||
|content=[Loading match-up info...] | |||
}} | |||
Vs. | {{MatchUp-SFA2 | ||
|padding=yes | |||
|header=[[File:A2_Icon_Ken.png]] '''Vs. Ken:''' 3-7 Ken's favor | |||
|content=[Loading match-up info...] | |||
}} | |||
{{MatchUp-SFA2 | |||
|padding=yes | |||
|header=[[File:A2_Icon_Bison.png]] '''Vs. M. Bison (dictator):''' 7-3 Adon's favor | |||
|content=[Loading match-up info...] | |||
}} | |||
Vs. | {{MatchUp-SFA2 | ||
|padding=yes | |||
|header=[[File:A2_Icon_Rolento.png]] '''Vs. Rolento:''' 4-6 Rolento's favor | |||
|content=[Loading match-up info...] | |||
}} | |||
{{MatchUp-SFA2 | |||
|padding=yes | |||
|header=[[File:A2_Icon_Rose.png]] '''Vs. Rose:''' 4-6 Rose's favor | |||
|content=[Loading match-up info...] | |||
}} | |||
Vs. | {{MatchUp-SFA2 | ||
|padding=yes | |||
|header=[[File:A2_Icon_Ryu.png]] '''Vs. Ryu:''' 3-7 Ryu's favor | |||
|content=[Loading match-up info...] | |||
}} | |||
{{MatchUp-SFA2 | |||
|padding=yes | |||
|header=[[File:A2_Icon_Sagat.png]] '''Vs. Sagat:''' 5-5 Even match-up | |||
|content=[Loading match-up info...] | |||
}} | |||
Vs. | {{MatchUp-SFA2 | ||
|padding=yes | |||
|header=[[File:A2_Icon_Sakura.png]] '''Vs. Sakura:''' 3-7 Sakura's favor | |||
|content=[Loading match-up info...] | |||
}} | |||
{{MatchUp-SFA2 | |||
|padding=yes | |||
|header=[[File:A2_Icon_Sodom.png]] '''Vs. Sodom:''' 4-6 Sodom's favor | |||
|content=[Loading match-up info...] | |||
}} | |||
Vs. Zangief: | {{MatchUp-SFA2 | ||
|padding=yes | |||
|header=[[File:A2_Icon_Zangief.png]] '''Vs. Zangief:''' 5-5 Even match-up | |||
|content=[Loading match-up info...] | |||
}} | |||
{{Navbox-SFA2}} | |||
[[Category:Adon]] | |||
[[Category:Street Fighter Alpha Series]] | |||
[[Category:Street Fighter Alpha 2]] | [[Category:Street Fighter Alpha 2]] | ||
Latest revision as of 15:10, 1 February 2024
| Adon | |
|---|---|
| |
| Health: | 144 |
| Defensive Rating: | 0 |
| Stun: | 40 |
| Walk Speed Forward: | 300 |
| Walk Speed Backward: | 200 |
| Jump Backward: | 45f (3+42+0) |
| Neutral Backward: | 45f (3+42+0) |
| Jump Forward: | 45f (3+42+0) |
| Wake-Up: | 47f |
| Quick Rise: | 20f |
| Throw Range: | 17 |
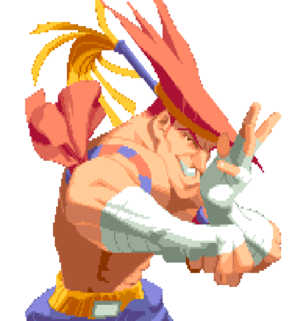
Drawing from the speed and cunning of the majestic jaguar, Adon's style has been known to mesmerize victims. A master of Muay Thai, Adon trained with Sagat, but when the latter was defeated by Ryu, Adon believed Sagat to be a disgrace. Adon now seeks Sagat to become the Muay Thai leader once and for all.
Normal Moves
| SFA2 Framedata Glossary | |
|---|---|
| Damage |
Units of base damage inflicted by the move (100% life bar = 144 units of health). Most moves have a damage range; the number inside the square brackets indicates which Random Damage Table the move uses to look up any additional damage and the % chance of doing so. |
| Stun |
Units of stun inflicted by the move. |
| Startup |
The frame the move hits on (1st active frame). Super moves with a screen freeze will separate pre- and post-screen freeze startup frames by a '+' (Ex: 5+0). |
| Active |
The portion of a move that can hit. How many frames a move remains active for. ()=Inactive frames in-between active frames. [xN]=Repeated sequences. |
| Frame Adv |
The frame advantage values when the attack is blocked. (Add +1 frame to all OnBlockAdv values for the move's OnHitAdv value; Ex: +2oB/+3oH, -4oB/-3oH) |
| Meter |
The units of meter gained on whiff/block/hit. (48, 96, and 144 units of meter are required for 1, 2, and 3 bars of meter respectively) |
| Block |
Low attacks must be blocked crouching. High attacks must be blocked standing. Mid attacks can be blocked either way. |
| Properties |
|
| Frames |
All framedata collected with the game speed set to normal, where the game tickrate and framerate are the same(60fps). |
| Speed |
All framedata collected with the game speed set to normal. |
| Hitboxes |
All hitbox images have the character standing/jumping in the exact same position, so hitbox distances can be easily compared.
|
| Credit | Damage, stun, framedata, meter, and updated hitboxes collected by |
Standing
Crouching
Neutral Jumping
Diagonal Jumping
Command Normals
Normal Throws
| Damage | Stun | Startup | Active | Frame Adv | Meter | Block | Properties |
|---|---|---|---|---|---|---|---|
| 17[0] | 0 | 1 | N/A | N/A | -/-/3 | N/A |
- Deals 8 damage when opponent tech throws.
- Adon has average throw range (Alpha2ThrowRanges).
| Damage | Stun | Startup | Active | Frame Adv | Meter | Block | Properties |
|---|---|---|---|---|---|---|---|
| 17[0] | 0 | 1 | N/A | N/A | -/-/3 | N/A |
- Deals 8 damage when opponent tech throws.
- Adon has average throw range (Alpha2ThrowRanges).
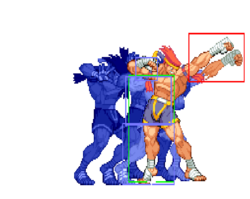
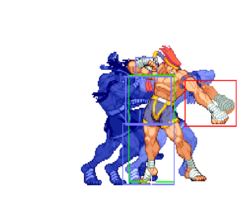
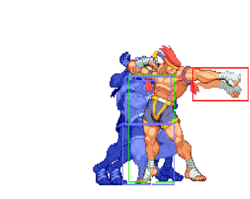
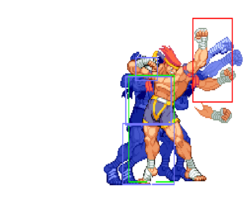
Alpha Counters
Punch Alpha Counter
(while in blockstun)![]() +
+ ![]()
| Damage | Stun | Startup | Active | Frame Adv | Meter | Block | Properties |
|---|---|---|---|---|---|---|---|
| 6[0]x4 | 1x4 | 1 | [2(1)x3]2 | +7 | 0/0/0 |
- First 3 hits are unblockable.
- Only the last hit results in a knockdown.
- Note: The USA revision (960430), Adon's Punch AC hits the opponent very easily during a fixed animation frame (even if it is a weak attack), making it a slight buff. Special thanks to Raf for the finding!
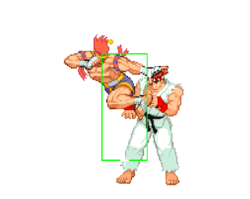
Adon rapid fists the opponent as an anti-air, and sends them almost fullscreen.
Kick Alpha Counter
(while in blockstun)![]() +
+ ![]()
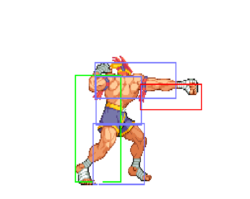
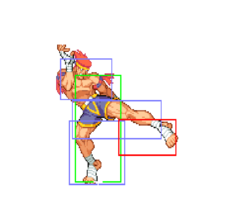
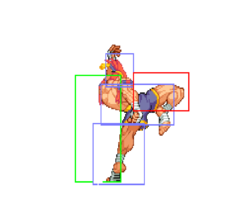
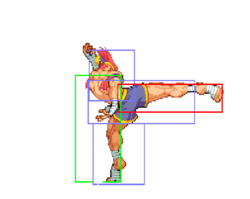
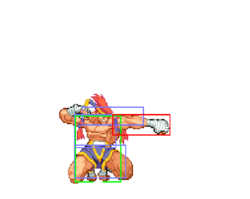
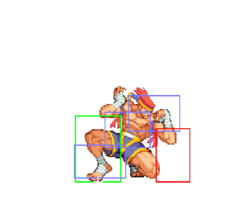
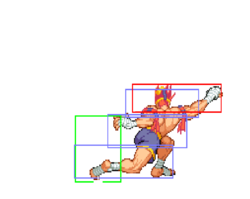
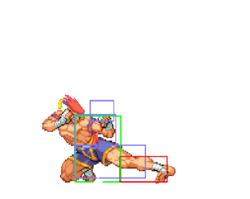
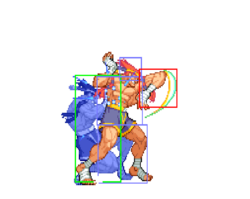
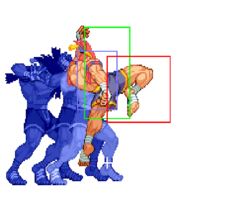
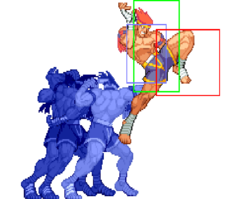
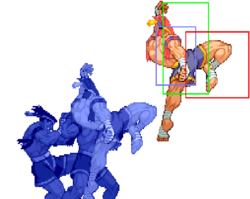
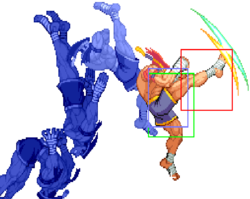
Special Moves
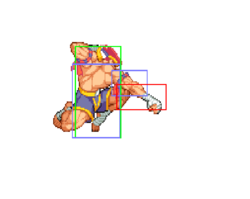
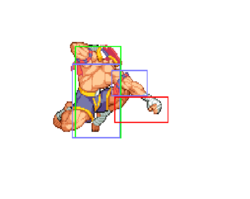
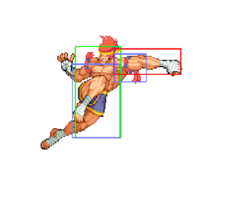
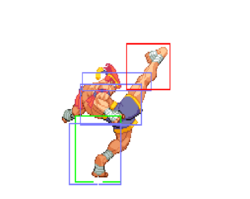
Great air-to-air but is a very unsafe move. On hit they can still do a CC or cr.![]() xx special. Only time it is safe is by distance, example is hitting Ryu's hand with a
xx special. Only time it is safe is by distance, example is hitting Ryu's hand with a ![]() jag kick at max distance. Using this move wrong will get you killed very fast. Jaguar Kick has slightly better frame advantage if blocked crouching, but is still punishable.
jag kick at max distance. Using this move wrong will get you killed very fast. Jaguar Kick has slightly better frame advantage if blocked crouching, but is still punishable.
- Punishable on hit.
![]()
![]() - [Hitboxes pictured]
- [Hitboxes pictured]
Best version to use to punish fireballs, leaving you far away.
![]()
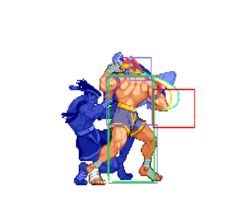
Rising Jaguar
Dragon Punch, Uppercut![]() +
+ ![]()
| Version | Damage | Stun | Startup | Active | Frame Adv | Meter | Block | Properties |
|---|---|---|---|---|---|---|---|---|
| 15[4], 4[4] | 8, 6 | 3 | 2(2)10 | -17 | 7/7+1 per hit/10 | |||
| 17[5], 5[5] | 8, 4 | 5 | 5(2)9 | -23 | 7/7+1/7 | |||
| 16[8], 4[8] | 6, 6 | 5 | 8(4)6 | -28 | 7/7/7+3 |
Rising Jaguar has slightly better frame advantage if blocked standing, but is still punishable.
- Cannot be air blocked.
- Unscaled damage in CC.
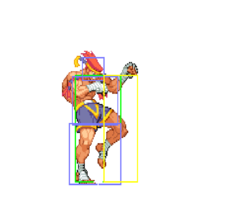
![]() - [Hitboxes pictured]
- [Hitboxes pictured]
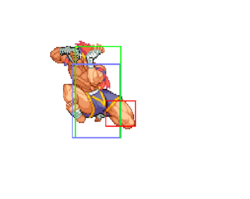
- 3 frames of startup invul; 1 of which while active.
- Hits 1 time max.
Good anit-air. Only version with any invul.
![]()
- 0 frames of startup invul.
- Hits 1 time max.
![]()
- 0 frames of startup invul.
- Hits 2 times max.
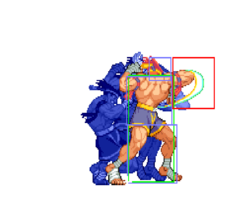
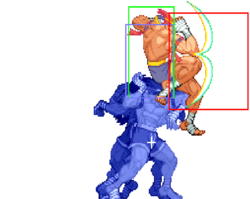
Jaguar Tooth
Wall Dive, Divekick![]() +
+ ![]()
| Version | Damage | Stun | Startup | Active | Frame Adv | Meter | Block | Properties |
|---|---|---|---|---|---|---|---|---|
| 15[7] | 8 | 43-47 | 10 | -2 | 2/4/6 | - | ||
| 15[8] | 10 | 43-47 | 13 | -3 | 2/4/6 | - | ||
| 15[10] | 12 | 43-47 | 17 | -7 | 2/4/6 | - |
Nice for mind games, but very easy to CC and alpha counter. Use to make your opponent whiff a move and punish with a CC. Doing this on reaction to a fireball will get you DP'd or CC'd.
- Startup depends on the distance to the wall behind Adon.
- Better frame advantage the lower Jaguar Tooth hits or is blocked. Can give positive frame advantage.
- Unscaled damage in CC.
![]() - [Hitbox pictured top]
- [Hitbox pictured top]
- Travels about half screen.
![]() - [Hitbox pictured bottom]
- [Hitbox pictured bottom]
- Travels about 3/4ths screen.
![]() - [Hitbox pictured bottom]
- [Hitbox pictured bottom]
- Travels about full screen.
- Punishable on hit.
Super Moves
Startup Invulnerability Notes:
- At the end of a super screen freeze, projectiles will start moving before the opponent's character is unfrozen, giving the supers more projectile invul. frames than hit invul. frames.
Jaguar Varied Assault
Punch Super![]()
![]() +
+ ![]()
Combo into this after a cross up.
- A full 2 quarter-circles isn't required. Required inputs:


 +
+  .
.
Level 1
- 5 frames of startup hit invul.; 0 of which while active.
- 7 frames of startup projectile invul.
- Hits 4 times.
Level 2
- 6 frames of startup hit invul.; 1 of which while active.
- 10 frames of startup projectile invul.
- Hits 6 times.
Level 3
- 6 frames of startup hit invul.; 1 of which while active.
- 13 frames of startup projectile invul.
- Hits 6 times.
Good wake-up super. Mash ![]() at the end to get a stronger version (Jaguar Assassin), mash
at the end to get a stronger version (Jaguar Assassin), mash ![]() if it is blocked (Jaguar Thousand).
if it is blocked (Jaguar Thousand).
Jaguar Varied Assault (Level 3) -> Jaguar Thousand
Punch Ender![]()
![]() +
+ ![]() ,
, ![]() (rapidly)
(rapidly)
Jaguar Varied Assault (Level 3) -> Jaguar Assassin
Kick Ender![]()
![]() +
+ ![]() ,
, ![]() (rapidly)
(rapidly)
Jaguar Revolver
Axe Kick Super![]()
![]() +
+ ![]()
Very good move to punish fireballs at lvl 1. Works w/ lvl 2 and 3, but I would CC instead thru the fireball. Use this super to punish cr.![]() or cr.
or cr.![]() xx fireball pokes.
xx fireball pokes.
- A full 2 quarter-circles isn't required. Required inputs:


 +
+  .
.
Level 1
- 23 frames of startup hit invul.; 0 of which while active.
- 33 frames of startup projectile invul.
- Hits 3 times.
Level 2
- 26 frames of startup hit invul.; 3 of which while active.
- 36 frames of startup projectile invul.
- Hits 4 times.
Level 3
- 29 frames of startup hit invul.; 6 of which while active.
- 39 frames of startup projectile invul.
- Hits 6 times.
The Basics
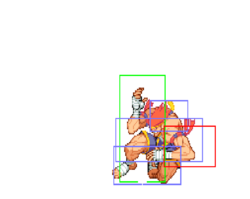
You wanna force your opponent to mess up and punish hard. His cross up is very good, and should be done after any knock down. Adon want to zone the oppoent and be smart with jag tooths to make them jumpy. cr.![]() is your friend, but dont under use his other normal cause they are very good, especially cr.
is your friend, but dont under use his other normal cause they are very good, especially cr.![]() , cr.
, cr.![]() ,
, ![]() . His overhead has good range but use it sparingly since it is slow and can be cc'ed; best used after knocking them down. Just remember: hit hard, always look for a opening to land his cc.
. His overhead has good range but use it sparingly since it is slow and can be cc'ed; best used after knocking them down. Just remember: hit hard, always look for a opening to land his cc.
Advanced Strategy
Combos
Custom Combos
These ccs can be at any lvl, just watch the meter and end with dp.
2. [cr.![]() xx
xx ![]() jag kick xN,
jag kick xN, ![]() xx
xx ![]() dp (opponent must be standing)
dp (opponent must be standing)
3. Lvl 3- cr.![]() xx
xx ![]() jag kick,
jag kick, ![]() dp x2
dp x2
Anti-air ccs
5. lvl 2 and up- ![]() or
or ![]() xx
xx ![]() jag kick xN,
jag kick xN, ![]() dp
dp
6. lvl 3- ![]() or
or ![]() xx
xx ![]() jag kick,
jag kick, ![]() dp x2
dp x2
This is where Adon shines his long limbs let him punish from far away, even blocked fireballs mid screen. To punish from far as hell, use ![]() to start cc #2. Most customs you do should be #1 or #4. Also at lvl 2/3, blow threw fireballs and cc, pretty much a round winner. After any cc, sweep, if the tech roll you will hit them and get a free jag dp juggle.
to start cc #2. Most customs you do should be #1 or #4. Also at lvl 2/3, blow threw fireballs and cc, pretty much a round winner. After any cc, sweep, if the tech roll you will hit them and get a free jag dp juggle.
Adon: lvl 1- c.rh xx hk dp x2
lvl 1- c.rh xx lk jag kick x2, hk dp
lvl 2- c.rh xx lk jag kick xN, hk dp
lvl 3- c.rh xx [hk jag kick, hk dp]x2
lvl 3- c.rh xx lk jag kick x4, mk jag kick, hk dp
lvl 3- c.mp xx lk jag kick x5, s.mp or s.lk in hk dp (must be standing)
Match-ups
You can anti-air him with any of your normal aa's (Rising Jaguar, df+mk, cr. hp (far), and just AC as well) and that will take a lot of his game away. Don't ever jaguar kick unless you want to die or you're absolutely sure you're far enough away to be safe. This match is basically just building meter and trying to outpoke each other, then land the CC.
Standing roundhouse and cr.mp are obviously tough for Birdie to deal with, but remember his cr.hp will AA just about anything.
