JtheSaltyy (talk | contribs) |
|||
| (19 intermediate revisions by 8 users not shown) | |||
| Line 1: | Line 1: | ||
= Introduction = | == Introduction == | ||
Ryo Sakazaki is | {{CvS2 Character Subnav|char=Ryo|short=Ryo}} | ||
<div> | |||
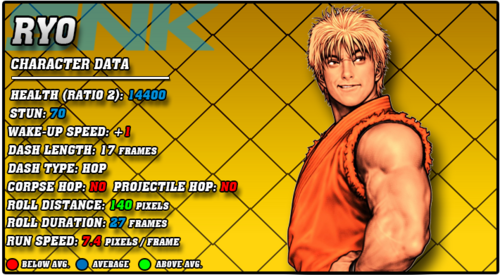
[[File:CVS2_Ryo_Data.png|right|500px]] | |||
== Story == | |||
Ryo Sakazaki is the son of Takuma Sakazaki, master of Kyokugenryu Karate. As such, Ryo inherited his fathers passion, and became the new modern day Kyokugenryu master. He teaches Kyokugenryu at his local dojo, alongside his rival and best friend Robert Garcia and his little sister and martial arts prodigy Yuri Sakazaki. He lives in the same town as Terry, South Town, and was around before the events of Fatal Fury. In fact, his debut game, Art of Fighting, is one of the earliest in the broader SNK timeline. It tells the story of Yuri being kidnapped by Geese Howard, who was just starting out at the time, and how Ryo and Robert fight King to rescue her. Ryo is also the very first and original champion of the King of Fighters tournament, and the first fighting game crossover character in history when he became a secret boss in Fatal Fury Special. | |||
= | == Gameplay == | ||
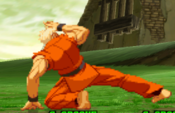
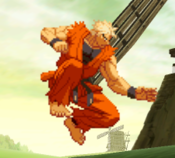
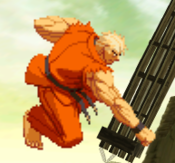
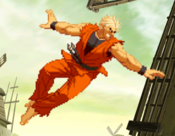
Ryo, on the surface, is very similar to the Capcom shotos. For the most part, he plays like them too. However, he has some unique tools, like an air fireball that can end his combos, a launcher special for fun resets, and a charge kick move for combos. He also has very strong level 3 supers, with a powerful fireball super in Haoh Sho Ko Ken and a great rush super in Ryuko Ranbu. He has a special level 3 with Heaven Glaze Punch, which is an unsafe and long startup super that does massive stun if it hits. Ryo works best in neutral, like any good shoto, throwing fireballs and using his good normals and DP anti-air to control space. | |||
He does suffer some weaknesses however. He is much slower than the average shoto, with a low overall jump arc and a slow dash and run. This forces him to rely on his neutral more, and his fireball more. While he does have a solid fireball and plenty of ways to deal with people who try to challenge his fireball, CvS2 has roll cancels. These can blow up fireballs on a solid read, and forces Ryo to be very thoughtful about applying his strongest tool. | |||
Ryo is a shoto, but takes the archetype and spins it a bit more than the main three shotos do by having more unique specials and different weaknesses. If you like solid fireballs, good neutral, and don't mind a slow or meter hungry guy, Ryo is a good pick in the right Grooves. | |||
=== Groove Selection === | |||
'''Best - K:''' For the most part, you'll usually see Ryo in K-Groove. Rage ups his damage from pokes and fireballs, and access to his scary level 3's makes for a solid neutral powerhouse type character. JD gives him a good way to deal with opponents zoning, and a way to generate a ton of Rage meter without needing to get hit. Run and hop aid his low mobility and give him shorthop HK, which is one of his best moves. | |||
'''Useful - C/N/S:''' C-Ryo is right behind K-Ryo. While he sacrifices a lot of mobility and the poking and comeback power of Rage, C-Ryo gets a lot more access to his useful supers. He also has versatile uses for level 2 cancels, mostly from level 2 Ranbu. The loss of mobility hurts a lot, and makes C-Ryo play even more patient than before, but he does get roll cancels which are always nice. N-Ryo is the opposite, getting all the mobility of K-Ryo and even rolls but losing easy access to his powerful supers. S-Ryo is surprisingly useful, as he plays slow enough that charging isn't too bad, and infinite level 1 Haoh Sho Koh Ken is as funny as it sounds. He gets run and hop too, but still has to contend with S-Grooves weak overall mechanics. | |||
'''Worst - A/P:''' A-Groove gives Ryo access to Custom Combos and some of the more powerful subsystems like Alpha Counter, but still lacks mobility, and you'll never be using a super as you would always rather Custom Combo. P-Ryo is very weak, as Ryo doesn't have the greatest meterless punish game without charge, and you'll rarely have super if at all. | |||
{{StrengthsAndWeaknesses | |||
|intro= | |||
--------------------------- | |||
'''Ryo''' is a versatile all-rounder with a powerful fireball and anti-airs. He also has unique combos with his launcher, and very useful and damaging supers. He suffers from being a fireball centric character in CvS2, and his slow mobility and lacking punishes without meter. Ryo is best in '''K-Groove'''. | |||
'''Difficulty''': Pretty Easy<br>'''Tier''': B- | |||
|pros= | |||
* '''Shoto:''' Useful shoto-style kit, with one of the better fireballs and a good DP to anti-air with | |||
* '''Launcher:''' Unique launcher special for combos that gives him either standing resets or a very plus knockdown | |||
* '''Supers:''' Versatile and useful supers in his Ryuko Ranbu and Haoh Shoh Koh Ken | |||
* '''Hop HK:''' One of the better hop normals with hop HK | |||
* '''Pokes:''' Good pokes all around | |||
|cons= | |||
* '''Slow:''' Slow mobility makes his approach hard, forcing him to play more patient | |||
* '''Situational Punishes:''' Best punishes require him to either have charge, be very close, or have a super | |||
* '''Roll Cancels:''' Reliance on fireball in a game with roll cancels can be difficult, but entirely manageable | |||
* '''Not Groove Friendly:''' Only really good in one Groove | |||
}} | |||
=== Players to Watch === | |||
{| class="wikitable" | |||
|- | |||
! Name !! Country !! Groove !! Accounts !! Notes | |||
|- | |||
| Wadatsumi || Japan || C-Groove || Twitter: @wadatsunami || Uses pure fundamentals to get by with a weak character. Lands damaging combos when the time comes. <br> [https://www.youtube.com/watch?v=15N_8GDPQjo&ab_channel=%E7%A6%8F%E5%B2%A1%E5%A4%A9%E4%BD%93%E3%82%AB%E3%83%97%E3%82%A8%E3%82%B9%E9%83%A8CVS2FUKUOKA Sample Match] | |||
|- | |||
| Rai || Japan || K-Groove || Twitter: @raikapibara || A Ryo apologist. Uses his great game sense to make him look like Ryu a little bit. <br> [https://youtu.be/twgAlyIrl3c?t=1033 Sample Match] | |||
|- | |||
|} | |||
<br><br> | |||
== Normal Moves == | == Normal Moves == | ||
=== Far Normals === | |||
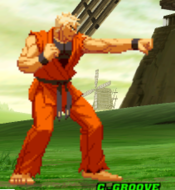
=== <span class="invisible-header">5LP</span> === | |||
{{MoveData | |||
| name = Far Jab | |||
| input = 5LP / Far LP | |||
| subtitle = Far Light Punch | |||
| image = CVS2_Ryo_5LP.PNG | |||
| caption = | |||
| linkname = 5LP | |||
| data = | |||
{{AttackData-CvS2 | |||
| version = Far {{Icon-Capcom|LP}} | |||
| subtitle = | |||
| damage = 300 | |||
| stun = 3 | |||
| cancel = RF/SP/SU | |||
| guard = Mid | |||
| parry = High | |||
| startup = 3 | |||
| active = 4 | |||
| recovery = 6 | |||
| total = 13 | |||
| advHit = +5 | |||
| advBlock = +5 | |||
| invul = None | |||
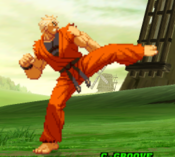
| description = A standard jab by all means. Fast and good for interrupting strings but is crouchable by a majority of characters. You'll usually use 2LP instead. | |||
}} | |||
}} | |||
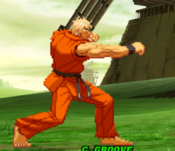
=== <span class="invisible-header">5MP</span> === | |||
{{MoveData | |||
| name = Far Strong | |||
| input = 5MP / Far MP | |||
| subtitle = Far Medium Punch | |||
| image = CVS2_Ryo_5MP.PNG | |||
| caption = | |||
| linkname = 5MP | |||
| data = | |||
{{AttackData-CvS2 | |||
| version = Far {{Icon-Capcom|MP}} | |||
| subtitle = | |||
| damage = 900 | |||
| stun = 9 | |||
| cancel = SP/SU | |||
| guard = Mid | |||
| parry = High | |||
| startup = 4 | |||
| active = 2 | |||
| recovery = 21 | |||
| total = 27 | |||
| advHit = -2 | |||
| advBlock = -2 | |||
| invul = None | |||
| description = A useful 5MP for interrupting the opponents mashing. Tends to beat out other buttons through speed, and has decent reach for a 4f normal. You can cancel into Haoh Ken and it will combo at all but max range. | |||
}} | |||
}} | |||
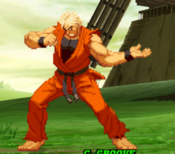
=== <span class="invisible-header">5HP</span> === | |||
{{MoveData | |||
| name = Far Fierce | |||
| input = 5HP / Far HP | |||
| subtitle = Far Heavy Punch | |||
| image = CVS2_Ryo_5HP.PNG | |||
| caption = | |||
| linkname = 5HP | |||
| data = | |||
{{AttackData-CvS2 | |||
| version = Far {{Icon-Capcom|HP}} | |||
| subtitle = | |||
| damage = 1400 | |||
| stun = 14 | |||
| cancel = SU | |||
| guard = Mid | |||
| parry = High | |||
| startup = 7 | |||
| active = 3 | |||
| recovery = 31 | |||
| total = 41 | |||
| advHit = -10 | |||
| advBlock = -10 | |||
| invul = None | |||
| description = A big chop from above. Does alright damage for a single hit, and is your most damaging super cancel, but you will otherwise never use this. It's very laggy on whiff, and on hit or block you can be punished at close range. | |||
}} | |||
}} | |||
=== <span class="invisible-header">5LK</span> === | |||
{{MoveData | |||
| name = Far Short | |||
| input = 5LK / Far LK | |||
| subtitle = Far Light Kick | |||
| image = CVS2_Ryo_5LK.PNG | |||
| caption = | |||
| linkname = 5LK | |||
| data = | |||
{{AttackData-CvS2 | |||
| version = Far {{Icon-Capcom|LK}} | |||
| subtitle = | |||
| damage = 500 | |||
| stun = 5 | |||
| cancel = SU | |||
| guard = Mid | |||
| parry = High | |||
| startup = 5 | |||
| active = 4 | |||
| recovery = 14 | |||
| total = 23 | |||
| advHit = -2 | |||
| advBlock = -2 | |||
| invul = None | |||
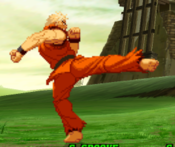
| description = A fast kick with alright range. Low risk, low reward poke, as it only confirms into Super. Not bad to check a dash with every now and then though. | |||
}} | |||
}} | |||
=== <span class="invisible-header">5MK</span> === | |||
{{MoveData | |||
| name = Far Forward | |||
| input = 5MK / Far MK | |||
| subtitle = Far Medium Kick | |||
| image = CVS2_Ryo_5MK.PNG | |||
| caption = | |||
| linkname = 5MK | |||
| data = | |||
{{AttackData-CvS2 | |||
| version = Far {{Icon-Capcom|MK}} | |||
| subtitle = | |||
| damage = 900 | |||
| stun = 9 | |||
| cancel = None | |||
| guard = Mid | |||
| parry = High | |||
| startup = 7 | |||
| active = 7 | |||
| recovery = 14 | |||
| total = 28 | |||
| advHit = -1 | |||
| advBlock = -1 | |||
| invul = None | |||
| description = A kick at a similar angle to 5LK. No real reward on hit outside of damage since you have no cancels, but is useful for the same things 5LK is thanks to the damage increase and higher active frame count. Just note the slower startup too. | |||
}} | |||
}} | |||
=== <span class="invisible-header">5HK</span> === | |||
{{MoveData | |||
| name = Far Roundhouse | |||
| input = 5HK / Far HK | |||
| subtitle = Far Heavy Kick | |||
| image = CVS2_Ryo_5HK.PNG | |||
| caption = | |||
| linkname = 5HK | |||
| data = | |||
{{AttackData-CvS2 | |||
| version = Far {{Icon-Capcom|HK}} | |||
| subtitle = | |||
| damage = 1300 | |||
| stun = 13 | |||
| cancel = None | |||
| guard = Mid | |||
| parry = High | |||
| startup = 8 | |||
| active = 8 | |||
| recovery = 17 | |||
| total = 33 | |||
| advHit = -1 | |||
| advBlock = -1 | |||
| invul = None | |||
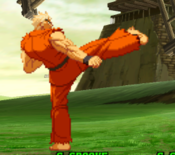
| description = A good kick at an anti-air angle. Crouchable at all ranges, making it pretty useless as a poke, but since Ryo's DP isn't the greatest this tends to be your main anti-air in conjunction with 2HP. The angle it hits at is especially useful, as you'll usually be throwing fireballs from a slightly spaced out range and this will catch jumps at that range. | |||
}} | |||
}} | |||
== Close Normals == | |||
=== <span class="invisible-header">clLP</span> === | |||
{{MoveData | |||
| name = Close Jab | |||
| input = cl.LP / cl5LP | |||
| subtitle = Close Light Punch | |||
| image = CVS2_Ryo_clLP.PNG | |||
| caption = | |||
| linkname = cl.LP | |||
| data = | |||
{{AttackData-CvS2 | |||
| version = Close {{Icon-Capcom|LP}} | |||
| subtitle = | |||
| damage = 400 | |||
| stun = 4 | |||
| cancel = RF/SP/SU | |||
| guard = Mid | |||
| parry = High | |||
| startup = 2 | |||
| active = 4 | |||
| recovery = 6 | |||
| total = 12 | |||
| advHit = +5 | |||
| advBlock = +5 | |||
| invul = None | |||
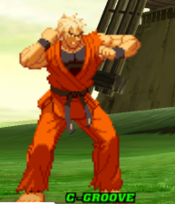
| description = Pretty identical to 5LP but a frame faster and 100 damage higher. Has the same weakness of being crouchable however. Can be an alright emergency anti-air if they pressed a button at a bad timing, but otherwise not much use. | |||
}} | |||
}} | |||
=== <span class="invisible-header">clMP</span> === | |||
{{MoveData | |||
| name = Close Strong | |||
| input = cl.MP / cl5MP | |||
| subtitle = Close Medium Punch | |||
| image = CVS2_Ryo_clMP.PNG | |||
| caption = | |||
| linkname = cl.MP | |||
| data = | |||
{{AttackData-CvS2 | |||
| version = Close {{Icon-Capcom|MP}} | |||
| subtitle = | |||
| damage = 900 | |||
| stun = 9 | |||
| cancel = SP/SU | |||
| guard = Mid | |||
| parry = High | |||
| startup = 3 | |||
| active = 4 | |||
| recovery = 18 | |||
| total = 25 | |||
| advHit = -2 | |||
| advBlock = -2 | |||
| invul = None | |||
| description = A quick gut punch. Your main medium normal, and main close normal in general, since cl.MK is a bit odd and Ryo has no close heavies. Useful for confirming after jump ins into his launcher special, as a meaty, or as a punish up close. | |||
}} | |||
}} | |||
=== <span class="invisible-header">clHP</span> === | |||
{{MoveData | |||
| name = Close Fierce | |||
| input = cl.HP / cl5HP | |||
| subtitle = Close Heavy Punch | |||
| image = CVS2_Ryo_5HP.PNG | |||
| caption = | |||
| linkname = cl.HP | |||
| data = | |||
{{AttackData-CvS2 | |||
| version = Close {{Icon-Capcom|HP}} | |||
| subtitle = | |||
| damage = 1400 | |||
| stun = 14 | |||
| cancel = SU | |||
| guard = Mid | |||
| parry = High | |||
| startup = 7 | |||
| active = 3 | |||
| recovery = 31 | |||
| total = 41 | |||
| advHit = -10 | |||
| advBlock = -10 | |||
| invul = None | |||
| description = Identical to the far version in every way, making it very very bad up close. Only use this if you can cancel it into a super, and make sure you're gonna be able to do that, since at this close you'll likely eat a punish. | |||
}} | |||
}} | |||
=== <span class="invisible-header">clLK</span> === | |||
{{MoveData | |||
| name = Close Short | |||
| input = cl.LK / cl5LK | |||
| subtitle = Close Light Kick | |||
| image = CVS2_Ryo_clLK.PNG | |||
| caption = | |||
| linkname = cl.LK | |||
| data = | |||
{{AttackData-CvS2 | |||
| version = Close {{Icon-Capcom|LK}} | |||
| subtitle = | |||
| damage = 400 | |||
| stun = 4 | |||
| cancel = SP/SU | |||
| guard = Mid | |||
| parry = High | |||
| startup = 3 | |||
| active = 6 | |||
| recovery = 13 | |||
| total = 22 | |||
| advHit = 0 | |||
| advBlock = 0 | |||
| invul = None | |||
| description = An awkward looking kick. Arguably a better close jab than cl.LP, as it starts only a frame later but has a lot more active frames and can't be crouched. Not as plus however, and regardless you won't be using it often as Ryo is rarely this close on offense. | |||
}} | |||
}} | |||
=== <span class="invisible-header">clMK</span> === | |||
{{MoveData | |||
| name = Close Forward | |||
| input = cl.MK / cl5MK | |||
| subtitle = Close Medium Kick | |||
| image = CVS2_Ryo_clMK.PNG | |||
| caption = | |||
| linkname = cl.MK | |||
| data = | |||
{{AttackData-CvS2 | |||
| version = Close {{Icon-Capcom|MK}} | |||
| subtitle = | |||
| damage = 700 | |||
| stun = 7 | |||
| cancel = None | |||
| guard = Mid | |||
| parry = Mid | |||
| startup = 9 | |||
| active = 6 | |||
| recovery = 16 | |||
| total = 31 | |||
| advHit = 0 | |||
| advBlock = 0 | |||
| invul = None | |||
| description = A stomp to the feet. Strange for a close normal, as it has a full 9 frames of startup and can't be cancelled into anything. Still not a standing low either, and does less damage than cl.MP despite being slower. The best purpose for this move is meaty links, but even then it isnt very good at this and it doesn't lead to much without meter. Stick to cl.MP in a majority of situations. | |||
}} | |||
}} | |||
=== <span class="invisible-header">clHK</span> === | |||
{{MoveData | |||
| name = Close Roundhouse | |||
| input = cl.HK / cl5HK | |||
| subtitle = Close Heavy Kick | |||
| image = CVS2_Ryo_5HK.PNG | |||
| caption = | |||
| linkname = cl.HK | |||
| data = | |||
{{AttackData-CvS2 | |||
| version = Close {{Icon-Capcom|HK}} | |||
| subtitle = | |||
| damage = 1300 | |||
| stun = 13 | |||
| cancel = None | |||
| guard = Mid | |||
| parry = High | |||
| startup = 8 | |||
| active = 8 | |||
| recovery = 17 | |||
| total = 33 | |||
| advHit = -1 | |||
| advBlock = -1 | |||
| invul = None | |||
| description = Identical to 5HK, meaning Ryo has no close heavy normal like most other characters. Still just an anti-air as well, as even up close it can be crouched. Just like doing 5HP too close, avoid doing this up close. | |||
}} | |||
}} | |||
== Crouching Normals == | |||
=== <span class="invisible-header">2LP</span> === | |||
{{MoveData | |||
| name = Crouch Jab | |||
| input = 2LP / cr.LP | |||
| subtitle = Crouching Light Punch | |||
| image = CVS2_Ryo_2LP.PNG | |||
| caption = | |||
| linkname = 2LP | |||
| data = | |||
{{AttackData-CvS2 | |||
| version = {{Motion|d}}+{{Icon-Capcom|LP}} | |||
| subtitle = | |||
| damage = 300 | |||
| stun = 3 | |||
| cancel = RF/SP/SU | |||
| guard = Mid | |||
| parry = Low | |||
| startup = 3 | |||
| active = 4 | |||
| recovery = 6 | |||
| total = 13 | |||
| advHit = +5 | |||
| advBlock = +5 | |||
| invul = None | |||
| description = A useful 2LP for mashing and pressure. Can link into 2MP on normal hit and 2MK on counter hit. Good for panic mashing to beat tick throws or dashes, solid 2LP all around. | |||
}} | |||
}} | |||
=== <span class="invisible-header">2MP</span> === | |||
{{MoveData | |||
| name = Crouch Strong | |||
| input = 2MP / cr.MP | |||
| subtitle = Crouching Medium Punch | |||
| image = CVS2_Ryo_2MP.PNG | |||
| caption = | |||
| linkname = 2MP | |||
| data = | |||
{{AttackData-CvS2 | |||
| version = {{Motion|d}}+{{Icon-Capcom|MP}} | |||
| subtitle = | |||
| damage = 900 | |||
| stun = 9 | |||
| cancel = SP/SU | |||
| guard = Mid | |||
| parry = Low | |||
| startup = 4 | |||
| active = 5 | |||
| recovery = 11 | |||
| total = 20 | |||
| advHit = +4 | |||
| advBlock = +4 | |||
| invul = None | |||
| description = A useful 2MP and one of Ryo's better normals for brawling and poking. Similar to 5MP, it'll stuff a lot of things, and on counterhit it links into itself making for a solid meaty or running normal. Can also be linked into for super confirms. | |||
}} | |||
}} | |||
=== <span class="invisible-header">2HP</span> === | |||
{{MoveData | |||
| name = Crouch Fierce | |||
| input = 2HP / cr.HP | |||
| subtitle = Crouching Heavy Punch | |||
| image = CVS2_Ryo_2HP.PNG | |||
| caption = | |||
| linkname = 2HP | |||
| data = | |||
{{AttackData-CvS2 | |||
| version = {{Motion|d}}+{{Icon-Capcom|HP}} | |||
| subtitle = | |||
| damage = 1200/700 | |||
| stun = 12/7 | |||
| cancel = SP/SU | |||
| guard = Mid | |||
| parry = High | |||
| startup = 3 | |||
| active = 9 | |||
| recovery = 24 | |||
| total = 36 | |||
| advHit = -9 | |||
| advBlock = -9 | |||
| invul = None | |||
| description = An uppercut that reaches high but not very far. One of Ryo's fastest normals and is his only cancellable heavy, functioning as a close heavy replacement in punish situations. Also a useful anti-air, as it covers the high angle that 5HK can whiff at. | |||
}} | |||
}} | |||
=== <span class="invisible-header">2LK</span> === | |||
{{MoveData | |||
| name = Crouch Short | |||
| input = 2LK / cr.LK | |||
| subtitle = Crouching Light Kick | |||
| image = CVS2_Ryo_2LK.PNG | |||
| caption = | |||
| linkname = 2LK | |||
| data = | |||
{{AttackData-CvS2 | |||
| version = {{Motion|d}}+{{Icon-Capcom|LK}} | |||
| subtitle = | |||
| damage = 400 | |||
| stun = 4 | |||
| cancel = SP/SU | |||
| guard = Low | |||
| parry = Low | |||
| startup = 3 | |||
| active = 4 | |||
| recovery = 7 | |||
| total = 14 | |||
| advHit = +4 | |||
| advBlock = +4 | |||
| invul = None | |||
| description = A basic 2LK low kick for his main low mix. Useful after resets to mix between a high 6MP, a low 2LK, and a throw. Not the greatest, as it doesn't easily confirm into anything and you instead have to do a somewhat difficult link from it into 2HP. | |||
}} | |||
}} | |||
=== <span class="invisible-header">2MK</span> === | |||
{{MoveData | |||
| name = Crouch Forward | |||
| input = 2MK / cr.MK | |||
| subtitle = Crouching Medium Kick | |||
| image = CVS2_Ryo_2MK.PNG | |||
| caption = | |||
| linkname = 2MK | |||
| data = | |||
{{AttackData-CvS2 | |||
| version = {{Motion|d}}+{{Icon-Capcom|MK}} | |||
| subtitle = | |||
| damage = 800 | |||
| stun = 8 | |||
| cancel = SP/SU | |||
| guard = Low | |||
| parry = Low | |||
| startup = 5 | |||
| active = 8 | |||
| recovery = 17 | |||
| total = 30 | |||
| advHit = -3 | |||
| advBlock = -3 | |||
| invul = None | |||
| description = Ryo kicks outwards far away with his foot. The shoto 2MK, useful for poking and cancels into fireballs. Ryo's is useful in the same way, as it allows him a cancel into fireball or Ranbu for damage. | |||
}} | |||
}} | |||
=== <span class="invisible-header">2HK</span> === | |||
{{MoveData | |||
| name = Crouch Roundhouse | |||
| input = 2HK / cr.HK | |||
| subtitle = Crouching Heavy Kick | |||
| image = CVS2_Ryo_2HK.PNG | |||
| caption = | |||
| linkname = 2HK | |||
| data = | |||
{{AttackData-CvS2 | |||
| version = {{Motion|d}}+{{Icon-Capcom|HK}} | |||
| subtitle = | |||
| damage = 1300 | |||
| stun = 13 | |||
| cancel = SU | |||
| guard = Low | |||
| parry = Low | |||
| startup = 6 | |||
| active = 9 | |||
| recovery = 26 | |||
| total = 41 | |||
| advHit = -DWN | |||
| advBlock = -11 | |||
| invul = None | |||
| description = A simple sweep, useful for getting a knockdown at range but can be very laggy on whiff and is negative on block. Despite this, it is one of your furthest reaching normals, making it a useful whiff punish. | |||
}} | |||
}} | |||
== Jumping Normals == | |||
=== <span class="invisible-header">jLP</span> === | |||
{{MoveData | |||
| name = Jump Jab | |||
| input = j.LP / 8LP | |||
| subtitle = Jumping Jab | |||
| image = CVS2_Ryo_jLP.PNG | |||
| caption = | |||
| linkname = j.LK | |||
| data = | |||
{{AttackData-CvS2 | |||
| version = {{Motion|ub}},{{Motion|u}},{{Motion|uf}}+{{Icon-Capcom|LP}} | |||
| subtitle = | |||
| damage = 500 | |||
| stun = 5 | |||
| cancel = SP | |||
| guard = High | |||
| parry = High | |||
| startup = 4 | |||
| active = 22 | |||
| recovery = 0 | |||
| total = 26 | |||
| advHit = Varies | |||
| advBlock = Varies | |||
| invul = None | |||
| description = A very active chop. Like most j.LP's, useful to interrupt an opponent jumping quickly but not for much else. | |||
}} | |||
}} | |||
=== <span class="invisible-header">jMP</span> === | |||
{{MoveData | |||
| name = Jump Strong | |||
| input = j.MP / 8MP | |||
| subtitle = Jumping Medium Punch | |||
| image = CVS2_Ryo_jMP.PNG | |||
| caption = | |||
| linkname = j.MP | |||
| data = | |||
{{AttackData-CvS2 | |||
| version = {{Motion|ub}},{{Motion|u}},{{Motion|uf}}+{{Icon-Capcom|MP}} | |||
| subtitle = | |||
| damage = 900 | |||
| stun = 9 | |||
| cancel = None | |||
| guard = High | |||
| parry = High | |||
| startup = 5/6 | |||
| active = 8 | |||
| recovery = 0 | |||
| total = 13/14 | |||
| advHit = Varies | |||
| advBlock = Varies | |||
| invul = None | |||
| description = A quick punch down. Not very useful for anything, as it doesn't have high damage, a cancel, or great active frames. On a diagonal jump, it has a single frame extra startup, so if you wanna do this as an air-to-air use nj.MP for that. | |||
}} | |||
}} | |||
=== <span class="invisible-header">jHP</span> === | |||
{{MoveData | |||
| name = Jump Fierce | |||
| input = j.HP / 8HP | |||
| subtitle = Jumping Heavy Punch | |||
| image = CVS2_Ryo_jHP.PNG | |||
| caption = | |||
| linkname = j.HP | |||
| data = | |||
{{AttackData-CvS2 | |||
| version = {{Motion|ub}},{{Motion|u}},{{Motion|uf}}+{{Icon-Capcom|HP}} | |||
| subtitle = | |||
| damage = 1200 | |||
| stun = 12 | |||
| cancel = None | |||
| guard = High | |||
| parry = High | |||
| startup = 7 | |||
| active = 7 | |||
| recovery = 0 | |||
| total = 14 | |||
| advHit = Varies | |||
| advBlock = Varies | |||
| invul = None | |||
| description = A downward chop. Not a bad jump heavy, but j.HK is so good it gets outclassed. You see this as a combo ender a lot after the launcher special, as it does good damage and gives Ryo a neat reset mixup that can be hard to react to. | |||
}} | |||
}} | |||
=== <span class="invisible-header">jLK</span> === | |||
{{MoveData | |||
| name = Jump Short | |||
| input = j.LK / 8LK | |||
| subtitle = Jumping Light Kick | |||
| image = CVS2_Ryo_jLK.PNG | |||
| caption = | |||
| linkname = j.LK | |||
| data = | |||
{{AttackData-CvS2 | |||
| version = {{Motion|ub}},{{Motion|u}},{{Motion|uf}}+{{Icon-Capcom|LK}} | |||
| subtitle = | |||
| damage = 500 | |||
| stun = 5 | |||
| cancel = SP | |||
| guard = High | |||
| parry = High | |||
| startup = 4 | |||
| active = 22 | |||
| recovery = 0 | |||
| total = 26 | |||
| advHit = Varies | |||
| advBlock = Varies | |||
| invul = None | |||
| description = An outwards kick that lingers. Similar in use to j.LP, with the only difference being that it's slightly longer range and higher, meaning you would probably rather do this as an air-to-air light. | |||
}} | |||
}} | |||
=== <span class="invisible-header">jMK</span> === | |||
{{MoveData | |||
| name = Jump Forward | |||
| input = j.MK / 8MK | |||
| subtitle = Jumping Medium Kick | |||
| image = CVS2_Ryo_jHK.PNG | |||
| caption = | |||
| linkname = j.MK | |||
| data = | |||
{{AttackData-CvS2 | |||
| version = {{Motion|ub}},{{Motion|u}},{{Motion|uf}}+{{Icon-Capcom|MK}} | |||
| subtitle = | |||
| damage = 800 | |||
| stun = 8 | |||
| cancel = None | |||
| guard = High | |||
| parry = High | |||
| startup = 6 | |||
| active = 10 | |||
| recovery = 0 | |||
| total = 16 | |||
| advHit = Varies | |||
| advBlock = Varies | |||
| invul = None | |||
| description = A kick with the same animation as j.HK. This is your crossup jump-in, but sadly that means it doesn't see a ton of use since Ryo can't set up crossups very well. Still, after a knockdown you can sometimes get this. | |||
}} | |||
}} | |||
=== <span class="invisible-header">jHK</span> === | |||
{{MoveData | |||
| name = Jump Roundhouse | |||
| input = j.HK / 8HK | |||
| subtitle = Jumping Heavy Kick | |||
| image = CVS2_Ryo_jHK.PNG | |||
| caption = | |||
| linkname = j.HK | |||
| data = | |||
{{AttackData-CvS2 | |||
| version = {{Motion|ub}},{{Motion|u}},{{Motion|uf}}+{{Icon-Capcom|HK}} | |||
| subtitle = | |||
| damage = 1200 | |||
| stun = 12 | |||
| cancel = None | |||
| guard = High | |||
| parry = High | |||
| startup = 7 | |||
| active = 6/5 | |||
| recovery = 0 | |||
| total = 13/12 | |||
| advHit = Varies | |||
| advBlock = Varies | |||
| invul = None | |||
| description = Your main jump normal, and new best friend. Can be very oppressive, especially in hop Grooves, due to the great hitbox and high damage. You can usually confirm into a cl.MP on a full jump or a 623HP on a hop for good damage. | |||
}} | |||
}} | |||
== Command Normals == | |||
=== <span class="invisible-header">Hyouchuu Wari</span> === | |||
{{MoveData | |||
| name = Hyouchuu Wari | |||
| input = 6MP | |||
| subtitle = Overhead | |||
| image = CVS2_Ryo_6MP_First.PNG | |||
| caption = The Startup | |||
| image2 = CVS2_Ryo_6MP_Second.PNG | |||
| caption2 = The Chop | |||
| linkname = 6MP | |||
| data = | |||
{{AttackData-CvS2 | |||
| version = {{Motion|f}}+{{Icon-Capcom|MP}} | |||
| subtitle = | |||
| damage = 1000 | |||
| stun = 10 | |||
| cancel = None | |||
| guard = High | |||
| parry = High | |||
| startup = 23 | |||
| active = 2 | |||
| recovery = 21 | |||
| total = 46 | |||
| advHit = -3 | |||
| advBlock = -3 | |||
| invul = None | |||
| description = Ryo winds up before chopping the opponent overhead. Useful in his mixups and corner resets to make the opponent block high, but is pretty low reward. Still, it is safe to basically everything on block. Be wary of P/K-Groove opponents with good reactions who will parry or JD this, as it can be punished then. | |||
}} | |||
}} | |||
== Throws == | |||
=== <span class="invisible-header">Tana Otoshi</span> === | |||
{{MoveData | |||
| name = Tana Otoshi | |||
| input = Near Opponent, 4/6HP | |||
| subtitle = Punch Throw | |||
| image = CVS2_Ryo_PThrow.PNG | |||
| caption = | |||
| linkname = Punch Throw | |||
| data = | |||
{{AttackData-CvS2 | |||
| version = Close {{Motion|b}}/{{Motion|f}}+{{Icon-Capcom|HP}} | |||
| subtitle = | |||
| damage = 1900 | |||
| stun = 0 | |||
| cancel = None | |||
| guard = Grab | |||
| parry = Grab | |||
| startup = 3 | |||
| active = 1 | |||
| recovery = 13 | |||
| total = 17 | |||
| advHit = -DWN | |||
| advBlock = Grab | |||
| invul = None | |||
| description = Ryo grabs the opponent before chopping them with a fast 6MP. The faster throw, useful for tick throws and throw punishes. Does a bit more damage than the average punch throw. | |||
}} | |||
}} | |||
=== <span class="invisible-header">Tomoe Nage</span> === | |||
{{MoveData | |||
| name = Tomoe Nage | |||
| input = Near Opponent, 4/6HK | |||
| subtitle = Kick Throw | |||
| image = CVS2_Ryo_KThrow.PNG | |||
| caption = | |||
| linkname = Kick Throw | |||
| data = | |||
{{AttackData-CvS2 | |||
| version = Close {{Motion|b}}/{{Motion|f}}+{{Icon-Capcom|HK}} | |||
| subtitle = | |||
| damage = 2100 | |||
| stun = 0 | |||
| cancel = None | |||
| guard = Grab | |||
| parry = Grab | |||
| startup = 5 | |||
| active = 1 | |||
| recovery = 13 | |||
| total = 19 | |||
| advHit = -DWN | |||
| advBlock = Grab | |||
| invul = None | |||
| description = Ryo flips the opponent over his shoulder and kicks them away. Higher damage but slower throw, useful for throw mixups. Similar to P Throw, does a bit higher damage than other kick throws, but not as notable here. | |||
}} | |||
}} | |||
== Special Moves == | == Special Moves == | ||
=== <span class="invisible-header">Ko-Ou Ken</span> === | |||
{{MoveData | |||
| name = Ko-Ou Ken | |||
| input = 236P | |||
| subtitle = Fireball | |||
| image = CVS2_Ryo_236P.PNG | |||
| caption = | |||
| linkname = Ko-Ou Ken | |||
| data = | |||
{{AttackData-CvS2 | |||
| version = {{Motion|236}}+{{Icon-Capcom|LP}} | |||
| subtitle = | |||
| damage = 800 | |||
| stun = 8 | |||
| cancel = None | |||
| guard = Mid | |||
| parry = High | |||
| startup = 12 | |||
| active = Traveling | |||
| recovery = 44 | |||
| total = 56 | |||
| advHit = -11 | |||
| advBlock = -11 | |||
| invul = None | |||
}} | |||
{{AttackData-CvS2 | |||
| header = no | |||
| version = {{Motion|236}}+{{Icon-Capcom|MP}} | |||
| subtitle = | |||
| damage = 900 | |||
| stun = 9 | |||
| cancel = None | |||
| guard = Mid | |||
| parry = High | |||
| startup = 14 | |||
| active = Traveling | |||
| recovery = 45 | |||
| total = 59 | |||
| advHit = -12 | |||
| advBlock = -12 | |||
| invul = None | |||
}} | |||
{{AttackData-CvS2 | |||
| header = no | |||
| version = {{Motion|236}}+{{Icon-Capcom|HP}} | |||
| subtitle = | |||
| damage = 1000 | |||
| stun = 10 | |||
| cancel = None | |||
| guard = Mid | |||
| parry = High | |||
| startup = 15 | |||
| active = Traveling | |||
| recovery = 46 | |||
| total = 61 | |||
| advHit = -13 | |||
| advBlock = -13 | |||
| invul = None | |||
| description = Ryo's classic fireball special. Fairly standard, with LP having a very slow travel speed and HP being a bit faster. The core of Ryo's gameplan, all of his pressure and neutral focuses on smart utilization of his fireball. He has the classic zoning style of throwing fireballs and anti-airing people who jump over them, but he also uses these closer up a lot to bait the opponent into picking a riskier option. This works because the travel time can make them plus on block, even though it leaves a very wide gap that the opponent can exploit. Forcing them to try and exploit that gap through a roll, RC special, jump, or super, is key to making Ryo work. | |||
}} | |||
}} | |||
=== <span class="invisible-header">Air Ko-Ou Ken</span> === | |||
{{MoveData | |||
| name = Air Ko-Ou Ken | |||
| input = j.236P | |||
| subtitle = Air Fireball | |||
| image = CVS2_Ryo_j236P.PNG | |||
| caption = | |||
| linkname = j.236P | |||
| data = | |||
{{AttackData-CvS2 | |||
| version = In Air, {{Motion|236}}+{{Icon-Capcom|LP}} | |||
| subtitle = | |||
| damage = 700 | |||
| stun = 7 | |||
| cancel = None | |||
| guard = Mid | |||
| parry = High | |||
| startup = 14 | |||
| active = Traveling | |||
| recovery = Till Landing +21 | |||
| total = 35+ | |||
| advHit = 0 | |||
| advBlock = 0 | |||
| invul = None | |||
}} | |||
{{AttackData-CvS2 | |||
| header = no | |||
| version = In Air, {{Motion|236}}+{{Icon-Capcom|MP}} | |||
| subtitle = | |||
| damage = 800 | |||
| stun = 8 | |||
| cancel = None | |||
| guard = Mid | |||
| parry = High | |||
| startup = 14 | |||
| active = Traveling | |||
| recovery = Till Landing +21 | |||
| total = 35+ | |||
| advHit = -5 | |||
| advBlock = -5 | |||
| invul = None | |||
}} | |||
{{AttackData-CvS2 | |||
| header = no | |||
| version = In Air, {{Motion|236}}+{{Icon-Capcom|HP}} | |||
| subtitle = | |||
| damage = 900 | |||
| stun = 9 | |||
| cancel = None | |||
| guard = Mid | |||
| parry = High | |||
| startup = 14 | |||
| active = Traveling | |||
| recovery = Till Landing +21 | |||
| total = 35+ | |||
| advHit = -10 | |||
| advBlock = -10 | |||
| invul = None | |||
| description = An air version of Ryo's grounded fireballs. Not as useful for zoning as you might like, since Ryo has a massive amount of lag on landing. A smart opponent will be able to use movement or RC specials to evade the fireball and punish you. Instead, this has two major uses. The first being as a knockdown combo ender after his launcher, and the second being as a way to bait opponents doing a normal anti-air. Ryo hangs in the air for a while, so a poorly timed anti-air from the opponent can get stuffed. | |||
}} | |||
}} | |||
=== <span class="invisible-header">Kohou</span> === | |||
{{MoveData | |||
| name = Kohou | |||
| input = 623P | |||
| subtitle = Uppercut, DP | |||
| image = CVS2_Ryo_623P.PNG | |||
| caption = | |||
| linkname = 623P | |||
| data = | |||
{{AttackData-CvS2 | |||
| version = {{Motion|623}}+{{Icon-Capcom|LP}} | |||
| subtitle = | |||
| damage = 1500/1000 | |||
| stun = 15/10 | |||
| cancel = None | |||
| guard = Mid | |||
| parry = High | |||
| startup = 6 | |||
| active = 18 | |||
| recovery = 23 | |||
| total = 47 | |||
| advHit = -DWN | |||
| advBlock = -17 | |||
| invul = 8 (Full), 4 (Lower) | |||
}} | |||
{{AttackData-CvS2 | |||
| header = no | |||
| version = {{Motion|623}}+{{Icon-Capcom|MP}} | |||
| subtitle = | |||
| damage = 1600/1100 | |||
| stun = 16/11 | |||
| cancel = None | |||
| guard = Mid | |||
| parry = High | |||
| startup = 5 | |||
| active = 22 | |||
| recovery = 27 | |||
| total = 54 | |||
| advHit = -DWN | |||
| advBlock = -25 | |||
| invul = 9 (Full) | |||
}} | |||
{{AttackData-CvS2 | |||
| header = no | |||
| version = {{Motion|623}}+{{Icon-Capcom|HP}} | |||
| subtitle = | |||
| damage = 1700/1200 | |||
| stun = 17/12 | |||
| cancel = None | |||
| guard = Mid | |||
| parry = High | |||
| startup = 5 | |||
| active = 26 | |||
| recovery = 31 | |||
| total = 62 | |||
| advHit = -DWN | |||
| advBlock = -33 | |||
| invul = 9 (Full) | |||
| description = The shoto uppercut special. Not the best uppercut for anti-air, as it recovers very fast and doesn't go as high. Still a very useful anti-air regardless, and luckily Ryo has 5HK and 2HP to anti-air with as well. HP version is useful as a combo ender and a reversal, although risky. | |||
}} | |||
}} | |||
=== <span class="invisible-header">Hien Shippu Kyaku</span> === | |||
{{MoveData | |||
| name = Hien Shippu Kyaku | |||
| input = [1]6K | |||
| subtitle = Flying Kicks | |||
| image = CVS2_Ryo_16K.PNG | |||
| caption = | |||
| linkname = Hien Shippu Kyaku | |||
| data = | |||
{{AttackData-CvS2 | |||
| version = Charge {{Motion|db}},{{Motion|f}}+{{Icon-Capcom|LK}} | |||
| subtitle = | |||
| damage = 400+1000 | |||
| stun = 4+10 | |||
| cancel = None | |||
| guard = Mid | |||
| parry = High | |||
| startup = 16 | |||
| active = 27 | |||
| recovery = 7 | |||
| total = 50 | |||
| advHit = -DWN | |||
| advBlock = -17 | |||
| invul = None | |||
}} | |||
{{AttackData-CvS2 | |||
| header = no | |||
| version = Charge {{Motion|db}},{{Motion|f}}+{{Icon-Capcom|MK}} | |||
| subtitle = | |||
| damage = 400+1100 | |||
| stun = 4+11 | |||
| cancel = None | |||
| guard = Mid | |||
| parry = High | |||
| startup = 16 | |||
| active = 28 | |||
| recovery = 7 | |||
| total = 51 | |||
| advHit = -DWN | |||
| advBlock = -18 | |||
| invul = None | |||
}} | |||
{{AttackData-CvS2 | |||
| header = no | |||
| version = Charge {{Motion|db}},{{Motion|f}}+{{Icon-Capcom|HK}} | |||
| subtitle = | |||
| damage = 400+1200 | |||
| stun = 4+12 | |||
| cancel = None | |||
| guard = Mid | |||
| parry = High | |||
| startup = 16 | |||
| active = 30 | |||
| recovery = 7 | |||
| total = 53 | |||
| advHit = -DWN | |||
| advBlock = -20 | |||
| invul = None | |||
| description = Ryo jumps into the air and flies forward with his foot out, before spinning around to kick again and knock the opponent down. Useful as combo enders since they do good damage from a 2HP and will usually connect, but have a major downside in being charge moves. If you have charge for them, they're useful combo ending specials, RC specials, and just generally for risky approaches like a Tatsu. You specifically have to hold 1 or downback to charge these. | |||
}} | |||
}} | |||
=== <span class="invisible-header">Zanretsuken</span> === | |||
{{MoveData | |||
| name = Zanretsuken | |||
| input = 646P | |||
| subtitle = Rapid Punches | |||
| image = CVS2_Ryo_646P.PNG | |||
| caption = | |||
| linkname = Zanretsuken | |||
| data = | |||
{{AttackData-CvS2 | |||
| version = {{Motion|f}}{{Motion|b}}{{Motion|f}}+{{Icon-Capcom|LP}} | |||
| subtitle = | |||
| damage = 1400 | |||
| stun = 14 | |||
| cancel = None | |||
| guard = Mid | |||
| parry = High | |||
| startup = 9 | |||
| active = 6(3)6(3)6(3)5 | |||
| recovery = 16 | |||
| total = 59 | |||
| advHit = -DWN | |||
| advBlock = -16 | |||
| invul = None | |||
}} | |||
{{AttackData-CvS2 | |||
| header = no | |||
| version = {{Motion|f}}{{Motion|b}}{{Motion|f}}+{{Icon-Capcom|MP}} | |||
| subtitle = | |||
| damage = 1900 | |||
| stun = 19 | |||
| cancel = None | |||
| guard = Mid | |||
| parry = High | |||
| startup = 9 | |||
| active = 5(3)5(3)5(3)5(3)5(3)5(3)5(3)5 | |||
| recovery = 18 | |||
| total = 88 | |||
| advHit = -DWN | |||
| advBlock = -40 | |||
| invul = None | |||
}} | |||
{{AttackData-CvS2 | |||
| header = no | |||
| version = {{Motion|f}}{{Motion|b}}{{Motion|f}}+{{Icon-Capcom|HP}} | |||
| subtitle = | |||
| damage = 2400 | |||
| stun = 24 | |||
| cancel = None | |||
| guard = Mid | |||
| parry = High | |||
| startup = 9 | |||
| active = 4(2)4(2)4(2)4(2)4(2)4(2)4(2)4(2)4(2)4(2)4(2)4 | |||
| recovery = 18 | |||
| total = 97 | |||
| advHit = -DWN | |||
| advBlock = -47 | |||
| invul = None | |||
| description = A strange move where Ryo punches the air in front of him a lot. If it hits, the opponent is sucked into it and punched a bunch of times before being uppercut away. You can use this to catch obvious rolls or things like that, but for the most part, avoid using this. Ryo is stuck in the animation and can be punished after, and all versions are punishable on block. You have better combo options as well. | |||
}} | |||
}} | |||
=== <span class="invisible-header">Kyokugenryu Renbu Ken</span> === | |||
{{MoveData | |||
| name = Kyokugenryu Renbu Ken | |||
| input = 63214P | |||
| subtitle = Launcher, Combo Special | |||
| image = CVS2_Ryo_63214P.PNG | |||
| caption = | |||
| linkname = Kyokugenryu Renbuken | |||
| data = | |||
{{AttackData-CvS2 | |||
| version = {{Motion|63214}}+{{Icon-Capcom|LP}} | |||
| subtitle = | |||
| damage = 200x3+400 | |||
| stun = 2x3+4 | |||
| cancel = Super Jump | |||
| guard = Mid | |||
| parry = High | |||
| startup = 14 | |||
| active = 4 | |||
| recovery = 16 | |||
| total = 34 | |||
| advHit = -DWN | |||
| advBlock = -5 | |||
| invul = None | |||
}} | |||
{{AttackData-CvS2 | |||
| header = no | |||
| version = {{Motion|63214}}+{{Icon-Capcom|MP}} | |||
| subtitle = | |||
| damage = 200x3+500 | |||
| stun = 2x3+5 | |||
| cancel = Super Jump | |||
| guard = Mid | |||
| parry = High | |||
| startup = 14 | |||
| active = 4 | |||
| recovery = 19 | |||
| total = 37 | |||
| advHit = -DWN | |||
| advBlock = -8 | |||
| invul = None | |||
}} | |||
{{AttackData-CvS2 | |||
| header = no | |||
| version = {{Motion|63214}}+{{Icon-Capcom|HP}} | |||
| subtitle = | |||
| damage = 200x3+600 | |||
| stun = 2x3+6 | |||
| cancel = Super Jump | |||
| guard = Mid | |||
| parry = High | |||
| startup = 14 | |||
| active = 4 | |||
| recovery = 21 | |||
| total = 39 | |||
| advHit = -DWN | |||
| advBlock = -10 | |||
| invul = None | |||
| description = Ryo slides forward with a punch. The LP version stands in place, the HP version slides noticeably forward, and the MP version is a slight movement. While this is normally a proximity unblockable in classic Ryo's kit, in this game it is neither a proximity move or unblockable. Instead, this is your main combo special for damage and mixup potential. The 2nd hit of the uppercut portion can be cancelled into a super jump, where you can juggle into a j.HP for max damage or a j.236HP for a knockdown. In the corner, the j.HP juggle leads into a potent reset between his overhead, low, a shorthop HK, a throw, or just waiting. Midscreen, the reset isn't super valuable, but it is still max damage. Outside of combos, you can sometimes use the slide to punish things, but this is niche. | |||
}} | |||
}} | |||
=== <span class="invisible-header">Mouko Raijinsetsu</span> === | |||
{{MoveData | |||
| name = Mouko Raijinsetsu | |||
| input = 421P | |||
| subtitle = Overhead Special, Leaping Punch | |||
| image = CVS2_Ryo_421P.PNG | |||
| caption = | |||
| linkname = Mouko Raijinsetsu | |||
| data = | |||
{{AttackData-CvS2 | |||
| version = {{Motion|421}}+{{Icon-Capcom|LP}} | |||
| subtitle = | |||
| damage = 1200 | |||
| stun = 12 | |||
| cancel = None | |||
| guard = High | |||
| parry = High | |||
| startup = 27 | |||
| active = 5 | |||
| recovery = 23 | |||
| total = 55 | |||
| advHit = -DWN | |||
| advBlock = -8 | |||
| invul = Throw (Airborne) | |||
}} | |||
{{AttackData-CvS2 | |||
| header = no | |||
| version = {{Motion|421}}+{{Icon-Capcom|MP}} | |||
| subtitle = | |||
| damage = 1300 | |||
| stun = 13 | |||
| cancel = None | |||
| guard = High | |||
| parry = High | |||
| startup = 29 | |||
| active = 5 | |||
| recovery = 25 | |||
| total = 59 | |||
| advHit = -DWN | |||
| advBlock = -10 | |||
| invul = Throw (Airborne) | |||
}} | |||
{{AttackData-CvS2 | |||
| header = no | |||
| version = {{Motion|421}}+{{Icon-Capcom|HP}} | |||
| subtitle = | |||
| damage = 1400 | |||
| stun = 14 | |||
| cancel = None | |||
| guard = High | |||
| parry = High | |||
| startup = 30 | |||
| active = 8 | |||
| recovery = 26 | |||
| total = 64 | |||
| advHit = -DWN | |||
| advBlock = -14 | |||
| invul = Throw (Airborne) | |||
| description = Ryo leaps through the air with a flying chop. This is an overhead special, but sadly it is more than reactable. While it can hit as a surprise occassionally from neutral or as a cancel, you're left open to anti-airs, and if they block it they can usually punish you. Not very high damage either, though they do give a knockdown. You won't want to use this often, so that when you do, it can be as surprising as possible. | |||
}} | |||
}} | |||
== Super Moves == | == Super Moves == | ||
=== <span class="invisible-header">Haoh Shoh Koh Ken</span> === | |||
{{MoveData | |||
| name = Haoh Shoh Koh Ken | |||
| input = 641236P | |||
| subtitle = Fireball Super | |||
| image = CVS2_Ryo_641236P.PNG | |||
| caption = [https://twitter.com/KRISPYKAISER/status/1535160869684150272?t=p47dP5Op7tooE5IkwwigDQ&s=19 Did You Know] | |||
| linkname = Haoh Shoh Koh Ken | |||
| data = | |||
{{AttackData-CvS2 | |||
| version = {{Motion|f}}{{Motion|41236}}+{{Icon-Capcom|LP}} | |||
| subtitle = | |||
| damage = 2300 | |||
| stun = 0 | |||
| cancel = None | |||
| guard = Mid | |||
| parry = High | |||
| startup = 4:6 | |||
| active = Traveling | |||
| recovery = 45 | |||
| total = 55 | |||
| advHit = -DWN | |||
| advBlock = -9 | |||
| invul = 7 (Full) | |||
}} | |||
{{AttackData-CvS2 | |||
| header = no | |||
| version = {{Motion|f}}{{Motion|41236}}+{{Icon-Capcom|MP}} | |||
| subtitle = | |||
| damage = 3600 | |||
| stun = 0 | |||
| cancel = SP/SU | |||
| guard = Mid | |||
| parry = High | |||
| startup = 4:8 | |||
| active = Traveling | |||
| recovery = 46 | |||
| total = 58 | |||
| advHit = -DWN | |||
| advBlock = -7 | |||
| invul = 12 (Full) | |||
}} | |||
{{AttackData-CvS2 | |||
| header = no | |||
| version = {{Motion|f}}{{Motion|41236}}+{{Icon-Capcom|HP}} | |||
| subtitle = | |||
| damage = 5000 | |||
| stun = 0 | |||
| cancel = None | |||
| guard = Mid | |||
| parry = High | |||
| startup = 4:8 | |||
| active = Traveling | |||
| recovery = 47 | |||
| total = 59 | |||
| advHit = -DWN | |||
| advBlock = -2 | |||
| invul = 19 (Full) | |||
| description = A fast and massive fireball super. Great to punish people for trying to get around your meterless fireball, and to punish whiffs or anti-air bad jumps. Since Ryo is played in K-Groove, the level 3 version is a worthwhile reversal, as even if they block it you're fairly safe. They have to roll through to punish you, which leaves them open for a grab. Don't do this often as you spend all of your Rage for it, however. Can be used as a combo ender, but Ranbu is usually better and easier to input in combos. | |||
}} | |||
}} | |||
=== <span class="invisible-header">Ryuko Ranbu</span> === | |||
{{MoveData | |||
| name = Ryuko Ranbu | |||
| input = 2363214P | |||
| subtitle = Rush Super, Ranbu | |||
| image = CVS2_Ryo_2363214P.PNG | |||
| caption = | |||
| linkname = Ryuko Ranbu | |||
| data = | |||
{{AttackData-CvS2 | |||
| version = {{Motion|236}}{{Motion|63214}}+{{Icon-Capcom|LP}} | |||
| subtitle = | |||
| damage = 2700 | |||
| stun = 0 | |||
| cancel = None | |||
| guard = Mid | |||
| parry = High | |||
| startup = 4:4 | |||
| active = 18 | |||
| recovery = 22 | |||
| total = 48 | |||
| advHit = -DWN | |||
| advBlock = -25 | |||
| invul = 8 (Full) | |||
}} | |||
{{AttackData-CvS2 | |||
| header = no | |||
| version = {{Motion|236}}{{Motion|63214}}+{{Icon-Capcom|MP}} | |||
| subtitle = | |||
| damage = 3800 | |||
| stun = 0 | |||
| cancel = SP/SU | |||
| guard = Mid | |||
| parry = High | |||
| startup = 4:4 | |||
| active = 28 | |||
| recovery = 34 | |||
| total = 70 | |||
| advHit = -DWN | |||
| advBlock = -47 | |||
| invul = 14 (Full) | |||
}} | |||
{{AttackData-CvS2 | |||
| header = no | |||
| version = {{Motion|236}}{{Motion|63214}}+{{Icon-Capcom|HP}} | |||
| subtitle = | |||
| damage = 5400 | |||
| stun = 0 | |||
| cancel = None | |||
| guard = Mid | |||
| parry = High | |||
| startup = 4:4 | |||
| active = 38 | |||
| recovery = 36 | |||
| total = 82 | |||
| advHit = -DWN | |||
| advBlock = -59 | |||
| invul = 22 (Full) | |||
| description = Ryo leaps forward quickly before attacking his opponent with a barrage of attacks ending in a Kohou. Great damage combo ender and fireball punish, the fast travel time lets the level 3 version punish fireballs shockingly late. Solid anti-airs as well, with plenty of invuln and active frames. The level 1 version is a bit worthless, but acts as a useful combo ender in Grooves like N or at the end of a Custom Combo. In C-Groove, the level 2 version easily cancels into either Kyokugenryu Renbuken or a level 1 Ryuko Ranbu for solid damage. | |||
}} | |||
}} | |||
=== <span class="invisible-header">Heaven Glaze Punch</span> === | |||
{{MoveData | |||
| name = Heaven Glaze Punch | |||
| input = 236236P | |||
| subtitle = Stun Super | |||
| image = CVS2_Ryo_236236P.PNG | |||
| caption = | |||
| linkname = Heaven Glaze Punch | |||
| data = | |||
{{AttackData-CvS2 | |||
| version = {{Motion|236}}{{Motion|236}}+{{Icon-Capcom|P}} | |||
| subtitle = | |||
| damage = 3000 | |||
| stun = 80 | |||
| cancel = None | |||
| guard = Mid | |||
| parry = High | |||
| startup = 4:28 | |||
| active = 4 | |||
| recovery = 42 | |||
| total = 78 | |||
| advHit = -DWN | |||
| advBlock = -30 | |||
| invul = 32 (Full) | |||
| description = An interesting level 3 super, Ryo winds up before stepping forward with a massive straight punch. Does a ridiculous 80 stun, immediatelly stunning low stun characters and bringing mid or high stun characters close. Sadly, it also is cursed with massive startup time, horrible whifflag, and being -30 on block. Despite what you may think, this only barely scratches the guard bar too, so no funky guard crush strings. Because of this, Heaven Glaze Punch is essentially a high risk, high reward, expensive guess super. If they do something laggy, the massive invuln and decent reach will likely punish it, namely a fireball read. However, should you mistime it or guess wrong, they get whatever they want to punish you. Use with caution, and keep in mind Ryo's other two supers are very good in comparison to this. | |||
}} | |||
}} | |||
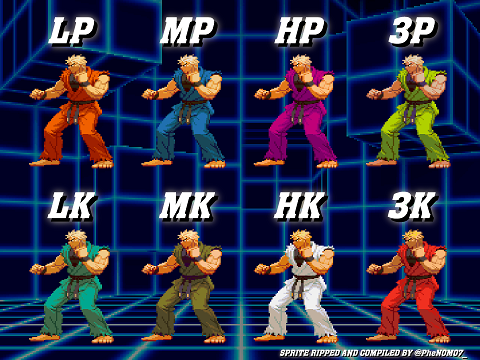
= | == Colors == | ||
[[File:Ryo_CvS2_colors.png]] | |||
{{Navbox-CvS2}} | |||
[[Category:Capcom vs SNK 2]] | |||
[[Category:Ryo]] | |||
Latest revision as of 12:55, 13 March 2024
Introduction
Story
Ryo Sakazaki is the son of Takuma Sakazaki, master of Kyokugenryu Karate. As such, Ryo inherited his fathers passion, and became the new modern day Kyokugenryu master. He teaches Kyokugenryu at his local dojo, alongside his rival and best friend Robert Garcia and his little sister and martial arts prodigy Yuri Sakazaki. He lives in the same town as Terry, South Town, and was around before the events of Fatal Fury. In fact, his debut game, Art of Fighting, is one of the earliest in the broader SNK timeline. It tells the story of Yuri being kidnapped by Geese Howard, who was just starting out at the time, and how Ryo and Robert fight King to rescue her. Ryo is also the very first and original champion of the King of Fighters tournament, and the first fighting game crossover character in history when he became a secret boss in Fatal Fury Special.
Gameplay
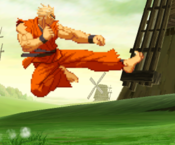
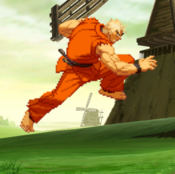
Ryo, on the surface, is very similar to the Capcom shotos. For the most part, he plays like them too. However, he has some unique tools, like an air fireball that can end his combos, a launcher special for fun resets, and a charge kick move for combos. He also has very strong level 3 supers, with a powerful fireball super in Haoh Sho Ko Ken and a great rush super in Ryuko Ranbu. He has a special level 3 with Heaven Glaze Punch, which is an unsafe and long startup super that does massive stun if it hits. Ryo works best in neutral, like any good shoto, throwing fireballs and using his good normals and DP anti-air to control space.
He does suffer some weaknesses however. He is much slower than the average shoto, with a low overall jump arc and a slow dash and run. This forces him to rely on his neutral more, and his fireball more. While he does have a solid fireball and plenty of ways to deal with people who try to challenge his fireball, CvS2 has roll cancels. These can blow up fireballs on a solid read, and forces Ryo to be very thoughtful about applying his strongest tool.
Ryo is a shoto, but takes the archetype and spins it a bit more than the main three shotos do by having more unique specials and different weaknesses. If you like solid fireballs, good neutral, and don't mind a slow or meter hungry guy, Ryo is a good pick in the right Grooves.
Groove Selection
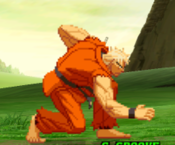
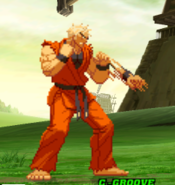
Best - K: For the most part, you'll usually see Ryo in K-Groove. Rage ups his damage from pokes and fireballs, and access to his scary level 3's makes for a solid neutral powerhouse type character. JD gives him a good way to deal with opponents zoning, and a way to generate a ton of Rage meter without needing to get hit. Run and hop aid his low mobility and give him shorthop HK, which is one of his best moves.
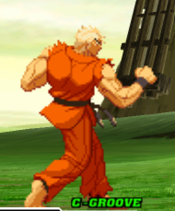
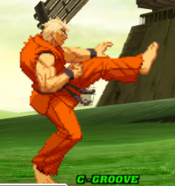
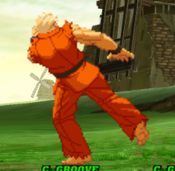
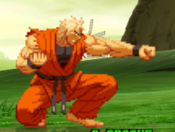
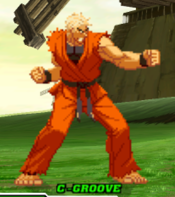
Useful - C/N/S: C-Ryo is right behind K-Ryo. While he sacrifices a lot of mobility and the poking and comeback power of Rage, C-Ryo gets a lot more access to his useful supers. He also has versatile uses for level 2 cancels, mostly from level 2 Ranbu. The loss of mobility hurts a lot, and makes C-Ryo play even more patient than before, but he does get roll cancels which are always nice. N-Ryo is the opposite, getting all the mobility of K-Ryo and even rolls but losing easy access to his powerful supers. S-Ryo is surprisingly useful, as he plays slow enough that charging isn't too bad, and infinite level 1 Haoh Sho Koh Ken is as funny as it sounds. He gets run and hop too, but still has to contend with S-Grooves weak overall mechanics.
Worst - A/P: A-Groove gives Ryo access to Custom Combos and some of the more powerful subsystems like Alpha Counter, but still lacks mobility, and you'll never be using a super as you would always rather Custom Combo. P-Ryo is very weak, as Ryo doesn't have the greatest meterless punish game without charge, and you'll rarely have super if at all.
|
Ryo is a versatile all-rounder with a powerful fireball and anti-airs. He also has unique combos with his launcher, and very useful and damaging supers. He suffers from being a fireball centric character in CvS2, and his slow mobility and lacking punishes without meter. Ryo is best in K-Groove. Difficulty: Pretty EasyTier: B- |
|
| Pros | Cons |
|
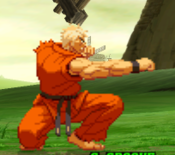
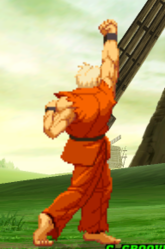
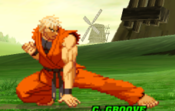
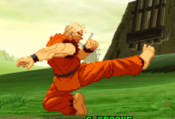
|
Players to Watch
| Name | Country | Groove | Accounts | Notes |
|---|---|---|---|---|
| Wadatsumi | Japan | C-Groove | Twitter: @wadatsunami | Uses pure fundamentals to get by with a weak character. Lands damaging combos when the time comes. Sample Match |
| Rai | Japan | K-Groove | Twitter: @raikapibara | A Ryo apologist. Uses his great game sense to make him look like Ryu a little bit. Sample Match |
Normal Moves
Far Normals
5LP
5MP
5HP
5LK
5MK
5HK
Close Normals
clLP
clMP
clHP
clLK
clMK
clHK
Crouching Normals
2LP
2MP
2HP
2LK
2MK
2HK
Jumping Normals
jLP
jMP
jHP
jLK
jMK
jHK
Command Normals
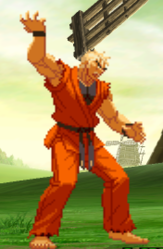
Hyouchuu Wari
Throws
Tana Otoshi
Tomoe Nage
Special Moves
Ko-Ou Ken
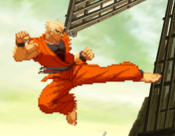
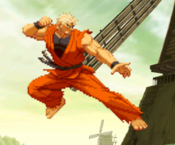
Air Ko-Ou Ken
Kohou
Hien Shippu Kyaku
Zanretsuken
Kyokugenryu Renbu Ken
Mouko Raijinsetsu
Super Moves
Haoh Shoh Koh Ken
Ryuko Ranbu
Heaven Glaze Punch
Colors
