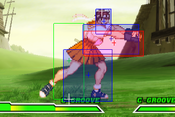
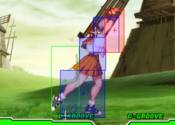
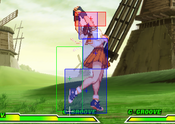
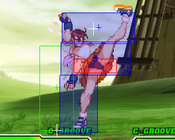
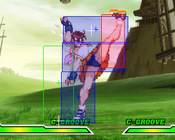
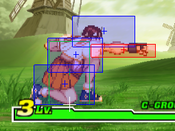
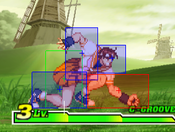
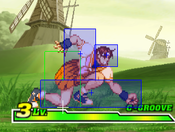
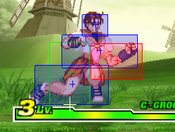
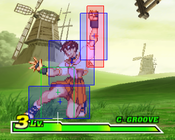
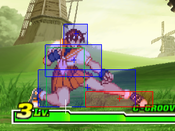
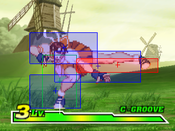
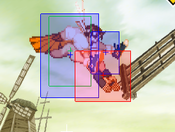
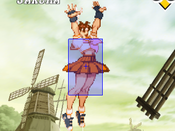
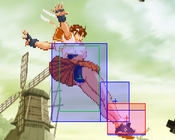
JtheSaltyy (talk | contribs) No edit summary |
|||
| (86 intermediate revisions by 8 users not shown) | |||
| Line 1: | Line 1: | ||
= Introduction = | == Introduction == | ||
{{CvS2 Character Subnav|char=Sakura|short=Sakura}} | |||
<div> | |||
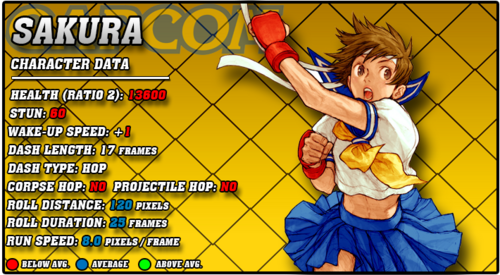
[[File:CVS2_Sakura_Data.png|right|500px]] | |||
== Story == | |||
'''Sakura Kasugano''' is a Japanese high-school student with a fixation on her favorite fighter, Ryu. She lived a fairly normal high-school life, hanging out with her friends Hinata Wakaba and Natsu Ayuhara, until she saw Ryu fighting one day on the way home from school. She immediately became fascinated, and began training to fight like he does, emulating many of his techniques. She used her newfound skill to beat up the older kids who bully her and her friends, but eventually sets her sights on becoming Ryu's student. She frequently skips class to try and hunt him down, and on the way, has her own journey where she makes friends and enemies from around the world. Namely, she makes a rival in Karin Kanzuki. As she grows up from her childhood fixation on fighting and her idolization turned crush on Ryu, she often finds herself asking if fighting forever is truly a worthwhile use of ones life. | |||
= | == Gameplay == | ||
Sakura is part of the big top tiers of CvS2, usually placed somewhere in the top 5 or right outside it at 6th. Like many of the CvS2 top tiers, her ability to control neutral is amazing, with her strong buttons both on the ground and in the air. 5LK, 5MP, 5HK, 2MK, and all of her jump kicks are stellar and versatile buttons that allow her to poke safely at the enemy and get them where she wants them. After she wins neutral, Sakura has very high natural damage, ending combos in her 623P Shouoken uppercuts. She also notably has some of the most annoying roll cancels in the game to fight, with her RC 214K Shunpukyaku tatsus acting as incredibly hard to contest fireball callouts with great reward and her RC 236P Hadosho energy waves being invincible and safe pokes. | |||
Her air mobility is no joke either, sporting the classic shoto air tatsu in j.214K, but also having a powerful divekick in j.236K Oukakyaku. Mixed with her amazing buttons in the air, this makes anti-airing her properly almost as hard as whiff punishing her properly, and when mixed with her amazing RC specials, makes Sakura a neutral nightmare. She also has one of the most powerful Custom Combos in the game, her infamous Shoshosho combo. This is very hard to properly execute, but when done right, makes A-Sakura a terrifying beast of a punish character who can eat your fireball or whiffed poke and spit out 9k or more damage from it. As if contesting her properly wasn't hard enough, the threat of a CC Shoshosho makes it nearly impossible, and Sakura gets to run her game for as long as she wants to. | |||
=== Groove Selection === | |||
'''Best - A:''' While Sakura is fairly strong overall, A-Sakura gives her everything she wants to win and more. Having a roll gives her access to RC Tatsu and RC Fireball, making her neutral much more annoying. The real attractive factor is her Custom Combo, Shoshosho. By simply doing repeated 623HP's, Sakura can dish out massive damage and melt through guard bars. The stellar range on this allows her to activate from ridiculously far away and punish whatever the opponent did, whether that was whiff a button or throw a projectile. While her anti-air CC isn't quite as strong, it's still plenty good. A-Sakura is often seen as a point character on plenty of A-Groove teams, thanks to her amazing matchup spread vs other point characters, her strong meter build, and her ability to play without relying on meter while still excelling at using it. | |||
'''Useful - C/N/K:''' C-Sakura is likely the second best way to play her. Her level 2 combos, especially using her 214HK Tatsu links, do massive damage and are very flashy to pull off. They are quite difficult however, and in general, C-Sakura is going to be forced to learn Sakura's more difficult links and master the 1 frame link from her 214HK into her 2LP to make her level 2's hurt. C-Sakura plays overall similar enough to A-Sakura, with a different way to use meter. N-Sakura changes the formula a bit, getting much more aggressive potential with run and hop. While she can still roll cancel specials for maximum neutral annoyance, she can also run in or hop over lows, making it even more difficult to directly contest her. She still plays her normal game, similar to A-Sakura, but gets more access to scary mixups with hop crossups and empty hop low/throw, allowing her to vortex opponents very effectively. K-Sakura plays much like N-Sakura, but without rolls. Off of her high damage combos, she often gets enough time to mix the opponent between a hop HK on the same side and a crossup hop MK, or she can always empty hop and go low or throw. Rage gives her a great damage buff, and her level 3 236236K Midare Zakura lets her end Rage combos with huge damage. K-Sakura has to sacrifice rolls however, but she can still play a solid offensive neutral, and her mixups are no joke. | |||
'''Worst - S/P:''' While listed here as worst, neither of these Grooves are necessarily bad for her, and Sakura can still shine in them. They just fit her the least. S-Sakura is one of the better S-Groove characters, mostly thanks to her ability to play without meter available. She can still do her normal and solid neutral gameplan, and even gets a run and hop to solidify her offense more. Charging is a pain, but since Sakura is hard to contest, she can charge a bit more safely after instilling the fear of her buttons into the opponent. However, this is much less effective without rolls, and while Sakura doesn't require meter at all times, it does make her quite a lot scarier when she has it. Infinite level 1's do allow her to use her level 1 236236P Shinku Hadouken to zone a bit more effectively however. P-Sakura is a fairly solid P-Groove character, especially because Sakura can punish pretty reliably off of a good parry. Lack of rolls hurts a lot, and having only hop to make up for it instead of both hop and run is a hard trade-off. P-Sakura relies on you having solid parry ability, converting those parries into a knockdown and a blender of hop mixups, and cashing out on the one or maybe even two level 3 supers you get a round. | |||
{{StrengthsAndWeaknesses | |||
|intro= | |||
--------------------------- | |||
'''Sakura''' is a top-tier powerhouse of a shoto, with some of the best neutral control in the game. She can control space with big buttons, great air mobility with her divekick and air Tatsus, and her incredible roll cancels. Once she gets meter, she can cash it out into big damage. Sakura is best in '''A-Groove'''. | |||
'''Difficulty''': Hard (A-Groove), Medium (Any other Groove)<br>'''Tier''': S | |||
|pros= | |||
* '''Neutral:''' Sakura has incredibly powerful neutral options, from a suite of great buttons and pokes to useful mobility for repositioning and damaging anti-air ability | |||
* '''Damage:''' Her 623HP is a stellar combo ender that connects from very far out, allowing her high and consistent meterless damage. With meter, her punishes skyrocket into being some of the highest damage in the game, especially with Custom Combo | |||
* '''Roll Cancel:''' Roll Cancel Tatsus are safe or even plus on block neutral skips that allow Sakura to get in immediately against players who won't try to avoid them. Roll Cancel Fireballs are fast and safe on block pokes that can't be contested with buttons and must be jumped over, and even then all your opponent can punish with is a throw, assuming they can even get there in time | |||
* '''Mixups:''' With a good overhead, a very strong throw, a great crossup and multiple good jump-ins, and one of the better low confirms in the game, Sakura can vortex opponents very easily into death with just a few good guesses | |||
* '''Shoshosho:''' Sakura's infamous CC, the Shoshosho combo, does massive damage and works from anywhere on the screen against a grounded opponent. It also guard crushes, meaning even if they block, they still get hit. This is a very strong tool, and the reason A-Sakura is such a great top tier. The execution is difficult, but eventually mastering this is key to playing Sakura to her highest potential | |||
|cons= | |||
* '''Zoning:''' Without a true fireball or invincible reversal, Sakura struggles to zone opponents out without maintaining the range to utilize her powerful buttons, which is only about midrange | |||
* '''Execution:''' Between her Shoshosho being fast repetitive 623 motions, her 1 frame links from 214HK, fast cancels from her lights, and multiple specials that need roll cancelling, Sakura has to master some difficult execution to really shine | |||
* '''Low Health:''' Very low health and stun means a few good hits can knock out her. | |||
}} | |||
=== Players to Watch === | |||
{| class="wikitable" | |||
|- | |||
! Name !! Country !! Groove !! Accounts !! Notes | |||
|- | |||
| YSK || Japan || A-Groove || Twitter: @yosuke0815 || The point character of YSK's dominant A-Yare (Sakura Bison Blanka) team. Plays with a decent amount of movement and tries to meter build. <br> [https://youtu.be/dyAI1fS32_M?t=92 Sample Match] | |||
|- | |||
| Uma || Japan || A-Groove || Twitter: @umaare || An OG player and an A-Yare team user. <br> [https://youtu.be/MPrMeTBEU5E Sample Match] | |||
|- | |||
| Yane || Japan || S-Groove || Twitter: @yanechudan || Being a skilled S-Groover, Yane is very well versed with making S-Sakura dominate neutral and is especially threatening with desperation mode. <br> [https://youtu.be/PeUNHW8Pu4M?t=11238 Sample Match] | |||
|- | |||
|} | |||
<br><br> | |||
== Normal Moves == | == Normal Moves == | ||
=== Far Standing Normals === | |||
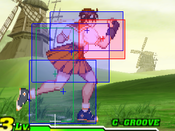
<span class="invisible-header">5LP</span> | |||
{{MoveData | |||
| name = Stand Jab | |||
| input = 5LP | |||
| subtitle = {{Icon-Capcom|LP}} | |||
| image =CVS2_SAKURA_LP.png | |||
| caption = Light Punch | |||
| linkname = 5LP | |||
| data = | |||
{{AttackData-CvS2 | |||
| version = | |||
| subtitle = {{Icon-Capcom|LP}} | |||
| damage = 200 | |||
| stun = 2 | |||
| cancel = RF,SP,SU | |||
| guard = mid | |||
| parry = mid | |||
| startup = 2 | |||
| active = 4 | |||
| recovery = 5 | |||
| total = 11 | |||
| advHit = +8 | |||
| advBlock = +8 | |||
| invul = none | |||
| description = | |||
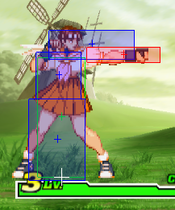
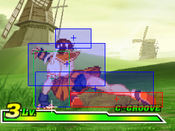
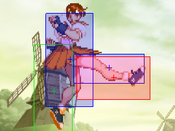
*One of the best jabs in the game with a 2 frame start up and a massive +8 on contact. | |||
*Characters who can't duck Sakura's jab have a very hard time dealing with walk fwd jab similarly to Sagat, and the list of who can't duck it is the same. | |||
*Can also be used as a quick emergency anti-air. | |||
}} | |||
}} | |||
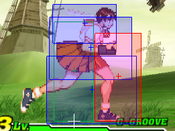
<span class="invisible-header">5MP</span> | |||
{{MoveData | |||
| name = Stand Strong | |||
| input = 5MP | |||
| subtitle = {{Icon-Capcom|MP}} | |||
| image =CVS2_SAKURA_MP.png | |||
| caption = Medium Punch | |||
| linkname = 5MP | |||
| data = | |||
{{AttackData-CvS2 | |||
| version = | |||
| subtitle = {{Icon-Capcom|MP}} | |||
| damage = 800 | |||
| stun = 8 | |||
| cancel = SP,SU | |||
| guard = mid | |||
| parry = mid | |||
| startup = 5 | |||
| active = 5 | |||
| recovery = 12 | |||
| total = 22 | |||
| advHit = +3 | |||
| advBlock = +3 | |||
| invul =none | |||
| description = | |||
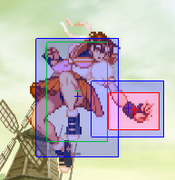
*One of your main meterbuild tools. | |||
*Works as an anti-air in a similar vein to 5LP. | |||
*One of your main links from 5LP from farther away when cl.HP is out of reach. | |||
}} | |||
}} | |||
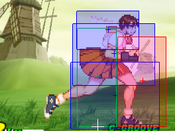
<span class="invisible-header">5HP</span> | |||
{{MoveData | |||
| name = Stand Fierce | |||
| input = 5HP | |||
| subtitle = {{Icon-Capcom|HP}} | |||
| image = .png | |||
| caption = Heavy Punch | |||
| image2 =CVS2_SAKURA_HP.png | |||
| caption2 = Heavy Punch | |||
| linkname = 5HP | |||
| data = | |||
{{AttackData-CvS2 | |||
| version = | |||
| subtitle = {{Icon-Capcom|HP}} | |||
| damage =1200 | |||
| stun = 12 | |||
| cancel = SU | |||
| guard = mid | |||
| parry = mid | |||
| startup = 5 | |||
| active = 3(2)5 | |||
| recovery =23 | |||
| total = | |||
| advHit = +1 | |||
| advBlock = +1 | |||
| invul =none | |||
| description = | |||
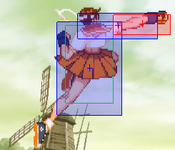
*Not super useful in any particular way. Can be used as an anti air similarly to her other stand punches but it does not do much as a poke or anything else. | |||
}} | |||
}} | |||
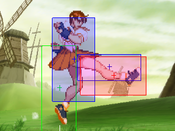
<span class="invisible-header">5LK</span> | |||
{{MoveData | |||
| name = Stand Short | |||
| input = 5LK | |||
| subtitle = {{Icon-Capcom|LK}} | |||
| image =CVS2_SAKURA_LK.png | |||
| caption = Light Kick | |||
| linkname = 5LK | |||
| data = | |||
{{AttackData-CvS2 | |||
| version = | |||
| subtitle = {{Icon-Capcom|LK}} | |||
| damage = 300 | |||
| stun = 3 | |||
| cancel = SP, SU | |||
| guard = mid | |||
| parry = mid | |||
| startup = 3 | |||
| active = 5 | |||
| recovery = 13 | |||
| total = 21 | |||
| advHit = -3 | |||
| advBlock = -3 | |||
| invul = | |||
| description = | |||
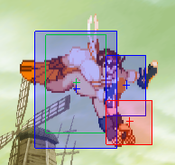
*Your main cancel into DP in combos. | |||
*The effectiveness of 5LK as a poke is slightly reduced as this is actually her close LK in Alpha 2, her far LK went much farther and acted as a better poke. Here, you can use it to throw out with little risk but the gimped range limits it to up-close interactions. | |||
}} | |||
}} | |||
<span class="invisible-header">5MK</span> | |||
{{MoveData | |||
| name = Stand Forward | |||
| input = 5MK | |||
| subtitle = {{Icon-Capcom|MK}} | |||
| image =CVS2_SAKURA_MK.png | |||
| caption = Medium Kick | |||
| linkname = 5MK | |||
| data = | |||
{{AttackData-CvS2 | |||
| version = | |||
| subtitle = {{Icon-Capcom|MK}} | |||
| damage = 800 | |||
| stun = 8 | |||
| cancel = SU | |||
| guard = mid | |||
| parry = mid | |||
| startup = 7 | |||
| active = 7 | |||
| recovery = 21 | |||
| total = 35 | |||
| advHit = -8 | |||
| advBlock = -8 | |||
| invul = none | |||
| description = | |||
*Useless normal. | |||
}} | |||
}} | |||
<span class="invisible-header">5HK</span> | |||
{{MoveData | |||
| name = Stand Roundhouse | |||
| input = 5HK | |||
| subtitle = {{Icon-Capcom|HK}} | |||
| image =CVS2_SAKURA_HK.png | |||
| caption = Heavy Kick | |||
| linkname = 5HK | |||
| data = | |||
{{AttackData-CvS2 | |||
| version = | |||
| subtitle = {{Icon-Capcom|HK}} | |||
| damage = 1000 | |||
| stun = 10 | |||
| cancel = none | |||
| guard = mid | |||
| parry = mid | |||
| startup = 8 | |||
| active = 5 | |||
| recovery = 17 | |||
| total = 30 | |||
| advHit = +2 | |||
| advBlock = +2 | |||
| invul = none | |||
| description = | |||
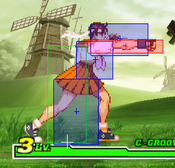
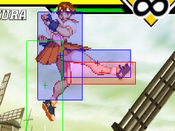
*Infamous button. This is your main poke in neutral for any given matchup. It has a ton of range and is safe on block, but more importantly is also safe on JD (it is around -2) so in most cases you're safe from punishment when using this move. | |||
*It is most effectively used at around max range. This way you can check any oncoming pokes without getting outsped by quicker shorter ranged pokes. | |||
}} | |||
}} | |||
=== Close Standing Normals === | |||
<span class="invisible-header">cl5MP</span> | |||
{{MoveData | |||
| name = Close Stand Strong | |||
| input = cl5MP | |||
| subtitle = Close {{Icon-Capcom|MP}} | |||
| image =CVS2_SAKURA_CMP.png | |||
| caption = Medium Punch | |||
| linkname = cl5MP | |||
| data = | |||
{{AttackData-CvS2 | |||
| version = | |||
| subtitle = Close{{Icon-Capcom|MP}} | |||
| damage = 700 | |||
| stun = 7 | |||
| cancel = SP,SU | |||
| guard = mid | |||
| parry = mid | |||
| startup = 4 | |||
| active = 5 | |||
| recovery = 11 | |||
| total = 20 | |||
| advHit = +4 | |||
| advBlock = +4 | |||
| invul = none | |||
| description = | |||
* Mainly a meaty tool, does not do much outside of that. | |||
}} | |||
}} | |||
<span class="invisible-header">cl5HP</span> | |||
{{MoveData | |||
| name = Close Stand Fierce | |||
| input = cl5HP | |||
| subtitle = Close {{Icon-Capcom|HP}} | |||
| image =CVS2_SAKURA_CHP_1.png | |||
| caption = | |||
| image2 =CVS2_SAKURA_CHP_2.png | |||
| caption2 = | |||
| image3 =CVS2_SAKURA_CHP_3.png | |||
| caption3 = | |||
| linkname = cl5HP | |||
| data = | |||
{{AttackData-CvS2 | |||
| version = | |||
| subtitle = Close{{Icon-Capcom|HP}} | |||
| damage = 1100, 900 | |||
| stun = 11, 9 | |||
| cancel = SP,SU; SU | |||
| guard = mid | |||
| parry = mid | |||
| startup = 3 | |||
| active = 8 | |||
| recovery = 27 | |||
| total = 38 | |||
| advHit = -11 | |||
| advBlock = -11 | |||
| invul = none | |||
| description = | |||
*Your much higher damage cancel into DP/super. 5LK is more common to see but cl.HP is the go-to for optimal damage. | |||
*Links from 2LP/5LP easily. | |||
*Also a great anti-crossup move as it hits above and slightly behind, so you can use it later than some other cl.HP anti-crossup type normals. | |||
}} | |||
}} | |||
<span class="invisible-header">cl5HK</span> | |||
{{MoveData | |||
| name = Close Stand Roundhouse | |||
| input = cl5HK | |||
| subtitle = Close{{Icon-Capcom|HK}} | |||
| image =CVS2_SAKURA_CHK_1.png | |||
| caption = Heavy Kick | |||
| image2 =CVS2_SAKURA_CHK_2.png | |||
| caption2 = Heavy Kick | |||
| linkname = cl5HK | |||
| data = | |||
{{AttackData-CvS2 | |||
| version = | |||
| subtitle = Close{{Icon-Capcom|HK}} | |||
| damage = 1200, 1000 | |||
| stun = 12, 10 | |||
| cancel = SP, SU; SU | |||
| guard = mid | |||
| parry = mid | |||
| startup = 4 | |||
| active = 7 | |||
| recovery = 23 | |||
| total = 34 | |||
| advHit = -6 | |||
| advBlock = -6 | |||
| invul = N/A | |||
| description = | |||
* Deals more damage than cl.HP at the cost of an extra startup frame. | |||
* Has a lot shorter range than cl.HP, so cl.HP is generally used for combos over this. | |||
* Can be used as an early up-close anti-air. It can't hit very anti-crossup like cl.HP can but it hits at an angle slightly in front. | |||
}} | |||
}} | |||
=== Crouching Normals === | |||
<span class="invisible-header">2LP</span> | |||
{{MoveData | |||
| name = Crouching Jab | |||
| input = 2LP | |||
| subtitle = {{Motion|d}}{{Icon-Capcom|LP}} | |||
| image =CVS2_SAKURA_2LP.png | |||
| caption = Crouching Light Punch | |||
| linkname = 2LP | |||
| data = | |||
{{AttackData-CvS2 | |||
| version = | |||
| subtitle = | |||
| damage = 200 | |||
| stun = 2 | |||
| cancel = RF, SP, SU | |||
| guard = mid | |||
| parry = mid | |||
| startup = 3 | |||
| active = 4 | |||
| recovery = 6 | |||
| total = 13 | |||
| advHit = +7 | |||
| advBlock = +7 | |||
| invul = none | |||
| description = | |||
* Great 2LP, it isn't 2-frame like 5LP but is still +7 on contact. You can link into many optimal cancel options easily. | |||
* Outside of its great frame advantage, 2LK is generally the preferred low button. | |||
}} | |||
}} | |||
<span class="invisible-header">2MP</span> | |||
{{MoveData | |||
| name = Crouching Strong | |||
| input = 2MP | |||
| subtitle = {{Motion|d}}{{Icon-Capcom|MP}} | |||
| image =CVS2_SAKURA_2MP_1.png | |||
| caption = Medium Punch | |||
| image2 =CVS2_SAKURA_2MP_2.png | |||
| caption2 = Medium Punch | |||
| linkname = 2MP | |||
| data = | |||
{{AttackData-CvS2 | |||
| version = | |||
| subtitle = | |||
| damage = 800 | |||
| stun = 8 | |||
| cancel = SP,SU | |||
| guard = mid | |||
| parry = mid | |||
| startup = 4 | |||
| active = 4 | |||
| recovery = 21 | |||
| total = 29 | |||
| advHit = -5 | |||
| advBlock = -5 | |||
| invul = N/A | |||
| description = | |||
* Decent low-crush normal, but can be tricky to actually stuff low pokes with it at times. | |||
* Sometimes used as a cancel on block into Hadoken or Tatsu. | |||
}} | |||
}} | |||
<span class="invisible-header">2HP</span> | |||
{{MoveData | |||
| name = Crouching Fierce | |||
| input = 2HP | |||
| subtitle = {{Motion|d}}{{Icon-Capcom|HP}} | |||
| image =CVS2_SAKURA_2HP_1.png | |||
| caption = Heavy Punch | |||
| image2 =CVS2_SAKURA_2HP_2.png | |||
| caption2 = | |||
| linkname = 2HP | |||
| data = | |||
{{AttackData-CvS2 | |||
| version = | |||
| subtitle = | |||
| damage = 1100, 800 | |||
| stun = 11, 8 | |||
| cancel = SP,SU; SU | |||
| guard = mid | |||
| parry = mid | |||
| startup = 3 | |||
| active = 11 | |||
| recovery = 26 | |||
| total = 40 | |||
| advHit = -13 | |||
| advBlock = -13 | |||
| invul = N/A | |||
| description = | |||
* Also used as a cancel into DP/super if you are not sure if proximity distance is close enough. | |||
* Mainly used as one of your go-to anti-airs, similarly to other shoto 2HPs. | |||
}} | |||
}} | |||
<span class="invisible-header">2LK</span> | |||
{{MoveData | |||
| name = Crouching Short | |||
| input = 2LK | |||
| subtitle = {{Motion|d}}{{Icon-Capcom|LK}} | |||
| image =CVS2_SAKURA_2LK.png | |||
| caption = Crouching Light Kick | |||
| linkname = 2LK | |||
| data = | |||
{{AttackData-CvS2 | |||
| version = | |||
| subtitle = | |||
| damage = 200 | |||
| stun = 2 | |||
| cancel = RF, SP, SU | |||
| guard = low | |||
| parry = low | |||
| startup = 3 | |||
| active = 4 | |||
| recovery = 8 | |||
| total = +3 | |||
| advHit = +3 | |||
| advBlock = | |||
| invul =N/A | |||
| description = | |||
* Your go-to combo starter and pressure tool. It is +3 which is not nearly as much as 2LK but it hits low. | |||
* Chains into itself and 5LK for a very easy BnB. | |||
}} | |||
}} | |||
<span class="invisible-header">2MK</span> | |||
{{MoveData | |||
| name = Crouching Forward | |||
| input = 2MK | |||
| subtitle = {{Motion|d}}{{Icon-Capcom|MK}} | |||
| image =CVS2_SAKURA_2MK.png | |||
| caption = Crouching Medium Kick | |||
| linkname = 2MK | |||
| data = | |||
{{AttackData-CvS2 | |||
| version = | |||
| subtitle = | |||
| damage = 700 | |||
| stun = 7 | |||
| cancel = SU | |||
| guard = low | |||
| parry = low | |||
| startup = 4 | |||
| active = 4 | |||
| recovery = 24 | |||
| total = 32 | |||
| advHit = -8 | |||
| advBlock = -8 | |||
| invul =N/A | |||
| description = | |||
* A pretty decent poke in the vein of Ryu's iconic 2MK, but it's subtely worse. -8 on contact and no special cancel makes its utility much more limited | |||
* At max range is where this poke is best used, as the pushback makes the fact that it is -8 a nonfactor. 4 frame startup and a lot of range is still very valuable in CvS2 even if the poke is unsafe. | |||
}} | |||
}} | |||
<span class="invisible-header">2HK</span> | |||
{{MoveData | |||
| name = Crouching Roundhouse | |||
| input = 2HK | |||
| subtitle = {{Motion|d}}{{Icon-Capcom|HK}} | |||
| image =CVS2_SAKURA_2HK.png | |||
| caption = Crouching Heavy Kick | |||
| linkname = 2HK | |||
| data = | |||
{{AttackData-CvS2 | |||
| version = | |||
| subtitle = | |||
| damage = 1000 | |||
| stun = 10 | |||
| cancel = SU | |||
| guard = low | |||
| parry = low | |||
| startup = 6 | |||
| active = 3 | |||
| recovery = 35 | |||
| total = 44 | |||
| advHit = KND | |||
| advBlock = -14 | |||
| invul = | |||
| description = | |||
* A basic sweep, but has no special cancel so it is limited to long range punishes. | |||
}} | |||
}} | |||
=== Air Normals === | |||
<span class="invisible-header">8LP</span> | |||
{{MoveData | |||
| name = Jumping Jab | |||
| input = 8LP | |||
| subtitle = {{Motion|ub}},{{Motion|u}},or {{Motion|uf}}+{{Icon-Capcom|LP}} | |||
| image =CVS2_SAKURA_JLP.png | |||
| caption = Jumping Light Punch | |||
| linkname = 8LP | |||
| data = | |||
{{AttackData-CvS2 | |||
| version = | |||
| subtitle = | |||
| damage = 500 | |||
| stun = 5 | |||
| cancel = | |||
| guard = | |||
| parry = | |||
| startup = 3 | |||
| active = 22 | |||
| recovery = | |||
| total = | |||
| advHit = | |||
| advBlock = | |||
| invul = | |||
| description = | |||
* Decent air-to-air, but is outclassed by j.LK. | |||
}} | |||
}} | |||
<span class="invisible-header">8MP</span> | |||
{{MoveData | |||
| name = Jumping Strong | |||
| input = 8MP | |||
| subtitle = {{Motion|ub}},{{Motion|u}},or {{Motion|uf}}+{{Icon-Capcom|MP}} | |||
| image =CVS2_SAKURA_JMP.png | |||
| caption = Medium Punch | |||
| linkname = 8MP | |||
| data = | |||
{{AttackData-CvS2 | |||
| version = | |||
| subtitle = {{Motion|ub}},{{Motion|u}},or {{Motion|uf}}+{{Icon-Capcom|MP}} | |||
| damage = 800 | |||
| stun = 8 | |||
| cancel = | |||
| guard = | |||
| parry = | |||
| startup = 4 | |||
| active = 8 | |||
| recovery = | |||
| total = | |||
| advHit = | |||
| advBlock = | |||
| invul = | |||
| description = | |||
* Good to use as an instant jump anti-air. | |||
}} | |||
}} | |||
<span class="invisible-header">8HP</span> | |||
{{MoveData | |||
| name = Jumping Fierce | |||
| input = 8HP | |||
| subtitle = {{Motion|ub}},{{Motion|u}},or {{Motion|uf}}+{{Icon-Capcom|HP}} | |||
| image =CVS2_SAKURA_JHP.png | |||
| caption = Heavy Punch | |||
| linkname = 8HP | |||
| data = | |||
{{AttackData-CvS2 | |||
| version = | |||
| subtitle = | |||
| damage = 1100 | |||
| stun = 11 | |||
| cancel = | |||
| guard = | |||
| parry = | |||
| startup = 7 | |||
| active = 5 | |||
| recovery = | |||
| total = | |||
| advHit = | |||
| advBlock = | |||
| invul = | |||
| description = | |||
* One of your main jump-ins. | |||
}} | |||
}} | |||
<span class="invisible-header">8LK</span> | |||
{{MoveData | |||
| name = Jumping Short | |||
| input = 8LK | |||
| subtitle = {{Motion|ub}},{{Motion|u}},or {{Motion|uf}}+{{Icon-Capcom|LK}} | |||
| image =CVS2_SAKURA_JLK.png | |||
| caption = Light Kick | |||
| linkname = 8LK | |||
| data = | |||
{{AttackData-CvS2 | |||
| version = | |||
| subtitle = | |||
| damage = 400 | |||
| stun = 4 | |||
| cancel = | |||
| guard = | |||
| parry = | |||
| startup = 4 | |||
| active = 26 | |||
| recovery = | |||
| total = | |||
| advHit = | |||
| advBlock = | |||
| invul = | |||
| description = | |||
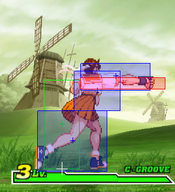
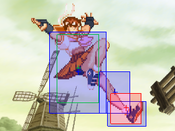
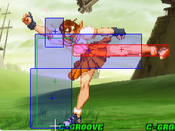
* The hitbox doesn't do the incredible range of this move justice. this move gives sakura phenominal air to air and as a jump in, as it can let her jump in from 2/3 distance for no good reason. | |||
}} | |||
}} | |||
<span class="invisible-header">8MK</span> | |||
{{MoveData | |||
| name = Jumping Forward | |||
| input = 8MK | |||
| subtitle = {{Motion|ub}},{{Motion|u}},or {{Motion|uf}}+{{Icon-Capcom|MK}} | |||
| image =CVS2_SAKURA_JMK.png | |||
| caption = Medium Kick | |||
| linkname = 8MK | |||
| data = | |||
{{AttackData-CvS2 | |||
| version = | |||
| subtitle = | |||
| damage = 700 | |||
| stun = 7 | |||
| cancel = | |||
| guard = | |||
| parry = | |||
| startup = 5 | |||
| active = 8 | |||
| recovery = | |||
| total = | |||
| advHit = | |||
| advBlock = | |||
| invul = | |||
| description = | |||
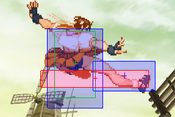
* Amazing cross-up normal, can hit extremely deep. Your go-to for left-right mixups. | |||
}} | |||
}} | |||
<span class="invisible-header">8HK</span> | |||
{{MoveData | |||
| name = Jumping Roundhouse | |||
| input = 8HK | |||
| subtitle = {{Motion|ub}},{{Motion|u}},or {{Motion|uf}}+{{Icon-Capcom|HK}} | |||
| image =CVS2_SAKURA_JHK.png | |||
| caption = Jumping Heavy Kick | |||
| linkname = 8HK | |||
| data = | |||
{{AttackData-CvS2 | |||
| version = | |||
| subtitle = | |||
| damage = 1000 | |||
| stun = 10 | |||
| cancel = | |||
| guard = | |||
| parry = | |||
| startup = 8 | |||
| active = 12 | |||
| recovery = | |||
| total = | |||
| advHit = | |||
| advBlock = | |||
| invul = | |||
| description = | |||
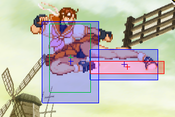
* Your other go-to jump-in from close range, at the cost of 100 damage and an extra startup frame. Also your go-to shorthop normal. | |||
}} | |||
}} | |||
===command normals=== | |||
<span class="invisible-header">8HK</span> | |||
{{MoveData | |||
| name = Sakura kick | |||
| input = 6 mk | |||
| subtitle = {{motion|f}}+{{Icon-Capcom|MK}} | |||
| image =.png | |||
| caption = | |||
| linkname = | |||
| data = | |||
{{AttackData-CvS2 | |||
| version = | |||
| subtitle = | |||
| damage = 700 | |||
| stun = 7 | |||
| cancel = none | |||
| guard = H | |||
| parry = H | |||
| startup = 23 | |||
| active = 3 | |||
| recovery = 16 | |||
| total = 42 | |||
| advHit = +1 | |||
| advBlock = +1 | |||
| invul = | |||
| description = | |||
* Decent overhead, usually used for round closing situations or for resets during a CC. | |||
}} | |||
}} | |||
== Special Moves == | == Special Moves == | ||
===== <span class="invisible-header">Fireball</span> ===== | |||
{{MoveData | |||
| name = Hadoken | |||
| input = 236+P | |||
| subtitle = Fireball | |||
| image =CVS2_SAKURA_HADO.png | |||
| caption = | |||
| linkname = FB | |||
| data = | |||
{{AttackData-CvS2 | |||
| version = LP | |||
| subtitle = {{Motion|236}} + {{Icon-Capcom|LP}} | |||
| damage = 1200 | |||
| stun = 12 | |||
| cancel = | |||
| guard = mid | |||
| parry = mid | |||
| startup = 16 | |||
| active = | |||
| recovery = 37 | |||
| total = | |||
| advHit = KND | |||
| advBlock = -3 | |||
| invul = | |||
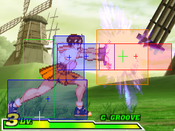
| description = | |||
* | |||
}} | |||
{{AttackData-CvS2 | |||
| header = no | |||
| version = MP | |||
| subtitle = {{Motion|236}} + {{Icon-Capcom|MP}} | |||
| damage = 700+700 | |||
| stun = 7+7 | |||
| cancel = | |||
| guard = mid | |||
| parry = mid | |||
| startup = 19 | |||
| active = | |||
| recovery = 24 | |||
| total = | |||
| advHit = KND | |||
| advBlock = 0 | |||
| invul = | |||
| description = | |||
* | |||
}} | |||
{{AttackData-CvS2 | |||
| header = no | |||
| version = HP | |||
| subtitle = {{Motion|236}} + {{Icon-Capcom|HP}} | |||
| damage = 500x3 | |||
| stun = 5x3 | |||
| cancel = | |||
| guard = mid | |||
| parry = mid | |||
| startup = 22 | |||
| active = | |||
| recovery = 31 | |||
| total = | |||
| advHit = KND | |||
| advBlock = +3 | |||
| invul = | |||
| description = | |||
* | |||
}} | |||
}} | |||
===== <span class="invisible-header">DP</span> ===== | |||
{{MoveData | |||
| name = Shuoken | |||
| input = 623+P | |||
| subtitle = Combo ender. | |||
| image =CVS2_SAKURA_LDP.png | |||
| caption = Light | |||
| image2 =CVS2_SAKURA_MDP.png | |||
| caption2 =Medium | |||
| image3 =CVS2_SAKURA_HDP.png | |||
| caption3 =Heavy | |||
| linkname = FB | |||
| data = | |||
{{AttackData-CvS2 | |||
| version = LP | |||
| subtitle = {{Motion|623}} + {{Icon-Capcom|LP}} | |||
| damage = 1100 | |||
| stun = 11 | |||
| cancel = | |||
| guard = mid | |||
| parry = mid | |||
| startup = 4 | |||
| active = 6 | |||
| recovery = 36 | |||
| total = 46 | |||
| advHit = down | |||
| advBlock = -26 | |||
| invul = | |||
| description = | |||
* | |||
}} | |||
{{AttackData-CvS2 | |||
| header = no | |||
| version = MP | |||
| subtitle = {{Motion|623}} + {{Icon-Capcom|MP}} | |||
| damage = 900+300x2 | |||
| stun = 9+3x2 | |||
| cancel = | |||
| guard = mid | |||
| parry = mid | |||
| startup = 6 | |||
| active = 3,3,10 | |||
| recovery = 35 | |||
| total = | |||
| advHit = Down | |||
| advBlock = -30 | |||
| invul = | |||
| description = | |||
* | |||
}} | |||
{{AttackData-CvS2 | |||
| header = no | |||
| version = HP | |||
| subtitle = {{Motion|623}} + {{Icon-Capcom|HP}} | |||
| damage = 500+300X4 | |||
| stun = 5+3x4 | |||
| cancel = | |||
| guard = mid | |||
| parry = mid | |||
| startup = 9 | |||
| active = 3,3,2,2,12 | |||
| recovery = 41 | |||
| total = | |||
| advHit = Down | |||
| advBlock = -30 | |||
| invul = | |||
| description = | |||
* | |||
}} | |||
}} | |||
===== <span class="invisible-header">tatsu</span> ===== | |||
{{MoveData | |||
| name = Tatsumaki Shunpukyaku | |||
| input = 214+K | |||
| subtitle = | |||
| image =CVS2_SAKURA_LTATSU.png | |||
| caption = Light | |||
| image2 =CVS2_SAKURA_HTATSU.png | |||
| caption2 = Heavy | |||
| image3 =CVS2_SAKURA_AIR_TATSU.png | |||
| caption3 = Air | |||
| linkname = FB | |||
| data = | |||
{{AttackData-CvS2 | |||
| version = LP | |||
| subtitle = {{Motion|214}} + {{Icon-Capcom|LK}} | |||
| damage = 700 | |||
| stun = 7 | |||
| cancel = | |||
| guard = mid | |||
| parry = mid | |||
| startup = 16 | |||
| active = 10 | |||
| recovery = 19 | |||
| total = | |||
| advHit = -5 | |||
| advBlock = -5 | |||
| invul = | |||
| description = | |||
* | |||
}} | |||
{{AttackData-CvS2 | |||
| header = no | |||
| version = MP | |||
| subtitle = {{Motion|214}} + {{Icon-Capcom|MK}} | |||
| damage = 400+500 | |||
| stun = 4+5 | |||
| cancel = | |||
| guard = mid | |||
| parry = mid | |||
| startup = 16 | |||
| active = 3 (9) 6 | |||
| recovery = 19 | |||
| total = | |||
| advHit = -1 | |||
| advBlock = -1 | |||
| invul = | |||
| description = | |||
* | |||
}} | |||
{{AttackData-CvS2 | |||
| header = no | |||
| version = HP | |||
| subtitle = {{Motion|214}} + {{Icon-Capcom|HK}} | |||
| damage = 300+300+400 | |||
| stun = 3+3+4 | |||
| cancel = | |||
| guard = mid | |||
| parry = mid | |||
| startup = 16 | |||
| active = 3 (9) 3 (9) 2 | |||
| recovery = 19 | |||
| total = | |||
| advHit = +3 | |||
| advBlock = +3 | |||
| invul = | |||
| description = | |||
* | |||
}} | |||
}} | |||
===== <span class="invisible-header">tatsu follow up</span> ===== | |||
{{MoveData | |||
| name = Tatsu follow up | |||
| input = after Tatsu, 214+k | |||
| subtitle = hard knockdown tool | |||
| image =CVS2_SAKURA_TATSU_END.png | |||
| caption = | |||
| linkname = FB | |||
| data = | |||
{{AttackData-CvS2 | |||
| version = All versions | |||
| subtitle = {{Motion|214}} + {{Icon-Capcom|K}} | |||
| damage = 500 | |||
| stun = 5 | |||
| cancel = | |||
| guard = mid | |||
| parry = mid | |||
| startup = 10 | |||
| active = 8 | |||
| recovery = 27 | |||
| total = | |||
| advHit = Down | |||
| advBlock = -13 | |||
| invul = | |||
| description = | |||
* | |||
}} | |||
}} | |||
===== <span class="invisible-header">otoishi</span> ===== | |||
{{MoveData | |||
| name = Sakura Otoishi | |||
| input = 623+K, Then P or K | |||
| subtitle = | |||
| image =CVS2_SAKURA_OTO1.png | |||
| caption = Start up | |||
| image2 =CVS2_SAKURA_OTO3.png | |||
| caption2 = Hit | |||
| image3 =CVS2_SAKURA_OTO2.png | |||
| caption3 = Disengage | |||
| linkname = FB | |||
| data = | |||
{{AttackData-CvS2 | |||
| version = LK | |||
| subtitle = {{Motion|623}} + {{Icon-Capcom|LK}} | |||
| damage = 600 | |||
| stun = 6 | |||
| cancel = | |||
| guard = mid | |||
| parry = mid | |||
| startup = 50+41 | |||
| active = | |||
| recovery = 15 | |||
| total = | |||
| advHit = Down | |||
| advBlock = -30 | |||
| invul = | |||
| description = | |||
* | |||
}} | |||
{{AttackData-CvS2 | |||
| header = no | |||
| version = MK | |||
| subtitle = {{Motion|623}} + {{Icon-Capcom|MK}} | |||
| damage = 600 | |||
| stun = 6 | |||
| cancel = | |||
| guard = mid | |||
| parry = mid | |||
| startup = 50+41 | |||
| active = | |||
| recovery = 15 | |||
| total = | |||
| advHit = Down | |||
| advBlock = -31 | |||
| invul = | |||
| description = | |||
* | |||
}} | |||
{{AttackData-CvS2 | |||
| header = no | |||
| version = HK | |||
| subtitle = {{Motion|623}} + {{Icon-Capcom|HK}} | |||
| damage = 600 | |||
| stun = 6 | |||
| cancel = | |||
| guard = mid | |||
| parry = mid | |||
| startup = 50+41 | |||
| active = | |||
| recovery = 15 | |||
| total = | |||
| advHit = Down | |||
| advBlock = -24 | |||
| invul = | |||
| description = | |||
* | |||
}} | |||
{{AttackData-CvS2 | |||
| header = no | |||
| version = punches | |||
| subtitle ={{Icon-Capcom|P}} | |||
| damage = | |||
| stun = | |||
| cancel = | |||
| guard = | |||
| parry = | |||
| startup = | |||
| active = | |||
| recovery = | |||
| total = | |||
| advHit = | |||
| advBlock = | |||
| invul = | |||
| description = | |||
* | |||
}} | |||
{{AttackData-CvS2 | |||
| header = no | |||
| version = stop | |||
| subtitle ={{Icon-Capcom|K}} | |||
| damage = | |||
| stun = | |||
| cancel = | |||
| guard = | |||
| parry = | |||
| startup = | |||
| active = | |||
| recovery = | |||
| total = | |||
| advHit = | |||
| advBlock = | |||
| invul = | |||
| description = | |||
* | |||
}} | |||
}} | |||
===== <span class="invisible-header">Dive kick</span> ===== | |||
{{MoveData | |||
| name = Ouka Kyaku | |||
| input = In air, 236 K | |||
| subtitle = Dive Kick | |||
| image =CVS2_SAKURA_FOOTDIVE.png | |||
| caption = | |||
| linkname = FB | |||
| data = | |||
{{AttackData-CvS2 | |||
| version = all versions | |||
| subtitle = {{Motion|236}} + {{Icon-Capcom|K}} | |||
| damage = 800 | |||
| stun = 8 | |||
| cancel = | |||
| guard = mid | |||
| parry = mid | |||
| startup = 12 | |||
| active = until landing | |||
| recovery = 4 | |||
| total = | |||
| advHit = +10 | |||
| advBlock = +15 | |||
| invul = | |||
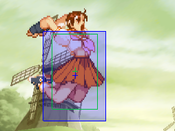
| description = all button strengths are the same. | |||
* | |||
}} | |||
}} | |||
== Super Moves == | == Super Moves == | ||
===== <span class="invisible-header">Fireball</span> ===== | |||
{{MoveData | |||
| name = Shinku hadoken | |||
| input = 236236+P | |||
| subtitle = Fireball super | |||
| image = .png | |||
| caption = | |||
| linkname = FB | |||
| data = | |||
{{AttackData-CvS2 | |||
| version = LP | |||
| subtitle = {{Motion|236}} {{Motion|236}} + {{Icon-Capcom|LP}} | |||
| damage = 1900 | |||
| stun = | |||
| cancel = | |||
| guard = Mid | |||
| parry = Mid | |||
| startup = 9 | |||
| active = - | |||
| recovery = 50 | |||
| total = 59 | |||
| advHit = HKND | |||
| advBlock = -11 | |||
| invul = 8 (Full) | |||
| description = | |||
* | |||
}} | |||
{{AttackData-CvS2 | |||
| header = no | |||
| version = MP | |||
| subtitle = {{Motion|236}} {{Motion|236}} + {{Icon-Capcom|MP}} | |||
| damage = 2800 | |||
| stun = | |||
| cancel = | |||
| guard = Mid | |||
| parry = Mid | |||
| startup = 9 | |||
| active = - | |||
| recovery = 50 | |||
| total = 59 | |||
| advHit = HKND | |||
| advBlock = -8 | |||
| invul = 13 (Full) | |||
| description = | |||
* | |||
}} | |||
{{AttackData-CvS2 | |||
| header = no | |||
| version = HP | |||
| subtitle = {{Motion|236}} {{Motion|236}} + {{Icon-Capcom|HP}} | |||
| damage = 4400 | |||
| stun = | |||
| cancel = | |||
| guard = Mid | |||
| parry = Mid | |||
| startup = 9 | |||
| active = - | |||
| recovery = 50 | |||
| total = 59 | |||
| advHit = HKND | |||
| advBlock = -5 | |||
| invul = 20 (Full) | |||
| description = | |||
* | |||
}} | |||
}} | |||
===== <span class="invisible-header">dps</span> ===== | |||
{{MoveData | |||
| name = Midare Sakura | |||
| input = 236236+K | |||
| subtitle = DP super | |||
| image = .png | |||
| caption = | |||
| linkname = FB | |||
| data = | |||
{{AttackData-CvS2 | |||
| version = LK | |||
| subtitle = {{Motion|236}} {{Motion|236}} + {{Icon-Capcom|LK}} | |||
| damage = 2500 | |||
| stun = | |||
| cancel = | |||
| guard = Mid | |||
| parry = Mid | |||
| startup = 8 | |||
| active = 4+4 (15) 5+16 | |||
| recovery = 38 | |||
| total = | |||
| advHit = HKND | |||
| advBlock = -30 | |||
| invul = 8 (Full) | |||
| description = | |||
* | |||
}} | |||
{{AttackData-CvS2 | |||
| header = no | |||
| version = MK | |||
| subtitle = {{Motion|236}} {{Motion|236}} + {{Icon-Capcom|MK}} | |||
| damage = 3600 | |||
| stun = | |||
| cancel = | |||
| guard = Mid | |||
| parry = Mid | |||
| startup = 10 | |||
| active = 4+4 (12) 3+5+20 | |||
| recovery = 38 | |||
| total = | |||
| advHit = HKND | |||
| advBlock = -34 | |||
| invul = 14 (Full) | |||
| description = | |||
* | |||
}} | |||
{{AttackData-CvS2 | |||
| header = no | |||
| version = HK | |||
| subtitle = {{Motion|236}} {{Motion|236}} + {{Icon-Capcom|HK}} | |||
| damage = 5400 | |||
| stun = | |||
| cancel = | |||
| guard = Mid | |||
| parry = Mid | |||
| startup = 6 | |||
| active = 1+1+4 (11) 1+1+4 (12) 3+5+26 | |||
| recovery = 35 | |||
| total = | |||
| advHit = HKND | |||
| advBlock = -37 | |||
| invul = 22 (Full) | |||
| description = | |||
* | |||
}} | |||
}} | |||
===== <span class="invisible-header">tatsu s</span> ===== | |||
{{MoveData | |||
| name = Haruissen | |||
| input = 214214+K | |||
| subtitle = Tatsu super | |||
| image = .png | |||
| caption = | |||
| linkname = FB | |||
| data = | |||
{{AttackData-CvS2 | |||
| version = LK | |||
| subtitle = {{Motion|214}} {{Motion|214}} + {{Icon-Capcom|LK}} | |||
| damage = 2300 | |||
| stun = | |||
| cancel = | |||
| guard = Low | |||
| parry = Low | |||
| startup = 8 | |||
| active = 2 (6) 2 (6) 2 (6) 2 (11) 5 | |||
| recovery = 23 | |||
| total = | |||
| advHit = HKND | |||
| advBlock = -4 | |||
| invul = 8 (Full) | |||
| description = | |||
* | |||
}} | |||
{{AttackData-CvS2 | |||
| header = no | |||
| version = MK | |||
| subtitle = {{Motion|214}} {{Motion|214}} + {{Icon-Capcom|MK}} | |||
| damage = 3300 | |||
| stun = | |||
| cancel = | |||
| guard = Low | |||
| parry = Low | |||
| startup = 8 | |||
| active = 2 (6) 2 (6) 2 (6) 2 (6) 2 (11) 5 | |||
| recovery = 21 | |||
| total = | |||
| advHit = HKND | |||
| advBlock = -2 | |||
| invul = 14 (Full) | |||
| description = | |||
* | |||
}} | |||
{{AttackData-CvS2 | |||
| header = no | |||
| version = HK | |||
| subtitle = {{Motion|214}} {{Motion|214}} + {{Icon-Capcom|HK}} | |||
| damage = 5000 | |||
| stun = | |||
| cancel = | |||
| guard = Low | |||
| parry = Low | |||
| startup = 8 | |||
| active = 2 (6) 2 (6) 2 (6) 2 (6) 2 (6) 2 (11) 5 | |||
| recovery = 19 | |||
| total = | |||
| advHit = HKND | |||
| advBlock = 0 | |||
| invul = 22 (Full) | |||
| description = | |||
* | |||
}} | |||
}} | |||
== Colors == | |||
[[File:Sakura_CvS2_colors.PNG|480px]] | |||
{{Navbox-CvS2}} | |||
[[Category:Capcom vs SNK 2]] | |||
[[Category:Sakura]] | |||
Latest revision as of 22:41, 4 June 2025
Introduction
Story
Sakura Kasugano is a Japanese high-school student with a fixation on her favorite fighter, Ryu. She lived a fairly normal high-school life, hanging out with her friends Hinata Wakaba and Natsu Ayuhara, until she saw Ryu fighting one day on the way home from school. She immediately became fascinated, and began training to fight like he does, emulating many of his techniques. She used her newfound skill to beat up the older kids who bully her and her friends, but eventually sets her sights on becoming Ryu's student. She frequently skips class to try and hunt him down, and on the way, has her own journey where she makes friends and enemies from around the world. Namely, she makes a rival in Karin Kanzuki. As she grows up from her childhood fixation on fighting and her idolization turned crush on Ryu, she often finds herself asking if fighting forever is truly a worthwhile use of ones life.
Gameplay
Sakura is part of the big top tiers of CvS2, usually placed somewhere in the top 5 or right outside it at 6th. Like many of the CvS2 top tiers, her ability to control neutral is amazing, with her strong buttons both on the ground and in the air. 5LK, 5MP, 5HK, 2MK, and all of her jump kicks are stellar and versatile buttons that allow her to poke safely at the enemy and get them where she wants them. After she wins neutral, Sakura has very high natural damage, ending combos in her 623P Shouoken uppercuts. She also notably has some of the most annoying roll cancels in the game to fight, with her RC 214K Shunpukyaku tatsus acting as incredibly hard to contest fireball callouts with great reward and her RC 236P Hadosho energy waves being invincible and safe pokes.
Her air mobility is no joke either, sporting the classic shoto air tatsu in j.214K, but also having a powerful divekick in j.236K Oukakyaku. Mixed with her amazing buttons in the air, this makes anti-airing her properly almost as hard as whiff punishing her properly, and when mixed with her amazing RC specials, makes Sakura a neutral nightmare. She also has one of the most powerful Custom Combos in the game, her infamous Shoshosho combo. This is very hard to properly execute, but when done right, makes A-Sakura a terrifying beast of a punish character who can eat your fireball or whiffed poke and spit out 9k or more damage from it. As if contesting her properly wasn't hard enough, the threat of a CC Shoshosho makes it nearly impossible, and Sakura gets to run her game for as long as she wants to.
Groove Selection
Best - A: While Sakura is fairly strong overall, A-Sakura gives her everything she wants to win and more. Having a roll gives her access to RC Tatsu and RC Fireball, making her neutral much more annoying. The real attractive factor is her Custom Combo, Shoshosho. By simply doing repeated 623HP's, Sakura can dish out massive damage and melt through guard bars. The stellar range on this allows her to activate from ridiculously far away and punish whatever the opponent did, whether that was whiff a button or throw a projectile. While her anti-air CC isn't quite as strong, it's still plenty good. A-Sakura is often seen as a point character on plenty of A-Groove teams, thanks to her amazing matchup spread vs other point characters, her strong meter build, and her ability to play without relying on meter while still excelling at using it.
Useful - C/N/K: C-Sakura is likely the second best way to play her. Her level 2 combos, especially using her 214HK Tatsu links, do massive damage and are very flashy to pull off. They are quite difficult however, and in general, C-Sakura is going to be forced to learn Sakura's more difficult links and master the 1 frame link from her 214HK into her 2LP to make her level 2's hurt. C-Sakura plays overall similar enough to A-Sakura, with a different way to use meter. N-Sakura changes the formula a bit, getting much more aggressive potential with run and hop. While she can still roll cancel specials for maximum neutral annoyance, she can also run in or hop over lows, making it even more difficult to directly contest her. She still plays her normal game, similar to A-Sakura, but gets more access to scary mixups with hop crossups and empty hop low/throw, allowing her to vortex opponents very effectively. K-Sakura plays much like N-Sakura, but without rolls. Off of her high damage combos, she often gets enough time to mix the opponent between a hop HK on the same side and a crossup hop MK, or she can always empty hop and go low or throw. Rage gives her a great damage buff, and her level 3 236236K Midare Zakura lets her end Rage combos with huge damage. K-Sakura has to sacrifice rolls however, but she can still play a solid offensive neutral, and her mixups are no joke.
Worst - S/P: While listed here as worst, neither of these Grooves are necessarily bad for her, and Sakura can still shine in them. They just fit her the least. S-Sakura is one of the better S-Groove characters, mostly thanks to her ability to play without meter available. She can still do her normal and solid neutral gameplan, and even gets a run and hop to solidify her offense more. Charging is a pain, but since Sakura is hard to contest, she can charge a bit more safely after instilling the fear of her buttons into the opponent. However, this is much less effective without rolls, and while Sakura doesn't require meter at all times, it does make her quite a lot scarier when she has it. Infinite level 1's do allow her to use her level 1 236236P Shinku Hadouken to zone a bit more effectively however. P-Sakura is a fairly solid P-Groove character, especially because Sakura can punish pretty reliably off of a good parry. Lack of rolls hurts a lot, and having only hop to make up for it instead of both hop and run is a hard trade-off. P-Sakura relies on you having solid parry ability, converting those parries into a knockdown and a blender of hop mixups, and cashing out on the one or maybe even two level 3 supers you get a round.
|
Sakura is a top-tier powerhouse of a shoto, with some of the best neutral control in the game. She can control space with big buttons, great air mobility with her divekick and air Tatsus, and her incredible roll cancels. Once she gets meter, she can cash it out into big damage. Sakura is best in A-Groove. Difficulty: Hard (A-Groove), Medium (Any other Groove)Tier: S |
|
| Pros | Cons |
|
|
Players to Watch
| Name | Country | Groove | Accounts | Notes |
|---|---|---|---|---|
| YSK | Japan | A-Groove | Twitter: @yosuke0815 | The point character of YSK's dominant A-Yare (Sakura Bison Blanka) team. Plays with a decent amount of movement and tries to meter build. Sample Match |
| Uma | Japan | A-Groove | Twitter: @umaare | An OG player and an A-Yare team user. Sample Match |
| Yane | Japan | S-Groove | Twitter: @yanechudan | Being a skilled S-Groover, Yane is very well versed with making S-Sakura dominate neutral and is especially threatening with desperation mode. Sample Match |
Normal Moves
Far Standing Normals
5LP
| Damage | Stun | Cancel | Guard | Parry | Startup | Active | Recovery | Total | Adv Hit | Adv Block | Invul |
|---|---|---|---|---|---|---|---|---|---|---|---|
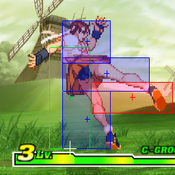
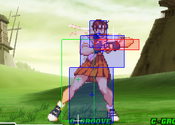
| 200 | 2 | RF,SP,SU | mid | mid | 2 | 4 | 5 | 11 | +8 | +8 | none |
| |||||||||||
5MP
| Damage | Stun | Cancel | Guard | Parry | Startup | Active | Recovery | Total | Adv Hit | Adv Block | Invul |
|---|---|---|---|---|---|---|---|---|---|---|---|
| 800 | 8 | SP,SU | mid | mid | 5 | 5 | 12 | 22 | +3 | +3 | none |
| |||||||||||
5HP
| Damage | Stun | Cancel | Guard | Parry | Startup | Active | Recovery | Total | Adv Hit | Adv Block | Invul |
|---|---|---|---|---|---|---|---|---|---|---|---|
| 1200 | 12 | SU | mid | mid | 5 | 3(2)5 | 23 | - | +1 | +1 | none |
| |||||||||||
5LK
| Damage | Stun | Cancel | Guard | Parry | Startup | Active | Recovery | Total | Adv Hit | Adv Block | Invul |
|---|---|---|---|---|---|---|---|---|---|---|---|
| 300 | 3 | SP, SU | mid | mid | 3 | 5 | 13 | 21 | -3 | -3 | - |
| |||||||||||
5MK
| Damage | Stun | Cancel | Guard | Parry | Startup | Active | Recovery | Total | Adv Hit | Adv Block | Invul |
|---|---|---|---|---|---|---|---|---|---|---|---|
| 800 | 8 | SU | mid | mid | 7 | 7 | 21 | 35 | -8 | -8 | none |
| |||||||||||
5HK
| Damage | Stun | Cancel | Guard | Parry | Startup | Active | Recovery | Total | Adv Hit | Adv Block | Invul |
|---|---|---|---|---|---|---|---|---|---|---|---|
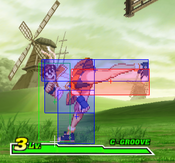
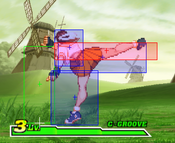
| 1000 | 10 | none | mid | mid | 8 | 5 | 17 | 30 | +2 | +2 | none |
| |||||||||||
Close Standing Normals
cl5MP
| Damage | Stun | Cancel | Guard | Parry | Startup | Active | Recovery | Total | Adv Hit | Adv Block | Invul |
|---|---|---|---|---|---|---|---|---|---|---|---|
| 700 | 7 | SP,SU | mid | mid | 4 | 5 | 11 | 20 | +4 | +4 | none |
| |||||||||||
cl5HP
| Damage | Stun | Cancel | Guard | Parry | Startup | Active | Recovery | Total | Adv Hit | Adv Block | Invul |
|---|---|---|---|---|---|---|---|---|---|---|---|
| 1100, 900 | 11, 9 | SP,SU; SU | mid | mid | 3 | 8 | 27 | 38 | -11 | -11 | none |
| |||||||||||
cl5HK
| Damage | Stun | Cancel | Guard | Parry | Startup | Active | Recovery | Total | Adv Hit | Adv Block | Invul |
|---|---|---|---|---|---|---|---|---|---|---|---|
| 1200, 1000 | 12, 10 | SP, SU; SU | mid | mid | 4 | 7 | 23 | 34 | -6 | -6 | N/A |
| |||||||||||
Crouching Normals
2LP
| Damage | Stun | Cancel | Guard | Parry | Startup | Active | Recovery | Total | Adv Hit | Adv Block | Invul |
|---|---|---|---|---|---|---|---|---|---|---|---|
| 200 | 2 | RF, SP, SU | mid | mid | 3 | 4 | 6 | 13 | +7 | +7 | none |
| |||||||||||
2MP
| Damage | Stun | Cancel | Guard | Parry | Startup | Active | Recovery | Total | Adv Hit | Adv Block | Invul |
|---|---|---|---|---|---|---|---|---|---|---|---|
| 800 | 8 | SP,SU | mid | mid | 4 | 4 | 21 | 29 | -5 | -5 | N/A |
| |||||||||||
2HP
| Damage | Stun | Cancel | Guard | Parry | Startup | Active | Recovery | Total | Adv Hit | Adv Block | Invul |
|---|---|---|---|---|---|---|---|---|---|---|---|
| 1100, 800 | 11, 8 | SP,SU; SU | mid | mid | 3 | 11 | 26 | 40 | -13 | -13 | N/A |
| |||||||||||
2LK
| Damage | Stun | Cancel | Guard | Parry | Startup | Active | Recovery | Total | Adv Hit | Adv Block | Invul |
|---|---|---|---|---|---|---|---|---|---|---|---|
| 200 | 2 | RF, SP, SU | low | low | 3 | 4 | 8 | +3 | +3 | - | N/A |
| |||||||||||
2MK
| Damage | Stun | Cancel | Guard | Parry | Startup | Active | Recovery | Total | Adv Hit | Adv Block | Invul |
|---|---|---|---|---|---|---|---|---|---|---|---|
| 700 | 7 | SU | low | low | 4 | 4 | 24 | 32 | -8 | -8 | N/A |
| |||||||||||
2HK
| Damage | Stun | Cancel | Guard | Parry | Startup | Active | Recovery | Total | Adv Hit | Adv Block | Invul |
|---|---|---|---|---|---|---|---|---|---|---|---|
| 1000 | 10 | SU | low | low | 6 | 3 | 35 | 44 | KND | -14 | - |
| |||||||||||
Air Normals
8LP
| Damage | Stun | Cancel | Guard | Parry | Startup | Active | Recovery | Total | Adv Hit | Adv Block | Invul |
|---|---|---|---|---|---|---|---|---|---|---|---|
| 500 | 5 | - | - | - | 3 | 22 | - | - | - | - | - |
| |||||||||||
8MP
| Damage | Stun | Cancel | Guard | Parry | Startup | Active | Recovery | Total | Adv Hit | Adv Block | Invul |
|---|---|---|---|---|---|---|---|---|---|---|---|
| 800 | 8 | - | - | - | 4 | 8 | - | - | - | - | - |
| |||||||||||
8HP
| Damage | Stun | Cancel | Guard | Parry | Startup | Active | Recovery | Total | Adv Hit | Adv Block | Invul |
|---|---|---|---|---|---|---|---|---|---|---|---|
| 1100 | 11 | - | - | - | 7 | 5 | - | - | - | - | - |
| |||||||||||
8LK
| Damage | Stun | Cancel | Guard | Parry | Startup | Active | Recovery | Total | Adv Hit | Adv Block | Invul |
|---|---|---|---|---|---|---|---|---|---|---|---|
| 400 | 4 | - | - | - | 4 | 26 | - | - | - | - | - |
| |||||||||||
8MK
| Damage | Stun | Cancel | Guard | Parry | Startup | Active | Recovery | Total | Adv Hit | Adv Block | Invul |
|---|---|---|---|---|---|---|---|---|---|---|---|
| 700 | 7 | - | - | - | 5 | 8 | - | - | - | - | - |
| |||||||||||
8HK
| Damage | Stun | Cancel | Guard | Parry | Startup | Active | Recovery | Total | Adv Hit | Adv Block | Invul |
|---|---|---|---|---|---|---|---|---|---|---|---|
| 1000 | 10 | - | - | - | 8 | 12 | - | - | - | - | - |
| |||||||||||
command normals
8HK
| Damage | Stun | Cancel | Guard | Parry | Startup | Active | Recovery | Total | Adv Hit | Adv Block | Invul |
|---|---|---|---|---|---|---|---|---|---|---|---|
| 700 | 7 | none | H | H | 23 | 3 | 16 | 42 | +1 | +1 | - |
| |||||||||||
Special Moves
Fireball
DP
tatsu
tatsu follow up
otoishi
Dive kick
Super Moves
Fireball
dps
tatsu s
Colors
