RagingStormX (talk | contribs) |
|||
| (56 intermediate revisions by 10 users not shown) | |||
| Line 1: | Line 1: | ||
= Introduction = | == Introduction == | ||
{{CvS2 Character Subnav|char=Cammy|short=Cammy}} | |||
<div> | |||
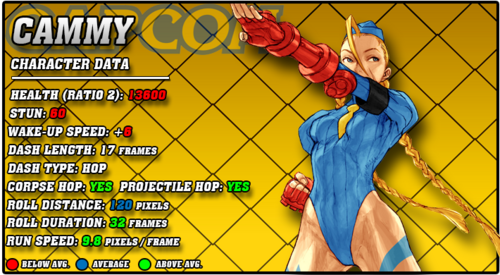
[[File:CVS2_Cammy_Data.png|right|500px]] | |||
= Moves | == Story == | ||
Cammy White, a.k.a. Killer Bee, is an ex-Shadoloo member and a Doll who gained self-awareness and broke free from M. Bison/Dictator's control with help from Dhalsim. Dolls were clones of M. Bison himself who were made to be his personal assassins and guards, acting very robotically. Cammy freed the other Dolls, but an explosion caused her to lose her memory, and Vega/Claw deposited her at the base of Delta Red, a paramilitary organization. After learning about the World Warrior tournament in the events of Street Fighter 2, Cammy entered, feeling a connection to M. Bison. She learned of her true past, and decided to spend the rest of her life fighting against M. Bison. | |||
== Gameplay == | |||
Cammy is one of the best characters in CvS2, likely right behind the top tiers. Her strengths are numerous, from some of the best normals in the game to plenty of powerful specials and mixup potential. Her amazing walkspeed allows her to keep her preferred range easily, and some of her amazing buttons like 2MK and especially 5HP keep the opponent constantly in check. Her signature special, Spiral Arrow, allows her to punish a majority of fireballs and can be spaced to make her safe and get her in. Her uppercut, Cannon Spike, is incredibly fast with great priority and invincible startup, eating up any jump at all and giving Cammy great air control. Her divekick, Cannon Strike, is a is a powerful dive that allows her to alter her jump arc and leaves her very plus. With meter, any good hit from a long distance poke or ridiculously plus close range normal can confirm easily into her Spin Drive Smasher super, usually called SDS, for insane damage. Fast ground speed, insane frame data, scary offense with meter, and versatile specials make Cammy an offensive grounded nightmare. | |||
Cammy does have a few major weaknesses holding her back from being as strong as characters like Sagat or Blanka. Her health is lower than the average character, against characters with high damage she can be KOd with a few good moves. She has a very floaty and high jump, and while having a strong divekick makes it a bit better, anti-airing her is still easier than most characters. Probably the biggest weakness is she has one of the worst rolls in the game, being very slow and reactable, making it very risky to roll with her. Nevertheless, these weaknesses barely hold back an otherwise stellar character. | |||
=== Groove Selection === | |||
'''Best - K/P/C:''' Cammy has three popular grooves, K, P, and C. K-Cammy is the best of the three, as Cammy works incredibly in K-Groove. Rage makes her aggressive movement scarier as any poke can confirm into a level 3 SDS for massive damage. Shorthop and run gives Cammy more ways to move around, and her hop normals are amazing. JD is a powerful defensive option, and since Cammy can easily confirm into SDS or Spiral Arrow she can almost always get a punish after a good JD. A lack of roll doesn't affect her at all either, considering her roll is so bad. P-Cammy is also quite good, as similar to JD Cammy can easily punish into a knockdown from any parry. While P-Cammy won't always have super, being able to parry so easily into level 3 SDS when she does have it makes her terrifying. While she doesn't have run, she does have shorthop, and no rolls is no issue. C-Cammy sacrifices a lot of these for more ways to get SDS out, making her neutral and pokes much more threatening. C-Cammy also has a powerful and stylish level 2 combo. | |||
'''Useful - N:''' N-Cammy is just a little behind C-Cammy. N-Cammy combines aspects of K-Cammy and C-Cammy by being able to cancel into level 1 SDS often, and maintaining the movement of K-Groove. Max Mode is somewhat useless as Cammy would rather spend that meter on a confirm into SDS, but it's a useful option. N-Cammy can barely make use of guard cancel roll however, and her roll in general is far too weak for N-Groove. | |||
'''Worst - S/A:''' S-Cammy and A-Cammy are her two weakest grooves. Cammy likes her meter for SDS cancels, and S-Cammy has to give up aggressive space to build meter. S-Cammy at low health does get access to infinite level 1 SDS but her health is so low that this is incredibly risky. A-Cammy has none of the mechanics to aid her movement, and while CC is strong, Cammy uses the meter better by confirming into SDS. By no means however are either of these Grooves bad, Cammy works well in both. Just that the others give her much better options overall. | |||
{{StrengthsAndWeaknesses | |||
|intro= | |||
--------------------------- | |||
'''Cammy''' is a clear top tier with amazing normals, dominant neutral, and scary punishes, but she pays for it with a horrible roll and bad jump. Cammy is best in '''K, C, and P-Groove'''. | |||
'''Difficulty''': Pretty Easy<br>'''Tier''': S | |||
|pros= | |||
* '''Normals:''' Some of the most absurd normals in the game, from a 3 frame +10 cl.HP to a super far reaching 2MK and a very plus 2MP | |||
* '''Fast:''' Very fast grounded movement, with a fast walk and the 2nd fastest run | |||
* '''Versatile Moves:''' Great specials, with a combo ender/low profile punish in Spiral Arrow, an amazing DP anti-air/reversal in Cannon Spike, and a powerful divekick in Cannon Strike | |||
* '''Mixups:''' Great mix with hop, hop HK is oppressive and her low confirms are great, plus a good crossup and multiple damaging throws | |||
* '''Powerful Super:''' An amazing and easy to confirm super in SDS, and great damage with meter in general in almost every Groove | |||
* '''Groove Friendly:''' Cammy gets something to some extent in every Groove, and is notably one of the best P-Groove characters in the game | |||
* '''Simple and Strong:''' She's just really good and really easy | |||
|cons= | |||
* '''Bad Roll and Jump:''' One of the worst jumps and rolls means she can't take risks often and has to rely on forcing mistakes from the opponent | |||
* '''Low Health:''' Very low health and stun means a few good hits can kill her | |||
}} | |||
=== Players to Watch === | |||
{| class="wikitable" | |||
|- | |||
! Name !! Country !! Groove !! Accounts !! Notes | |||
|- | |||
| S-Zawa || Japan || C/P-Groove || Twitter: @Cvs2Fukuoka || A great player overall, uses Cammy on both his C team and P team very effectively. <br> [https://www.youtube.com/watch?v=BEJSfCfhnFI2%A1%E5%A4%A9%E4%BD%93%E3%82%AB%E3%83%97%E3%82%A8%E3%82%B9%E9%83%A8CVS2FUKUOKA C-Groove Sample Match] <br> [https://www.youtube.com/watch?v=BEJSfCfhnFI&t=3316s&ab_channel=%E7%A6%8F%E5%B2%A1%E5%A4%A9%E4%BD%93%E3%82%AB%E3%83%97%E3%82%A8%E3%82%B9%E9%83%A8CVS2FUKUOKA P-Groove Sample Match] | |||
|- | |||
| Kiku || Japan || C-Groove || N/A || One of the best C-Groovers in the world. Kiku's Cammy is more methodical but can lock an opponent down if needed. <br> [https://youtu.be/wfCMAaRVOq4 Sample Match] | |||
|- | |||
| DM || Japan || P-Groove || N/A || One of Fukuoka's strongest players. He usually tries to find parries into a quick knockdown and begin his pressure. <br> [https://www.youtube.com/watch?v=15N_8GDPQjo&t=1042s&ab_channel=%E7%A6%8F%E5%B2%A1%E5%A4%A9%E4%BD%93%E3%82%AB%E3%83%97%E3%82%A8%E3%82%B9%E9%83%A8CVS2FUKUOKA Sample Match] | |||
|- | |||
| Bocchan || Japan || K-Groove || N/A || The point character on his infamous CBS squad. Bocchan takes no time in getting into the opponent's face and reaping the rewards. <br> [https://youtu.be/wfCMAaRVOq4?t=78 Sample Match] | |||
|- | |||
|} | |||
<br><br> | |||
== Normal Moves == | == Normal Moves == | ||
=== Far Normals === | |||
=== <span class="invisible-header">5LP</span> === | |||
{{MoveData | |||
| name = Far Jab | |||
| input = 5LP / Far LP | |||
| subtitle = Far Light Punch | |||
| image = CVS2_Cammy_5LP.PNG | |||
| caption = | |||
| linkname = 5LP | |||
| data = | |||
{{AttackData-CvS2 | |||
| version = Far {{Icon-Capcom|LP}} | |||
| subtitle = | |||
| damage = 200 | |||
| stun = 2 | |||
| cancel = RF/SP/SU | |||
| guard = Mid | |||
| parry = High | |||
| startup = 3 | |||
| active = 4 | |||
| recovery = 7 | |||
| total = 14 | |||
| advHit = +4 | |||
| advBlock = +4 | |||
| invul = None | |||
| description = A fast standard jab. Crouchable, but very plus and not a bad way to check people jumping or moving at you. | |||
* | |||
}} | |||
}} | |||
=== <span class="invisible-header">5MP</span> === | |||
{{MoveData | |||
| name = Far Strong | |||
| input = 5MP / Far MP | |||
| subtitle = Far Medium Punch | |||
| image = CVS2_Cammy_5MP.PNG | |||
| caption = | |||
| linkname = 5MP | |||
| data = | |||
{{AttackData-CvS2 | |||
| version = Far {{Icon-Capcom|MP}} | |||
| subtitle = | |||
| damage = 800 | |||
| stun = 8 | |||
| cancel = SP/SU | |||
| guard = Mid | |||
| parry = High | |||
| startup = 4 | |||
| active = 4 | |||
| recovery = 11 | |||
| total = 19 | |||
| advHit = +5 | |||
| advBlock = +5 | |||
| invul = None | |||
| description = A far and plus strong punch. Usually you would rather do 2MP, since this is crouchable and not as plus. Not a bad button against taller characters however. | |||
* | |||
}} | |||
}} | |||
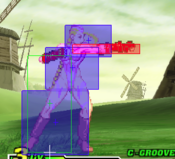
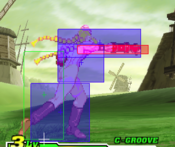
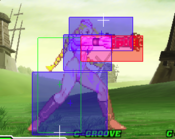
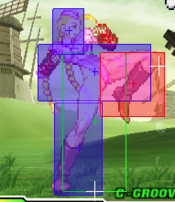
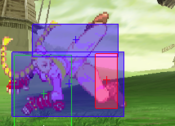
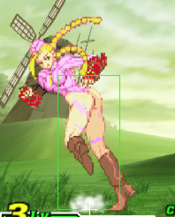
=== <span class="invisible-header">5HP</span> === | |||
{{MoveData | |||
| name = Far Fierce | |||
| input = 5HP / Far HP | |||
| subtitle = Far Heavy Punch | |||
| image = CVS2_Cammy_5HP_First.PNG | |||
| caption = First Hitbox | |||
| image2 = CVS2_Cammy_5HP_Second.PNG | |||
| caption2 = Second Hitbox | |||
| linkname = 5HP | |||
| data = | |||
{{AttackData-CvS2 | |||
| version = Far {{Icon-Capcom|HP}} | |||
| subtitle = | |||
| damage = 1100 | |||
| stun = 11 | |||
| cancel = SU | |||
| guard = Mid | |||
| parry = High | |||
| startup = 3 | |||
| active = 10 | |||
| recovery = 9 | |||
| total = 22 | |||
| advHit = +9 | |||
| advBlock = +9 | |||
| invul = None | |||
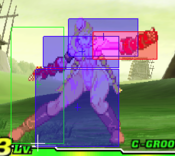
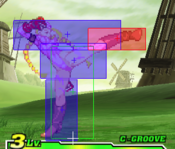
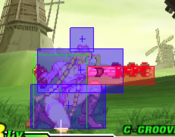
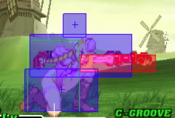
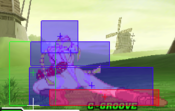
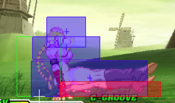
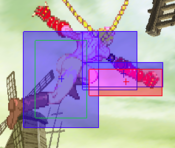
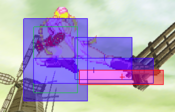
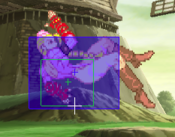
| description = Ridiculous button. 3 frame startup ties it with most jabs, and shes left a whopping +9. Not special cancellable but the super cancel means you can punish a lot of things into SDS from far away. You don't even need to cancel this into super, it's so plus you can link it, making hitconfirming incredibly easy. The 3 frame listed startup is for the first hitbox which has smaller range and is useful for close links, the second hitbox comes out slightly later. | |||
* | |||
}} | |||
}} | |||
=== <span class="invisible-header">5LK</span> === | |||
{{MoveData | |||
| name = Far Short | |||
| input = 5LK / Far LK | |||
| subtitle = Far Light Kick | |||
| image = CVS2_Cammy_5LK.PNG | |||
| caption = | |||
| linkname = 5LK | |||
| data = | |||
{{AttackData-CvS2 | |||
| version = Far {{Icon-Capcom|LK}} | |||
| subtitle = | |||
| damage = 400 | |||
| stun = 4 | |||
| cancel = SP/SU | |||
| guard = Mid | |||
| parry = High | |||
| startup = 4 | |||
| active = 8 | |||
| recovery = 8 | |||
| total = 20 | |||
| advHit = -1 | |||
| advBlock = -1 | |||
| invul = None | |||
| description = A quick kick angled upwards. Not a bad button but Cammy basically always has something better. | |||
* | |||
}} | |||
}} | |||
=== <span class="invisible-header">5MK</span> === | |||
{{MoveData | |||
| name = Far Forward | |||
| input = 5MK / Far MK | |||
| subtitle = Far Medium Kick | |||
| image = CVS2_Cammy_5MK.PNG | |||
| caption = | |||
| linkname = 5MK | |||
| data = | |||
{{AttackData-CvS2 | |||
| version = Far {{Icon-Capcom|MK}} | |||
| subtitle = | |||
| damage = 800 | |||
| stun = 8 | |||
| cancel = SU | |||
| guard = Mid | |||
| parry = High | |||
| startup = 7 | |||
| active = 2 | |||
| recovery = 17 | |||
| total = 26 | |||
| advHit = +1 | |||
| advBlock = +1 | |||
| invul = None | |||
| description = A similar kick to 5LK. Reaches very far, making it nice as a standing poke, and the angle makes it a nice far anti-air when you can't DP. | |||
* | |||
}} | |||
}} | |||
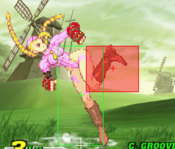
=== <span class="invisible-header">5HK</span> === | |||
{{MoveData | |||
| name = Far Roundhouse | |||
| input = 5HK / Far HK | |||
| subtitle = Far Heavy Kick | |||
| image = CVS2_Cammy_5HK_First.PNG | |||
| caption = First Hitbox | |||
| image2 = CVS2_Cammy_5HK_Second.PNG | |||
| caption2 = Second Hitbox | |||
| linkname = 5HK | |||
| data = | |||
{{AttackData-CvS2 | |||
| version = Far {{Icon-Capcom|HK}} | |||
| subtitle = | |||
| damage = 1100/1000 | |||
| stun = 11/10 | |||
| cancel = SU | |||
| guard = Mid | |||
| parry = High | |||
| startup = 5 | |||
| active = 10 | |||
| recovery = 22 | |||
| total = 37 | |||
| advHit = -8 | |||
| advBlock = -8 | |||
| invul = None | |||
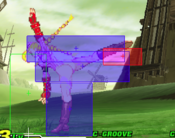
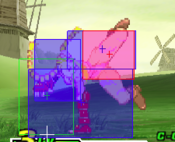
| description = A far reaching double kick. Great as an anti-air from farther away, as it's very fast and has plenty of active frames. Also a stellar poke in neutral, though you may find Cammy has better buttons in most situations. | |||
* | |||
}} | |||
}} | |||
=== Close Normals === | |||
=== <span class="invisible-header">clLP</span> === | |||
{{MoveData | |||
| name = Close Jab | |||
| input = cl.LP / cl5LP | |||
| subtitle = Close Light Punch | |||
| image = CVS2_Cammy_clLP.PNG | |||
| caption = | |||
| linkname = cl.LP | |||
| data = | |||
{{AttackData-CvS2 | |||
| version = Close {{Icon-Capcom|LP}} | |||
| subtitle = | |||
| damage = 300 | |||
| stun = 3 | |||
| cancel = RF/SP/SU | |||
| guard = Mid | |||
| parry = High | |||
| startup = 2 | |||
| active = 3 | |||
| recovery = 6 | |||
| total = 11 | |||
| advHit = +6 | |||
| advBlock = +6 | |||
| invul = None | |||
| description = Cammy's fastest button, though only by a frame. Since Cammy has so many normals with 3 frame startup and higher average reward, this sees very little use as a scramble button or in pressure. It's especially weaker as it can be crouched by many characters. | |||
* | |||
}} | |||
}} | |||
=== <span class="invisible-header">clMP</span> === | |||
{{MoveData | |||
| name = Close Strong | |||
| input = cl.MP / cl5MP | |||
| subtitle = Close Medium Punch | |||
| image = CVS2_Cammy_clMP_First.PNG | |||
| caption = First Hitbox | |||
| image2 = CVS2_Cammy_clMP_Second.PNG | |||
| caption2 = Second Hitbox | |||
| linkname = cl.MP | |||
| data = | |||
{{AttackData-CvS2 | |||
| version = Close {{Icon-Capcom|MP}} | |||
| subtitle = | |||
| damage = 700/600 | |||
| stun = 7/6 | |||
| cancel = SP/SU | |||
| guard = Mid | |||
| parry = High | |||
| startup = 4 | |||
| active = 4 | |||
| recovery = 16 | |||
| total = 24 | |||
| advHit = 0 | |||
| advBlock = 0 | |||
| invul = None | |||
| description = A fast uppercut punch. Not a bad close anti-air due to the fast startup, but you would always rather DP. The activation range can make it a bit inconsistent but 5MP isn't a terrible move to anti-air with either so this isn't a massive issue. | |||
* | |||
}} | |||
}} | |||
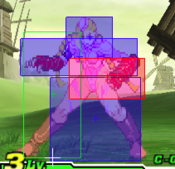
=== <span class="invisible-header">clHP</span> === | |||
{{MoveData | |||
| name = Close Fierce | |||
| input = cl.HP / cl5HP | |||
| subtitle = Close Heavy Punch | |||
| image = CVS2_Cammy_clHP.PNG | |||
| caption = Always her turn | |||
| linkname = cl.HP | |||
| data = | |||
{{AttackData-CvS2 | |||
| version = Close {{Icon-Capcom|HP}} | |||
| subtitle = | |||
| damage = 1000 | |||
| stun = 10 | |||
| cancel = SP/SU | |||
| guard = Mid | |||
| parry = High | |||
| startup = 3 | |||
| active = 4 | |||
| recovery = 10 | |||
| total = 17 | |||
| advHit = +10 | |||
| advBlock = +10 | |||
| invul = None | |||
| description = As if the far version wasn't enough of a privilege. This is arguably her best normal in a suite of amazing normals. Massively plus and lightning fast with 3 frame startup makes this basically a cracked, uncrouchable jab. Cammy can walk in and do these over and over while threatening frametraps and throws, putting the fear of a Spiral Arrow cancel in their heart. With enough meter, this will easily link into SDS, making a Raged/full bar Cammy terrifying up close as she can easily confirm into massive damage. | |||
* | |||
}} | |||
}} | |||
=== <span class="invisible-header">clLK</span> === | |||
{{MoveData | |||
| name = Close Short | |||
| input = cl.LK / cl5LK | |||
| subtitle = Close Light Kick | |||
| image = CVS2_Cammy_clLK.PNG | |||
| caption = | |||
| linkname = cl.LK | |||
| data = | |||
{{AttackData-CvS2 | |||
| version = Close {{Icon-Capcom|LK}} | |||
| subtitle = | |||
| damage = 300 | |||
| stun = 3 | |||
| cancel = SP/SU | |||
| guard = Mid | |||
| parry = High | |||
| startup = 3 | |||
| active = 6 | |||
| recovery = 8 | |||
| total = 17 | |||
| advHit = +3 | |||
| advBlock = +3 | |||
| invul = None | |||
| description = A quick knee aimed at the chest. Not a bad close light but generally not a button you'll press often, can be useful as a tic throw because of the minor pushback and low plus frame count but even then Cammy has better options. | |||
* | |||
}} | |||
}} | |||
=== <span class="invisible-header">clMK</span> === | |||
{{MoveData | |||
| name = Close Forward | |||
| input = cl.MK / cl5MK | |||
| subtitle = Close Medium Kick | |||
| image = CVS2_Cammy_clMK.PNG | |||
| caption = | |||
| linkname = cl.MK | |||
| data = | |||
{{AttackData-CvS2 | |||
| version = Close {{Icon-Capcom|MK}} | |||
| subtitle = | |||
| damage = 800 | |||
| stun = 8 | |||
| cancel = SU | |||
| guard = Mid | |||
| parry = High | |||
| startup = 5 | |||
| active = 2 | |||
| recovery = 16 | |||
| total = 23 | |||
| advHit = +2 | |||
| advBlock = +2 | |||
| invul = None | |||
| description = Not much use for this. Identical animation to 5LK but is a close normal instead, almost entirely removing usage as an anti-air. Cammy has many better normals than this. | |||
* | |||
}} | |||
}} | |||
=== <span class="invisible-header">clHK</span> === | |||
{{MoveData | |||
| name = Close Roundhouse | |||
| input = cl.HK / cl5HK | |||
| subtitle = Close Heavy Kick | |||
| image = CVS2_Cammy_clHK.PNG | |||
| caption = | |||
| linkname = cl.HK | |||
| data = | |||
{{AttackData-CvS2 | |||
| version = Close {{Icon-Capcom|HK}} | |||
| subtitle = | |||
| damage = 1200/1000 | |||
| stun = 12/10 | |||
| cancel = SU | |||
| guard = Mid | |||
| parry = High | |||
| startup = 8 | |||
| active = 8 | |||
| recovery = 15 | |||
| total = 31 | |||
| advHit = -1 | |||
| advBlock = -1 | |||
| invul = None | |||
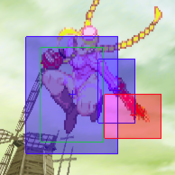
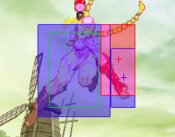
| description = Like 5HK, but it goes up instead of forward. Not a bad anti-air but not one you'll get often, as it covers an angle better covered by Cannon Spike. Still, it can be useful for when you can't react in time, and even if you're too far out for it you'll get 5HK which is not a bad misinput at all. | |||
* | |||
}} | |||
}} | |||
=== Crouching Normals === | |||
=== <span class="invisible-header">2LP</span> === | |||
{{MoveData | |||
| name = Crouch Jab | |||
| input = 2LP / cr.LP | |||
| subtitle = Crouching Light Punch | |||
| image = CVS2_Cammy_2LP.PNG | |||
| caption = | |||
| linkname = 2LP | |||
| data = | |||
{{AttackData-CvS2 | |||
| version = {{motion|d}}{{Icon-Capcom|LP}} | |||
| subtitle = | |||
| damage = 200 | |||
| stun = 2 | |||
| cancel = RF/SP/SU | |||
| guard = Mid | |||
| parry = Mid | |||
| startup = 3 | |||
| active = 4 | |||
| recovery = 6 | |||
| total = 13 | |||
| advHit = +5 | |||
| advBlock = +5 | |||
| invul = None | |||
| description = A great crouching jab. Fast and plus, and links into plenty of Cammy's higher power normals. Nice to start punishes and confirms with. | |||
* | |||
}} | |||
}} | |||
=== <span class="invisible-header">2MP</span> === | |||
{{MoveData | |||
| name = Crouch Strong | |||
| input = 2MP / cr.MP | |||
| subtitle = Crouching Medium Punch | |||
| image = CVS2_Cammy_2MP.PNG | |||
| caption = | |||
| linkname = 2MP | |||
| data = | |||
{{AttackData-CvS2 | |||
| version = {{Motion|d}}{{Icon-Capcom|MP}} | |||
| subtitle = | |||
| damage = 700 | |||
| stun = 7 | |||
| cancel = SP/SU | |||
| guard = Mid | |||
| parry = Low | |||
| startup = 4 | |||
| active = 4 | |||
| recovery = 9 | |||
| total = 17 | |||
| advHit = +7 | |||
| advBlock = +7 | |||
| invul = None | |||
| description = Basically an upgraded jab with one frame extra startup. One of your most used buttons, as it links easily into a ton of other things. Useful for confirms, starting punishes, and as a meaty. Has great reach and priority too, even for a 2MP, which makes it a strong option for whiff punishing into Spiral Arrow/SDS. | |||
* | |||
}} | |||
}} | |||
=== <span class="invisible-header">2HP</span> === | |||
{{MoveData | |||
| name = Crouch Fierce | |||
| input = 2HP / cr.HP | |||
| subtitle = Crouching Heavy Punch | |||
| image = CVS2_Cammy_2HP.PNG | |||
| caption = | |||
| linkname = 2HP | |||
| data = | |||
{{AttackData-CvS2 | |||
| version = {{motion|d}}{{Icon-Capcom|HP}} | |||
| subtitle = | |||
| damage = 1000 | |||
| stun = 10 | |||
| cancel = SU | |||
| guard = Mid | |||
| parry = High | |||
| startup = 6 | |||
| active = 8 | |||
| recovery = 12 | |||
| total = 26 | |||
| advHit = +4 | |||
| advBlock = +4 | |||
| invul = None | |||
| description = Another far anti-air at the same angle as 5HP. Not bad for it either, but is otherwise not used much. | |||
* | |||
}} | |||
}} | |||
=== <span class="invisible-header">2LK</span> === | |||
{{MoveData | |||
| name = Crouch Short | |||
| input = 2LK / cr.LK | |||
| subtitle = Crouching Light Kick | |||
| image = CVS2_Cammy_2LK.PNG | |||
| caption = | |||
| linkname = 2LK | |||
| data = | |||
{{AttackData-CvS2 | |||
| version = {{Motion|d}}{{Icon-Capcom|LK}} | |||
| subtitle = | |||
| damage = 200 | |||
| stun = 2 | |||
| cancel = RF/SP/SU | |||
| guard = Low | |||
| parry = Low | |||
| startup = 4 | |||
| active = 4 | |||
| recovery = 8 | |||
| total = 16 | |||
| advHit = +3 | |||
| advBlock = +3 | |||
| invul = None | |||
| description = Cammy's main low option for mixups. Not as plus as her punches, but chains into 2LP which has plenty of link options. Good for confirms on oki or dash pressure to force them to block low. | |||
* | |||
}} | |||
}} | |||
=== <span class="invisible-header">2HK</span> === | |||
{{MoveData | |||
| name = Crouch Forward | |||
| input = 2MK / cr.MK | |||
| subtitle = Crouching Medium Kick | |||
| image = CVS2_Cammy_2MK.PNG | |||
| caption = | |||
| linkname = 2MK | |||
| data = | |||
{{AttackData-CvS2 | |||
| version = {{Motion|d}}{{Icon-Capcom|MK}} | |||
| subtitle = | |||
| damage = 700 | |||
| stun = 7 | |||
| cancel = SP/SU | |||
| guard = Low | |||
| parry = Low | |||
| startup = 4 | |||
| active = 7 | |||
| recovery = 13 | |||
| total = 24 | |||
| advHit = 0 | |||
| advBlock = 0 | |||
| invul = None | |||
| description = A far reaching low forward for poking in neutral and confirming into SDS. The far reach and fast startup let it link even after very long confirms to add damage into an SDS cancel. From most ranges this will combo into Spiral Arrow, making it a solid neutral poke and whiff punish, but at tip range it will not combo and will leave you open for punishment. SDS will always combo from tip range. | |||
* | |||
}} | |||
}} | |||
=== <span class="invisible-header">2HK</span> === | |||
{{MoveData | |||
| name = Crouch Roundhouse | |||
| input = 2HK / cr.HK | |||
| subtitle = Crouching Heavy Kick | |||
| image = CVS2_Cammy_2HK.PNG | |||
| caption = | |||
| linkname = 2HK | |||
| data = | |||
{{AttackData-CvS2 | |||
| version = {{Motion|d}}{{Icon-Capcom|HK}} | |||
| subtitle = | |||
| damage = 1000 | |||
| stun = 10 | |||
| cancel = None | |||
| guard = Low | |||
| parry = Low | |||
| startup = 9 | |||
| active = 6 | |||
| recovery = 25 | |||
| total = 40 | |||
| advHit = -DWN | |||
| advBlock = -7 | |||
| invul = None | |||
| description = Cammy's sweep. Decent range but a lot of endlag, not very safe to whiff or even have this blocked. If you're fishing for a poke to knockdown, you'll usually get more mileage out of fishing for 2MK > Spiral Arrow than this and be safer too. | |||
* | |||
}} | |||
}} | |||
=== Jumping Normals === | |||
=== <span class="invisible-header">jLP</span> === | |||
{{MoveData | |||
| name = Jump Jab | |||
| input = j.LP / 8LP | |||
| subtitle = Jumping Light Punch | |||
| image = CVS2_Cammy_jLP.PNG | |||
| caption = | |||
| linkname = j.LP | |||
| data = | |||
{{AttackData-CvS2 | |||
| version = {{motion|ub}},{{motion|u}},{{motion|uf}}+{{Icon-Capcom|LP}} | |||
| subtitle = | |||
| damage = 500 | |||
| stun = 5 | |||
| cancel = None | |||
| guard = High | |||
| parry = High | |||
| startup = 3/5 | |||
| active = 24 | |||
| recovery = 0 | |||
| total = 27/29 | |||
| advHit = Varies | |||
| advBlock = Varies | |||
| invul = None | |||
| description = A basic j.LP. Lots of active frames and fast startup make it a decent tool for interrupts on other opponents jumping, but Cammy's jump takes so long she usually recovers last. The 5 frame startup listed is on a diagonal jump, as for some reason diagonal j.LP takes two frames longer to start. | |||
* | |||
}} | |||
}} | |||
=== <span class="invisible-header">jMP</span> === | |||
{{MoveData | |||
| name = Jump Strong | |||
| input = j.MP / 8MP | |||
| subtitle = Jumping Medium Punch | |||
| image = CVS2_Cammy_jMP.PNG | |||
| caption = | |||
| linkname = j.MP | |||
| data = | |||
{{AttackData-CvS2 | |||
| version = {{motion|ub}},{{motion|u}},{{motion|uf}}+{{Icon-Capcom|MP}} | |||
| subtitle = | |||
| damage = 700 | |||
| stun = 7 | |||
| cancel = None | |||
| guard = High | |||
| parry = High | |||
| startup = 5/6 | |||
| active = 8 | |||
| recovery = 0 | |||
| total = 13/14 | |||
| advHit = Varies | |||
| advBlock = Varies | |||
| invul = None | |||
| description = A quick downwards chop. Not much use for this. Similar to j.LP, it arbitrarily has one more frame of startup on a diagonal jump, which doesn't impact anything really. | |||
* | |||
}} | |||
}} | |||
=== <span class="invisible-header">jHP</span> === | |||
{{MoveData | |||
| name = Jump Fierce | |||
| input = j.HP / 8HP | |||
| subtitle = Jumping Heavy Punch | |||
| image = CVS2_Cammy_jHP.PNG | |||
| caption = | |||
| linkname = j.HP | |||
| data = | |||
{{AttackData-CvS2 | |||
| version = {{motion|ub}},{{motion|u}},{{motion|uf}}+{{Icon-Capcom|HP}} | |||
| subtitle = | |||
| damage = 1100 | |||
| stun = 11 | |||
| cancel = None | |||
| guard = High | |||
| parry = High | |||
| startup = 5 | |||
| active = 8/6 | |||
| recovery = 0 | |||
| total = 13/11 | |||
| advHit = Varies | |||
| advBlock = Varies | |||
| invul = None | |||
| description = One of Cammy's two heavy jump ins. While it does have a weaker hitbox than j.HK, it does 100 more damage, making it her highest damage starter for stun combos or situations where you know it'll land like punishing a fireball. Has 2 more active frames during a neutral jump, which technically makes nj.HP the better for air-to-air, but is mostly meaningless. | |||
* | |||
}} | |||
}} | |||
=== <span class="invisible-header">jLK</span> === | |||
{{MoveData | |||
| name = Jump Short | |||
| input = j.LK / 8LK | |||
| subtitle = Jumping Light Kick | |||
| image = CVS2_Cammy_jLK.PNG | |||
| caption = | |||
| linkname = j.LK | |||
| data = | |||
{{AttackData-CvS2 | |||
| version = {{motion|ub}},{{motion|u}},{{motion|uf}}+{{Icon-Capcom|LK}} | |||
| subtitle = | |||
| damage = 400 | |||
| stun = 4 | |||
| cancel = None | |||
| guard = High | |||
| parry = High | |||
| startup = 4 | |||
| active = 24 | |||
| recovery = 0 | |||
| total = 28 | |||
| advHit = Varies | |||
| advBlock = Varies | |||
| invul = None | |||
| description = Cammy sticks her leg out quickly below her. Has a good crossup hitbox, making it very useful in her mixup game, but is otherwise outclassed as a jump-in. Despite being a light, Cammy can easily combo from this into her fast three frame cl.HP. | |||
* | |||
}} | |||
}} | |||
< | === <span class="invisible-header">jMK</span> === | ||
{{MoveData | |||
| name = Jump Forward | |||
| input = j.MK / 8MK | |||
| subtitle = Jumping Medium Kick | |||
| image = CVS2_Cammy_jMK.PNG | |||
| caption = | |||
| linkname = j.MK | |||
| data = | |||
{{AttackData-CvS2 | |||
| version = {{motion|ub}},{{motion|u}},{{motion|uf}}+{{Icon-Capcom|MK}} | |||
| subtitle = | |||
| damage = 800 | |||
| stun = 8 | |||
| cancel = None | |||
| guard = High | |||
| parry = High | |||
| startup = 7 | |||
| active = 8 | |||
| recovery = 0 | |||
| total = 15 | |||
| advHit = Varies | |||
| advBlock = Varies | |||
| invul = None | |||
| description = An upward angled kick. Good for catching people above Cammy, but it would be rare for that to happen. In hop grooves, this is a decent hop anti-air. | |||
* | |||
}} | |||
}} | |||
< | === <span class="invisible-header">jHK</span> === | ||
{{MoveData | |||
| name = Jump Roundhouse | |||
| input = j.HK / 8HK | |||
< | | subtitle = Jumping Heavy Kick | ||
| image = CVS2_Cammy_jHK.PNG | |||
< | | caption = | ||
| linkname = j.HK | |||
< | | data = | ||
{{AttackData-CvS2 | |||
< | | version = {{motion|ub}},{{motion|u}},{{motion|uf}}+{{Icon-Capcom|HK}} | ||
| subtitle = | |||
| damage = 1000 | |||
| stun = 10 | |||
| cancel = None | |||
| guard = High | |||
| parry = High | |||
| startup = 5 | |||
| active = 6/8 | |||
| recovery = 0 | |||
| total = 11/13 | |||
| advHit = Varies | |||
| advBlock = Varies | |||
| invul = None | |||
| description = Cammy's main jump normal, as it reaches far and does good damage. Shorthop HK can be dominant against characters without reversals, as it can be spaced quite far out. Has the reverse data of j.HP, in that it has 2 more active frames during a diagonal jump. | |||
* | |||
}} | |||
}} | |||
== Throws == | |||
=== <span class="invisible-header">Hooligan Suplex</span> === | |||
{{MoveData | |||
| name = Hooligan Suplex | |||
| input = Near Opponent, 4/6HP | |||
| subtitle = Punch Throw | |||
| image = CVS2_Cammy_PThrow.PNG | |||
| caption = | |||
| linkname = Punch Throw | |||
| data = | |||
{{AttackData-CvS2 | |||
| version = Close {{Motion|B}}/{{Motion|f}}+{{Icon-Capcom|HP}} | |||
| subtitle = | |||
| damage = 1600 | |||
| stun = 0 | |||
| cancel = None | |||
| guard = Grab | |||
| parry = Grab | |||
| startup = 3 | |||
| active = 1 | |||
| recovery = 13 | |||
| total = 17 | |||
| advHit = -DWN | |||
| advBlock = Grab | |||
| invul = None | |||
| description = Cammy suplexes the opponent. Faster but lower damage of her two grounded throws, useful for close punishes and tick throws. | |||
}} | |||
}} | |||
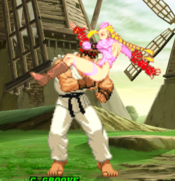
=== <span class="invisible-header">Frankensteiner</span> === | |||
{{MoveData | |||
| name = Frankensteiner | |||
| input = Near Opponent, 4/6HK | |||
| subtitle = Kick Throw | |||
| image = CVS2_Cammy_KThrow.PNG | |||
| caption = | |||
| linkname = Kick Throw | |||
| data = | |||
{{AttackData-CvS2 | |||
| version = Close {{Motion|b}}/{{Motion|f}}+{{Icon-Capcom|HK}} | |||
| subtitle = | |||
| damage = 1800 | |||
| stun = 0 | |||
| cancel = None | |||
| guard = Grab | |||
| parry = Grab | |||
| startup = 5 | |||
| active = 1 | |||
| recovery = 13 | |||
| total = 19 | |||
| advHit = -DWN | |||
| advBlock = Grab | |||
| invul = None | |||
| description = Cammy wraps her legs around the opponents head and flips them over. Higher damage of the two throws, so it's more useful for mixups, but 2 frames slower makes it worse as a punish, although not by much | |||
}} | |||
}} | |||
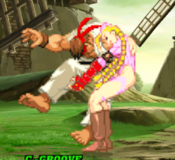
=== <span class="invisible-header">Flying Neck Hunt</span> === | |||
{{MoveData | |||
| name = Flying Neck Hunt | |||
| input = In Air and Near Opponent, 4/6HP | |||
| subtitle = Air Punch Throw | |||
| image = CVS2_Cammy_APThrow.PNG | |||
| caption = | |||
| linkname = Air Punch Throw | |||
| data = | |||
{{AttackData-CvS2 | |||
| version = In Air and Close {{Motion|b}}/{{Motion|f}}+{{Icon-Capcom|HP}} | |||
| subtitle = | |||
| damage = 1700 | |||
| stun = 0 | |||
| cancel = None | |||
| guard = Grab | |||
| parry = Grab | |||
| startup = 0 | |||
| active = 1 | |||
| recovery = 0 | |||
| total = 1 | |||
| advHit = -DWN | |||
| advBlock = Grab | |||
| invul = None | |||
| description = One of Cammy's two air throws, because she needed to have two of these. Both work as solid anti-airs since they start in a single frame, but timing them can be a little weird. In comparison to her air kick throw, this has 200 less damage but gives an amazing knockdown making this the one you'll usually prefer. | |||
}} | |||
}} | |||
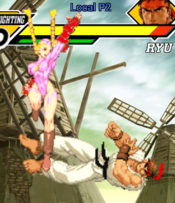
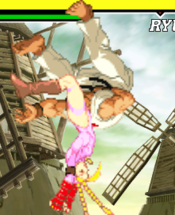
=== <span class="invisible-header">Air Frankensteiner</span> === | |||
{{MoveData | |||
| name = Air Frankensteiner | |||
| input = In Air, Near Opponent 4/6HK | |||
| subtitle = Air Kick Throw | |||
| image = CVS2_Cammy_AKThrow.PNG | |||
| caption = | |||
| linkname = Air Kick Throw | |||
| data = | |||
{{AttackData-CvS2 | |||
| version = In Air and Close {{Motion|b}}/{{Motion|f}}+{{Icon-Capcom|HK}} | |||
| subtitle = | |||
| damage = 1900 | |||
| stun = 0 | |||
| cancel = None | |||
| guard = Grab | |||
| parry = Grab | |||
| startup = 0 | |||
| active = 1 | |||
| recovery = 0 | |||
| total = 1 | |||
| advHit = -DWN | |||
| advBlock = Grab | |||
| invul = None | |||
| description = Cammy does her Frankensteiner throw but in the air this time. Does a nice bit of damage, and is her highest damage normal grab in general, but gives a pretty mediocre knockdown. You'll generally stick to air punch throw over this, but if you think the damage is more worth it or think it'll kill, there's little reason not to do this one instead. | |||
}} | |||
}} | |||
== Special Moves == | == Special Moves == | ||
=== <span class="invisible-header">Spiral Arrow</span> === | |||
{{MoveData | |||
| name = Spiral Arrow | |||
| input = 236K | |||
| subtitle = Drill | |||
| image = CVS2_Cammy_236K_First.PNG | |||
| caption = Starting hitbox | |||
| image2 = CVS2_Cammy_236K_Second.PNG | |||
| caption2 = Travelling hitbox | |||
| linkname = Spiral Arrow | |||
| data = | |||
{{AttackData-CvS2 | |||
| version = {{Motion|236}}+{{Icon-Capcom|LK}} | |||
| subtitle = | |||
| damage = 1200/1100 | |||
| stun = 12/11 | |||
| cancel = None | |||
| guard = Low | |||
| parry = Low | |||
| startup = 8 | |||
| active = 23 | |||
| recovery = 19 | |||
| total = 50 | |||
| advHit = -DWN | |||
| advBlock = -18 | |||
| invul = None | |||
* | |||
}} | |||
{{AttackData-CvS2 | |||
| header = no | |||
| version = {{Motion|236}}+{{Icon-Capcom|MK}} | |||
| subtitle = | |||
| damage = 1300/1200 | |||
| stun = 13/12 | |||
| cancel = None | |||
| guard = Low | |||
| parry = Low | |||
| startup = 8 | |||
| active = 23 | |||
| recovery = 20 | |||
| total = 51 | |||
| advHit = -DWN | |||
| advBlock = -19 | |||
| invul = None | |||
* | |||
}} | |||
{{AttackData-CvS2 | |||
| header = no | |||
| version = {{Motion|236}}+{{Icon-Capcom|HK}} | |||
| subtitle = | |||
| damage = 300+1300 | |||
| stun = 3+13 | |||
| cancel = None | |||
| guard = Low | |||
| parry = Low | |||
| startup = 8 | |||
| active = 23 | |||
| recovery = 23 | |||
| total = 54 | |||
| advHit = -DWN | |||
| advBlock = -18 | |||
| invul = None | |||
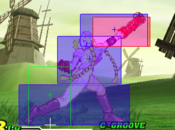
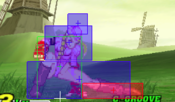
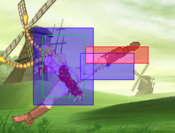
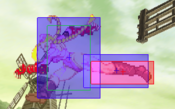
| description = Cammy slides along the ground while spinning like an arrow. Her main special, especially for ending combos. Since every version has the same startup, stick to the HK version in combos for max damage. In neutral these still have plenty of use, as they have pretty extreme low profile and can be spaced to be safe. When done point blank you are left more than punishable however, so learn where you can do each version and be safe. Roll cancelling makes these even more potent, but Cammy is mostly played in Grooves without rolls. | |||
If hit near the tip in the corner you can convert to a level 1 or 2 AA super for big damage, level to cancel does more than level 3 juggle. | |||
* | |||
}} | |||
}} | |||
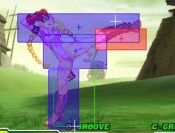
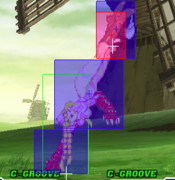
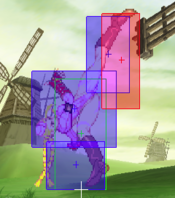
=== <span class="invisible-header">Cannon Spike</span> === | |||
{{MoveData | |||
| name = Cannon Spike | |||
| input = 623K | |||
| subtitle = DP | |||
| image = CVS2_Cammy_623K_First.PNG | |||
| caption = Invulnerable Startup | |||
| image2 = CVS2_Cammy_623K_Second.PNG | |||
| caption2 = First Hitbox | |||
| image3 = CVS2_Cammy_623K_Third.PNG | |||
| caption3 = Second Hitbox | |||
| linkname = Cannon Spike | |||
| data = | |||
{{AttackData-CvS2 | |||
| version = {{Motion|623}}+{{Icon-Capcom|LK}} | |||
| subtitle = | |||
| damage = 1400/700 | |||
| stun = 14/7 | |||
| cancel = None | |||
| guard = Mid | |||
| parry = High | |||
| startup = 4 | |||
| active = 23 | |||
| recovery = 22 | |||
| total = 49 | |||
| advHit = -DWN | |||
| advBlock = -28 | |||
| invul = 4 (Full), 3 (Lower) | |||
* | |||
}} | |||
{{AttackData-CvS2 | |||
| header = no | |||
| version = {{Motion|623}}+{{Icon-Capcom|MK}} | |||
| subtitle = | |||
| damage = 1500/700 | |||
| stun = 15/7 | |||
| cancel = None | |||
| guard = Mid | |||
| parry = High | |||
| startup = 4 | |||
| active = 28 | |||
| recovery = 28 | |||
| total = 60 | |||
| advHit = -DWN | |||
| advBlock = -29 | |||
| invul = 4 (Full), 3 (Lower) | |||
* | |||
}} | |||
{{AttackData-CvS2 | |||
| header = no | |||
| version = {{Motion|623}}+{{Icon-Capcom|HK}} | |||
| subtitle = | |||
| damage = 1600/700 | |||
| stun = 16/7 | |||
| cancel = None | |||
| guard = Mid | |||
| parry = High | |||
| startup = 4 | |||
| active = 33 | |||
| recovery = 35 | |||
| total = 72 | |||
| advHit = -DWN | |||
| advBlock = -30 | |||
| invul = 8 (Full) | |||
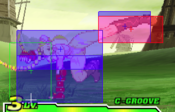
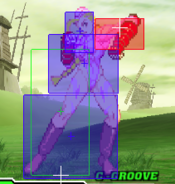
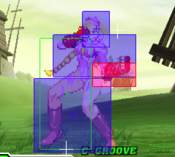
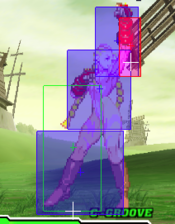
| description = Cammy's kick DP series. Very high priority and fast, making them stellar anti-airs. Learn to DP on reaction to jumps as this makes it very hard to jump on Cammy. Can also be used for reversals, namely the HK version, but are very unsafe so use this with caution. | |||
* | |||
}} | |||
}} | |||
=== <span class="invisible-header">Cannon Strike</span> === | |||
{{MoveData | |||
| name = Cannon Strike | |||
| input = j.214K | |||
| subtitle = Divekick | |||
| image = CVS2_Cammy_j214K.PNG | |||
| caption = | |||
| linkname = j214K | |||
| data = | |||
{{AttackData-CvS2 | |||
| version = In Air, {{Motion|214}}+{{Icon-Capcom|K}} | |||
| subtitle = | |||
| damage = 800 | |||
| stun = 8 | |||
| cancel = None | |||
| guard = High | |||
| parry = High | |||
| startup = 12 | |||
| active = Travelling | |||
| recovery = 4 (Landing) | |||
| total = ~16 | |||
| advHit = +10 | |||
| advBlock = +10 | |||
| invul = None | |||
| description = A very useful divekick. Similar to Cammy's other two main specials, this has higher priority than it should. Mixing that with the pause in the air to throw off anti-air timings, it can be hard for some characters to properly anti-air this without a DP or invuln special. Still, you shouldn't use this every jump. Tends to be very plus, but try to aim for the lower parts of the opponents hurtbox to be as plus as possible and guarantee a combo afterwards. The only difference in versions used is the angle she travels, and even then it's not a major difference. | |||
* | |||
}} | |||
}} | |||
=== <span class="invisible-header">Axle Spinning Knuckle</span> === | |||
{{MoveData | |||
| name = Axle Spinning Knuckle | |||
| input = 63214P | |||
| subtitle = Spin | |||
| image = CVS2_Cammy_63214P_First.PNG | |||
| caption = Hurtbox Disappears | |||
| image2 = CVS2_Cammy_63214P_Second.PNG | |||
| caption2 = Hitbox Appears | |||
| linkname = 63214P | |||
| data = | |||
{{AttackData-CvS2 | |||
| version = {{Motion|63214}}+{{Icon-Capcom|LP}} | |||
| subtitle = | |||
| damage = 400+1000 | |||
| stun = 4+10 | |||
| cancel = None | |||
| guard = Mid | |||
| parry = High | |||
| startup = 44 | |||
| active = 11 | |||
| recovery = 8 | |||
| total = 53 | |||
| advHit = -DWN | |||
| advBlock = +8 | |||
| invul = 2 (Middle Body), 31 (Projectile) | |||
* | |||
}} | |||
{{AttackData-CvS2 | |||
| header = no | |||
| version = {{Motion|63214}}+{{Icon-Capcom|MP}} | |||
| subtitle = | |||
| damage = 400+1100 | |||
| stun = 4+11 | |||
| cancel = None | |||
| guard = Mid | |||
| parry = High | |||
| startup = 45 | |||
| active = 11 | |||
| recovery = 8 | |||
| total = 54 | |||
| advHit = -DWN | |||
| advBlock = +8 | |||
| invul = 2 (Middle Body), 32 (Projectile) | |||
* | |||
}} | |||
{{AttackData-CvS2 | |||
| header = no | |||
| version = {{Motion|63214}}+{{Icon-Capcom|HP}} | |||
| subtitle = | |||
| damage = 400+1200 | |||
| stun = 4+12 | |||
| cancel = None | |||
| guard = Mid | |||
| parry = High | |||
| startup = 46 | |||
| active = 11 | |||
| recovery = 8 | |||
| total = 55 | |||
| advHit = -DWN | |||
| advBlock = +8 | |||
| invul = 2 (Middle Body), 33 (Projectile) | |||
| description = Cammy spins toward her opponent before throwing out a backhand punch. Massive projectile invuln lets her breeze through any projectile. Because of the lengthy startup however, this has to be used very early on to actually punish a fireball, making it a bit of a risky guess. While she is left very plus, this will always lose to lows like sweeps or 2MK > supers, making it a large risk for medium reward in the form of a knockdown or plus frames, which Cammy can already get with much more safety usually. If you know 100% they'll throw a fireball, and you aren't in a roll groove for RC Spiral Arrow, this isn't bad. Otherwise, avoid using this. | |||
* | |||
}} | |||
}} | |||
=== <span class="invisible-header">Hooligan Combination</span> === | |||
{{MoveData | |||
| name = Hooligan Combination | |||
| input = 12369P | |||
| subtitle = Flip | |||
| image = CVS2_Cammy_12369P.PNG | |||
| caption = | |||
| linkname = Hooligan Combination | |||
| data = | |||
{{AttackData-CvS2 | |||
| version = {{Motion|db}}{{Motion|236}}{{Motion|uf}}+{{Icon-Capcom|LP}} | |||
| subtitle = | |||
| damage = None | |||
| stun = None | |||
| cancel = None | |||
| guard = None | |||
| parry = None | |||
| startup = 0 | |||
| active = 66 | |||
| recovery = 0 | |||
| total = 66 | |||
| advHit = None | |||
| advBlock = None | |||
| invul = None | |||
* | |||
}} | |||
{{AttackData-CvS2 | |||
| header = no | |||
| version = {{Motion|db}}{{Motion|236}}{{Motion|uf}}+{{Icon-Capcom|MP}} | |||
| subtitle = | |||
| damage = None | |||
| stun = None | |||
| cancel = None | |||
| guard = None | |||
| parry = None | |||
| startup = 0 | |||
| active = 62 | |||
| recovery = 0 | |||
| total = 62 | |||
| advHit = None | |||
| advBlock = None | |||
| invul = None | |||
* | |||
}} | |||
{{AttackData-CvS2 | |||
| header = no | |||
| version = {{Motion|db}}{{Motion|236}}{{Motion|uf}}+{{Icon-Capcom|HP}} | |||
| subtitle = | |||
| damage = None | |||
| stun = None | |||
| cancel = None | |||
| guard = None | |||
| parry = None | |||
| startup = 0 | |||
| active = 58 | |||
| recovery = 0 | |||
| total = 58 | |||
| advHit = None | |||
| advBlock = None | |||
| invul = None | |||
| description = Cammy flips through the air at her opponent. The input is very strange, and is somewhat difficult since it has to be done before Cammy jumps out of her jump startup. This has three possible followups: Cannon Strike, Throw, and Razor Edge Slicer. These are an overhead, a grab, and a low. This is generally not a tool you will use often, as even though Cammy can threaten a great mixup from it, it has tons of travel time and the opponent can easily hit you out of it or even just jump or roll away. Similar to Axle Spinning Knuckle, you won't get many chances to use this in a match. However, if you know an opponent will block against Cammy to avoid getting counterhit and has been teching all your throws, this can be a worthwhile last-ditch mixup. | |||
* | |||
}} | |||
}} | |||
=== <span class="invisible-header">Cannon Strike Followup</span> === | |||
{{MoveData | |||
| name = Cannon Strike Followup | |||
| input = K after Hooligan Combination | |||
| subtitle = Divekick Followup | |||
| image = CVS2_Cammy_j214K.PNG | |||
| caption = | |||
| linkname = K Followup | |||
| data = | |||
{{AttackData-CvS2 | |||
| version = After Hooligan, {{Icon-Capcom|K}} | |||
| subtitle = | |||
| damage = 800 | |||
| stun = 8 | |||
| cancel = None | |||
| guard = High | |||
| parry = High | |||
| startup = 12 | |||
| active = Travelling | |||
| recovery = 4 (Landing) | |||
| total = ~16 | |||
| advHit = +10 | |||
| advBlock = +10 | |||
| invul = None | |||
| description = Identical to the normal version. Overhead mixup from Hooligan, and the one you'll use the most in the few cases you use Hooligan since it's the fastest to come out and doesn't require close proximity. | |||
* | |||
}} | |||
}} | |||
=== <span class="invisible-header">Throw Followup</span> === | |||
{{MoveData | |||
| name = Hooligan Throw | |||
| input = After Hooligan, Close 4/6P | |||
| subtitle = Throw Followup | |||
| image = CVS2_Cammy_HThrow.PNG | |||
| caption = | |||
| linkname = | |||
| data = | |||
{{AttackData-CvS2 | |||
| version = After Hooligan, Close {{Motion|b}}/{{Motion|f}}+{{Icon-Capcom|P}} | |||
| subtitle = | |||
| damage = 1700/1800 | |||
| stun = 0 | |||
| cancel = None | |||
| guard = Grab | |||
| parry = Grab | |||
| startup = 0 | |||
| active = 1 | |||
| recovery = Till Landing/5 | |||
| total = ~6 | |||
| advHit = -DWN | |||
| advBlock = Grab | |||
| invul = None | |||
| description = A grab mixup from Hooligan. Rarely used since opponents won't respect Hooligan enough for you to get this, but it is an option you have if they respect you too much. Funnily enough this has an airgrab version that does more damage, so if the opponent jumps out of a Hooligan mixup late you can get this and punish them. Still not a great option, but it is possible. | |||
* | |||
}} | |||
}} | |||
=== <span class="invisible-header">Razor Edge Slicer</span> === | |||
{{MoveData | |||
| name = Razor Edge Slicer | |||
| input = After Hooligan, do nothing | |||
| subtitle = Low Followup | |||
| image = CVS2_Cammy_Slide.PNG | |||
| caption = | |||
| linkname = Razor Edge Slicer | |||
| data = | |||
{{AttackData-CvS2 | |||
| version = After Hooligan, {{Motion|5}} | |||
| subtitle = | |||
| damage = 1100/1200/1300 | |||
| stun = 11/12/13 | |||
| cancel = None | |||
| guard = Low | |||
| parry = Low | |||
| startup = 5 | |||
| active = 8 | |||
| recovery = 25/23/31 | |||
| total = 38/36/44 | |||
| advHit = -DWN | |||
| advBlock = -7 | |||
| invul = None | |||
| description = A slide after a full Hooligan flip that hits low. The different recovery values and damage values correspond with what version of Hooligan you used. This is probably Cammy's absolute least useful move. Your opponent has to completely respect the full Hooligan flip before this even starts, and then try to block high as you land. Since every version of Hooligan takes roughly a full second to complete, only opponents with the slowest of reactions and the least amount of knowledge of how blocking works will get hit by this. Even if they do somehow get stuck blocking it, Cammy is punishable if this gets blocked. In the rare cases you even use Hooligan, stick to the other two followups. | |||
* | |||
}} | |||
}} | |||
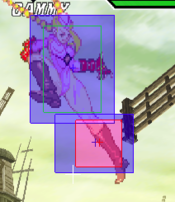
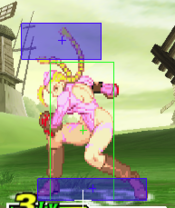
== Super Moves == | == Super Moves == | ||
= The | === <span class="invisible-header">Spin Drive Smasher</span> === | ||
{{MoveData | |||
| name = Spin Drive Smasher | |||
| input = 236236K | |||
| subtitle = SDS | |||
| image = CVS2_Cammy_236236K_First.PNG | |||
| caption = Starting Hitbox | |||
| image2 = CVS2_Cammy_236236K_Second.PNG | |||
| caption2 = Travelling Hitbox | |||
| linkname = SDS | |||
| data = | |||
{{AttackData-CvS2 | |||
| version = {{Motion|236}}{{Motion|236}}+{{Icon-Capcom|LK}} | |||
| subtitle = | |||
| damage = 2400 | |||
| stun = 0 | |||
| cancel = None | |||
| guard = Mid | |||
| parry = Mid | |||
| startup = 4:4 | |||
| active = 8(17)27 | |||
| recovery = 26 | |||
| total = 86 | |||
| advHit = -DWN | |||
| advBlock = -42 | |||
| invul = 8 (Full) | |||
* | |||
}} | |||
{{AttackData-CvS2 | |||
| header = no | |||
| version = {{Motion|236}}{{Motion|236}}+{{Icon-Capcom|MK}} | |||
| subtitle = | |||
| damage = 3500 | |||
| stun = 0 | |||
| cancel = SP/SU | |||
| guard = Mid | |||
| parry = Mid | |||
| startup = 4:4 | |||
| active = 12(17)27 | |||
| recovery = 30 | |||
| total = 94 | |||
| advHit = -DWN | |||
| advBlock = -51 | |||
| invul = 14 (Full) | |||
* | |||
}} | |||
{{AttackData-CvS2 | |||
| header = no | |||
| version = {{Motion|236}}{{Motion|236}}+{{Icon-Capcom|HK}} | |||
| subtitle = | |||
| damage = 5200 | |||
| stun = 0 | |||
| cancel = None | |||
| guard = Mid | |||
| parry = Mid | |||
| startup = 4:4 | |||
| active = 16(17)30 | |||
| recovery = 35 | |||
| total = 106 | |||
| advHit = -DWN | |||
| advBlock = -63 | |||
| invul = 22 (Full) | |||
| description = Cammy's main super. In neutral these have decent invuln and can punish lots of things because of her speed, like Hibiki Distance Slashes, but the main attraction of these is combo potential. Even though they're average in terms of damage, Cammy has many easy ways to confirm into these, making any hit from Cammy with meter very threatening as she can always put a super behind it. The level 3 version is the scariest, with very respectable damage, but C-Cammy will often use the level 2 version for her powerful level 2 combo. | |||
* | |||
}} | |||
}} | |||
=== <span class="invisible-header">Reverse Shaft Breaker</span> === | |||
{{MoveData | |||
| name = Reverse Shaft Breaker | |||
| input = 214214K | |||
| subtitle = Reversal Super | |||
| image = CVS2_Cammy_214214K_First.PNG | |||
| caption = Invincible Startup | |||
| image2 = CVS2_Cammy_214214K_Second.PNG | |||
| caption2 = First Active Frames | |||
| linkname = Reverse Shaft Breaker | |||
| data = | |||
{{AttackData-CvS2 | |||
| version = {{Motion|214}}{{Motion|214}}+{{Icon-Capcom|LK}} | |||
| subtitle = | |||
| damage = 2300~2700 | |||
| stun = 0 | |||
| cancel = None | |||
| guard = Mid | |||
| parry = High | |||
| startup = 4:4 | |||
| active = 32 | |||
| recovery = 24 | |||
| total = 64 | |||
| advHit = -DWN | |||
| advBlock = -12 | |||
| invul = 8 (Full) | |||
* | |||
}} | |||
{{AttackData-CvS2 | |||
| header = no | |||
| version = {{Motion|214}}{{Motion|214}}+{{Icon-Capcom|MK}} | |||
| subtitle = | |||
| damage = 2600~4000 | |||
| stun = 0 | |||
| cancel = SP/SU | |||
| guard = Mid | |||
| parry = High | |||
| startup = 4:4 | |||
| active = 36 | |||
| recovery = 27 | |||
| total = 71 | |||
| advHit = -DWN | |||
| advBlock = -20 | |||
| invul = 14 (Full) | |||
* | |||
}} | |||
{{AttackData-CvS2 | |||
| header = no | |||
| version = {{Motion|214}}{{Motion|214}}+{{Icon-Capcom|HK}} | |||
| subtitle = | |||
| damage = 3200~5600 | |||
| stun = 0 | |||
| cancel = None | |||
| guard = Mid | |||
| parry = High | |||
| startup = 4:4 | |||
| active = 38 | |||
| recovery = 30 | |||
| total = 76 | |||
| advHit = -DWN | |||
| advBlock = -26 | |||
| invul = 22 (Full) | |||
| description = The less used of Cammy's two supers, but not a bad super really. Mashing your kick buttons increases damage and should be done on hit, but it makes you more negative on block. Regardless of mashing or not you are still punishable. Useful as reversals and anti-airs, but you would probably stick to the somewhat less risky Cannon Spike for those purposes. Sees use in C-Cammy and A-Cammy as a juggle ender after a level 2 cancel or Custom Combo. | |||
* | |||
}} | |||
}} | |||
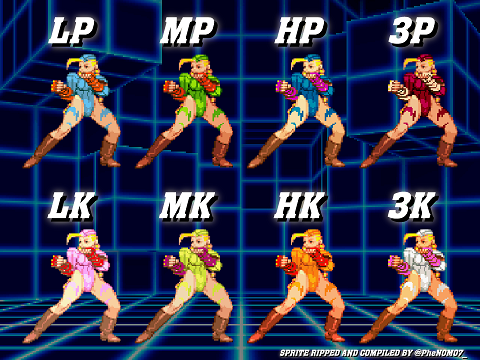
= | == Colors == | ||
[[File:Cammy_CvS2_colors.png]] | |||
{{Navbox-CvS2}} | |||
[[Category:Capcom vs SNK 2]] | |||
Latest revision as of 16:49, 29 March 2025
Introduction
Story
Cammy White, a.k.a. Killer Bee, is an ex-Shadoloo member and a Doll who gained self-awareness and broke free from M. Bison/Dictator's control with help from Dhalsim. Dolls were clones of M. Bison himself who were made to be his personal assassins and guards, acting very robotically. Cammy freed the other Dolls, but an explosion caused her to lose her memory, and Vega/Claw deposited her at the base of Delta Red, a paramilitary organization. After learning about the World Warrior tournament in the events of Street Fighter 2, Cammy entered, feeling a connection to M. Bison. She learned of her true past, and decided to spend the rest of her life fighting against M. Bison.
Gameplay
Cammy is one of the best characters in CvS2, likely right behind the top tiers. Her strengths are numerous, from some of the best normals in the game to plenty of powerful specials and mixup potential. Her amazing walkspeed allows her to keep her preferred range easily, and some of her amazing buttons like 2MK and especially 5HP keep the opponent constantly in check. Her signature special, Spiral Arrow, allows her to punish a majority of fireballs and can be spaced to make her safe and get her in. Her uppercut, Cannon Spike, is incredibly fast with great priority and invincible startup, eating up any jump at all and giving Cammy great air control. Her divekick, Cannon Strike, is a is a powerful dive that allows her to alter her jump arc and leaves her very plus. With meter, any good hit from a long distance poke or ridiculously plus close range normal can confirm easily into her Spin Drive Smasher super, usually called SDS, for insane damage. Fast ground speed, insane frame data, scary offense with meter, and versatile specials make Cammy an offensive grounded nightmare.
Cammy does have a few major weaknesses holding her back from being as strong as characters like Sagat or Blanka. Her health is lower than the average character, against characters with high damage she can be KOd with a few good moves. She has a very floaty and high jump, and while having a strong divekick makes it a bit better, anti-airing her is still easier than most characters. Probably the biggest weakness is she has one of the worst rolls in the game, being very slow and reactable, making it very risky to roll with her. Nevertheless, these weaknesses barely hold back an otherwise stellar character.
Groove Selection
Best - K/P/C: Cammy has three popular grooves, K, P, and C. K-Cammy is the best of the three, as Cammy works incredibly in K-Groove. Rage makes her aggressive movement scarier as any poke can confirm into a level 3 SDS for massive damage. Shorthop and run gives Cammy more ways to move around, and her hop normals are amazing. JD is a powerful defensive option, and since Cammy can easily confirm into SDS or Spiral Arrow she can almost always get a punish after a good JD. A lack of roll doesn't affect her at all either, considering her roll is so bad. P-Cammy is also quite good, as similar to JD Cammy can easily punish into a knockdown from any parry. While P-Cammy won't always have super, being able to parry so easily into level 3 SDS when she does have it makes her terrifying. While she doesn't have run, she does have shorthop, and no rolls is no issue. C-Cammy sacrifices a lot of these for more ways to get SDS out, making her neutral and pokes much more threatening. C-Cammy also has a powerful and stylish level 2 combo.
Useful - N: N-Cammy is just a little behind C-Cammy. N-Cammy combines aspects of K-Cammy and C-Cammy by being able to cancel into level 1 SDS often, and maintaining the movement of K-Groove. Max Mode is somewhat useless as Cammy would rather spend that meter on a confirm into SDS, but it's a useful option. N-Cammy can barely make use of guard cancel roll however, and her roll in general is far too weak for N-Groove.
Worst - S/A: S-Cammy and A-Cammy are her two weakest grooves. Cammy likes her meter for SDS cancels, and S-Cammy has to give up aggressive space to build meter. S-Cammy at low health does get access to infinite level 1 SDS but her health is so low that this is incredibly risky. A-Cammy has none of the mechanics to aid her movement, and while CC is strong, Cammy uses the meter better by confirming into SDS. By no means however are either of these Grooves bad, Cammy works well in both. Just that the others give her much better options overall.
|
Cammy is a clear top tier with amazing normals, dominant neutral, and scary punishes, but she pays for it with a horrible roll and bad jump. Cammy is best in K, C, and P-Groove. Difficulty: Pretty EasyTier: S |
|
| Pros | Cons |
|
|
Players to Watch
| Name | Country | Groove | Accounts | Notes |
|---|---|---|---|---|
| S-Zawa | Japan | C/P-Groove | Twitter: @Cvs2Fukuoka | A great player overall, uses Cammy on both his C team and P team very effectively. C-Groove Sample Match P-Groove Sample Match |
| Kiku | Japan | C-Groove | N/A | One of the best C-Groovers in the world. Kiku's Cammy is more methodical but can lock an opponent down if needed. Sample Match |
| DM | Japan | P-Groove | N/A | One of Fukuoka's strongest players. He usually tries to find parries into a quick knockdown and begin his pressure. Sample Match |
| Bocchan | Japan | K-Groove | N/A | The point character on his infamous CBS squad. Bocchan takes no time in getting into the opponent's face and reaping the rewards. Sample Match |
