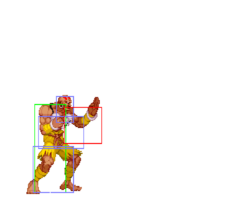
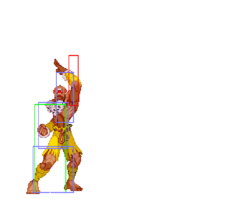
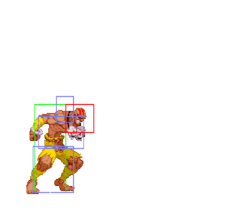
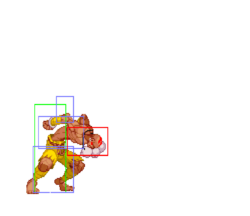
No edit summary |
|||
| (44 intermediate revisions by 5 users not shown) | |||
| Line 1: | Line 1: | ||
<templatestyles src="CharacterPage-SFA2/styles.css"/> | |||
{{TOClimit}} | |||
{{HiddenTOCHeader | |||
|header= =Overview=}} | |||
{{CharacterOverview-SFA2 | |||
|overview= The Indian monk fights for his people who suffer from famine and disease. He has sought to unify his mind, body and soul through the discipline of Yoga. As he nears his goal, Dhalsim must test himself and his skills before he can rise to a higher state of consciousness. | |||
'''Players to watch:''' [https://www.fightcade.com/id/SabreAZ SabreAZ], [https://www.fightcade.com/id/xQj xQj(aka zoo & yw10)] | |||
<br><br> | |||
<center>'''Moveset'''</center> | |||
<center><div style="width:100%;max-width:450px;"><youtube>pRYBEL_mgQg</youtube></div></center> | |||
<br> | |||
|playstyle=[[File:A2_Icon_Dhalsim.png|30px]] Dhalsim, is not as amazing as his ST counterpart, but still has his stretchy limbs and command normals that will fit if the player prefers to play patient and distant.'' | |||
|pros= *Good zoning | |||
* Good dive kicks | |||
* Yoga Fire and Flame can be combo'd into and does good stun | |||
* Decent ACs that have a purpose depending on the situation | |||
* Damaging CC that can be used as an anti-air | |||
* Unblockable setup after Yoga Strike | |||
|cons=* Second lowest defense rating in the game, resulting in more damage taken | |||
* Slow movement and floaty jump | |||
* Some of the worst supers in the game | |||
* Overall hard to use | |||
= | |name=Dhalsim | ||
|image=SFA2_Dhalsim_Portrait.png | |||
|health=144 | |||
|rating=-3 | |||
|stun=40 | |||
|fSpeed=200 | |||
|bSpeed=125 | |||
|bJump=70f (3+67+0) | |||
|nJump=69f (3+66+0) | |||
|fJump=69f (3+66+0) | |||
|wakeupNormal=51f | |||
|wakeupQuick=20f | |||
|throw=20 | |||
|colorsName=Dhalsim | |||
|old=no | |||
}} | |||
[[File: | {{HiddenTOCHeader | ||
|header= =Move List=}} | |||
== Normal Moves == | |||
<center>{{FrameDataKey-SFA2 | |||
|credit=Damage, stun, framedata, meter, and updated hitboxes collected by [[File:A2_Icon_ChunLi.png]][[User:Veri7as|Veri7as]], June 2025 | |||
}}</center> | |||
===Standing=== | |||
{{MoveData-SFA2 | |||
|image=A2_Dhalsim_st.lp_1.png | |||
|imageSize=250px | |||
|image2=A2_Dhalsim_st.lp_2.png | |||
|imageSize2=250px | |||
|caption= | |||
|name= | |||
|subtitle= | |||
|input=st.[[File:Lp.png]] | |||
|data= | |||
{{AttackData-SFA2 | |||
|Damage= 5<sup>[0]</sup>, 5<sup>[0]</sup> | |||
|Stun= 3, 3 | |||
|Startup= 4 | |||
|Active= 3(0)6 | |||
|Frame Adv= -3, 0 | |||
|Meter= 0/1/2 | |||
|Block=[[File:Mid.png]] | |||
|Properties=[[File:Specialcancel.png]]<br>[[File:Supercancel.png]] | |||
}} | |||
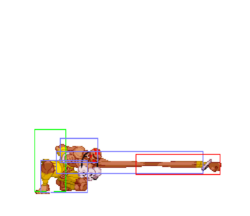
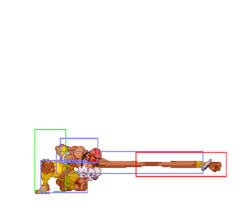
|description=* Hits 1 time. | |||
* Both hits are cancellable. | |||
}} | |||
{{MoveData-SFA2 | |||
|image=A2_Dhalsim_st.mp.png | |||
|imageSize=250px | |||
|caption= | |||
|name= | |||
|subtitle= | |||
|input=st.[[File:Mp.png]] | |||
|data= | |||
{{AttackData-SFA2 | |||
|Damage= 9<sup>[0]</sup> | |||
|Stun= 6 | |||
|Startup= 13 | |||
|Active= 4 | |||
|Frame Adv= +1 | |||
|Meter= 1/3/6 | |||
|Block=[[File:Mid.png]] | |||
|Properties= - | |||
}} | |||
|description= | |||
}} | |||
{{MoveData-SFA2 | |||
|image=A2_Dhalsim_st.hp.png | |||
|imageSize=250px | |||
|caption= | |||
|name= | |||
|subtitle= | |||
|input=st.[[File:Hp.png]] | |||
|data= | |||
{{AttackData-SFA2 | |||
|Damage= 13<sup>[0]</sup> | |||
|Stun= 8 | |||
|Startup= 17 | |||
|Active= 6 | |||
|Frame Adv= -5 | |||
|Meter= 2/5/9 | |||
|Block=[[File:Mid.png]] | |||
|Properties= - | |||
}} | |||
|description= | |||
}} | |||
{{MoveData-SFA2 | |||
|image=A2_Dhalsim_st.lk.png | |||
|imageSize=250px | |||
|caption= | |||
|name= | |||
|subtitle= | |||
|input=st.[[File:Lk.png]] | |||
|data= | |||
{{AttackData-SFA2 | |||
|Damage= 5<sup>[0]</sup> | |||
|Stun= 3 | |||
|Startup= 9 | |||
|Active= 4 | |||
|Frame Adv= -3 | |||
|Meter= 0/1/2 | |||
|Block=[[File:Mid.png]] | |||
|Properties= - | |||
}} | |||
|description= | |||
}} | |||
< | {{MoveData-SFA2 | ||
|image=A2_Dhalsim_st.mk.png | |||
|imageSize=250px | |||
|caption= | |||
|name= | |||
|subtitle= | |||
|input=st.[[File:Mk.png]] | |||
|data= | |||
{{AttackData-SFA2 | |||
|Damage= 9<sup>[0]</sup> | |||
|Stun= 6 | |||
|Startup= 13 | |||
|Active= 4 | |||
|Frame Adv= -4 | |||
|Meter= 1/3/6 | |||
|Block=[[File:Mid.png]] | |||
|Properties= - | |||
}} | |||
|description= | |||
}} | |||
= | {{MoveData-SFA2 | ||
|image=A2_Dhalsim_st.hk.png | |||
|imageSize=250px | |||
|caption= | |||
|name= | |||
|subtitle= | |||
|input=st.[[File:Hk.png]] | |||
|data= | |||
{{AttackData-SFA2 | |||
|Damage= 12<sup>[0]</sup> | |||
|Stun= 8 | |||
|Startup= 17 | |||
|Active= 4 | |||
|Frame Adv= -2 | |||
|Meter= 2/5/9 | |||
|Block=[[File:Mid.png]] | |||
|Properties= - | |||
}} | |||
|description= | |||
}} | |||
== | ===Back Standing=== | ||
{{MoveData-SFA2 | |||
|image=A2_Dhalsim_b.mp_1.png | |||
|imageSize=250px | |||
|image2=A2_Dhalsim_b.mp_2.png | |||
|imageSize2=250px | |||
|caption= | |||
|name= | |||
|subtitle= | |||
|input=[[File:B.png]]+ [[File:Mp.png]] | |||
|data= | |||
{{AttackData-SFA2 | |||
|Damage= 10<sup>[1]</sup>, 9<sup>[1]</sup> | |||
|Stun= 6, 6 | |||
|Startup= 5 | |||
|Active= 2(0)8 | |||
|Frame Adv= -3, -2 | |||
|Meter= 1/3/6 | |||
|Block=[[File:Mid.png]] | |||
|Properties=[[File:Specialcancel.png]]<br>[[File:Supercancel.png]] | |||
}} | |||
|description=* Hits 1 time. | |||
* Both hits are cancellable. | |||
A good anti air that comes out fast. | |||
}} | |||
{{MoveData-SFA2 | |||
[[File: | |image=A2_Dhalsim_b.hp_1.png | ||
|imageSize=250px | |||
|image2=A2_Dhalsim_b.hp_2.png | |||
|imageSize2=250px | |||
|caption= | |||
|name= | |||
|subtitle= | |||
|input=[[File:B.png]]+ [[File:Hp.png]] | |||
|data= | |||
{{AttackData-SFA2 | |||
|Damage= 13<sup>[2]</sup>, 9<sup>[2]</sup> | |||
|Stun= 4, 8 | |||
|Startup= 7 | |||
|Active= 6(0)8 | |||
|Frame Adv= -10 | |||
|Meter= 2/2+2+1/2+4+3 | |||
|Block=[[File:Mid.png]] | |||
|Properties= [[File:Specialcancel.png]]<br>[[File:Supercancel.png]] | |||
}} | |||
|description=*'''Punishable on hit.''' | |||
* Hits 2 times. | |||
* Second hit is not cancellable. | |||
}} | |||
{{MoveData-SFA2 | |||
[[File: | |image=A2_Dhalsim_b.lk.png | ||
|imageSize=250px | |||
|caption= | |||
|name= | |||
|subtitle= | |||
|input=[[File:B.png]]+ [[File:Lk.png]] | |||
|data= | |||
{{AttackData-SFA2 | |||
|Damage= 5<sup>[0]</sup> | |||
|Stun= 3 | |||
|Startup= 5 | |||
|Active= 5 | |||
|Frame Adv= -3 | |||
|Meter= 0/1/2 | |||
|Block=[[File:Mid.png]] | |||
|Properties=[[File:Specialcancel.png]]<br>[[File:Supercancel.png]] | |||
}} | |||
|description= | |||
}} | |||
{{MoveData-SFA2 | |||
|image=A2_Dhalsim_b.mk.png | |||
[[File: | |imageSize=250px | ||
|caption= | |||
|name= | |||
|subtitle= | |||
|input=[[File:B.png]]+ [[File:Mk.png]] | |||
|data= | |||
{{AttackData-SFA2 | |||
|Damage= 12<sup>[1]</sup> | |||
|Stun= 6 | |||
|Startup= 6 | |||
|Active= 4 | |||
|Frame Adv= +2 | |||
|Meter= 1/3/6 | |||
|Block=[[File:Mid.png]] | |||
|Properties= - | |||
}} | |||
|description= | |||
}} | |||
{{MoveData-SFA2 | |||
[[File: | |image=A2_Dhalsim_b.hk.png | ||
|imageSize=250px | |||
|caption= | |||
|name= | |||
|subtitle= | |||
|input=[[File:B.png]]+ [[File:Hk.png]] | |||
|data= | |||
{{AttackData-SFA2 | |||
|Damage= 16<sup>[2]</sup> | |||
|Stun= 8 | |||
|Startup= 7 | |||
|Active= 4 | |||
|Frame Adv= -7 | |||
|Meter= 2/5/9 | |||
|Block=[[File:Mid.png]] | |||
|Properties= - | |||
}} | |||
|description= *'''Punishable on hit.''' | |||
Another good anti-air. | |||
}} | |||
===Crouching=== | |||
{{MoveData-SFA2 | |||
[[File: | |image=A2_Dhalsim_cr.lp.png | ||
|imageSize=250px | |||
|caption= | |||
|name= | |||
|subtitle= | |||
|input=cr.[[File:Lp.png]] | |||
|data= | |||
{{AttackData-SFA2 | |||
|Damage= 5<sup>[0]</sup> | |||
|Stun= 3 | |||
|Startup= 11 | |||
|Active= 5 | |||
|Frame Adv= -7 | |||
|Meter= 0/1/2 | |||
|Block=[[File:Low.png]] | |||
|Properties= - | |||
}} | |||
|description= | |||
}} | |||
{{MoveData-SFA2 | |||
|image=A2_Dhalsim_cr.mp.png | |||
|imageSize=250px | |||
|caption= | |||
|name= | |||
|subtitle= | |||
|input=cr.[[File:Mp.png]] | |||
|data= | |||
{{AttackData-SFA2 | |||
|Damage= 9<sup>[1]</sup> | |||
|Stun= 6 | |||
|Startup= 14 | |||
|Active= 5 | |||
|Frame Adv= -6 | |||
|Meter= 1/3/6 | |||
|Block=[[File:Low.png]] | |||
|Properties= - | |||
}} | |||
|description= | |||
}} | |||
{{MoveData-SFA2 | |||
[[File: | |image=A2_Dhalsim_cr.hp.png | ||
|imageSize=250px | |||
|caption= | |||
|name= | |||
|subtitle= | |||
|input=cr.[[File:Hp.png]] | |||
|data= | |||
{{AttackData-SFA2 | |||
|Damage= 12<sup>[2]</sup> | |||
|Stun= 8 | |||
|Startup= 14 | |||
|Active= 6 | |||
|Frame Adv= -5 | |||
|Meter= 2/5/9 | |||
|Block=[[File:Low.png]] | |||
|Properties= - | |||
}} | |||
|description= | |||
}} | |||
{{MoveData-SFA2 | |||
|image=A2_Dhalsim_cr.lk.png | |||
|imageSize=250px | |||
|caption= | |||
|name= | |||
|subtitle= | |||
|input=cr.[[File:Lk.png]] | |||
|data= | |||
{{AttackData-SFA2 | |||
|Damage= 5<sup>[0]</sup> | |||
|Stun= 3 | |||
|Startup= 6 | |||
|Active= 9 | |||
|Frame Adv= -4 at worst<br>+4 at best | |||
|Meter= 0/1/2 | |||
|Block=[[File:Low.png]] | |||
|Properties=[[File:Specialcancel.png]]<br>[[File:Supercancel.png]] | |||
}} | |||
|description= | |||
}} | |||
{{MoveData-SFA2 | |||
[[File: | |image=A2_Dhalsim_cr.mk.png | ||
|imageSize=250px | |||
|caption= | |||
|name= | |||
|subtitle= | |||
|input=cr.[[File:Mk.png]] | |||
|data= | |||
{{AttackData-SFA2 | |||
|Damage= 9<sup>[1]</sup> | |||
|Stun= 3 | |||
|Startup= 9 | |||
|Active= 11 | |||
|Frame Adv= -5 at worst<br>+5 at best | |||
|Meter= 1/3/6 | |||
|Block=[[File:Low.png]] | |||
|Properties= - | |||
}} | |||
|description= *'''Punishable on hit.''' | |||
}} | |||
{{MoveData-SFA2 | |||
|image=A2_Dhalsim_cr.hk.png | |||
|imageSize=250px | |||
|caption= | |||
|name= | |||
|subtitle= | |||
|input=cr.[[File:Hk.png]] | |||
|data= | |||
{{AttackData-SFA2 | |||
|Damage= 14<sup>[2]</sup> | |||
|Stun= 3 | |||
|Startup= 10 | |||
|Active= 13 | |||
|Frame Adv= -19 at worst<br>-7 at best | |||
|Meter= 2/5/9 | |||
|Block=[[File:Low.png]] | |||
|Properties=[[File:Softknockdown.png]] | |||
}} | |||
|description= | |||
}} | |||
===Back Crouching=== | |||
{{MoveData-SFA2 | |||
[[File: | |image=A2_Dhalsim_cr.b.lp.png | ||
|imageSize=250px | |||
|caption= | |||
|name= | |||
|subtitle= | |||
|input=[[File:Db.png]]+ [[File:Lp.png]] | |||
|data= | |||
{{AttackData-SFA2 | |||
|Damage= 5<sup>[0]</sup> | |||
|Stun= 3 | |||
|Startup= 4 | |||
|Active= 3 | |||
|Frame Adv= +3 | |||
|Meter= 0/1/2 | |||
|Block=[[File:Mid.png]] | |||
|Properties=[[File:Specialcancel.png]]<br>[[File:Supercancel.png]] | |||
}} | |||
|description= | |||
}} | |||
{{MoveData-SFA2 | |||
|image=A2_Dhalsim_cr.b.mp.png | |||
|imageSize=250px | |||
|caption= | |||
|name= | |||
|subtitle= | |||
|input=[[File:Db.png]]+ [[File:Mp.png]] | |||
|data= | |||
{{AttackData-SFA2 | |||
|Damage= 8<sup>[1]</sup> | |||
|Stun= 6 | |||
|Startup= 5 | |||
|Active= 4 | |||
|Frame Adv= +5 | |||
|Meter= 1/3/6 | |||
|Block=[[File:Mid.png]] | |||
|Properties=[[File:Specialcancel.png]]<br>[[File:Supercancel.png]] | |||
}} | |||
|description= | |||
}} | |||
{{MoveData-SFA2 | |||
[[File: | |image=A2_Dhalsim_cr.b.hp.png | ||
|imageSize=250px | |||
|caption= | |||
|name= | |||
|subtitle= | |||
|input=[[File:Db.png]]+ [[File:Hp.png]] | |||
|data= | |||
{{AttackData-SFA2 | |||
|Damage= 12<sup>[2]</sup> | |||
|Stun= 6 | |||
|Startup= 7 | |||
|Active= 4 | |||
|Frame Adv= +7 | |||
|Meter= 2/5/9 | |||
|Block=[[File:Mid.png]] | |||
|Properties= - | |||
}} | |||
|description= | |||
}} | |||
{{MoveData-SFA2 | |||
|image=A2_Dhalsim_cr.b.lk.png | |||
|imageSize=250px | |||
|caption= | |||
|name= | |||
|subtitle= | |||
|input=[[File:Db.png]]+ [[File:Lk.png]] | |||
|data= | |||
{{AttackData-SFA2 | |||
|Damage= 5<sup>[0]</sup> | |||
|Stun= 3 | |||
|Startup= 5 | |||
|Active= 6 | |||
|Frame Adv= -4 | |||
|Meter= 0/1/2 | |||
|Block=[[File:Low.png]] | |||
|Properties=[[File:Specialcancel.png]]<br>[[File:Supercancel.png]] | |||
}} | |||
|description= | |||
}} | |||
{{MoveData-SFA2 | |||
[[File: | |image=A2_Dhalsim_cr.b.mk.png | ||
|imageSize=250px | |||
|caption= | |||
|name= | |||
|subtitle= | |||
|input=[[File:Db.png]]+ [[File:Mk.png]] | |||
|data= | |||
{{AttackData-SFA2 | |||
|Damage= 11<sup>[1]</sup> | |||
|Stun= 6 | |||
|Startup= 6 | |||
|Active= 5 | |||
|Frame Adv= +2 | |||
|Meter= 1/3/6 | |||
|Block=[[File:Low.png]] | |||
|Properties=[[File:Specialcancel.png]]<br>[[File:Supercancel.png]] | |||
}} | |||
|description= | |||
}} | |||
{{MoveData-SFA2 | |||
|image=A2_Dhalsim_cr.b.hk.png | |||
|imageSize=250px | |||
|caption= | |||
|name= | |||
|subtitle= | |||
|input=[[File:Db.png]]+ [[File:Hk.png]] | |||
|data= | |||
{{AttackData-SFA2 | |||
|Damage= 16<sup>[2]</sup> | |||
|Stun= 8 | |||
|Startup= 7 | |||
|Active= 2 | |||
|Frame Adv= -5 | |||
|Meter= 2/5/9 | |||
|Block=[[File:Low.png]] | |||
|Properties=[[File:Specialcancel.png]][[File:Supercancel.png]]<br>[[File:Softknockdown.png]] | |||
}} | |||
|description= | |||
}} | |||
===Neutral Jumping=== | |||
{{MoveData-SFA2 | |||
|image=A2_Dhalsim_nj.lp.png | |||
|imageSize=250px | |||
|caption= | |||
|name= | |||
|subtitle= | |||
|input=nj.[[File:Lp.png]] | |||
|data= | |||
{{AttackData-SFA2 | |||
|Damage= 10<sup>[0]</sup> | |||
|Stun= 3 | |||
|Startup= 10 | |||
|Active= 6 | |||
|Frame Adv= | |||
|Meter= 0/1/2 | |||
|Block=[[File:High.png]] | |||
|Properties= | |||
}} | |||
|description= | |||
}} | |||
{{MoveData-SFA2 | |||
[[File: | |image=A2_Dhalsim_nj.mp.png | ||
|imageSize=250px | |||
|caption= | |||
|name= | |||
|subtitle= | |||
|input=nj.[[File:Mp.png]] | |||
|data= | |||
{{AttackData-SFA2 | |||
|Damage= 11<sup>[1]</sup> | |||
|Stun= 6 | |||
|Startup= 9 | |||
|Active= 4 | |||
|Frame Adv= | |||
|Meter= 2/4/7 | |||
|Block=[[File:High.png]] | |||
|Properties= | |||
}} | |||
|description= | |||
}} | |||
{{MoveData-SFA2 | |||
|image=A2_Dhalsim_nj.hp.png | |||
|imageSize=250px | |||
|caption= | |||
|name= | |||
|subtitle= | |||
|input=nj.[[File:Hp.png]] | |||
|data= | |||
{{AttackData-SFA2 | |||
|Damage= 12<sup>[2]</sup> | |||
|Stun= 6 | |||
|Startup= 9 | |||
|Active= 3 | |||
|Frame Adv= | |||
|Meter= 4/7/11 | |||
|Block=[[File:High.png]] | |||
|Properties= | |||
}} | |||
|description= | |||
}} | |||
{{MoveData-SFA2 | |||
[[File: | |image=A2_Dhalsim_nj.lk.png | ||
|imageSize=250px | |||
|caption= | |||
|name= | |||
|subtitle= | |||
|input=nj.[[File:Lk.png]] | |||
|data= | |||
{{AttackData-SFA2 | |||
|Damage= 10<sup>[0]</sup> | |||
|Stun= 3 | |||
|Startup= 9 | |||
|Active= 6 | |||
|Frame Adv= | |||
|Meter= 0/1/2 | |||
|Block=[[File:High.png]] | |||
|Properties= | |||
}} | |||
|description= | |||
}} | |||
{{MoveData-SFA2 | |||
|image=A2_Dhalsim_nj.mk.png | |||
|imageSize=250px | |||
|caption= | |||
|name= | |||
|subtitle= | |||
|input=nj.[[File:Mk.png]] | |||
|data= | |||
{{AttackData-SFA2 | |||
|Damage= 11<sup>[1]</sup> | |||
|Stun= 6 | |||
|Startup= 11 | |||
|Active= 3 | |||
|Frame Adv= | |||
|Meter= 2/4/7 | |||
|Block=[[File:High.png]] | |||
|Properties= | |||
}} | |||
|description= | |||
}} | |||
{{MoveData-SFA2 | |||
|image=A2_Dhalsim_nj.hk.png | |||
[[File: | |imageSize=250px | ||
|caption= | |||
|name= | |||
|subtitle= | |||
|input=nj.[[File:Hk.png]] | |||
|data= | |||
{{AttackData-SFA2 | |||
|Damage= 14<sup>[2]</sup> | |||
|Stun= 8 | |||
|Startup= 13 | |||
|Active= 6 | |||
|Frame Adv= | |||
|Meter= 4/7/11 | |||
|Block=[[File:High.png]] | |||
|Properties= | |||
}} | |||
|description= | |||
}} | |||
===Back Neutral Jumping=== | |||
{{MoveData-SFA2 | |||
[[File: | |image=A2_Dhalsim_nj.b.lp.png | ||
|imageSize=250px | |||
|caption= | |||
|name= | |||
|subtitle= | |||
|input=nj.[[File:B.png]]+ [[File:Lp.png]] | |||
|data= | |||
{{AttackData-SFA2 | |||
|Damage= 10<sup>[0]</sup> | |||
|Stun= 3 | |||
|Startup= 5 | |||
|Active= 10 | |||
|Frame Adv= | |||
|Meter= 0/1/2 | |||
|Block=[[File:High.png]] | |||
|Properties= | |||
}} | |||
|description= | |||
}} | |||
{{MoveData-SFA2 | |||
|image=A2_Dhalsim_nj.b.mp.png | |||
|imageSize=250px | |||
|caption= | |||
|name= | |||
|subtitle= | |||
|input=nj.[[File:B.png]]+ [[File:Mp.png]] | |||
|data= | |||
{{AttackData-SFA2 | |||
|Damage= 12<sup>[1]</sup> | |||
|Stun= 6 | |||
|Startup= 9 | |||
|Active= 8 | |||
|Frame Adv= | |||
|Meter= 2/4/7 | |||
|Block=[[File:High.png]] | |||
|Properties= | |||
}} | |||
|description= | |||
}} | |||
{{MoveData-SFA2 | |||
[[File: | |image=A2_Dhalsim_nj.b.hp.png | ||
|imageSize=250px | |||
|caption= | |||
|name= | |||
|subtitle= | |||
|input=nj.[[File:B.png]]+ [[File:Hp.png]] | |||
|data= | |||
{{AttackData-SFA2 | |||
|Damage= 14<sup>[2]</sup> | |||
|Stun= 8 | |||
|Startup= 9 | |||
|Active= 6 | |||
|Frame Adv= | |||
|Meter= 4/7/11 | |||
|Block=[[File:High.png]] | |||
|Properties= | |||
}} | |||
|description= | |||
}} | |||
== | {{MoveData-SFA2 | ||
|image=A2_Dhalsim_nj.b.lk.png | |||
|imageSize=250px | |||
|caption= | |||
|name= | |||
|subtitle= | |||
|input=nj.[[File:B.png]]+ [[File:Lk.png]] | |||
|data= | |||
{{AttackData-SFA2 | |||
|Damage= 10<sup>[0]</sup> | |||
|Stun= 3 | |||
|Startup= 5 | |||
|Active= 10 | |||
|Frame Adv= | |||
|Meter= 0/1/2 | |||
|Block=[[File:High.png]] | |||
|Properties= | |||
}} | |||
|description= | |||
}} | |||
{{MoveData-SFA2 | |||
|image=A2_Dhalsim_nj.b.mk.png | |||
|imageSize=250px | |||
|caption= | |||
|name= | |||
|subtitle= | |||
|input=nj.[[File:B.png]]+ [[File:Mk.png]] | |||
|data= | |||
{{AttackData-SFA2 | |||
|Damage= 11<sup>[1]</sup> | |||
|Stun= 6 | |||
|Startup= 6 | |||
|Active= 8 | |||
|Frame Adv= | |||
|Meter= 2/4/7 | |||
|Block=[[File:High.png]] | |||
|Properties= | |||
}} | |||
|description= | |||
}} | |||
{{MoveData-SFA2 | |||
|image=A2_Dhalsim_nj.b.hk.png | |||
|imageSize=250px | |||
|caption= | |||
|name= | |||
|subtitle= | |||
|input=nj.[[File:B.png]]+ [[File:Hk.png]] | |||
|data= | |||
{{AttackData-SFA2 | |||
|Damage= 15<sup>[2]</sup> | |||
|Stun= 8 | |||
|Startup= 11 | |||
|Active= 5 | |||
|Frame Adv= | |||
|Meter= 4/7/11 | |||
|Block=[[File:High.png]] | |||
|Properties= | |||
}} | |||
|description= | |||
}} | |||
===Diagonal Jumping=== | |||
{{MoveData-SFA2 | |||
|image=A2_Dhalsim_dj.lp.png | |||
|imageSize=250px | |||
|caption= | |||
|name= | |||
|subtitle= | |||
|input=dj.[[File:Lp.png]] | |||
|data= | |||
{{AttackData-SFA2 | |||
|Damage= 10<sup>[0]</sup> | |||
|Stun= 3 | |||
|Startup= 11 | |||
|Active= 3 | |||
|Frame Adv= | |||
|Meter= 0/1/2 | |||
|Block=[[File:High.png]] | |||
|Properties= | |||
}} | |||
|description= | |||
}} | |||
{{MoveData-SFA2 | |||
|image=A2_Dhalsim_dj.mp.png | |||
|imageSize=250px | |||
|caption= | |||
|name= | |||
|subtitle= | |||
|input=dj.[[File:Mp.png]] | |||
|data= | |||
{{AttackData-SFA2 | |||
|Damage= 11<sup>[1]</sup> | |||
|Stun= 6 | |||
|Startup= 9 | |||
|Active= 4 | |||
|Frame Adv= | |||
|Meter= 2/4/7 | |||
|Block=[[File:High.png]] | |||
|Properties= | |||
}} | |||
|description= | |||
}} | |||
[[File: | {{MoveData-SFA2 | ||
|image=A2_Dhalsim_dj.hp.png | |||
|imageSize=250px | |||
|caption= | |||
|name= | |||
|subtitle= | |||
|input=dj.[[File:Hp.png]] | |||
|data= | |||
{{AttackData-SFA2 | |||
|Damage= 12<sup>[2]</sup> | |||
|Stun= 8 | |||
|Startup= 9 | |||
|Active= 2 | |||
|Frame Adv= | |||
|Meter= 4/7/11 | |||
|Block=[[File:High.png]] | |||
|Properties= | |||
}} | |||
|description= | |||
}} | |||
{{MoveData-SFA2 | |||
|image=A2_Dhalsim_dj.lk.png | |||
|imageSize=250px | |||
|caption= | |||
|name= | |||
|subtitle= | |||
|input=dj.[[File:Lk.png]] | |||
|data= | |||
{{AttackData-SFA2 | |||
|Damage= 10<sup>[0]</sup> | |||
|Stun= 3 | |||
|Startup= 9 | |||
|Active= 6 | |||
|Frame Adv= | |||
|Meter= 0/1/2 | |||
|Block=[[File:High.png]] | |||
|Properties= | |||
}} | |||
|description= | |||
}} | |||
{{MoveData-SFA2 | |||
|image=A2_Dhalsim_dj.mk.png | |||
|imageSize=250px | |||
|caption= | |||
|name= | |||
|subtitle= | |||
|input=dj.[[File:Mk.png]] | |||
|data= | |||
{{AttackData-SFA2 | |||
|Damage= 11<sup>[1]</sup> | |||
|Stun= 6 | |||
|Startup= 11 | |||
|Active= 3 | |||
|Frame Adv= | |||
|Meter= 2/4/7 | |||
|Block=[[File:High.png]] | |||
|Properties= Cross-up | |||
}} | |||
|description= | |||
}} | |||
[[File: | {{MoveData-SFA2 | ||
|image=A2_Dhalsim_dj.hk.png | |||
|imageSize=250px | |||
|caption= | |||
|name= | |||
|subtitle= | |||
|input=dj.[[File:Hk.png]] | |||
|data= | |||
{{AttackData-SFA2 | |||
|Damage= 14<sup>[2]</sup> | |||
|Stun= 8 | |||
|Startup= 13 | |||
|Active= 6 | |||
|Frame Adv= | |||
|Meter= 4/7/11 | |||
|Block=[[File:High.png]] | |||
|Properties= | |||
}} | |||
|description= | |||
}} | |||
===Back Diagonal Jumping=== | |||
{{MoveData-SFA2 | |||
|image=A2_Dhalsim_dj.b.lp.png | |||
|imageSize=250px | |||
|caption= | |||
|name= | |||
|subtitle= | |||
|input=dj.[[File:B.png]]+ [[File:Lp.png]] | |||
|data= | |||
{{AttackData-SFA2 | |||
|Damage= 10<sup>[0]</sup> | |||
|Stun= 3 | |||
|Startup= 5 | |||
|Active= 10 | |||
|Frame Adv= | |||
|Meter= 0/1/2 | |||
|Block=[[File:High.png]] | |||
|Properties= | |||
}} | |||
|description= | |||
}} | |||
[[File: | {{MoveData-SFA2 | ||
|image=A2_Dhalsim_dj.b.mp.png | |||
|imageSize=250px | |||
|caption= | |||
|name= | |||
|subtitle= | |||
|input=dj.[[File:B.png]]+ [[File:Mp.png]] | |||
|data= | |||
{{AttackData-SFA2 | |||
|Damage= 12<sup>[1]</sup> | |||
|Stun= 6 | |||
|Startup= 9 | |||
|Active= 8 | |||
|Frame Adv= | |||
|Meter= 2/4/7 | |||
|Block=[[File:High.png]] | |||
|Properties= | |||
}} | |||
|description= | |||
}} | |||
{{MoveData-SFA2 | |||
|image=A2_Dhalsim_dj.b.hp.png | |||
|imageSize=250px | |||
|caption= | |||
|name= | |||
|subtitle= | |||
|input=dj.[[File:B.png]]+ [[File:Hp.png]] | |||
|data= | |||
{{AttackData-SFA2 | |||
|Damage= 14<sup>[2]</sup> | |||
|Stun= 8 | |||
|Startup= 9 | |||
|Active= 6 | |||
|Frame Adv= | |||
|Meter= 4/7/11 | |||
|Block=[[File:High.png]] | |||
|Properties= | |||
}} | |||
|description= | |||
}} | |||
{{MoveData-SFA2 | |||
|image=A2_Dhalsim_dj.b.lk.png | |||
|imageSize=250px | |||
|caption= | |||
|name= | |||
|subtitle= | |||
|input=dj.[[File:B.png]]+ [[File:Lk.png]] | |||
|data= | |||
{{AttackData-SFA2 | |||
|Damage= 10<sup>[0]</sup> | |||
|Stun= 3 | |||
|Startup= 5 | |||
|Active= 10 | |||
|Frame Adv= | |||
|Meter= 0/1/2 | |||
|Block=[[File:High.png]] | |||
|Properties= | |||
}} | |||
|description= | |||
}} | |||
{{MoveData-SFA2 | |||
|image=A2_Dhalsim_dj.b.mk.png | |||
|imageSize=250px | |||
|caption= | |||
|name= | |||
|subtitle= | |||
|input=dj.[[File:B.png]]+ [[File:Mk.png]] | |||
|data= | |||
{{AttackData-SFA2 | |||
|Damage= 11<sup>[1]</sup> | |||
|Stun= 6 | |||
|Startup= 6 | |||
|Active= 8 | |||
|Frame Adv= | |||
|Meter= 2/4/7 | |||
|Block=[[File:High.png]] | |||
|Properties= | |||
}} | |||
|description= | |||
}} | |||
{{MoveData-SFA2 | |||
|image=A2_Dhalsim_dj.b.hk.png | |||
|imageSize=250px | |||
|caption= | |||
|name= | |||
|subtitle= | |||
|input=dj.[[File:B.png]]+ [[File:Hk.png]] | |||
|data= | |||
{{AttackData-SFA2 | |||
|Damage= 14<sup>[2]</sup> | |||
|Stun= 8 | |||
|Startup= 11 | |||
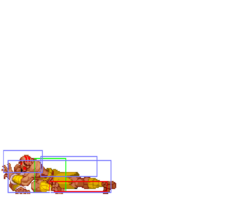
|Active= 5 | |||
|Frame Adv= | |||
|Meter= 4/7/11 | |||
|Block=[[File:High.png]] | |||
|Properties= | |||
}} | |||
|description= | |||
}} | |||
== Command Normals == | |||
== | {{MoveData-SFA2 | ||
|image=A2_Dhalsim_Overhead.png | |||
|imageSize=250px | |||
|caption= | |||
|name=Yoga Shock | |||
|subtitle=Overhead | |||
|input=[[File:B.png]]+ [[File:Lp.png]](hold) | |||
|data= | |||
{{AttackData-SFA2 | |||
|Damage= 9<sup>[0]</sup> | |||
|Stun= 6 | |||
|Startup= 57 | |||
|Active= 4 | |||
|Frame Adv= -1 | |||
|Meter= 0/2/5 | |||
|Block=[[File:High.png]] | |||
|Properties= - | |||
}} | |||
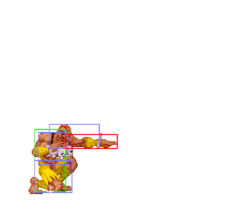
|description= *Requires 31 frames of charge. | |||
}} | |||
{{MoveData-SFA2 | |||
[[File: | |image=A2_Dhalsim_f.lp.png | ||
|imageSize=250px | |||
|caption= | |||
|name= | |||
|subtitle= | |||
|input=[[File:F.png]] + [[File:Lp.png]] | |||
|data= | |||
{{AttackData-SFA2 | |||
|Damage= 5<sup>[0]</sup> | |||
|Stun= 3 | |||
|Startup= 6 | |||
|Active= 4 | |||
|Frame Adv= +1 | |||
|Meter= 0/1/2 | |||
|Block=[[File:Mid.png]] | |||
|Properties= - | |||
}} | |||
|description= | |||
}} | |||
{{MoveData-SFA2 | |||
[[File: | |image=A2_Dhalsim_Drill_hp.png | ||
|imageSize=250px | |||
|caption= | |||
|name=Drill Zutsuki | |||
|subtitle=Punch Drill | |||
|input=(in air)[[File:D.png]]+ [[File:Hp.png]] | |||
|data= | |||
{{AttackData-SFA2 | |||
|Damage= 12<sup>[2]</sup> | |||
|Stun= 8 | |||
|Startup= 8 | |||
|Active= until landing | |||
|Frame Adv= | |||
|Meter= 4/7/11 | |||
|Block=[[File:Mid.png]] | |||
|Properties= - | |||
}} | |||
|description= *Can be done with any down direction: {{db}}, {{d}}, or {{df}} | |||
*On the way up: minimum height of 55 pixels; 10th frame in the air. | |||
*On the way down: minimum height of 103 pixels; 15 frames before landing. | |||
*Drill angle: 70 degrees | |||
}} | |||
{{MoveData-SFA2 | |||
[[File: | |image=A2_Dhalsim_Drill_lk.png | ||
|imageSize=250px | |||
|image2=A2_Dhalsim_Drill_mk.png | |||
|imageSize2=250px | |||
|image3=A2_Dhalsim_Drill_hk.png | |||
|imageSize3=250px | |||
|caption= | |||
|name=Drill Kick | |||
|subtitle=Kick Drill | |||
|input=(in air)[[File:D.png]]+ [[File:K.png]] | |||
|data= | |||
{{AttackData-SFA2 | |||
|version=[[File:Lk.png]] | |||
|Damage= 10<sup>[2]</sup> | |||
|Stun= 6 | |||
|Startup= 8 | |||
|Active= until landing | |||
|Frame Adv= | |||
|Meter= 2/5/9 | |||
|Block=[[File:Mid.png]] | |||
|Properties= - | |||
}} | |||
{{AttackData-SFA2 | |||
|header= no | |||
|version=[[File:Mk.png]] | |||
|Damage= 10<sup>[2]</sup> | |||
|Stun= 6 | |||
|Startup= 8 | |||
|Active= until landing | |||
|Frame Adv= | |||
|Meter= 3/6/10 | |||
|Block=[[File:Mid.png]] | |||
|Properties= - | |||
}} | |||
{{AttackData-SFA2 | |||
|header= no | |||
|version=[[File:Hk.png]] | |||
|Damage= 10<sup>[2]</sup> | |||
|Stun= 6 | |||
|Startup= 8 | |||
|Active= until landing | |||
|Frame Adv= | |||
|Meter= 4/7/11 | |||
|Block=[[File:Mid.png]] | |||
|Properties= - | |||
}} | |||
|description= *Can be done with any down direction: {{db}}, {{d}}, or {{df}} | |||
*On the way up: minimum height of 55 pixels; 10th frame in the air. | |||
*On the way down: minimum height of 103 pixels; 15 frames before landing. | |||
----- | |||
{{lk}} | |||
*Drill angle: 70 degrees | |||
----- | |||
{{mk}} | |||
*Drill angle: 50 degrees | |||
----- | |||
{{hk}} | |||
*Drill angle: 20 degrees | |||
}} | |||
==Throws== | == Normal Throws == | ||
{{MoveData-SFA2 | |||
*( | |image=A2_Dhalsim_ThrowRange.png | ||
|imageSize=250px | |||
|image2=A2_Dhalsim_Throw_mp_1.png | |||
|imageSize2=250px | |||
|image3=A2_Dhalsim_Throw_mp_2.png | |||
|imageSize3=250px | |||
|caption= | |||
|name=Yoga Smash | |||
|subtitle=Punch Throw | |||
|input=[[File:B.png]]/[[File:F.png]] + [[File:Mp.png]] | |||
|data= | |||
{{AttackData-SFA2 | |||
|Damage= 12<sup>[0]</sup>+1xN+1 = 14-22 | |||
|Stun= 0 | |||
|Startup= 1 | |||
|Active= N/A | |||
|Frame Adv= N/A | |||
|Meter= -/-/3 | |||
|Block= N/A | |||
|Properties= [[File:Throw.png]][[File:Mash.png]]<br>[[File:Hardknockdown.png]] | |||
}} | |||
|description= *Mashable throw from both sides to add or reduce the number of hits. With a min of 3 and a max of 11 hits. | |||
*Does not side switch. | |||
*Deals 13 damage when opponent tech throws. | |||
*Dhalsim has the 2nd best throw range in the game ([[Street_Fighter_Alpha_2/System#Regular_Throw_Ranges|Alpha2ThrowRanges]]). | |||
}} | |||
== | {{MoveData-SFA2 | ||
|image=A2_Dhalsim_ThrowRange.png | |||
*( | |imageSize=250px | ||
|image2=A2_Dhalsim_Throw_hp_1.png | |||
|imageSize2=250px | |||
|image3=A2_Dhalsim_Throw_hp_2.png | |||
|imageSize3=250px | |||
|caption= | |||
|name=Yoga Throw | |||
|subtitle=Kick Throw | |||
|input=[[File:B.png]]/[[File:F.png]] + [[File:Hp.png]] | |||
|data= | |||
{{AttackData-SFA2 | |||
|Damage= 20<sup>[0]</sup> | |||
|Stun= 0 | |||
|Startup= 1 | |||
|Active= N/A | |||
|Frame Adv= N/A | |||
|Meter= -/-/3 | |||
|Block= N/A | |||
|Properties= [[File:Throw.png]]<br>[[File:Hardknockdown.png]] | |||
}} | |||
|description= *Deals 10 damage when opponent tech throws. | |||
*Dhalsim has the 2nd best throw range in the game ([[Street_Fighter_Alpha_2/System#Regular_Throw_Ranges|Alpha2ThrowRanges]]). | |||
}} | |||
== Alpha Counters == | |||
{{MoveData-SFA2 | |||
[[File: | |image=A2_Dhalsim_PAC_1.png | ||
|imageSize=250px | |||
|image2=A2_Dhalsim_PAC_2.png | |||
|imageSize2=250px | |||
|caption= | |||
|name=Punch Alpha Counter | |||
|subtitle= | |||
|input=(while in blockstun)[[File:Qcd.png]]+ [[File:P.png]] | |||
|data= | |||
{{AttackData-SFA2 | |||
|Damage= 15<sup>[2]</sup>, 13<sup>[2]</sup> | |||
|Stun= 8, 8 | |||
|Startup= 4 | |||
|Active= 2(0)8 | |||
|Frame Adv= -3 | |||
|Meter= 0/0/0 | |||
|Block=[[File:Mid.png]] | |||
|Properties= [[File:Startupinv.png]]<br>[[File:Hardknockdown.png]] | |||
}} | |||
|description= Your go-to AC out the two. Comes out fast, and is a good anti-air. | |||
}} | |||
{{MoveData-SFA2 | |||
[[File: | |image=A2_Dhalsim_KAC.png | ||
|imageSize=250px | |||
|caption= | |||
|name=Kick Alpha Counter | |||
|subtitle= | |||
|input=(while in blockstun)[[File:Qcd.png]]+ [[File:K.png]] | |||
|data= | |||
{{AttackData-SFA2 | |||
|Damage= 14<sup>[2]</sup> | |||
|Stun= 8 | |||
|Startup= 4 | |||
|Active= 13 | |||
|Frame Adv= -15 | |||
|Meter= 0/0/0 | |||
|Block=[[File:Mid.png]] | |||
|Properties= [[File:Startupinv.png]]<br>[[File:Hardknockdown.png]] | |||
}} | |||
|description= Can low-profile certain moves like Tatsu. | |||
}} | |||
== Special Moves == | |||
{{MoveData-SFA2 | |||
|image=A2_Dhalsim_YogaFire_1.png | |||
|imageSize=250px | |||
|image2=A2_Dhalsim_YogaFire_2.png | |||
|imageSize2=250px | |||
|caption= | |||
|name=Yoga Fire | |||
|subtitle=Fireball | |||
|input=[[File:Qcf.png]] + [[File:P.png]] | |||
|data= | |||
{{AttackData-SFA2 | |||
|version=[[File:Lp.png]] | |||
|Damage= 10<sup>[6]</sup>, 9<sup>[6]</sup>, 6<sup>[6]</sup>, 5<sup>[6]</sup> | |||
|Stun= 4x4 | |||
|Startup= 14 | |||
|Active= 3(0)28(0)32(0)32 | |||
|Frame Adv= -16 | |||
|Meter= 4/6/9 | |||
|Block=[[File:Mid.png]] | |||
|Properties=[[File:Proj.png]] | |||
}} | |||
{{AttackData-SFA2 | |||
|header= no | |||
|version=[[File:Mp.png]] | |||
|Damage= 13<sup>[7]</sup>, 12<sup>[7]</sup>, 9<sup>[7]</sup>, 8<sup>[7]</sup> | |||
|Stun= 10x4 | |||
|Startup= 14 | |||
|Active= 3(0)21(0)24(0)24 | |||
|Frame Adv= -15 | |||
|Meter= 4/6/9 | |||
|Block=[[File:Mid.png]] | |||
|Properties=[[File:Proj.png]]<br>[[File:Softknockdown.png]] | |||
}} | |||
{{AttackData-SFA2 | |||
|header= no | |||
|version=[[File:Hp.png]] | |||
|Damage= 14<sup>[10]</sup>, 13<sup>[10]</sup>, 10<sup>[10]</sup>, 9<sup>[10]</sup> | |||
|Stun= 12x4 | |||
|Startup= 14 | |||
|Active= 3(0)17(0)19(0)16 | |||
|Frame Adv= -14 | |||
|Meter= 4/6/9 | |||
|Block=[[File:Mid.png]] | |||
|Properties=[[File:Proj.png]]<br>[[File:Softknockdown.png]] | |||
}} | |||
|description= | |||
[ | ----- | ||
{{lp}} | |||
*'''Punishable on hit.''' | |||
*Speed: 300 pixels per 100 frames; Tied for the slowest possible fireball in SFA2 ([https://srk.shib.live/w/Street_Fighter_Alpha_2/System#Fireballs Alpha2Fireballs]). | |||
*Slows to half speed near the end. | |||
----- | |||
{{mp}} | |||
*Speed: 350 pixels per 100 frames. | |||
*Slows to half speed near the end. | |||
----- | |||
* | {{hp}} | ||
*Speed: 400 pixels per 100 frames. | |||
*Slows to half speed near the end. | |||
}} | |||
{{MoveData-SFA2 | |||
|image=A2_Dhalsim_YogaFlame_1.png | |||
|imageSize=250px | |||
|image2=A2_Dhalsim_YogaFlame_2.png | |||
|imageSize2=250px | |||
|caption= | |||
|name=Yoga Flame | |||
|subtitle=Flame | |||
|input=[[File:Hcb.png]] + [[File:P.png]] | |||
|data= | |||
{{AttackData-SFA2 | |||
|version=[[File:Lp.png]] | |||
|Damage= 16<sup>[10]</sup>, 16<sup>[10]</sup> | |||
|Stun= 8, 8 | |||
|Startup= 18 | |||
|Active= 3(0)33 | |||
|Frame Adv= +4 | |||
|Meter= 6/8/11 | |||
|Block=[[File:Mid.png]] | |||
|Properties=[[File:Proj.png]]<br>[[File:Softknockdown.png]] | |||
}} | |||
{{AttackData-SFA2 | |||
|header= no | |||
|version=[[File:Mp.png]] | |||
|Damage= 17<sup>[10]</sup>, 17<sup>[10]</sup> | |||
|Stun= 10, 10 | |||
|Startup= 20 | |||
|Active= 3(0)51 | |||
|Frame Adv= +4 | |||
|Meter= 6/8/11 | |||
|Block=[[File:Mid.png]] | |||
|Properties=[[File:Proj.png]]<br>[[File:Softknockdown.png]] | |||
}} | |||
{{AttackData-SFA2 | |||
|header= no | |||
|version=[[File:Hp.png]] | |||
|Damage= 18<sup>[10]</sup>, 18<sup>[10]</sup> | |||
|Stun= 12, 12 | |||
|Startup= 22 | |||
|Active= 3(0)65 | |||
|Frame Adv= +4 | |||
|Meter= 6/8/11 | |||
|Block=[[File:Mid.png]] | |||
|Properties=[[File:Proj.png]]<br>[[File:Softknockdown.png]] | |||
}} | |||
|description= *The flame is cancelled on block/hit or when hit by another projectile. | |||
*'''Unscaled damage in CC.''' | |||
Can be used as an anti-air if timed correctly. | |||
----- | |||
{{lp}} | |||
----- | |||
{{mp}} | |||
----- | |||
{{hp}} | |||
}} | |||
{{MoveData-SFA2 | |||
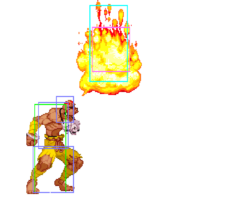
|image=A2_Dhalsim_YogaBlast_1.png | |||
* | |imageSize=250px | ||
|image2=A2_Dhalsim_YogaBlast_2.png | |||
|imageSize2=250px | |||
|caption= | |||
|name=Yoga Blast | |||
|subtitle=Up Flame | |||
|input=[[File:Hcb.png]] + [[File:K.png]] | |||
|data= | |||
{{AttackData-SFA2 | |||
|version=[[File:Lk.png]] | |||
|Damage= 17<sup>[10]</sup>, 17<sup>[10]</sup> | |||
|Stun= 8, 8 | |||
|Startup= 18 | |||
|Active= 6(0)11 | |||
|Frame Adv= +13 | |||
|Meter= 6/8/11 | |||
|Block=[[File:Mid.png]] | |||
|Properties=[[File:Proj.png]]<br>[[File:Softknockdown.png]] | |||
}} | |||
{{AttackData-SFA2 | |||
|header= no | |||
|version=[[File:Mk.png]] | |||
|Damage= 18<sup>[10]</sup>, 18<sup>[10]</sup> | |||
|Stun= 10, 10 | |||
|Startup= 19 | |||
|Active= 6(0)26 | |||
|Frame Adv= +13 | |||
|Meter= 6/8/11 | |||
|Block=[[File:Mid.png]] | |||
|Properties=[[File:Proj.png]]<br>[[File:Softknockdown.png]] | |||
}} | |||
{{AttackData-SFA2 | |||
|header= no | |||
|version=[[File:Hk.png]] | |||
|Damage= 19<sup>[10]</sup>, 19<sup>[10]</sup> | |||
|Stun= 12, 12 | |||
|Startup= 20 | |||
|Active= 6(0)41 | |||
|Frame Adv= +13 | |||
|Meter= 6/8/11 | |||
|Block=[[File:Mid.png]] | |||
|Properties=[[File:Proj.png]]<br>[[File:Softknockdown.png]] | |||
}} | |||
|description= *The flame is cancelled on block/hit or when hit by another projectile. | |||
*'''Unscaled damage in CC.''' | |||
If spaced properly, can anti-air certain jump-ins. | |||
----- | |||
{{lk}} | |||
Can be used to build meter from fullscreen. | |||
----- | |||
{{mk}} | |||
----- | |||
{{hk}} | |||
}} | |||
{{MoveData-SFA2 | |||
|image=A2_Dhalsim_YogaTeleport_1.png | |||
|imageSize=250px | |||
|image2=A2_Dhalsim_YogaTeleport_2.png | |||
|imageSize2=250px | |||
|image3=A2_Dhalsim_YogaTeleport_3.png | |||
|imageSize3=250px | |||
|image4=A2_Dhalsim_YogaTeleport_4.png | |||
|imageSize4=250px | |||
|caption= | |||
|name=Yoga Teleport | |||
|subtitle= | |||
|input=[[File:Rdp.png]]/[[File:Dp.png]] + [[File:3p.png]]/[[File:3k.png]] | |||
|data= | |||
{{AttackData-SFA2 | |||
|version=All | |||
|Damage= N/A | |||
|Stun= N/A | |||
|Startup= N/A | |||
|Active= N/A | |||
|Frame Adv= N/A | |||
|Meter= 2/-/- | |||
|Block= N/A | |||
|Properties= | |||
}} | |||
|description= *Can also be done in the air. | |||
*Invul on first frame. | |||
----- | |||
{{rdp}}+{{3p}} | |||
*Teleports on the same side, closer to opponent. | |||
*65 frames on invul. | |||
*7 frames of recovery. | |||
----- | |||
{{rdp}}+{{3k}} | |||
*Teleports on the same side, farther from opponent. | |||
*65 frames on invul. | |||
*7 frames of recovery. | |||
----- | |||
{{dp}}+{{3p}} | |||
*Teleports to the opposite side, closer to opponent. | |||
*Only P2 can teleport to the opposite side while opponent is in the corner. | |||
*65 frames on invul. | |||
*7 frames of recovery. | |||
----- | |||
{{dp}}+{{3k}} | |||
*Teleports to the opposite side, farther from opponent. | |||
*Only P2 can teleport to the opposite side while opponent is in the corner. | |||
*65 frames on invul. | |||
*7 frames of recovery. | |||
----- | |||
' | (in air) | ||
* | *No minimum height. | ||
*Same side and distances as grounded teleport, except can't teleport to the opposite side while opponent is in the corner (even P2). | |||
*Teleports to the same height. | |||
*Can attack after. | |||
*66 frames on invul. | |||
*1 frame of recovery. | |||
}} | |||
{{MoveData-SFA2 | |||
|image=A2_Dhalsim_YogaEscape_1.png | |||
|imageSize=250px | |||
|image2=A2_Dhalsim_YogaEscape_2.png | |||
|imageSize2=250px | |||
|image3=A2_Dhalsim_YogaEscape_3.png | |||
|imageSize3=250px | |||
|image4=A2_Dhalsim_YogaEscape_4.png | |||
|imageSize4=250px | |||
|image5=A2_Dhalsim_YogaEscape_5.png | |||
|imageSize5=250px | |||
|caption= | |||
|name=Yoga Escape | |||
|subtitle= | |||
|input=(while falling from a knockdown)[[File:Qcd.png]] + [[File:K.png]] | |||
|data= | |||
{{AttackData-SFA2 | |||
|version=[[File:Qcd.png]]+ [[File:K.png]] | |||
|Damage= N/A | |||
|Stun= N/A | |||
|Startup= N/A | |||
|Active= N/A | |||
|Frame Adv= N/A | |||
|Meter= 0/-/- | |||
|Block= N/A | |||
|Properties= | |||
}} | |||
|description= *8 frames of recovery before landing. | |||
Teleports out of a knockdown, allowing Dhalsim to escape some juggles. | |||
}} | |||
== Super Moves == | |||
Startup Invulnerability Notes: | |||
*At the end of a super screen freeze, projectiles will start moving before the opponent's character is unfrozen, giving the supers more projectile invul. frames than hit invul. frames. | |||
{{MoveData-SFA2 | |||
|image=A2_Dhalsim_YogaInferno_1.png | |||
|imageSize=250px | |||
|image2=A2_Dhalsim_YogaInferno_2.png | |||
|imageSize2=250px | |||
|image3=A2_Dhalsim_YogaInferno_3.png | |||
|imageSize3=250px | |||
|image4=A2_Dhalsim_YogaInferno_4.png | |||
|imageSize4=250px | |||
|caption= | |||
|name=Yoga Inferno | |||
|subtitle=Flame Super | |||
|input=[[File:Qcf.png]][[File:Qcf.png]] + [[File:P.png]] | |||
|data= | |||
{{AttackData-SFA2 | |||
|version= Level 1 | |||
|subtitle= [[File:P.png]] | |||
|Damage= 22<sup>[12]</sup>, 7<sup>[12]</sup>, 4<sup>[12]</sup> | |||
|Stun= 1x3 | |||
|Startup= 5+0 | |||
|Active= 6(0)8(0)8 | |||
|Frame Adv= +1 | |||
|Meter= 0/0/0 | |||
|Block=[[File:Mid.png]] | |||
|Properties=[[File:Startupinv.png]]<br>[[File:Hardknockdown.png]] | |||
}} | |||
{{AttackData-SFA2 | |||
|header= no | |||
|version= Level 2 | |||
|subtitle= [[File:P.png]][[File:P.png]] | |||
|Damage= 22<sup>[12]</sup>, 3<sup>[12]</sup>x7 | |||
|Stun= 0x5, 1x3 | |||
|Startup= 5+0 | |||
|Active= 6[(0)8]x3(0)16(0)8(0)8 | |||
|Frame Adv= +1 | |||
|Meter= 0/0/0 | |||
|Block=[[File:Mid.png]] | |||
|Properties=[[File:Startupinv.png]]<br>[[File:Hardknockdown.png]] | |||
}} | |||
{{AttackData-SFA2 | |||
|header= no | |||
|version= Level 3 | |||
|subtitle= [[File:3p.png]] | |||
|Damage= 28<sup>[12]</sup>, 3<sup>[12]</sup>x12 | |||
|Stun= 0x10, 1x3 | |||
|Startup= 5+0 | |||
|Active= 6[(0)8]x3(0)16[(0)8]x3(0)16(0)8(0)8 | |||
|Frame Adv= +1 | |||
|Meter= 0/0/0 | |||
|Block=[[File:Mid.png]] | |||
|Properties=[[File:Startupinv.png]]<br>[[File:Hardknockdown.png]] | |||
}} | |||
|description= *Cancels opponent's projectiles. | |||
*Only the last hit causes a hard knockdown. | |||
----- | |||
* | {{AttackColor-SF | ||
|strength=light | |||
|content=Level 1}} | |||
*5 frames of startup hit invul.; 0 of which while active. | |||
*12 frames of startup projectile invul. | |||
*Hits 3 times. | |||
----- | |||
{{AttackColor-SF | |||
|strength=medium | |||
|content=Level 2}} | |||
*5 frames of startup hit invul.; 1 of which while active. | |||
*13 frames of startup projectile invul. | |||
*Hits 8 times. | |||
----- | |||
{{AttackColor-SF | |||
|strength=heavy | |||
|content=Level 3}} | |||
*5 frames of startup hit invul.; 1 of which while active. | |||
*14 frames of startup projectile invul. | |||
*Hits 13 times. | |||
}} | |||
{{MoveData-SFA2 | |||
|image=A2_Dhalsim_YogaStrike.png | |||
|imageSize=250px | |||
|caption= | |||
|name=Yoga Strike | |||
|subtitle= | |||
|input=[[File:Qcf.png]][[File:Qcf.png]] + [[File:K.png]] | |||
|data= | |||
{{AttackData-SFA2 | |||
|version= Level 1 | |||
|subtitle= [[File:K.png]] | |||
|Damage= 33<sup>[0]</sup> | |||
|Stun= 0 | |||
|Startup= 6+2 | |||
|Active= 26 | |||
|Frame Adv= N/A | |||
|Meter= 0/-/0 | |||
|Block= N/A | |||
|Properties=[[File:Startupinv.png]][[File:Airthrow.png]]<br>[[File:Hardknockdown.png]] | |||
}} | |||
{{AttackData-SFA2 | |||
|header= no | |||
|version= Level 2 | |||
|subtitle= [[File:K.png]][[File:K.png]] | |||
|Damage= 12<sup>[0]</sup>+33<sup>[0]</sup> | |||
|Stun= 0 | |||
|Startup= 6+2 | |||
|Active= 26 | |||
|Frame Adv= N/A | |||
|Meter= 0/-/0 | |||
|Block= N/A | |||
|Properties=[[File:Startupinv.png]][[File:Airthrow.png]]<br>[[File:Hardknockdown.png]] | |||
}} | |||
{{AttackData-SFA2 | |||
|header= no | |||
|version= Level 3 | |||
|subtitle= [[File:3k.png]] | |||
|Damage= 12<sup>[0]</sup>+16<sup>[0]</sup>+33<sup>[0]</sup> | |||
|Stun= 0 | |||
|Startup= 6+2 | |||
|Active= 26 | |||
|Frame Adv= N/A | |||
|Meter= 0/-/0 | |||
|Block= N/A | |||
|Properties=[[File:Startupinv.png]][[File:Airthrow.png]]<br>[[File:Hardknockdown.png]] | |||
}} | |||
|description= *A full 2 quarter-circles isn't required. Required inputs: {{d}}{{df}}{{f}}{{d}}{{df}} + {{k}} | |||
Pretty difficult to connect compared to Rose or even Zangief's airthrow supers. But if you do it can set up his unblockable setup: | |||
<youtube>3J5wMi_0ew8</youtube> | |||
----- | |||
{{AttackColor-SF | |||
|strength=light | |||
|content=Level 1}} | |||
*5 frames of startup hit invul.; 0 of which while active. | |||
*13 frames of startup projectile invul. | |||
----- | |||
{{AttackColor-SF | |||
|strength=medium | |||
|content=Level 2}} | |||
*5 frames of startup hit invul.; 0 of which while active. | |||
*15 frames of startup projectile invul. | |||
----- | |||
{{AttackColor-SF | |||
|strength=heavy | |||
|content=Level 3}} | |||
*6 frames of startup hit invul.; 0 of which while active. | |||
*17 frames of startup projectile invul. | |||
}} | |||
= The Basics = | =The Basics= | ||
The #1 most important tool to winning with Dhalsim is learning his CC its his #1 offensive and defensive tool. Its high damage makes people 2nd guess jumping at Sim or whiffing a normal. | ----- | ||
{{Content Box-SFA2 | |||
|padding=yes | |||
|header= | |||
|content=The #1 most important tool to winning with Dhalsim is learning his CC its his #1 offensive and defensive tool. Its high damage makes people 2nd guess jumping at Sim or whiffing a normal. | |||
*1st way of using this and the way most people know it is to do Sweep (close rh or long slide rh) into repeated SHORT yoga up flames. The short upflames are key as they have less recovery in a CC then forward and RH ones. On a level 1 you should CC you should be able to get 3 upflames in there with atleast 35 to 40% damage. The key to getting max upflames in is getting the first one off right after the slide hits so first one is hitting right off the ground and continue hitting while raising up the char into the air. (aka the sweet spot) a level 3 should net you atleast 50% or more. Also ALWAYS be on the look out for whiffed RH sweeps from opponents or missed specials. Reacting 1/4 screen away with a CC into slide/upflames will keep people on their toes. | *1st way of using this and the way most people know it is to do Sweep (close rh or long slide rh) into repeated SHORT yoga up flames. The short upflames are key as they have less recovery in a CC then forward and RH ones. On a level 1 you should CC you should be able to get 3 upflames in there with atleast 35 to 40% damage. The key to getting max upflames in is getting the first one off right after the slide hits so first one is hitting right off the ground and continue hitting while raising up the char into the air. (aka the sweet spot) a level 3 should net you atleast 50% or more. Also ALWAYS be on the look out for whiffed RH sweeps from opponents or missed specials. Reacting 1/4 screen away with a CC into slide/upflames will keep people on their toes. | ||
| Line 261: | Line 1,767: | ||
*Most people forget also sim has Air taunt also where he floats jump a fb and float down (safe if char is full screen away with no meter lol) | *Most people forget also sim has Air taunt also where he floats jump a fb and float down (safe if char is full screen away with no meter lol) | ||
}} | |||
= Advanced Strategy = | =Advanced Strategy= | ||
I find that adding a Yoga Fire before the Yoga Blast makes the combo slightly easier: crouching Roundhouse-> Yoga Fire-> Yoga Blast x 2~5 | ----- | ||
{{Content Box-SFA2 | |||
|padding=yes | |||
|header= | |||
|content=I find that adding a Yoga Fire before the Yoga Blast makes the combo slightly easier: crouching Roundhouse-> Yoga Fire-> Yoga Blast x 2~5 | |||
Dhalsim’s Level 1 Yoga Inferno has a tendency to trade with lot of ground attacks, and as a result allows him in most cases to recover before the opponent and continue into a combo. After you’ve traded with the Level 1 YI, it’s possible to link into certain combos below. | Dhalsim’s Level 1 Yoga Inferno has a tendency to trade with lot of ground attacks, and as a result allows him in most cases to recover before the opponent and continue into a combo. After you’ve traded with the Level 1 YI, it’s possible to link into certain combos below. | ||
}} | |||
=Combos= | |||
*Close St HP xx Fierce Yoga Fire | ----- | ||
{{Content Box-SFA2 | |||
|padding=yes | |||
|header= | |||
|content=*Close St HP xx Fierce Yoga Fire | |||
*Close Cr MK xx Fierce Yoga Fire | *Close Cr MK xx Fierce Yoga Fire | ||
| Line 288: | Line 1,804: | ||
St LP xx Inferno | St LP xx Inferno | ||
}} | |||
Custom Combo High Knockdown | =Custom Combos= | ||
----- | |||
{{Content Box-SFA2 | |||
|padding=yes | |||
|header= | |||
|content=Custom Combo High Knockdown | |||
Don’t forget that after you land a Yoga Strike you can attempt the glitch YS glitch; another YS as the opponent wakes up. Even if the opponent is blocking, they’ll become airborne and be grabbed by the YS. | Don’t forget that after you land a Yoga Strike you can attempt the glitch YS glitch; another YS as the opponent wakes up. Even if the opponent is blocking, they’ll become airborne and be grabbed by the YS. | ||
After Yoga strike, Dhalsim's meaty slide is unblockable? | After Yoga strike, Dhalsim's meaty slide is unblockable? | ||
Any lvl- c.rh xx hk up flame xN | Any lvl- c.rh xx hk up flame xN | ||
| Line 301: | Line 1,822: | ||
<youtube>E9-n-dpDkCM</youtube> | <youtube>E9-n-dpDkCM</youtube> | ||
}} | |||
= Match-ups = | = Match-ups = | ||
----- | |||
{{MatchUp-SFA2 | |||
|padding=yes | |||
|header=[[File:A2_Icon_Adon.png]] '''Vs. Adon:''' | |||
|content=[Loading match-up info...] | |||
}} | |||
{{MatchUp-SFA2 | |||
|padding=yes | |||
|header=[[File:A2_Icon_Akuma.png]] '''Vs. Akuma:''' | |||
|content=[Loading match-up info...] | |||
}} | |||
Vs. | |||
{{MatchUp-SFA2 | |||
|padding=yes | |||
|header=[[File:A2_Icon_Birdie.png]] '''Vs. Birdie:''' | |||
|content=[Loading match-up info...] | |||
}} | |||
Vs. | {{MatchUp-SFA2 | ||
|padding=yes | |||
|header=[[File:A2_Icon_Charlie.png]] '''Vs. Charlie-Nash:''' | |||
|content=[Loading match-up info...] | |||
}} | |||
{{MatchUp-SFA2 | |||
|padding=yes | |||
|header=[[File:A2_Icon_ChunLi.png]] '''Vs. Chun-Li:''' | |||
|content=[Loading match-up info...] | |||
}} | |||
Vs. | {{MatchUp-SFA2 | ||
|padding=yes | |||
|header=[[File:A2_Icon_Dan.png]] '''Vs. Dan:''' | |||
|content=[Loading match-up info...] | |||
}} | |||
{{MatchUp-SFA2 | |||
|padding=yes | |||
|header=[[File:A2_Icon_Dhalsim.png]] '''Vs. Dhalsim:''' | |||
|content=[Loading match-up info...] | |||
}} | |||
Vs. | {{MatchUp-SFA2 | ||
|padding=yes | |||
|header=[[File:A2_Icon_Akuma.png]] '''Vs. Evil Ryu:''' | |||
|content=[Loading match-up info...] | |||
}} | |||
{{MatchUp-SFA2 | |||
|padding=yes | |||
|header=[[File:A2_Icon_Gen.png]] '''Vs. Gen:''' | |||
|content=[Loading match-up info...] | |||
}} | |||
Vs. | {{MatchUp-SFA2 | ||
|padding=yes | |||
|header=[[File:A2_Icon_Guy.png]] '''Vs. Guy:''' | |||
|content=[Loading match-up info...] | |||
}} | |||
{{MatchUp-SFA2 | |||
|padding=yes | |||
|header=[[File:A2_Icon_Ken.png]] '''Vs. Ken:''' | |||
|content=[Loading match-up info...] | |||
}} | |||
Vs. | {{MatchUp-SFA2 | ||
|padding=yes | |||
|header=[[File:A2_Icon_Bison.png]] '''Vs. M. Bison (dictator):''' | |||
|content=[Loading match-up info...] | |||
}} | |||
{{MatchUp-SFA2 | |||
|padding=yes | |||
|header=[[File:A2_Icon_Rolento.png]] '''Vs. Rolento:''' | |||
|content=[Loading match-up info...] | |||
}} | |||
Vs. | {{MatchUp-SFA2 | ||
|padding=yes | |||
|header=[[File:A2_Icon_Rose.png]] '''Vs. Rose:''' | |||
|content=[Loading match-up info...] | |||
}} | |||
{{MatchUp-SFA2 | |||
|padding=yes | |||
|header=[[File:A2_Icon_Ryu.png]] '''Vs. Ryu:''' | |||
|content=[Loading match-up info...] | |||
}} | |||
Vs. | {{MatchUp-SFA2 | ||
|padding=yes | |||
|header=[[File:A2_Icon_Sagat.png]] '''Vs. Sagat:''' | |||
|content=[Loading match-up info...] | |||
}} | |||
{{MatchUp-SFA2 | |||
|padding=yes | |||
|header=[[File:A2_Icon_Sakura.png]] '''Vs. Sakura:''' | |||
|content=[Loading match-up info...] | |||
}} | |||
Vs. Sodom: | {{MatchUp-SFA2 | ||
|padding=yes | |||
|header=[[File:A2_Icon_Sodom.png]] '''Vs. Sodom:''' | |||
|content=[Loading match-up info...] | |||
}} | |||
{{MatchUp-SFA2 | |||
|padding=yes | |||
|header=[[File:A2_Icon_Zangief.png]] '''Vs. Zangief:''' | |||
|content=[Loading match-up info...] | |||
}} | |||
{{ | {{Navbox-SFA2}} | ||
[[Category:Dhalsim]] | |||
[[Category:Street Fighter Alpha Series]] | [[Category:Street Fighter Alpha Series]] | ||
[[Category:Street Fighter Alpha 2]] | [[Category:Street Fighter Alpha 2]] | ||
Latest revision as of 02:16, 17 June 2025
| Dhalsim | |
|---|---|
| |
| Health: | 144 |
| Defensive Rating: | -3 |
| Stun: | 40 |
| Walk Speed Forward: | 200 |
| Walk Speed Backward: | 125 |
| Jump Backward: | 70f (3+67+0) |
| Neutral Backward: | 69f (3+66+0) |
| Jump Forward: | 69f (3+66+0) |
| Wake-Up: | 51f |
| Quick Rise: | 20f |
| Throw Range: | 20 |
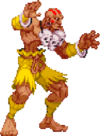
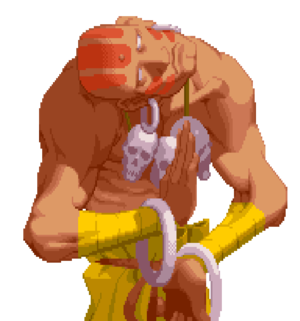
The Indian monk fights for his people who suffer from famine and disease. He has sought to unify his mind, body and soul through the discipline of Yoga. As he nears his goal, Dhalsim must test himself and his skills before he can rise to a higher state of consciousness.
Players to watch: SabreAZ, xQj(aka zoo & yw10)
Normal Moves
| SFA2 Framedata Glossary | |
|---|---|
| Damage |
Units of base damage inflicted by the move (100% life bar = 144 units of health). Most moves have a damage range; the number inside the square brackets indicates which Random Damage Table the move uses to look up any additional damage and the % chance of doing so. |
| Stun |
Units of stun inflicted by the move. |
| Startup |
The frame the move hits on (1st active frame). Super moves with a screen freeze will separate pre- and post-screen freeze startup frames by a '+' (Ex: 5+0). |
| Active |
The portion of a move that can hit. How many frames a move remains active for. ()=Inactive frames in-between active frames. [xN]=Repeated sequences. |
| Frame Adv |
The frame advantage values when the attack is blocked. (Add +1 frame to all OnBlockAdv values for the move's OnHitAdv value; Ex: +2oB/+3oH, -4oB/-3oH) |
| Meter |
The units of meter gained on whiff/block/hit. (48, 96, and 144 units of meter are required for 1, 2, and 3 bars of meter respectively) |
| Block |
Low attacks must be blocked crouching. High attacks must be blocked standing. Mid attacks can be blocked either way. |
| Properties |
|
| Frames |
All framedata collected with the game speed set to normal, where the game tickrate and framerate are the same(60fps). |
| Speed |
All framedata collected with the game speed set to normal. |
| Hitboxes |
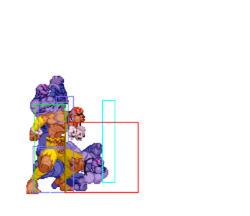
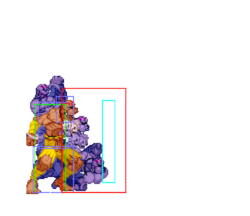
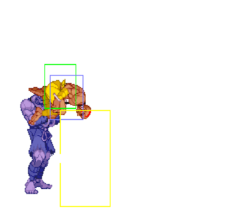
All hitbox images have the character standing/jumping in the exact same position, so hitbox distances can be easily compared.
|
| Credit | Damage, stun, framedata, meter, and updated hitboxes collected by |
Standing
Back Standing
Crouching
Back Crouching
Neutral Jumping
Back Neutral Jumping
Diagonal Jumping
Back Diagonal Jumping
Command Normals
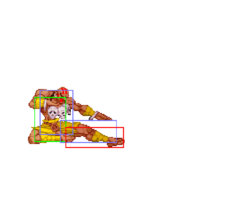
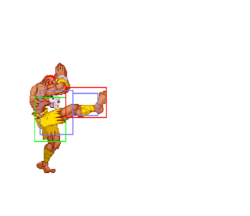
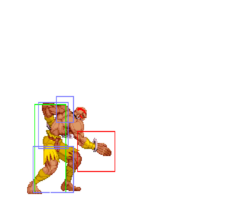
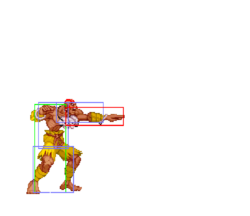
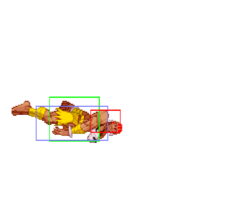
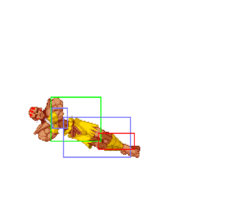
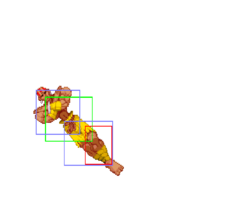
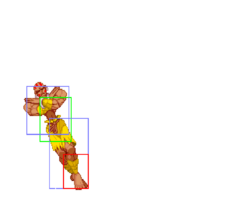
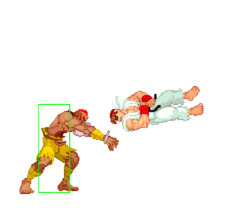
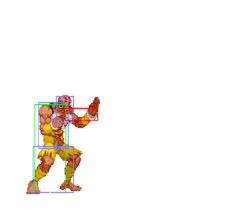
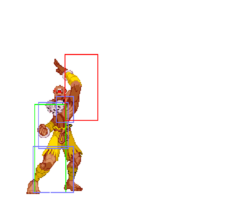
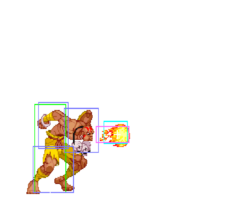
Drill Zutsuki
Punch Drill
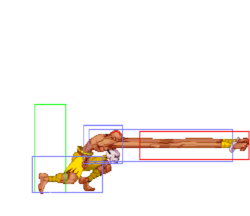
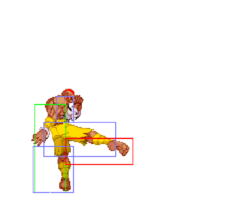
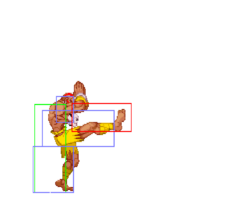
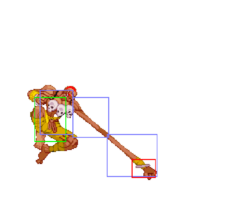
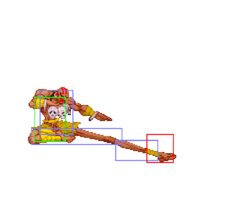
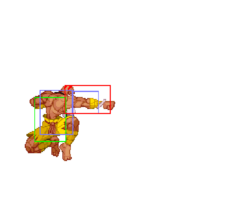
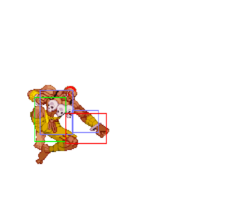
(in air)![]() +
+ ![]()
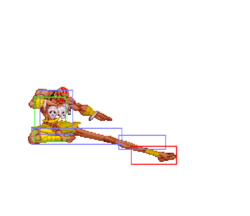
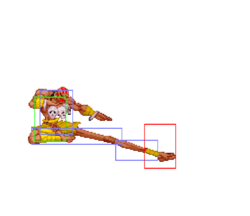
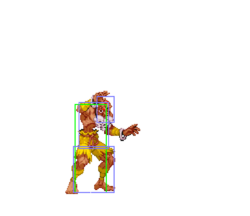
| Damage | Stun | Startup | Active | Frame Adv | Meter | Block | Properties |
|---|---|---|---|---|---|---|---|
| 12[2] | 8 | 8 | until landing | - | 4/7/11 | - |
- Can be done with any down direction:
 ,
,  , or
, or 
- On the way up: minimum height of 55 pixels; 10th frame in the air.
- On the way down: minimum height of 103 pixels; 15 frames before landing.
- Drill angle: 70 degrees
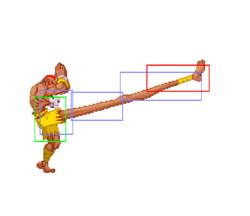
| Version | Damage | Stun | Startup | Active | Frame Adv | Meter | Block | Properties |
|---|---|---|---|---|---|---|---|---|
| 10[2] | 6 | 8 | until landing | - | 2/5/9 | - | ||
| 10[2] | 6 | 8 | until landing | - | 3/6/10 | - | ||
| 10[2] | 6 | 8 | until landing | - | 4/7/11 | - |
- Can be done with any down direction:
 ,
,  , or
, or 
- On the way up: minimum height of 55 pixels; 10th frame in the air.
- On the way down: minimum height of 103 pixels; 15 frames before landing.
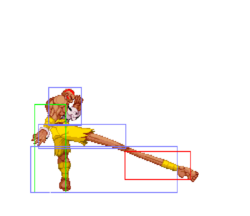
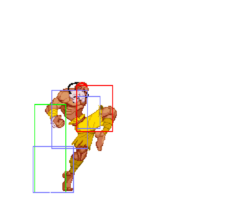
![]()
- Drill angle: 70 degrees
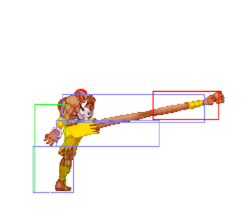
![]()
- Drill angle: 50 degrees
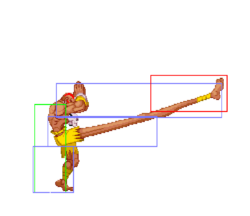
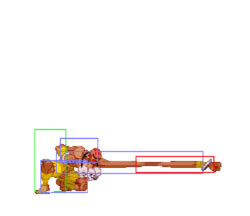
![]()
- Drill angle: 20 degrees
Normal Throws
| Damage | Stun | Startup | Active | Frame Adv | Meter | Block | Properties |
|---|---|---|---|---|---|---|---|
| 12[0]+1xN+1 = 14-22 | 0 | 1 | N/A | N/A | -/-/3 | N/A |
- Mashable throw from both sides to add or reduce the number of hits. With a min of 3 and a max of 11 hits.
- Does not side switch.
- Deals 13 damage when opponent tech throws.
- Dhalsim has the 2nd best throw range in the game (Alpha2ThrowRanges).
| Damage | Stun | Startup | Active | Frame Adv | Meter | Block | Properties |
|---|---|---|---|---|---|---|---|
| 20[0] | 0 | 1 | N/A | N/A | -/-/3 | N/A |
- Deals 10 damage when opponent tech throws.
- Dhalsim has the 2nd best throw range in the game (Alpha2ThrowRanges).
Alpha Counters
Punch Alpha Counter
(while in blockstun)![]() +
+ ![]()
Kick Alpha Counter
(while in blockstun)![]() +
+ ![]()
Special Moves
![]()
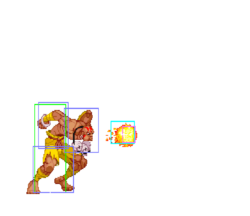
- Punishable on hit.
- Speed: 300 pixels per 100 frames; Tied for the slowest possible fireball in SFA2 (Alpha2Fireballs).
- Slows to half speed near the end.
![]()
- Speed: 350 pixels per 100 frames.
- Slows to half speed near the end.
![]()
- Speed: 400 pixels per 100 frames.
- Slows to half speed near the end.
| Version | Damage | Stun | Startup | Active | Frame Adv | Meter | Block | Properties |
|---|---|---|---|---|---|---|---|---|
| 16[10], 16[10] | 8, 8 | 18 | 3(0)33 | +4 | 6/8/11 | |||
| 17[10], 17[10] | 10, 10 | 20 | 3(0)51 | +4 | 6/8/11 | |||
| 18[10], 18[10] | 12, 12 | 22 | 3(0)65 | +4 | 6/8/11 |
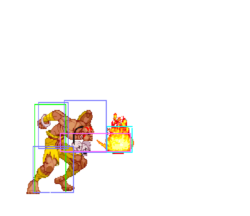
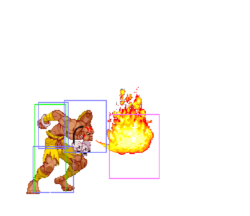
- The flame is cancelled on block/hit or when hit by another projectile.
- Unscaled damage in CC.
Can be used as an anti-air if timed correctly.
![]()
![]()
![]()
| Version | Damage | Stun | Startup | Active | Frame Adv | Meter | Block | Properties |
|---|---|---|---|---|---|---|---|---|
| 17[10], 17[10] | 8, 8 | 18 | 6(0)11 | +13 | 6/8/11 | |||
| 18[10], 18[10] | 10, 10 | 19 | 6(0)26 | +13 | 6/8/11 | |||
| 19[10], 19[10] | 12, 12 | 20 | 6(0)41 | +13 | 6/8/11 |
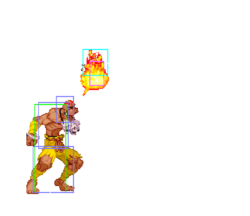
- The flame is cancelled on block/hit or when hit by another projectile.
- Unscaled damage in CC.
If spaced properly, can anti-air certain jump-ins.
![]()
Can be used to build meter from fullscreen.
![]()
![]()
| Version | Damage | Stun | Startup | Active | Frame Adv | Meter | Block | Properties |
|---|---|---|---|---|---|---|---|---|
| All | N/A | N/A | N/A | N/A | N/A | 2/-/- | N/A | - |
- Can also be done in the air.
- Invul on first frame.
![]() +
+![]()
- Teleports on the same side, closer to opponent.
- 65 frames on invul.
- 7 frames of recovery.
![]() +
+![]()
- Teleports on the same side, farther from opponent.
- 65 frames on invul.
- 7 frames of recovery.
![]() +
+![]()
- Teleports to the opposite side, closer to opponent.
- Only P2 can teleport to the opposite side while opponent is in the corner.
- 65 frames on invul.
- 7 frames of recovery.
![]() +
+![]()
- Teleports to the opposite side, farther from opponent.
- Only P2 can teleport to the opposite side while opponent is in the corner.
- 65 frames on invul.
- 7 frames of recovery.
(in air)
- No minimum height.
- Same side and distances as grounded teleport, except can't teleport to the opposite side while opponent is in the corner (even P2).
- Teleports to the same height.
- Can attack after.
- 66 frames on invul.
- 1 frame of recovery.
Yoga Escape
(while falling from a knockdown)![]() +
+ ![]()
Super Moves
Startup Invulnerability Notes:
- At the end of a super screen freeze, projectiles will start moving before the opponent's character is unfrozen, giving the supers more projectile invul. frames than hit invul. frames.
- Cancels opponent's projectiles.
- Only the last hit causes a hard knockdown.
Level 1
- 5 frames of startup hit invul.; 0 of which while active.
- 12 frames of startup projectile invul.
- Hits 3 times.
Level 2
- 5 frames of startup hit invul.; 1 of which while active.
- 13 frames of startup projectile invul.
- Hits 8 times.
Level 3
- 5 frames of startup hit invul.; 1 of which while active.
- 14 frames of startup projectile invul.
- Hits 13 times.
| Version | Damage | Stun | Startup | Active | Frame Adv | Meter | Block | Properties |
|---|---|---|---|---|---|---|---|---|
| Level 1 |
33[0] | 0 | 6+2 | 26 | N/A | 0/-/0 | N/A | |
| Level 2 |
12[0]+33[0] | 0 | 6+2 | 26 | N/A | 0/-/0 | N/A | |
| Level 3 |
12[0]+16[0]+33[0] | 0 | 6+2 | 26 | N/A | 0/-/0 | N/A |
- A full 2 quarter-circles isn't required. Required inputs:


 +
+ 
Pretty difficult to connect compared to Rose or even Zangief's airthrow supers. But if you do it can set up his unblockable setup:
Level 1
- 5 frames of startup hit invul.; 0 of which while active.
- 13 frames of startup projectile invul.
Level 2
- 5 frames of startup hit invul.; 0 of which while active.
- 15 frames of startup projectile invul.
Level 3
- 6 frames of startup hit invul.; 0 of which while active.
- 17 frames of startup projectile invul.
The Basics
The #1 most important tool to winning with Dhalsim is learning his CC its his #1 offensive and defensive tool. Its high damage makes people 2nd guess jumping at Sim or whiffing a normal.
- 1st way of using this and the way most people know it is to do Sweep (close rh or long slide rh) into repeated SHORT yoga up flames. The short upflames are key as they have less recovery in a CC then forward and RH ones. On a level 1 you should CC you should be able to get 3 upflames in there with atleast 35 to 40% damage. The key to getting max upflames in is getting the first one off right after the slide hits so first one is hitting right off the ground and continue hitting while raising up the char into the air. (aka the sweet spot) a level 3 should net you atleast 50% or more. Also ALWAYS be on the look out for whiffed RH sweeps from opponents or missed specials. Reacting 1/4 screen away with a CC into slide/upflames will keep people on their toes.
- 2nd way of using his CC is as an anti air. Sim has probably one of thee best anti air normals in this game with his jab chop(more on that normal later) add that normal to the start of a CC when your opponent is jumping towards you gives you I’d say IMO 95% reliable anti air. Only thing thats gonna beat you jumping in is someone who anticipates you using this CC as anti air and activates on way down themselves but even then it may still trade.
- A couple other useful CC tricks is to throw a line of jab yoga fires, then time it so teleport is at end of CC and land behind opponent and use mix ups to break their block of fbs or throw them or recross them up with RH drills back to the original side. Another is if the opponent is dar away and not much damage left 5/10% and you see an opening, activate CC full screen and land a few repeated long standing strongs or standing fierces to punish missed moves for the kill (aka jeff shaefer cc’s). Also activating CC after RH drill crossup (MUST BE DEEP) can lead to some good damage
After learning the CCs, you have 1/2 your game complete. The other 50% consist of good poking strings. know yer recovery of your normals, only thing sim has for mid range char length pokes are standing strong and forward slides. both are relatively safe pokes (other then being AC’ed of course) always look out to poke with low fierce when u think someones gonna throw a fb, quick and will atleast trade at worst. Mix in low long jabs also cuz after they block it they’ll assume it was low fierce and they’ll have recovery time at that point to throw a fb, WRONG throw a quick low fierce right after for a good follow up.
- Standing jab like i mentioned before GREAT anti air use it as much as you can. doesn’t do alot of damage but usually safe if done correctly. back +strong other good anti air especially if opponent is more RIGHT above you instead of more at a angle.
- Short slides are great Bait to set up AC’s People will see the slide and think its a RH slide and a easy hit , block their attempt and quickly AC to gain the advantage.
Air normals are the most important MUST get used to using the up close (hold back) air normals as they are vital when in close. air to air combat is not where sim excels so stay out the air when u can.
Of course any Sim 101 is learning Sims mummy/drill angles, know when to use each cuz done too early are a great source of pain to sim as most can counter easily if done too early.
Alot of people used to say sims AC sucked, well they’re not rose or Ken calibur but overall they’re pretty damn useful. punch AC not great damage but if u know u can’t get a Anti air out in time on a jump in its always a good 2nd choice. Just don’t do it when they’re too close to ground since it does have a tad bit of start up time, kick AC very useful, like said before bait with slides to get a AC in , Slide AC damage is actually pretty damn good compared to most. Should only be used against opponents ground attacks, horribly useless against jump ins. also after kick AC , recover and drill to other side as they get up to activate CC as crossup and keep em on their toes.
Supers
- Other then Fancy points and trying to land the kick super x3 trick on people (see my post on srk ggpo forum) you shouldn’t be using Sims supers. MAYBE if they are dizzy right in front of you and have 35% or less on their bar and you have a level 3 other than that? Not really, although you can cancel into Inferno if you catch your opponent not blocking while standing. However, Inferno has horrible priority overall.
Other random things, Sims Yoga flame, great priority , pretty much safe if blocked. Always use jab one has quicker recovery and quicker start up, learn your spacing with it and use it to Bait out AC’s from shotos. If spaced right they’ll AC and it’ll whiff and you can follow up with another for more block damage. The hitbox of Flame is VERY wide other then opponent being RIGHT next to sim its all hit box so do it up close(just outside of right next to opponent) they’ll think they’re safe but it’ll hit them and since yer so close(corner only) u can go into mix up games, quick recovery from flame u can go into throw(great tick) or if you think they’re gonna throw reverse activate a CC or short slide into throw or blocked flame, blocked low short into guessing game of throw/CC lots of things to mix in. Learn the teleports. Kick ones are most important land far screen because if you're teleporting usually you are doing it to get fuck out of dodge. Remember you can drill/mummy/activate CC when u come out of teleports in the air so if u anticipate them knowing where yer going get ready to try and counter
Style points
- Land Level 3 SJOD’s (Standing Jab O’ Doom) hold back and hold jab button for 2 full sec’s for full charge YOGA!(overhead also)
- Kill someone with Noogie throw, hold up as they die and you can get a free appeal jump after the kill.
- Most people forget also sim has Air taunt also where he floats jump a fb and float down (safe if char is full screen away with no meter lol)
Advanced Strategy
I find that adding a Yoga Fire before the Yoga Blast makes the combo slightly easier: crouching Roundhouse-> Yoga Fire-> Yoga Blast x 2~5
Dhalsim’s Level 1 Yoga Inferno has a tendency to trade with lot of ground attacks, and as a result allows him in most cases to recover before the opponent and continue into a combo. After you’ve traded with the Level 1 YI, it’s possible to link into certain combos below.
Combos
- Close St HP xx Fierce Yoga Fire
- Close Cr MK xx Fierce Yoga Fire
- Far Cr LK xx Level 1/2 Yoga Inferno
Other Combos:
Cr MP xx Fire
Cr MP xx Inferno
Back St LK xx Fire
Back St LK xx Inferno
St LP xx Fire
St LP xx Inferno
Custom Combos
Custom Combo High Knockdown
Don’t forget that after you land a Yoga Strike you can attempt the glitch YS glitch; another YS as the opponent wakes up. Even if the opponent is blocking, they’ll become airborne and be grabbed by the YS.
After Yoga strike, Dhalsim's meaty slide is unblockable?
Any lvl- c.rh xx hk up flame xN
AA cc- s.lp xx hk upflame xN
Match-ups
