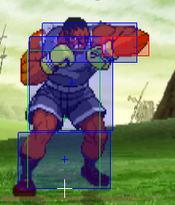
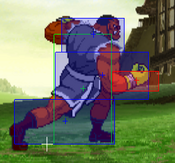
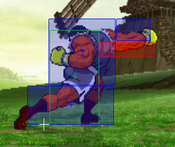
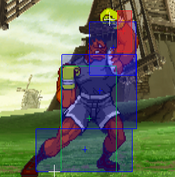
Callie Rose (talk | contribs) m (→Gameplay) |
RagingStormX (talk | contribs) |
||
| (15 intermediate revisions by 4 users not shown) | |||
| Line 1: | Line 1: | ||
== Introduction == | == Introduction == | ||
{| | {{CvS2 Character Subnav|char=Balrog|short=Balrog}} | ||
<div> | |||
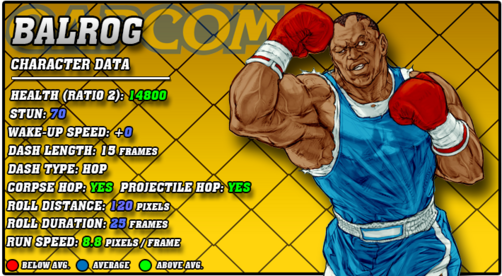
[[File:CVS2_Boxer_Data.png|right|502px]] | |||
== Story == | == Story == | ||
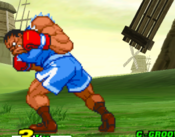
'''Balrog''', known as '''Mike Bison''' in Japan and '''Boxer''' worldwide, is an American boxing legend. Balrog was raised from a childhood of poverty in a criminal area, and made it out by training to become a boxing fighter. He took to it quickly, and was soon called one of the best boxing champions at the time. However, his upbringing made him more relentless and cutthroat, leading him to high violence in the ring and using illegal moves like his Buffalo Headbutt. After accidentally killing one of his opponents, Balrog was banned from any competitive boxing circuits. Still, he had plenty of money and was an amazing fighter. He enjoyed a life of fame and riches, until one day he joined Shadaloo. | '''Balrog''', known as '''Mike Bison''' in Japan and '''Boxer''' worldwide, is an American boxing legend. Balrog was raised from a childhood of poverty in a criminal area, and made it out by training to become a boxing fighter. He took to it quickly, and was soon called one of the best boxing champions at the time. However, his upbringing made him more relentless and cutthroat, leading him to high violence in the ring and using illegal moves like his Buffalo Headbutt. After accidentally killing one of his opponents, Balrog was banned from any competitive boxing circuits. Still, he had plenty of money and was an amazing fighter. He enjoyed a life of fame and riches, until one day he joined Shadaloo. | ||
| Line 47: | Line 15: | ||
=== Groove Selection === | === Groove Selection === | ||
'''Best - C:''' Balrog's best Groove | '''Best - C/K:''' Balrog's best Grooves are C-Groove and K-Groove. C-Groove gets easy access to a lot of meter for Crazy Buffalo combos or a Gigaton Blow punish with meter, air blocking to make his jumps a lot safer while he charges midair, and his level 2 Crazy Buffalo cancels easily into a Buffalo Headbutt for solid damage with meter. Balrog has a solid roll cancel with RC Dash Straight, and while it can still be crouched, using it as a fireball or standing poke punish makes this less risky. K-Balrog loses that consistent meter and RCs, but what he gets in return is Rage. A raged Balrog is terrifying specifically because he has access to Gigaton Blow and with the mechanic of JDs, Balrog can get rage multiple times. JDs also make moves more punishable, and by that alone Gigaton Blow gets even more threatening. K-Balrog also has a good run (good run pressure) and a really good shorthop. He can open up opponents better than he can in C, but overall the two are relatively even in strength. | ||
'''Useful - | '''Useful - A/N:''' A-Balrog is right behind C and K. A-Balrog loses the threat of super almost entirely, but makes up for it with his Custom Combo. It's not the highest damage, but it is a very powerful tool, and his CC is actually quite easy to perform. Both A-Balrog and K-Balrog trade off consistent meter threat for these tools however, which is a hefty loss. N-Balrog maintains the threat of a level 1 Crazy Buffalo combo, and gets access to the movement of K-Groove and the rolls of C/A-Groove, but basically never has Gigaton Blow. | ||
'''Worst - S/P:''' S-Balrog is a bit of a gimmick, just like any S-Groove character. Infinite level 1 Crazy Buffalo is pretty nice, as it solidifies his punishes a bit more, but he doesn't entirely need it. As a loss, he has to charge meter to have any threat of a super. Having to charge meter removes the threat of dash punches or Buffalo Headbutt in neutral, and leaves him open to punishment. This really sucks for Balrog, who can be a little more than reliant on a good super. Gigaton Blow is even rarer in S-Groove as well. P-Balrog is very hard to use, as you sacrifice charge to parry, meaning he can't get much of a punish. Situationally, you can parry a move and have enough time to charge for a Gigaton Blow punish, but this is rare and about the scariest thing P-Balrog has. | '''Worst - S/P:''' S-Balrog is a bit of a gimmick, just like any S-Groove character. Infinite level 1 Crazy Buffalo is pretty nice, as it solidifies his punishes a bit more, but he doesn't entirely need it. As a loss, he has to charge meter to have any threat of a super. Having to charge meter removes the threat of dash punches or Buffalo Headbutt in neutral, and leaves him open to punishment. This really sucks for Balrog, who can be a little more than reliant on a good super. Gigaton Blow is even rarer in S-Groove as well. P-Balrog is very hard to use, as you sacrifice charge to parry, meaning he can't get much of a punish. Situationally, you can parry a move and have enough time to charge for a Gigaton Blow punish, but this is rare and about the scariest thing P-Balrog has. | ||
| Line 56: | Line 24: | ||
|intro= | |intro= | ||
--------------------------- | --------------------------- | ||
'''Balrog (Boxer)''' is a versatile character with good defense and offense, but lacking neutral. If he gets a solid punish on defense, he can go into powerful guard crush strings against his opponent and secure a win. However, if he never gets these, and is forced to play neutral all day, he struggles hard. Balrog is best in '''C-Groove'''. | '''Balrog (Boxer)''' is a versatile character with good defense and offense, but lacking neutral. If he gets a solid punish on defense, he can go into powerful guard crush strings against his opponent and secure a win. However, if he never gets these, and is forced to play neutral all day, he struggles hard. Balrog is best in '''C-Groove''' and '''K-Groove'''. | ||
'''Difficulty''': Medium<br>'''Tier''': B- | |||
|pros= | |pros= | ||
* '''Defense:''' Between two fast punishing supers, Buffalo Headbutt, and RC Dash Straight/Ground Straight, Balrog has plenty of defensive tools | * '''Defense:''' Between two fast punishing supers, Buffalo Headbutt, and RC Dash Straight/Ground Straight, Balrog has plenty of defensive tools | ||
* '''Offense:''' Balrog has | * '''Offense:''' Balrog has good pressure between Dash Straight, whiffed Dash Upper, and his generally plus buttons | ||
* '''Supers:''' Crazy Buffalo is a solid combo ender and punish super, and Gigaton Blow is | * '''Supers:''' Crazy Buffalo is a solid combo ender and punish super, and Gigaton Blow is arguably the best lvl.3 super in the game | ||
* '''Damage:''' You can output quite a lot of damage with Balrog, especially if you have meter | * '''Damage:''' You can output quite a lot of damage with Balrog, especially if you have meter | ||
|cons= | |cons= | ||
* ''' | * '''Crouch-able Attacks:''' Balrog's two best pokes, st.HP and Dash Straight, can be crouched under by certain characters. This is a big weakness, as those two attacks are the crux of Balrog's ability to play neutral. Without any guarantee of landing those attacks, Balrog will struggle mightily in those matchups. | ||
* '''Neutral:''' | * '''Neutral:''' If Dash Straight can be crouched under, Balrog's other options to play neutral are weak | ||
* '''Matchup Dependency:''' This leads back in to his Dash Straight | * '''Matchup Dependency:''' This leads back in to his Crouch-able Attacks weakness. In matchups where Balrog can reliably land his Dash Straight, he is either even with or has an advantage against the opponent. In matchups where he can't do that, he has to do a lot more work for noticeable less results. | ||
* '''Meter Hungry:''' Balrog really likes having a super to threaten with | * '''Meter Hungry:''' Balrog really likes having a super to threaten with. C-Groove and K-Groove are the best grooves because C-Groove gives him reliable access to at least a level 1 while K-Groove always gives Balrog a level 3 once per round | ||
}} | }} | ||
=== Players to Watch === | |||
{| class="wikitable" | |||
|- | |||
! Name !! Country !! Groove !! Accounts !! Notes | |||
|- | |||
| 178 || Japan || C-Groove || Twitter: @chandesogeese || Known for using weirder characters, 178 uses Boxer just as well. Also lands tons of high level TAPs. <br> [https://youtu.be/t0TNum-0fxU?t=42 Sample Match] | |||
|- | |||
| Kodama || Japan || K-Groove || N/A || Uses K-Boxer's terrifying level 3 very well to accrue high damage along with his good short hop and JD game. <br> [https://youtu.be/8M99wzs_zOs?t=145 Sample Match] | |||
|- | |||
|} | |||
<br><br> | |||
== Normal Moves == | == Normal Moves == | ||
=== Far Normals === | |||
=== <span class="invisible-header">5LP</span> === | === <span class="invisible-header">5LP</span> === | ||
{{MoveData | {{MoveData | ||
| Line 612: | Line 596: | ||
| input = j.MP | | input = j.MP | ||
| subtitle = Jumping Medium Punch | | subtitle = Jumping Medium Punch | ||
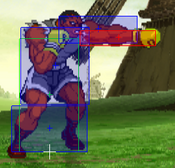
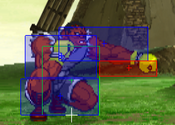
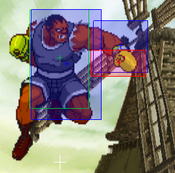
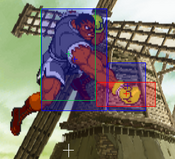
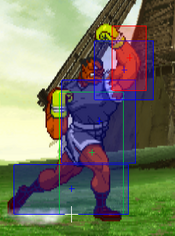
| image = | | image = CVS2_Boxer_njMP.png | ||
| caption = Neutral Jump | | caption = Neutral Jump | ||
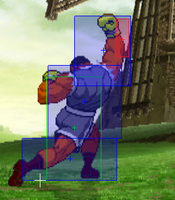
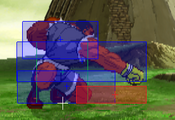
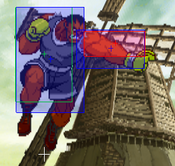
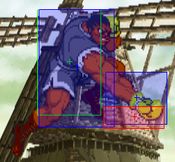
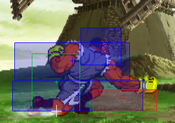
| image2 = | | image2 = CVS2_Boxer_jMP.png | ||
| caption2 = Diagonal Jump | | caption2 = Diagonal Jump | ||
| linkname = j.MP | | linkname = j.MP | ||
| Line 776: | Line 760: | ||
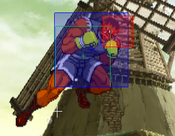
| input = j.HK | | input = j.HK | ||
| subtitle = Jumping Heavy Kick | | subtitle = Jumping Heavy Kick | ||
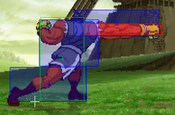
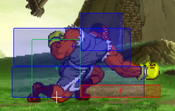
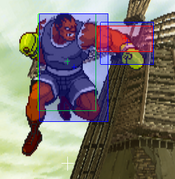
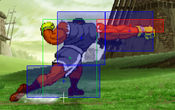
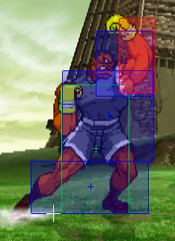
| image = | | image = CVS2_Boxer_jHK.png | ||
| caption = | | caption = | ||
| linkname = j.HP | | linkname = j.HP | ||
| Line 874: | Line 858: | ||
== Special Moves == | == Special Moves == | ||
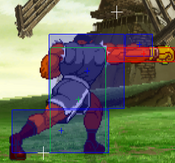
=== <span class="invisible-header">Dash Straight</span> === | |||
{{MoveData | |||
| name = Dash Straight | |||
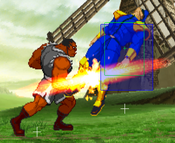
| input = [4]6P | |||
| subtitle = Dash Punch | |||
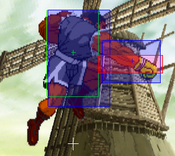
| image = CVS2_Boxer_46P.PNG | |||
| caption = Your favorite move on about half the cast, and an instant death button on the other half | |||
| linkname = Dash Straight | |||
| data = | |||
{{AttackData-CvS2 | |||
| version = Charge {{Motion|b}},{{Motion|f}}+{{Icon-Capcom|LP}} | |||
| subtitle = | |||
| damage = 1100 | |||
| stun = 11 | |||
| cancel = None | |||
| guard = Mid | |||
| parry = High | |||
| startup = 5~14 | |||
| active = 4 | |||
| recovery = 17 | |||
| total = 26~35 | |||
| advHit = -1 | |||
| advBlock = -1 | |||
| invul = None | |||
}} | |||
{{AttackData-CvS2 | |||
| header = no | |||
| version = Charge {{Motion|b}},{{Motion|f}}+{{Icon-Capcom|MP}} | |||
| subtitle = | |||
| damage = 1200 | |||
| stun = 12 | |||
| cancel = None | |||
| guard = Mid | |||
| parry = High | |||
| startup = 6~22 | |||
| active = 4 | |||
| recovery = 18 | |||
| total = 28~44 | |||
| advHit = -2 | |||
| advBlock = -2 | |||
| invul = None | |||
}} | |||
{{AttackData-CvS2 | |||
| header = no | |||
| version = Charge {{Motion|b}},{{Motion|f}}+{{Icon-Capcom|HP}} | |||
| subtitle = | |||
| damage = 1300 | |||
| stun = 13 | |||
| cancel = None | |||
| guard = Mid | |||
| parry = High | |||
| startup = 6~30 | |||
| active = 4 | |||
| recovery = 19 | |||
| total = 29~53 | |||
| advHit = -3 | |||
| advBlock = -3 | |||
| invul = None | |||
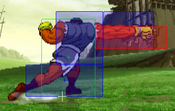
| description = Balrog's signature Dash Straight, and one of the saddest balance mistakes in CvS2. The listed startup is minimum and maximum travel time, these will activate as soon as they reach the opponent or when they reach the maximum slide distance. These are amazing neutral winning tools with massive reach, great forward movement, and great on block values. However, they have a massive caveat: about two/thirds of the cast can crouch under these. On the characters that can't crouch under them, these are oppressive and define neutral. They're fast and insanely far reaching, they can stuff most anything. Your opponent has to move around them, JD them, parry them, or do something invincible through them. Solid spacing on these makes them incredibly hard to interrupt or properly punish, and they also act as useful combo enders since Balrog can get a scary standing mixup on them. On the characters that can crouch under these, they become essentially useless. | |||
'''Dash | '''Characters who can't crouch under Dash Straight:''' | ||
* | <div class="mw-collapsible mw-collapsed" style="width:5%" > | ||
<div class="mw-collapsible-content"> | |||
* Raiden | |||
* Geese | |||
* Chang | |||
* Zangief | |||
* Sagat | |||
* Eagle | |||
* Rugal | |||
* Yamazaki | |||
* Benimaru | |||
* E.Honda | |||
* Dhalsim | |||
* Terry | |||
* Kyo | |||
* Joe | |||
</div> | |||
</div> | |||
</br> | |||
'''Characters who can crouch under Dash Straight:''' | |||
<div class="mw-collapsible mw-collapsed" style="width:5%" > | |||
<div class="mw-collapsible-content"> | |||
* Guile | |||
* Boxer | |||
* Blanka | |||
* Dictator | |||
* Kyosuke | |||
* Todo | |||
* Ryo | |||
* Ryu | |||
* Ken | |||
* Akuma | |||
* Dan | |||
* Rolento | |||
* Haohmaru | |||
* Claw | |||
* Cammy | |||
* Morrigan | |||
* Yun | |||
* Chun-Li | |||
* Sakura | |||
* Mai | |||
* Kim | |||
* Vice | |||
* Yuri | |||
* Nakoruru | |||
* Rock | |||
* Hibiki | |||
* Maki | |||
* Iori | |||
* Athena | |||
</div> | |||
</div> | |||
}} | |||
}} | |||
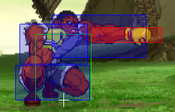
=== <span class="invisible-header">Dash Uppercut</span> === | |||
{{MoveData | |||
| name = Dash Uppercut | |||
| input = [4]6K | |||
| subtitle = Dash Upper | |||
| image = CVS2_Boxer_46K.PNG | |||
| caption = | |||
| linkname = Dash Uppercut | |||
| data = | |||
{{AttackData-CvS2 | |||
| version = Charge {{Motion|b}},{{Motion|f}}+{{Icon-Capcom|LK}} | |||
| subtitle = | |||
| damage = 1200 | |||
| stun = 12 | |||
| cancel = None | |||
| guard = Mid | |||
| parry = High | |||
| startup = 4~11 | |||
| active = 4 | |||
| recovery = 15 | |||
| total = 23~30 | |||
| advHit = +1 | |||
| advBlock = +1 | |||
| invul = None | |||
}} | |||
{{AttackData-CvS2 | |||
| header = no | |||
| version = Charge {{Motion|b}},{{Motion|f}}+{{Icon-Capcom|MK}} | |||
| subtitle = | |||
| damage = 1300 | |||
| stun = 13 | |||
| cancel = None | |||
| guard = Mid | |||
| parry = High | |||
| startup = 5~20 | |||
| active = 4 | |||
| recovery = 15 | |||
| total = 24~39 | |||
| advHit = +1 | |||
| advBlock = +1 | |||
| invul = None | |||
}} | |||
{{AttackData-CvS2 | |||
| header = no | |||
| version = Charge {{Motion|b}},{{Motion|f}}+{{Icon-Capcom|HK}} | |||
| subtitle = | |||
| damage = 1400 | |||
| stun = 14 | |||
| cancel = None | |||
| guard = Mid | |||
| parry = High | |||
| startup = 6~29 | |||
| active = 4 | |||
| recovery = 15 | |||
| total = 25~48 | |||
| advHit = +1 | |||
| advBlock = +1 | |||
| invul = None | |||
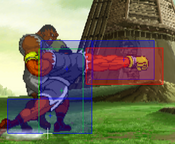
| description = A dashing uppercut. Mostly, this is used to anti-air opponents trying to jump over Dash Straight. By design, every character in the game can crouch under these, which makes them even worse for neutral than Dash Straight. However, against the matchups where you get to use Dash Straight, this is a good way to snipe opponents trying to neutral jump or backward jump away from it. They're also +1, so if an opponent is stand blocking in fear of a Dash Ground Straight or a 2HK, you can safely reset pressure. | |||
}} | |||
}} | |||
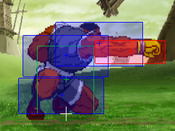
=== <span class="invisible-header">Dash Ground Straight</span> === | |||
{{MoveData | |||
| name = Dash Ground Straight | |||
| input = [4]3P | |||
| subtitle = Dash Lower | |||
| image = CVS2_Boxer_43P.PNG | |||
| caption = | |||
| linkname = Dash Ground Straight | |||
| data = | |||
{{AttackData-CvS2 | |||
| version = Charge {{Motion|b}},{{Motion|df}}+{{Icon-Capcom|LP}} | |||
| subtitle = | |||
| damage = 1000 | |||
| stun = 10 | |||
| cancel = None | |||
| guard = Low | |||
| parry = Low | |||
| startup = 6~14 | |||
| active = 4 | |||
| recovery = 28 | |||
| total = 38~46 | |||
| advHit = -DWN | |||
| advBlock = -10 | |||
| invul = None | |||
}} | |||
{{AttackData-CvS2 | |||
| header = no | |||
| version = Charge {{Motion|b}},{{Motion|df}}+{{Icon-Capcom|MP}} | |||
| subtitle = | |||
| damage = 1100 | |||
| stun = 11 | |||
| cancel = None | |||
| guard = Low | |||
| parry = Low | |||
| startup = 7~23 | |||
| active = 4 | |||
| recovery = 25 | |||
| total = 36~52 | |||
| advHit = -DWN | |||
| advBlock = -10 | |||
| invul = None | |||
}} | |||
{{AttackData-CvS2 | |||
| header = no | |||
| version = Charge {{Motion|b}},{{Motion|df}}+{{Icon-Capcom|HP}} | |||
| subtitle = | |||
| damage = 1200 | |||
| stun = 12 | |||
| cancel = None | |||
| guard = Low | |||
| parry = Low | |||
| startup = 8~32 | |||
| active = 4 | |||
| recovery = 26 | |||
| total = 38~62 | |||
| advHit = -DWN | |||
| advBlock = -10 | |||
| invul = None | |||
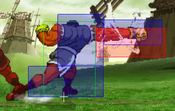
| description = Balrog slides forward like Dash Straight, but punches at their feet with a move that hits low. Normally, this is to punish people trying to walk away from Dash Straight. This still works, but since the answer to Dash Straight is to crouch, these are more often than not blocked in neutral. This sucks, as they're -10 and more than punishable. They make alright punishes and decent combo enders, though their ability to do either of these relies on having close enough proximity for the move to come out fast. | |||
}} | |||
}} | |||
''' | === <span class="invisible-header">Dash Ground Uppercut</span> === | ||
{{MoveData | |||
| name = Dash Ground Uppercut | |||
| input = [4]3K | |||
| subtitle = Dash Upper Knockdown | |||
| image = CVS2_Boxer_43K.PNG | |||
| caption = | |||
| linkname = Dash Ground Uppercut | |||
| data = | |||
{{AttackData-CvS2 | |||
| version = Charge {{Motion|b}},{{Motion|df}}+{{Icon-Capcom|LK}} | |||
| subtitle = | |||
| damage = 1100 | |||
| stun = 11 | |||
| cancel = None | |||
| guard = Mid | |||
| parry = High | |||
| startup = 7~14 | |||
| active = 4 | |||
| recovery = 23 | |||
| total = 34~41 | |||
| advHit = -DWN | |||
| advBlock = -7 | |||
| invul = None | |||
}} | |||
{{AttackData-CvS2 | |||
| header = no | |||
| version = Charge {{Motion|b}},{{Motion|df}}+{{Icon-Capcom|MK}} | |||
| subtitle = | |||
| damage = 1200 | |||
| stun = 12 | |||
| cancel = None | |||
| guard = Mid | |||
| parry = High | |||
| startup = 8~23 | |||
| active = 4 | |||
| recovery = 23 | |||
| total = 35~50 | |||
| advHit = -DWN | |||
| advBlock = -7 | |||
| invul = None | |||
}} | |||
{{AttackData-CvS2 | |||
| header = no | |||
| version = Charge {{Motion|b}},{{Motion|df}}+{{Icon-Capcom|HK}} | |||
| subtitle = | |||
| damage = 1300 | |||
| stun = 13 | |||
| cancel = None | |||
| guard = Mid | |||
| parry = High | |||
| startup = 9~32 | |||
| active = 4 | |||
| recovery = 23 | |||
| total = 36~59 | |||
| advHit = -DWN | |||
| advBlock = -7 | |||
| invul = None | |||
| description = A move with the exact same animation and hitbox as Dash Uppercut, but it knocks grounded opponents down. Technically does more damage against standing opponents as a combo ender than Dash Ground Straight, but 100 extra damage isn't that worth it overall. Slower minimum startup than the other dash punches and still being crouchable universally means this isn't really a useful tool over a normal Dash Uppercut, and serves essentially the same purpose of anti-airing people jumping over your Dash Straight but with worse damage and startup. Still unsafe on block too, if they do stand block it, but punishing it is hard as it looks nearly identical to Dash Uppercut. The secret is that Balrog's legs are in a different position, and he says a different voiceline. Learn the difference so you can punish these on block, or just crouch and punish both with no effort. | |||
}} | |||
}} | |||
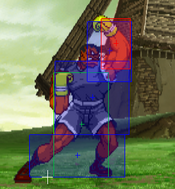
=== <span class="invisible-header">Buffalo Head Butt</span> === | |||
{{MoveData | |||
| name = Buffalo Head Butt | |||
| input = [2]8P | |||
| subtitle = Headbutt | |||
| image = CVS2_Boxer_28P.PNG | |||
| caption = | |||
| linkname = Buffalo Head Butt | |||
| data = | |||
{{AttackData-CvS2 | |||
| version = Charge {{Motion|d}},{{Motion|u}}+{{Icon-Capcom|LP}} | |||
| subtitle = | |||
| damage = 1400 | |||
| stun = 14 | |||
| cancel = None | |||
| guard = Mid | |||
| parry = High | |||
| startup = 8 | |||
| active = 11 | |||
| recovery = 25 | |||
| total = 44 | |||
| advHit = -DWN | |||
| advBlock = -12 | |||
| invul = 1-8 (Upper) | |||
}} | |||
{{AttackData-CvS2 | |||
| header = no | |||
| version = Charge {{Motion|d}},{{Motion|u}}+{{Icon-Capcom|MP}} | |||
| subtitle = | |||
| damage = 1500 | |||
| stun = 15 | |||
| cancel = None | |||
| guard = Mid | |||
| parry = High | |||
| startup = 9 | |||
| active = 11 | |||
| recovery = 25 | |||
| total = 45 | |||
| advHit = -DWN | |||
| advBlock = -12 | |||
| invul = 1-9 (Upper) | |||
}} | |||
{{AttackData-CvS2 | |||
| header = no | |||
| version = Charge {{Motion|d}},{{Motion|u}}+{{Icon-Capcom|HP}} | |||
| subtitle = | |||
| damage = 1600 | |||
| stun = 16 | |||
| cancel = None | |||
| guard = Mid | |||
| parry = High | |||
| startup = 10 | |||
| active = 11 | |||
| recovery = 25 | |||
| total = 46 | |||
| advHit = -DWN | |||
| advBlock = -12 | |||
| invul = None | |||
| description = Balrog jumps into the air with a headbutt. The LP and MP versions are useful anti-airs and punish tools, and the HP version is your preferred combo ender but usually requires some close range. No version of this is a true reversal without Roll Cancels. The LP version is also useful in neutral to punish extended hurtboxes, like fireballs or long standing pokes. | |||
}} | |||
}} | |||
=== <span class="invisible-header">Turn Punch</span> === | |||
{{MoveData | |||
| name = Turn Punch | |||
| input = Hold PPP or KKK | |||
| subtitle = TAP | |||
| image = CVS2_Boxer_TAP_First.PNG | |||
| caption = Windup | |||
| image2 = CVS2_Boxer_TAP.png | |||
| caption2 = Attack | |||
| linkname = Turn Punch | |||
| data = | |||
{{AttackData-CvS2 | |||
| version = Hold {{Icon-Capcom|3P}}/{{Icon-Capcom|3K}} for 1~2 seconds | |||
| subtitle = Level 1 | |||
| damage = 1400 | |||
| stun = 14 | |||
| cancel = None | |||
| guard = Mid | |||
| parry = High | |||
| startup = 41 | |||
| active = 6 | |||
| recovery = 13 | |||
| total = 60 | |||
| advHit = +2 | |||
| advBlock = +2 | |||
| invul = None | |||
}} | |||
{{AttackData-CvS2 | |||
| header = no | |||
| version = Hold {{Icon-Capcom|3P}}/{{Icon-Capcom|3K}} for 2~4 seconds | |||
| subtitle = Level 2 | |||
| damage = 1600 | |||
| stun = 16 | |||
| cancel = None | |||
| guard = Mid | |||
| parry = High | |||
| startup = 41 | |||
| active = 7 | |||
| recovery = 15 | |||
| total = 63 | |||
| advHit = +2 | |||
| advBlock = +2 | |||
| invul = None | |||
}} | |||
{{AttackData-CvS2 | |||
| header = no | |||
| version = Hold {{Icon-Capcom|3P}}/{{Icon-Capcom|3K}} for 4~8 seconds | |||
| subtitle = Level 3 | |||
| damage = 1900 | |||
| stun = 19 | |||
| cancel = None | |||
| guard = Mid | |||
| parry = High | |||
| startup = 41 | |||
| active = 8 | |||
| recovery = 17 | |||
| total = 66 | |||
| advHit = +2 | |||
| advBlock = +2 | |||
| invul = None | |||
}} | |||
{{AttackData-CvS2 | |||
| header = no | |||
| version = Hold {{Icon-Capcom|3P}}/{{Icon-Capcom|3K}} for 8~16 seconds | |||
| subtitle = Level 4 | |||
| damage = 2200 | |||
| stun = 22 | |||
| cancel = None | |||
| guard = Mid | |||
| parry = High | |||
| startup = 41 | |||
| active = 9 | |||
| recovery = 18 | |||
| total = 68 | |||
| advHit = +2 | |||
| advBlock = +2 | |||
| invul = None | |||
}} | |||
{{AttackData-CvS2 | |||
| header = no | |||
| version = Hold {{Icon-Capcom|3P}}/{{Icon-Capcom|3K}} for 16~24 seconds | |||
| subtitle = Level 5 | |||
| damage = 2600 | |||
| stun = 26 | |||
| cancel = None | |||
| guard = Mid | |||
| parry = High | |||
| startup = 41 | |||
| active = 10 | |||
| recovery = 20 | |||
| total = 71 | |||
| advHit = +2 | |||
| advBlock = +2 | |||
| invul = None | |||
}} | |||
{{AttackData-CvS2 | |||
| header = no | |||
| version = Hold {{Icon-Capcom|3P}}/{{Icon-Capcom|3K}} for 24~32 seconds | |||
| subtitle = Level 6 | |||
| damage = 2900 | |||
| stun = 29 | |||
| cancel = None | |||
| guard = Mid | |||
| parry = High | |||
| startup = 41 | |||
| active = 11 | |||
| recovery = 22 | |||
| total = 74 | |||
| advHit = +2 | |||
| advBlock = +2 | |||
| invul = None | |||
}} | |||
{{AttackData-CvS2 | |||
| header = no | |||
| version = Hold {{Icon-Capcom|3P}}/{{Icon-Capcom|3K}} for 32~40 seconds | |||
| subtitle = Level 7 | |||
| damage = 3500 | |||
| stun = 35 | |||
| cancel = None | |||
| guard = Mid | |||
| parry = High | |||
| startup = 41 | |||
| active = 12 | |||
| recovery = 23 | |||
| total = 76 | |||
| advHit = +2 | |||
| advBlock = +2 | |||
| invul = None | |||
}} | |||
{{AttackData-CvS2 | |||
| header = no | |||
| version = Hold {{Icon-Capcom|3P}}/{{Icon-Capcom|3K}} for 40~48 seconds | |||
| subtitle = Level 8 | |||
| damage = 4000 | |||
| stun = 40 | |||
| cancel = None | |||
| guard = Mid | |||
| parry = High | |||
| startup = 41 | |||
| active = 13 | |||
| recovery = 25 | |||
| total = 79 | |||
| advHit = +2 | |||
| advBlock = +2 | |||
| invul = None | |||
}} | |||
{{AttackData-CvS2 | |||
| header = no | |||
| version = Hold {{Icon-Capcom|3P}}/{{Icon-Capcom|3K}} for 48~56 seconds | |||
| subtitle = Level 9 | |||
| damage = 4500 | |||
| stun = 45 | |||
| cancel = None | |||
| guard = Mid | |||
| parry = High | |||
| startup = 41 | |||
| active = 14 | |||
| recovery = 27 | |||
| total = 82 | |||
| advHit = +2 | |||
| advBlock = +2 | |||
| invul = None | |||
}} | |||
{{AttackData-CvS2 | |||
| header = no | |||
| version = Hold {{Icon-Capcom|3P}}/{{Icon-Capcom|3K}} for 56 seconds or more | |||
| subtitle = Level FINAL | |||
| damage = 5000 | |||
| stun = 50 | |||
| cancel = None | |||
| guard = Mid | |||
| parry = High | |||
| startup = 41 | |||
| active = 15 | |||
| recovery = 28 | |||
| total = 84 | |||
| advHit = +2 | |||
| advBlock = +2 | |||
| invul = None | |||
| description = Turn Punch, or Turn Around Punch, abbreviated to TAP. Boxer reels back for a long time before lunging forward with a, thankfully uncrouchable, Dash Straight. A move of extreme lows and mediocre highs. Lacks the projectile invuln of other games Turn Punches, meaning the 41 frame startup hurts as much as it sounds like it would. As you charge higher and higher, the damage return becomes much more rewarding, and if you get a stun you can do massive meterless damage assuming you charged high enough. This means you have to sacrifice half of your buttons though, and usually you'll do this with his kicks, meaning no Dash Uppercuts, 2HK, 2LK low route, or anything. In exchange, you get a chance dizzy stun with notably high reward. Often, you'll be better off avoiding this and just using all of Balrog's normals, since he needs them much more than another high damage tool. | |||
}} | |||
}} | |||
== Super Moves == | == Super Moves == | ||
=== <span class="invisible-header">Crazy Buffalo</span> === | |||
{{MoveData | |||
| name = Crazy Buffalo | |||
| input = [4]646P, K for Uppers | |||
| subtitle = Punch Super | |||
| image = CVS2_Boxer_4646P.PNG | |||
| caption = | |||
| linkname = Crazy Buffalo | |||
| data = | |||
{{AttackData-CvS2 | |||
| version = Charge {{Motion|b}},{{Motion|f}}{{Motion|b}}{{Motion|f}}+{{Icon-Capcom|LP}} | |||
| subtitle = | |||
| damage = 2800 | |||
| stun = 0 | |||
| cancel = None | |||
| guard = Mid | |||
| parry = High | |||
| startup = 5:4/7 | |||
| active = 5(5/8)5(17)6 | |||
| recovery = 17 | |||
| total = 64/70 | |||
| advHit = -DWN | |||
| advBlock = -8 | |||
| invul = 1-9 (Full) | |||
}} | |||
{{AttackData-CvS2 | |||
| header = no | |||
| version = Charge {{Motion|b}},{{Motion|f}}{{Motion|b}}{{Motion|f}}+{{Icon-Capcom|MP}} | |||
| subtitle = | |||
| damage = 4000 | |||
| stun = 0 | |||
| cancel = SP/SU | |||
| guard = Mid | |||
| parry = High | |||
| startup = 5:4/7 | |||
| active = 5(5/8)5(5/8)5(17)6 | |||
| recovery = 16 | |||
| total = 73/82 | |||
| advHit = -DWN | |||
| advBlock = -7 | |||
| invul = 1-16 (Full) | |||
}} | |||
{{AttackData-CvS2 | |||
| header = no | |||
| version = Charge {{Motion|b}},{{Motion|f}}{{Motion|b}}{{Motion|f}}+{{Icon-Capcom|HP}} | |||
| subtitle = | |||
| damage = 5100 | |||
| stun = 0 | |||
| cancel = None | |||
| guard = Mid | |||
| parry = High | |||
| startup = 5:4/7 | |||
| active = 5(5/8)5(5/8)5(5/8)5(17)6 | |||
| recovery = 15 | |||
| total = 82/94 | |||
| advHit = -DWN | |||
| advBlock = -6 | |||
| invul = 1-23 (Full) | |||
| description = Balrog rushes forward with either a series of Dash Straights normally, or a series of Dash Uppers if you mash kicks. Dash Uppers have taller hitboxes but still whiff on crouchers, and are overall slower. Upper versions can work better in some juggles. The second values in the frame data table are with Dash Uppers. These are solid combo enders and punish tools, Balrog can go through fireballs or pokes with them or reversal with them. While they aren't as good at this as Gigaton Blow is, they are cheaper and safer. The level 2 version is especially nice, as it can cancel into HP Headbutt for very respectable 2 bar damage. Sadly, these don't juggle very well, so they aren't great as C-Groove level 2 cancels and can be finicky as A-Groove enders. | |||
}} | |||
}} | |||
=== <span class="invisible-header">Gigaton Blow</span> === | |||
{{MoveData | |||
| name = Gigaton Blow | |||
| input = [4]646K | |||
| subtitle = Kick Super, Level 3 | |||
| image = CVS2_Boxer_4646K.PNG | |||
| caption = Really, it was their fault you blocked their move | |||
| linkname = Gigaton Blow | |||
| data = | |||
{{AttackData-CvS2 | |||
| version = Charge {{Motion|b}},{{Motion|f}}{{Motion|b}}{{Motion|f}}+{{Icon-Capcom|K}} | |||
| subtitle = | |||
| damage = 6800 | |||
| stun = 0 | |||
| cancel = None | |||
| guard = Mid | |||
| parry = High | |||
| startup = 5:4 | |||
| active = 20 | |||
| recovery = 21 | |||
= | | total = 50 | ||
| advHit = -DWN | |||
= | | advBlock = -10 | ||
| invul = 1-23 (Full) | |||
| description = A beastly level 3 super, one of the best in the game. No other super matches the distance it travels and the speed at which it does. If Balrog has enough meter for this, the opponent is in a very tight spot. Balrog can easily punish fireballs, whiffed heavies, and any special with lag with Gigaton Blow. This hits for almost 7000 damage as well. If Balrog gets any solid confirm into this, he reaches ridiculous damage ceilings, and can easily KO most characters. Plus, if you block anything that is -7 or more, this will punish it. Iori rekkas, Hibiki Distance Slashes, Blanka Balls, etc etc. This really hurts the opponent, as they can't whiff heavy buttons or throw projectiles, and if you block anything that would normally be pretty safe, you can punish with a massive damage hit. This super has two downsides however: the expensive cost, and it is punishable on block. Make sure that it'll hit, and be ready to have no meter left afterwards, and this is easily Balrog's most standout tool. | |||
= | }} | ||
}} | |||
Hibiki, | |||
== Colors == | == Colors == | ||
| Line 954: | Line 1,503: | ||
{{Navbox-CvS2}} | {{Navbox-CvS2}} | ||
[[Category:Capcom vs SNK 2]] | [[Category:Capcom vs SNK 2]] | ||
[[Category:Balrog]] | |||
Latest revision as of 21:56, 6 May 2025
Introduction
Story
Balrog, known as Mike Bison in Japan and Boxer worldwide, is an American boxing legend. Balrog was raised from a childhood of poverty in a criminal area, and made it out by training to become a boxing fighter. He took to it quickly, and was soon called one of the best boxing champions at the time. However, his upbringing made him more relentless and cutthroat, leading him to high violence in the ring and using illegal moves like his Buffalo Headbutt. After accidentally killing one of his opponents, Balrog was banned from any competitive boxing circuits. Still, he had plenty of money and was an amazing fighter. He enjoyed a life of fame and riches, until one day he joined Shadaloo.
He quickly rose the ranks of Shadaloo, and became M. Bison's personal enforcer. Throughout most of the games, Balrog enjoys his high position in Shadaloo, and carries out multiple hits for them alongside directing other grunt work. Not much is known about where Balrog is in the modern time of Street Fighter 3, but we know he lost to Alex in the grand finals of a tournament called Vale Tudo Eternal Fighting prior to the events of Street Fighter III: New Generation/
Gameplay
Balrog is a classic bully character, using his forward moving punches and long reaching normals to bust up opponents in neutral. In other games, especially Street Fighter 2: Super Turbo, Balrog is often considered a high or top tier character for his amazing offense and neutral. Balrog isn't as strong in CvS2 sadly, but is nowhere near weak, usually scoring in the mid tier somewhere. He still has his amazing dash punches, but Dash Straight can be crouched by a majority of the cast, limiting its use heavily. This sorta sucks, because Dash Straight is classically the main one you use in neutral for it's long reach and safety on block. Dash Upper and Dash Ground Upper both suffer this weakness as well, leaving him with only the risky and unsafe Dash Ground Lower, which he never wants to do in neutral except as a surprise tool from Dash Straight. This forces him to play a lot slower, and wait for the opponent to allow an opening.
Balrog comes with plenty of benefits however. He has simple and good combos, Dash Upper is amazing for creating powerful guard crush strings, and his supers are incredibly useful. Crazy Buffalo is a high damage combo ender with good reach and invuln, and the level 2 combo from it is simple and powerful. The real juice is his level 3, Gigaton Blow. Incredibly fast, great range, and high damage makes Gigaton Blow a terrifying punish tool akin to Ken's SAIII in 3rd Strike, but with much scarier damage. Even without a super, Buffalo Headbutt can get Balrog out of a sticky situation, and RC Dash Straight makes opponents think twice about throwing that fireball or standing poke out. Balrog leans a lot more defensively in CvS2 in neutral, as a crouchable Dash Straight removes his most ignorant neutral skip. Once he gets to be aggro, he can overwhelm his opponents, and solid defense gets you there faster than a high risk neutral skip.
Groove Selection
Best - C/K: Balrog's best Grooves are C-Groove and K-Groove. C-Groove gets easy access to a lot of meter for Crazy Buffalo combos or a Gigaton Blow punish with meter, air blocking to make his jumps a lot safer while he charges midair, and his level 2 Crazy Buffalo cancels easily into a Buffalo Headbutt for solid damage with meter. Balrog has a solid roll cancel with RC Dash Straight, and while it can still be crouched, using it as a fireball or standing poke punish makes this less risky. K-Balrog loses that consistent meter and RCs, but what he gets in return is Rage. A raged Balrog is terrifying specifically because he has access to Gigaton Blow and with the mechanic of JDs, Balrog can get rage multiple times. JDs also make moves more punishable, and by that alone Gigaton Blow gets even more threatening. K-Balrog also has a good run (good run pressure) and a really good shorthop. He can open up opponents better than he can in C, but overall the two are relatively even in strength.
Useful - A/N: A-Balrog is right behind C and K. A-Balrog loses the threat of super almost entirely, but makes up for it with his Custom Combo. It's not the highest damage, but it is a very powerful tool, and his CC is actually quite easy to perform. Both A-Balrog and K-Balrog trade off consistent meter threat for these tools however, which is a hefty loss. N-Balrog maintains the threat of a level 1 Crazy Buffalo combo, and gets access to the movement of K-Groove and the rolls of C/A-Groove, but basically never has Gigaton Blow.
Worst - S/P: S-Balrog is a bit of a gimmick, just like any S-Groove character. Infinite level 1 Crazy Buffalo is pretty nice, as it solidifies his punishes a bit more, but he doesn't entirely need it. As a loss, he has to charge meter to have any threat of a super. Having to charge meter removes the threat of dash punches or Buffalo Headbutt in neutral, and leaves him open to punishment. This really sucks for Balrog, who can be a little more than reliant on a good super. Gigaton Blow is even rarer in S-Groove as well. P-Balrog is very hard to use, as you sacrifice charge to parry, meaning he can't get much of a punish. Situationally, you can parry a move and have enough time to charge for a Gigaton Blow punish, but this is rare and about the scariest thing P-Balrog has.
|
Balrog (Boxer) is a versatile character with good defense and offense, but lacking neutral. If he gets a solid punish on defense, he can go into powerful guard crush strings against his opponent and secure a win. However, if he never gets these, and is forced to play neutral all day, he struggles hard. Balrog is best in C-Groove and K-Groove. Difficulty: MediumTier: B- |
|
| Pros | Cons |
|
|
Players to Watch
| Name | Country | Groove | Accounts | Notes |
|---|---|---|---|---|
| 178 | Japan | C-Groove | Twitter: @chandesogeese | Known for using weirder characters, 178 uses Boxer just as well. Also lands tons of high level TAPs. Sample Match |
| Kodama | Japan | K-Groove | N/A | Uses K-Boxer's terrifying level 3 very well to accrue high damage along with his good short hop and JD game. Sample Match |
Normal Moves
Far Normals
5LP
5MP
5HP
5LK
5MK
5HK
Close Normals
clLP
clMP
clHP
clLK
clMK
clHK
Crouching Normals
2LP
2MP
2HP
2LK
2MK
2HK
Jumping Normals
jLP
jMP
jHP
jLK
jMK
jHK
Throws
Head Bomber
Dirty Bomber
Special Moves
Dash Straight
Dash Uppercut
Dash Ground Straight
Dash Ground Uppercut
Buffalo Head Butt
Turn Punch
Super Moves
Crazy Buffalo
Gigaton Blow
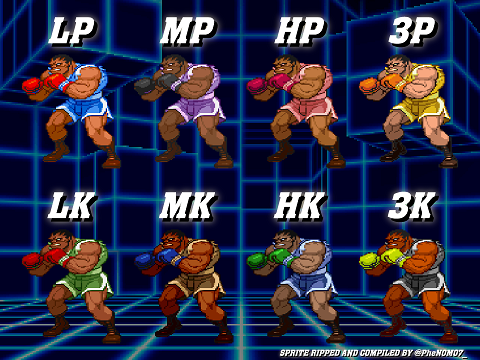
Colors
