No edit summary |
RagingStormX (talk | contribs) |
||
| (41 intermediate revisions by 5 users not shown) | |||
| Line 1: | Line 1: | ||
= Introduction | == Introduction == | ||
{{CvS2 Character Subnav|char=Dhalsim|short=Dhalsim}} | |||
<div> | |||
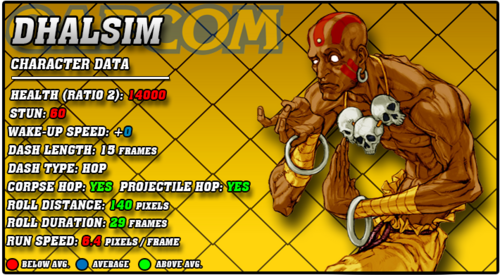
{| | [[File:CVS2_Dhalsim_Data.png|right|500px]] | ||
== Story == | |||
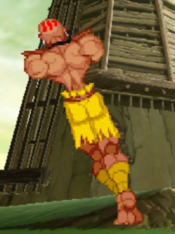
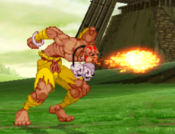
'''Dhalsim''' is a powerful Yoga master. He is capable of stretching his body out to immense lengths, and conjuring fire from his mouth. He can also teleport, and later on learns how to float. He starts out fighting to raise money for his village, as he cares deeply for those who live there. Although, he has to contradict his natural pacifist beliefs. Throughout many of the games, he finds himself conflicted between his pacifist lifestyle and having to use his great powers to fight for his village. After the events of Street Fighter II: World Warrior, Dhalsim retires from fighting. That is, until S.I.N. in Street Fighter IV builds a dam that bars water from getting into Dhalsim's village. He is once again forced to choose between his pacifist beliefs and the need to fight. | |||
== Gameplay == | |||
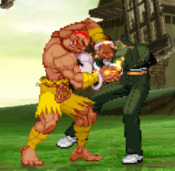
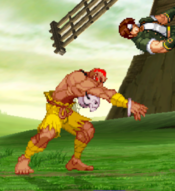
Dhalsim is the original long-arms zoner. He has stretchy normals that allow him to cover plenty of angles, but has to carefully pick and choose which one he needs for what situation, as they all hit at specific and precise angles. While Dhalsim is infamously powerful in other games like Super Turbo and Alpha 3, CvS2 Dhalsim is quite underwhelming. Many characters are dominant in neutral already, and his extended hurtboxes end up hurting him a lot more. His weak defense makes Grooves with hop and run dismantle him, and he struggles to properly zone them at all. His normally powerful fireball is beaten out by CvS2's roll cancel glitch, as are many of his zoning tools in general, and his offensive mixup is much worse than normal. Overall, Dhalsim is a low tier that has to win neutral every single time in order to win. | |||
Dhalsim does still have very powerful zoning tools however. His normals, namely ones like 5LK and 5HP, control a bunch of grounded space. 5HK and 4MP are great anti-airs, and his divekicks help him be aggressive and mobile. He has fairly useful supers for zoning and chipping. He has a risky but strong reversal in his teleports, and it can be hard to properly punish them as well. Dhalsim has powerful neutral tools, but not much else. You have to win neutral more than anyone else to win, and one time of losing it can spell the end. You can be winning for the majority of the match, but one good hit from the opponent can spell your doom. | |||
=== Groove Selection === | |||
'''Best - C:''' C-Dhalsim is the best Groove for Dhalsim, plain and simple. Airblock makes his horrible floaty jump a lot safer, lots of access to his supers makes his damage, reversal, and chip out game a lot more solid, and Alpha Counters give him a MUCH needed defensive option. Roll cancel lets him RC his fire specials to make them much harder to contest and much more annoying in neutral. While his roll isn't great, it can be appreciated as a risky escape tool. C-Groove gives Dhalsim the defensive options he needs and lots of access to his supers: all that he needs to perform well. | |||
'''Useful - A/S:''' A-Dhalsim is a bit of a lesser C-Dhalsim. Losing airblock hurts a lot, but you get Custom Combo in return. While this isn't necessarily a bad trade, Dhalsim's CC isn't the greatest, and he would rather just have his supers. Still, you get the basic defense of C-Groove plus a decent reversal combo tool with big damage potential: it could be a lot worse. S-Dhalsim is a lot more gimmicky. While charging doesn't actively hurt his gameplan, getting hit while charging can end the round for Dhalsim. He has no access to supers for a majority of the round, which doesn't hurt too bad, but at low health having infinite level 1's makes him a bit scarier. | |||
'''Worst - K/N/P:''' K-Dhalsim is strange to play. Dhalsim having run and hop isn't as beneficial to his gameplan as you might think, since his offense isn't very rewarding for how much risk it carries. Rage does make his normal poke strategy much scarier however, and a good punish into a level 3 still hurts, so K-Dhalsim with Rage has some merit. N-Dhalsim is a worse version of K-Dhalsim. His level 1's are solid but not good enough to live on just level 1 supers alone, and he doesn't have a good enough RC special for N-Groove. P-Dhalsim is the worst way to play him. Dhalsim has very weak punishes, meaning parries do very little, though he can almost always at least punish thanks to his range. Only having roughly one level 3 super per round hurts, and the lack of any other good options is a major sacrifice. | |||
{{StrengthsAndWeaknesses | |||
|intro= | |||
--------------------------- | |||
'''Dhalsim''' is a fragile long-arm zoner who relies on massive range normals to keep opponents out. However, if he fails, he often dies in one or two interactions. Dhalsim is best in '''C-Groove'''. | |||
'''Difficulty''': Hard<br>'''Tier''': C | |||
|pros= | |||
* '''Normals:''' Dhalsim's massive normals list gives him a tool for most situations, and he can zone very effectively with good usage of his tools | |||
* '''Unique Mobility:''' Despite his jump and slow walkspeed and run, he can be surprisingly mobile, with multiple teleports, divekicks, and slides | |||
* '''Zoning:''' Combining the two above strengths, Dhalsim can keep his opponents out for a majority of the round | |||
* '''Cash out damage:''' Dhalsim can do massive damage in certain situations and anti-air when he has full meter | |||
|cons= | |||
* '''Low Health:''' If the opponent gets one clean hit, Dhalsim hurts a lot, and it leads into a knockdown which gets the opponent in, opening him up for another big punish, and likely killing him | |||
* '''Extended Hurtboxes:''' All of Dhalsim's normals extend hurtboxes with them, meaning invincible moves or moves with a bunch of active frames will hit him even from fullscreen away | |||
* '''Bad Punishes:''' Dhalsim's combos are weak and don't do much damage, especially without meter outside the corner | |||
* '''Large Toolset:''' Learning Dhalsim can be very hard, as his normals all cover specific uses and he has a LOT of normals. Getting used to all of the different situations to use all of his different tools is key to winning with him | |||
}} | |||
| | |||
=== Players to Watch === | |||
{| class="wikitable" | |||
| | |||
| | |||
| | |||
| | |||
|- | |- | ||
! Name !! Country !! Groove !! Accounts !! Notes | |||
|- | |- | ||
| | | Iyo || Japan || N/C-Groove || N/A || The Dhalsim God. A player who gained immense respect in his day for being this good with Sim, and unfortunately does not play anymore. <br> [https://www.youtube.com/watch?v=AJVc0gMtxkI&list=PLxbMixYdhJ4Y8K9LW-ChZJzpckAFJyGb_&index=14&ab_channel=psychorarity N-Groove Sample Match] <br> [https://www.youtube.com/watch?v=lZZ6FmRDZZM&list=PLxbMixYdhJ4Y8K9LW-ChZJzpckAFJyGb_&index=2&ab_channel=diewplz C-Groove Sample Match] | ||
| | |||
| | |||
| | |||
| | |||
|- | |- | ||
|} | |} | ||
<br><br> | |||
'''!!!THIS PAGE IS STILL A WIP. IF YOU NEED FRAME DATA NOW, REFER TO THE CVS2 BIBLE OR LOOK THROUGH EDIT HISTORY FOR THE LAST EDIT CONTAINING FRAME DATA IF THERE WAS ONE!!!''' | |||
== Normal Moves == | == Normal Moves == | ||
Dhalsim | === Far Normals === | ||
=== <span class="invisible-header">5LP</span> === | |||
{{MoveData | |||
| name = Stand Jab | |||
| input = 5LP / Stand LP | |||
| subtitle = Stand Light Punch | |||
| image = CVS2 Dhalsim 5LP.png | |||
| caption = | |||
| linkname = 5LP | |||
| data = | |||
{{AttackData-CvS2 | |||
| version = {{Icon-Capcom|LP}} | |||
| subtitle = | |||
| damage = 400 | |||
| stun = 4 | |||
| cancel = SU | |||
| guard = Mid | |||
| parry = High | |||
| startup = 5 | |||
| active = 6 | |||
| recovery = 6 | |||
| total = 17 | |||
| advHit = +3 | |||
| advBlock = +3 | |||
| invul = None | |||
| description = Placeholder | |||
}} | |||
}} | |||
=== <span class="invisible-header">5MP</span> === | |||
{{MoveData | |||
| name = Stand Strong | |||
| input = 5MP / Stand MP | |||
| subtitle = Stand Medium Punch | |||
| image = CVS2 Dhalsim 5MP.png | |||
| caption = | |||
| linkname = 5MP | |||
| data = | |||
{{AttackData-CvS2 | |||
| version = {{Icon-Capcom|MP}} | |||
| subtitle = | |||
| damage = 700 | |||
| stun = 7 | |||
| cancel = None | |||
| guard = Mid | |||
| parry = High | |||
| startup = 13 | |||
| active = 6 | |||
| recovery = 16 | |||
| total = 35 | |||
| advHit = -2 | |||
| advBlock = -2 | |||
| invul = None | |||
| description = Placeholder | |||
}} | |||
}} | |||
=== <span class="invisible-header">5HP</span> === | |||
{{MoveData | |||
| name = Stand Fierce | |||
| input = 5HP / Stand HP | |||
| subtitle = Stand Heavy Punch | |||
| image = CVS2 Dhalsim 5HP.png | |||
| caption = | |||
| linkname = 5HP | |||
| data = | |||
{{AttackData-CvS2 | |||
| version = {{Icon-Capcom|HP}} | |||
| subtitle = | |||
| damage = 1100 | |||
| stun = 11 | |||
| cancel = None | |||
| guard = Mid | |||
| parry = High | |||
| startup = 11 | |||
| active = 6 | |||
| recovery = 26 | |||
| total = 43 | |||
| advHit = -12 | |||
| advBlock = -12 | |||
| invul = None | |||
| description = Placeholder | |||
}} | |||
}} | |||
=== <span class="invisible-header">5LK</span> === | |||
{{MoveData | |||
| name = Stand Short | |||
| input = 5LK / Stand LK | |||
| subtitle = Stand Light Kick | |||
| image = CVS2 Dhalsim 5LK.png | |||
| caption = | |||
| linkname = 5LK | |||
| data = | |||
{{AttackData-CvS2 | |||
| version = {{Icon-Capcom|LK}} | |||
| subtitle = | |||
| damage = 400 | |||
| stun = 4 | |||
| cancel = None | |||
| guard = Mid | |||
| parry = Mid | |||
| startup = 8 | |||
| active = 6 | |||
| recovery = 16 | |||
| total = 30 | |||
| advHit = -7 | |||
| advBlock = -7 | |||
| invul = None | |||
| description = Placeholder | |||
}} | |||
}} | |||
=== <span class="invisible-header">5MK</span> === | |||
{{MoveData | |||
| name = Stand Forward | |||
| input = 5MK / Stand MK | |||
| subtitle = Stand Medium Kick | |||
| image = CVS2 Dhalsim 5MK.png | |||
| caption = | |||
| linkname = 5MK | |||
| data = | |||
{{AttackData-CvS2 | |||
| version = {{Icon-Capcom|MK}} | |||
| subtitle = | |||
| damage = 800 | |||
| stun = 8 | |||
| cancel = None | |||
| guard = Mid | |||
| parry = High | |||
| startup = 12 | |||
| active = 6 | |||
| recovery = 20 | |||
| total = 38 | |||
| advHit = -8 | |||
| advBlock = -8 | |||
| invul = None | |||
| description = Placeholder | |||
}} | |||
}} | |||
=== <span class="invisible-header">5HK</span> === | |||
{{MoveData | |||
| name = Stand Roundhouse | |||
| input = 5HK / Stand HK | |||
| subtitle = Stand Heavy Kick | |||
| image = CVS2 Dhalsim 5HK.png | |||
| caption = | |||
| linkname = 5HK | |||
| data = | |||
{{AttackData-CvS2 | |||
| version = {{Icon-Capcom|HK}} | |||
| subtitle = | |||
| damage = 1100 | |||
| stun = 11 | |||
| cancel = None | |||
| guard = Mid | |||
| parry = High | |||
| startup = 13 | |||
| active = 6 | |||
| recovery = 22 | |||
| total = 41 | |||
| advHit = -4 | |||
| advBlock = -4 | |||
| invul = None | |||
| description = Placeholder | |||
}} | |||
}} | |||
=== <span class="invisible-header">4LP</span> === | |||
{{MoveData | |||
| name = Back Jab | |||
| input = 4LP / b.LP | |||
| subtitle = Back Light Punch | |||
| image = CVS2 Dhalsim 4LP.png | |||
| caption = | |||
| linkname = 4LP | |||
| data = | |||
{{AttackData-CvS2 | |||
| version = {{Motion|4}} {{Icon-Capcom|LP}} | |||
| subtitle = | |||
| damage = 300, 300 | |||
| stun = 3, 3 | |||
| cancel = SP/SU | |||
| guard = Mid | |||
| parry = High | |||
| startup = 2 | |||
| active = 9 | |||
| recovery = 6 | |||
| total = 17 | |||
| advHit = 0 | |||
| advBlock = 0 | |||
| invul = None | |||
| description = A very fast close anti-air with a good hitbox above him, beating many jumps, able to be canceled into a fireball for more guard damage on them landing. | |||
}} | |||
}} | |||
=== <span class="invisible-header">4MP</span> === | |||
{{MoveData | |||
| name = Back Strong | |||
| input = 4MP / b.MP | |||
| subtitle = Back Medium Punch | |||
| image = CVS2 Dhalsim 4MP.png | |||
| caption = | |||
| linkname = 4MP | |||
| data = | |||
{{AttackData-CvS2 | |||
| version = {{Motion|4}} {{Icon-Capcom|MP}} | |||
| subtitle = | |||
| damage = 800, 600 | |||
| stun = 8, 6 | |||
| cancel = SP/SU | |||
| guard = Mid | |||
| parry = High | |||
| startup = 3 | |||
| active = 9 | |||
| recovery = 6 | |||
| total = 18 | |||
| advHit = +5 | |||
| advBlock = +5 | |||
| invul = None | |||
| description = A solid anti-air that is near impossible to get over, a great tool up close that is plus on block and can be used as a strong meaty vs tall crouchers. This move, when used as anti air, pops the opponent up and close on landing. If done deep as anti-air, you can cancel and juggle to super. | |||
}} | |||
}} | |||
=== <span class="invisible-header">4HP</span> === | |||
{{MoveData | |||
| name = Back Fierce | |||
| input = 4HP / b.HP | |||
| subtitle = Back Heavy Punch | |||
| image = CVS2 Dhalsim 4HP.png | |||
| caption = | |||
| linkname = 4HP | |||
| data = | |||
{{AttackData-CvS2 | |||
| version = {{Motion|4}} {{Icon-Capcom|HP}} | |||
| subtitle = | |||
| damage = 800, 600 | |||
| stun = 8, 6 | |||
| cancel = SP/SU | |||
| guard = Mid | |||
| parry = High | |||
| startup = 4 | |||
| active = 10 | |||
| recovery = 23 | |||
| total = 37 | |||
| advHit = -6 | |||
| advBlock = -6 | |||
| invul = None | |||
| description = A 2 hit headbutt, can be used in frame traps to confirm to Yoga carpet or inferno. | |||
}} | |||
}} | |||
=== <span class="invisible-header">4LK</span> === | |||
{{MoveData | |||
| name = Back Short | |||
| input = 4LK / b.LK | |||
| subtitle = Back Light Kick | |||
| image =CVS2 Dhalsim 4LK.png | |||
| caption = | |||
| linkname = 4LK | |||
| data = | |||
{{AttackData-CvS2 | |||
| version = {{Motion|4}} {{Icon-Capcom|LK}} | |||
| subtitle = | |||
| damage = 500 | |||
| stun = 5 | |||
| cancel = SP/SU | |||
| guard = Mid | |||
| parry = Mid | |||
| startup = 4 | |||
| active = 6 | |||
| recovery = 9 | |||
| total = 19 | |||
| advHit = 0 | |||
| advBlock = 0 | |||
| invul = None | |||
| description = Placeholder | |||
}} | |||
}} | |||
=== <span class="invisible-header">4MK</span> === | |||
{{MoveData | |||
| name = Back Forward | |||
| input = 4MK / b.MK | |||
| subtitle = Back Medium Kick | |||
| image = CVS2 Dhalsim 4MK.png | |||
| caption = | |||
| linkname = 4MK | |||
| data = | |||
{{AttackData-CvS2 | |||
| version = {{Motion|4}} {{Icon-Capcom|MK}} | |||
| subtitle = | |||
| damage = 800 | |||
| stun = 8 | |||
| cancel = SP/SU | |||
| guard = Mid | |||
| parry = High | |||
| startup = 5 | |||
| active = 8 | |||
| recovery = 11 | |||
| total = 24 | |||
| advHit = +1 | |||
| advBlock = +1 | |||
| invul = None | |||
| description = Placeholder | |||
}} | |||
}} | |||
=== <span class="invisible-header">4HK</span> === | |||
{{MoveData | |||
| name = Back Roundhouse | |||
| input = 4HK / b.HK | |||
| subtitle = Back Heavy Kick | |||
| image = CVS2 Dhalsim 4HK.png | |||
| caption = | |||
| linkname = 4HK | |||
| data = | |||
{{AttackData-CvS2 | |||
| version = {{Motion|4}} {{Icon-Capcom|HK}} | |||
| subtitle = | |||
| damage = 1200 | |||
| stun = 12 | |||
| cancel = SP/SU | |||
| guard = Mid | |||
| parry = High | |||
| startup = 6 | |||
| active = 16 | |||
| recovery = 14 | |||
| total = 36 | |||
| advHit = -6 | |||
| advBlock = -6 | |||
| invul = None | |||
| description = Placeholder | |||
}} | |||
}} | |||
=== Crouching Normals === | |||
=== <span class="invisible-header">2LP</span> === | |||
{{MoveData | |||
| name = Crouch Jab | |||
| input = 2LP / cr.LP | |||
| subtitle = Crouching Light Punch | |||
| image = CVS2 Dhalsim 2LP.png | |||
| caption = | |||
| linkname = 2LP | |||
| data = | |||
{{AttackData-CvS2 | |||
| version = {{Motion|d}}+{{Icon-Capcom|LP}} | |||
| subtitle = | |||
| damage = 400 | |||
| stun = 4 | |||
| cancel = None | |||
| guard = Low | |||
| parry = Low | |||
| startup = 11 | |||
| active = 6 | |||
| recovery = 13 | |||
| total = 30 | |||
| advHit = -4 | |||
| advBlock = -4 | |||
| invul = None | |||
| description = Placeholder | |||
}} | |||
}} | |||
=== <span class="invisible-header">2MP</span> === | |||
{{MoveData | |||
| name = Crouch Strong | |||
| input = 2MP / cr.MP | |||
| subtitle = Crouching Medium Punch | |||
| image = CVS2 Dhalsim 2MP.png | |||
| caption = | |||
| linkname = 2MP | |||
| data = | |||
{{AttackData-CvS2 | |||
| version = {{Motion|d}}+{{Icon-Capcom|MP}} | |||
| subtitle = | |||
| damage = 700 | |||
| stun = 7 | |||
| cancel = None | |||
| guard = Low | |||
| parry = Low | |||
| startup = 12 | |||
| active = 6 | |||
| recovery = 16 | |||
| total = 34 | |||
| advHit = -2 | |||
| advBlock = -2 | |||
| invul = None | |||
| description = Placeholder | |||
}} | |||
}} | |||
=== <span class="invisible-header">2HP</span> === | |||
{{MoveData | |||
| name = Crouch Fierce | |||
| input = 2HP / cr.HP | |||
| subtitle = Crouching Heavy Punch | |||
| image = CVS2 Dhalsim 2HP.png | |||
| caption = | |||
| linkname = 2HP | |||
| data = | |||
{{AttackData-CvS2 | |||
| version = {{Motion|d}}+{{Icon-Capcom|HP}} | |||
| subtitle = | |||
| damage = 1200 | |||
| stun = 12 | |||
| cancel = None | |||
| guard = Low | |||
| parry = Low | |||
| startup = 14 | |||
| active = 6 | |||
| recovery = 24 | |||
| total = 44 | |||
| advHit = -6 | |||
| advBlock = -6 | |||
| invul = None | |||
| description = Placeholder | |||
}} | |||
}} | |||
=== <span class="invisible-header">2LK</span> === | |||
{{MoveData | |||
| name = Crouch Short | |||
| input = 2LK / cr.LK | |||
| subtitle = Crouching Light Kick | |||
| image = CVS2 Dhalsim 2LK.png | |||
| caption = | |||
| linkname = 2LK | |||
| data = | |||
{{AttackData-CvS2 | |||
| version = {{Motion|d}}+{{Icon-Capcom|LK}} | |||
| subtitle = | |||
| damage = 300, 300 | |||
| stun = 3, 3 | |||
| cancel = SP/SU | |||
| guard = Low | |||
| parry = Low | |||
| startup = 3 | |||
| active = 9 | |||
| recovery = 10 | |||
| total = 22 | |||
| advHit = -4 | |||
| advBlock = -4 | |||
| invul = None | |||
| description = Placeholder | |||
}} | |||
}} | |||
=== <span class="invisible-header">2MK</span> === | |||
{{MoveData | |||
| name = Crouch Forward | |||
| input = 2MK / cr.MK | |||
| subtitle = Crouching Medium Kick | |||
| image = CVS2 Dhalsim 2MK.png | |||
| caption = | |||
| linkname = 2MK | |||
| data = | |||
{{AttackData-CvS2 | |||
| version = {{Motion|d}}+{{Icon-Capcom|MK}} | |||
| subtitle = | |||
| damage = 600, 600 | |||
| stun = 6, 6 | |||
| cancel = SP/SU | |||
| guard = Low | |||
| parry = Low | |||
| startup = 6 | |||
| active = 10 | |||
| recovery = 14 | |||
| total = 24 | |||
| advHit = -4 | |||
| advBlock = -4 | |||
| invul = None | |||
| description = Placeholder | |||
}} | |||
}} | |||
=== <span class="invisible-header">2HK</span> === | |||
{{MoveData | |||
| name = Crouch Roundhouse | |||
| input = 2HK / cr.HK | |||
| subtitle = Crouching Heavy Kick | |||
| image = CVS2 Dhalsim 2HK.png | |||
| caption = | |||
| linkname = 2HK | |||
| data = | |||
{{AttackData-CvS2 | |||
| version = {{Motion|d}}+{{Icon-Capcom|HK}} | |||
| subtitle = | |||
| damage = 1000 | |||
| stun = 10 | |||
| cancel = None | |||
| guard = Low | |||
| parry = Low | |||
| startup = 9 | |||
| active = 12 | |||
| recovery = 21 | |||
| total = 42 | |||
| advHit = DWN | |||
| advBlock = -9 | |||
| invul = None | |||
| description = | |||
}} | |||
}} | |||
=== <span class="invisible-header">1LP</span> === | |||
{{MoveData | |||
| name = Downback Jab | |||
| input = 1LP / db.LP | |||
| subtitle = | |||
| image = CVS2 Dhalsim 1LP.png | |||
| caption = | |||
| linkname = 1LP | |||
| data = | |||
{{AttackData-CvS2 | |||
| version = {{Motion|db}}+{{Icon-Capcom|LP}} | |||
| subtitle = | |||
| damage = 300 | |||
| stun = 3 | |||
| cancel = SP/SU | |||
| guard = Mid | |||
| parry = Mid | |||
| startup = 4 | |||
| active = 3 | |||
| recovery = 9 | |||
| total = 16 | |||
| advHit = +3 | |||
| advBlock = +3 | |||
| invul = None | |||
| description = Placeholder | |||
}} | |||
}} | |||
=== <span class="invisible-header">1MP</span> === | |||
{{MoveData | |||
| name = Downback Strong | |||
| input = 1MP / db.MP | |||
| subtitle = | |||
| image = CVS2 Dhalsim 1MP.png | |||
| caption = | |||
| linkname = 1MP | |||
| data = | |||
{{AttackData-CvS2 | |||
| version = {{Motion|db}}+{{Icon-Capcom|MP}} | |||
| subtitle = | |||
| damage = 800 | |||
| stun = 8 | |||
| cancel = SP/SU | |||
| guard = Mid | |||
| parry = Mid | |||
| startup = 4 | |||
| active = 4 | |||
| recovery = 10 | |||
| total = 18 | |||
| advHit = +6 | |||
| advBlock = +6 | |||
| invul = None | |||
| description = Placeholder | |||
}} | |||
}} | |||
=== <span class="invisible-header">1HP</span> === | |||
{{MoveData | |||
| name = Downback Fierce | |||
| input = 1HP / db.HP | |||
| subtitle = | |||
| image = CVS2 Dhalsim 1HP.png | |||
| caption = | |||
| linkname = 1HP | |||
| data = | |||
{{AttackData-CvS2 | |||
| version = {{Motion|db}}+{{Icon-Capcom|HP}} | |||
| subtitle = | |||
| damage = 1200 | |||
| stun = 12 | |||
| cancel = SU | |||
| guard = Mid | |||
| parry = Mid | |||
| startup = 5 | |||
| active = 4 | |||
| recovery = 12 | |||
| total = 21 | |||
| advHit = +8 | |||
| advBlock = +8 | |||
| invul = None | |||
| description = Placeholder | |||
}} | |||
}} | |||
=== <span class="invisible-header">1LK</span> === | |||
{{MoveData | |||
| name = Downback Short | |||
| input = 1LK / db.LK | |||
| subtitle = | |||
| image = CVS2 Dhalsim 1LK.png | |||
| caption = | |||
| linkname = 1LK | |||
| data = | |||
{{AttackData-CvS2 | |||
| version = {{Motion|db}}+{{Icon-Capcom|LK}} | |||
| subtitle = | |||
| damage = 400 | |||
| stun = 4 | |||
| cancel = SP/SU | |||
| guard = Low | |||
| parry = Low | |||
| startup = 4 | |||
| active = 4 | |||
| recovery = 10 | |||
| total = 18 | |||
| advHit = +1 | |||
| advBlock = +1 | |||
| invul = None | |||
| description = Placeholder | |||
}} | |||
}} | |||
=== <span class="invisible-header">1MK</span> === | |||
{{MoveData | |||
| name = Downback Forward | |||
| input = 1MK / db.MK | |||
| subtitle = | |||
| image = CVS2 Dhalsim 1MK.png | |||
| caption = | |||
| linkname = 1MK | |||
| data = | |||
{{AttackData-CvS2 | |||
| version = {{Motion|db}}+{{Icon-Capcom|MK}} | |||
| subtitle = | |||
| damage = 700 | |||
| stun = 7 | |||
| cancel = SP/SU | |||
| guard = Low | |||
| parry = Low | |||
| startup = 5 | |||
| active = 4 | |||
| recovery = 13 | |||
| total = 22 | |||
| advHit = +3 | |||
| advBlock = +3 | |||
| invul = None | |||
| description = Placeholder | |||
}} | |||
}} | |||
=== <span class="invisible-header">1HK</span> === | |||
{{MoveData | |||
| name = Downback Roundhouse | |||
| input = 1HK / db.HK | |||
| subtitle = | |||
| image = CVS2 Dhalsim 1HK.png | |||
| caption = | |||
| linkname = 1HK | |||
| data = | |||
{{AttackData-CvS2 | |||
| version = {{Motion|db}}+{{Icon-Capcom|HK}} | |||
| subtitle = | |||
| damage = 1100 | |||
| stun = 11 | |||
| cancel = SU | |||
| guard = Low | |||
| parry = Low | |||
| startup = 7 | |||
| active = 4 | |||
| recovery = 25 | |||
| total = 36 | |||
| advHit = DWN | |||
| advBlock = -4 | |||
| invul = None | |||
| description = | |||
}} | |||
}} | |||
=== Jumping Normals === | |||
=== <span class="invisible-header">j.LP</span> === | |||
{{MoveData | |||
| name = Jump Jab | |||
| input = j.LP | |||
| subtitle = Jumping Light Punch | |||
| image = CVS2 Dhalsim jLP.png | |||
| caption = | |||
| linkname = j.LP | |||
| data = | |||
{{AttackData-CvS2 | |||
| version = {{Motion|ub}}/{{Motion|u}}/{{Motion|uf}}+{{Icon-Capcom|LP}} | |||
| subtitle = | |||
| damage = 400 | |||
| stun = 4 | |||
| cancel = - | |||
| guard = High | |||
| parry = High | |||
| startup = 15 | |||
| active = 16 | |||
| recovery = - | |||
| total = 31 | |||
| advHit = - | |||
| advBlock = - | |||
| invul = None | |||
| description = Placeholder | |||
}} | |||
}} | |||
=== <span class="invisible-header">j.MP</span> === | |||
{{MoveData | |||
| name = Jump Strong | |||
| input = j.MP | |||
| subtitle = Jumping Medium Punch | |||
| image = CVS2 Dhalsim jMP.png | |||
| caption = | |||
| linkname = j.MP | |||
| data = | |||
{{AttackData-CvS2 | |||
| version = {{Motion|ub}}/{{Motion|u}}/{{Motion|uf}}+{{Icon-Capcom|MP}} | |||
| subtitle = | |||
| damage = 700 | |||
| stun = 7 | |||
| cancel = - | |||
| guard = High | |||
| parry = High | |||
| startup = 15 | |||
| active = 16 | |||
| recovery = - | |||
| total = 31 | |||
| advHit = - | |||
| advBlock = - | |||
| invul = None | |||
| description = Placeholder | |||
}} | |||
}} | |||
=== <span class="invisible-header">j.HP</span> === | |||
{{MoveData | |||
| name = Jump Fierce | |||
| input = j.HP | |||
| subtitle = Jumping Heavy Punch | |||
| image = CVS2 Dhalsim jHP.png | |||
| caption = | |||
| linkname = j.HP | |||
| data = | |||
{{AttackData-CvS2 | |||
| version = {{Motion|ub}}/{{Motion|u}}/{{Motion|uf}}+{{Icon-Capcom|HP}} | |||
| subtitle = | |||
| damage = 1100 | |||
| stun = 11 | |||
| cancel = - | |||
| guard = High | |||
| parry = High | |||
| startup = 10 | |||
| active = 4 | |||
| recovery = - | |||
| total = 14 | |||
| advHit = - | |||
| advBlock = - | |||
| invul = None | |||
| description = Placeholder | |||
}} | |||
}} | |||
=== <span class="invisible-header">j.LK</span> === | |||
{{MoveData | |||
| name = Jump Short | |||
| input = j.LK | |||
| subtitle = Jumping Light Kick | |||
| image = CVS2 Dhalsim jLK.png | |||
| caption = | |||
| linkname = j.LK | |||
| data = | |||
{{AttackData-CvS2 | |||
| version = {{Motion|ub}}/{{Motion|u}}/{{Motion|uf}}+{{Icon-Capcom|LK}} | |||
| subtitle = | |||
| damage = 500 | |||
| stun = 5 | |||
| cancel = - | |||
| guard = High | |||
| parry = High | |||
| startup = 6 | |||
| active = 6 | |||
| recovery = - | |||
| total = 12 | |||
| advHit = - | |||
| advBlock = - | |||
| invul = None | |||
| description = Placeholder | |||
}} | |||
}} | |||
=== <span class="invisible-header">j.MK</span> === | |||
{{MoveData | |||
| name = Jump Forward | |||
| input = j.MK | |||
| subtitle = Jumping Medium Kick | |||
| image = CVS2 Dhalsim jMK.png | |||
| caption = | |||
| linkname = j.MK | |||
| data = | |||
{{AttackData-CvS2 | |||
| version = {{Motion|ub}}/{{Motion|u}}/{{Motion|uf}}+{{Icon-Capcom|MK}} | |||
| subtitle = | |||
| damage = 700 | |||
| stun = 7 | |||
| cancel = - | |||
| guard = High | |||
| parry = High | |||
| startup = 11 | |||
| active = 7 | |||
| recovery = - | |||
| total = 18 | |||
| advHit = - | |||
| advBlock = - | |||
| invul = None | |||
| description = Placeholder | |||
}} | |||
}} | |||
=== <span class="invisible-header">j.HK</span> === | |||
{{MoveData | |||
| name = Jump Roundhouse | |||
| input = j.HK | |||
| subtitle = Jumping Heavy Kick | |||
| image = CVS2 Dhalsim jHK.png | |||
| caption = | |||
| linkname = j.HK | |||
| data = | |||
{{AttackData-CvS2 | |||
| version = {{Motion|ub}}/{{Motion|u}}/{{Motion|uf}}+{{Icon-Capcom|HK}} | |||
| subtitle = | |||
| damage = 1200 | |||
| stun = 12 | |||
| cancel = - | |||
| guard = High | |||
| parry = High | |||
| startup = 12 | |||
| active = 8 | |||
| recovery = - | |||
| total = 20 | |||
| advHit = - | |||
| advBlock = - | |||
| invul = None | |||
| description = Placeholder | |||
}} | |||
}} | |||
=== <span class="invisible-header">j.4LP</span> === | |||
{{MoveData | |||
| name = Jump Back Jab | |||
| input = j.4LP | |||
| subtitle = | |||
| image = CVS2 Dhalsim j4LP.png | |||
| caption = | |||
| linkname = j.4LP | |||
| data = | |||
{{AttackData-CvS2 | |||
| version = {{Motion|ub}}/{{Motion|u}}/{{Motion|uf}}, {{Motion|b}} +{{Icon-Capcom|LP}} | |||
| subtitle = | |||
| damage = 500 | |||
| stun = 5 | |||
| cancel = - | |||
| guard = High | |||
| parry = High | |||
| startup = 3 | |||
| active = 10 | |||
| recovery = - | |||
| total = 13 | |||
| advHit = - | |||
| advBlock = - | |||
| invul = None | |||
| description = Placeholder | |||
}} | |||
}} | |||
=== <span class="invisible-header">j.4MP</span> === | |||
{{MoveData | |||
| name = Jump Back Strong | |||
| input = j.4MP | |||
| subtitle = | |||
| image = CVS2 Dhalsim j4MP.png | |||
| caption = | |||
| linkname = j.4MP | |||
| data = | |||
{{AttackData-CvS2 | |||
| version = {{Motion|ub}}/{{Motion|u}}/{{Motion|uf}}, {{Motion|b}} +{{Icon-Capcom|MP}} | |||
| subtitle = | |||
| damage = 800 | |||
| stun = 8 | |||
| cancel = - | |||
| guard = High | |||
| parry = High | |||
| startup = 4 | |||
| active = 8 | |||
| recovery = - | |||
| total = 12 | |||
| advHit = - | |||
| advBlock = - | |||
| invul = None | |||
| description = Placeholder | |||
}} | |||
}} | |||
=== <span class="invisible-header">j.4HP</span> === | |||
{{MoveData | |||
| name = Jump Back Fierce | |||
| input = j.4HP | |||
| subtitle = | |||
| image = CVS2 Dhalsim j4HP.png | |||
| caption = | |||
| linkname = j.4HP | |||
| data = | |||
{{AttackData-CvS2 | |||
| version = {{Motion|ub}}/{{Motion|u}}/{{Motion|uf}}, {{Motion|b}} +{{Icon-Capcom|HP}} | |||
| subtitle = | |||
| damage = 1200 | |||
| stun = 12 | |||
| cancel = - | |||
| guard = High | |||
| parry = High | |||
| startup = 4 | |||
| active = 6 | |||
| recovery = - | |||
| total = 10 | |||
| advHit = - | |||
| advBlock = - | |||
| invul = None | |||
| description = Placeholder | |||
}} | |||
}} | |||
=== <span class="invisible-header">j.4LK</span> === | |||
{{MoveData | |||
| name = Jump Back Short | |||
| input = j.4LK | |||
| subtitle = | |||
| image = CVS2 Dhalsim j4LK.png | |||
| caption = | |||
| linkname = j.4LK | |||
| data = | |||
{{AttackData-CvS2 | |||
| version = {{Motion|ub}}/{{Motion|u}}/{{Motion|uf}}, {{Motion|b}} +{{Icon-Capcom|LK}} | |||
| subtitle = | |||
| damage = 600 | |||
| cancel = 6 | |||
| guard = High | |||
| parry = High | |||
| startup = 4 | |||
| active = 10 | |||
| recovery = - | |||
| total = 14 | |||
| advHit = - | |||
| advBlock = - | |||
| invul = None | |||
| description = Placeholder | |||
}} | |||
}} | |||
=== <span class="invisible-header">j.4MK</span> === | |||
{{MoveData | |||
| name = Jump Back Forward | |||
| input = j.4MK | |||
| subtitle = | |||
| image = CVS2 Dhalsim j4MK.png | |||
| caption = | |||
| linkname = j.4MK | |||
| data = | |||
{{AttackData-CvS2 | |||
| version = {{Motion|ub}}/{{Motion|u}}/{{Motion|uf}}, {{Motion|b}} +{{Icon-Capcom|MK}} | |||
| subtitle = | |||
| damage = 800 | |||
| stun = 8 | |||
| cancel = - | |||
| guard = High | |||
| parry = High | |||
| startup = 7 | |||
| active = 6 | |||
| recovery = - | |||
| total = 13 | |||
| advHit = - | |||
| advBlock = - | |||
| invul = None | |||
| description = Placeholder | |||
}} | |||
}} | |||
=== <span class="invisible-header">j.4HK</span> === | |||
{{MoveData | |||
| name = Jump Back Roundhouse | |||
| input = j.4HK | |||
| subtitle = | |||
| image = CVS2 Dhalsim j4HK.png | |||
| caption = | |||
| linkname = j.4HK | |||
| data = | |||
{{AttackData-CvS2 | |||
| version = {{Motion|ub}}/{{Motion|u}}/{{Motion|uf}}, {{Motion|b}} +{{Icon-Capcom|HK}} | |||
| subtitle = | |||
| damage = 1300 | |||
| stun = 13 | |||
| cancel = - | |||
| guard = High | |||
| parry = High | |||
| startup = 8 | |||
| active = 6 | |||
| recovery = - | |||
| total = 14 | |||
| advHit = - | |||
| advBlock = - | |||
| invul = None | |||
| description = Placeholder | |||
}} | |||
}} | |||
== Command Normals == | |||
=== <span class="invisible-header">Drill Zutsukii</span> === | |||
{{MoveData | |||
| name = Drill Zutsuki | |||
| input = j.2HP | |||
| subtitle = Yoga Mummy | |||
| image = CVS2 Dhalsim j2HP.png | |||
| caption = | |||
| linkname = | |||
| data = | |||
{{AttackData-CvS2 | |||
| version = In Air, {{Motion|2}} + {{Icon-Capcom|HP}} | |||
| subtitle = | |||
| damage = 900 | |||
| stun = 9 | |||
| cancel = | |||
| guard = Mid | |||
| parry = High | |||
| startup = 8 | |||
| active = Varies | |||
| recovery = 7 | |||
| total = | |||
| advHit = | |||
| advBlock = | |||
| invul = None | |||
| description = Placeholder | |||
}} | |||
}} | |||
=== <span class="invisible-header">Drill Kick</span> === | |||
{{MoveData | |||
| name = Drill Kick | |||
| input = j.2K | |||
| subtitle = | |||
| image = CVS2 Dhalsim j2LK.png | |||
| caption = Light | |||
| image2 = CVS2 Dhalsim j2MK.png | |||
| caption2 = Medium | |||
| image3 = CVS2 Dhalsim j2HK.png | |||
| caption3 = Heavy | |||
| linkname = | |||
| data = | |||
{{AttackData-CvS2 | |||
| version = In Air, {{Motion|2}} + {{Icon-Capcom|LK}} | |||
| subtitle = | |||
| damage = 700 | |||
| stun = 7 | |||
| cancel = | |||
| guard = Mid | |||
| parry = High | |||
| startup = 8 | |||
| active = Varies | |||
| recovery = 7 | |||
| total = | |||
| advHit = | |||
| advBlock = | |||
| invul = None | |||
}} | |||
{{AttackData-CvS2 | |||
| header = no | |||
| version = In Air, {{Motion|2}} + {{Icon-Capcom|MK}} | |||
| subtitle = | |||
| damage = 800 | |||
| stun = 8 | |||
| cancel = | |||
| guard = Mid | |||
| parry = High | |||
| startup = 8 | |||
| active = Varies | |||
| recovery = 7 | |||
| total = | |||
| advHit = | |||
| advBlock = | |||
| invul = None | |||
}} | |||
{{AttackData-CvS2 | |||
| header = no | |||
| version = In Air, {{Motion|2}} + {{Icon-Capcom|HK}} | |||
| subtitle = | |||
| damage = 900 | |||
| stun = 9 | |||
| cancel = | |||
| guard = Mid | |||
| parry = High | |||
| startup = 8 | |||
| active = Varies | |||
| recovery = 7 | |||
| total = | |||
| advHit = | |||
| advBlock = | |||
| invul = None | |||
| description = Placeholder | |||
}} | |||
}} | |||
== Throws == | |||
=== <span class="invisible-header">Punch Throw</span> === | |||
{{MoveData | |||
| name = Yoga Smash | |||
| input = Near Opponent, 4/6HP | |||
| subtitle = Punch Throw | |||
| image = CVS2 Dhalsim punchthrow.png | |||
| caption = | |||
| linkname = Yoga Smash | |||
| data = | |||
{{AttackData-CvS2 | |||
| version = Close {{Motion|b}}/{{Motion|f}}+{{Icon-Capcom|HP}} | |||
| subtitle = | |||
| damage = 800 + 200x(2-14) | |||
| stun = 0 | |||
| cancel = - | |||
| guard = Grab | |||
| parry = - | |||
| startup = 3 | |||
| active = 1 | |||
| recovery = 3 | |||
| total = 7 | |||
| advHit = - | |||
| advBlock = - | |||
| invul = - | |||
| description = Placeholder | |||
}} | |||
}} | |||
=== <span class="invisible-header">Kick Throw</span> === | |||
{{MoveData | |||
| name = Yoga Suruu | |||
| input = Near Opponent, 4/6HK | |||
| subtitle = Kick Throw | |||
| image = CVS2 Dhalsim kickthrow.png | |||
| caption = | |||
| linkname = Yoga Suruu | |||
| data = | |||
{{AttackData-CvS2 | |||
| version = Close {{Motion|b}}/{{Motion|f}}+{{Icon-Capcom|HK}} | |||
| subtitle = | |||
| damage = 2000 | |||
| stun = 0 | |||
| cancel = - | |||
| guard = Grab | |||
| parry = - | |||
| startup = 5 | |||
| active = 1 | |||
| recovery = 3 | |||
| total = 9 | |||
| advHit = - | |||
| advBlock = - | |||
| invul = - | |||
| description = Placeholder | |||
}} | |||
}} | |||
== Special Moves == | == Special Moves == | ||
=== <span class="invisible-header">Yoga Fire</span> === | |||
{{MoveData | |||
| name = Yoga Fire | |||
| input = 236P | |||
| subtitle = | |||
| image = CVS2 Dhalsim 236P.png | |||
| caption = | |||
| linkname = | |||
| data = | |||
{{AttackData-CvS2 | |||
| version = {{Motion|236}} + {{Icon-Capcom|LP}} | |||
| subtitle = | |||
| damage = 700 | |||
| stun = 7 | |||
| cancel = None | |||
| guard = Mid | |||
| parry = High | |||
| startup = 14 | |||
| active = | |||
| recovery = 42 | |||
| total = 56 | |||
| advHit = -7 | |||
| advBlock = -7 | |||
| invul = None | |||
}} | |||
{{AttackData-CvS2 | |||
| header = no | |||
| version = {{Motion|236}} + {{Icon-Capcom|MP}} | |||
| subtitle = | |||
| damage = 800 | |||
| stun = 8 | |||
| cancel = None | |||
| guard = Mid | |||
| parry = High | |||
| startup = 14 | |||
| active = | |||
| recovery = 43 | |||
| total = 57 | |||
| advHit = DWN | |||
| advBlock = -8 | |||
| invul = None | |||
}} | |||
{{AttackData-CvS2 | |||
| header = no | |||
| version = {{Motion|236}} + {{Icon-Capcom|HP}} | |||
| subtitle = | |||
| damage = 900 | |||
| stun = 9 | |||
| cancel = None | |||
| guard = Mid | |||
| parry = High | |||
| startup = 14 | |||
| active = | |||
| recovery = 44 | |||
| total = 58 | |||
| advHit = DWN | |||
| advBlock = -9 | |||
| invul = None | |||
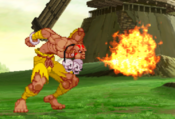
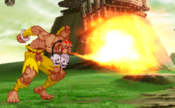
| description = A pretty decent fireball that has good speeds for each version (jab is pretty slow, hp is pretty fast). This fireball has only 2 frames more total than Ryu (start up is 2 frames slower, same recovery) while having a better disadvantage on block. If blocked at a distance, you can tag on a fp for extra guard damage or delay it to attempt to frame trap. | |||
}} | |||
}} | |||
=Yoga | === <span class="invisible-header">Yoga Flame</span> === | ||
{{MoveData | |||
| name = Yoga Flame | |||
| input = 63214P | |||
| subtitle = | |||
| image = CVS2 Dhalsim 63214P.png | |||
| caption = | |||
| linkname = | |||
| data = | |||
{{AttackData-CvS2 | |||
| version = {{Motion|63214}} + {{Icon-Capcom|LP}} | |||
| subtitle = | |||
| damage = 1400, 1200 | |||
| stun = 14, 12 | |||
| cancel = None | |||
| guard = Mid | |||
| parry = High | |||
| startup = 18 | |||
| active = 26 | |||
| recovery = 25 | |||
| total = 69 | |||
| advHit = DWN | |||
| advBlock = -5 | |||
| invul = None | |||
}} | |||
{{AttackData-CvS2 | |||
| header = no | |||
| version = {{Motion|63214}} + {{Icon-Capcom|MP}} | |||
| subtitle = | |||
| damage = 1500, 1300 | |||
| stun = 15, 13 | |||
| cancel = None | |||
| guard = Mid | |||
| parry = High | |||
| startup = 19 | |||
| active = 41 | |||
| recovery = 26 | |||
| total = 86 | |||
| advHit = DWN | |||
| advBlock = -5 | |||
| invul = None | |||
}} | |||
{{AttackData-CvS2 | |||
| header = no | |||
| version = {{Motion|63214}} + {{Icon-Capcom|HP}} | |||
| subtitle = | |||
| damage = 1600, 1400 | |||
| stun = 16, 14 | |||
| cancel = None | |||
| guard = Mid | |||
| parry = High | |||
| startup = 20 | |||
| active = 56 | |||
| recovery = 26 | |||
| total = 102 | |||
| advHit = DWN | |||
| advBlock = -5 | |||
| invul = None | |||
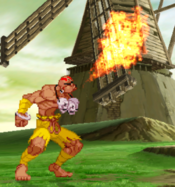
| description = A limited ranged flame that counts as a projectile with good recovery. A great move to RC versus awkward jumps, strong pokes, reversal, or on opponents wake up. At -5 and distance it is punishable by most things outside "instant" supers (Sonic Hurricane, Gigaton Blow, Lvl 3 Spin Drive Smasher, etc) | |||
}} | |||
}} | |||
=Yoga | === <span class="invisible-header">Yoga Blast</span> === | ||
{{MoveData | |||
| name = Yoga Blast | |||
| input = 63214K | |||
| subtitle = | |||
| image = CVS2 Dhalsim 63214K.png | |||
| caption = | |||
| linkname = | |||
| data = | |||
{{AttackData-CvS2 | |||
| version = {{Motion|63214}} + {{Icon-Capcom|LK}} | |||
| subtitle = | |||
| damage = 1500, 1300 | |||
| stun = 15, 13 | |||
| cancel = None | |||
| guard = Mid | |||
| parry = High | |||
| startup = 19 | |||
| active = 12 | |||
| recovery = 24 | |||
| total = 55 | |||
| advHit = DWN | |||
| advBlock = | |||
| invul = None | |||
}} | |||
{{AttackData-CvS2 | |||
| header = no | |||
| version = {{Motion|63214}} + {{Icon-Capcom|MK}} | |||
| subtitle = | |||
| damage = 1600, 1400 | |||
| stun = 16, 14 | |||
| cancel = None | |||
| guard = Mid | |||
| parry = High | |||
| startup = 21 | |||
| active = 20 | |||
| recovery = 24 | |||
| total = 65 | |||
| advHit = DWN | |||
| advBlock = | |||
| invul = None | |||
}} | |||
{{AttackData-CvS2 | |||
| header = no | |||
| version = {{Motion|63214}} + {{Icon-Capcom|HK}} | |||
| subtitle = | |||
| damage = 1700, 1500 | |||
| stun = 17, 15 | |||
| cancel = None | |||
| guard = Mid | |||
| parry = High | |||
| startup = 23 | |||
| active = 26 | |||
| recovery = 24 | |||
| total = 73 | |||
| advHit = DWN | |||
| advBlock = | |||
| invul = None | |||
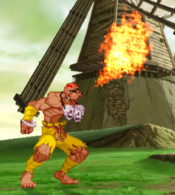
| description = An upward anti-air angle flame that can be airblocked. Usually used in custom combos and level 2 cancels. Not a good reactionary anti-air, used more as a call out of a jump. Has decent recovery on whiff for light version. | |||
}} | |||
}} | |||
=Yoga | === <span class="invisible-header">Yoga Teleport</span> === | ||
{{MoveData | |||
| name = Yoga Teleport | |||
| input = 623/421 PPP/KKK (Air OK) | |||
| subtitle = | |||
| image = CVS2 Dhalsim teleport.png | |||
| caption = | |||
| linkname = | |||
| data = | |||
{{AttackData-CvS2 | |||
| version = | |||
| subtitle = | |||
| damage = | |||
| stun = | |||
| cancel = | |||
| guard = | |||
| parry = | |||
| startup = | |||
| active = | |||
| recovery = | |||
| total = 87 | |||
| advHit = | |||
| advBlock = | |||
| invul = 77 (Full) | |||
| description = A frame one invincible reversal with heavy recovery. It semi useable to escape situations (teleport aways from a cross up, etc). | |||
}} | |||
}} | |||
= | == Super Moves== | ||
== | === <span class="invisible-header">Yoga Stream</span> === | ||
{{MoveData | |||
| name = Yoga Stream | |||
| input = 236236P | |||
| subtitle = | |||
| image = CVS2 Dhalsim 236236P.png | |||
| caption = | |||
| linkname = | |||
| data = | |||
{{AttackData-CvS2 | |||
| version = {{Motion|236}} {{Motion|236}} + {{Icon-Capcom|LP}} | |||
| subtitle = | |||
| damage = 2100 | |||
| stun = 0 | |||
| cancel = None | |||
| guard = Low | |||
| parry = Low | |||
| startup = 4:5 | |||
| active = 29 | |||
| recovery = 45 | |||
| total = 83 | |||
| advHit = DWN | |||
| advBlock = -12 | |||
| invul = 8 (Full) | |||
}} | |||
{{AttackData-CvS2 | |||
| header = no | |||
| version = {{Motion|236}} {{Motion|236}} + {{Icon-Capcom|MP}} | |||
| subtitle = | |||
| damage = 3300 | |||
| stun = 0 | |||
| cancel = SP/SU | |||
| guard = Low | |||
| parry = Low | |||
| startup = 4:5 | |||
| active = 59 | |||
| recovery = 45 | |||
| total = 113 | |||
| advHit = DWN | |||
| advBlock = -12 | |||
| invul = 14 (Full) | |||
}} | |||
{{AttackData-CvS2 | |||
| header = no | |||
| version = {{Motion|236}} {{Motion|236}} + {{Icon-Capcom|HP}} | |||
| subtitle = | |||
| damage = 4900 | |||
| stun = 0 | |||
| cancel = None | |||
| guard = Low | |||
| parry = Low | |||
| startup = 4:5 | |||
| active = 89 | |||
| recovery = 45 | |||
| total = 143 | |||
| advHit = DWN | |||
| advBlock = -12 | |||
| invul = 22 (Full) | |||
| description = A ok damage flame carpet, with great range. Combos from all normals, but better to come into Yoga Tempest or Yoga Inferno when possible due to better damage and level 2 cancels. Level 2 and 3 versions can be linked into after a counter hit crouching db+fp. | |||
}} | |||
}} | |||
= | === <span class="invisible-header">Yoga Volcano</span> === | ||
{{MoveData | |||
| name = Yoga Volcano | |||
| input = 236236K | |||
| subtitle = | |||
| image = CVS2 Dhalsim 236236K.png | |||
| caption = | |||
| linkname = | |||
| data = | |||
{{AttackData-CvS2 | |||
| version = {{Motion|236}} {{Motion|236}} + {{Icon-Capcom|LK}} | |||
| subtitle = | |||
| damage = 2300 | |||
| stun = 0 | |||
| cancel = None | |||
| guard = Mid | |||
| parry = High | |||
| startup = 5:8 | |||
| active = 26 | |||
| recovery = 22 | |||
| total = 61 | |||
| advHit = DWN | |||
| advBlock = | |||
| invul = 9 (Full) | |||
}} | |||
{{AttackData-CvS2 | |||
| header = no | |||
| version = {{Motion|236}} {{Motion|236}} + {{Icon-Capcom|MK}} | |||
| subtitle = | |||
| damage = 3500 | |||
| stun = 0 | |||
| cancel = SP/SU | |||
| guard = Mid | |||
| parry = High | |||
| startup = 5:8 | |||
| active = 56 | |||
| recovery = 22 | |||
| total = 91 | |||
| advHit = DWN | |||
| advBlock = | |||
| invul = 15 (Full) | |||
}} | |||
{{AttackData-CvS2 | |||
| header = no | |||
| version = {{Motion|236}} {{Motion|236}} + {{Icon-Capcom|HK}} | |||
| subtitle = | |||
| damage = 5100 | |||
| stun = 0 | |||
| cancel = None | |||
| guard = Mid | |||
| parry = High | |||
| startup = 4:8 | |||
| active = 86 | |||
| recovery = 22 | |||
| total = 120 | |||
| advHit = DWN | |||
| advBlock = | |||
| invul = 23 (Full) | |||
| description = A solid anti-air super with a slower start-up and juggling properties. Levels 2 and 3 are very good anti-airs and every level does more damage than Yoga Stream. Combos from crouching db+hk from most ranges. | |||
}} | |||
}} | |||
= | === <span class="invisible-header">Yoga Tempest</span> === | ||
{{MoveData | |||
| name = Yoga Tempest | |||
| input = 6321463214P | |||
| subtitle = | |||
| image = CVS2 Dhalsim 6321463214P.png | |||
| caption = | |||
| linkname = | |||
| data = | |||
{{AttackData-CvS2 | |||
| version = {{Motion|63214}} {{Motion|63214}} + {{Icon-Capcom|P}} | |||
| subtitle = | |||
| damage = 6000 | |||
| stun = 0 | |||
| cancel = None | |||
| guard = Mid | |||
| parry = High | |||
| startup = 4:8 | |||
| active = 86 | |||
| recovery = 46 | |||
| total = 144 | |||
| advHit = DWN | |||
| advBlock = -13 | |||
| invul = 22 (Full) | |||
| description = Dhalsim's strongest super and one of the strongest supers in the game. Tempest has juggle properties, being able to combo after sweep anywhere or juggled after Yoga flame in the corner. A very strong anti-air that cover a good horizontal distance. | |||
}} | |||
}} | |||
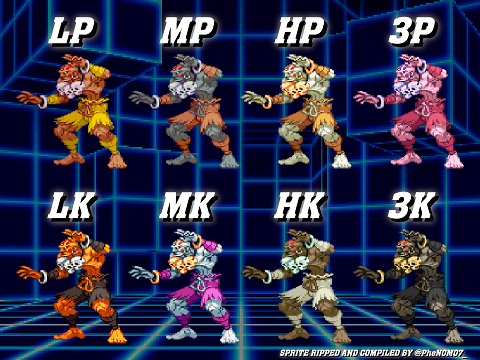
= | == Colors == | ||
[[File:Dhalsim_CvS2_colors.png]] | |||
Latest revision as of 20:54, 28 March 2025
Introduction
Story
Dhalsim is a powerful Yoga master. He is capable of stretching his body out to immense lengths, and conjuring fire from his mouth. He can also teleport, and later on learns how to float. He starts out fighting to raise money for his village, as he cares deeply for those who live there. Although, he has to contradict his natural pacifist beliefs. Throughout many of the games, he finds himself conflicted between his pacifist lifestyle and having to use his great powers to fight for his village. After the events of Street Fighter II: World Warrior, Dhalsim retires from fighting. That is, until S.I.N. in Street Fighter IV builds a dam that bars water from getting into Dhalsim's village. He is once again forced to choose between his pacifist beliefs and the need to fight.
Gameplay
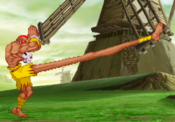
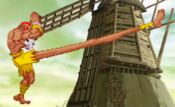
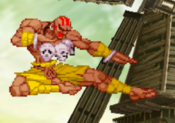
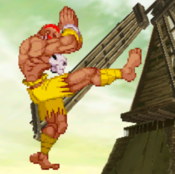
Dhalsim is the original long-arms zoner. He has stretchy normals that allow him to cover plenty of angles, but has to carefully pick and choose which one he needs for what situation, as they all hit at specific and precise angles. While Dhalsim is infamously powerful in other games like Super Turbo and Alpha 3, CvS2 Dhalsim is quite underwhelming. Many characters are dominant in neutral already, and his extended hurtboxes end up hurting him a lot more. His weak defense makes Grooves with hop and run dismantle him, and he struggles to properly zone them at all. His normally powerful fireball is beaten out by CvS2's roll cancel glitch, as are many of his zoning tools in general, and his offensive mixup is much worse than normal. Overall, Dhalsim is a low tier that has to win neutral every single time in order to win.
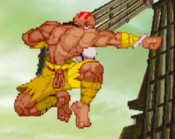
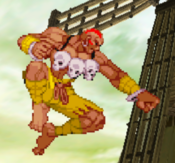
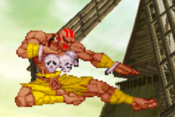
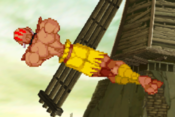
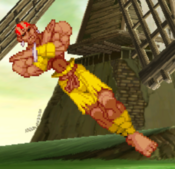
Dhalsim does still have very powerful zoning tools however. His normals, namely ones like 5LK and 5HP, control a bunch of grounded space. 5HK and 4MP are great anti-airs, and his divekicks help him be aggressive and mobile. He has fairly useful supers for zoning and chipping. He has a risky but strong reversal in his teleports, and it can be hard to properly punish them as well. Dhalsim has powerful neutral tools, but not much else. You have to win neutral more than anyone else to win, and one time of losing it can spell the end. You can be winning for the majority of the match, but one good hit from the opponent can spell your doom.
Groove Selection
Best - C: C-Dhalsim is the best Groove for Dhalsim, plain and simple. Airblock makes his horrible floaty jump a lot safer, lots of access to his supers makes his damage, reversal, and chip out game a lot more solid, and Alpha Counters give him a MUCH needed defensive option. Roll cancel lets him RC his fire specials to make them much harder to contest and much more annoying in neutral. While his roll isn't great, it can be appreciated as a risky escape tool. C-Groove gives Dhalsim the defensive options he needs and lots of access to his supers: all that he needs to perform well.
Useful - A/S: A-Dhalsim is a bit of a lesser C-Dhalsim. Losing airblock hurts a lot, but you get Custom Combo in return. While this isn't necessarily a bad trade, Dhalsim's CC isn't the greatest, and he would rather just have his supers. Still, you get the basic defense of C-Groove plus a decent reversal combo tool with big damage potential: it could be a lot worse. S-Dhalsim is a lot more gimmicky. While charging doesn't actively hurt his gameplan, getting hit while charging can end the round for Dhalsim. He has no access to supers for a majority of the round, which doesn't hurt too bad, but at low health having infinite level 1's makes him a bit scarier.
Worst - K/N/P: K-Dhalsim is strange to play. Dhalsim having run and hop isn't as beneficial to his gameplan as you might think, since his offense isn't very rewarding for how much risk it carries. Rage does make his normal poke strategy much scarier however, and a good punish into a level 3 still hurts, so K-Dhalsim with Rage has some merit. N-Dhalsim is a worse version of K-Dhalsim. His level 1's are solid but not good enough to live on just level 1 supers alone, and he doesn't have a good enough RC special for N-Groove. P-Dhalsim is the worst way to play him. Dhalsim has very weak punishes, meaning parries do very little, though he can almost always at least punish thanks to his range. Only having roughly one level 3 super per round hurts, and the lack of any other good options is a major sacrifice.
|
Dhalsim is a fragile long-arm zoner who relies on massive range normals to keep opponents out. However, if he fails, he often dies in one or two interactions. Dhalsim is best in C-Groove. Difficulty: HardTier: C |
|
| Pros | Cons |
|
|
Players to Watch
| Name | Country | Groove | Accounts | Notes |
|---|---|---|---|---|
| Iyo | Japan | N/C-Groove | N/A | The Dhalsim God. A player who gained immense respect in his day for being this good with Sim, and unfortunately does not play anymore. N-Groove Sample Match C-Groove Sample Match |
!!!THIS PAGE IS STILL A WIP. IF YOU NEED FRAME DATA NOW, REFER TO THE CVS2 BIBLE OR LOOK THROUGH EDIT HISTORY FOR THE LAST EDIT CONTAINING FRAME DATA IF THERE WAS ONE!!!
Normal Moves
Far Normals
5LP
5MP
5HP
5LK
5MK
5HK
4LP
4MP
4HP
4LK
4MK
4HK
Crouching Normals
2LP
2MP
2HP
2LK
2MK
2HK
1LP
1MP
1HP
1LK
1MK
1HK
Jumping Normals
j.LP
j.MP
j.HP
j.LK
j.MK
j.HK
j.4LP
j.4MP
j.4HP
j.4LK
j.4MK
j.4HK
Command Normals
Drill Zutsukii
Drill Kick
Throws
Punch Throw
Kick Throw
Special Moves
Yoga Fire
Yoga Flame
Yoga Blast
Yoga Teleport
| Damage | Stun | Cancel | Guard | Parry | Startup | Active | Recovery | Total | Adv Hit | Adv Block | Invul |
|---|---|---|---|---|---|---|---|---|---|---|---|
| - | - | - | - | - | - | - | - | 87 | - | - | 77 (Full) |
A frame one invincible reversal with heavy recovery. It semi useable to escape situations (teleport aways from a cross up, etc). | |||||||||||
Super Moves
Yoga Stream
Yoga Volcano
Yoga Tempest
Colors
