(1.13 update) |
CartoonFan18 (talk | contribs) No edit summary |
||
| (3 intermediate revisions by 2 users not shown) | |||
| Line 21: | Line 21: | ||
== Playstyle == | == Playstyle == | ||
Ren & Stimpy are | Ren & Stimpy are strong buttons: the character. Being an odd combination of floaty and heavy, R&S excel best keeping the opponent out and thwacking them with their massive hitboxes. They also have some of the best edgeguarding tools in the game in the form of Back Air and Down Strong, massive hitboxes that can be tough for even seasoned players to challenge. | ||
Unlike [[Nickelodeon All-Star Brawl/Ren & Stimpy|their last outing]], they have much better recovery tools this time too in the form of Side Special. They also have a useful counter in Down Special, which can charge up to release a deadly attack that will kill the opponent fairly early. Overall though, their floaty physics tend to be their biggest strength, as they can escape combos easier than most characters their size or weight. | Unlike [[Nickelodeon All-Star Brawl/Ren & Stimpy|their last outing]], they have much better recovery tools this time too in the form of Side Special. They also have a useful counter in Down Special, which can charge up to release a deadly attack that will kill the opponent fairly early. Overall though, their floaty physics tend to be their biggest strength, as they can escape combos easier than most characters their size or weight. | ||
If you enjoy hitting people with big moves, Ren & Stimpy are your odd duo! | If you enjoy hitting people with big moves, Ren & Stimpy are your odd duo! | ||
== Metagame == | |||
Ren and Stimpy are ranked 26th out of 29 on the current [[Nickelodeon All-Star Brawl 2/FAQ|tier list]], in the C tier. This is technically a minuscule drop from their 22nd out of 25 placement in the first [[Nickelodeon All-Star Brawl]], but they still maintain their bottom 4 placement. | |||
Ren & Stimpy's biggest strength are their huge hitboxes, largely pertaining to their aerials. Their strong attacks are no slouch, either, doing a significant amount of knockback each time one lands. These two strengths combined make them a very dangerous character offstage and on ledge, having huge, hard-hitting hitboxes to wall the opponent out from getting back on the stage. Finally, the duo are heavy, making them difficult to knock out in one fell swoop. | |||
However, with big power comes big flaws: Ren & Stimpy are a huge target. This is largely due to their large frame, but also because of their slow ground game. Because of this, they are almost always in the air, which makes them combo food if they get anti-aired. Their recovery is also exploitable, with Up Special being fairly slow on the ascent, and Side Special not giving any vertical height at all unless EX'd. | |||
The duo were previously seen much more positively as a high-tier character for most of the metagame. However, nerfs to their gravity in Patch 1.13 would drastically change opinions on the character, as they were now much easier to combo. While still a fairly common occurrence in friendlies, Ren & Stimpy are very rare to see at top level play in the present day, with most of their mains switching characters or being MIA entirely. | |||
|content2= | |content2= | ||
| Line 38: | Line 49: | ||
{{ProConTable | {{ProConTable | ||
|pros= | |pros= | ||
* '''Some of the hardest-hitting buttons in the game:''' Self-explanatory. Every R&S move feels like it hits like an 18-wheeler. | |||
* '''Some of the | * '''Heavy:''' Stimpy is a big boy, so R&S are somewhat difficult to take out. Side Special adds to their survivability. | ||
* '''Heavy:''' Stimpy is a big boy | |||
* '''Edgeguarding:''' Ren & Stimpy are excellent at edgeguarding. Back Air is huge and covers most of ledge, and if that doesn't work, you also have Down Strong. Log is also useful if you wanna mix it up a little. | * '''Edgeguarding:''' Ren & Stimpy are excellent at edgeguarding. Back Air is huge and covers most of ledge, and if that doesn't work, you also have Down Strong. Log is also useful if you wanna mix it up a little. | ||
* '''Strong out-of-shield game.''' R&S's big hitboxes (notably Up Air Light and Down Air Light) make them tough to challenge out of shield. | * '''Strong out-of-shield game.''' R&S's big hitboxes (notably Up Air Light and Down Air Light) make them tough to challenge out of shield. | ||
| Line 46: | Line 56: | ||
|cons= | |cons= | ||
* '''Up Special:''' It's not great. Side Special helps lighten the load if you have it on deck, but if you don't, you're stuck with a pretty meh vertical recovery move that's easy to spike. The explosion is pretty big, though. | * '''Up Special:''' It's not great. Side Special helps lighten the load if you have it on deck, but if you don't, you're stuck with a pretty meh vertical recovery move that's easy to spike. The explosion is pretty big, though. | ||
* '''Lack of disjoints:''' Ren & Stimpy's buttons are big, but they also have to utilize them at close or mid-range, making them rather unreliable for trades. | |||
* '''Slow ground game''' Ren & Stimpy are pretty slow on the ground, having a very low run speed. You will most likely spend most of your time in the air playing them as a result. | * '''Slow ground game''' Ren & Stimpy are pretty slow on the ground, having a very low run speed. You will most likely spend most of your time in the air playing them as a result. | ||
* '''Big:''' While their floatiness definitely gives this trait insurance, R&S are still a big target. Their buttons allow you to avoid a lot of trouble, but at some point if you're not careful you will get hit pretty hard. | * '''Big:''' While their floatiness definitely gives this trait insurance, R&S are still a big target. Their buttons allow you to avoid a lot of trouble, but at some point if you're not careful you will get hit pretty hard. | ||
| Line 535: | Line 546: | ||
{{MoveData | {{MoveData | ||
|image= NASB2_RenStimpy_DownThrow.png | |image= NASB2_RenStimpy_DownThrow.png | ||
|caption= | |caption= "It's Muddy! MudSkipper! It's Muddy! MudSkipper!" | ||
|name= NAME PLACEHOLDER | |name= NAME PLACEHOLDER | ||
|input= Down (Grabbing) | |input= Down (Grabbing) | ||
| Line 553: | Line 564: | ||
{{MoveData | {{MoveData | ||
|image= NASB2_RenStimpy_BackThrow.png | |image= NASB2_RenStimpy_BackThrow.png | ||
|caption= | |caption= "I’m not dying, I’m not going to die." | ||
|name= NAME PLACEHOLDER | |name= NAME PLACEHOLDER | ||
|input= Back (Grabbing) | |input= Back (Grabbing) | ||
Latest revision as of 03:37, 12 March 2025
About
The best of friends. Happy Happy, Joy Joy!
Playstyle
Ren & Stimpy are strong buttons: the character. Being an odd combination of floaty and heavy, R&S excel best keeping the opponent out and thwacking them with their massive hitboxes. They also have some of the best edgeguarding tools in the game in the form of Back Air and Down Strong, massive hitboxes that can be tough for even seasoned players to challenge.
Unlike their last outing, they have much better recovery tools this time too in the form of Side Special. They also have a useful counter in Down Special, which can charge up to release a deadly attack that will kill the opponent fairly early. Overall though, their floaty physics tend to be their biggest strength, as they can escape combos easier than most characters their size or weight.
If you enjoy hitting people with big moves, Ren & Stimpy are your odd duo!
Metagame
Ren and Stimpy are ranked 26th out of 29 on the current tier list, in the C tier. This is technically a minuscule drop from their 22nd out of 25 placement in the first Nickelodeon All-Star Brawl, but they still maintain their bottom 4 placement.
Ren & Stimpy's biggest strength are their huge hitboxes, largely pertaining to their aerials. Their strong attacks are no slouch, either, doing a significant amount of knockback each time one lands. These two strengths combined make them a very dangerous character offstage and on ledge, having huge, hard-hitting hitboxes to wall the opponent out from getting back on the stage. Finally, the duo are heavy, making them difficult to knock out in one fell swoop.
However, with big power comes big flaws: Ren & Stimpy are a huge target. This is largely due to their large frame, but also because of their slow ground game. Because of this, they are almost always in the air, which makes them combo food if they get anti-aired. Their recovery is also exploitable, with Up Special being fairly slow on the ascent, and Side Special not giving any vertical height at all unless EX'd.
The duo were previously seen much more positively as a high-tier character for most of the metagame. However, nerfs to their gravity in Patch 1.13 would drastically change opinions on the character, as they were now much easier to combo. While still a fairly common occurrence in friendlies, Ren & Stimpy are very rare to see at top level play in the present day, with most of their mains switching characters or being MIA entirely.
 | |
| Franchise |
The Ren & Stimpy Show |
|---|---|
| Home Stage |
Messy Kitchen |
| Weight |
Heavy (1.06) |
| Fall Speed |
Floaty (0.75) |
| Gravity |
Floaty (0.8) |
| Run Speed |
Slow (0.85) |
| Air Speed |
Fast (1.25) |
| Strengths | Weaknesses |
|---|---|
|
|
Moveset
Ground Light Attacks
Light

| Damage | Startup | Active Frames | Total Frames | Safety | |
|---|---|---|---|---|---|
| 00% | 0 | 0-0 | 0 | -0 | |
| |||||
Forward+Light

| Damage | Startup | Active Frames | Total Frames | Safety | |
|---|---|---|---|---|---|
| 00% | 0 | 0-0 | 0 | -0 | |
| |||||
Up+Light

| Damage | Startup | Active Frames | Total Frames | Safety | |
|---|---|---|---|---|---|
| 00% | 0 | 0-0 | 0 | -0 | |
| |||||
Down+Light

| Damage | Startup | Active Frames | Total Frames | Safety | |
|---|---|---|---|---|---|
| 00% | 0 | 0-0 | 0 | -0 | |
| |||||
Light (Running)

| Damage | Startup | Active Frames | Total Frames | Safety | |
|---|---|---|---|---|---|
| 00% | 0 | 0-0 | 0 | -0 | |
| |||||
Air Light Attacks
Light (Airborne)

| Damage | Startup | Active Frames | Total Frames | Safety | |
|---|---|---|---|---|---|
| 00% | 0 | 0-0 | 0 | -0 | |
| |||||
Forward+Light (Airborne)

| Damage | Startup | Active Frames | Total Frames | Safety | |
|---|---|---|---|---|---|
| 00% | 0 | 0-0 | 0 | -0 | |
| |||||
Back+Light (Airborne)

| Damage | Startup | Active Frames | Total Frames | Safety | |
|---|---|---|---|---|---|
| 00% | 0 | 0-0 | 0 | -0 | |
| |||||
Up+Light (Airborne)

| Damage | Startup | Active Frames | Total Frames | Safety | |
|---|---|---|---|---|---|
| 00% | 0 | 0-0 | 0 | -0 | |
| |||||
Down+Light (Airborne)

| Damage | Startup | Active Frames | Total Frames | Safety | |
|---|---|---|---|---|---|
| 00% | 0 | 0-0 | 0 | -0 | |
| |||||
Ground Strong Attacks
Strong

| Damage | Startup | Active Frames | Total Frames | Safety | |
|---|---|---|---|---|---|
| 00% | 0 | 0-0 | 0 | -0 | |
| |||||
Up+Strong

| Damage | Startup | Active Frames | Total Frames | Safety | |
|---|---|---|---|---|---|
| 00% | 0 | 0-0 | 0 | -0 | |
| |||||
Down+Strong

| Damage | Startup | Active Frames | Total Frames | Safety | |
|---|---|---|---|---|---|
| 00% | 0 | 0-0 | 0 | -0 | |
| |||||
Air Strong Attacks
Strong (Airborne)

| Damage | Startup | Active Frames | Total Frames | Safety | |
|---|---|---|---|---|---|
| 00% | 0 | 0-0 | 0 | -0 | |
| |||||
Up+Strong (Airborne)

| Damage | Startup | Active Frames | Total Frames | Safety | |
|---|---|---|---|---|---|
| 00% | 0 | 0-0 | 0 | -0 | |
| |||||
Down+Strong (Airborne)

| Damage | Startup | Active Frames | Total Frames | Safety | |
|---|---|---|---|---|---|
| 00% | 0 | 0-0 | 0 | -0 | |
| |||||
Special Attacks
Special

| Damage | Startup | Active Frames | Total Frames | Safety | |
|---|---|---|---|---|---|
| 00% | 0 | 0-0 | 0 | -0 | |
| |||||
Forward+Special

| Damage | Startup | Active Frames | Total Frames | Safety | |
|---|---|---|---|---|---|
| 00% | 0 | 0-0 | 0 | -0 | |
| |||||
Down+Special

| Damage | Startup | Active Frames | Total Frames | Safety | |
|---|---|---|---|---|---|
| 00% | 0 | 0-0 | 0 | -0 | |
| |||||
Up+Special

| Damage | Startup | Active Frames | Total Frames | Safety | |
|---|---|---|---|---|---|
| 00% | 0 | 0-0 | 0 | -0 | |
| |||||
Grab/Throws
Grab

| Damage | Startup | Active Frames | Total Frames | Safety | |
|---|---|---|---|---|---|
| 00% | 0 | 0-0 | 0 | -0 | |
| |||||
Grab (Running)

| Damage | Startup | Active Frames | Total Frames | Safety | |
|---|---|---|---|---|---|
| 00% | 0 | 0-0 | 0 | -0 | |
| |||||
Light (Grabbing)

| Damage | Startup | Active Frames | Total Frames | Safety | |
|---|---|---|---|---|---|
| 00% | 0 | 0-0 | 0 | -0 | |
| |||||
Up (Grabbing)

| Damage | Startup | Active Frames | Total Frames | Safety | |
|---|---|---|---|---|---|
| 00% | 0 | 0-0 | 0 | -0 | |
| |||||
Forward (Grabbing)

| Damage | Startup | Active Frames | Total Frames | Safety | |
|---|---|---|---|---|---|
| 00% | 0 | 0-0 | 0 | -0 | |
| |||||
Down (Grabbing)

| Damage | Startup | Active Frames | Total Frames | Safety | |
|---|---|---|---|---|---|
| 00% | 0 | 0-0 | 0 | -0 | |
| |||||
Back (Grabbing)

| Damage | Startup | Active Frames | Total Frames | Safety | |
|---|---|---|---|---|---|
| 00% | 0 | 0-0 | 0 | -0 | |
| |||||
Super
Slime+Light

| Damage | Startup | Active Frames | Total Frames | Safety | |
|---|---|---|---|---|---|
| 00% | 0 | 0-0 | 0 | -0 | |
| |||||
Taunts
Taunt

| Damage | Startup | Active Frames | Total Frames | Safety | |
|---|---|---|---|---|---|
| 00% | 0 | 0-0 | 0 | -0 | |
| |||||
Down+Taunt

| Damage | Startup | Active Frames | Total Frames | Safety | |
|---|---|---|---|---|---|
| 00% | 0 | 0-0 | 0 | -0 | |
| |||||
Up+Taunt

| Damage | Startup | Active Frames | Total Frames | Safety | |
|---|---|---|---|---|---|
| 00% | 0 | 0-0 | 0 | -0 | |
| |||||
Strategy
- PLACEHOLDER
- PLACEHOLDER
- PLACEHOLDER
Techniques
- PLACEHOLDER
- PLACEHOLDER
- PLACEHOLDER
Combos
- PLACEHOLDER
- PLACEHOLDER
- PLACEHOLDER
Matchups
| +2 | |
| +1 | |
| 0 | |
| 1 | |
| 2 |
Other Resources
- PLACEHOLDER
- PLACEHOLDER
- PLACEHOLDER
Videos
PLACEHOLDER
Costumes
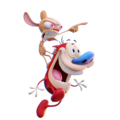
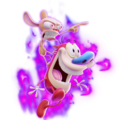
Ren & Stimpy's Default Outfit.
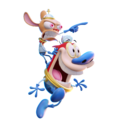
Ren & Stimpy as their Commander Höek and Cadet Stimpy alter-egos, first seen in the episode "Space Madness".
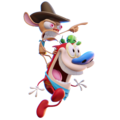
Ren & Stimpy as their Three-Fingered Hoek and Stupid the Kid alter-egos from the episode "Out West".
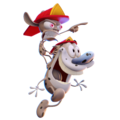
Ren & Stimpy as firedogs from the episode "Fire Dogs" and its sequel episode "Fire Dogs 2" from Adult Party Cartoon.
Mind controlled Ren & Stimpy (unlocked by defeating Ren & Stimpy twice in campaign mode).
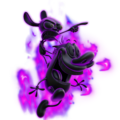
Ren & Stimpy's Ghost Clone (unlocked by defeating Ren & Stimpy thrice in campaign mode).


