No edit summary |
(Metagame) |
||
| (16 intermediate revisions by 5 users not shown) | |||
| Line 1: | Line 1: | ||
{{NickBrawl2 Character Intro|char=Azula |full=Azula|short=Azula | {{NickBrawl2 Character Intro|char=Azula |full=[[File:NASB2_AzulaStock.png|x30px]] Azula|short=Azula | ||
| franchise = Avatar: The Last Airbender | | franchise = Avatar: The Last Airbender | ||
| homestage = | | homestage = Fire Masters Meeting | ||
| weight = | | weight = 0.83 | ||
| fallspeed = | | fallspeed = 1.2 | ||
| gravity = | | gravity = 1.5 | ||
| runspeed = | | runspeed = 1.4 | ||
| airspeed = | | airspeed = 1.2 | ||
| placeholderone = | | placeholderone = | ||
| placeholdertwo = | | placeholdertwo = | ||
| Line 18: | Line 18: | ||
== About == | == About == | ||
The devious princess of the Fire Nation. | |||
== Playstyle == | |||
Azula is basically if you took a [[Street Fighter 3: 3rd Strike/Akuma|certain Master of the Fist]] and translated that into a platform fighter. She has a very powerful projectile game in her Neutral Special and Down Special, and an excellent, fast combo game that makes her an offensive powerhouse. She is rather light, but she makes up for it with her blisteringly fast speed and deadly edgeguarding. | |||
If you like being the rushdown to end all rushdowns, Azula is for you! | |||
== Metagame == | |||
Azula is ranked 2nd out of 29 on the current [[Nickelodeon All-Star Brawl 2/FAQ|tier list]], in the S+ tier. | |||
Azula is an overwhelmingly strong character in many ways. Her mobility is among the best in the game, having great stats and very quick frame data. She also has access to an air fireball in Neutral Special, and a deadly projectile confirm in both forms of Down Special. Continuing down the list, Azula also has an exceptionally strong edgeguarding game, a potent and intimidating juggle game, and her short, squatting frame makes her rather difficult for some characters to hit back. All of these traits give Azula a large and deadly amount of versatility at any stage in the game. | |||
However, this all comes at a price: Azula is fragile, and can be KO'd easily if she is too reckless. Also, while her recovery is by no means bad, it is fairly predictable and linear, so she is prone to getting ledgehogged or ledgetrapped by seasoned players. | |||
All in all, however, Azula's strengths far and wide outweigh her weaknesses. She is one of the most popular characters at any level of competitive play, with strong tournament results across the board. | |||
|content2= | |content2= | ||
| Line 29: | Line 42: | ||
}} | }} | ||
}} | }} | ||
---- | ---- | ||
{{ProConTable | {{ProConTable | ||
|pros= | |pros= | ||
* ''' | * '''Fast:''' Azula is very fast both in terms of general stats and moves. She moves around quickly and can get combos started quickly off of one whiff. | ||
* ''' | * '''Edgeguarding:''' Azula is crazy good at edgeguarding, with her Down Special and Strong Neutral Air meaning she can snipe you offensively or defensively if she feels like it. | ||
* ''' | * '''Projectiles:''' Azula has an air fireball in Neutral Special that works as an amazing zoning and pressure tool, as well as a Down Special that works well to control space and also kill the opponent off of an edgeguard. Her Strong Neutral Air also doubles as a projectile and kill move. | ||
* ''' | * '''Air combos:''' Azula's aerial chains are some of the deadliest in the game to go against. Her Strong Neutral Air is particularly devastating as a kill move if the opponent is close to the blast zone. | ||
* '''Short:''' Azula is always stanced in a squatting position. This means she can be harder to hit with ground normals than some other characters. | |||
* '''Beginner-friendly:''' Azula's combo routes are not terribly difficult to learn, and she is very common to play if you're just getting started. | |||
|cons= | |cons= | ||
* ''' | * '''Low Survivability:''' Azula is fairly light and can get KO'd easily if she's not careful. | ||
* '''Recovery:''' Azula's Up Special is a rather linear hover recovery, which is prone to getting edgeguarded easily. | |||
* ''' | * '''Fastfaller:''' While not on the same level as [[Nickelodeon All-Star Brawl 2/El Tigre|El Tigre]], Azula has a faster than normal fall speed, which means she is more susceptible to combos than some other characters. | ||
* ''' | |||
}} | }} | ||
---- | ---- | ||
== Moveset == | == Moveset == | ||
| Line 61: | Line 71: | ||
{{MoveData | {{MoveData | ||
|image= NASB2_Azula_LightNeutral-TwoFingerFirebending.png | |image= NASB2_Azula_LightNeutral-TwoFingerFirebending.png | ||
|caption= | |caption= | ||
|name= Two Finger Firebending | |name= Two Finger Firebending | ||
|input= Light | |input= Light | ||
| Line 79: | Line 89: | ||
{{MoveData | {{MoveData | ||
|image= NASB2_Azula_LightForward-FireSpinKick.png | |image= NASB2_Azula_LightForward-FireSpinKick.png | ||
|caption= | |caption= | ||
|name= Fire Spin Kick | |name= Fire Spin Kick | ||
|input= Forward+Light | |input= Forward+Light | ||
| Line 97: | Line 107: | ||
{{MoveData | {{MoveData | ||
|image= NASB2_Azula_LightUp-UpwardsFireKick.png | |image= NASB2_Azula_LightUp-UpwardsFireKick.png | ||
|caption= | |caption= | ||
|name= Upwards Fire Kick | |name= Upwards Fire Kick | ||
|input= Up+Light | |input= Up+Light | ||
| Line 115: | Line 125: | ||
{{MoveData | {{MoveData | ||
|image= NASB2_Azula_LightDown-FireSweep.png | |image= NASB2_Azula_LightDown-FireSweep.png | ||
|caption= | |caption= | ||
|name= Fire Sweep | |name= Fire Sweep | ||
|input= Down+Light | |input= Down+Light | ||
| Line 133: | Line 143: | ||
{{MoveData | {{MoveData | ||
|image= NASB2_Azula_DashAttack-FireTackle.png | |image= NASB2_Azula_DashAttack-FireTackle.png | ||
|caption= | |caption= | ||
|name= Fire Tackle | |name= Fire Tackle | ||
|input= Light( | |input= Light (Running) | ||
|data= | |data= | ||
{{AttackData-NickBrawl2 | {{AttackData-NickBrawl2 | ||
| Line 155: | Line 165: | ||
{{MoveData | {{MoveData | ||
|image= NASB2_Azula_LightNeutralAir-NeutralKick.png | |image= NASB2_Azula_LightNeutralAir-NeutralKick.png | ||
|caption= | |caption= | ||
|name= Neutral Kick | |name= Neutral Kick | ||
|input= | |input= Light (Airborne) | ||
|data= | |data= | ||
{{AttackData-NickBrawl2 | {{AttackData-NickBrawl2 | ||
| Line 173: | Line 183: | ||
{{MoveData | {{MoveData | ||
|image= NASB2_Azula_LightForwardAir-FireWhip.png | |image= NASB2_Azula_LightForwardAir-FireWhip.png | ||
|caption= | |caption= | ||
|name= Fire Whip | |name= Fire Whip | ||
|input= | |input= Forward+Light (Airborne) | ||
|data= | |data= | ||
{{AttackData-NickBrawl2 | {{AttackData-NickBrawl2 | ||
| Line 191: | Line 201: | ||
{{MoveData | {{MoveData | ||
|image= NASB2_Azula_LightBackAir-BurningBackKick.png | |image= NASB2_Azula_LightBackAir-BurningBackKick.png | ||
|caption= | |caption= | ||
|name= Burning Back Kick | |name= Burning Back Kick | ||
|input= | |input= Back+Light (Airborne) | ||
|data= | |data= | ||
{{AttackData-NickBrawl2 | {{AttackData-NickBrawl2 | ||
| Line 209: | Line 219: | ||
{{MoveData | {{MoveData | ||
|image= NASB2_Azula_LightUpAir-CrescentFireKick.png | |image= NASB2_Azula_LightUpAir-CrescentFireKick.png | ||
|caption= | |caption= | ||
|name= Crescent Fire Kick | |name= Crescent Fire Kick | ||
|input= | |input= Up+Light (Airborne) | ||
|data= | |data= | ||
{{AttackData-NickBrawl2 | {{AttackData-NickBrawl2 | ||
| Line 227: | Line 237: | ||
{{MoveData | {{MoveData | ||
|image= NASB2_Azula_LightDownAir-BurningMeteorKick.png | |image= NASB2_Azula_LightDownAir-BurningMeteorKick.png | ||
|caption= | |caption= | ||
|name= Burning Meteor Kick | |name= Burning Meteor Kick | ||
|input= | |input= Down+Light (Airborne) | ||
|data= | |data= | ||
{{AttackData-NickBrawl2 | {{AttackData-NickBrawl2 | ||
| Line 249: | Line 259: | ||
{{MoveData | {{MoveData | ||
|image= NASB2_Azula_ChargeForward-BurningFist.png | |image= NASB2_Azula_ChargeForward-BurningFist.png | ||
|caption= | |caption= | ||
|name= Burning Fist | |name= Burning Fist | ||
|input= Strong | |input= Strong | ||
| Line 267: | Line 277: | ||
{{MoveData | {{MoveData | ||
|image= NASB2_Azula_ChargeUp-ExplosiveFireball.png | |image= NASB2_Azula_ChargeUp-ExplosiveFireball.png | ||
|caption= | |caption= | ||
|name= Explosive Fireball | |name= Explosive Fireball | ||
|input= Up+Strong | |input= Up+Strong | ||
| Line 285: | Line 295: | ||
{{MoveData | {{MoveData | ||
|image= NASB2_Azula_ChargeDown-BurningSpin.png | |image= NASB2_Azula_ChargeDown-BurningSpin.png | ||
|caption= | |caption= | ||
|name= Burning Spin | |name= Burning Spin | ||
|input= Down+Strong | |input= Down+Strong | ||
| Line 307: | Line 317: | ||
{{MoveData | {{MoveData | ||
|image= NASB2_Azula_ChargeForwardAir-RotatingFlameKick.png | |image= NASB2_Azula_ChargeForwardAir-RotatingFlameKick.png | ||
|caption= | |caption= | ||
|name= Rotating Flame Kick | |name= Rotating Flame Kick | ||
|input= | |input= Strong (Airborne) | ||
|data= | |data= | ||
{{AttackData-NickBrawl2 | {{AttackData-NickBrawl2 | ||
| Line 325: | Line 335: | ||
{{MoveData | {{MoveData | ||
|image= NASB2_Azula_ChargeUpAir-FlameBurst.png | |image= NASB2_Azula_ChargeUpAir-FlameBurst.png | ||
|caption= | |caption= | ||
|name= Flame Burst | |name= Flame Burst | ||
|input= | |input= Up+Strong (Airborne) | ||
|data= | |data= | ||
{{AttackData-NickBrawl2 | {{AttackData-NickBrawl2 | ||
| Line 343: | Line 353: | ||
{{MoveData | {{MoveData | ||
|image= NASB2_Azula_ChargeDownAir-DiveKick.png | |image= NASB2_Azula_ChargeDownAir-DiveKick.png | ||
|caption= | |caption= | ||
|name= Dive Kick | |name= Dive Kick | ||
|input= | |input= Down+Strong (Airborne) | ||
|data= | |data= | ||
{{AttackData-NickBrawl2 | {{AttackData-NickBrawl2 | ||
| Line 365: | Line 375: | ||
{{MoveData | {{MoveData | ||
|image= NASB2_Azula_SpecialNeutral-Fireball.png | |image= NASB2_Azula_SpecialNeutral-Fireball.png | ||
|caption= | |caption= | ||
|name= Fireball | |name= Fireball | ||
|input= Special | |input= Special | ||
| Line 376: | Line 386: | ||
|Safety=-0 | |Safety=-0 | ||
|description= | |description= | ||
* | * While on the ground, Azula launches a fireball that travels horizontally. | ||
* | * While in the air, the fireball moves downwards diagonally. | ||
}} | }} | ||
}}<br> | }}<br> | ||
| Line 383: | Line 393: | ||
{{MoveData | {{MoveData | ||
|image= NASB2_Azula_SpecialForward-BurningLunge.png | |image= NASB2_Azula_SpecialForward-BurningLunge.png | ||
|caption= | |caption= | ||
|name= Burning Lunge | |name= Burning Lunge | ||
|input= Forward+Special | |input= Forward+Special | ||
| Line 394: | Line 404: | ||
|Safety=-0 | |Safety=-0 | ||
|description= | |description= | ||
* | * Azula lunges herself forward with a fiery kick. | ||
* | * The attack can be angled downwards in the air during the startup. | ||
}} | }} | ||
}}<br> | }}<br> | ||
| Line 401: | Line 411: | ||
{{MoveData | {{MoveData | ||
|image= NASB2_Azula_SpecialDown-Lightning.png | |image= NASB2_Azula_SpecialDown-Lightning.png | ||
|caption= | |caption= "I'LL SHOW YOU LIGHTNING!" | ||
|name= Lightning | |name= Lightning | ||
|input= Down+Special | |input= Down+Special | ||
| Line 412: | Line 422: | ||
|Safety=-0 | |Safety=-0 | ||
|description= | |description= | ||
* | * Azula creates lighting and then fires it forward to deal massive damage. | ||
* DESCRIPTION PLACEHOLDER | * DESCRIPTION PLACEHOLDER | ||
}} | }} | ||
| Line 419: | Line 429: | ||
{{MoveData | {{MoveData | ||
|image= NASB2_Azula_SpecialUp-FireThrusters.png | |image= NASB2_Azula_SpecialUp-FireThrusters.png | ||
|caption= | |caption= | ||
|name= Fire Thrusters | |name= Fire Thrusters | ||
|input= Up+Special | |input= Up+Special | ||
|data= | |||
{{AttackData-NickBrawl2 | |||
|Damage=00% | |||
|Startup=0 | |||
|Active=0-0 | |||
|Total Frames=0 | |||
|Safety=-0 | |||
|description= | |||
* Azula propels herself upwards with her firebending. | |||
* She can move forwards or backwards while ascending. | |||
}} | |||
}}<br> | |||
=== Grab/Throws === | |||
{{MoveData | |||
|image= NASB2_Azula_Grab.png | |||
|caption= | |||
|name= Grab | |||
|input= Grab | |||
|data= | |||
{{AttackData-NickBrawl2 | |||
|Damage=00% | |||
|Startup=0 | |||
|Active=0-0 | |||
|Total Frames=0 | |||
|Safety=-0 | |||
|description= | |||
* DESCRIPTION PLACEHOLDER | |||
* DESCRIPTION PLACEHOLDER | |||
}} | |||
}}<br> | |||
{{MoveData | |||
|image= NASB2_Azula_DashGrab.png | |||
|caption= | |||
|name= Dash Grab | |||
|input= Grab (Running) | |||
|data= | |||
{{AttackData-NickBrawl2 | |||
|Damage=00% | |||
|Startup=0 | |||
|Active=0-0 | |||
|Total Frames=0 | |||
|Safety=-0 | |||
|description= | |||
* DESCRIPTION PLACEHOLDER | |||
* DESCRIPTION PLACEHOLDER | |||
}} | |||
}}<br> | |||
{{MoveData | |||
|image= NASB2_Azula_Pummel.png | |||
|caption= | |||
|name= Grab Pummel | |||
|input= Light (Grabbing) | |||
|data= | |||
{{AttackData-NickBrawl2 | |||
|Damage=00% | |||
|Startup=0 | |||
|Active=0-0 | |||
|Total Frames=0 | |||
|Safety=-0 | |||
|description= | |||
* DESCRIPTION PLACEHOLDER | |||
* DESCRIPTION PLACEHOLDER | |||
}} | |||
}}<br> | |||
{{MoveData | |||
|image= NASB2_Azula_UpThrow.png | |||
|caption= | |||
|name= Up Throw | |||
|input= Up (Grabbing) | |||
|data= | |||
{{AttackData-NickBrawl2 | |||
|Damage=00% | |||
|Startup=0 | |||
|Active=0-0 | |||
|Total Frames=0 | |||
|Safety=-0 | |||
|description= | |||
* DESCRIPTION PLACEHOLDER | |||
* DESCRIPTION PLACEHOLDER | |||
}} | |||
}}<br> | |||
{{MoveData | |||
|image= NASB2_Azula_ForwardThrow.png | |||
|caption= | |||
|name= Forward Throw | |||
|input= Forward (Grabbing) | |||
|data= | |||
{{AttackData-NickBrawl2 | |||
|Damage=00% | |||
|Startup=0 | |||
|Active=0-0 | |||
|Total Frames=0 | |||
|Safety=-0 | |||
|description= | |||
* DESCRIPTION PLACEHOLDER | |||
* DESCRIPTION PLACEHOLDER | |||
}} | |||
}}<br> | |||
{{MoveData | |||
|image= NASB2_Azula_DownThrow.png | |||
|caption= | |||
|name= Down Throw | |||
|input= Down (Grabbing) | |||
|data= | |||
{{AttackData-NickBrawl2 | |||
|Damage=00% | |||
|Startup=0 | |||
|Active=0-0 | |||
|Total Frames=0 | |||
|Safety=-0 | |||
|description= | |||
* DESCRIPTION PLACEHOLDER | |||
* DESCRIPTION PLACEHOLDER | |||
}} | |||
}}<br> | |||
{{MoveData | |||
|image= NASB2_Azula_BackThrow.png | |||
|caption= | |||
|name= Back Throw | |||
|input= Back (Grabbing) | |||
|data= | |data= | ||
{{AttackData-NickBrawl2 | {{AttackData-NickBrawl2 | ||
| Line 441: | Line 581: | ||
{{MoveData | {{MoveData | ||
|image= NASB2_Azula_Super.png | |image= NASB2_Azula_Super.png | ||
|caption= | |caption= | ||
|name= | |name= Super | ||
|input= Slime+Light | |input= Slime+Light | ||
|data= | |data= | ||
| Line 463: | Line 603: | ||
{{MoveData | {{MoveData | ||
|image= NASB2_Azula_TauntNeutral.png | |image= NASB2_Azula_TauntNeutral.png | ||
|caption= | |caption= "We will dominate the earth!" | ||
|name= | |name= Taunt | ||
|input= Taunt | |input= Taunt | ||
|data= | |data= | ||
| Line 481: | Line 621: | ||
{{MoveData | {{MoveData | ||
|image= NASB2_Azula_TauntDown.png | |image= NASB2_Azula_TauntDown.png | ||
|caption= | |caption= "You're hurting my feelings" | ||
|name= | |name= Down Taunt | ||
|input= Down+Taunt | |input= Down+Taunt | ||
|data= | |data= | ||
| Line 499: | Line 639: | ||
{{MoveData | {{MoveData | ||
|image= NASB2_Azula_TauntUp.png | |image= NASB2_Azula_TauntUp.png | ||
|caption= | |caption= "It's okay, you can laugh. It's funny!" | ||
|name= | |name= Up Taunt | ||
|input= Up+Taunt | |input= Up+Taunt | ||
|data= | |data= | ||
| Line 514: | Line 654: | ||
}} | }} | ||
}}<br> | }}<br> | ||
---- | ---- | ||
== | == Strategy == | ||
* PLACEHOLDER | * PLACEHOLDER | ||
| Line 529: | Line 668: | ||
== | == Techniques == | ||
* PLACEHOLDER | * PLACEHOLDER | ||
| Line 557: | Line 678: | ||
== | == Combos == | ||
* PLACEHOLDER | * PLACEHOLDER | ||
| Line 563: | Line 684: | ||
* PLACEHOLDER | * PLACEHOLDER | ||
---- | |||
== Matchups == | |||
{| class="wikitable" | |||
|- | |||
| '''+2''' || | |||
|- | |||
| '''+1''' || | |||
|- | |||
| '''0''' || [[File:NASB2_Sponge_Icon.png|x80px]] [[File:NASB2_Patrick_Icon.png|x80px]] [[File:NASB2_Squidward_Icon.png|x80px]] [[File:NASB2_Plankton_Icon.png|x80px]] [[File:NASB2_ElTigre_Icon.png|x80px]] [[File:NASB2_Rocko_Icon.png|x80px]] [[File:NASB2_Jimmy_Icon.png|x80px]] [[File:NASB2_Lucy_Icon.png|x80px]] [[File:NASB2_Beavers-Daggett_Icon.png|x80px]] [[File:NASB2_Beavers-Norbert_Icon.png|x80px]] [[File:NASB2_Garfield_Icon.png|x80px]] [[File:NASB2_Aang_Icon.png|x80px]] [[File:NASB2_Korra_Icon.png|x80px]] [[File:NASB2_Azula_Icon.png|x80px]] [[File:NASB2_Raphael_Icon.png|x80px]] [[File:NASB2_Donatello_Icon.png|x80px]] [[File:NASB2_April_Icon.png|x80px]] [[File:NASB2_Danny_Icon.png|x80px]] [[File:NASB2_Ember_Icon.png|x80px]] [[File:NASB2_Gertie_Icon.png|x80px]] [[File:NASB2_Gerald_Icon.png|x80px]] [[File:NASB2_Nigel_Icon.png|x80px]] [[File:NASB2_Zim_Icon.png|x80px]] [[File:NASB2_Jenny_Icon.png|x80px]] [[File:NASB2_Reptar_Icon.png|x80px]] [[File:NASB2_RenStimpy_Icon.png|x80px]] [[File:NASB2_Krabs_Icon.png|x80px]] [[File:NASB2_Zuko_Icon.png|x80px]] [[File:NASB2_Rocksteady_Icon.png|x80px]] | |||
|- | |||
| '''1''' || | |||
|- | |||
| '''2''' || | |||
|} | |||
---- | ---- | ||
| Line 572: | Line 709: | ||
* PLACEHOLDER | * PLACEHOLDER | ||
* PLACEHOLDER | * PLACEHOLDER | ||
=== Videos === | |||
PLACEHOLDER | |||
| Line 578: | Line 718: | ||
== Costumes == | == Costumes == | ||
<gallery> | |||
File:NASB2 Azula Costume00.png| Azula's Default Outfit. | |||
File:NASB2 Azula Costume01.png| Azula wearing her Ba Sing Se outfit from the episode "The Crossroads of Destiny". | |||
File:NASB2 Azula Costume02.png| Azula's normal clothing seen throughout Book 2: Earth. | |||
File:NASB2 Azula Costume03.png| Azula's beach house party attire from the episode "The Beach" (Unlocked by having the Ultimate edition of NASB 2). | |||
File:NASB2 Azula Costume04.png| Mind controlled Azula (unlocked by defeating Azula twice in campaign mode). | |||
File:NASB2 Azula Costume05.png| Mind controlled Azula (unlocked by defeating Azula thrice in campaign mode). | |||
</gallery> | |||
{{Navbox-NickBrawl2}} | {{Navbox-NickBrawl2}} | ||
[[Category:Nickelodeon All-Star Brawl 2]] | [[Category:Nickelodeon All-Star Brawl 2]] | ||
Latest revision as of 21:43, 21 February 2025
About
The devious princess of the Fire Nation.
Playstyle
Azula is basically if you took a certain Master of the Fist and translated that into a platform fighter. She has a very powerful projectile game in her Neutral Special and Down Special, and an excellent, fast combo game that makes her an offensive powerhouse. She is rather light, but she makes up for it with her blisteringly fast speed and deadly edgeguarding.
If you like being the rushdown to end all rushdowns, Azula is for you!
Metagame
Azula is ranked 2nd out of 29 on the current tier list, in the S+ tier.
Azula is an overwhelmingly strong character in many ways. Her mobility is among the best in the game, having great stats and very quick frame data. She also has access to an air fireball in Neutral Special, and a deadly projectile confirm in both forms of Down Special. Continuing down the list, Azula also has an exceptionally strong edgeguarding game, a potent and intimidating juggle game, and her short, squatting frame makes her rather difficult for some characters to hit back. All of these traits give Azula a large and deadly amount of versatility at any stage in the game.
However, this all comes at a price: Azula is fragile, and can be KO'd easily if she is too reckless. Also, while her recovery is by no means bad, it is fairly predictable and linear, so she is prone to getting ledgehogged or ledgetrapped by seasoned players.
All in all, however, Azula's strengths far and wide outweigh her weaknesses. She is one of the most popular characters at any level of competitive play, with strong tournament results across the board.
 | |
| Franchise |
Avatar: The Last Airbender |
|---|---|
| Home Stage |
Fire Masters Meeting |
| Weight |
0.83 |
| Fall Speed |
1.2 |
| Gravity |
1.5 |
| Run Speed |
1.4 |
| Air Speed |
1.2 |
| Strengths | Weaknesses |
|---|---|
|
|
Moveset
Ground Light Attacks
Light

| Damage | Startup | Active Frames | Total Frames | Safety | |
|---|---|---|---|---|---|
| 00% | 0 | 0-0 | 0 | -0 | |
| |||||
Forward+Light

| Damage | Startup | Active Frames | Total Frames | Safety | |
|---|---|---|---|---|---|
| 00% | 0 | 0-0 | 0 | -0 | |
| |||||
Up+Light

| Damage | Startup | Active Frames | Total Frames | Safety | |
|---|---|---|---|---|---|
| 00% | 0 | 0-0 | 0 | -0 | |
| |||||
Down+Light

| Damage | Startup | Active Frames | Total Frames | Safety | |
|---|---|---|---|---|---|
| 00% | 0 | 0-0 | 0 | -0 | |
| |||||
Light (Running)

| Damage | Startup | Active Frames | Total Frames | Safety | |
|---|---|---|---|---|---|
| 00% | 0 | 0-0 | 0 | -0 | |
| |||||
Air Light Attacks
Light (Airborne)

| Damage | Startup | Active Frames | Total Frames | Safety | |
|---|---|---|---|---|---|
| 00% | 0 | 0-0 | 0 | -0 | |
| |||||
Forward+Light (Airborne)

| Damage | Startup | Active Frames | Total Frames | Safety | |
|---|---|---|---|---|---|
| 00% | 0 | 0-0 | 0 | -0 | |
| |||||
Back+Light (Airborne)

| Damage | Startup | Active Frames | Total Frames | Safety | |
|---|---|---|---|---|---|
| 00% | 0 | 0-0 | 0 | -0 | |
| |||||
Up+Light (Airborne)

| Damage | Startup | Active Frames | Total Frames | Safety | |
|---|---|---|---|---|---|
| 00% | 0 | 0-0 | 0 | -0 | |
| |||||
Down+Light (Airborne)

| Damage | Startup | Active Frames | Total Frames | Safety | |
|---|---|---|---|---|---|
| 00% | 0 | 0-0 | 0 | -0 | |
| |||||
Ground Strong Attacks
Strong

| Damage | Startup | Active Frames | Total Frames | Safety | |
|---|---|---|---|---|---|
| 00% | 0 | 0-0 | 0 | -0 | |
| |||||
Up+Strong

| Damage | Startup | Active Frames | Total Frames | Safety | |
|---|---|---|---|---|---|
| 00% | 0 | 0-0 | 0 | -0 | |
| |||||
Down+Strong

| Damage | Startup | Active Frames | Total Frames | Safety | |
|---|---|---|---|---|---|
| 00% | 0 | 0-0 | 0 | -0 | |
| |||||
Air Strong Attacks
Strong (Airborne)

| Damage | Startup | Active Frames | Total Frames | Safety | |
|---|---|---|---|---|---|
| 00% | 0 | 0-0 | 0 | -0 | |
| |||||
Up+Strong (Airborne)

| Damage | Startup | Active Frames | Total Frames | Safety | |
|---|---|---|---|---|---|
| 00% | 0 | 0-0 | 0 | -0 | |
| |||||
Down+Strong (Airborne)

| Damage | Startup | Active Frames | Total Frames | Safety | |
|---|---|---|---|---|---|
| 00% | 0 | 0-0 | 0 | -0 | |
| |||||
Special Attacks
Special

| Damage | Startup | Active Frames | Total Frames | Safety | |
|---|---|---|---|---|---|
| 00% | 0 | 0-0 | 0 | -0 | |
| |||||
Forward+Special

| Damage | Startup | Active Frames | Total Frames | Safety | |
|---|---|---|---|---|---|
| 00% | 0 | 0-0 | 0 | -0 | |
| |||||
Down+Special

| Damage | Startup | Active Frames | Total Frames | Safety | |
|---|---|---|---|---|---|
| 00% | 0 | 0-0 | 0 | -0 | |
| |||||
Up+Special

| Damage | Startup | Active Frames | Total Frames | Safety | |
|---|---|---|---|---|---|
| 00% | 0 | 0-0 | 0 | -0 | |
| |||||
Grab/Throws
Grab

| Damage | Startup | Active Frames | Total Frames | Safety | |
|---|---|---|---|---|---|
| 00% | 0 | 0-0 | 0 | -0 | |
| |||||
Grab (Running)

| Damage | Startup | Active Frames | Total Frames | Safety | |
|---|---|---|---|---|---|
| 00% | 0 | 0-0 | 0 | -0 | |
| |||||
Light (Grabbing)

| Damage | Startup | Active Frames | Total Frames | Safety | |
|---|---|---|---|---|---|
| 00% | 0 | 0-0 | 0 | -0 | |
| |||||
Up (Grabbing)

| Damage | Startup | Active Frames | Total Frames | Safety | |
|---|---|---|---|---|---|
| 00% | 0 | 0-0 | 0 | -0 | |
| |||||
Forward (Grabbing)

| Damage | Startup | Active Frames | Total Frames | Safety | |
|---|---|---|---|---|---|
| 00% | 0 | 0-0 | 0 | -0 | |
| |||||
Down (Grabbing)

| Damage | Startup | Active Frames | Total Frames | Safety | |
|---|---|---|---|---|---|
| 00% | 0 | 0-0 | 0 | -0 | |
| |||||
Back (Grabbing)

| Damage | Startup | Active Frames | Total Frames | Safety | |
|---|---|---|---|---|---|
| 00% | 0 | 0-0 | 0 | -0 | |
| |||||
Super
Slime+Light

| Damage | Startup | Active Frames | Total Frames | Safety | |
|---|---|---|---|---|---|
| 00% | 0 | 0-0 | 0 | -0 | |
| |||||
Taunts
Taunt

| Damage | Startup | Active Frames | Total Frames | Safety | |
|---|---|---|---|---|---|
| 00% | 0 | 0-0 | 0 | -0 | |
| |||||
Down+Taunt

| Damage | Startup | Active Frames | Total Frames | Safety | |
|---|---|---|---|---|---|
| 00% | 0 | 0-0 | 0 | -0 | |
| |||||
Up+Taunt

| Damage | Startup | Active Frames | Total Frames | Safety | |
|---|---|---|---|---|---|
| 00% | 0 | 0-0 | 0 | -0 | |
| |||||
Strategy
- PLACEHOLDER
- PLACEHOLDER
- PLACEHOLDER
Techniques
- PLACEHOLDER
- PLACEHOLDER
- PLACEHOLDER
Combos
- PLACEHOLDER
- PLACEHOLDER
- PLACEHOLDER
Matchups
| +2 | |
| +1 | |
| 0 | |
| 1 | |
| 2 |
Other Resources
- PLACEHOLDER
- PLACEHOLDER
- PLACEHOLDER
Videos
PLACEHOLDER
Costumes
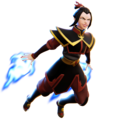
Azula's Default Outfit.
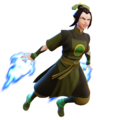
Azula wearing her Ba Sing Se outfit from the episode "The Crossroads of Destiny".
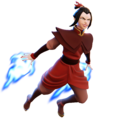
Azula's normal clothing seen throughout Book 2: Earth.
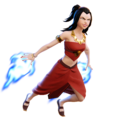
Azula's beach house party attire from the episode "The Beach" (Unlocked by having the Ultimate edition of NASB 2).
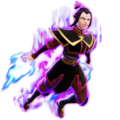
Mind controlled Azula (unlocked by defeating Azula twice in campaign mode).
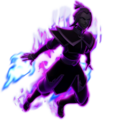
Mind controlled Azula (unlocked by defeating Azula thrice in campaign mode).


