No edit summary |
(Metagame) |
||
| (47 intermediate revisions by 6 users not shown) | |||
| Line 1: | Line 1: | ||
{{NickBrawl2 Character Intro|char=Jimmy |full=Jimmy Neutron|short=Jimmy | {{NickBrawl2 Character Intro|char=Jimmy |full=[[File:NASB2_JimmyStock.png|x30px]] Jimmy Neutron|short=Jimmy | ||
| franchise = Jimmy Neutron: Boy Genius | | franchise = Jimmy Neutron: Boy Genius | ||
| homestage = | | homestage = Jimmy's Lab | ||
| weight = | | weight = 0.83 | ||
| fallspeed = | | fallspeed = 1.2 | ||
| gravity = | | gravity = 1 | ||
| runspeed = | | runspeed = 0.95 | ||
| airspeed = | | airspeed = 1.25 | ||
| placeholderone = | | placeholderone = | ||
| placeholdertwo = | | placeholdertwo = | ||
| placeholderthree = | | placeholderthree = | ||
| charactercord = | | charactercord = | ||
| Line 18: | Line 18: | ||
== About == | == About == | ||
The boy genius with a large arsenal of inventions. | |||
== Playstyle == | |||
Jimmy is one of the best setup characters in the game, with his wide arsenal of projectiles and long-ranged options. He also has access to Goddard, his loyal robot dog companion, who can control the stage and pace of the match. Jimmy is overall a midrange powerhouse with a tool for pretty much any situation. | |||
If you like being creative with how you play and controlling a wide range of the stage, Jimmy is exceptional! | |||
== Metagame == | |||
Jimmy is ranked 4th out of 29 on the current [[Nickelodeon All-Star Brawl 2/FAQ|tier list]], in the S tier. | |||
Jimmy's biggest strength is his creativity in his toolkit. All of his tools flow into eachother rather nicely, and a very creative Jimmy can solve just about any situation with the versatility provided by his kit. Jimmy is also gifted with a very high jump and his hovercar Up Special, making recovery rather simple for him. Coupled with his strong projectiles, Jimmy excels at playing keepaway. Of all of his strengths, however, Goddard is by far his best, allowing for stage control, mixups, and even ping-pong combos between Jimmy and Goddard. | |||
Despite his strengths, Jimmy is not without some flaws. Notably, he struggles to fend off rushdown characters due to a poor out-of-shield game and not having many answers when the opponent escapes midrange. Jimmy also requires some time to set up his most powerful attacks, which means he might struggle if the opponent gets in on him too early. | |||
Overall though, Jimmy's strengths largely outweigh his weaknesses. While he is a very technical character to pick up and play, he has received very strong representation throughout all of competitive play. | |||
|content2= | |content2= | ||
| Line 29: | Line 42: | ||
}} | }} | ||
}} | }} | ||
---- | ---- | ||
{{ProConTable | {{ProConTable | ||
|pros= | |pros= | ||
* ''' | * '''Goddard:''' Jimmy's loyal dog allows for a high level of stage control and edgeguarding that most other characters cannot compare to. | ||
* ''' | * '''High Jump:''' Jimmy's high, floaty jump allows him to escape risky situations quickly. | ||
* ''' | * '''Rocket''': Jimmy's rocket Neutral Special is excellent for zoning and ledgetrapping. | ||
* ''' | * '''Speed:''' Jimmy is fairly quick on the ground and in the air. This allows him to be a tricky character to catch. | ||
* '''Ranged options:''' Jimmy has excellent spacing tools to stay out of reach of opponents. | |||
* '''Survivability:''' Jimmy survives for a surprisingly long time most matches due to his recovery tools and his various projectiles. | |||
|cons= | |cons= | ||
* ''' | * '''Exploitable recovery:''' While Jimmy's recovery is fantastic, if not mixed up it is rather exploitable, since he doesnt have much space to go but up. | ||
* ''' | * '''Rushdown characters:''' Jimmy has a tough time with characters who can get in his face and outspeed him. | ||
* ''' | * '''Setups require timing:''' Jimmy has to plan ahead for his setups to succeed. You might need to set yourself aside a lot of space on stage to get Goddard set up at times, which is costly. | ||
* ''' | * '''Poor OOS:''' In tandem with his rushdown problem, Jimmy doesn't have great options out of shield. | ||
}} | }} | ||
---- | ---- | ||
== Moveset == | == Moveset == | ||
| Line 60: | Line 71: | ||
{{MoveData | {{MoveData | ||
|image= | |image= NASB2_Jimmy_LightNeutral-SecretWatchLaser.png | ||
|caption= | |caption= "Can I please take my watch off? It's not water proof" | ||
|name= | |name= Secret Watch Laser | ||
|input= | |input= Light | ||
|data= | |||
{{AttackData-NickBrawl2 | |||
|Damage=3% (hand) 1% (laser) | |||
|Startup=8 | |||
|Active=0-0 | |||
|Total Frames=0 | |||
|Safety=-0 | |||
|description= | |||
* Jimmy presses a button on his watch shooting out a laser, this move has a hitbox on Jimmy's hand and on the lasers it shoots. | |||
* Once activated, Jimmy can walk forward or back by continuing to hold the light attack button and inputting left or right. | |||
* This move can be jump canceled, so a pseudo-waveshine is possible with it. Try to wavejab into grab! | |||
}} | |||
}}<br> | |||
{{MoveData | |||
|image= NASB2_Jimmy_LightForward-BackpackStretch-ArmLowPunchMode.png | |||
|caption= | |||
|name= Backpack Stretch-Arm Low Punch Mode | |||
|input= Forward+Light | |||
|data= | |||
{{AttackData-NickBrawl2 | |||
|Damage=9% (arm) 11% (fist) | |||
|Startup=10 | |||
|Active=10-13 | |||
|Total Frames=31 | |||
|Safety=-15 / -11 / -9 | |||
|description= | |||
* Jimmy leans over and a long mechanical arm stretches from his backpack. | |||
* The move has a sweetspot on the fist and a sourspot on the arm. | |||
* This move is very good for keeping opponents away. Also try to get the sweetspot, as the killpower is very nice. | |||
}} | |||
}}<br> | |||
{{MoveData | |||
|image= NASB2_Jimmy_LightUp-JarOfUnstableMolecules.png | |||
|caption= "Unstable molecules are highly... unstable!" | |||
|name= Jar of Unstable Molecules | |||
|input= Up+Light | |||
|data= | |||
{{AttackData-NickBrawl2 | |||
|Damage=8% | |||
|Startup=10 | |||
|Active=10-22 | |||
|Total Frames=40 | |||
|Safety=-0 | |||
|description= | |||
* Jimmy takes the lid off a jar of molecules and they rise into the air. | |||
* This move can juggle opponents and can allow Jimmy to jump up and use one of his charge aerials to secure a stock. | |||
}} | |||
}}<br> | |||
{{MoveData | |||
|image= NASB2_Jimmy_LightDown-Solution976J.png | |||
|caption= "That's odd... in the show 976/J was a love potion" | |||
|name= Solution 976/J | |||
|input= Down+Light | |||
|data= | |||
{{AttackData-NickBrawl2 | |||
|Damage=6% | |||
|Startup=8 | |||
|Active=8-12 | |||
|Total Frames=30 | |||
|Safety=-12 | |||
|description= | |||
* Jimmy spills some chemical on the ground from a test tube in his backpack. | |||
* This move is very good for popping opponents into the air, where Jimmy can then secure a stock with one of his charged aerials. | |||
}} | |||
}}<br> | |||
{{MoveData | |||
|image= NASB2_Jimmy_DashAttack-Neutro-GunkPoweredSneakers.png | |||
|caption= "A propulsive yet frictionless environment around my sneakers" | |||
|name= Neutro-gunk Powered Sneakers | |||
|input= Light (Running) | |||
|data= | |||
{{AttackData-NickBrawl2 | |||
|Damage=8% | |||
|Startup=8 | |||
|Active=8-18 | |||
|Total Frames=46 | |||
|Safety=-20 to -9 | |||
|description= | |||
* Jimmy dashes forward with a neat effect, running almost head first. | |||
* This move is ok. It can be a decent burst option to knock an opponent offstage, but it shouldn't be relied on. | |||
}} | |||
}}<br> | |||
=== Air Light Attacks === | |||
{{MoveData | |||
|image= NASB2_Jimmy_LightNeutralAir-AerialWatchLaser.png | |||
|caption= | |||
|name= Aerial Watch Laser | |||
|input= Light (Airborne) | |||
|data= | |||
{{AttackData-NickBrawl2 | |||
|Damage=00% | |||
|Startup=0 | |||
|Active=0-0 | |||
|Total Frames=0 | |||
|Safety=-0 | |||
|description= | |||
* Jimmy shoots out some lasers horizontally from his wrist watch. | |||
* This move is fantastic at taking space and approaching because the lasers can destroy projectiles and the hand hitbox can send opponents away. | |||
}} | |||
}}<br> | |||
{{MoveData | |||
|image= NASB2_Jimmy_LightForwardAir-LaserSwordHorizontalStrike.png | |||
|caption= "My power siphoning sword is charged and ready for battle" | |||
|name= Laser Sword Horizontal Strike | |||
|input= Forward+Light (Airborne) | |||
|data= | |||
{{AttackData-NickBrawl2 | |||
|Damage=00% | |||
|Startup=0 | |||
|Active=0-0 | |||
|Total Frames=0 | |||
|Safety=-0 | |||
|description= | |||
* Jimmy slashes his laser sword at a slightly upward angle | |||
* This move is great at starting combos and taking space in neutral, on hit try to follow up with another forward air or maybe a strong nair! | |||
}} | |||
}}<br> | |||
{{MoveData | |||
|image= NASB2_Jimmy_LightBackAir-LaserSwordBackwardsStrike.png | |||
|caption= "The power source is mine, Neutron" | |||
|name= Laser Sword Backwards Strike | |||
|input= Back+Light (Airborne) | |||
|data= | |||
{{AttackData-NickBrawl2 | |||
|Damage=00% | |||
|Startup=0 | |||
|Active=0-0 | |||
|Total Frames=0 | |||
|Safety=-0 | |||
|description= | |||
* Jimmy slashes his laser sword behind him, similarly to the forward aerial. | |||
* While not as good as the forward version, this aerial is still good at killing, but follow-ups are much more rare. | |||
}} | |||
}}<br> | |||
{{MoveData | |||
|image= NASB2_Jimmy_LightUpAir-BouncyKick.png | |||
|caption= "I'll have to cut the testing phase short" | |||
|name= Bouncy Kick | |||
|input= Up+Light (Airborne) | |||
|data= | |||
{{AttackData-NickBrawl2 | |||
|Damage=00% | |||
|Startup=0 | |||
|Active=0-0 | |||
|Total Frames=0 | |||
|Safety=-0 | |||
|description= | |||
* Jimmy kicks upwards with one of his bouncy shoes extending out. | |||
* This is Jimmy's main juggle tool and a fantastic poke on opponents standing on platforms. | |||
}} | |||
}}<br> | |||
{{MoveData | |||
|image= NASB2_Jimmy_LightDownAir-BouncyShoes.png | |||
|caption= "Sheen, power up bouncy shoes" | |||
|name= Bouncy Shoes | |||
|input= Down+Light (Airborne) | |||
|data= | |||
{{AttackData-NickBrawl2 | |||
|Damage=00% | |||
|Startup=0 | |||
|Active=0-0 | |||
|Total Frames=0 | |||
|Safety=-0 | |||
|description= | |||
* Jimmy stomps downwards with his extending bouncy shoes, if he is successful at hitting an opponent he will get a slight bounce upwards. | |||
* This move may be slow but it is really strong, you can even follow it into itself at certain percents. | |||
}} | |||
}}<br> | |||
=== Ground Strong Attacks === | |||
{{MoveData | |||
|image= NASB2_Jimmy_ChargeForward-HydraulicForce-AmplifyingBat.png | |||
|caption= "Play Ball" | |||
|name= Hydraulic Force-Amplifying Bat | |||
|input= Strong | |||
|data= | |data= | ||
{{AttackData-NickBrawl2 | {{AttackData-NickBrawl2 | ||
| Line 72: | Line 271: | ||
|Safety=-0 | |Safety=-0 | ||
|description= | |description= | ||
* | * Jimmy swings his force amplifying bat while sliding forward a little bit. | ||
* | * This move may be slow, but the kill power is pretty good and the shield pushback is also great. | ||
}} | }} | ||
}}<br> | }}<br> | ||
{{MoveData | {{MoveData | ||
|image= | |image= NASB2_Jimmy_ChargeUp-Girl-EatingPlant.png | ||
|caption= | |caption= "And you think it only attack the female fighters" | ||
|name= | |name= Girl-Eating Plant | ||
|input= | |input= Up+Strong | ||
|data= | |||
{{AttackData-NickBrawl2 | |||
|Damage=00% | |||
|Startup=0 | |||
|Active=0-0 | |||
|Total Frames=0 | |||
|Safety=-0 | |||
|description= | |||
* Jimmy takes out a Girl-Eating Plant and it chomps upwards. | |||
* This move has a scoop hitbox and then a hitbox on the plants mouth, this move is a nice kill option but very niche. Try comboing one of Goddard's options into it! | |||
}} | |||
}}<br> | |||
{{MoveData | |||
|image= NASB2_Jimmy_ChargeDown-QuickFreezingNitrideSolution.png | |||
|caption= "Dean Cain, look out!" | |||
|name= Quick Freezing Nitride Solution | |||
|input= Down+Strong | |||
|data= | |data= | ||
{{AttackData-NickBrawl2 | {{AttackData-NickBrawl2 | ||
| Line 90: | Line 307: | ||
|Safety=-0 | |Safety=-0 | ||
|description= | |description= | ||
* | * Jimmy throws a quick freezing nitride solution onto the ground, spawning 3 icey spikes one after the other. | ||
* | * This move is good at taking space and can put pressure on an opponents shield, the kill power is decent as well. | ||
}} | }} | ||
}}<br> | }}<br> | ||
=== Air Strong Attacks === | |||
{{MoveData | {{MoveData | ||
|image= | |image= NASB2_Jimmy_ChargeForwardAir-All-PurposeToaster.png | ||
|caption= | |caption= "Hey... The new XK-41. Dad! Throw me your toaster!" | ||
|name= | |name= All-Purpose Toaster | ||
|input= | |input= Strong (Airborne) | ||
|data= | |data= | ||
{{AttackData-NickBrawl2 | {{AttackData-NickBrawl2 | ||
| Line 108: | Line 328: | ||
|Safety=-0 | |Safety=-0 | ||
|description= | |description= | ||
* | * Jimmy takes out a modified version Hugh's XK-41 toaster and launches a piece of toast forwards. | ||
* | * This move has a hitbox on the toaster itself, which is very good at killing. | ||
* The toast can combo into itself and also apply a burning effect. | |||
}} | |||
}}<br> | |||
{{MoveData | |||
|image= NASB2_Jimmy_ChargeUpAir-BackpackStretch-Arm-UppercutMode.png | |||
|caption= | |||
|name= Backpack Stretch-Arm Uppercut Mode | |||
|input= Up+Strong (Airborne) | |||
|data= | |||
{{AttackData-NickBrawl2 | |||
|Damage=00% | |||
|Startup=0 | |||
|Active=0-0 | |||
|Total Frames=0 | |||
|Safety=-0 | |||
|description= | |||
* Jimmy's robotic stretch-arm emerges out of his backpack to deliver a devastating punch upwards. | |||
* This move is one of Jimmy's main kill options. | |||
* This move also contains a sweet and sour spot. Both are good at killing, but the sweet spot is much better of course. | |||
}} | }} | ||
}}<br> | }}<br> | ||
{{MoveData | {{MoveData | ||
|image= | |image= NASB2_Jimmy_ChargeDownAir-SuperBubblegum-Mobile.png | ||
|caption= | |caption= "No Jimmy, don't try it! It's too soon!" | ||
|name= | |name= Super Bubblegum-Mobile | ||
|input= | |input= Down+Strong (Airborne) | ||
|data= | |data= | ||
{{AttackData-NickBrawl2 | {{AttackData-NickBrawl2 | ||
| Line 126: | Line 366: | ||
|Safety=-0 | |Safety=-0 | ||
|description= | |description= | ||
* | * Jimmy blows out a super bubblegum mobile around him and plummets down. When Jimmy hits the stage he will bounce. | ||
* | * This move has a hurtbox on the bubble itself which Jimmy can be hurt by if the opponent hits it, so be careful! | ||
* This move also has the ability to be cancelled by any move after a certain period of time. | |||
}} | }} | ||
}}<br> | }}<br> | ||
=== Special Attacks === | |||
{{MoveData | |||
|image= NASB2_Jimmy_SpecialNeutral-IntelligentPurpleFlurpRocketLaunchingModule3000.png | |||
|caption= "That's a very nice little thing you've... invented" | |||
|name= Intelligent Purple Flurp Rocket Launching Module 3000 | |||
|input= Special | |||
|data= | |||
{{AttackData-NickBrawl2 | |||
|Damage=00% | |||
|Startup=0 | |||
|Active=0-0 | |||
|Total Frames=0 | |||
|Safety=-0 | |||
|description= | |||
* Jimmy fires up a rocket that can be programmed by holding the Special button. | |||
* EX: Jimmy's rocket moves faster and is larger. | |||
* This move can be programmed by holding the special button and then inputting the direction you want the rocket to go. | |||
* The game will remember a series of inputs you give it and the rocket will follow the preprogrammed path, so be creative! | |||
* The rocket can also be reprogrammed mid flight, give it a try! | |||
}} | |||
}}<br> | |||
=== | {{MoveData | ||
|image= NASB2_Jimmy_SpecialForward-ReverseAcoustivac.png | |||
|caption= "Only used for the Funky Jam Dance Party (with Some Science)" | |||
|name= Reverse Acoustivac | |||
|input= Forward+Special | |||
|data= | |||
{{AttackData-NickBrawl2 | |||
|Damage=00% | |||
|Startup=0 | |||
|Active=0-0 | |||
|Total Frames=0 | |||
|Safety=-0 | |||
|description= | |||
* Jimmy charges up a sound wave attack that propels him in the opposite direction he's facing. | |||
* EX: Jimmy shoots out a fully charged sound wave, regardless of the move's charge level prior. | |||
* This move is a windbox. | |||
* This move is good for disrupting your opponent's recovery and preventing them from snapping the ledge. | |||
}} | |||
}}<br> | |||
{{MoveData | |||
|image= NASB2_Jimmy_SpecialDown-Goddard.png | |||
|caption= "A mechanical canine" | |||
|name= Goddard | |||
|input= Down+Special | |||
|data= | |||
{{AttackData-NickBrawl2 | |||
|Damage=00% | |||
|Startup=0 | |||
|Active=0-0 | |||
|Total Frames=0 | |||
|Safety=-0 | |||
|description= | |||
* Jimmy sends out Godard to attack the opponent. | |||
* Press the Special Down button again to take control of Goddard and attack in different ways. | |||
* As Goddard, press the Special Button again to return to Jimmy. | |||
* EX: Goddard has more health. | |||
}} | |||
}}<br> | |||
{{MoveData | {{MoveData | ||
|image= | |image= NASB2_Jimmy_SpecialUp-HoverCar.png | ||
|caption= | |caption= "Thank goodness it's engorged with gas" | ||
|name= | |name= Hover Car | ||
|input= | |input= Up+Special | ||
|data= | |data= | ||
{{AttackData-NickBrawl2 | {{AttackData-NickBrawl2 | ||
| Line 148: | Line 449: | ||
|Safety=-0 | |Safety=-0 | ||
|description= | |description= | ||
* | * Jimmy uses his hovercar to rise upwards in the air. | ||
* | * EX: Jimmy moves faster which allows him to cover more space. | ||
}} | }} | ||
}}<br> | }}<br> | ||
=== Grab/Throws === | |||
{{MoveData | {{MoveData | ||
|image= | |image= NASB2_Jimmy_Grab.png | ||
|caption= | |caption= "Better use my Tractor Beam Ray." | ||
|name= | |name= Grab | ||
|input= | |input= Grab | ||
|data= | |data= | ||
{{AttackData-NickBrawl2 | {{AttackData-NickBrawl2 | ||
| Line 172: | Line 476: | ||
{{MoveData | {{MoveData | ||
|image= | |image= NASB2_Jimmy_DashGrab.png | ||
|caption= | |caption= | ||
|name= | |name= Dash Grab | ||
|input= | |input= Grab (Running) | ||
|data= | |data= | ||
{{AttackData-NickBrawl2 | {{AttackData-NickBrawl2 | ||
| Line 190: | Line 494: | ||
{{MoveData | {{MoveData | ||
|image= | |image= NASB2_Jimmy_Pummel.png | ||
|caption= | |caption= | ||
|name= | |name= Grab Pummel | ||
|input= | |input= Light (Grabbing) | ||
|data= | |data= | ||
{{AttackData-NickBrawl2 | {{AttackData-NickBrawl2 | ||
| Line 208: | Line 512: | ||
{{MoveData | {{MoveData | ||
|image= | |image= NASB2_Jimmy_UpThrow.png | ||
|caption= | |caption= | ||
|name= | |name= Up Throw | ||
|input= | |input= Up (Grabbing) | ||
|data= | |data= | ||
{{AttackData-NickBrawl2 | {{AttackData-NickBrawl2 | ||
| Line 224: | Line 528: | ||
}} | }} | ||
}}<br> | }}<br> | ||
{{MoveData | {{MoveData | ||
|image= | |image= NASB2_Jimmy_ForwardThrow.png | ||
|caption= | |caption= | ||
|name= | |name= Forward Throw | ||
|input= | |input= Forward (Grabbing) | ||
|data= | |data= | ||
{{AttackData-NickBrawl2 | {{AttackData-NickBrawl2 | ||
| Line 248: | Line 548: | ||
{{MoveData | {{MoveData | ||
|image= | |image= NASB2_Jimmy_DownThrow.png | ||
|caption= | |caption= | ||
|name= | |name= Down Throw | ||
|input= | |input= Down (Grabbing) | ||
|data= | |data= | ||
{{AttackData-NickBrawl2 | {{AttackData-NickBrawl2 | ||
| Line 264: | Line 564: | ||
}} | }} | ||
}}<br> | }}<br> | ||
{{MoveData | {{MoveData | ||
|image= | |image= NASB2_Jimmy_BackThrow.png | ||
|caption= | |caption= | ||
|name= | |name= Back Throw | ||
|input= | |input= Back (Grabbing) | ||
|data= | |data= | ||
{{AttackData-NickBrawl2 | {{AttackData-NickBrawl2 | ||
| Line 284: | Line 584: | ||
=== | === Goddard === | ||
{{MoveData | {{MoveData | ||
|image= | |image= NASB2_Jimmy_Goddard_Neutral_Attack.png | ||
|caption= | |caption= | ||
|name= | |name= Neutral Chomp | ||
|input= | |input= Light | ||
|data= | |data= | ||
{{AttackData-NickBrawl2 | {{AttackData-NickBrawl2 | ||
| Line 304: | Line 604: | ||
}} | }} | ||
}}<br> | }}<br> | ||
{{MoveData | {{MoveData | ||
|image= | |image= NASB2_Jimmy_Goddard_Forward_Attack.png | ||
|caption= | |caption= | ||
|name= | |name= Forwards Chomp | ||
|input= | |input= Forward+Light | ||
|data= | |data= | ||
{{AttackData-NickBrawl2 | {{AttackData-NickBrawl2 | ||
| Line 324: | Line 624: | ||
{{MoveData | {{MoveData | ||
|image= | |image= NASB2_Jimmy_Goddard_Up_Attack.png | ||
|caption= | |caption= | ||
|name= | |name= Upwards Chomp | ||
|input= | |input= Up+Light | ||
|data= | |data= | ||
{{AttackData-NickBrawl2 | {{AttackData-NickBrawl2 | ||
| Line 340: | Line 640: | ||
}} | }} | ||
}}<br> | }}<br> | ||
{{MoveData | {{MoveData | ||
|image= | |image= NASB2_Jimmy_Goddard_Down_Air.png | ||
|caption= | |caption= | ||
|name= | |name= Falling Spike | ||
|input= | |input= Down+Light | ||
|data= | |data= | ||
{{AttackData-NickBrawl2 | {{AttackData-NickBrawl2 | ||
| Line 364: | Line 660: | ||
{{MoveData | {{MoveData | ||
|image= | |image= NASB2_Jimmy_Goddard_Up_Charge_Attack.png | ||
|caption= | |caption= | ||
|name= | |name= Upwards Laser | ||
|input= | |input= Up+Strong | ||
|data= | |data= | ||
{{AttackData-NickBrawl2 | {{AttackData-NickBrawl2 | ||
| Line 382: | Line 678: | ||
{{MoveData | {{MoveData | ||
|image= | |image= NASB2_Jimmy_Goddard_Down_Charge_Attack.png | ||
|caption= | |caption= | ||
|name= | |name= Downwards Laser | ||
|input= | |input= Down+Strong | ||
|data= | |data= | ||
{{AttackData-NickBrawl2 | {{AttackData-NickBrawl2 | ||
| Line 400: | Line 696: | ||
{{MoveData | {{MoveData | ||
|image= | |image= NASB2 Jimmy Goddard Taunt Attack.png | ||
|caption= | |caption= "I'll make that bug a feature!" | ||
|name= | |name= Goddard Taunt | ||
|input= | |input= Taunt | ||
|data= | |data= | ||
{{AttackData-NickBrawl2 | {{AttackData-NickBrawl2 | ||
| Line 422: | Line 718: | ||
{{MoveData | {{MoveData | ||
|image= | |image= NASB2_Jimmy_Super.png | ||
|caption= | |caption= "Gotta blast!" | ||
|name= | |name= Super | ||
|input= | |input= Slime+Light | ||
|data= | |data= | ||
{{AttackData-NickBrawl2 | {{AttackData-NickBrawl2 | ||
| Line 440: | Line 736: | ||
=== | === Taunts === | ||
{{MoveData | {{MoveData | ||
|image= | |image= NASB2_Jimmy_TauntNeutral.png | ||
|caption= | |caption= "Hey!" | ||
|name= | |name= Taunt | ||
|input= | |input= Taunt | ||
|data= | |data= | ||
{{AttackData-NickBrawl2 | {{AttackData-NickBrawl2 | ||
| Line 461: | Line 757: | ||
}}<br> | }}<br> | ||
{{MoveData | |||
|image= NASB2_Jimmy_TauntDown.png | |||
|caption= "Actually dude, it's salt" | |||
|name= Down Taunt | |||
|input= Down+Taunt | |||
|data= | |||
{{AttackData-NickBrawl2 | |||
|Damage=00% | |||
|Startup=0 | |||
|Active=0-0 | |||
|Total Frames=0 | |||
|Safety=-0 | |||
|description= | |||
* DESCRIPTION PLACEHOLDER | |||
* DESCRIPTION PLACEHOLDER | |||
}} | |||
}}<br> | |||
{{MoveData | |||
|image= NASB2_Jimmy_TauntUp.png | |||
|caption= "I'm Loopy! I'm Loopy!" | |||
|name= Up Taunt | |||
|input= Up+Taunt | |||
|data= | |||
{{AttackData-NickBrawl2 | |||
|Damage=00% | |||
|Startup=0 | |||
|Active=0-0 | |||
|Total Frames=0 | |||
|Safety=-0 | |||
|description= | |||
* DESCRIPTION PLACEHOLDER | |||
* DESCRIPTION PLACEHOLDER | |||
}} | |||
}}<br> | |||
---- | ---- | ||
== | == Strategy == | ||
* PLACEHOLDER | * PLACEHOLDER | ||
| Line 475: | Line 806: | ||
== | == Techniques == | ||
* PLACEHOLDER | * PLACEHOLDER | ||
| Line 503: | Line 816: | ||
== | == Combos == | ||
* PLACEHOLDER | * PLACEHOLDER | ||
| Line 509: | Line 822: | ||
* PLACEHOLDER | * PLACEHOLDER | ||
---- | |||
== Matchups == | |||
{| class="wikitable" | |||
|- | |||
| '''+2''' || | |||
|- | |||
| '''+1''' || | |||
|- | |||
| '''0''' || [[File:NASB2_Sponge_Icon.png|x80px]] [[File:NASB2_Patrick_Icon.png|x80px]] [[File:NASB2_Squidward_Icon.png|x80px]] [[File:NASB2_Plankton_Icon.png|x80px]] [[File:NASB2_ElTigre_Icon.png|x80px]] [[File:NASB2_Rocko_Icon.png|x80px]] [[File:NASB2_Jimmy_Icon.png|x80px]] [[File:NASB2_Lucy_Icon.png|x80px]] [[File:NASB2_Beavers-Daggett_Icon.png|x80px]] [[File:NASB2_Beavers-Norbert_Icon.png|x80px]] [[File:NASB2_Garfield_Icon.png|x80px]] [[File:NASB2_Aang_Icon.png|x80px]] [[File:NASB2_Korra_Icon.png|x80px]] [[File:NASB2_Azula_Icon.png|x80px]] [[File:NASB2_Raphael_Icon.png|x80px]] [[File:NASB2_Donatello_Icon.png|x80px]] [[File:NASB2_April_Icon.png|x80px]] [[File:NASB2_Danny_Icon.png|x80px]] [[File:NASB2_Ember_Icon.png|x80px]] [[File:NASB2_Gertie_Icon.png|x80px]] [[File:NASB2_Gerald_Icon.png|x80px]] [[File:NASB2_Nigel_Icon.png|x80px]] [[File:NASB2_Zim_Icon.png|x80px]] [[File:NASB2_Jenny_Icon.png|x80px]] [[File:NASB2_Reptar_Icon.png|x80px]] [[File:NASB2_RenStimpy_Icon.png|x80px]] [[File:NASB2_Krabs_Icon.png|x80px]] [[File:NASB2_Zuko_Icon.png|x80px]] [[File:NASB2_Rocksteady_Icon.png|x80px]] | |||
|- | |||
| '''1''' || | |||
|- | |||
| '''2''' || | |||
|} | |||
---- | ---- | ||
| Line 518: | Line 847: | ||
* PLACEHOLDER | * PLACEHOLDER | ||
* PLACEHOLDER | * PLACEHOLDER | ||
=== Videos === | |||
PLACEHOLDER | |||
| Line 524: | Line 856: | ||
== Costumes == | == Costumes == | ||
<gallery> | |||
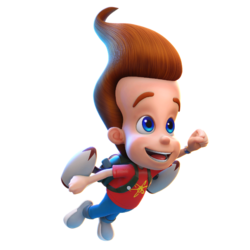
NASB2 Jimmy Costume00.png|Jimmy Neutron's default outfit. | |||
NASB2 Jimmy Costume01.png|Heli-Pack Jimmy based on the Mattel figure of the same name. | |||
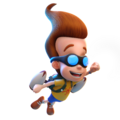
NASB2 Jimmy Costume02.png|Jimmy in a karate gear from the video game ''The Adventures of Jimmy Neutron: Boy Genius: Jet Fusion''. | |||
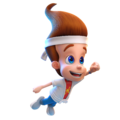
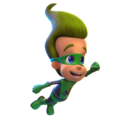
NASB2 Jimmy Costume03.png|Jimmy in his N-Men superhero outfit from the episode of the same name. | |||
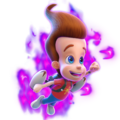
NASB2 Jimmy Costume04.png|Mind controlled Jimmy Neutron (unlocked by defeating Jimmy twice in campaign mode). | |||
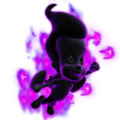
NASB2 Jimmy Costume05.png|Jimmy Neutron's Ghost Clone (unlocked by defeating Jimmy thrice in campaign mode). | |||
</gallery> | |||
{{Navbox-NickBrawl2}} | {{Navbox-NickBrawl2}} | ||
[[Category:Nickelodeon All-Star Brawl 2]] | [[Category:Nickelodeon All-Star Brawl 2]] | ||
Latest revision as of 20:04, 21 February 2025
About
The boy genius with a large arsenal of inventions.
Playstyle
Jimmy is one of the best setup characters in the game, with his wide arsenal of projectiles and long-ranged options. He also has access to Goddard, his loyal robot dog companion, who can control the stage and pace of the match. Jimmy is overall a midrange powerhouse with a tool for pretty much any situation.
If you like being creative with how you play and controlling a wide range of the stage, Jimmy is exceptional!
Metagame
Jimmy is ranked 4th out of 29 on the current tier list, in the S tier.
Jimmy's biggest strength is his creativity in his toolkit. All of his tools flow into eachother rather nicely, and a very creative Jimmy can solve just about any situation with the versatility provided by his kit. Jimmy is also gifted with a very high jump and his hovercar Up Special, making recovery rather simple for him. Coupled with his strong projectiles, Jimmy excels at playing keepaway. Of all of his strengths, however, Goddard is by far his best, allowing for stage control, mixups, and even ping-pong combos between Jimmy and Goddard.
Despite his strengths, Jimmy is not without some flaws. Notably, he struggles to fend off rushdown characters due to a poor out-of-shield game and not having many answers when the opponent escapes midrange. Jimmy also requires some time to set up his most powerful attacks, which means he might struggle if the opponent gets in on him too early.
Overall though, Jimmy's strengths largely outweigh his weaknesses. While he is a very technical character to pick up and play, he has received very strong representation throughout all of competitive play.
| Strengths | Weaknesses |
|---|---|
|
|
Moveset
Ground Light Attacks
| Damage | Startup | Active Frames | Total Frames | Safety | |
|---|---|---|---|---|---|
| 3% (hand) 1% (laser) | 8 | 0-0 | 0 | -0 | |
| |||||
| Damage | Startup | Active Frames | Total Frames | Safety | |
|---|---|---|---|---|---|
| 9% (arm) 11% (fist) | 10 | 10-13 | 31 | -15 / -11 / -9 | |
| |||||
| Damage | Startup | Active Frames | Total Frames | Safety | |
|---|---|---|---|---|---|
| 8% | 10 | 10-22 | 40 | -0 | |
| |||||
| Damage | Startup | Active Frames | Total Frames | Safety | |
|---|---|---|---|---|---|
| 6% | 8 | 8-12 | 30 | -12 | |
| |||||
| Damage | Startup | Active Frames | Total Frames | Safety | |
|---|---|---|---|---|---|
| 8% | 8 | 8-18 | 46 | -20 to -9 | |
| |||||
Air Light Attacks
| Damage | Startup | Active Frames | Total Frames | Safety | |
|---|---|---|---|---|---|
| 00% | 0 | 0-0 | 0 | -0 | |
| |||||
| Damage | Startup | Active Frames | Total Frames | Safety | |
|---|---|---|---|---|---|
| 00% | 0 | 0-0 | 0 | -0 | |
| |||||
| Damage | Startup | Active Frames | Total Frames | Safety | |
|---|---|---|---|---|---|
| 00% | 0 | 0-0 | 0 | -0 | |
| |||||
| Damage | Startup | Active Frames | Total Frames | Safety | |
|---|---|---|---|---|---|
| 00% | 0 | 0-0 | 0 | -0 | |
| |||||
| Damage | Startup | Active Frames | Total Frames | Safety | |
|---|---|---|---|---|---|
| 00% | 0 | 0-0 | 0 | -0 | |
| |||||
Ground Strong Attacks
| Damage | Startup | Active Frames | Total Frames | Safety | |
|---|---|---|---|---|---|
| 00% | 0 | 0-0 | 0 | -0 | |
| |||||
| Damage | Startup | Active Frames | Total Frames | Safety | |
|---|---|---|---|---|---|
| 00% | 0 | 0-0 | 0 | -0 | |
| |||||
| Damage | Startup | Active Frames | Total Frames | Safety | |
|---|---|---|---|---|---|
| 00% | 0 | 0-0 | 0 | -0 | |
| |||||
Air Strong Attacks
| Damage | Startup | Active Frames | Total Frames | Safety | |
|---|---|---|---|---|---|
| 00% | 0 | 0-0 | 0 | -0 | |
| |||||
| Damage | Startup | Active Frames | Total Frames | Safety | |
|---|---|---|---|---|---|
| 00% | 0 | 0-0 | 0 | -0 | |
| |||||
| Damage | Startup | Active Frames | Total Frames | Safety | |
|---|---|---|---|---|---|
| 00% | 0 | 0-0 | 0 | -0 | |
| |||||
Special Attacks
| Damage | Startup | Active Frames | Total Frames | Safety | |
|---|---|---|---|---|---|
| 00% | 0 | 0-0 | 0 | -0 | |
| |||||
| Damage | Startup | Active Frames | Total Frames | Safety | |
|---|---|---|---|---|---|
| 00% | 0 | 0-0 | 0 | -0 | |
| |||||
| Damage | Startup | Active Frames | Total Frames | Safety | |
|---|---|---|---|---|---|
| 00% | 0 | 0-0 | 0 | -0 | |
| |||||
| Damage | Startup | Active Frames | Total Frames | Safety | |
|---|---|---|---|---|---|
| 00% | 0 | 0-0 | 0 | -0 | |
| |||||
Grab/Throws
| Damage | Startup | Active Frames | Total Frames | Safety | |
|---|---|---|---|---|---|
| 00% | 0 | 0-0 | 0 | -0 | |
| |||||
| Damage | Startup | Active Frames | Total Frames | Safety | |
|---|---|---|---|---|---|
| 00% | 0 | 0-0 | 0 | -0 | |
| |||||
| Damage | Startup | Active Frames | Total Frames | Safety | |
|---|---|---|---|---|---|
| 00% | 0 | 0-0 | 0 | -0 | |
| |||||
| Damage | Startup | Active Frames | Total Frames | Safety | |
|---|---|---|---|---|---|
| 00% | 0 | 0-0 | 0 | -0 | |
| |||||
| Damage | Startup | Active Frames | Total Frames | Safety | |
|---|---|---|---|---|---|
| 00% | 0 | 0-0 | 0 | -0 | |
| |||||
| Damage | Startup | Active Frames | Total Frames | Safety | |
|---|---|---|---|---|---|
| 00% | 0 | 0-0 | 0 | -0 | |
| |||||
| Damage | Startup | Active Frames | Total Frames | Safety | |
|---|---|---|---|---|---|
| 00% | 0 | 0-0 | 0 | -0 | |
| |||||
Goddard
| Damage | Startup | Active Frames | Total Frames | Safety | |
|---|---|---|---|---|---|
| 00% | 0 | 0-0 | 0 | -0 | |
| |||||
| Damage | Startup | Active Frames | Total Frames | Safety | |
|---|---|---|---|---|---|
| 00% | 0 | 0-0 | 0 | -0 | |
| |||||
| Damage | Startup | Active Frames | Total Frames | Safety | |
|---|---|---|---|---|---|
| 00% | 0 | 0-0 | 0 | -0 | |
| |||||
| Damage | Startup | Active Frames | Total Frames | Safety | |
|---|---|---|---|---|---|
| 00% | 0 | 0-0 | 0 | -0 | |
| |||||
| Damage | Startup | Active Frames | Total Frames | Safety | |
|---|---|---|---|---|---|
| 00% | 0 | 0-0 | 0 | -0 | |
| |||||
| Damage | Startup | Active Frames | Total Frames | Safety | |
|---|---|---|---|---|---|
| 00% | 0 | 0-0 | 0 | -0 | |
| |||||
| Damage | Startup | Active Frames | Total Frames | Safety | |
|---|---|---|---|---|---|
| 00% | 0 | 0-0 | 0 | -0 | |
| |||||
Super
| Damage | Startup | Active Frames | Total Frames | Safety | |
|---|---|---|---|---|---|
| 00% | 0 | 0-0 | 0 | -0 | |
| |||||
Taunts
| Damage | Startup | Active Frames | Total Frames | Safety | |
|---|---|---|---|---|---|
| 00% | 0 | 0-0 | 0 | -0 | |
| |||||
| Damage | Startup | Active Frames | Total Frames | Safety | |
|---|---|---|---|---|---|
| 00% | 0 | 0-0 | 0 | -0 | |
| |||||
| Damage | Startup | Active Frames | Total Frames | Safety | |
|---|---|---|---|---|---|
| 00% | 0 | 0-0 | 0 | -0 | |
| |||||
Strategy
- PLACEHOLDER
- PLACEHOLDER
- PLACEHOLDER
Techniques
- PLACEHOLDER
- PLACEHOLDER
- PLACEHOLDER
Combos
- PLACEHOLDER
- PLACEHOLDER
- PLACEHOLDER
Matchups
| +2 | |
| +1 | |
| 0 | |
| 1 | |
| 2 |
Other Resources
- PLACEHOLDER
- PLACEHOLDER
- PLACEHOLDER
Videos
PLACEHOLDER
Costumes
