m (Senpac suggestion) |
m (Patch 1.13 update) |
||
| Line 227: | Line 227: | ||
|Safety=-0 | |Safety=-0 | ||
|description= | |description= | ||
* A multi-hit tail slap. Dag's sends down, Norb's sends up. The final hit sends farther horizontally on both beavers | * A multi-hit tail slap. Dag's sends down, Norb's sends up. The final hit sends farther horizontally on both beavers. | ||
}} | }} | ||
}}<br> | }}<br> | ||
| Line 244: | Line 244: | ||
|Safety=-0 | |Safety=-0 | ||
|description= | |description= | ||
* An upward tail slap. | * An upward tail slap. A great combo and shield pressure tool on both Beavers. | ||
}} | }} | ||
}}<br> | }}<br> | ||
| Line 359: | Line 359: | ||
|Safety=-0 | |Safety=-0 | ||
|description= | |description= | ||
* Daggett flings Excaliball upward. This move is great as a combo ender and kill move. The back hit after the initial swing sends the opponent flying backwards, so this also doubles as an edgeguarding tool as well, oddly enough! | * Daggett flings Excaliball upward. This move is great as a combo ender and, if at high enough %, a kill move. The back hit after the initial swing sends the opponent flying backwards, so this also doubles as an edgeguarding tool as well, oddly enough! | ||
* Norbert swings his dazzling hair at the opponent. VERY early kill move and amazing combo ender. Even useful as a horizontal recovery tool as it stalls him in the air for a short time. | * Norbert swings his dazzling hair at the opponent. VERY early kill move and amazing combo ender. Even useful as a horizontal recovery tool as it stalls him in the air for a short time. | ||
}} | }} | ||
| Line 377: | Line 377: | ||
|Safety=-0 | |Safety=-0 | ||
|description= | |description= | ||
* Daggett bonks you with a mallet. | * Daggett bonks you with a mallet. Sends the opponent straight down on the sweetspot as of 1.13. Great combo ender offstage. | ||
* Norbert swings his golf club in a similar fashion to Daggett's mallet. This move sends more horizontally, but otherwise functions pretty similarly. | * Norbert swings his golf club in a similar fashion to Daggett's mallet. This move sends more horizontally, but otherwise functions pretty similarly. | ||
Revision as of 23:48, 27 January 2025
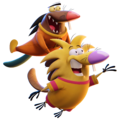
About
The Beaver Brothers, who often get angry at each other. The shark-like brown beaver is named Daggett, and the yellow mellow beaver is named Norbert.
Playstyle
Beavers are flexible and can be played in a variety of ways, from aggressively to more patient play. Daggett is an aggressive rushdown that relies primarily on getting in the opponent's face and not letting them breathe with his suffocating combo routes. Norbert is more of a swordie-type character, who excels more at mid-range. You can opt to play one beaver primarily, or use both during your play to mix up your playstyle.
The centerpiece of the brothers' toolkits are their assist attacks, which are extremely good at making sure you control the pace of the match at all times if used optimally. Overall, Beavers are a great pick for people who like having a grab bag of tools at their disposal, and also enjoy playing in multiple ways.
 | |
| Franchise |
The Angry Beavers |
|---|---|
| Home Stage |
Angry Beavers' Dam |
| Weight |
0.83 / 0.87 |
| Fall Speed |
1.05 / 1.17 |
| Gravity |
1.1 / 0.85 |
| Run Speed |
1.2 / 1.2 |
| Air Speed |
1.006 / 1 |
| Strengths | Weaknesses |
|---|---|
|
|
Moveset
Swapping
Beavers have a unique meter for their swapping mechanic, performed by doing Down Special. This meter is represented by swirling arrows (🔄). You can generally swap whenever, but it is most useful during assist attacks, as you can swap to the other beaver mid-attack. If the assist beaver is killed at any point in the match, the swap meter will have a small cooldown before you can swap again. During this time, if you perform Down Special, it will have no effect.
Assist attacks
The beavers' neutral and side special moves are both assist attacks. This is also represented by it's own meter, being the face of the brother not currently in use. Unlike the swapping mechanic, the assists always have a cooldown after use, though it is very short. However, if the assist beaver is killed by an opponent's attack, the time for it to regenerate increases, so it is best to be careful with how you space your assist attacks. The assist beaver being killed also causes the swap meter to empty.
Ground Light Attacks
Light

| Damage | Startup | Active Frames | Total Frames | Safety | |
|---|---|---|---|---|---|
| 00% | 0 | 0-0 | 0 | -0 | |
| |||||
Forward+Light

| Damage | Startup | Active Frames | Total Frames | Safety | |
|---|---|---|---|---|---|
| 00% | 0 | 0-0 | 0 | -0 | |
| |||||
Up+Light

| Damage | Startup | Active Frames | Total Frames | Safety | |
|---|---|---|---|---|---|
| 00% | 0 | 0-0 | 0 | -0 | |
| |||||
Down+Light

| Damage | Startup | Active Frames | Total Frames | Safety | |
|---|---|---|---|---|---|
| 00% | 0 | 0-0 | 0 | -0 | |
| |||||
Light (Running)

| Damage | Startup | Active Frames | Total Frames | Safety | |
|---|---|---|---|---|---|
| 00% | 0 | 0-0 | 0 | -0 | |
| |||||
Air Light Attacks
Light (Airborne)

| Damage | Startup | Active Frames | Total Frames | Safety | |
|---|---|---|---|---|---|
| 00% | 0 | 0-0 | 0 | -0 | |
| |||||
Forward+Light (Airborne)

| Damage | Startup | Active Frames | Total Frames | Safety | |
|---|---|---|---|---|---|
| 00% | 0 | 0-0 | 0 | -0 | |
| |||||
Back+Light (Airborne)

| Damage | Startup | Active Frames | Total Frames | Safety | |
|---|---|---|---|---|---|
| 00% | 0 | 0-0 | 0 | -0 | |
| |||||
Up+Light (Airborne)

| Damage | Startup | Active Frames | Total Frames | Safety | |
|---|---|---|---|---|---|
| 00% | 0 | 0-0 | 0 | -0 | |
| |||||
Down+Light (Airborne)

| Damage | Startup | Active Frames | Total Frames | Safety | |
|---|---|---|---|---|---|
| 00% | 0 | 0-0 | 0 | -0 | |
| |||||
Ground Strong Attacks
Strong

| Damage | Startup | Active Frames | Total Frames | Safety | |
|---|---|---|---|---|---|
| 00% | 0 | 0-0 | 0 | -0 | |
| |||||
Up+Strong

| Damage | Startup | Active Frames | Total Frames | Safety | |
|---|---|---|---|---|---|
| 00% | 0 | 0-0 | 0 | -0 | |
| |||||
Down+Strong

| Damage | Startup | Active Frames | Total Frames | Safety | |
|---|---|---|---|---|---|
| 00% | 0 | 0-0 | 0 | -0 | |
| |||||
Air Strong Attacks
Strong (Airborne)

| Damage | Startup | Active Frames | Total Frames | Safety | |
|---|---|---|---|---|---|
| 00% | 0 | 0-0 | 0 | -0 | |
| |||||
Up+Strong (Airborne)

| Damage | Startup | Active Frames | Total Frames | Safety | |
|---|---|---|---|---|---|
| 00% | 0 | 0-0 | 0 | -0 | |
| |||||
Down+Strong (Airborne)

| Damage | Startup | Active Frames | Total Frames | Safety | |
|---|---|---|---|---|---|
| 00% | 0 | 0-0 | 0 | -0 | |
This move has different sweetspot properties depending on the Beaver. MimiksYou created this handy chart here. | |||||
Special Attacks
Special

| Damage | Startup | Active Frames | Total Frames | Safety | |
|---|---|---|---|---|---|
| 00% | 0 | 0-0 | 0 | -0 | |
| |||||
Forward+Special

| Damage | Startup | Active Frames | Total Frames | Safety | |
|---|---|---|---|---|---|
| 00% | 0 | 0-0 | 0 | -0 | |
| |||||
Down+Special

| Damage | Startup | Active Frames | Total Frames | Safety | |
|---|---|---|---|---|---|
| 00% | 0 | 0-0 | 0 | -0 | |
| |||||
Up+Special

| Damage | Startup | Active Frames | Total Frames | Safety | |
|---|---|---|---|---|---|
| 00% | 0 | 0-0 | 0 | -0 | |
| |||||
Grab/Throws
Grab

| Damage | Startup | Active Frames | Total Frames | Safety | |
|---|---|---|---|---|---|
| 00% | 0 | 0-0 | 0 | -0 | |
| |||||
Grab (Running)

| Damage | Startup | Active Frames | Total Frames | Safety | |
|---|---|---|---|---|---|
| 00% | 0 | 0-0 | 0 | -0 | |
| |||||
Light (Grabbing)

| Damage | Startup | Active Frames | Total Frames | Safety | |
|---|---|---|---|---|---|
| 00% | 0 | 0-0 | 0 | -0 | |
| |||||
Up (Grabbing)

| Damage | Startup | Active Frames | Total Frames | Safety | |
|---|---|---|---|---|---|
| 00% | 0 | 0-0 | 0 | -0 | |
| |||||
Forward (Grabbing)

| Damage | Startup | Active Frames | Total Frames | Safety | |
|---|---|---|---|---|---|
| 00% | 0 | 0-0 | 0 | -0 | |
| |||||
Down (Grabbing)

| Damage | Startup | Active Frames | Total Frames | Safety | |
|---|---|---|---|---|---|
| 00% | 0 | 0-0 | 0 | -0 | |
| |||||
Back (Grabbing)

| Damage | Startup | Active Frames | Total Frames | Safety | |
|---|---|---|---|---|---|
| 00% | 0 | 0-0 | 0 | -0 | |
| |||||
Super
Slime+Light

| Damage | Startup | Active Frames | Total Frames | Safety | |
|---|---|---|---|---|---|
| 00% | 0 | 0-0 | 0 | -0 | |
| |||||
Taunts
Taunt

| Damage | Startup | Active Frames | Total Frames | Safety | |
|---|---|---|---|---|---|
| 00% | 0 | 0-0 | 0 | -0 | |
| |||||
Down+Taunt

| Damage | Startup | Active Frames | Total Frames | Safety | |
|---|---|---|---|---|---|
| 00% | 0 | 0-0 | 0 | -0 | |
| |||||
Up+Taunt

| Damage | Startup | Active Frames | Total Frames | Safety | |
|---|---|---|---|---|---|
| 00% | 0 | 0-0 | 0 | -0 | |
| |||||
Strategy
Disclaimer: This section is a massive WIP!
There's no one correct way to play the Angry Beavers. Again, they are a super flexible duo and can be played in many different ways. As such, I (sizzli) will go over some of the more optimal ways to play them in this section:
Daggett: General Tips
Daggett is always the beaver you start the match with. As such, many Beaver players such as myself tend to stick with him until mid-%, and then switch to Norb when it is time to take the stock.
Dag commonly starts routes with an up tilt. From there you can get a free grab into an up throw into another up tilt. Daggett can generally repeat this process twice or even three times depending on the character and how good you are at following DI. From here it's up to your imagination: if the opponent gets sent too high to warrant another regrab, there's a lot you can do: you can up air them, you can F-air them and start a F-air chain, or you can use Strong Neutral Air to catch their next option.
Strong Neutral Air (hereafter Kick) is generally Dag's best movement tool and best tool in general. With this move he can soar across the stage and is difficult to challenge. If you hold down on the stick during the frames where Dag starts to kick, he will also angle more downward, allowing him to slide onto platforms and the stage. You can also mix up the charge timing or slime cancel out of this move as a mixup. Just remember: you only get 1 kick per airtime, so use it wisely.
Daggett's assists are also extremely useful. New Year (Neutral Special) is great for controlling space or startling opponents who like to stay in one spot. It also works great as a combo extension into Kick or one of his f-air chains. Mashed Potatoes (Side Special) helps a ton with neutral as it controls a lot of space. It's best to do a retreating jump before doing Mashed Potatoes: that way you can cover as much space as possible, and its harder for the opponent to swat Norb out of the sky.
It's best to remember that Dag is a lightweight: he can't take too many hits before he gets knocked out. But he does have the better recovery of the two: his Up Special grants him a lot of height and he also has Kick at his disposal for horizontal distance. Dag is also pretty short and can escape tricky situations better than most characters, so it's best to use kick onstage to manuever around and make yourself hard to catch.
Usually Dag is often the "Combo beaver": stick with him at low % and then switch to Norb when the opponent is harder to combo. Dag's routes are very free flowing and surprisingly simple, but you need to be very quick for them to be effective, utilizing Dag's speed to the fullest. Dag benefits a lot from stages like Technodrome and Irken where there are a lot of platforms he can do his up air and Kick shenanigans with.
Dag's main kill moves are Strong Up Air and Neutral Strong. They work great as combo enders and can seamlessly flow into most of his routes. Up Strong and Down Strong work sometimes but are more committal. Kick can kill but the opponent needs to be at high % and you need to be really close to the blastzone, so it's risky and you have better options. You can also spike the opponent with Down Air Strong offstage for a cheesy early kill.
Dag is overall all about momentum. When he gets going, he won't stop until the opponent is either gone or at a deficit.
Norbert: General Tips
Using Down Special as Dag causes you to switch to Norb. Norbert is more of a mid-ranged swordie character, but he can play from up-close too. Norbert can start chains very similarly to Daggett, but his combo routes are fairly different, pun not intended. He often uses Forward Air in his combos, as it's an extremely safe move that works well both from midrange and close-range. Forward air combos pretty well into Neutral air and also itself. Up air is useful as well sometimes but the options after it are limited.
Norbert is much more useful at mid-high %s. His strongs are dangerously fast and cover a ton of space. He also has access to one of the strongest s-upairs in the game, and its a great combo ender as well. That doesn't mean he's useless at low % though, oh no, not at all. His combo routes are dangerous at any point in the match.
Norb's routes are a little bit less tight than Dag's due to how much hitstun his moves have. He really only needs one up tilt or f-air to confirm into pretty much anything he wants. Even something as simple as down throw -> f-air can cause massive damaging combos. His neutral air is also great at getting out of tough scenarios due to it's size.
Norb's assists are a little bit more situational than Dag's but still are great tools. Log is great at edgeguarding and disrupting the opponent, especially the EX version. Side special works well as a tech chase tool, but it's best trait is the fact that you can switch out of it. This makes it a very useful tool offstage for high recovery.
Norb's not immune to weakness though: He's a little bit heavier than Dag, which means he doesn't fall very gracefully, and is subject to being combo food. He also has a pretty exploitable recovery: he doesn't have a lot of horizontal options. Aside from the aforementioned side special trick, he can simply switch to Dag to make it painless, but if Dag is knocked out, he doesn't have a lot of options. Strong upair can marginally give him some airtime, but otherwise if he's too low, he's likely gone.
Bread n' Butters
- SC. = Slime Cancel
Dag
- Up tilt (Up light) can start -> Anything. Your imagination is the limit.
- Up tilt -> Turnaround Up tilt -> Up air -> Up air
- Up tilt -> Up throw
- The Locus: Light Fair -> Light Fair -> Strong Nair -> Strong Dair. Timing on hitting the mallet is a little strict but otherwise this is a fairly standard Dag special. You can also trade the mallet for an Up Air Light or ignore the Strong Nair if you have enough momentum.
- Up Air Light -> Up Air Strong is a general confirm around 70-80%. Higher than that it's a little bit tougher to hit.
Norb
- Light Fair is Norb's main combo starter. You can also use Up Light and then Light Fair if it's easier for you.
- Up Special -> SC. Strong Up Air.
- Light Fair -> Light Fair -> Light Dair. Strong confirm offstage, easy to set the opponent up into a tough situation offstage or straight up kill them.
Techniques
- PLACEHOLDER
- PLACEHOLDER
- PLACEHOLDER
Combos
- PLACEHOLDER
- PLACEHOLDER
- PLACEHOLDER
Matchups
| +2 | |
| +1 | |
| 0 | |
| 1 | |
| 2 |
Other Resources
- PLACEHOLDER
- PLACEHOLDER
- PLACEHOLDER
Videos
PLACEHOLDER
Costumes

The Beavers' default outfit....or lack thereof.
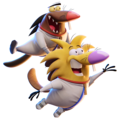
The Beavers wearing their jammies, featured in multiple episodes. Unlike the show, Norb doesn't have an N on his shirt.

The Beavers' t-shirts from "Beach Beavers a Go-Go".
The Beavers' astronaut suits from "Mission to the Big, Hot, Thingy" (unlocked by having the Ultimate edition of NASB 2).

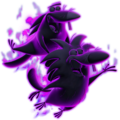
Mind controlled Beavers (unlocked by defeating Beavers twice in campaign mode).
The Beavers' Ghost Clones (unlocked by defeating Beavers thrice in campaign mode).


