(Some grab+taunt info, working my way bottoms up.) |
(TONS of descriptions for moves. I think I got pretty much all of them.) |
||
| Line 96: | Line 96: | ||
|Safety=-0 | |Safety=-0 | ||
|description= | |description= | ||
* | * The beavers engage in a slap fight with the opponent. This is an amazing shield pressure tool and you can call an assist attack during the animation. | ||
* | * The hitbox is slightly different depending on the beaver: | ||
**Dag's is more in front of him but he can hold it for longer. | |||
**Norb's can hit behind him, but has slightly different mash timing. | |||
}} | }} | ||
}}<br> | }}<br> | ||
| Line 103: | Line 105: | ||
{{MoveData | {{MoveData | ||
|image= NASB2_Beavers_LightForward-ChompChamps.png | |image= NASB2_Beavers_LightForward-ChompChamps.png | ||
|caption= | |caption= nomph | ||
|name= Chomp Champs | |name= Chomp Champs | ||
|input= Forward+Light | |input= Forward+Light | ||
| Line 114: | Line 116: | ||
|Safety=-0 | |Safety=-0 | ||
|description= | |description= | ||
* | * A forward-facing chomp move. Works pretty well as a tech chasing tool, but is tough to combo from. | ||
}} | }} | ||
}}<br> | }}<br> | ||
| Line 132: | Line 133: | ||
|Safety=-0 | |Safety=-0 | ||
|description= | |description= | ||
* | * One of the Beavers' main combo starters. Fantastic anti-air, neutral, and defensive move. Does it all, really. | ||
* | ** Dag's has a smaller hitbox on startup and sends towards him. | ||
** Norb's has a bigger hitbox on startup and sends away from him. | |||
}} | }} | ||
}}<br> | }}<br> | ||
| Line 150: | Line 152: | ||
|Safety=-0 | |Safety=-0 | ||
|description= | |description= | ||
* | * A doofy little tail slap move. This move doesn't see much use, but it sometimes can work as a tech chase tool and can be a very funny edgeguarding tool for vertical recoveries. | ||
}} | }} | ||
}}<br> | }}<br> | ||
| Line 168: | Line 169: | ||
|Safety=-0 | |Safety=-0 | ||
|description= | |description= | ||
* | * The Beavers slide on their belly. Good tech chase move, but like forward tilt, it's difficult to combo from. Good at higher %s. | ||
}} | }} | ||
}}<br> | }}<br> | ||
| Line 190: | Line 190: | ||
|Safety=-0 | |Safety=-0 | ||
|description= | |description= | ||
* | * A great get off me aerial and combo tool. Often sees more use with Norb due to the slightly larger hitbox on him. | ||
}} | }} | ||
}}<br> | }}<br> | ||
| Line 208: | Line 207: | ||
|Safety=-0 | |Safety=-0 | ||
|description= | |description= | ||
* | * Dag lightly slaps the opponent. Small range, but great combo tool at low and mid %s, even comboing into itself fairly easily. | ||
* | * Norb wields a golf club and swings at the opponent. One of the best aerials in the game: amazing, safe tool that is great at comboing (even comboing into itself at low-mid %s!), keeping opponents away, out of shield...an amazing versatile tool and the shining star of Norbert's kit. | ||
}} | }} | ||
}}<br> | }}<br> | ||
| Line 226: | Line 225: | ||
|Safety=-0 | |Safety=-0 | ||
|description= | |description= | ||
* | * A multi-hit tail slap. Dag's sends down, Norb's sends up. The final hit sends farther horizontally on both beavers. Niche combo tool. | ||
}} | }} | ||
}}<br> | }}<br> | ||
| Line 244: | Line 242: | ||
|Safety=-0 | |Safety=-0 | ||
|description= | |description= | ||
* | * An upward tail slap. Dag's sees more use due to his higher gravity compared to Norb, but it is a great combo tool on both Beavers. | ||
}} | }} | ||
}}<br> | }}<br> | ||
| Line 262: | Line 259: | ||
|Safety=-0 | |Safety=-0 | ||
|description= | |description= | ||
* | * Dag's is a downwards slap. Another good combo aerial. Particularly good to use after Forward Air. | ||
* | * Norb's is a downwards slash with his golf club. The tip of the club has a sweetspot and will spike if it connects, but the sourspot is also a pretty good tool for on-stage combos. Overall an excellent edgeguarding tool and confirms from his Forward Air quite handily. | ||
}} | }} | ||
}}<br> | }}<br> | ||
| Line 284: | Line 281: | ||
|Safety=-0 | |Safety=-0 | ||
|description= | |description= | ||
* | * Dag throws a bowling ball tethered by gum: the fabeled "Excaliball." This move is particularly strong during the startup, but becomes weaker over time. | ||
* | * Norb socks the opponent with a boxing glove. This move is surprisingly fast for a strong attack, but shares the same startup trait as Dag's. | ||
}} | }} | ||
}}<br> | }}<br> | ||
| Line 302: | Line 299: | ||
|Safety=-0 | |Safety=-0 | ||
|description= | |description= | ||
* | * Dag channels his inner '''MUSCULAR BEAVER''' and bulks up for a short moment. This move is great for dealing with up close pressure and doubles as a kill move at high %s on stages with low ceilings, but it doesn't have much use aside from that. | ||
* | * Norbert swings his golf club upward three times. This move is great at controlling space and is a great anti-air move, and can even kill at high %s. In recent patches, the consistency between the three hitboxes has been reduced marginally, which has made the move slightly weaker. | ||
}} | }} | ||
}}<br> | }}<br> | ||
| Line 320: | Line 317: | ||
|Safety=-0 | |Safety=-0 | ||
|description= | |description= | ||
* | * Dag turns into a crazy tornado and spins in place. This move is good as a kill option, but in recent patches, it has become much easier to fall out of, so use it wisely. | ||
* | * Norbert swings his golf club in a circular motion. Due to it's speed, this move is fantastic at covering ledge options and also doubles as a great tech chase tool. | ||
}} | }} | ||
}}<br> | }}<br> | ||
| Line 342: | Line 339: | ||
|Safety=-0 | |Safety=-0 | ||
|description= | |description= | ||
* | * Daggett does a karate kick in the air. Can only be used once in the air as of Patch 1.09, but that doesn't mean this move still isn't fantastic: it's a great movement option all-around and is difficult for most opponents to react to. It also doubles as an amazing followup tool for combos and even a horizontal recovery tool, and you can fastfall it during the startup frames. Arguably Dag's best move. | ||
* | * Norbert swings a log. This move actually has a particularly strong sweetspot on the tip like his golf club! Good as a horizontal kill move or as a combo ender if you want to reset to neutral. | ||
}} | }} | ||
}}<br> | }}<br> | ||
| Line 360: | Line 357: | ||
|Safety=-0 | |Safety=-0 | ||
|description= | |description= | ||
* | * Daggett flings Excaliball upward. This move is great as a combo ender and kill move. The back hit after the initial swing sends the opponent flying backwards, so this also doubles as an edgeguarding tool as well, oddly enough! | ||
* | * Norbert swings his dazzling hair at the opponent. VERY early kill move and amazing combo ender. Even useful as a horizontal recovery tool as it stalls him in the air for a short time. | ||
}} | }} | ||
}}<br> | }}<br> | ||
| Line 377: | Line 374: | ||
|Total Frames=0 | |Total Frames=0 | ||
|Safety=-0 | |Safety=-0 | ||
|description= | |description= Bonk | ||
* | * Daggett bonks you with a mallet. This move is great for ending combos near ledge as the sweetspot of the mallet sends the opponent particularly low. | ||
* | * Norbert swings his golf club in a similar fashion to Daggett's mallet. This move sends more horizontally, but otherwise functions pretty similarly. | ||
This move has different sweetspot properties depending on the Beaver. MimiksYou created this handy chart [https://media.discordapp.net/attachments/1171301375376896041/1187249353438543913/beaversdownsmair3.png?ex=668a189f&is=6688c71f&hm=a828caf51bc2e56beec7337f5ccc741efb700372b4cd1f8cd79d50da46053d1e&=&format=webp&quality=lossless&width=1232&height=1056 here.] | |||
}} | }} | ||
}}<br> | }}<br> | ||
| Line 399: | Line 398: | ||
|Safety=-0 | |Safety=-0 | ||
|description= | |description= | ||
* Norbert calls for Dagget to throw wooden logs at their opponents. | * Norbert calls for Dagget to throw wooden logs at their opponents. The EX version has better targeting. Great tool for edgeguarding, and will often set up opponents to eat a Down Air. | ||
* | * Daggett calls for Norbert to throw out a special New Year's beam attack. Travels across the whole screen, so its impossible to run away from, but it's not spammable. Great combo tool as well, as per usual with the Beavers. | ||
}} | }} | ||
}}<br> | }}<br> | ||
| Line 417: | Line 416: | ||
|Safety=-0 | |Safety=-0 | ||
|description= | |description= | ||
* Norbert calls for Dagget to bite continuously in front of them, dealing damage. | * Norbert calls for Dagget to bite continuously in front of them, dealing damage. Great as a tech chase tool and can also double as a great high recovery tool if you swap to Dag in between the move. | ||
* | * Daggett calls for Norbert to throw a barrage of mashed potatoes diagonally in front of them. Amazing stage control assist, as it covers most of the stage if positioned correctly. Best to use while jumping to cover the most space possible, especially on stages with high platforms. | ||
}} | }} | ||
}}<br> | }}<br> | ||
| Line 435: | Line 434: | ||
|Safety=-0 | |Safety=-0 | ||
|description= | |description= | ||
* The | * The Beavers tag out for each other. This is your main method of switching between them. As said before, if the assist beaver is KO'd and the swap meter is currently being replenished, this move will have no effect: the animation will play and you will simply stay as the current player Beaver. | ||
}} | }} | ||
}}<br> | }}<br> | ||
Revision as of 05:39, 6 July 2024
About
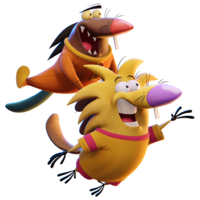
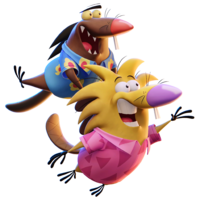
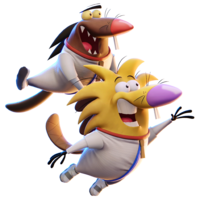
The Beaver Brothers, who often get angry at each other. The shark-like brown beaver is named Daggett, and the yellow mellow beaver is named Norbert.
Playstyle
Beavers are flexible and can be played in a variety of ways, from aggressively to more patient play. Daggett is an aggressive rushdown that relies primarily on getting in the opponent's face and not letting them breathe with his suffocating combo routes. Norbert is more of a swordie-type character, who excels more at mid-range. You can opt to play one beaver primarily, or use both during your play to mix up your playstyle.
The centerpiece of the brothers' toolkits are their assist attacks, which are extremely good at making sure you control the pace of the match at all times if used optimally. Overall, Beavers are a great pick for people who like having a grab bag of tools at their disposal, and also enjoy playing in multiple ways.
| Strengths | Weaknesses |
|---|---|
|
|
Moveset
Swapping
Beavers have a unique meter for their swapping mechanic, performed by doing Down Special. This meter is represented by swirling arrows (🔄). You can generally swap whenever, but it is most useful during assist attacks, as you can swap to the other beaver mid-attack. If the assist beaver is killed at any point in the match, the swap meter will have a small cooldown before you can swap again. During this time, if you perform Down Special, it will have no effect.
Assist attacks
The beavers' neutral and side special moves are both assist attacks. This is also represented by it's own meter, being the face of the brother not currently in use. Unlike the swapping mechanic, the assists always have a cooldown after use, though it is very short. However, if the assist beaver is killed by an opponent's attack, the time for it to regenerate increases, so it is best to be careful with how you space your assist attacks. The assist beaver being killed also causes the swap meter to empty.
Ground Light Attacks
| Damage | Startup | Active Frames | Total Frames | Safety | |
|---|---|---|---|---|---|
| 00% | 0 | 0-0 | 0 | -0 | |
| |||||
| Damage | Startup | Active Frames | Total Frames | Safety | |
|---|---|---|---|---|---|
| 00% | 0 | 0-0 | 0 | -0 | |
| |||||
| Damage | Startup | Active Frames | Total Frames | Safety | |
|---|---|---|---|---|---|
| 00% | 0 | 0-0 | 0 | -0 | |
| |||||
| Damage | Startup | Active Frames | Total Frames | Safety | |
|---|---|---|---|---|---|
| 00% | 0 | 0-0 | 0 | -0 | |
| |||||
| Damage | Startup | Active Frames | Total Frames | Safety | |
|---|---|---|---|---|---|
| 00% | 0 | 0-0 | 0 | -0 | |
| |||||
Air Light Attacks
| Damage | Startup | Active Frames | Total Frames | Safety | |
|---|---|---|---|---|---|
| 00% | 0 | 0-0 | 0 | -0 | |
| |||||
| Damage | Startup | Active Frames | Total Frames | Safety | |
|---|---|---|---|---|---|
| 00% | 0 | 0-0 | 0 | -0 | |
| |||||
| Damage | Startup | Active Frames | Total Frames | Safety | |
|---|---|---|---|---|---|
| 00% | 0 | 0-0 | 0 | -0 | |
| |||||
| Damage | Startup | Active Frames | Total Frames | Safety | |
|---|---|---|---|---|---|
| 00% | 0 | 0-0 | 0 | -0 | |
| |||||
| Damage | Startup | Active Frames | Total Frames | Safety | |
|---|---|---|---|---|---|
| 00% | 0 | 0-0 | 0 | -0 | |
| |||||
Ground Strong Attacks
| Damage | Startup | Active Frames | Total Frames | Safety | |
|---|---|---|---|---|---|
| 00% | 0 | 0-0 | 0 | -0 | |
| |||||
| Damage | Startup | Active Frames | Total Frames | Safety | |
|---|---|---|---|---|---|
| 00% | 0 | 0-0 | 0 | -0 | |
| |||||
| Damage | Startup | Active Frames | Total Frames | Safety | |
|---|---|---|---|---|---|
| 00% | 0 | 0-0 | 0 | -0 | |
| |||||
Air Strong Attacks
| Damage | Startup | Active Frames | Total Frames | Safety | |
|---|---|---|---|---|---|
| 00% | 0 | 0-0 | 0 | -0 | |
| |||||
| Damage | Startup | Active Frames | Total Frames | Safety | |
|---|---|---|---|---|---|
| 00% | 0 | 0-0 | 0 | -0 | |
| |||||
| Damage | Startup | Active Frames | Total Frames | Safety | |
|---|---|---|---|---|---|
| 00% | 0 | 0-0 | 0 | -0 | |
|
Bonk
This move has different sweetspot properties depending on the Beaver. MimiksYou created this handy chart here. | |||||
Special Attacks
| Damage | Startup | Active Frames | Total Frames | Safety | |
|---|---|---|---|---|---|
| 00% | 0 | 0-0 | 0 | -0 | |
| |||||
| Damage | Startup | Active Frames | Total Frames | Safety | |
|---|---|---|---|---|---|
| 00% | 0 | 0-0 | 0 | -0 | |
| |||||
| Damage | Startup | Active Frames | Total Frames | Safety | |
|---|---|---|---|---|---|
| 00% | 0 | 0-0 | 0 | -0 | |
| |||||
| Damage | Startup | Active Frames | Total Frames | Safety | |
|---|---|---|---|---|---|
| 00% | 0 | 0-0 | 0 | -0 | |
| |||||
Grab/Throws
| Damage | Startup | Active Frames | Total Frames | Safety | |
|---|---|---|---|---|---|
| 00% | 0 | 0-0 | 0 | -0 | |
| |||||
| Damage | Startup | Active Frames | Total Frames | Safety | |
|---|---|---|---|---|---|
| 00% | 0 | 0-0 | 0 | -0 | |
| |||||
| Damage | Startup | Active Frames | Total Frames | Safety | |
|---|---|---|---|---|---|
| 00% | 0 | 0-0 | 0 | -0 | |
| |||||
| Damage | Startup | Active Frames | Total Frames | Safety | |
|---|---|---|---|---|---|
| 00% | 0 | 0-0 | 0 | -0 | |
| |||||
| Damage | Startup | Active Frames | Total Frames | Safety | |
|---|---|---|---|---|---|
| 00% | 0 | 0-0 | 0 | -0 | |
| |||||
| Damage | Startup | Active Frames | Total Frames | Safety | |
|---|---|---|---|---|---|
| 00% | 0 | 0-0 | 0 | -0 | |
| |||||
| Damage | Startup | Active Frames | Total Frames | Safety | |
|---|---|---|---|---|---|
| 00% | 0 | 0-0 | 0 | -0 | |
| |||||
Super
| Damage | Startup | Active Frames | Total Frames | Safety | |
|---|---|---|---|---|---|
| 00% | 0 | 0-0 | 0 | -0 | |
| |||||
Taunts
| Damage | Startup | Active Frames | Total Frames | Safety | |
|---|---|---|---|---|---|
| 00% | 0 | 0-0 | 0 | -0 | |
| |||||
| Damage | Startup | Active Frames | Total Frames | Safety | |
|---|---|---|---|---|---|
| 00% | 0 | 0-0 | 0 | -0 | |
| |||||
| Damage | Startup | Active Frames | Total Frames | Safety | |
|---|---|---|---|---|---|
| 00% | 0 | 0-0 | 0 | -0 | |
| |||||
Strategy
- PLACEHOLDER
- PLACEHOLDER
- PLACEHOLDER
Techniques
- PLACEHOLDER
- PLACEHOLDER
- PLACEHOLDER
Combos
- PLACEHOLDER
- PLACEHOLDER
- PLACEHOLDER
Matchups
Daggett
| +2 | |
| +1 | |
| 0 | |
| 1 | |
| 2 |
Norbert
| +2 | |
| +1 | |
| 0 | |
| 1 | |
| 2 |
Other Resources
- PLACEHOLDER
- PLACEHOLDER
- PLACEHOLDER
Videos
PLACEHOLDER
Costumes


