No edit summary |
(General info on playstyle n such and pros/cons. Will get to assist explanations and attack specifications at a later date.) |
||
| Line 18: | Line 18: | ||
== About == | == About == | ||
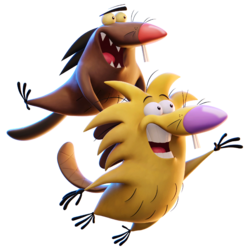
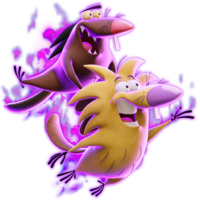
The Beaver Brothers, who often get angry at each other. | The Beaver Brothers, who often get angry at each other. The shark-like brown beaver is named '''Daggett''', and the yellow mellow beaver is named '''Norbert.''' | ||
== Playstyle == | == Playstyle == | ||
Beavers are flexible and can be played in a variety of ways, from aggressively to more patient play. Daggett is an aggressive rushdown that relies primarily on getting in the opponent's face and not letting them breathe with his suffocating combo routes. Norbert is more of a swordie-type character, who excels more at mid-range. You can opt to play one beaver primarily, or use both during your play to mix up your playstyle. | |||
The centerpiece of the brothers' toolkits are their assist attacks, which are extremely good at making sure you control the pace of the match at all times if used optimally. Overall, Beavers are a great pick for people who like having a grab bag of tools at their disposal, and also enjoy playing in multiple ways. | |||
|content2= | |content2= | ||
| Line 34: | Line 36: | ||
{{ProConTable | {{ProConTable | ||
|pros= | |pros= | ||
* ''' | * '''Both''' | ||
* ''' | ** Assists are fantastic on both beavers and are excellent stage control options. | ||
* ''' | ** Excellent ground normals and aerials. The beavers have sparse bad options. | ||
* ''' | * '''Daggett''' | ||
** '''Fast'''. Dag is a speedster and his movement can be extremely tricky. | |||
** Suffocating combo game. Can do 60 off of one Up Light conversion. | |||
** Aerial Neutral Strong is an incredible movement option. | |||
** Excellent recovery options. | |||
** Mashed potatoes (Side Special Assist) is an amazing neutral tool and covers half the stage if positioned well. | |||
** Short, which means he can escape some combos easier than some characters taller than him. | |||
* '''Norbert''' | |||
** Some of the best midrange aerials in the game. | |||
** Extremely strong combo routes into Aerial Up Strong, an amazing kill move. | |||
** Powerful edgeguarding and ledgetrapping tools. | |||
** Great, fast strong attacks. | |||
** Log (Neutral Special) is a great stage control tool and can even target the opponent if slime is used. | |||
** Amazing voice. "Service!" | |||
|cons= | |cons= | ||
* ''' | * '''Both''' | ||
* ''' | ** The assist beaver can be killed fairly easily if not careful. This can rack up damage fairly fast and causes a cooldown for using assists or switching. | ||
* ''' | ** Subpar disadvantage state. If the Beavers are down a stock they can take a lot of time and pressuring to get back on track. | ||
* ' | ** Assist projectiles often get beat out by better projectiles due to the cooldown. As such, against zoners Beavers have to be careful. | ||
* '''Daggett''' | |||
** Lightweight. Dag has to play very fast and loose because if he takes too many hits he will die pretty quickly. | |||
** Ground strongs are good but not amazing. Often will need to be confirmed into and not super useful point-blank. | |||
* '''Norbert''' | |||
** Slightly heavier than his brother (maybe it's the hair?) but that also means he is more susceptible to combos. | |||
** Recovery is a on the weaker side, having very little horizontal distance. Using EX might make it better, but unless you're close to ledge it might be more safe to switch to Dag instead to recover. | |||
}} | }} | ||
Revision as of 01:14, 4 July 2024
About
The Beaver Brothers, who often get angry at each other. The shark-like brown beaver is named Daggett, and the yellow mellow beaver is named Norbert.
Playstyle
Beavers are flexible and can be played in a variety of ways, from aggressively to more patient play. Daggett is an aggressive rushdown that relies primarily on getting in the opponent's face and not letting them breathe with his suffocating combo routes. Norbert is more of a swordie-type character, who excels more at mid-range. You can opt to play one beaver primarily, or use both during your play to mix up your playstyle.
The centerpiece of the brothers' toolkits are their assist attacks, which are extremely good at making sure you control the pace of the match at all times if used optimally. Overall, Beavers are a great pick for people who like having a grab bag of tools at their disposal, and also enjoy playing in multiple ways.
| Strengths | Weaknesses |
|---|---|
|
|
Moveset
Ground Light Attacks
| Damage | Startup | Active Frames | Total Frames | Safety | |
|---|---|---|---|---|---|
| 00% | 0 | 0-0 | 0 | -0 | |
| |||||
| Damage | Startup | Active Frames | Total Frames | Safety | |
|---|---|---|---|---|---|
| 00% | 0 | 0-0 | 0 | -0 | |
| |||||
| Damage | Startup | Active Frames | Total Frames | Safety | |
|---|---|---|---|---|---|
| 00% | 0 | 0-0 | 0 | -0 | |
| |||||
| Damage | Startup | Active Frames | Total Frames | Safety | |
|---|---|---|---|---|---|
| 00% | 0 | 0-0 | 0 | -0 | |
| |||||
| Damage | Startup | Active Frames | Total Frames | Safety | |
|---|---|---|---|---|---|
| 00% | 0 | 0-0 | 0 | -0 | |
| |||||
Air Light Attacks
| Damage | Startup | Active Frames | Total Frames | Safety | |
|---|---|---|---|---|---|
| 00% | 0 | 0-0 | 0 | -0 | |
| |||||
| Damage | Startup | Active Frames | Total Frames | Safety | |
|---|---|---|---|---|---|
| 00% | 0 | 0-0 | 0 | -0 | |
| |||||
| Damage | Startup | Active Frames | Total Frames | Safety | |
|---|---|---|---|---|---|
| 00% | 0 | 0-0 | 0 | -0 | |
| |||||
| Damage | Startup | Active Frames | Total Frames | Safety | |
|---|---|---|---|---|---|
| 00% | 0 | 0-0 | 0 | -0 | |
| |||||
| Damage | Startup | Active Frames | Total Frames | Safety | |
|---|---|---|---|---|---|
| 00% | 0 | 0-0 | 0 | -0 | |
| |||||
Ground Strong Attacks
| Damage | Startup | Active Frames | Total Frames | Safety | |
|---|---|---|---|---|---|
| 00% | 0 | 0-0 | 0 | -0 | |
| |||||
| Damage | Startup | Active Frames | Total Frames | Safety | |
|---|---|---|---|---|---|
| 00% | 0 | 0-0 | 0 | -0 | |
| |||||
| Damage | Startup | Active Frames | Total Frames | Safety | |
|---|---|---|---|---|---|
| 00% | 0 | 0-0 | 0 | -0 | |
| |||||
Air Strong Attacks
| Damage | Startup | Active Frames | Total Frames | Safety | |
|---|---|---|---|---|---|
| 00% | 0 | 0-0 | 0 | -0 | |
| |||||
| Damage | Startup | Active Frames | Total Frames | Safety | |
|---|---|---|---|---|---|
| 00% | 0 | 0-0 | 0 | -0 | |
| |||||
| Damage | Startup | Active Frames | Total Frames | Safety | |
|---|---|---|---|---|---|
| 00% | 0 | 0-0 | 0 | -0 | |
| |||||
Special Attacks
| Damage | Startup | Active Frames | Total Frames | Safety | |
|---|---|---|---|---|---|
| 00% | 0 | 0-0 | 0 | -0 | |
| |||||
| Damage | Startup | Active Frames | Total Frames | Safety | |
|---|---|---|---|---|---|
| 00% | 0 | 0-0 | 0 | -0 | |
| |||||
| Damage | Startup | Active Frames | Total Frames | Safety | |
|---|---|---|---|---|---|
| 00% | 0 | 0-0 | 0 | -0 | |
| |||||
| Damage | Startup | Active Frames | Total Frames | Safety | |
|---|---|---|---|---|---|
| 00% | 0 | 0-0 | 0 | -0 | |
| |||||
Grab/Throws
| Damage | Startup | Active Frames | Total Frames | Safety | |
|---|---|---|---|---|---|
| 00% | 0 | 0-0 | 0 | -0 | |
| |||||
| Damage | Startup | Active Frames | Total Frames | Safety | |
|---|---|---|---|---|---|
| 00% | 0 | 0-0 | 0 | -0 | |
| |||||
| Damage | Startup | Active Frames | Total Frames | Safety | |
|---|---|---|---|---|---|
| 00% | 0 | 0-0 | 0 | -0 | |
| |||||
| Damage | Startup | Active Frames | Total Frames | Safety | |
|---|---|---|---|---|---|
| 00% | 0 | 0-0 | 0 | -0 | |
| |||||
| Damage | Startup | Active Frames | Total Frames | Safety | |
|---|---|---|---|---|---|
| 00% | 0 | 0-0 | 0 | -0 | |
| |||||
| Damage | Startup | Active Frames | Total Frames | Safety | |
|---|---|---|---|---|---|
| 00% | 0 | 0-0 | 0 | -0 | |
| |||||
| Damage | Startup | Active Frames | Total Frames | Safety | |
|---|---|---|---|---|---|
| 00% | 0 | 0-0 | 0 | -0 | |
| |||||
Super
| Damage | Startup | Active Frames | Total Frames | Safety | |
|---|---|---|---|---|---|
| 00% | 0 | 0-0 | 0 | -0 | |
| |||||
Taunts
| Damage | Startup | Active Frames | Total Frames | Safety | |
|---|---|---|---|---|---|
| 00% | 0 | 0-0 | 0 | -0 | |
| |||||
| Damage | Startup | Active Frames | Total Frames | Safety | |
|---|---|---|---|---|---|
| 00% | 0 | 0-0 | 0 | -0 | |
| |||||
| Damage | Startup | Active Frames | Total Frames | Safety | |
|---|---|---|---|---|---|
| 00% | 0 | 0-0 | 0 | -0 | |
| |||||
Strategy
- PLACEHOLDER
- PLACEHOLDER
- PLACEHOLDER
Techniques
- PLACEHOLDER
- PLACEHOLDER
- PLACEHOLDER
Combos
- PLACEHOLDER
- PLACEHOLDER
- PLACEHOLDER
Matchups
Daggett
| +2 | |
| +1 | |
| 0 | |
| 1 | |
| 2 |
Norbert
| +2 | |
| +1 | |
| 0 | |
| 1 | |
| 2 |
Other Resources
- PLACEHOLDER
- PLACEHOLDER
- PLACEHOLDER
Videos
PLACEHOLDER
Costumes
