Callie Rose (talk | contribs) No edit summary |
m (→Double Lariat) |
||
| (19 intermediate revisions by 3 users not shown) | |||
| Line 1: | Line 1: | ||
= Introduction = | == Introduction == | ||
{| | {{CvS2 Character Subnav|char=Zangief|short=Zangief}} | ||
<div> | |||
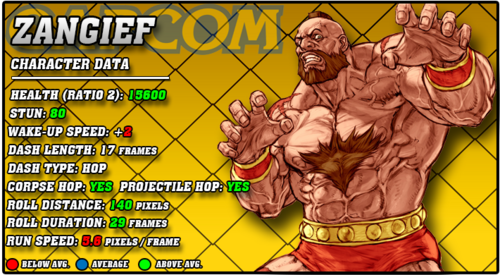
[[File:CVS2_Zangief_Data.png|right|500px]] | |||
== Story == | == Story == | ||
Zangief, nicknamed The Red Cyclone, is a massive man and a Russian hero. In the days of Street Fighter: Alpha, Zangief was the hero of the Soviet Union. The President of Russia and leader of the Soviet Union offered him full financial support to travel the world, beating opponents and boasting | Zangief, nicknamed The Red Cyclone, is a massive man and a Russian hero. In the days of Street Fighter: Alpha, Zangief was the hero of the Soviet Union. The President of Russia and the leader of the Soviet Union offered him full financial support to travel the world, beating opponents and boasting Soviet might. Zangief does this flawlessly, getting into fights with legends like Ken and winning. Once his mission is over, The President sends him to fight Shadaloo forces, slowly making their way into Russia. Along the way, Zangief finds two new friends in E. Honda and R. Mika. While it is unknown if they destroyed the Psycho Power Driver or not, Zangief still fights for his Soviet Russian pride to this day. | ||
== Gameplay == | == Gameplay == | ||
Zangief is the classic grappler. The character that the whole archetype is modeled after. | Zangief is the classic grappler. The character that the whole archetype is modeled after. His big body, huge damage, slow movement, and big buttons make Zangief what he is. While CvS2 is home to a few grapplers, Zangief stays the truest to the archetype. He hits hard with big normals and fast grabs and can get hit plenty of times before it starts to hurt. Opponents have to be scared of a good Zangief, as he has the amazing ability to punish just about anything, and he can control neutral shockingly well with big buttons and Lariats. | ||
Zangief hurts in a lot of places however. Likely the biggest one is his lacking mobility. While SNK Grooves give him runs and hops to aid this, he has a very slow run still, and he doesn't get to lose his slow | Zangief hurts in a lot of places, however. Likely the biggest one is his lacking mobility. While SNK Grooves give him runs and hops to aid this, he has a very slow run still, and he doesn't get to lose his slow walk speed. His lack of movement hurts a lot, as his best mixups and damage potential only exist when he's very close. To hurt this more, his main command grab sends them flying away, basically resetting to neutral. So the move you want to land most requires you to struggle with Zangief's biggest problem, and when you do land it, it resets you into that same situation. | ||
In all, Zangief is | In all, Zangief is in the lower half of the mid-tier characters. While he has great damage and a great ability to punish, he has to constantly fight against the top-tier CvS2 characters, who are all beastly in neutral. Zangief has to outplay opponents at a lot of turns, but if he does, he is a monster. | ||
=== Groove Selection === | === Groove Selection === | ||
Zangief's best Groove is definitely K-Groove. It gives you everything you need for a successful grappler playstyle in this game: a good defensive option in JD which often leads into a sweep or even SPD, Rage which juices his already high damage to new levels, and the threat of a level 3 360 in Rage. Zangief's high health also allows him to take a lot more hits and have Rage even more often than other K-Groove characters. K-Zangief pokes add up, SPDs do great damage even if they do reset to neutral, and his strike/throw mix becomes very threatening. | '''Best - K:''' Zangief's best Groove is definitely K-Groove. It gives you everything you need for a successful grappler playstyle in this game: a good defensive option in JD which often leads into a sweep or even SPD, Rage which juices his already high damage to new levels, and the threat of a level 3 360 in Rage. Zangief's high health also allows him to take a lot more hits and have Rage even more often than other K-Groove characters. K-Zangief pokes add up, SPDs do great damage even if they do reset to neutral, and his strike/throw mix becomes very threatening. | ||
A-Groove and N-Groove are a little behind K-Groove. A-Zangief gives up any mobility buffs | '''Useful - A/N/P:''' A-Groove and N-Groove are a little behind K-Groove. A-Zangief gives up any mobility buffs and has a pretty bad dash. In exchange, he gets access to a solid Custom Combo in the corner, and the powerful activation mechanic makes his throws stronger by mere threat alone. He also has rolls and Alpha Counters to aid his weaker neutral and defense. N-Groove is the opposite. N-Zangief has a great mix of tools for many situations, having the higher mobility of K-Groove and the rolls of A-Groove. He also gets access to roll, which once again gets him out of some tight spots. He sacrifices this by not having the threat of a level 3 720 without a Max Mode activation, and less overall meter altogether. P-Zangief is a very difficult P-Groove character, but parries can be very rewarding for Zangief who can usually get a sweep or SPD, similar to JD. He also can get parries into 720, which is hard to do, especially since P-Groove rarely has meter. It is very rewarding, however. P-Zangief lives and dies by how well you parry, just like most P-Groove characters. | ||
C-Zangief sacrifices a lot in comparison, and gets very little in return. Since both of his supers are grabs, he can't really do any level 2 combos, making the main attraction of C-Groove worthless for him. The main attraction of C-Zangief is air blocking and more consistent meter, he makes an alright point. S-Zangief is hard to consider worthwhile | '''Worst - C/S:''' C-Zangief sacrifices a lot in comparison, and gets very little in return. Since both of his supers are grabs, he can't really do any level 2 combos, making the main attraction of C-Groove worthless for him. The main attraction of C-Zangief is air blocking and more consistent meter, he makes an alright point. S-Zangief is hard to consider worthwhile since even though his health does let him have infinite level 1's more safely than other characters, this really doesn't benefit him much. He has a fun gimmick with dodge into SPD or 720, but having to charge for meter really hurts Zangief. In general, S-Zangief has very little in the way of strengths. | ||
{{StrengthsAndWeaknesses | |||
|intro= | |||
--------------------------- | |||
'''Zangief''' is a scary grappler who punishes the opponent with high damage and fast grabs, and controls neutral with big and damaging buttons. He pays for this with low combo potential and very slow movement. Zangief is best in '''K-Groove'''. | |||
'''Difficulty''': Hard<br>'''Tier''': C | |||
|pros= | |pros= | ||
* High health and stun lets him take a lot more hits than the average character | * '''Tank:''' High health and stun lets him take a lot more hits than the average character | ||
* His pokes do as much as some characters punishes, especially 2HP, double especially with Rage | * '''One-Hit Damage:''' His pokes do as much as some characters punishes, especially 2HP, double especially with Rage | ||
* A strong 1 frame command throw that allows him to interrupt strings, reversal throw, and punish with huge damage | * '''SPD:''' A strong 1 frame command throw that allows him to interrupt strings, reversal throw, and punish with huge damage | ||
* Decent mixup, with his command grabs, a crossup, and a few good meaties | * '''Mixup:''' Decent mixup, with his command grabs, a crossup, and a few good meaties | ||
|cons= | |cons= | ||
* One of the slowest characters, making neutral a chore, especially against the top tiers like Sagat or Cammy | * '''Extremely Slow:''' One of the slowest characters, making neutral a chore, especially against the top tiers like Sagat or Cammy | ||
* Only very threatening when he is close to you | * '''Requires Close Range:''' Only very threatening when he is close to you | ||
* His signature move, the SPD, resets him to fullscreen or nearly fullscreen and forces him to struggle to win neutral again to be threatening | * '''SPD Throws Very Far:''' His signature move, the SPD, resets him to fullscreen or nearly fullscreen and forces him to struggle to win neutral again to be threatening | ||
* Very big, making him the target of a lot of overheads and shorthop mixups | * '''Big:''' Very big, making him the target of a lot of overheads and shorthop mixups | ||
* Can't crouch under commonly crouchable moves like certain fireballs, making him block a lot more often | * '''Tall Croucher:''' Can't crouch under commonly crouchable moves like certain fireballs, making him block a lot more often | ||
}} | }} | ||
=== Players to Watch === | |||
{| class="wikitable" | |||
|- | |||
! Name !! Country !! Groove !! Accounts !! Notes | |||
|- | |||
| GunterJPN || Japan || A-Groove || Twitter: @GunterJPn || An A-Groover who finds success with odd teams. Also uses Gief's customs really well. <br> [https://youtu.be/TGj9nN9Ciho Sample Match] | |||
|- | |||
| Tobari || Japan || K/S-Groove || Twitter: @cvs2event_Tobari || Has an extremely large character pool. Mainly known for using Gief and Rolento really well. <br> [https://youtu.be/2VgzsYDILdU S-Groove Sample Match] <br> [https://youtu.be/dR5_Cpayebk?t=876s K-Groove Sample Match] | |||
|- | |||
|} | |||
<br><br> | |||
== Normal Moves == | == Normal Moves == | ||
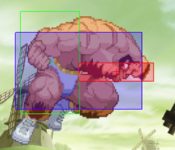
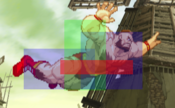
| Line 76: | Line 60: | ||
| input = 5LP / Far LP | | input = 5LP / Far LP | ||
| subtitle = Far Light Punch | | subtitle = Far Light Punch | ||
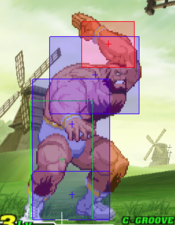
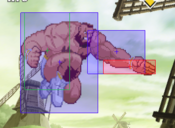
| image = | | image = CVS2_Zangief_5LP_First.PNG | ||
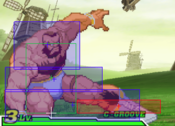
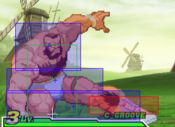
| caption = | | caption = First Hitbox | ||
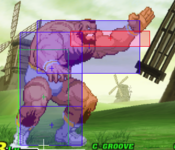
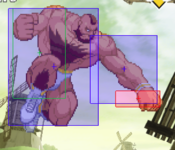
| image2 = CVS2_Zangief_5LP_Second.PNG | |||
| caption2 = Second Hitbox | |||
| linkname = 5LP | | linkname = 5LP | ||
| data = | | data = | ||
| Line 216: | Line 202: | ||
| input = 5HK / Far HK | | input = 5HK / Far HK | ||
| subtitle = Far Heavy Kick | | subtitle = Far Heavy Kick | ||
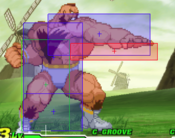
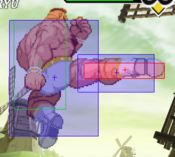
| image = | | image = CVS2_Zangief_5HK_First.PNG | ||
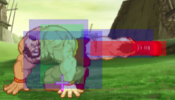
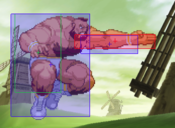
| caption = | | caption = First Hitbox | ||
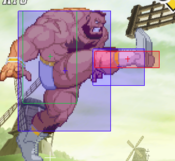
| image2 = CVS2_Zangief_5HK_Second.PNG | |||
| caption2 = Second Hitbox | |||
| linkname = 5HK | | linkname = 5HK | ||
| data = | | data = | ||
| Line 239: | Line 227: | ||
}} | }} | ||
== Crouching Normals == | |||
=== <span class="invisible-header">2LP</span> === | |||
{{MoveData | |||
| name = Crouch Jab | |||
| input = 2LP / cr.LP | |||
| subtitle = Crouching Light Punch | |||
| image = CVS2_Zangief_2LP.PNG | |||
| caption = | |||
| linkname = 2LP | |||
| data = | |||
{{AttackData-CvS2 | |||
| version = {{Motion|d}}+{{Icon-Capcom|LP}} | |||
| subtitle = | |||
| damage = 300 | |||
| stun = 3 | |||
| cancel = RF/SP/SU | |||
| guard = Mid | |||
| parry = Mid | |||
| startup = 3 | |||
| active = 4 | |||
| recovery = 8 | |||
| total = 15 | |||
| advHit = +5 | |||
| advBlock = +5 | |||
| invul = None | |||
| description = A very solid 2LP with good reach. Useful for mashing or pressure, and has some small links on counterhit for increased damage. Useful for tick throws as well, and if people start mashing out of them, just do another 2LP to counterhit it. | |||
}} | |||
}} | |||
== | === <span class="invisible-header">2MP</span> === | ||
{{MoveData | |||
| name = Crouch Strong | |||
| input = 2MP / cr.MP | |||
| subtitle = Crouching Medium Punch | |||
| image = CVS2_Zangief_2MP.PNG | |||
| caption = | |||
| linkname = 2MP | |||
| data = | |||
{{AttackData-CvS2 | |||
| version = {{Motion|d}}+{{Icon-Capcom|MP}} | |||
| subtitle = | |||
| damage = 1000 | |||
| stun = 10 | |||
| cancel = None | |||
| guard = Mid | |||
| parry = High | |||
| startup = 6 | |||
| active = 12 | |||
| recovery = 11 | |||
| total = 37 | |||
| advHit = -1 | |||
| advBlock = -1 | |||
| invul = None | |||
| description = A one handed crouching uppercut. Another decent anti-air alongside 5LP and Lariat. Not very useful for anything else however, as Zangief has better and more rewarding grounded buttons. Notably large blindspot in front of Zangief, so make sure you use this against jumps that are farther away to avoid it whiffing. | |||
}} | |||
}} | |||
== | === <span class="invisible-header">2HP</span> === | ||
{{MoveData | |||
| name = Crouch Fierce | |||
| input = 2HP / cr.HP | |||
| subtitle = Crouching Heavy Punch | |||
| image = CVS2_Zangief_2HP.PNG | |||
| caption = Who needs neutral anyway? | |||
| linkname = 2HP | |||
| data = | |||
{{AttackData-CvS2 | |||
| version = {{Motion|d}}+{{Icon-Capcom|HP}} | |||
| subtitle = | |||
| damage = 1400 | |||
| stun = 14 | |||
| cancel = None | |||
| guard = Mid | |||
| parry = High | |||
| startup = 11 | |||
| active = 12 | |||
| recovery = 16 | |||
| total = 37 | |||
| advHit = -2 | |||
| advBlock = -2 | |||
| invul = None | |||
| description = Like 5HP, but low to the ground. Has a few notable advantages over 5HP, namely the lower crouching hitbox. It also has a higher active frame count to catch people, and less overall total frames. For this, it pays with being 200 less damage. Regardless, you'll usually use this more anyhow, since the benefits outweigh the slightly lower damage and it still does ridiculous damage regardless of that. | |||
}} | |||
}} | |||
= | === <span class="invisible-header">2LK</span> === | ||
{{MoveData | |||
| name = Crouch Short | |||
| input = 2LK / cr.LK | |||
| subtitle = Crouching Light Kick | |||
| image = CVS2_Zangief_2LK.PNG | |||
| caption = | |||
| linkname = 2LK | |||
| data = | |||
{{AttackData-CvS2 | |||
| version = {{Motion|d}}+{{Icon-Capcom|LK}} | |||
| subtitle = | |||
| damage = 400 | |||
| stun = 4 | |||
| cancel = SP/SU | |||
| guard = Low | |||
| parry = Low | |||
| startup = 4 | |||
| active = 5 | |||
| recovery = 15 | |||
| total = 24 | |||
| advHit = -5 | |||
| advBlock = -5 | |||
| invul = None | |||
| description = While 2LK is usually a characters main low mixup, Zangief would rather do his sweep command normal than this. It has a lot of weaknesses, the most obvious being that its -5 meaning that you can't get any links or pressure afterwards. Zangief has a big weakness in his lack of a solid knockdown special, so even if you could hitconfirm with this, there wouldn't be much use. If you want something like empty hop low, stick to the 1HK command normal before using this. | |||
}} | |||
}} | |||
=== <span class="invisible-header">2MK</span> === | |||
{{MoveData | |||
| name = Crouch Forward | |||
| input = 2MK / cr.MK | |||
| subtitle = Crouching Medium Kick | |||
| image = CVS2_Zangief_2MK.PNG | |||
| caption = | |||
| linkname = 2MK | |||
| data = | |||
{{AttackData-CvS2 | |||
| version = {{Motion|d}}+{{Icon-Capcom|MK}} | |||
| subtitle = | |||
| damage = 1000 | |||
| stun = 10 | |||
| cancel = None | |||
| guard = Low | |||
| parry = Low | |||
| startup = 8 | |||
| active = 12 | |||
| recovery = 14 | |||
| total = 34 | |||
| advHit = -4 | |||
| advBlock = -4 | |||
| invul = None | |||
| description = A low kick far outwards. Not a bad poke, as it's fairly safe, but not much reward either. 2HK has the same range and gives a knockdown, although this is notably safer. If you want a whiff punish, go to 2HK, and if you want a poke, stick to 5MP/2HP. | |||
}} | |||
}} | |||
=== <span class="invisible-header">2HK</span> === | |||
{{MoveData | |||
| name = Crouch Roundhouse | |||
| input = 2HK / cr.HK | |||
| subtitle = Crouching Heavy Kick | |||
| image = CVS2_Zangief_2HK.PNG | |||
| caption = | |||
| linkname = 2HK | |||
| data = | |||
{{AttackData-CvS2 | |||
| version = {{Motion|d}}+{{Icon-Capcom|HK}} | |||
| subtitle = | |||
| damage = 1300 | |||
| stun = 13 | |||
| cancel = None | |||
| guard = Low | |||
| parry = Low | |||
| startup = 9 | |||
| active = 10 | |||
| recovery = 24 | |||
| total = 33 | |||
| advHit = -DWN | |||
| advBlock = -8 | |||
| invul = None | |||
| description = A standard far reaching sweep. Not as laggy as most other sweeps, which is important since this is one of Zangief's only strike-based knockdowns. Useful to punish things, either on whiff or block, or to catch someone low trying to walk or backdash away from Zangief. | |||
}} | |||
}} | |||
= | == Jumping Normals == | ||
-- | === <span class="invisible-header">jLP</span> === | ||
== | {{MoveData | ||
| name = Jump Jab | |||
| input = j.LP / 8LP | |||
| subtitle = Jumping Light Punch | |||
| image = CVS2_Zangief_jLP.PNG | |||
| caption = | |||
| linkname = j.LP | |||
| data = | |||
{{AttackData-CvS2 | |||
| version = {{Motion|ub}}/{{Motion|u}}/{{Motion|uf}}+{{Icon-Capcom|LP}} | |||
| subtitle = | |||
| damage = 700 | |||
| stun = 7 | |||
| cancel = None | |||
| guard = High | |||
| parry = High | |||
| startup = 4/5 | |||
| active = 22 | |||
| recovery = 0 | |||
| total = 26/27 | |||
| advHit = Varies | |||
| advBlock = Varies | |||
| invul = None | |||
| description = A long reaching chop. Better reach than the average j.LP makes it a more consistent air-to-air, and Zangief likes having a good one. Good to interrupt people jumping at you or the startup of air specials like divekicks. On a neutral jump, has one frame less startup. | |||
}} | |||
}} | |||
=== | === <span class="invisible-header">jMP</span> === | ||
{{MoveData | |||
| name = Jump Strong | |||
| input = j.MP / 8MP | |||
| subtitle = Jumping Medium Punch | |||
| image = CVS2_Zangief_jMP.PNG | |||
| caption = | |||
| linkname = j.MP | |||
| data = | |||
{{AttackData-CvS2 | |||
| version = {{Motion|ub}}/{{Motion|u}}/{{Motion|uf}}+{{Icon-Capcom|MP}} | |||
| subtitle = | |||
| damage = 1100 | |||
| stun = 11 | |||
| cancel = None | |||
| guard = High | |||
| parry = High | |||
| startup = 6 | |||
| active = 4 | |||
| recovery = 0 | |||
| total = 10 | |||
| advHit = Varies | |||
| advBlock = Varies | |||
| invul = None | |||
| description = An aerial chop attack. It is one of Zangief's best jumping normals. It works great to punish fireballs and works as a decent air to air. | |||
}} | |||
}} | |||
=== | === <span class="invisible-header">jHP</span> === | ||
{{MoveData | |||
| name = Jump Fierce | |||
| input = j.HP / 8HP | |||
| subtitle = Jumping Heavy Punch | |||
| image = CVS2_Zangief_njHP.PNG | |||
| caption = Neutral Jump | |||
| image2 = CVS2_Zangief_jHP.PNG | |||
| caption2 = Diagonal Jump | |||
| linkname = j.HP | |||
| data = | |||
{{AttackData-CvS2 | |||
| version = {{Motion|u}}+{{Icon-Capcom|HP}} | |||
| subtitle = | |||
| damage = 1600 | |||
| stun = 16 | |||
| cancel = None | |||
| guard = High | |||
| parry = High | |||
| startup = 10 | |||
| active = 8 | |||
| recovery = 0 | |||
| total = 18 | |||
| advHit = Varies | |||
| advBlock = Varies | |||
| invul = None | |||
| description = | |||
}} | |||
{{AttackData-CvS2 | |||
| version = {{Motion|ub}}/{{Motion|uf}}+{{Icon-Capcom|HP}} | |||
| subtitle = | |||
| damage = 1400 | |||
| stun = 14 | |||
| cancel = None | |||
| guard = High | |||
| parry = High | |||
| startup = 10 | |||
| active = 6 | |||
| recovery = 0 | |||
| total = 16 | |||
| advHit = Varies | |||
| advBlock = Varies | |||
| invul = None | |||
| description = Massive damage jump normals. The diagonal version is what you'll use most as a jump-in, due to the high reach and damage. The neutral jump version is one of the highest damage jump normals in the game, and if you ever get a stun with Zangief, you can just do a simple nj.HP, 1HK combo for great damage and a knockdown in 2 hits. | |||
}} | |||
}} | |||
=== Jumping | === <span class="invisible-header">jLK</span> === | ||
{{MoveData | |||
| name = Jump Short | |||
| input = j.LK / 8LK | |||
| subtitle = Jumping Light Kick | |||
| image = CVS2_Zangief_jLK.PNG | |||
| caption = | |||
| linkname = j.LK | |||
| data = | |||
{{AttackData-CvS2 | |||
| version = {{Motion|ub}}/{{Motion|u}}/{{Motion|uf}}+{{Icon-Capcom|LK}} | |||
| subtitle = | |||
| damage = 600 | |||
| stun = 6 | |||
| cancel = None | |||
| guard = High | |||
| parry = High | |||
| startup = 6 | |||
| active = 22 | |||
| recovery = 0 | |||
| total = 28 | |||
| advHit = Varies | |||
| advBlock = Varies | |||
| invul = None | |||
| description = A kick with similar purpose to j.LP. In comparison to that, it has a frame more startup but 100 less damage. It gets longer range, but neither this or j.LP are your ranged air-to-airs, so stick to j.LP usually. | |||
}} | |||
}} | |||
=== | === <span class="invisible-header">jMK</span> === | ||
{{MoveData | |||
| name = Jump Forward | |||
| input = j.MK / 8MK | |||
| subtitle = Jumping Medium Kick | |||
| image = CVS2_Zangief_jMK.PNG | |||
| caption = | |||
| linkname = j.MK | |||
| data = | |||
{{AttackData-CvS2 | |||
| version = {{Motion|ub}}/{{Motion|u}}/{{Motion|uf}}+{{Icon-Capcom|MK}} | |||
| subtitle = | |||
| damage = 1000 | |||
| stun = 10 | |||
| cancel = None | |||
| guard = High | |||
| parry = High | |||
| startup = 8 | |||
| active = 10/12 | |||
| recovery = 0 | |||
| total = 18/20 | |||
| advHit = Varies | |||
| advBlock = Varies | |||
| invul = None | |||
| description = A big kick. Similar to j.MP, not much use. Zangief has better jump-ins and better air-to-airs, stick to using those. | |||
}} | |||
}} | |||
=== | === <span class="invisible-header">jHK</span> === | ||
{{MoveData | |||
| name = Jump Roundhouse | |||
| input = j.HK / 8HK | |||
| subtitle = Jumping Heavy Kick | |||
| image = CVS2_Zangief_jHK.PNG | |||
| caption = | |||
| linkname = j.HK | |||
| data = | |||
{{AttackData-CvS2 | |||
| version = {{Motion|ub}}/{{Motion|u}}/{{Motion|uf}}+{{Icon-Capcom|HK}} | |||
| subtitle = | |||
| damage = 1400 | |||
| stun = 14 | |||
| cancel = None | |||
| guard = High | |||
| parry = High | |||
| startup = 8 | |||
| active = 6 | |||
| recovery = 0 | |||
| total = 14 | |||
| advHit = Varies | |||
| advBlock = Varies | |||
| invul = None | |||
| description = A dropkick with similar range to j.HP. Because of the similarities, you'll usually stick to j.HP as a jump in for it's lower hitbox and j.HK as an air-to-air for it's faster startup and higher hitbox. | |||
}} | |||
}} | |||
== | == Command Normals == | ||
=== | === <span class="invisible-header">Long Kick</span> === | ||
The | {{MoveData | ||
| name = Long Kick | |||
| input = 1MK/1HK | |||
| subtitle = | |||
| image = CVS2_Zangief_2LK.PNG | |||
| caption = | |||
| linkname = 1MK/1HK | |||
| data = | |||
{{AttackData-CvS2 | |||
| version = {{Motion|db}}+{{Icon-Capcom|MK}} | |||
| subtitle = | |||
| damage = 1100 | |||
| stun = 11 | |||
| cancel = SP/SU | |||
| guard = Low | |||
| parry = Low | |||
| startup = 5 | |||
| active = 4 | |||
| recovery = 17 | |||
| total = 26 | |||
| advHit = -1 | |||
| advBlock = -1 | |||
| invul = None | |||
}} | |||
{{AttackData-CvS2 | |||
| version = {{Motion|db}}+{{Icon-Capcom|HK}} | |||
| subtitle = | |||
| damage = 1500 | |||
| stun = 15 | |||
| cancel = SU | |||
| guard = Low | |||
| parry = Low | |||
| startup = 7 | |||
| active = 4 | |||
| recovery = 19 | |||
| total = 31 | |||
| advHit = -DWN | |||
| advBlock = +1 | |||
| invul = None | |||
| description = Zangief kicks out with a kick that looks identical to 2LK. The MK version is a great normal for up-close pokes and ending blockstrings, and can combo into a Banishing Flat, which is your main counterhit route off of 2LP. The HK version is much more interesting, as it's basically just an upgraded version of his already great sweep. Hard knockdown, +1 on block, and a fast 7 frame startup makes it a stellar normal. However, it does have the notable weakness of having much less range than a normal 2HK. You will usually do 1HK after a jump in to guarantee a knockdown and damage, or as a punish on laggy moves. | |||
}} | |||
}} | |||
=== | === <span class="invisible-header">Headbutt</span> === | ||
{{MoveData | |||
| name = Headbutt | |||
| input = j.8MP/j.8HP | |||
| subtitle = | |||
| image = CVS2_Zangief_j8HP.PNG | |||
| caption = | |||
| linkname = j.8P | |||
| data = | |||
{{AttackData-CvS2 | |||
| version = In Air, {{Motion|u}}+{{Icon-Capcom|MP}} | |||
| subtitle = | |||
| damage = 1200 | |||
| stun = 18 | |||
| cancel = None | |||
| guard = High | |||
| parry = High | |||
| startup = 4 | |||
| active = 12 | |||
| recovery = 0 | |||
| total = 16 | |||
| advHit = Varies | |||
| advBlock = Varies | |||
| invul = None | |||
}} | |||
{{AttackData-CvS2 | |||
| version = In Air, {{Motion|u}}+{{Icon-Capcom|HP}} | |||
| subtitle = | |||
| damage = 1500 | |||
| stun = 40 | |||
| cancel = None | |||
| guard = High | |||
| parry = High | |||
| startup = 4 | |||
| active = 6 | |||
| recovery = 0 | |||
| total = 10 | |||
| advHit = Varies | |||
| advBlock = Varies | |||
| invul = None | |||
| description = Zangief headbutts the air above him. The MP version is a nice rising anti-air in some situations, especially vs floatier jumps. The real meat is the HP version, which is harder to land but does a massive 40 stun. Two will stun low and mid stun characters, three will stun anyone. While it can be hard to use this, if you know they want to jump, you can punish that using this and make them regret it. | |||
}} | |||
}} | |||
== | === <span class="invisible-header">Flying Body Attack</span> === | ||
{{MoveData | |||
| name = Flying Body Attack | |||
| input = j.2HP | |||
| subtitle = Body Splash | |||
| image = CVS2_Zangief_j2HP.PNG | |||
| caption = | |||
| linkname = j.2HP | |||
| data = | |||
{{AttackData-CvS2 | |||
| version = In Air, {{Motion|d}}+{{Icon-Capcom|HP}} | |||
| subtitle = | |||
| damage = 1300 | |||
| stun = 13 | |||
| cancel = None | |||
| guard = High | |||
| parry = High | |||
| startup = 5 | |||
| active = 22 | |||
| recovery = 0 | |||
| total = 27 | |||
| advHit = Varies | |||
| advBlock = Varies | |||
| invul = None | |||
| description = Zangief spreads his body out wide and slams down on the opponent. Amazing normal to use on a knockdown, as it'll very ambiguously cross up the opponent. Not as high damage as a j.HP and has little range beyond Zangief's body, so you won't use it as your main jump-in. | |||
}} | |||
}} | |||
=== | === <span class="invisible-header">Double Knee Drop</span> === | ||
{{MoveData | |||
| name = Double Knee Drop | |||
| input = j.2LK/j.2MK | |||
| subtitle = Knee Drop | |||
| image = CVS2_Zangief_j2LK.PNG | |||
| caption = Short Version | |||
| image2 = CVS2_Zangief_j2MK.PNG | |||
| caption2 = Forward Version | |||
| linkname = j.2LK/j.2MK | |||
| data = | |||
{{AttackData-CvS2 | |||
| version = In Air, {{Motion|d}}+{{Icon-Capcom|LK}} | |||
| subtitle = | |||
| damage = 600 | |||
| stun = 6 | |||
| cancel = None | |||
| guard = High | |||
| parry = High | |||
| startup = 7 | |||
| active = 22 | |||
| recovery = 0 | |||
| total = 29 | |||
| advHit = Varies | |||
| advBlock = Varoes | |||
| invul = None | |||
| description = | |||
}} | |||
{{AttackData-CvS2 | |||
| version = In Air, {{Motion|d}}+{{Icon-Capcom|MK}} | |||
| subtitle = | |||
| damage = 1000 | |||
| stun = 10 | |||
| cancel = None | |||
| guard = High | |||
| parry = High | |||
| startup = 7 | |||
| active = 22 | |||
| recovery = 0 | |||
| total = 29 | |||
| advHit = Varies | |||
| advBlock = Varoes | |||
| invul = None | |||
| description = Zangief drops down on the opponent with his knees. These alter his jump arc, making him a bit floatier, and have high active frames making them amazing at stuffing out normal anti-airs. The ability to alter his jump also makes anti-airing these harder in general. If you're getting sniped out of the air a lot by normal anti-airs like 2HP's, try using these. | |||
}} | |||
}} | |||
=== | == Throws == | ||
=== <span class="invisible-header">Pile Driver</span> === | |||
{{MoveData | |||
| name = Pile Driver/Brain Buster | |||
| input = Near Opponent, 4/6HP | |||
| subtitle = Punch Throw | |||
| image = CVS2_Zangief_6PThrow.PNG | |||
| caption = Pile Driver | |||
| image2 = CVS2_Zangief_4PThrow.PNG | |||
| caption2 = Brain Buster | |||
| linkname = Punch Throws | |||
| data = | |||
{{AttackData-CvS2 | |||
| version = Close {{Motion|b}}/{{Motion|f}}+{{Icon-Capcom|HP}} | |||
| subtitle = | |||
| damage = 2100 | |||
| stun = 0 | |||
| cancel = None | |||
| guard = Grab | |||
| parry = Grab | |||
| startup = 3 | |||
| active = 1 | |||
| recovery = 13 | |||
| total = 17 | |||
| advHit = -DWN | |||
| advBlock = Grab | |||
| invul = None | |||
| description = Zangief's punch throw is unique, as the forward version and backward version are listed as seperate moves despite being basically identical. Neither version gives him great oki, but they do much more damage than the average punch throw and don't sacrifice the 3 frame startup for it. Still, an SPD will do better damage and punish more things, and these give just as bad of a knockdown if not worse. If you need a throw, stick to SPD. | |||
}} | |||
}} | |||
=== | === <span class="invisible-header">Kamitsuki</span> === | ||
{{MoveData | |||
| name = Kamitsuki | |||
| input = Near Opponent, 4/6K | |||
| subtitle = Kick Throw, Bite | |||
| image = CVS2_Zangief_KThrow.PNG | |||
| caption = | |||
| linkname = Kick Throw | |||
| data = | |||
{{AttackData-CvS2 | |||
| version = Close {{Motion|b}}/{{Motion|f}}+{{Icon-Capcom|HK}} | |||
| subtitle = | |||
| damage = 1000+200x2~17 | |||
| stun = 0 | |||
| cancel = None | |||
| guard = Grab | |||
| parry = Grab | |||
| startup = 5 | |||
| active = 1 | |||
| recovery = 13 | |||
| total = 19 | |||
| advHit = -DWN | |||
| advBlock = Grab | |||
| invul = None | |||
| description = Zangief grabs his opponent and starts biting them on the face. Yeah. Not the greatest throw, as it's slower than both Punch Throws and SPD, and since it can be mashed out of it doesn't do as much damage as you would like. It does have one benefit, being that Zangief gets a solid knockdown from it, but it isn't worth the other costs. | |||
}} | |||
}} | |||
== Special Moves == | |||
=== <span class="invisible-header">Double Lariat</span> === | |||
{{MoveData | |||
| name = Double Lariat | |||
| input = 3P | |||
| subtitle = Lariat | |||
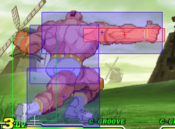
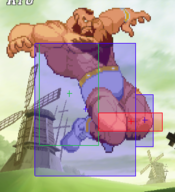
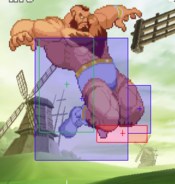
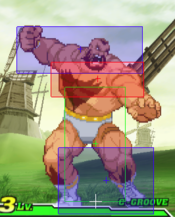
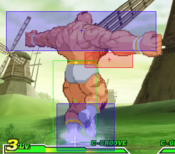
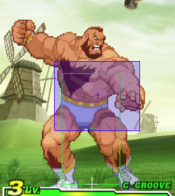
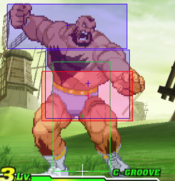
| image = CVS2_Zangief_PPP_First.PNG | |||
| caption = Upper Body Invuln | |||
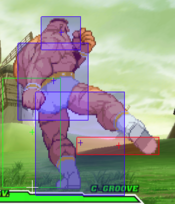
| image2 = CVS2_Zangief_PPP_Second.PNG | |||
| caption2 = Early Hitbox and Mid Invuln | |||
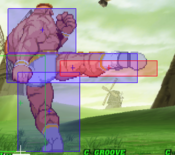
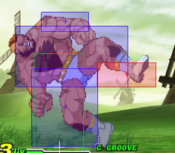
| image3 = CVS2_Zangief_PPP_Third.PNG | |||
| caption3 = Spinning Hitbox | |||
| linkname = Double Lariat | |||
| data = | |||
{{AttackData-CvS2 | |||
| version = {{Icon-Capcom|P}}{{Icon-Capcom|P}}{{Icon-Capcom|P}} | |||
| subtitle = | |||
| damage = 1300, 1500~1000 | |||
| stun = 13, 15~10 | |||
| cancel = None | |||
| guard = Mid | |||
| parry = High | |||
| startup = 4 | |||
| active = 2(4)9(3)7(4)8(5)10(5)7 | |||
| recovery = 11 | |||
| total = 79 | |||
| advHit = -DWN | |||
| advBlock = Varies | |||
| invul = 4 (Upper), 67 (Middle Body) | |||
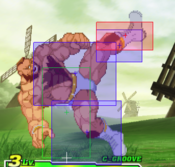
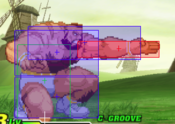
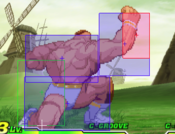
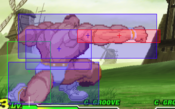
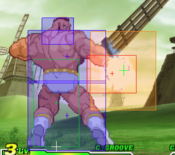
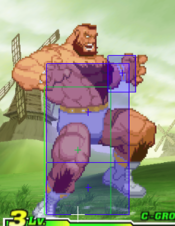
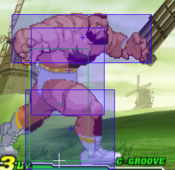
| description = Zangief's classic punch lariat. Very consistent anti-air when timed correctly, and since the hurtbox in the center of his body disappears, he can go through fireballs with this. Smart Lariat usage makes it incredibly hard to hit Zangief with a fireball, and he can usually approach through them since this can be guided with 4 or 6 during the active frames. If you whiff this, you'll likely be punished. The strange damage values and on-block values are because each hit has different data, this is hard to predict and is basically random, but every hit is punishable so it doesn't matter much. | |||
}} | |||
}} | |||
=== <span class="invisible-header">Quick Double Lariat</span> === | |||
{{MoveData | |||
| name = Quick Double Lariat | |||
| input = 3K | |||
| subtitle = Quick Lariat | |||
| image = CVS2_Zangief_KKK_First.PNG | |||
| caption = Lower and Mid Invuln | |||
| image2 = CVS2_Zangief_KKK_Second.PNG | |||
| caption2 = Lower Invuln | |||
| linkname = Quick Double Lariat | |||
| data = | |||
{{AttackData-CvS2 | |||
| version = {{Icon-Capcom|K}}{{Icon-Capcom|K}}{{Icon-Capcom|K}} | |||
| subtitle = | |||
| damage = 1200, 1300~1100 | |||
| stun = 12, 13~11 | |||
| cancel = None | |||
| guard = Mid | |||
| parry = High | |||
| startup = 4 | |||
| active = 2(4)8(3)7(4)6 | |||
| recovery = 14 | |||
| total = 52 | |||
| advHit = -DWN | |||
| advBlock = -24 | |||
| invul = 4 (Upper/Lower), 34 (Lower) | |||
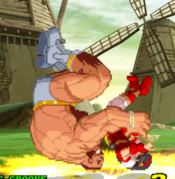
| description = Essentially the same as Lariat, but about 2/3rds of the duration. Does lower damage to compensate for this, but is still your preferred ender in combos where you know it'll hit. Can also be nice as an anti-poke tool, similar to Ken's LP Shoryuken, and is hard to really punish in neutral despite the long animation. Invulnerable on his feet instead of his middle body, so not an anti-fireball tool like 3P Lariat. | |||
}} | |||
}} | |||
=== <span class="invisible-header">Banishing Flat</span> === | |||
{{MoveData | |||
| name = Banishing Flat | |||
| input = 623P | |||
| subtitle = Green Hand | |||
| image = CVS2_Zangief_623P.PNG | |||
| caption = | |||
| linkname = Banishing Flat | |||
| data = | |||
{{AttackData-CvS2 | |||
| version = {{Motion|623}}+{{Icon-Capcom|LP}} | |||
| subtitle = | |||
| damage = 1400 | |||
| stun = 14 | |||
| cancel = None | |||
| guard = Mid | |||
| parry = High | |||
| startup = 14 | |||
| active = 8 | |||
| recovery = 19 | |||
| total = 31 | |||
| advHit = -3 | |||
| advBlock = -3 | |||
| invul = None (Delete Proj. Frame 15~23) | |||
}} | |||
{{AttackData-CvS2 | |||
| header = no | |||
| version = {{Motion|623}}+{{Icon-Capcom|MP}} | |||
| subtitle = | |||
| damage = 1500 | |||
| stun = 15 | |||
| cancel = None | |||
| guard = Mid | |||
| parry = High | |||
| startup = 15 | |||
| active = 10 | |||
| recovery = 18 | |||
| total = 43 | |||
| advHit = -4 | |||
| advBlock = -4 | |||
| invul = None (Delete Proj. Frame 16~26) | |||
}} | |||
{{AttackData-CvS2 | |||
| header = no | |||
| version = {{Motion|623}}+{{Icon-Capcom|HP}} | |||
| subtitle = | |||
| damage = 1600 | |||
| stun = 16 | |||
| cancel = None | |||
| guard = Mid | |||
| parry = High | |||
| startup = 16 | |||
| active = 12 | |||
| recovery = 19 | |||
| total = 47 | |||
| advHit = -7 | |||
| advBlock = -7 | |||
| invul = None (Delete Proj. Frame 17~29) | |||
| description = Zangief turns around and slaps the air with green energy surrounding his hand. A unique and good move that can end combos in a standing mixup, delete projectiles, and get Zangief close. The jab version is a good combo ender, and Zangief can mix up between a few options after. He can do another 623LP, he can walk forward slightly and command grab, he can jump, he can block, etc. The MP and HP versions are better for deleting projectiles and approaching. | |||
}} | |||
}} | |||
=== <span class="invisible-header">Spinning Pile Driver</span> === | |||
{{MoveData | |||
| name = Spinning Pile Driver | |||
| input = 360P | |||
| subtitle = SPD | |||
| image = CVS2_Zangief_360P.PNG | |||
| caption = | |||
| linkname = Spinning Pile Driver | |||
| data = | |||
{{AttackData-CvS2 | |||
| version = {{Motion|360}}+{{Icon-Capcom|LP}} | |||
| subtitle = | |||
| damage = 2000 | |||
| stun = 0 | |||
| cancel = None | |||
| guard = Grab | |||
| parry = Grab | |||
| startup = 0 | |||
| active = 1 | |||
| recovery = 48 | |||
| total = 49 | |||
| advHit = -DWN | |||
| advBlock = Grab | |||
| invul = None | |||
}} | |||
{{AttackData-CvS2 | |||
| header = no | |||
| version = {{Motion|360}}+{{Icon-Capcom|MP}} | |||
| subtitle = | |||
| damage = 2300 | |||
| stun = 0 | |||
| cancel = None | |||
| guard = Grab | |||
| parry = Grab | |||
| startup = 0 | |||
| active = 1 | |||
| recovery = 46 | |||
| total = 47 | |||
| advHit = -DWN | |||
| advBlock = Grab | |||
| invul = None | |||
}} | |||
{{AttackData-CvS2 | |||
| header = no | |||
| version = {{Motion|360}}+{{Icon-Capcom|HP}} | |||
| subtitle = | |||
| damage = 2700 | |||
| stun = 0 | |||
| cancel = None | |||
| guard = Grab | |||
| parry = Grab | |||
| startup = 0 | |||
| active = 1 | |||
| recovery = 44 | |||
| total = 45 | |||
| advHit = -DWN | |||
| advBlock = Grab | |||
| invul = None | |||
| description = Zangief's signature damaging command grab. Despite what you may think at first, this isn't used as a mixup tool. Though it is his fastest grab, it gives him a very bad knockdown, ending his aggression. Instead this is used as a reversal and punish. It starts instantly, meaning if they can be grabbed at all they will be. This allows it to beat out strikes, punish a lot of things that were likely meant to be safe, and make opponents restructure their pressure. Smart use of this makes Zangief a lot more of a walking tank. Since Zangief is often in K-Groove, he can easily access this after almost any JD for a great punish, making him much scarier. The LP version does the least damage but has the most range, while the HP version is the inverse. Unless you know the punish, stick to the LP version to ensure it reaches. | |||
}} | |||
}} | |||
=== <span class="invisible-header">Atomic Suplex</span> === | |||
{{MoveData | |||
| name = Atomic Suplex | |||
| input = Near Opponent, 360K | |||
| subtitle = Proximity 360 | |||
| image = CVS2_Zangief_cl360K.PNG | |||
| caption = | |||
| linkname = Atomic Suplex | |||
| data = | |||
{{AttackData-CvS2 | |||
| version = Close {{Motion|360}}+{{Icon-Capcom|LK}} | |||
| subtitle = | |||
| damage = 2200 | |||
| stun = 0 | |||
| cancel = None | |||
| guard = Grab | |||
| parry = Grab | |||
| startup = 1 | |||
| active = 1 | |||
| recovery = 0 (Can't Whiff) | |||
| total = 2 | |||
| advHit = -DWN | |||
| advBlock = Grab | |||
| invul = None | |||
}} | |||
{{AttackData-CvS2 | |||
| header = no | |||
| version = Close {{Motion|360}}+{{Icon-Capcom|MK}} | |||
| subtitle = | |||
| damage = 2500 | |||
| stun = 0 | |||
| cancel = None | |||
| guard = Grab | |||
| parry = Grab | |||
| startup = 1 | |||
| active = 1 | |||
| recovery = 0 (Can't Whiff) | |||
| total = 2 | |||
| advHit = -DWN | |||
| advBlock = Grab | |||
| invul = None | |||
}} | |||
{{AttackData-CvS2 | |||
| header = no | |||
| version = Close {{Motion|360}}+{{Icon-Capcom|HK}} | |||
| subtitle = | |||
| damage = 2900 | |||
| stun = 0 | |||
| cancel = None | |||
| guard = Grab | |||
| parry = Grab | |||
| startup = 1 | |||
| active = 1 | |||
| recovery = 0 (Can't Whiff) | |||
| total = 2 | |||
| advHit = -DWN | |||
| advBlock = Grab | |||
| invul = None | |||
| description = Zangief's close range proximity throw. If they aren't in range or aren't immediately grabbable, Flying Power Bomb comes out instead of this. This is your main throw for mixups, as while it has slightly less range than a jab SPD, it does more damage and gives a more workable knockdown for you to continue your mixup. Has 1 frame of startup, so it isn't instant, but that doesn't matter as much since this makes it a bit better to tick throw with. Be careful of the range, as you really don't want Flying Power Bomb to come out. | |||
}} | |||
}} | |||
=== <span class="invisible-header">Flying Power Bomb</span> === | |||
{{MoveData | |||
| name = Flying Power Bomb | |||
| input = 360K | |||
| subtitle = Running Bear Grab | |||
| image = CVS2_Zangief_360K.PNG | |||
| caption = | |||
| linkname = Flying Power Bomb | |||
| data = | |||
{{AttackData-CvS2 | |||
| version = {{Motion|360}}+{{Icon-Capcom|LK}} | |||
| subtitle = | |||
| damage = 1900 | |||
| stun = 0 | |||
| cancel = None | |||
| guard = Grab | |||
| parry = Grab | |||
| startup = 15 | |||
| active = 25 | |||
| recovery = 50 | |||
| total = 90 | |||
| advHit = -DWN | |||
| advBlock = Grab | |||
| invul = None | |||
}} | |||
{{AttackData-CvS2 | |||
| header = no | |||
| version = {{Motion|360}}+{{Icon-Capcom|MK}} | |||
| subtitle = | |||
| damage = 2000 | |||
| stun = 0 | |||
| cancel = None | |||
| guard = Grab | |||
| parry = Grab | |||
| startup = 15 | |||
| active = 26 | |||
| recovery = 52 | |||
| total = 53 | |||
| advHit = -DWN | |||
| advBlock = Grab | |||
| invul = None | |||
}} | |||
{{AttackData-CvS2 | |||
| header = no | |||
| version = {{Motion|360}}+{{Icon-Capcom|HK}} | |||
| subtitle = | |||
| damage = 2100 | |||
| stun = 0 | |||
| cancel = None | |||
| guard = Grab | |||
| parry = Grab | |||
| startup = 15 | |||
| active = 33 | |||
| recovery = 54 | |||
| total = 102 | |||
| advHit = -DWN | |||
| advBlock = Grab | |||
| invul = None | |||
| description = Zangief slowly walks forward and tries to grab the opponent. A very risky move with only a few use cases over his other command grabs. It has slow startup, obvious and slow movement, almost a full second of whifflag, and does the least damage of his command grabs. The slow startup works in its favor for one situation: tick throws. It isn't safe, but you can cancel any of Zangief's cancellable normals into this and get a tick throw. A smart opponent can react and mash, but the threat is stronger when paired with frame traps or cancels to Green Hand. This isn't a trick to rely on, but you can catch opponents expecting you to end safely with a throw, making it occasionally worth the risk. | |||
}} | |||
}} | |||
== Super Moves == | |||
=== <span class="invisible-header">Final Atomic Buster</span> === | |||
{{MoveData | |||
| name = Final Atomic Buster | |||
| input = 720P | |||
| subtitle = FAB, 720 | |||
| image = CVS2_Zangief_720P.PNG | |||
| caption = | |||
| linkname = Final Atomic Buster | |||
| data = | |||
{{AttackData-CvS2 | |||
| version = {{Motion|360}}{{Motion|360}}+{{Icon-Capcom|LP}} | |||
| subtitle = | |||
| damage = 3500 | |||
| stun = 0 | |||
| cancel = None | |||
| guard = Grab | |||
| parry = Grab | |||
| startup = 4:0 | |||
| active = 1 | |||
| recovery = 48 | |||
| total = 53 | |||
| advHit = -DWN | |||
| advBlock = Grab | |||
| invul = 8 (Full) | |||
}} | |||
{{AttackData-CvS2 | |||
| header = no | |||
| version = {{Motion|360}}{{Motion|360}}+{{Icon-Capcom|MP}} | |||
| subtitle = | |||
| damage = 5000 | |||
| stun = 0 | |||
| cancel = None | |||
| guard = Grab | |||
| parry = Grab | |||
| startup = 4:0 | |||
| active = 1 | |||
| recovery = 48 | |||
| total = 53 | |||
| advHit = -DWN | |||
| advBlock = Grab | |||
| invul = 14 (Full) | |||
}} | |||
{{AttackData-CvS2 | |||
| header = no | |||
| version = {{Motion|360}}{{Motion|360}}+{{Icon-Capcom|HP}} | |||
| subtitle = | |||
| damage = 7000 | |||
| stun = 0 | |||
| cancel = None | |||
| guard = Grab | |||
| parry = Grab | |||
| startup = 4:0 | |||
| active = 1 | |||
| recovery = 48 | |||
| total = 53 | |||
| advHit = -DWN | |||
| advBlock = Grab | |||
| invul = 22 (Full) | |||
| description = A massively damaging and satisfying command grab. Very useful mixup and reversal tool. After the superflash, it starts immediately, meaning if they do anything that isn't throw invulnerable they will get grabbed. The threat of this forces them to move more, which opens them up to catching jumps with a j.HP, j.8HP, Lariat, etc. It also acts as a huge damage punish in similar spots to SPD, making it hard to run real offense on a Zangief player with good punish timings. The threat of this skyrockets in K-Groove because of JD. When Zangief is Raged, he has access to the level 3 version of this for MASSIVE damage. One JD can lead to this as a punish. The input makes it hard to utilize, and you usually have to hide it behind something like a dash, jump, JD, Max Mode activation, or a normal as a tick throw. | |||
}} | |||
}} | |||
=== <span class="invisible-header">Aerial Russian Slam</span> === | |||
{{MoveData | |||
| name = Aerial Russian Slam | |||
| input = 23623K | |||
| subtitle = Anti-Air Super | |||
| image = CVS2_Zangief_23623K.PNG | |||
| caption = | |||
| linkname = Aerial Russian Slam | |||
| data = | |||
{{AttackData-CvS2 | |||
| version = {{Motion|236}}{{Motion|d}}{{Motion|df}}+{{Icon-Capcom|LK}} | |||
| subtitle = | |||
| damage = 2200 | |||
| stun = 0 | |||
| cancel = None | |||
| guard = Grab | |||
| parry = Grab | |||
| startup = 4:5 | |||
| active = 25 | |||
| recovery = 33 | |||
| total = 67 | |||
| advHit = -DWN | |||
| advBlock = Grab | |||
| invul = 8 (Full) | |||
}} | |||
{{AttackData-CvS2 | |||
| header = no | |||
| version = {{Motion|236}}{{Motion|d}}{{Motion|df}}+{{Icon-Capcom|MK}} | |||
| subtitle = | |||
| damage = 3600 | |||
| stun = 0 | |||
| cancel = None | |||
| guard = Grab | |||
| parry = Grab | |||
| startup = 4:5 | |||
| active = 25 | |||
| recovery = 33 | |||
| total = 67 | |||
| advHit = -DWN | |||
| advBlock = Grab | |||
| invul = 14 (Full) | |||
}} | |||
{{AttackData-CvS2 | |||
| header = no | |||
| version = {{Motion|236}}{{Motion|d}}{{Motion|df}}+{{Icon-Capcom|HK}} | |||
| subtitle = | |||
| damage = 5200 | |||
| stun = 0 | |||
| cancel = None | |||
| guard = Grab | |||
| parry = Grab | |||
| startup = 4:5 | |||
| active = 25 | |||
| recovery = 33 | |||
| total = 67 | |||
| advHit = -DWN | |||
| advBlock = Grab | |||
| invul = 22 (Full) | |||
| description = A leaping anti-air command grab. Not the most consistent anti-air, but if you read the jump, this will punish it for good damage. Especially the level 3 version, which can lead to the basic mixup between this and his 720. If they don't jump, 720 will grab them, and if they do, this will hit them. Still, usually it's better to save the meter/Rage for a level 3 720, since that super is a lot scarier. This is also a combo ender in A-Groove for his Custom Combos. | |||
}} | |||
}} | |||
== Colors == | == Colors == | ||
Latest revision as of 11:59, 12 January 2024
Introduction
Story
Zangief, nicknamed The Red Cyclone, is a massive man and a Russian hero. In the days of Street Fighter: Alpha, Zangief was the hero of the Soviet Union. The President of Russia and the leader of the Soviet Union offered him full financial support to travel the world, beating opponents and boasting Soviet might. Zangief does this flawlessly, getting into fights with legends like Ken and winning. Once his mission is over, The President sends him to fight Shadaloo forces, slowly making their way into Russia. Along the way, Zangief finds two new friends in E. Honda and R. Mika. While it is unknown if they destroyed the Psycho Power Driver or not, Zangief still fights for his Soviet Russian pride to this day.
Gameplay
Zangief is the classic grappler. The character that the whole archetype is modeled after. His big body, huge damage, slow movement, and big buttons make Zangief what he is. While CvS2 is home to a few grapplers, Zangief stays the truest to the archetype. He hits hard with big normals and fast grabs and can get hit plenty of times before it starts to hurt. Opponents have to be scared of a good Zangief, as he has the amazing ability to punish just about anything, and he can control neutral shockingly well with big buttons and Lariats.
Zangief hurts in a lot of places, however. Likely the biggest one is his lacking mobility. While SNK Grooves give him runs and hops to aid this, he has a very slow run still, and he doesn't get to lose his slow walk speed. His lack of movement hurts a lot, as his best mixups and damage potential only exist when he's very close. To hurt this more, his main command grab sends them flying away, basically resetting to neutral. So the move you want to land most requires you to struggle with Zangief's biggest problem, and when you do land it, it resets you into that same situation.
In all, Zangief is in the lower half of the mid-tier characters. While he has great damage and a great ability to punish, he has to constantly fight against the top-tier CvS2 characters, who are all beastly in neutral. Zangief has to outplay opponents at a lot of turns, but if he does, he is a monster.
Groove Selection
Best - K: Zangief's best Groove is definitely K-Groove. It gives you everything you need for a successful grappler playstyle in this game: a good defensive option in JD which often leads into a sweep or even SPD, Rage which juices his already high damage to new levels, and the threat of a level 3 360 in Rage. Zangief's high health also allows him to take a lot more hits and have Rage even more often than other K-Groove characters. K-Zangief pokes add up, SPDs do great damage even if they do reset to neutral, and his strike/throw mix becomes very threatening.
Useful - A/N/P: A-Groove and N-Groove are a little behind K-Groove. A-Zangief gives up any mobility buffs and has a pretty bad dash. In exchange, he gets access to a solid Custom Combo in the corner, and the powerful activation mechanic makes his throws stronger by mere threat alone. He also has rolls and Alpha Counters to aid his weaker neutral and defense. N-Groove is the opposite. N-Zangief has a great mix of tools for many situations, having the higher mobility of K-Groove and the rolls of A-Groove. He also gets access to roll, which once again gets him out of some tight spots. He sacrifices this by not having the threat of a level 3 720 without a Max Mode activation, and less overall meter altogether. P-Zangief is a very difficult P-Groove character, but parries can be very rewarding for Zangief who can usually get a sweep or SPD, similar to JD. He also can get parries into 720, which is hard to do, especially since P-Groove rarely has meter. It is very rewarding, however. P-Zangief lives and dies by how well you parry, just like most P-Groove characters.
Worst - C/S: C-Zangief sacrifices a lot in comparison, and gets very little in return. Since both of his supers are grabs, he can't really do any level 2 combos, making the main attraction of C-Groove worthless for him. The main attraction of C-Zangief is air blocking and more consistent meter, he makes an alright point. S-Zangief is hard to consider worthwhile since even though his health does let him have infinite level 1's more safely than other characters, this really doesn't benefit him much. He has a fun gimmick with dodge into SPD or 720, but having to charge for meter really hurts Zangief. In general, S-Zangief has very little in the way of strengths.
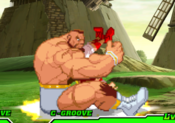
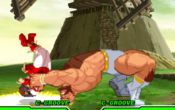
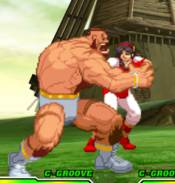
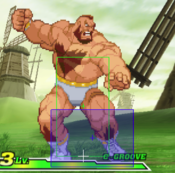
|
Zangief is a scary grappler who punishes the opponent with high damage and fast grabs, and controls neutral with big and damaging buttons. He pays for this with low combo potential and very slow movement. Zangief is best in K-Groove. Difficulty: HardTier: C |
|
| Pros | Cons |
|
|
Players to Watch
| Name | Country | Groove | Accounts | Notes |
|---|---|---|---|---|
| GunterJPN | Japan | A-Groove | Twitter: @GunterJPn | An A-Groover who finds success with odd teams. Also uses Gief's customs really well. Sample Match |
| Tobari | Japan | K/S-Groove | Twitter: @cvs2event_Tobari | Has an extremely large character pool. Mainly known for using Gief and Rolento really well. S-Groove Sample Match K-Groove Sample Match |
Normal Moves
Zangief has no close normal versions, so there are only far, crouching, and jumping listed.
Far Normals
5LP
5MP
5HP
5LK
5MK
5HK
Crouching Normals
2LP
2MP
2HP
2LK
2MK
2HK
Jumping Normals
jLP
jMP
jHP
jLK
jMK
jHK
Command Normals
Long Kick
Headbutt
Flying Body Attack
Double Knee Drop
Throws
Pile Driver
Kamitsuki
Special Moves
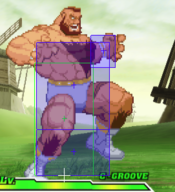
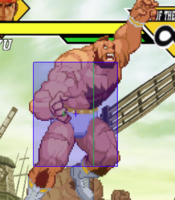
Double Lariat
Quick Double Lariat
Banishing Flat
Spinning Pile Driver
Atomic Suplex
Flying Power Bomb
Super Moves
Final Atomic Buster
Aerial Russian Slam
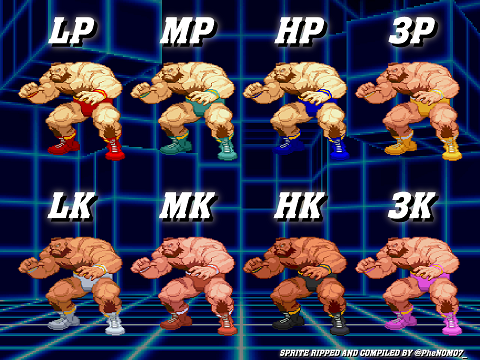
Colors
