Callie Rose (talk | contribs) No edit summary |
|||
| (8 intermediate revisions by 3 users not shown) | |||
| Line 2: | Line 2: | ||
{{CvS2 Character Subnav|char=Rock|short=Rock}} | {{CvS2 Character Subnav|char=Rock|short=Rock}} | ||
<div> | <div> | ||
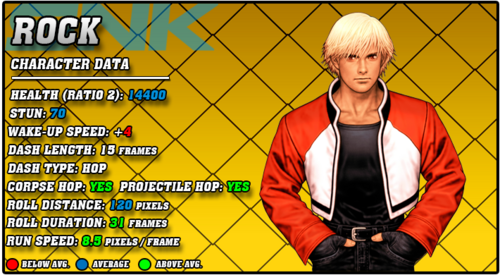
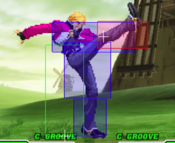
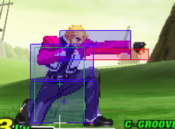
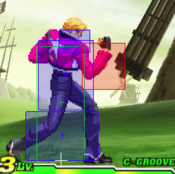
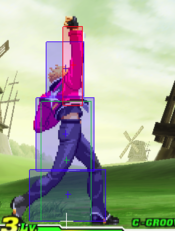
[[File:CVS2_Rock_Data.png|right|500px]] | |||
== Story == | == Story == | ||
'''Rock Howard''' is the biological son of Geese Howard. Geese didn't help raise Rock at all, leaving Rock's mother Marie to care for him. They lived a fairly modest and simple life, and while Rock knew of his father and who he was, he never met him. When Rock was seven years old, his mother contracted a very serious illness. He tried to nurse her back to health, but being a young child, there wasn't much he could do. In a last-ditch attempt to save her, he went to Geese Tower to confront his father. Despite Geese's immense wealth and Rock's begging and pleading, Geese sent him away, wanting nothing to do with it. When Rock returned home, his mother had passed away. Rock would never forgive Geese for this, holding a permanent grudge against his father ever since. | '''Rock Howard''' is the biological son of Geese Howard. Geese didn't help raise Rock at all, leaving Rock's mother Marie to care for him. They lived a fairly modest and simple life, and while Rock knew of his father and who he was, he never met him. When Rock was seven years old, his mother contracted a very serious illness. He tried to nurse her back to health, but being a young child, there wasn't much he could do. In a last-ditch attempt to save her, he went to Geese Tower to confront his father. Despite Geese's immense wealth and Rock's begging and pleading, Geese sent him away, wanting nothing to do with it. When Rock returned home, his mother had passed away. Rock would never forgive Geese for this, holding a permanent grudge against his father ever since. | ||
| Line 59: | Line 24: | ||
--------------------------- | --------------------------- | ||
'''Rock''' is a strong all-rounder with great aggressive mixup, solid neutral buttons, and some decent zoning. He doesn't excel at much of anything besides offense, and can lose to the more degenerate tools of the top tiers, but he has every tool to succeed, especially in K-Groove. Rock is best in '''K-Groove'''. | '''Rock''' is a strong all-rounder with great aggressive mixup, solid neutral buttons, and some decent zoning. He doesn't excel at much of anything besides offense, and can lose to the more degenerate tools of the top tiers, but he has every tool to succeed, especially in K-Groove. Rock is best in '''K-Groove'''. | ||
'''Difficulty''': Pretty Hard<br>'''Tier''': A | |||
|pros= | |pros= | ||
* '''Versatile:''' Rock has a bit of everything in him, from a fireball, a reversal, a command run, a command grab, and a very reliable combo ender | * '''Versatile:''' Rock has a bit of everything in him, from a fireball, a reversal, a command run, a command grab, and a very reliable combo ender | ||
| Line 73: | Line 40: | ||
}} | }} | ||
=== Players to Watch === | |||
{| class="wikitable" | |||
|- | |||
! Name !! Country !! Groove !! Accounts !! Notes | |||
|- | |||
| Tsugunosuke || Japan || N-Groove || N/A || Very strong player, has a very good Rock. <br> [https://youtu.be/1th3nisn4w0 Sample Match] | |||
|- | |||
| GAO || Japan || K-Groove || N/A || Runs Rock at anchor, but he is also the best Rock player in the world so that alleviates the issue. <br> [https://youtu.be/59ajhBkgoH4 Sample Match] | |||
|- | |||
| OTK || Japan || K-Groove || Twitter: @den_ta9 || Once the best Rock in the world, he plays with a lot of aggression and reads to create his quick and dangerous offense. <br> [https://youtu.be/Vnki5Zf1lo4?si=ocq6jgTU4MBDhnbw&t=4 Sample Match] | |||
|- | |||
|} | |||
<br><br> | |||
== Normal Moves == | == Normal Moves == | ||
| Line 554: | Line 532: | ||
| advBlock = -6 | | advBlock = -6 | ||
| invul = None | | invul = None | ||
| description = A great low kick for linking into, or whiff punishing into a special/super for knockdown. | | description = A great low kick for linking into, or whiff punishing into a special/super for knockdown. While it can combo into 214HP, it is an unreliable cancel at range and can fall out, however it works consistently point blank. If you don't cancel, it is -6 on block, which isn't great but it can be made safe at range. You cannot whiff this normal as safe in neutral as others as it's duration is quite lengthy. | ||
}} | }} | ||
}} | }} | ||
| Line 838: | Line 816: | ||
| invul = None | | invul = None | ||
| description = Rock grabs the opponent before uppercutting them away. Higher damage but slower startup, standard kick throw. For some reason, only has 10 frames of recovery on whiff where most throws have 13, but this only happens in the extremely rare situations where throw whiffs even happen, so don't worry about it too much. To get oki from this, whiff 214MP to get close. | | description = Rock grabs the opponent before uppercutting them away. Higher damage but slower startup, standard kick throw. For some reason, only has 10 frames of recovery on whiff where most throws have 13, but this only happens in the extremely rare situations where throw whiffs even happen, so don't worry about it too much. To get oki from this, whiff 214MP to get close. | ||
}} | |||
}} | |||
== Specials == | |||
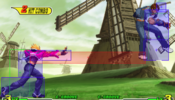
=== <span class="invisible-header">Reppuken</span> === | |||
{{MoveData | |||
| name = Reppuken | |||
| input = 236LP/MP | |||
| subtitle = Fireball | |||
| image = CVS2_Rock_236P.PNG | |||
| caption = | |||
| linkname = Reppuken | |||
| data = | |||
{{AttackData-CvS2 | |||
| version = {{Motion|236}}+{{Icon-Capcom|LP}} | |||
| subtitle = | |||
| damage = 800 | |||
| stun = 8 | |||
| cancel = None | |||
| guard = Mid | |||
| parry = Mid | |||
| startup = 14 | |||
| active = Traveling | |||
| recovery = 45 | |||
| total = 59 | |||
| advHit = -12 | |||
| advBlock = -12 | |||
| invul = None | |||
}} | |||
{{AttackData-CvS2 | |||
| header = no | |||
| version = {{Motion|236}}+{{Icon-Capcom|MP}} | |||
| subtitle = | |||
| damage = 900 | |||
| stun = 9 | |||
| cancel = None | |||
| guard = Mid | |||
| parry = Mid | |||
| startup = 15 | |||
| active = Traveling | |||
| recovery = 45 | |||
| total = 60 | |||
| advHit = -12 | |||
| advBlock = -12 | |||
| invul = None | |||
| description = Rock tosses out the iconic Reppuken. Solid fireballs, but held back as zoning tools due to being grounded. Grounded fireballs are more easily avoided by things like hops or low invulnerable moves, which are more common than moves that naturally avoid high flying fireballs. Still, these aren't necessarily bad for throwing out at fullscreen. Where they really shine is in pressure. Cancelling into them, tossing them out at spacings where it's hard to escape Rock's pressure, or timing them to land meaty. They aren't plus, but they do make for reliable and safe blockstring enders, which Rock lacks otherwise. | |||
}} | |||
}} | |||
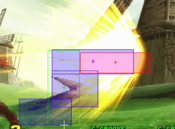
=== <span class="invisible-header">Double Reppuken</span> === | |||
{{MoveData | |||
| name = Double Reppuken | |||
| input = 236HP | |||
| subtitle = Double Fireball | |||
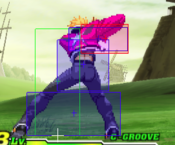
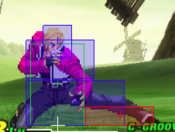
| image = CVS2_Rock_236HP_First.PNG | |||
| caption = Windup Hitbox | |||
| image2 = CVS2_Rock_236HP_Second.PNG | |||
| caption2 = Traveling Hitbox | |||
| linkname = Double Reppuken | |||
| data = | |||
{{AttackData-CvS2 | |||
| version = {{Motion|236}}+{{Icon-Capcom|HP}} | |||
| subtitle = | |||
| damage = 500+900 | |||
| stun = 5+9 | |||
| cancel = None | |||
| guard = Mid | |||
| parry = Mid | |||
| startup = 17 | |||
| active = 23, Trav. | |||
| recovery = 37 | |||
| total = 77 | |||
| advHit = -4 | |||
| advBlock = -4 | |||
| invul = None | |||
| description = Rock winds up a Reppuken before tossing it out. The first half, where Rock is holding the energy near him, will delete projectiles. This allows Rock to delete a projectile and toss one of his own. It can be used this way as a counter for zoning, but the commitment of it overall makes it a bit risky. It can also be used in pressure like normal Reppuken as a greedy alternative for better frame advantage. This also makes for one of Rock's best roll cancels. RC Double Reppuken is a great anti-air and reversal, and is very safe as well. | |||
}} | |||
}} | |||
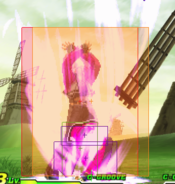
=== <span class="invisible-header">Rising Tackle</span> === | |||
{{MoveData | |||
| name = Rising Tackle | |||
| input = [2]8P | |||
| subtitle = Charge DP | |||
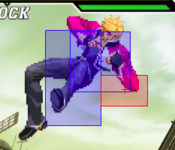
| image = CVS2_Rock_28P_First.PNG | |||
| caption = Invincible Startup | |||
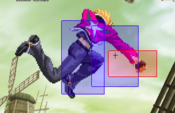
| image2 = CVS2_Rock_28P_Second.PNG | |||
| caption2 = HP version invincible till active frames | |||
| linkname = Rising Tackle | |||
| data = | |||
{{AttackData-CvS2 | |||
| version = Charge {{Motion|d}},{{Motion|u}}+{{Icon-Capcom|LP}} | |||
| subtitle = | |||
| damage = 1000+200x2 | |||
| stun = 10+2x2 | |||
| cancel = None | |||
| guard = Mid | |||
| parry = Mid | |||
| startup = 6 | |||
| active = 2(6)3,9 | |||
| recovery = 32 | |||
| total = 58 | |||
| advHit = DWN | |||
| advBlock = -28 | |||
| invul = 1~6 (Full), 7~12 (Lower) | |||
}} | |||
{{AttackData-CvS2 | |||
| header = no | |||
| version = Charge {{Motion|d}},{{Motion|u}}+{{Icon-Capcom|MP}} | |||
| subtitle = | |||
| damage = 1000+200x3 | |||
| stun = 10+2x3 | |||
| cancel = None | |||
| guard = Mid | |||
| parry = Mid | |||
| startup = 6 | |||
| active = 2(6)3,3,11 | |||
| recovery = 38 | |||
| total = 69 | |||
| advHit = DWN | |||
| advBlock = -39 | |||
| invul = 1~6 (Full), 7~8 (Upper), 9~12 (Lower) | |||
}} | |||
{{AttackData-CvS2 | |||
| header = no | |||
| version = Charge {{Motion|d}},{{Motion|u}}+{{Icon-Capcom|HP}} | |||
| subtitle = | |||
| damage = 1000+200x4 | |||
| stun = 10+2x4 | |||
| cancel = None | |||
| guard = Mid | |||
| parry = Mid | |||
| startup = 6 | |||
| active = 2(6)3,3,3,13 | |||
| recovery = 44 | |||
| total = 80 | |||
| advHit = DWN | |||
| advBlock = -50 | |||
| invul = 1~8 (Full), 9~12 (Air Guard) | |||
| description = Rock imitates Terry's Rising Tackle. These make for solid anti-airs, and the HP version is a reversal, however they have one major drawback. They require charge. This means that you can't always have them, and more often than not you'll rely on normal anti-airs like 2MP and 5HK. Having the charge for a reversal HP Rising Tackle isn't hard however, and makes for a solid high-risk high-reward defensive tool. | |||
}} | |||
}} | |||
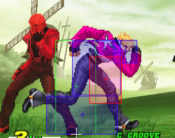
=== <span class="invisible-header">Crack Counter</span> === | |||
{{MoveData | |||
| name = Crack Counter | |||
| input = 236K | |||
| subtitle = Counters | |||
| image = CVS2_Rock_236LK.PNG | |||
| caption = High | |||
| image2 = CVS2_Rock_236MK.PNG | |||
| caption2 = Mid | |||
| image3 = CVS2_Rock_236HK.PNG | |||
| caption3 = Low | |||
| linkname = Crack Counter | |||
| data = | |||
{{AttackData-CvS2 | |||
| version = {{Motion|236}}+{{Icon-Capcom|LK}} | |||
| subtitle = | |||
| damage = 1500 | |||
| stun = 15 | |||
| cancel = None | |||
| guard = None | |||
| parry = None | |||
| startup = 3 | |||
| active = 23 | |||
| recovery = 12 | |||
| total = 35 | |||
| advHit = DWN | |||
| advBlock = None | |||
| invul = 3~17 (Counters High) | |||
}} | |||
{{AttackData-CvS2 | |||
| header = no | |||
| version = {{Motion|236}}+{{Icon-Capcom|MK}} | |||
| subtitle = | |||
| damage = 1800 | |||
| stun = 18 | |||
| cancel = None | |||
| guard = None | |||
| parry = None | |||
| startup = 3 | |||
| active = 23 | |||
| recovery = 12 | |||
| total = 35 | |||
| advHit = DWN | |||
| advBlock = None | |||
| invul = 3~17 (Counters Mid) | |||
}} | |||
{{AttackData-CvS2 | |||
| header = no | |||
| version = {{Motion|236}}+{{Icon-Capcom|HK}} | |||
| subtitle = | |||
| damage = 1600 | |||
| stun = 16 | |||
| cancel = None | |||
| guard = None | |||
| parry = None | |||
| startup = 3 | |||
| active = 23 | |||
| recovery = 12 | |||
| total = 35 | |||
| advHit = DWN | |||
| advBlock = None | |||
| invul = 3~17 (Counters Low) | |||
| description = Rock positions his hands to catch the opponents attack, and if he does, he quickly retaliates with a Crack Shot to knock them down. Useful but notably not frame 1 counters for calling out pressure and repetitive neutral. If an opponent is constantly poking you at a specific range, doing the same blockstring over and over, or always jumping in with a button out, use one of these and make them rethink that linear style. Not being frame 1 is a bit hard, since that means they can't be reversals. It also means they can't call out all forms of pressure, as a 2 frame gap will still hit them. You can use the LK version as an anti-air, but this isn't as reliable as a DP or normal, since a simple empty jump will beat it cleanly. Use these as prediction based callout tools, and don't overuse them, since you'll definitely be punished for that. | |||
}} | |||
}} | |||
=== <span class="invisible-header">Hard Edge</span> === | |||
{{MoveData | |||
| name = Hard Edge | |||
| input = 214P | |||
| subtitle = Elbow | |||
| image = CVS2_Rock_214P.PNG | |||
| caption = | |||
| linkname = Hard Edge | |||
| data = | |||
{{AttackData-CvS2 | |||
| version = {{Motion|214}}+{{Icon-Capcom|LP}} | |||
| subtitle = | |||
| damage = 1200 | |||
| stun = 12 | |||
| cancel = None | |||
| guard = Mid | |||
| parry = High | |||
| startup = 16 | |||
| active = 8 | |||
| recovery = 26 | |||
| total = 50 | |||
| advHit = DWN | |||
| advBlock = -10 | |||
| invul = 13~24 (Airborne) | |||
}} | |||
{{AttackData-CvS2 | |||
| header = no | |||
| version = {{Motion|214}}+{{Icon-Capcom|MP}} | |||
| subtitle = | |||
| damage = 1300 | |||
| stun = 13 | |||
| cancel = None | |||
| guard = Mid | |||
| parry = High | |||
| startup = 16 | |||
| active = 12 | |||
| recovery = 26 | |||
| total = 54 | |||
| advHit = DWN | |||
| advBlock = -14 | |||
| invul = 13~28 (Airborne) | |||
}} | |||
{{AttackData-CvS2 | |||
| header = no | |||
| version = {{Motion|214}}+{{Icon-Capcom|HP}} | |||
| subtitle = | |||
| damage = 1000+500 | |||
| stun = 10+5 | |||
| cancel = None | |||
| guard = Mid | |||
| parry = High | |||
| startup = 16 | |||
| active = 18 | |||
| recovery = 26 | |||
| total = 60 | |||
| advHit = DWN | |||
| advBlock = -28 | |||
| invul = 13~34 (Airborne) | |||
| description = Rock flies forward with his elbow, knocking the opponent down if it hits. The LP and MP versions are useful forward-moving specials that you can use to force your way in at some risk. The HP version has an additional hit for more damage, though it is much less safe, so use it as a combo ender instead. You can roll cancel these to fly through fireballs and punish them, though this is still technically punishable. Notably, the MP version gives a much better knockdown, so you might want to end in the MP version for better overall reward in some matchups. | |||
}} | |||
}} | |||
=== <span class="invisible-header">Rage Run</span> === | |||
{{MoveData | |||
| name = Rage Run | |||
| input = 214K | |||
| subtitle = Command Run | |||
| image = CVS2_Rock_214LK.PNG | |||
| caption = Type: Dunk | |||
| image2 = CVS2_Rock_214MK.PNG | |||
| caption2 = Type: Save | |||
| image3 = CVS2_Rock_214HK.PNG | |||
| caption3 = Type: Shift | |||
| linkname = Rage Run | |||
| data = | |||
{{AttackData-CvS2 | |||
| version = {{Motion|214}}+{{Icon-Capcom|LK}} | |||
| subtitle = Type: Dunk | |||
| damage = 1000 | |||
| stun = 10 | |||
| cancel = None | |||
| guard = High | |||
| parry = High | |||
| startup = 14~22, 21 | |||
| active = 5 | |||
| recovery = 31/34 | |||
| total = 53/74~82 | |||
| advHit = DWN | |||
| advBlock = -21 | |||
| invul = 0~26 (Airborne) | |||
}} | |||
{{AttackData-CvS2 | |||
| header = no | |||
| version = {{Motion|214}}+{{Icon-Capcom|MK}} | |||
| subtitle = Type: Save | |||
| damage = 0 | |||
| stun = 0 | |||
| cancel = None | |||
| guard = None | |||
| parry = None | |||
| startup = 13~22 | |||
| active = 0 | |||
| recovery = 28 | |||
| total = 41~50 | |||
| advHit = None | |||
| advBlock = None | |||
| invul = None | |||
}} | |||
{{AttackData-CvS2 | |||
| header = no | |||
| version = {{Motion|214}}+{{Icon-Capcom|HK}} | |||
| subtitle = Type: Shift | |||
| damage = 0 | |||
| stun = 0 | |||
| cancel = 360P (30~43) | |||
| guard = None | |||
| parry = None | |||
| startup = 2~32 | |||
| active = 43 | |||
| recovery = 31 | |||
| total = 76~106 | |||
| advHit = None | |||
| advBlock = None | |||
| invul = 1~12 (Full, During Shift) | |||
| description = Rock's various command runs. Depending on the button strength used, you'll get one of three very different tools. The command run itself is nothing special, and while it can be used to close distance, so can Rock's less committal movement options. All of these can be cancelled into to reset pressure and go for another mixup, though this is never safe and repeated usage of it will get you killed. All of his run followups will only activate within proximity of the opponent, and if they don't reach that proximity, Rock will go into a short endlag animation. | |||
* '''Type: Dunk''' is an overhead that is off the ground on the first active frame. This allows it to go over lows that would normally poke you out of the run, and is also throw invulnerable. As an overhead mixup, it isn't horrible. It gives an immediate knockdown, which Rock can work well off of, and a decent bit of damage. It is very high risk however. It's -21 on block, more than punishable by every character, and it is somewhat reactable. | |||
* '''Type: Save''' is a run-stop style move. Rock will run until he is close to the opponent and stop. This is a risky but useful pressure reset against opponents. It leaves a wide gap when cancelled into, regardless of what move you used before, so if your opponent is wary they will punish with a poke into super. If your opponent knows you're gonna do it, you'll get hit with something even harder. | |||
* '''Type: Shift''' is a unique move where Rock will phase through his opponents. This has partial invincibility during the startup of the shift, allowing it to pass through pokes. The last bit of endlag can be cancelled into Shinkuu Nage as well, allowing for a faster command grab mixup, making the opponent respect a possible strike more. This would be the most useful pressure reset tool, since timing the mash on it is hard, but forcing a sideswap is questionable. This does make it a solid corner escape tool however, and you can use it after a knockdown to quickly sideswap if needed. | |||
}} | |||
}} | |||
=== <span class="invisible-header">Shinkuu Nage/Rasetsu</span> === | |||
{{MoveData | |||
| name = Shinkuu Nage | |||
| input = 360P | |||
| subtitle = Command Grab | |||
| image = CVS2_Rock_360P.PNG | |||
| caption = Command Grab | |||
| image2 = CVS2_Rock_PPP.PNG | |||
| caption2 = Rasetsu | |||
| linkname = Shinkuu Nage | |||
| data = | |||
{{AttackData-CvS2 | |||
| version = {{Motion|360}}+{{Icon-Capcom|P}} | |||
| subtitle = | |||
| damage = 1200 | |||
| stun = 0 | |||
| cancel = 3P, Rasetsu | |||
| guard = Grab | |||
| parry = Grab | |||
| startup = 6 | |||
| active = 1 | |||
| recovery = 35 | |||
| total = 42 | |||
| advHit = DWN | |||
| advBlock = Grab | |||
| invul = None | |||
}} | |||
{{AttackData-CvS2 | |||
| header = no | |||
| version = Hold {{Icon-Capcom|3P}} | |||
| subtitle = Rasetsu | |||
| damage = 800 | |||
| stun = 8 | |||
| cancel = None | |||
| guard = Mid | |||
| parry = High | |||
| startup = 4, 5~172 | |||
| active = 12 | |||
| recovery = 23 | |||
| total = 44~211 | |||
| advHit = DWN | |||
| advBlock = -11 | |||
| invul = None | |||
| description = Rock does a quick grab at the opponents feet and tosses them away. This is a relatively useful command grab, though it sadly switches sides. This is made up for by the ability to Break it, usually just called cancelling, by tapping PPP. This allows you to either get a juggle, or run up for much better okizeme. You can run all the way up and do Rage Run Type: Shift to regain your side, though this still tosses them away from the corner. If you want a juggle, all you get midscreen really is one hit of 214HP. In the corner you can get a juggle into Raging Storm. A-Rock can activate and Custom Combo from this anywhere. | |||
Rasetsu is done by holding PPP instead of just tapping. Rock shoots a massive blast of energy from his hand. You have to hold for a specific amount of time, but it isn't very hard to land the timing. Doing the 214HP juggle gives better damage, but it is pretty hard to use the knockdown, while Rasetsu has a bit of a better knockdown. Still, you usually won't use this often, and will either just stick to breaking the grab and going for oki or juggling afterwards for more damage. | |||
}} | |||
}} | |||
== Supers == | |||
=== <span class="invisible-header">Raging Storm</span> === | |||
{{MoveData | |||
| name = Raging Storm | |||
| input = 236236P | |||
| subtitle = Storm Super | |||
| image = CVS2_Rock_236236P.PNG | |||
| caption = | |||
| linkname = Raging Storm | |||
| data = | |||
{{AttackData-CvS2 | |||
| version = {{Motion|236}}{{Motion|236}}+{{Icon-Capcom|LP}} | |||
| subtitle = | |||
| damage = 2400 | |||
| stun = 0 | |||
| cancel = None | |||
| guard = Mid | |||
| parry = Mid | |||
| startup = 4:6 | |||
| active = 9(3)9(3)9 | |||
| recovery = 30 | |||
| total = 73 | |||
| advHit = DWN | |||
| advBlock = -7 | |||
| invul = 1~6 (Full) | |||
}} | |||
{{AttackData-CvS2 | |||
| header = no | |||
| version = {{Motion|236}}{{Motion|236}}+{{Icon-Capcom|MP}} | |||
| subtitle = | |||
| damage = 3600 | |||
| stun = 0 | |||
| cancel = SP/SU | |||
| guard = Mid | |||
| parry = Mid | |||
| startup = 4:8 | |||
| active = 9(3)9(3)9(3)9 | |||
| recovery = 30 | |||
| total = 87 | |||
| advHit = DWN | |||
| advBlock = -7 | |||
| invul = 1~14 (Full) | |||
}} | |||
{{AttackData-CvS2 | |||
| header = no | |||
| version = {{Motion|236}}{{Motion|236}}+{{Icon-Capcom|HP}} | |||
| subtitle = | |||
| damage = 5000 | |||
| stun = 0 | |||
| cancel = None | |||
| guard = Mid | |||
| parry = Mid | |||
| startup = 4:10 | |||
| active = 9(3)9(3)9(3)9(3)9 | |||
| recovery = 30 | |||
| total = 101 | |||
| advHit = DWN | |||
| advBlock = -7 | |||
| invul = 1~22 (Full) | |||
| description = Rock sends up a massive storm of energy, mimicking Geese's Raging Storm. Useful anti-airs and reversals, though not entirely the best due to the slower startup speed. These can also be used in juggles better than Shine Knuckle, though Shine Knuckle is better for longer grounded confirms overall. The level 2 and 3 versions are true reversals, and are fairly safe thanks to pushback, making for great utilities. | |||
}} | |||
}} | |||
=== <span class="invisible-header">Shine Knuckle</span> === | |||
{{MoveData | |||
| name = Shine Knuckle | |||
| input = 236236K | |||
| subtitle = Punch Super, Rush Super | |||
| image = CVS2_Rock_236236K.PNG | |||
| caption = | |||
| linkname = Shine Knuckle | |||
| data = | |||
{{AttackData-CvS2 | |||
| version = {{Motion|236}}{{Motion|236}}+{{Icon-Capcom|LK}} | |||
| subtitle = | |||
| damage = 2400 | |||
| stun = 0 | |||
| cancel = None | |||
| guard = Mid | |||
| parry = High | |||
| startup = 5:6 | |||
| active = 12 | |||
| recovery = 36 | |||
| total = 59 | |||
| advHit = DWN | |||
| advBlock = -25 | |||
| invul = 1~8 (Full) | |||
}} | |||
{{AttackData-CvS2 | |||
| header = no | |||
| version = {{Motion|236}}{{Motion|236}}+{{Icon-Capcom|MK}} | |||
| subtitle = | |||
| damage = 4000 | |||
| stun = 0 | |||
| cancel = SP/SU | |||
| guard = Mid | |||
| parry = High | |||
| startup = 5:6 | |||
| active = 18 | |||
| recovery = 36 | |||
| total = 65 | |||
| advHit = DWN | |||
| advBlock = -27 | |||
| invul = 1~15 | |||
}} | |||
{{AttackData-CvS2 | |||
| header = no | |||
| version = {{Motion|236}}{{Motion|236}}+{{Icon-Capcom|HK}} | |||
| subtitle = | |||
| damage = 5400 | |||
| stun = 0 | |||
| cancel = None | |||
| guard = Mid | |||
| parry = High | |||
| startup = 5:6 | |||
| active = 22 | |||
| recovery = 36 | |||
| total = 69 | |||
| advHit = DWN | |||
| advBlock = -43 | |||
| invul = 1~23 (Full) | |||
| description = Rock covers himself in light before flying forward. The LP and MP versions just hit multiple times, but the HP version will cause a short autocombo. These are very useful punish supers thanks to the fast forward movement, and also act as your preferred confirm super. You can go through pokes and fireballs to score a punish. The HP version autocombo is very high damage, but it tends to be outclassed by Deadly Rave NEO, so you won't use it very often. | |||
}} | |||
}} | |||
=== <span class="invisible-header">Deadly Rave NEO</span> === | |||
{{MoveData | |||
| name = Deadly Rave NEO | |||
| input = 632146K... | |||
| subtitle = Rave Super | |||
| image = CVS2_Rock_632146K.PNG | |||
| caption = | |||
| linkname = Deadly Rave NEO | |||
| data = | |||
{{AttackData-CvS2 | |||
| version = {{Motion|63214}}{{Motion|f}}+{{Icon-Capcom|K}},{{Icon-Capcom|LP}},{{Icon-Capcom|LP}},{{Icon-Capcom|LK}},{{Icon-Capcom|LK}},{{Icon-Capcom|MP}},{{Icon-Capcom|MK}},{{Icon-Capcom|HP}},{{Icon-Capcom|HK}},{{Motion|214}}+{{Icon-Capcom|HP}} | |||
| subtitle = | |||
| damage = 6300 | |||
| stun = 0 | |||
| cancel = None | |||
| guard = Mid | |||
| parry = High | |||
| startup = 4:4 | |||
| active = 40 | |||
| recovery = 32 | |||
| total = 80 | |||
| advHit = DWN | |||
| advBlock = -13 | |||
| invul = 1~22 (Full) | |||
| description = Rock does a long string of attacks, ending in a unique cinematic where Rock hits with a multi-hitting wave of energy. Similar to the original Deadly Rave, this is a massive damage combo ender with great forward movement to go through fireballs or pokes. Rock can end after the HK in the input string and link into another combo for enhanced damage. This is very combo friendly, even after long confirms, making it possible for Rock to hit 9k damage in a single combo or more. Level 3 only limits the usage of it, but K-Rock gets to combo into this frequently for massive damage potential. | |||
}} | }} | ||
}} | }} | ||
Latest revision as of 02:52, 28 November 2023
Introduction
Story
Rock Howard is the biological son of Geese Howard. Geese didn't help raise Rock at all, leaving Rock's mother Marie to care for him. They lived a fairly modest and simple life, and while Rock knew of his father and who he was, he never met him. When Rock was seven years old, his mother contracted a very serious illness. He tried to nurse her back to health, but being a young child, there wasn't much he could do. In a last-ditch attempt to save her, he went to Geese Tower to confront his father. Despite Geese's immense wealth and Rock's begging and pleading, Geese sent him away, wanting nothing to do with it. When Rock returned home, his mother had passed away. Rock would never forgive Geese for this, holding a permanent grudge against his father ever since.
Rock isn't the only person with a grudge against Geese however. While he was still fairly young, Terry would send Geese flying from the top of his tower and to his death. Rock, still a young child, felt a strange mixture of feelings. He felt joyed that a horrible man had met a deserved fate, but he felt lonely, now truly orphaned. He would attend Terry's street fights from then on. Eventually, Rock would let his anger get the best of him, and charged Terry down. Terry, the kind man he is, wouldn't try to hurt Rock at all. After Rock got his feelings out, Terry and him talked a lot, and Rock would become Terry's pupil and eventually adopted son. Rock would grow into a formidable fighter in his teenage years, combining the fighting styles of Geese and Terry, and improving on their moves a lot as well. Rock would end up competing in the King of Fighters tournament held in Second South Town, and would find that it was a ploy by his uncle Kain R. Heinlein to get Rock close to him. They agreed to work together, Kain wanting the secrets of Geese's will and also promising to tell Rock things about his mothers family, and saying she was possibly still alive.
Gameplay
Rock is the epitome of an all-rounder, thanks in no small part to his mixed moveset from both Geese and Terry. Rock has great buttons for neutral, like his 2MK, 2HK, 5HP, 5MP, 2MP, and j.HK. He has various specials with great uses both in neutral and offense, like his 236P Reppuken fireballs, his 214P Hard Edge specials, his various 236K Crack Counters for calling out bad pokes, and even a 214K command run with various followups to mix the opponent up with. He even has a 360P Shinkuu Nage command grab that he can cancel with PPP for extended combos from it, or hold PPP to shoot out a blast of energy with Rasetsu. Rising Tackle is a charge move sadly, limiting it's usage, but if Rock has the charge for it, it's a great reversal and anti-air.
Rock's supers match up in their versatility as well, with 236236K Shine Knuckle being a great combo ender, 236236P Raging Storm making a useful and damaging anti-air and reversal, and his 632146K Deadly Rave level 3 giving him massive damage potential. What holds Rock back from top tier status is not excelling in any specific category, and having lackluster and committal tools in comparison to the top tiers. Rock has to play a bit more honest, for lack of a better word, and struggles against the powerful and high damage pokes that the top tiers have. Rock is plenty powerful, and if he gets to play his game, he shines with the best of them. He just doesn't get to play the easy and straightforward style of many of the top tiers.
Groove Selection
Best - K: Rock is very comfortable playing in K-Groove, as it gives him all he wants. Run and hop make his mixup potential a lot scarier than it already is, and h.HK is a beast of a button that can be hard to properly challenge. He has plenty of use for Just Defend into punishes thanks to 214HP Hard Edge being a very consistent hard knockdown ender. Rage makes him a damage beast, and he can do Deadly Rave combos like Geese for massive damage, or save for a confirm into level 3 Shine Knuckle or an anti-air with level 3 Raging Storm. What K-Rock lacks is a roll, which isn't too bad since his roll isn't the best, but it does mean he can't roll cancel specials. Some of his specials do work well with RC, like 236HP Double Reppuken, or his various 214K command runs. Still, this isn't a huge downside, and the rest of the benefits make K-Rock the best rock.
Useful - N/C/P/A: Rock has uses in a majority of the other Grooves too, though they don't give him as much as K-Groove does. N-Rock gets a lot of what K-Rock gets, but also gains a roll in exchange for sacrificing the damage of Rage. Rock doesn't have a great roll, but being able to RC various specials makes his neutral a lot scarier, and gives him the ability to reversal without charge or meter. C-Rock gets more access to his supers, namely Shine Knuckle, allowing him to end combos in bigger damage. Level 2 Raging Storm is a cheaper version that still is a true reversal, and he can confirm it into a Hard Edge or a level 1 Shine Knuckle for worthwhile damage increases. P-Rock has very consistent punishes after a parry, making him a rewarding P-Groove character. He also maintains hop for h.HK. The sacrifice here is that you won't usually have meter, but when you do, a single parry hurts a lot with a Deadly Rave combo. A-Rock has a damaging Custom Combo, and CC in general is a great utility. Rock has a lot of utility with CC as well, letting him use it in a variety of situations. The sacrifice is never using his supers really, and no hop/run.
Worst - S: S-Rock has very little worth using. While Rock can perform without meter fine, his supers are great, and having meter to use them is a big buff to Rock's gameplan and damage. The level 1 versions of his supers aren't the greatest, doing lackluster damage and not being reversals, so having infinite level 1's isn't a huge deal. Having to charge for meter is very risky as well for an aggressive character like Rock. Run and hop are also in K-Groove and N-Groove, two of Rock's best Grooves. You would be better off picking any of the other Grooves for Rock.
|
Rock is a strong all-rounder with great aggressive mixup, solid neutral buttons, and some decent zoning. He doesn't excel at much of anything besides offense, and can lose to the more degenerate tools of the top tiers, but he has every tool to succeed, especially in K-Groove. Rock is best in K-Groove. Difficulty: Pretty HardTier: A |
|
| Pros | Cons |
|
|
Players to Watch
| Name | Country | Groove | Accounts | Notes |
|---|---|---|---|---|
| Tsugunosuke | Japan | N-Groove | N/A | Very strong player, has a very good Rock. Sample Match |
| GAO | Japan | K-Groove | N/A | Runs Rock at anchor, but he is also the best Rock player in the world so that alleviates the issue. Sample Match |
| OTK | Japan | K-Groove | Twitter: @den_ta9 | Once the best Rock in the world, he plays with a lot of aggression and reads to create his quick and dangerous offense. Sample Match |
Normal Moves
Far Normals
5LP
5MP
5HP
5LK
5MK
5HK
Close Standing Normals
clLP
clMP
clHP
clLK
clMK
clHK
Crouching Normals
2LP
2MP
2HP
2LK
2MK
2HK
Jumping Normals
j.LP
j.MP
j.HP
j.LK
j.MK
j.HK
Command Normals
Parabola Kick
Throws
Kokusen
Grappling Upper
Specials
Reppuken
Double Reppuken
Rising Tackle
Crack Counter
Hard Edge
Rage Run
Shinkuu Nage/Rasetsu
Supers
Raging Storm
Shine Knuckle
Deadly Rave NEO
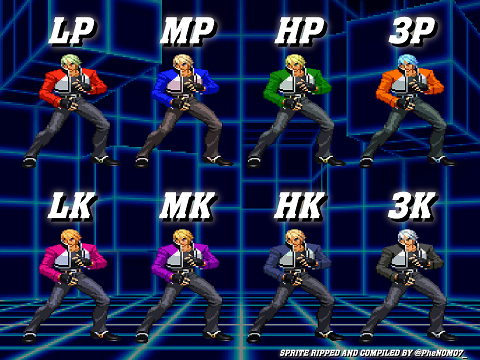
Colors
