GigaTempest (talk | contribs) No edit summary |
GigaTempest (talk | contribs) No edit summary |
||
| Line 17: | Line 17: | ||
* '''Relatively low damage output without meter and even somewhat mediocre damage output with only S-Power''' | * '''Relatively low damage output without meter and even somewhat mediocre damage output with only S-Power''' | ||
* '''Lack of reliable (non-risky) reversals''' | * '''Lack of reliable (non-risky) reversals''' | ||
* ''' | * '''Reliant on meter; struggles heavily in matchups where he can't build meter safely''' | ||
}} | }} | ||
Revision as of 01:06, 30 July 2023
Introduction
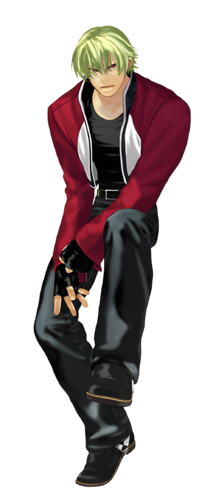
He is the abandoned son of Geese Howard and Mary R. Heinlein, after his mother's death he was a vagabond and then found by Terry Bogard who adopted him as a father figure and legal tutor.
His fighting style its a mix about the reversals of Geese Howard with Terry Bogard rush attacks.
Gameplay
TBD
| Strengths | Weaknesses |
|---|---|
|
|
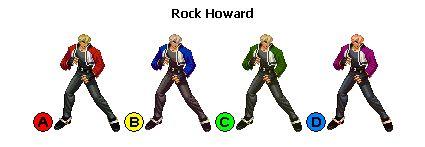
Character Colors
Move List
Frame Data Source : http://www13.atwiki.jp/garoumow/pages/19.html and http://www13.atwiki.jp/garoumow/pages/68.html
| Data Help | |
|---|---|
| Disclaimer: This is meant to teach basic terminology used when describing moves. | |
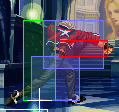
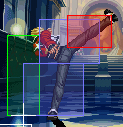
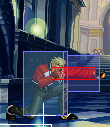
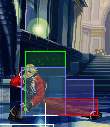
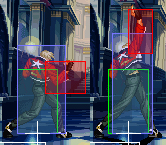
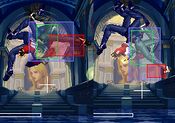
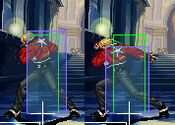
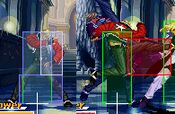
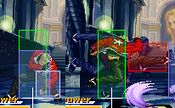
| Hitbox: | A predefined area (usually a rectangle or rectangles) that tells the game how any given attack can come in contact with a character. Hitboxes are invisible to the player when normally playing. |
| Hurtbox: | A predefined area (usually a group of rectangles) that tell the game how your character is allowed to get hit by any incoming attack. Specifically, you'll get hit by (or block) an attack if that attack's hitbox ever overlaps your hurtbox. |
| Throw Box/Range: | Active throw frames and range. Your opponent will be thrown in this field if not in block or hit stun. |
| Projectile Box: | Hitbox on a projectile attack. |
| Guard/Counter Box: | The Guard Box or Counter Box. This appears when blocking or using a counter move. |
| Push Box: | Has no bearing on hit/hurt boxes. Just prevents characters to not pass through each other. (Also known as "Collision Box".) |
| Startup | The number of frames before an attack can hit the opponent. Does not include the first active frame. |
| Guard | The way this move must be blocked.
High or H or Overhead (especially when from the ground) -- must be blocked standing. |
| Damage | "Basic" damage -- Unmodified damage values
"Correct" damage -- Damage values accounting for damage scaling, TOP multiplier, and defense rate |
| Guard Crush Value | Decreases the defender's guard durability gauge by this value. |
| +X | Attacker has X number of advantage frames. |
| -X | Attacker has X number of disadvantage frames. |
| KD | Short for "knockdown", knocks down opponent on hit. |
| ◯ | Cancelable on both hit and block. |
| ∞ | Chain cancelable with the same button (renda cancel). |
| ※ | Cancelable on the first hit/part only. |
| 《X》OR «X» OR <<X>> OR (X) | X number of inactive frames between hits of multihit moves. |
| △ | Only cancelable on block. |
| ▽ | Only cancelable on hit. |
| × OR X | Not cancelable. |
Close Standing Normals
| Damage | Guard | Startup | Active | Recovery | Total |
|---|---|---|---|---|---|
| 4 | Mid | 3 | 4 | 5 | 12 |
| Hit Adv | Block Adv | Cancel on Hit | Cancel on Block | Guard Crush Value | |
| +6 | +6 | Yes/chainable | Yes/chainable | 4 | |
|
Standing jab. | |||||
| Damage | Guard | Startup | Active | Recovery | Total |
|---|---|---|---|---|---|
| 6 | Mid | 3 | 1 | 12 | 16 |
| Hit Adv | Block Adv | Cancel on Hit | Cancel on Block | Guard Crush Value | |
| +2 | +2 | Yes | Yes | 4 |
| Damage | Guard | Startup | Active | Recovery | Total |
|---|---|---|---|---|---|
| 10 | Mid | 5 | 4 | 25 | 34 |
| Hit Adv | Block Adv | Cancel on Hit | Cancel on Block | Guard Crush Value | |
| -8 | -8 | Yes | Yes | 5 |
Far Standing Normals
| Damage | Guard | Startup | Active | Recovery | Total |
|---|---|---|---|---|---|
| 5 | Mid | 3 | 4 | 7 | 14 |
| Hit Adv | Block Adv | Cancel on Hit | Cancel on Block | Guard Crush Value | |
| +4 | +4 | Yes/chainable | Yes/chainable | 4 |
| Damage | Guard | Startup | Active | Recovery | Total |
|---|---|---|---|---|---|
| 7 | Mid | 7 | 4 | 14 | 25 |
| Hit Adv | Block Adv | Cancel on Hit | Cancel on Block | Guard Crush Value | |
| -3 | -3 | No | No | 4 |
| Damage | Guard | Startup | Active | Recovery | Total |
|---|---|---|---|---|---|
| 14 | Mid | 10 | 2 | 25 | 37 |
| Hit Adv | Block Adv | Cancel on Hit | Cancel on Block | Guard Crush Value | |
| -6 | -6 | No | No | 5 |
| Damage | Guard | Startup | Active | Recovery | Total |
|---|---|---|---|---|---|
| 14 | Mid | 11 | 3 | 27 | 41 |
| Hit Adv | Block Adv | Cancel on Hit | Cancel on Block | Guard Crush Value | |
| -9 | -9 | No | Yes | 5 | |
|
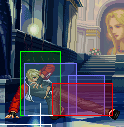
f.5D whiffs on crouching opponents. | |||||
Crouching Normals
| Damage | Guard | Startup | Active | Recovery | Total |
|---|---|---|---|---|---|
| 4 | Mid | 4 | 4 | 8 | 16 |
| Hit Adv | Block Adv | Cancel on Hit | Cancel on Block | Guard Crush Value | |
| +3 | +3 | Yes/chainable | Yes/chainable | 4 |
| Damage | Guard | Startup | Active | Recovery | Total |
|---|---|---|---|---|---|
| 6 | Low | 4 | 4 | 6 | 14 |
| Hit Adv | Block Adv | Cancel on Hit | Cancel on Block | Guard Crush Value | |
| +5 | +5 | Yes/chainable | Yes/chainable | 4 |
| Damage | Guard | Startup | Active | Recovery | Total |
|---|---|---|---|---|---|
| 10 | Mid | 5 | 4 | 20 | 29 |
| Hit Adv | Block Adv | Cancel on Hit | Cancel on Block | Guard Crush Value | |
| -3 | -3 | Yes | Yes | 5 |
| Damage | Guard | Startup | Active | Recovery | Total |
|---|---|---|---|---|---|
| 10 | Low | 8 | 3 | 30 | 41 |
| Hit Adv | Block Adv | Cancel on Hit | Cancel on Block | Guard Crush Value | |
| KD | -12 | No | No | 5 |
Jumping Normals
| Damage | Guard | Startup | Active | Recovery | Total |
|---|---|---|---|---|---|
| 6 | High | 3 | 10 | - | - |
| Hit Adv | Block Adv | Cancel on Hit | Cancel on Block | Guard Crush Value | |
| - | - | No | No | 4 |
| Damage | Guard | Startup | Active | Recovery | Total |
|---|---|---|---|---|---|
| 6 | High | 4 | 5 | - | - |
| Hit Adv | Block Adv | Cancel on Hit | Cancel on Block | Guard Crush Value | |
| - | - | No | No | 4 |
| Damage | Guard | Startup | Active | Recovery | Total |
|---|---|---|---|---|---|
| 9 | High | 8 | 6 | - | - |
| Hit Adv | Block Adv | Cancel on Hit | Cancel on Block | Guard Crush Value | |
| - | - | No | No | 5 |
| Damage | Guard | Startup | Active | Recovery | Total |
|---|---|---|---|---|---|
| 9 | High | 10 | 4 | - | - |
| Hit Adv | Block Adv | Cancel on Hit | Cancel on Block | Guard Crush Value | |
| - | - | No | No | 5 |
Universal Moves
| Damage | Guard | Startup | Active | Recovery | Total |
|---|---|---|---|---|---|
| 10 | Overhead | 21 | 6 | 15 | 42 |
| Hit Adv | Block Adv | Cancel on Hit | Cancel on Block | Guard Crush Value | |
| -2 | +4 | No | No | 6 |
| Damage | Guard | Startup | Active | Recovery | Total |
|---|---|---|---|---|---|
| 10 | Mid | 9 | 3 | 27 | 39 |
| Hit Adv | Block Adv | Cancel on Hit | Cancel on Block | Guard Crush Value | |
| -11 | -5 | Yes | No | 6 | |
| |||||
| Damage | Guard | Startup | Active | Recovery | Total |
|---|---|---|---|---|---|
| 20 (with 1.25x damage modifier) | Overhead | 29 | - | - | - |
| Hit Adv | Block Adv | Cancel on Hit | Cancel on Block | Guard Crush Value | |
| KD | -16 | - | - | 25 | |
|
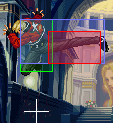
Rock's TOP attack is a horribly slow overhead. It deals decent damage and knocks down on hit, but the reward doesnt come close to making up for the immense risk of this move. | |||||
Throws
| Damage | Guard | Startup | Active | Recovery | Total |
|---|---|---|---|---|---|
| 14 | - | 1 | - | - | - |
| Hit Adv | Block Adv | Cancel on Hit | Cancel on Block | Guard Crush Value | |
| +35 | - | - | - | - | |
|
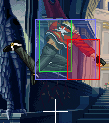
Normal throw. | |||||
Feints
| Damage | Guard | Startup | Active | Recovery | Total |
|---|---|---|---|---|---|
| - | - | - | - | - | 12 |
| Hit Adv | Block Adv | Cancel on Hit | Cancel on Block | Guard Crush Value | |
| - | - | - | - | - | |
|
Mimics the start of Shining Knuckle. | |||||
| Damage | Guard | Startup | Active | Recovery | Total |
|---|---|---|---|---|---|
| - | - | - | - | - | 11 |
| Hit Adv | Block Adv | Cancel on Hit | Cancel on Block | Guard Crush Value | |
| - | - | - | - | - | |
|
Mimics the start of Reppuken. | |||||
Special Moves
Super Moves
