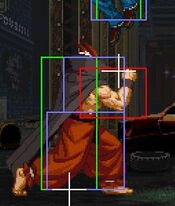
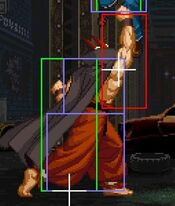
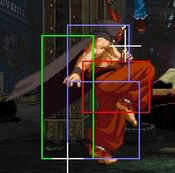
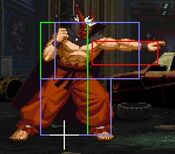
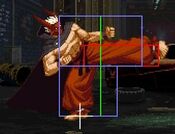
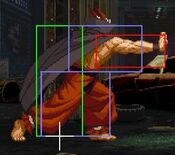
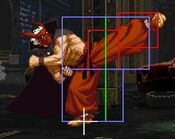
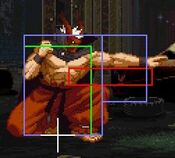
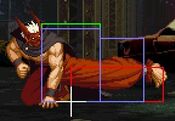
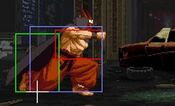
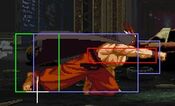
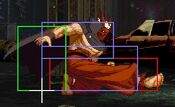
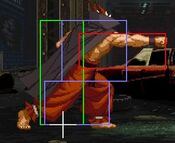
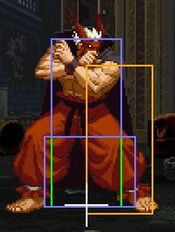
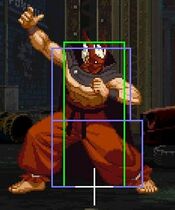
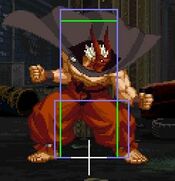
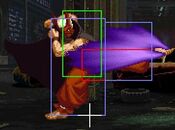
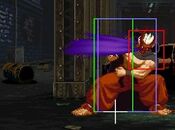
(Removed info to be put into separate pages in the header) |
(Added to →Move List) |
||
| Line 34: | Line 34: | ||
==Move List== | ==Move List== | ||
Frame Data Source: https://w.atwiki.jp/garoumow/pages/31.html and https://w.atwiki.jp/garoumow/pages/69.html | |||
Frame Data Source: https://w.atwiki.jp/garoumow/pages/31.html | |||
{{MOTW Legend}} | |||
===Close Standing Normals=== | ===Close Standing Normals=== | ||
| Line 77: | Line 65: | ||
}} | }} | ||
}} | }} | ||
===== <span class="invisible-header"></span> ===== | ===== <span class="invisible-header"></span> ===== | ||
| Line 102: | Line 92: | ||
}} | }} | ||
}} | }} | ||
===== <span class="invisible-header"></span> ===== | ===== <span class="invisible-header"></span> ===== | ||
| Line 128: | Line 120: | ||
}} | }} | ||
}} | }} | ||
===== <span class="invisible-header"></span> ===== | ===== <span class="invisible-header"></span> ===== | ||
| Line 153: | Line 147: | ||
}} | }} | ||
}} | }} | ||
===Far Standing Normals=== | ===Far Standing Normals=== | ||
| Line 179: | Line 175: | ||
}} | }} | ||
}} | }} | ||
===== <span class="invisible-header"></span> ===== | ===== <span class="invisible-header"></span> ===== | ||
| Line 204: | Line 202: | ||
}} | }} | ||
}} | }} | ||
===== <span class="invisible-header"></span> ===== | ===== <span class="invisible-header"></span> ===== | ||
| Line 229: | Line 229: | ||
}} | }} | ||
}} | }} | ||
===== <span class="invisible-header"></span> ===== | ===== <span class="invisible-header"></span> ===== | ||
| Line 254: | Line 256: | ||
}} | }} | ||
}} | }} | ||
===Crouching Normals=== | ===Crouching Normals=== | ||
| Line 280: | Line 284: | ||
}} | }} | ||
}} | }} | ||
===== <span class="invisible-header"></span> ===== | ===== <span class="invisible-header"></span> ===== | ||
| Line 305: | Line 311: | ||
}} | }} | ||
}} | }} | ||
===== <span class="invisible-header"></span> ===== | ===== <span class="invisible-header"></span> ===== | ||
| Line 331: | Line 339: | ||
}} | }} | ||
}} | }} | ||
===== <span class="invisible-header"></span> ===== | ===== <span class="invisible-header"></span> ===== | ||
| Line 356: | Line 366: | ||
}} | }} | ||
}} | }} | ||
===Jumping Normals=== | ===Jumping Normals=== | ||
| Line 382: | Line 394: | ||
}} | }} | ||
}} | }} | ||
===== <span class="invisible-header"></span> ===== | ===== <span class="invisible-header"></span> ===== | ||
| Line 404: | Line 418: | ||
|Cancel on Block=◯ | |Cancel on Block=◯ | ||
|Guard Crush Value=4 | |Guard Crush Value=4 | ||
|description= | |description= Forward or backward small jump B can beat out Upper-Body Evasive Attacks. | ||
}} | }} | ||
}} | }} | ||
===== <span class="invisible-header"></span> ===== | ===== <span class="invisible-header"></span> ===== | ||
| Line 432: | Line 448: | ||
}} | }} | ||
}} | }} | ||
===== <span class="invisible-header"></span> ===== | ===== <span class="invisible-header"></span> ===== | ||
| Line 457: | Line 475: | ||
}} | }} | ||
}} | }} | ||
===Command Normals=== | ===Command Normals=== | ||
| Line 484: | Line 504: | ||
}} | }} | ||
====Evasive Attacks==== | |||
===== <span class="invisible-header"></span> ===== | ===== <span class="invisible-header"></span> ===== | ||
<font style="visibility:hidden" size="0"></font> | <font style="visibility:hidden" size="0"></font> | ||
| Line 505: | Line 528: | ||
|Cancel on Block=X | |Cancel on Block=X | ||
|Guard Crush Value=5 | |Guard Crush Value=5 | ||
|description= | |description= Kara cancelable while airborne at the latter part of startup. | ||
}} | }} | ||
}} | }} | ||
===== <span class="invisible-header"></span> ===== | ===== <span class="invisible-header"></span> ===== | ||
| Line 529: | Line 554: | ||
|Block Adv=-2 | |Block Adv=-2 | ||
|Feint Cancel=X | |Feint Cancel=X | ||
|Cancel on Hit= | |Cancel on Hit=X | ||
|Cancel on Block=X | |Cancel on Block=X | ||
|Guard Crush Value=3, 3 | |Guard Crush Value=3, 3 | ||
|description=* 1~7F upper body invincibility | |description=* 1~7F upper body invincibility | ||
* kara cancel is possible between the 1st and 2nd hits. | |||
}} | }} | ||
}} | }} | ||
===Throws=== | ===Throws=== | ||
| Line 589: | Line 589: | ||
}} | }} | ||
}} | }} | ||
===Feint Cancels=== | ===Feint Cancels=== | ||
| Line 612: | Line 614: | ||
|Cancel on Block= | |Cancel on Block= | ||
|Guard Crush Value= | |Guard Crush Value= | ||
|description= | |description= Mimics the start of 214A/C. | ||
}} | }} | ||
}} | }} | ||
| Line 637: | Line 639: | ||
|Cancel on Block= | |Cancel on Block= | ||
|Guard Crush Value= | |Guard Crush Value= | ||
|description= | |description= Mimics the start of 236(x2)A/C. | ||
}} | |||
}} | |||
===T.O.P. Attack=== | |||
===== <span class="invisible-header"></span> ===== | |||
<font style="visibility:hidden" size="0"></font> | |||
{{MoveData | |||
|image=Garou Grant CD-1.jpg | |||
|image2=Garou Grant CD-2.jpg | |||
|name=Devil's Rock | |||
|subtitle={{Icon-SNK|C}}{{Icon-SNK|D}} | |||
|caption=T.O.P. Attack | |||
|data= | |||
{{AttackData-Garou | |||
|Damage= | |||
|Guard=Mid | |||
|Startup=16 | |||
|Active= | |||
|Recovery= | |||
|Total= | |||
|Hit Adv=KD | |||
|Block Adv=-15 | |||
|Feint Cancel=X | |||
|Cancel on Hit=X | |||
|Cancel on Block=X | |||
|Guard Crush Value=10 x 3 | |||
|description=Grant's TOP attack is pretty strong. For some characters, two blocked TOP attacks will Guard Crush. His TOP attack hits up to 3 times. Overall, his TOP attack is a great poke for once in a while, can even work as a anti-air at times. Just remember to use it wisely and don't become predictable with it. | |||
Grant's reliance on meter and his turtling playstyle benefit greatly from being in TOP. Placing the TOP at the beginning of his lifebar is the best choice. | |||
}} | }} | ||
}} | }} | ||
===Special Moves=== | ===Special Moves=== | ||
| Line 666: | Line 701: | ||
| Cancel on Block = X | | Cancel on Block = X | ||
| Guard Crush Value = 7 | | Guard Crush Value = 7 | ||
| description = Grant's 'projectile' which isn't much of a projectile. The animation shows the move going about half the distance of Grants body, but the hitbox is much smaller than that. This is a terrible move and should rarely be used for anything. It doesn't combo into much, and it doesn't work as an anti air like the animation would suggest it would. The strong version pushes Grant forward a bit, and its just as bad as the weak version. The hitbox is the same as the weak version, it just stay's out for a few extra frames. | | description = Grant's 'projectile' which isn't much of a projectile. The animation shows the move going about half the distance of Grants body, but the hitbox is much smaller than that. This is a terrible move and should rarely be used for anything. It doesn't combo into much, and it doesn't work as an anti air like the animation would suggest it would. The strong version pushes Grant forward a bit, and its just as bad as the weak version. The hitbox is the same as the weak version, it just stay's out for a few extra frames. | ||
Impossible to just defend at 0-pixel health bar. | |||
}} | }} | ||
{{AttackData-Garou | {{AttackData-Garou | ||
| Line 684: | Line 721: | ||
| Cancel on Block = X | | Cancel on Block = X | ||
| Guard Crush Value = 8 | | Guard Crush Value = 8 | ||
| description = | | description = Impossible to just defend at 0-pixel health bar. | ||
}} | }} | ||
}} | }} | ||
===== <span class="invisible-header"></span> ===== | ===== <span class="invisible-header"></span> ===== | ||
| Line 713: | Line 752: | ||
| Guard Crush Value = 3, 3 | | Guard Crush Value = 3, 3 | ||
| description = * Breakable with {{Icon-SNK|A}}{{Icon-SNK|B}} | | description = * Breakable with {{Icon-SNK|A}}{{Icon-SNK|B}} | ||
* 1~2F invincibility | * 1~2F full-body invincibility | ||
Dragon punch move that can be followed up with a dive kick. Grant can play a very annoying keep away game with this move and be very affective. When you break the move, it leads to free special/super, and in the corner, it leads to free {{Motion|3}} + {{Icon-SNK|C}} juggle, which can then be followed by special/super. The hitbox to this move is also a bit funny. If Grants forearm isn't touching the opponent, then the move won't hit, so if you're close enough to see only the hand hit, the move will whiff, remember this when trying to break the move as it will leave you open. The weak version travels about jump height, while the strong version flies off the screen. | Dragon punch move that can be followed up with a dive kick. Grant can play a very annoying keep away game with this move and be very affective. When you break the move, it leads to free special/super, and in the corner, it leads to free {{Motion|3}} + {{Icon-SNK|C}} juggle, which can then be followed by special/super. The hitbox to this move is also a bit funny. If Grants forearm isn't touching the opponent, then the move won't hit, so if you're close enough to see only the hand hit, the move will whiff, remember this when trying to break the move as it will leave you open. The weak version travels about jump height, while the strong version flies off the screen. | ||
Impossible to just defend at 0-pixel health bar. | |||
}} | }} | ||
{{AttackData-Garou | {{AttackData-Garou | ||
| Line 733: | Line 774: | ||
| Guard Crush Value = 4, 4, 4 | | Guard Crush Value = 4, 4, 4 | ||
| description = * Breakable with {{Icon-SNK|A}}{{Icon-SNK|B}} | | description = * Breakable with {{Icon-SNK|A}}{{Icon-SNK|B}} | ||
* 1~3F invincibility | * 1~3F full-body invincibility | ||
Impossible to just defend at 0-pixel health bar. | |||
}} | }} | ||
}} | }} | ||
===== <span class="invisible-header"></span> ===== | ===== <span class="invisible-header"></span> ===== | ||
| Line 763: | Line 808: | ||
| description = * Can be cancelled into out of DP | | description = * Can be cancelled into out of DP | ||
Grant's dive kick, but nothing like the overpowered dive kicks we all have come to know and hate. Both versions have a bit of start up time and come down slowly, plus the move doesn't have much priority and can be beat out or trade with plenty of attacks. You can use this as a follow up to both versions of his dragon punch if you don't break it-and it is very useful for wake up mix ups. Instant air {{Icon-SNK|B}} into this works very well. This move also helps with running away after a dragon punch, and will annoy your opponent if they don't know how to deal with it. | Grant's dive kick, but nothing like the overpowered dive kicks we all have come to know and hate. Both versions have a bit of start up time and come down slowly, plus the move doesn't have much priority and can be beat out or trade with plenty of attacks. You can use this as a follow up to both versions of his dragon punch if you don't break it-and it is very useful for wake up mix ups. Instant air {{Icon-SNK|B}} into this works very well. This move also helps with running away after a dragon punch, and will annoy your opponent if they don't know how to deal with it. | ||
Can beat out Upper-Body Evasive Attacks. | |||
Impossible to just defend at 0-pixel health bar. | |||
}} | }} | ||
{{AttackData-Garou | {{AttackData-Garou | ||
| Line 780: | Line 829: | ||
| Cancel on Block = X | | Cancel on Block = X | ||
| Guard Crush Value = 7 | | Guard Crush Value = 7 | ||
| description = * Startup is 16F if | | description = * Startup is 16F if canceled into from a DP | ||
Can beat out Upper-Body Evasive Attacks. | |||
}} | }} | ||
}} | }} | ||
===== <span class="invisible-header"></span> ===== | ===== <span class="invisible-header"></span> ===== | ||
| Line 809: | Line 862: | ||
| Guard Crush Value = 7 | | Guard Crush Value = 7 | ||
| description = The RTSD move. People hate it for many reasons, mainly because Grant can use it over his normal dash to build meter while he advances. The Snkb.gif is very punishable on block, while the {{Icon-SNK|D}} version will leave you at -1, so only a few supers can punish this, also throws if you do it too close to the corner. Doing the {{Icon-SNK|B}} version as a follow up to dragon punch break is the best option mid screen, with or without meter. Opponents who stick something out while jumping back will generally beat this movie, so try not to use it against players who do that. | | description = The RTSD move. People hate it for many reasons, mainly because Grant can use it over his normal dash to build meter while he advances. The Snkb.gif is very punishable on block, while the {{Icon-SNK|D}} version will leave you at -1, so only a few supers can punish this, also throws if you do it too close to the corner. Doing the {{Icon-SNK|B}} version as a follow up to dragon punch break is the best option mid screen, with or without meter. Opponents who stick something out while jumping back will generally beat this movie, so try not to use it against players who do that. | ||
Impossible to just defend at 0-pixel health bar. | |||
}} | }} | ||
{{AttackData-Garou | {{AttackData-Garou | ||
| Line 829: | Line 884: | ||
}} | }} | ||
}} | }} | ||
===== <span class="invisible-header"></span> ===== | ===== <span class="invisible-header"></span> ===== | ||
| Line 875: | Line 932: | ||
}} | }} | ||
}} | }} | ||
===Super Moves=== | ===Super Moves=== | ||
| Line 901: | Line 960: | ||
| Cancel on Block = X | | Cancel on Block = X | ||
| Guard Crush Value = 20 | | Guard Crush Value = 20 | ||
| description = * 1~12F invincibility | | description = * 1~12F full-body invincibility | ||
}} | }} | ||
{{AttackData-Garou | {{AttackData-Garou | ||
| Line 919: | Line 978: | ||
| Cancel on Block = X | | Cancel on Block = X | ||
| Guard Crush Value = 30 | | Guard Crush Value = 30 | ||
| description = * 1~13F invincibility | | description = * 1~13F full-body invincibility | ||
}} | }} | ||
}} | }} | ||
===== <span class="invisible-header"></span> ===== | ===== <span class="invisible-header"></span> ===== | ||
| Line 947: | Line 1,008: | ||
| Cancel on Block = X | | Cancel on Block = X | ||
| Guard Crush Value = 1 × 13, 3 | | Guard Crush Value = 1 × 13, 3 | ||
| description = * 1~2F invincibility | | description = * 1~2F full-body invincibility | ||
}} | }} | ||
{{AttackData-Garou | {{AttackData-Garou | ||
| Line 965: | Line 1,026: | ||
| Cancel on Block = X | | Cancel on Block = X | ||
| Guard Crush Value = 1 x 13, 5 | | Guard Crush Value = 1 x 13, 5 | ||
| description = * 1~4F invincibility | | description = * 1~4F full-body invincibility | ||
}} | }} | ||
}} | }} | ||
Revision as of 01:55, 28 January 2023
Introduction
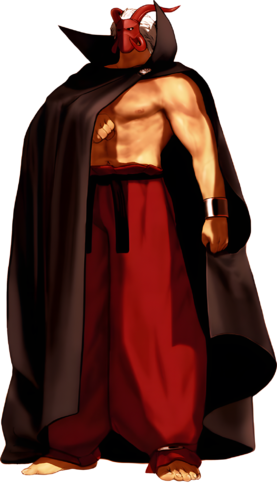
Grant is the mid boss in MOTW. If you're playing against the computer, you will end up facing him no matter what, but depending on how well (or poorly) you perform in the game (winning grade) he may end up being the last boss.
Gameplay
Grant is considered by many to be the most brain dead (easiest) character in the game. Many believe that he can be picked up in mere minutes and become a character that can compete on any level. He is called cheap, ridiculous, overpowered, and at times some call for him being banned from competitive play due to being 'over powered.'
While Grant is one of the most powerful characters in the game, he has to play cautious. If he just goes all out and rushes blindly he will end up losing against seasoned players. He may seem all mighty to many players out there, but he is not as bad as he is made out to be.
| Strengths | Weaknesses |
|---|---|
|
|
Character Colors
Move List
Frame Data Source: https://w.atwiki.jp/garoumow/pages/31.html and https://w.atwiki.jp/garoumow/pages/69.html
| Data Help | |
|---|---|
| Disclaimer: This is meant to teach basic terminology used when describing moves. | |
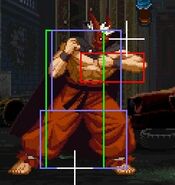
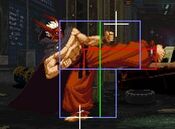
| Hitbox: | A predefined area (usually a rectangle or rectangles) that tells the game how any given attack can come in contact with a character. Hitboxes are invisible to the player when normally playing. |
| Hurtbox: | A predefined area (usually a group of rectangles) that tell the game how your character is allowed to get hit by any incoming attack. Specifically, you'll get hit by (or block) an attack if that attack's hitbox ever overlaps your hurtbox. |
| Throw Box/Range: | Active throw frames and range. Your opponent will be thrown in this field if not in block or hit stun. |
| Projectile Box: | Hitbox on a projectile attack. |
| Guard/Counter Box: | The Guard Box or Counter Box. This appears when blocking or using a counter move. |
| Push Box: | Has no bearing on hit/hurt boxes. Just prevents characters to not pass through each other. (Also known as "Collision Box".) |
| Startup | The number of frames before an attack can hit the opponent. Does not include the first active frame. |
| Guard | The way this move must be blocked.
High or H or Overhead (especially when from the ground) -- must be blocked standing. |
| Damage | "Basic" damage -- Unmodified damage values
"Correct" damage -- Damage values accounting for damage scaling, TOP multiplier, and defense rate |
| Guard Crush Value | Decreases the defender's guard durability gauge by this value. |
| +X | Attacker has X number of advantage frames. |
| -X | Attacker has X number of disadvantage frames. |
| KD | Short for "knockdown", knocks down opponent on hit. |
| ◯ | Cancelable on both hit and block. |
| ∞ | Chain cancelable with the same button (renda cancel). |
| ※ | Cancelable on the first hit/part only. |
| 《X》OR «X» OR <<X>> OR (X) | X number of inactive frames between hits of multihit moves. |
| △ | Only cancelable on block. |
| ▽ | Only cancelable on hit. |
| × OR X | Not cancelable. |
Close Standing Normals
| Damage | Guard | Startup | Active | Recovery | Total |
|---|---|---|---|---|---|
| 5 | Mid | 3 | 4 | 5 | 12 |
| Hit Adv | Block Adv | Cancel on Hit | Cancel on Block | Guard Crush Value | |
| +6 | +6 | X | X | 4 | |
|
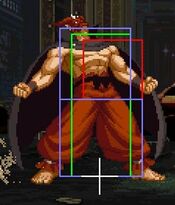
Standing jab. | |||||
| Damage | Guard | Startup | Active | Recovery | Total |
|---|---|---|---|---|---|
| 11 | Mid | 8 | 3 | 30 | 41 |
| Hit Adv | Block Adv | Cancel on Hit | Cancel on Block | Guard Crush Value | |
| -12 | -12 | X | X | 6 |
| Damage | Guard | Startup | Active | Recovery | Total |
|---|---|---|---|---|---|
| 11 | Mid | 9 | 3 | 13 | 25 |
| Hit Adv | Block Adv | Cancel on Hit | Cancel on Block | Guard Crush Value | |
| +5 | +5 | X | X | 8 |
Far Standing Normals
| Damage | Guard | Startup | Active | Recovery | Total |
|---|---|---|---|---|---|
| 6 | Mid | 6 | 4 | 7 | 17 |
| Hit Adv | Block Adv | Cancel on Hit | Cancel on Block | Guard Crush Value | |
| +4 | +4 | X | X | 6 |
| Damage | Guard | Startup | Active | Recovery | Total |
|---|---|---|---|---|---|
| 14 | Mid | 9 | 5 | 22 | 36 |
| Hit Adv | Block Adv | Cancel on Hit | Cancel on Block | Guard Crush Value | |
| -6 | -6 | X | X | 6 | |
|
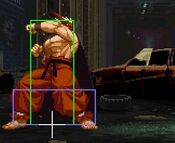
Is also a good anti air, and a great overall poke from max distance. It beats out many moves and pokes in the game, deals a lot of damage for a normal, and also deals a fair amount of guard crush damage. | |||||
| Damage | Guard | Startup | Active | Recovery | Total |
|---|---|---|---|---|---|
| 14 | Mid | 14 | 5 | 20 | 39 |
| Hit Adv | Block Adv | Cancel on Hit | Cancel on Block | Guard Crush Value | |
| KD | -4 | X | X | 10 | |
|
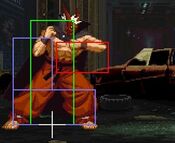
Makes a good anti air if timed correctly, but should not be abused, since it is very easy to bait. This move is Grants most common kara-canceled move since it inches him forward allowing for his special attack to go slightly further. It has pretty bad recover and can be punished by the entire cast. | |||||
Crouching Normals
| Damage | Guard | Startup | Active | Recovery | Total |
|---|---|---|---|---|---|
| 5 | Low | 4 | 4 | 6 | 14 |
| Hit Adv | Block Adv | Cancel on Hit | Cancel on Block | Guard Crush Value | |
| +5 | +5 | X | X | 4 |
| Damage | Guard | Startup | Active | Recovery | Total |
|---|---|---|---|---|---|
| 6 | Low | 5 | 3 | 10 | 18 |
| Hit Adv | Block Adv | Cancel on Hit | Cancel on Block | Guard Crush Value | |
| +2 | +2 | X | X | 4 |
| Damage | Guard | Startup | Active | Recovery | Total |
|---|---|---|---|---|---|
| 7, 7 | Low | 10 | 1, (1), 3 | 38 | 53 |
| Hit Adv | Block Adv | Cancel on Hit | Cancel on Block | Guard Crush Value | |
| -20 | -20 | X | X | 10, 10 | |
|
This attack shouldn't be used too often. it has pretty bad recovery and Grant cannot link anything after it. It has horrible recovery on hit and block. Its a decent poke from afar as its his longest reaching attack, but many characters can punish it. Grant players will want to use this as little as possible. | |||||
| Damage | Guard | Startup | Active | Recovery | Total |
|---|---|---|---|---|---|
| 11 | Low | 8 | 4 | 31 | 43 |
| Hit Adv | Block Adv | Cancel on Hit | Cancel on Block | Guard Crush Value | |
| KD | -14 | X | X | 5 |
Jumping Normals
| Damage | Guard | Startup | Active | Recovery | Total |
|---|---|---|---|---|---|
| 6 | High | 3 | 11 | - | - |
| Hit Adv | Block Adv | Cancel on Hit | Cancel on Block | Guard Crush Value | |
| - | - | ◯ | ◯ | 4 | |
|
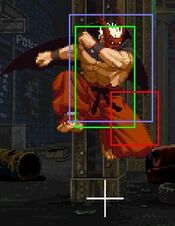
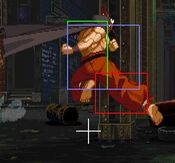
Is great for beating people who love to do air specials. It can beat out everything in the air, as long as Grant remains under the opponent. The attack is angled at 45° so there's a good chance it will whiff if the oppnent is leveled with Grant. | |||||
| Damage | Guard | Startup | Active | Recovery | Total |
|---|---|---|---|---|---|
| 6 | High | 3 | 10 | - | - |
| Hit Adv | Block Adv | Cancel on Hit | Cancel on Block | Guard Crush Value | |
| - | - | ◯ | ◯ | 4 | |
|
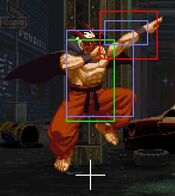
Forward or backward small jump B can beat out Upper-Body Evasive Attacks. | |||||
| Damage | Guard | Startup | Active | Recovery | Total |
|---|---|---|---|---|---|
| 11 | High | 7 | 6 | - | - |
| Hit Adv | Block Adv | Cancel on Hit | Cancel on Block | Guard Crush Value | |
| - | - | ◯ | ◯ | 5 | |
|
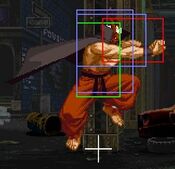
A good air-to-air. It takes longer to come out than his weaker air attacks, but its worth it, just be sure to time it right and you will be set. Once Grant hits with this, he has the opportunity to play some ground mind games since he can dash under, or to the exact spot his opponent will land leading to an ambiguous cross up. He can also do a 0 Frame super, which if timed right can be unblockable if the opponent doesn't know how to counter it. | |||||
| Damage | Guard | Startup | Active | Recovery | Total |
|---|---|---|---|---|---|
| 11 | High | 6 | 6 | - | - |
| Hit Adv | Block Adv | Cancel on Hit | Cancel on Block | Guard Crush Value | |
| - | - | ◯ | ◯ | 5 | |
|
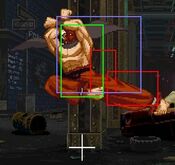
A great attack to use if your opponent loves to jump in from far away. instant jump back D will beat just about every air attack in the game. try to bait your opponent into jumping by using his ground normals and locking them down until the opponent feels they have to jump in and then stick this out. | |||||
Command Normals
| Damage | Guard | Startup | Active | Recovery | Total |
|---|---|---|---|---|---|
| 10 | Mid | 12 | 4 | 26 | 42 |
| Hit Adv | Block Adv | Cancel on Hit | Cancel on Block | Guard Crush Value | |
| KD | -9 | X | X | 12 | |
|
Grants 'Chest Hump' attack. This is rarely used outside of the corner for juggle purposes. If it connects it will lead to a free special/super. Note: This move cannot be feint canceled. Earlier versions of the game are used for many combo videos, and in it Grant is able to FC this attack. He does not have an infinite | |||||
Evasive Attacks
| Damage | Guard | Startup | Active | Recovery | Total |
|---|---|---|---|---|---|
| 11 | Overhead | 21 | 11 | 11 | 43 |
| Hit Adv | Block Adv | Cancel on Hit | Cancel on Block | Guard Crush Value | |
| -3 | +3 | X | X | 5 | |
|
Kara cancelable while airborne at the latter part of startup. | |||||
| Damage | Guard | Startup | Active | Recovery | Total |
|---|---|---|---|---|---|
| 6, 6 | Mid | 8 | 3, (5), 5 | 22 | 43 |
| Hit Adv | Block Adv | Cancel on Hit | Cancel on Block | Guard Crush Value | |
| -8 | -2 | X | X | 3, 3 | |
| |||||
Throws
| Damage | Guard | Startup | Active | Recovery | Total |
|---|---|---|---|---|---|
| 14 | - | 1 | - | - | - |
| Hit Adv | Block Adv | Cancel on Hit | Cancel on Block | Guard Crush Value | |
| +33 | - | - | - | - | |
|
Grant's normal throw. | |||||
Feint Cancels
| Damage | Guard | Startup | Active | Recovery | Total |
|---|---|---|---|---|---|
| - | - | - | - | - | - |
| Hit Adv | Block Adv | Cancel on Hit | Cancel on Block | Guard Crush Value | |
| - | - | - | - | - | |
|
Mimics the start of 214A/C. | |||||
| Damage | Guard | Startup | Active | Recovery | Total |
|---|---|---|---|---|---|
| - | - | - | - | - | - |
| Hit Adv | Block Adv | Cancel on Hit | Cancel on Block | Guard Crush Value | |
| - | - | - | - | - | |
|
Mimics the start of 236(x2)A/C. | |||||
T.O.P. Attack
| Damage | Guard | Startup | Active | Recovery | Total |
|---|---|---|---|---|---|
| - | Mid | 16 | - | - | - |
| Hit Adv | Block Adv | Cancel on Hit | Cancel on Block | Guard Crush Value | |
| KD | -15 | X | X | 10 x 3 | |
|
Grant's TOP attack is pretty strong. For some characters, two blocked TOP attacks will Guard Crush. His TOP attack hits up to 3 times. Overall, his TOP attack is a great poke for once in a while, can even work as a anti-air at times. Just remember to use it wisely and don't become predictable with it. Grant's reliance on meter and his turtling playstyle benefit greatly from being in TOP. Placing the TOP at the beginning of his lifebar is the best choice. | |||||
Special Moves
Super Moves
| S Power | Damage | Guard | Startup | Active | Recovery | Total |
|---|---|---|---|---|---|---|
| 31 | Mid | 11 | - | - | - | |
| Hit Adv | Block Adv | Cancel on Hit | Cancel on Block | Guard Crush Value | ||
| KD | -11 | X | X | 20 | ||
| ||||||
| P Power | Damage | Guard | Startup | Active | Recovery | Total |
| 45 | Mid | 9 | - | - | - | |
| Hit Adv | Block Adv | Cancel on Hit | Cancel on Block | Guard Crush Value | ||
| KD | -11 | X | X | 30 | ||
| ||||||
| S Power | Damage | Guard | Startup | Active | Recovery | Total |
|---|---|---|---|---|---|---|
| 39 | Mid | 0 | - | - | - | |
| Hit Adv | Block Adv | Cancel on Hit | Cancel on Block | Guard Crush Value | ||
| KD | -2 | X | X | 1 × 13, 3 | ||
| ||||||
| P Power | Damage | Guard | Startup | Active | Recovery | Total |
| 55 | Mid | 0 | - | - | - | |
| Hit Adv | Block Adv | Cancel on Hit | Cancel on Block | Guard Crush Value | ||
| KD | -2 | X | X | 1 x 13, 5 | ||
| ||||||
