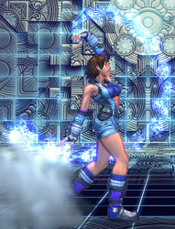
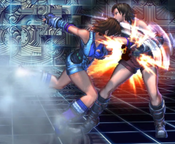
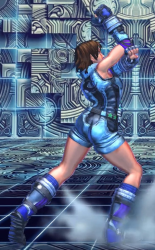
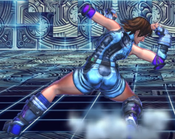
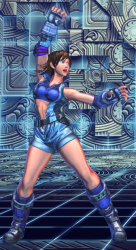
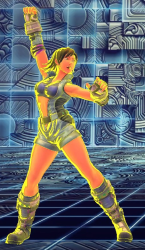
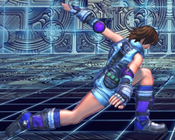
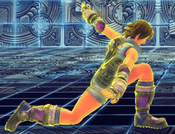
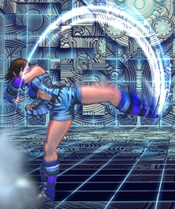
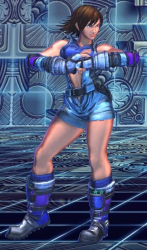
Loserprance (talk | contribs) (changed graphics) |
Loserprance (talk | contribs) mNo edit summary |
||
| (4 intermediate revisions by the same user not shown) | |||
| Line 26: | Line 26: | ||
| subtitle = | | subtitle = | ||
| image = SFxT_Asuka_5LP.png | | image = SFxT_Asuka_5LP.png | ||
| caption = | | caption = | ||
| linkname = link_name | | linkname = link_name | ||
| data = | | data = | ||
{{AttackData-SFxT | {{AttackData-SFxT | ||
| command = {{Icon-SmallCapcom|LP}} | | command = {{Icon-SmallCapcom|LP}} | ||
| Line 45: | Line 45: | ||
| description = | | description = | ||
* Neck and above crushes airborne attacks frames 1-4 | * Neck and above crushes airborne attacks frames 1-4 | ||
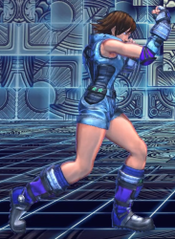
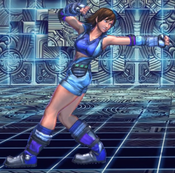
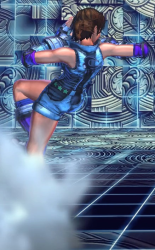
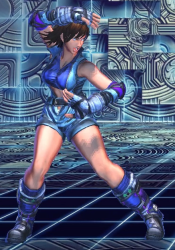
Asuka does not have a spammable jab such as Cammy, Rolento, or Raven, therefore she cannot rely on walking and jabbing. Also does not have very good range. Mostly used to hit-confirm her BnB | |||
}} | }} | ||
}} | }} | ||
| Line 53: | Line 54: | ||
| subtitle = | | subtitle = | ||
| image = SFxT_Asuka_5MP.png | | image = SFxT_Asuka_5MP.png | ||
| caption = | | caption = | ||
| linkname = link_name | | linkname = link_name | ||
| data = | | data = | ||
{{AttackData-SFxT | {{AttackData-SFxT | ||
| command = {{Icon-SmallCapcom|MP}} | | command = {{Icon-SmallCapcom|MP}} | ||
| Line 71: | Line 72: | ||
| js = 1 | | js = 1 | ||
| description = | | description = | ||
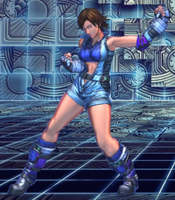
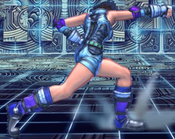
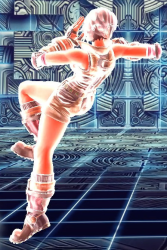
Cannot link but MP plays a main part of her BnB combo using her Tekken strings. Longer range than LP so can be used in place to hit-confirm combos | |||
}} | }} | ||
}} | }} | ||
| Line 80: | Line 81: | ||
| subtitle = | | subtitle = | ||
| image = SFxT_Asuka_5HP.png | | image = SFxT_Asuka_5HP.png | ||
| caption = | | caption = | ||
| linkname = link_name | | linkname = link_name | ||
| data = | | data = | ||
{{AttackData-SFxT | {{AttackData-SFxT | ||
| command = {{Icon-SmallCapcom|HP}} | | command = {{Icon-SmallCapcom|HP}} | ||
| Line 99: | Line 100: | ||
| description = | | description = | ||
* Crumples on counter hit | * Crumples on counter hit | ||
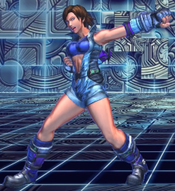
Rarely EVER used outside of emergency ABC magic chain; if you want to launcher combo, there are better options anyways | |||
}} | }} | ||
}} | }} | ||
| Line 107: | Line 109: | ||
| subtitle = | | subtitle = | ||
| image = SFxT_Asuka_5LK.png | | image = SFxT_Asuka_5LK.png | ||
| caption = | | caption = | ||
| linkname = link_name | | linkname = link_name | ||
| data = | | data = | ||
{{AttackData-SFxT | {{AttackData-SFxT | ||
| command = {{Icon-SmallCapcom|LK}} | | command = {{Icon-SmallCapcom|LK}} | ||
| Line 125: | Line 127: | ||
| js = 1 | | js = 1 | ||
| description = | | description = | ||
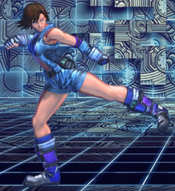
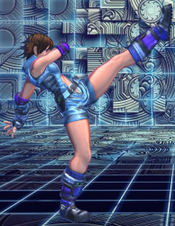
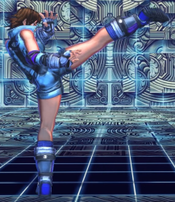
Amazing move that is crucial to Asuka's mixup game. Only standing normal that hits low | |||
}} | }} | ||
}} | }} | ||
| Line 134: | Line 136: | ||
| subtitle = | | subtitle = | ||
| image = SFxT_Asuka_5MK.png | | image = SFxT_Asuka_5MK.png | ||
| caption = | | caption = | ||
| linkname = link_name | | linkname = link_name | ||
| data = | | data = | ||
{{AttackData-SFxT | {{AttackData-SFxT | ||
| command = {{Icon-SmallCapcom|MK}} | | command = {{Icon-SmallCapcom|MK}} | ||
| Line 152: | Line 154: | ||
| js = 1 | | js = 1 | ||
| description = | | description = | ||
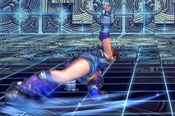
Used in Tekken chain as her BnB. Asuka takes a step forward before attacking make this a good more for footsies or punishing an unsafe normal as you can cancel this move to cr.MP into BnB | |||
}} | }} | ||
}} | }} | ||
| Line 161: | Line 163: | ||
| subtitle = | | subtitle = | ||
| image = SFxT_Asuka_5HK.png | | image = SFxT_Asuka_5HK.png | ||
| caption = | | caption = | ||
| linkname = link_name | | linkname = link_name | ||
| data = | | data = | ||
{{AttackData-SFxT | {{AttackData-SFxT | ||
| command = {{Icon-SmallCapcom|HK}} | | command = {{Icon-SmallCapcom|HK}} | ||
| Line 179: | Line 181: | ||
| js = 1 | | js = 1 | ||
| description = | | description = | ||
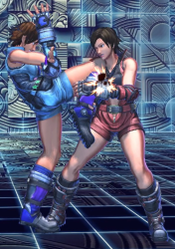
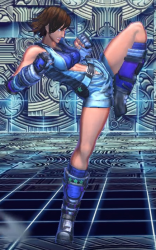
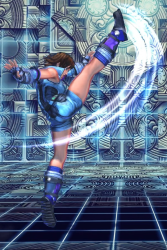
Strange hitbox on this move, possibly prone to whiffing during launcher combos. Considering starting using HP xx Launcher as a more reliable attack. | |||
}} | }} | ||
}} | }} | ||
| Line 188: | Line 190: | ||
| subtitle = | | subtitle = | ||
| image = SFxT_Asuka_CL_5LK.png | | image = SFxT_Asuka_CL_5LK.png | ||
| caption = | | caption = | ||
| linkname = link_name | | linkname = link_name | ||
| data = | | data = | ||
{{AttackData-SFxT | {{AttackData-SFxT | ||
| command = (near opponent) {{Icon-SmallCapcom|LK}} | | command = (near opponent) {{Icon-SmallCapcom|LK}} | ||
| Line 215: | Line 217: | ||
| subtitle = | | subtitle = | ||
| image = SFxT_Asuka_2LP.png | | image = SFxT_Asuka_2LP.png | ||
| caption = | | caption = | ||
| linkname = link_name | | linkname = link_name | ||
| data = | | data = | ||
{{AttackData-SFxT | {{AttackData-SFxT | ||
| command = {{SmallMotion|d}} + {{Icon-SmallCapcom|LP}} | | command = {{SmallMotion|d}} + {{Icon-SmallCapcom|LP}} | ||
| Line 233: | Line 235: | ||
| js = 1 | | js = 1 | ||
| description = | | description = | ||
Not used, bad range, better moves for hit confirm | |||
}} | }} | ||
}} | }} | ||
| Line 242: | Line 244: | ||
| subtitle = | | subtitle = | ||
| image = SFxT_Asuka_2MP.png | | image = SFxT_Asuka_2MP.png | ||
| caption = | | caption = | ||
| linkname = link_name | | linkname = link_name | ||
| data = | | data = | ||
{{AttackData-SFxT | {{AttackData-SFxT | ||
| command = {{SmallMotion|d}} + {{Icon-SmallCapcom|MP}} | | command = {{SmallMotion|d}} + {{Icon-SmallCapcom|MP}} | ||
| Line 260: | Line 262: | ||
| js = 1 | | js = 1 | ||
| description = | | description = | ||
Ends all of Asuka's variations of her Tekken chain and links, then canceled into a special move. | |||
}} | }} | ||
}} | }} | ||
| Line 269: | Line 271: | ||
| subtitle = | | subtitle = | ||
| image = SFxT_Asuka_2HP.png | | image = SFxT_Asuka_2HP.png | ||
| caption = | | caption = | ||
| linkname = link_name | | linkname = link_name | ||
| data = | | data = | ||
{{AttackData-SFxT | {{AttackData-SFxT | ||
| command = {{SmallMotion|d}} + {{Icon-SmallCapcom|HP}} | | command = {{SmallMotion|d}} + {{Icon-SmallCapcom|HP}} | ||
| Line 288: | Line 290: | ||
| description = | | description = | ||
* Crumples on counter hit | * Crumples on counter hit | ||
This moves crumples on counter hit, therefore it is a good tool to throw out while trying to footsie someone from close range. Stand just outside of HP's max range and if you attack a outlying limb, it will crumple the opponent, setting up major damage | |||
}} | }} | ||
}} | }} | ||
| Line 296: | Line 299: | ||
| subtitle = | | subtitle = | ||
| image = SFxT_Asuka_2LK.png | | image = SFxT_Asuka_2LK.png | ||
| caption = | | caption = | ||
| linkname = link_name | | linkname = link_name | ||
| data = | | data = | ||
{{AttackData-SFxT | {{AttackData-SFxT | ||
| command = {{SmallMotion|d}} + {{Icon-SmallCapcom|LK}} | | command = {{SmallMotion|d}} + {{Icon-SmallCapcom|LK}} | ||
| Line 314: | Line 317: | ||
| js = 1 | | js = 1 | ||
| description = | | description = | ||
Can be used to start her low game, but st.lk is much more ambiguous and harder to see coming. | |||
}} | }} | ||
}} | }} | ||
| Line 323: | Line 326: | ||
| subtitle = | | subtitle = | ||
| image = SFxT_Asuka_2MK.png | | image = SFxT_Asuka_2MK.png | ||
| caption = | | caption = | ||
| linkname = link_name | | linkname = link_name | ||
| data = | | data = | ||
{{AttackData-SFxT | {{AttackData-SFxT | ||
| command = {{SmallMotion|d}} + {{Icon-SmallCapcom|MK}} | | command = {{SmallMotion|d}} + {{Icon-SmallCapcom|MK}} | ||
| Line 341: | Line 344: | ||
| js = 1 | | js = 1 | ||
| description = | | description = | ||
Great utility can be used to duck under normal fireballs (Sonic Boom, Low Tiger Shot, and Juri's LK Fuhajin can still hit Asuka) | |||
}} | }} | ||
}} | }} | ||
| Line 350: | Line 353: | ||
| subtitle = | | subtitle = | ||
| image = SFxT_Asuka_2HK.png | | image = SFxT_Asuka_2HK.png | ||
| caption = | | caption = | ||
| linkname = link_name | | linkname = link_name | ||
| data = | | data = | ||
{{AttackData-SFxT | {{AttackData-SFxT | ||
| command = {{SmallMotion|d}} + {{Icon-SmallCapcom|HK}} | | command = {{SmallMotion|d}} + {{Icon-SmallCapcom|HK}} | ||
| Line 368: | Line 371: | ||
| js = - | | js = - | ||
| description = | | description = | ||
An average sweep. can be chained into for the hard knockdown, otherwise not much use. | |||
}} | }} | ||
}} | }} | ||
| Line 377: | Line 380: | ||
| subtitle = | | subtitle = | ||
| image = SFxT_Asuka_8LP.png | | image = SFxT_Asuka_8LP.png | ||
| caption = | | caption = | ||
| linkname = link_name | | linkname = link_name | ||
| data = | | data = | ||
{{AttackData-SFxT | {{AttackData-SFxT | ||
| command = {{SmallMotion|ub}} / {{SmallMotion|u}} / {{SmallMotion|uf}} + {{Icon-SmallCapcom|LP}} | | command = {{SmallMotion|ub}} / {{SmallMotion|u}} / {{SmallMotion|uf}} + {{Icon-SmallCapcom|LP}} | ||
| Line 404: | Line 407: | ||
| subtitle = | | subtitle = | ||
| image = SFxT_Asuka_8MP.png | | image = SFxT_Asuka_8MP.png | ||
| caption = | | caption = | ||
| linkname = link_name | | linkname = link_name | ||
| data = | | data = | ||
{{AttackData-SFxT | {{AttackData-SFxT | ||
| command = {{SmallMotion|ub}} / {{SmallMotion|u}} / {{SmallMotion|uf}} + {{Icon-SmallCapcom|MP}} | | command = {{SmallMotion|ub}} / {{SmallMotion|u}} / {{SmallMotion|uf}} + {{Icon-SmallCapcom|MP}} | ||
| Line 431: | Line 434: | ||
| subtitle = | | subtitle = | ||
| image = SFxT_Asuka_8HP.png | | image = SFxT_Asuka_8HP.png | ||
| caption = | | caption = | ||
| linkname = link_name | | linkname = link_name | ||
| data = | | data = | ||
{{AttackData-SFxT | {{AttackData-SFxT | ||
| command = {{SmallMotion|ub}} / {{SmallMotion|u}} / {{SmallMotion|uf}} + {{Icon-SmallCapcom|HP}} | | command = {{SmallMotion|ub}} / {{SmallMotion|u}} / {{SmallMotion|uf}} + {{Icon-SmallCapcom|HP}} | ||
| Line 458: | Line 461: | ||
| subtitle = | | subtitle = | ||
| image = SFxT_Asuka_8LK.png | | image = SFxT_Asuka_8LK.png | ||
| caption = | | caption = | ||
| linkname = link_name | | linkname = link_name | ||
| data = | | data = | ||
{{AttackData-SFxT | {{AttackData-SFxT | ||
| command = {{SmallMotion|ub}} / {{SmallMotion|u}} / {{SmallMotion|uf}} + {{Icon-SmallCapcom|LK}} | | command = {{SmallMotion|ub}} / {{SmallMotion|u}} / {{SmallMotion|uf}} + {{Icon-SmallCapcom|LK}} | ||
| Line 485: | Line 488: | ||
| subtitle = | | subtitle = | ||
| image = SFxT_Asuka_8MK.png | | image = SFxT_Asuka_8MK.png | ||
| caption = | | caption = | ||
| linkname = link_name | | linkname = link_name | ||
| data = | | data = | ||
{{AttackData-SFxT | {{AttackData-SFxT | ||
| command = {{SmallMotion|ub}} / {{SmallMotion|u}} / {{SmallMotion|uf}} + {{Icon-SmallCapcom|MK}} | | command = {{SmallMotion|ub}} / {{SmallMotion|u}} / {{SmallMotion|uf}} + {{Icon-SmallCapcom|MK}} | ||
| Line 512: | Line 515: | ||
| subtitle = | | subtitle = | ||
| image = SFxT_Asuka_8HK.png | | image = SFxT_Asuka_8HK.png | ||
| caption = | | caption = | ||
| linkname = link_name | | linkname = link_name | ||
| data = | | data = | ||
{{AttackData-SFxT | {{AttackData-SFxT | ||
| command = {{SmallMotion|ub}} / {{SmallMotion|u}} / {{SmallMotion|uf}} + {{Icon-SmallCapcom|HK}} | | command = {{SmallMotion|ub}} / {{SmallMotion|u}} / {{SmallMotion|uf}} + {{Icon-SmallCapcom|HK}} | ||
| Line 539: | Line 542: | ||
| subtitle = | | subtitle = | ||
| image = SFxT_Asuka_HPHK.png | | image = SFxT_Asuka_HPHK.png | ||
| caption = | | caption = | ||
| linkname = link_name | | linkname = link_name | ||
| data = | | data = | ||
{{AttackData-SFxT | {{AttackData-SFxT | ||
| command = {{Icon-SmallCapcom|HP}} + {{Icon-SmallCapcom|HK}} | | command = {{Icon-SmallCapcom|HP}} + {{Icon-SmallCapcom|HK}} | ||
| Line 563: | Line 566: | ||
{{MoveData | {{MoveData | ||
| name = Cross Cancel | | name = Cross Cancel | ||
| input = f+HP+HK | | input = (while blocking) f+HP+HK | ||
| subtitle = | | subtitle = | ||
| image = | | image = SFxT_Asuka_63214P_P.png | ||
| caption = | | caption = | ||
| linkname = link_name | | linkname = link_name | ||
| data = | | data = | ||
{{AttackData-SFxT | {{AttackData-SFxT | ||
| command = (while blocking) {{SmallMotion|f}} + {{Icon-SmallCapcom|HP}} + {{Icon-SmallCapcom|HK}} | | command = (while blocking) {{SmallMotion|f}} + {{Icon-SmallCapcom|HP}} + {{Icon-SmallCapcom|HK}} | ||
| Line 595: | Line 598: | ||
| subtitle = | | subtitle = | ||
| image = SFxT_Asuka_6LP.png | | image = SFxT_Asuka_6LP.png | ||
| caption = | | caption = | ||
| linkname = link_name | | linkname = link_name | ||
| data = | | data = | ||
{{AttackData-SFxT | {{AttackData-SFxT | ||
| command = {{SmallMotion|f}} + {{Icon-SmallCapcom|LP}} | | command = {{SmallMotion|f}} + {{Icon-SmallCapcom|LP}} | ||
| Line 608: | Line 611: | ||
| recovery = 26 | | recovery = 26 | ||
| advHit = float | | advHit = float | ||
| advBlock = | | advBlock = -7 | ||
| jp = 1 | | jp = 1 | ||
| jc = 1 | | jc = 1 | ||
| Line 622: | Line 625: | ||
| subtitle = | | subtitle = | ||
| image = SFxT_Asuka_6MP.png | | image = SFxT_Asuka_6MP.png | ||
| caption = | | caption = | ||
| linkname = link_name | | linkname = link_name | ||
| data = | | data = | ||
{{AttackData-SFxT | {{AttackData-SFxT | ||
| command = {{SmallMotion|f}} + {{Icon-SmallCapcom|MP}} | | command = {{SmallMotion|f}} + {{Icon-SmallCapcom|MP}} | ||
| Line 635: | Line 638: | ||
| recovery = 15 | | recovery = 15 | ||
| advHit = +6 | | advHit = +6 | ||
| advBlock = | | advBlock = -8 | ||
| jp = 2 | | jp = 2 | ||
| jc = 1 | | jc = 1 | ||
| Line 649: | Line 652: | ||
| subtitle = | | subtitle = | ||
| image = SFxT_Asuka_6HK.png | | image = SFxT_Asuka_6HK.png | ||
| caption = | | caption = | ||
| linkname = link_name | | linkname = link_name | ||
| data = | | data = | ||
{{AttackData-SFxT | {{AttackData-SFxT | ||
| command = {{SmallMotion|f}} + {{Icon-SmallCapcom|HK}} | | command = {{SmallMotion|f}} + {{Icon-SmallCapcom|HK}} | ||
| Line 662: | Line 665: | ||
| recovery = 25 | | recovery = 25 | ||
| advHit = ground bounce,float | | advHit = ground bounce,float | ||
| advBlock = | | advBlock = -2 | ||
| jp = 3,3 | | jp = 3,3 | ||
| jc = 1,3 | | jc = 1,3 | ||
| Line 676: | Line 679: | ||
| subtitle = | | subtitle = | ||
| image = SFxT_Asuka_6LK.png | | image = SFxT_Asuka_6LK.png | ||
| caption = | | caption = | ||
| linkname = link_name | | linkname = link_name | ||
| data = | | data = | ||
{{AttackData-SFxT | {{AttackData-SFxT | ||
| command = {{SmallMotion|f}} + {{Icon-SmallCapcom|LK}} | | command = {{SmallMotion|f}} + {{Icon-SmallCapcom|LK}} | ||
| Line 689: | Line 692: | ||
| recovery = 23 | | recovery = 23 | ||
| advHit = float | | advHit = float | ||
| advBlock = | | advBlock = -15 | ||
| jp = 1 | | jp = 1 | ||
| jc = 1 | | jc = 1 | ||
| Line 703: | Line 706: | ||
| subtitle = | | subtitle = | ||
| image = SFxT_Asuka_6LK.png | | image = SFxT_Asuka_6LK.png | ||
| caption = | | caption = | ||
| image2 = SFxT_Asuka_6LP.png | | image2 = SFxT_Asuka_6LP.png | ||
| caption2 = | | caption2 = | ||
| linkname = link_name | | linkname = link_name | ||
| data = | | data = | ||
{{AttackData-SFxT | {{AttackData-SFxT | ||
| command = {{SmallMotion|f}} + {{Icon-SmallCapcom|LK}} [[File:---.png]] {{SmallMotion|f}} + {{Icon-SmallCapcom|LP}} | | command = {{SmallMotion|f}} + {{Icon-SmallCapcom|LK}} [[File:---.png]] {{SmallMotion|f}} + {{Icon-SmallCapcom|LP}} | ||
| Line 718: | Line 721: | ||
| recovery = 26 | | recovery = 26 | ||
| advHit = float | | advHit = float | ||
| advBlock = | | advBlock = -7 | ||
| jp = 1 | | jp = 1 | ||
| jc = 1 | | jc = 1 | ||
| Line 732: | Line 735: | ||
| subtitle = | | subtitle = | ||
| image = SFxT_Asuka_6LK.png | | image = SFxT_Asuka_6LK.png | ||
| caption = | | caption = | ||
| image2 = SFxT_Asuka_3HK.png | | image2 = SFxT_Asuka_3HK.png | ||
| caption2 = | | caption2 = | ||
| linkname = link_name | | linkname = link_name | ||
| data = | | data = | ||
{{AttackData-SFxT | {{AttackData-SFxT | ||
| command = {{SmallMotion|f}} + {{Icon-SmallCapcom|LK}} [[File:---.png]] {{SmallMotion|df}} + {{Icon-SmallCapcom|HK}} | | command = {{SmallMotion|f}} + {{Icon-SmallCapcom|LK}} [[File:---.png]] {{SmallMotion|df}} + {{Icon-SmallCapcom|HK}} | ||
| Line 761: | Line 764: | ||
| subtitle = | | subtitle = | ||
| image = SFxT_Asuka_5MP.png | | image = SFxT_Asuka_5MP.png | ||
| caption = | | caption = | ||
| image2 | | image2 = SFxT_Asuka_5LP.png | ||
| caption2 | | caption2 = | ||
| linkname = link_name | | linkname = link_name | ||
| data = | | data = | ||
{{AttackData-SFxT | {{AttackData-SFxT | ||
| command = {{Icon-SmallCapcom|MP}} [[File:---.png]] {{Icon-SmallCapcom|LP}} | | command = {{Icon-SmallCapcom|MP}} [[File:---.png]] {{Icon-SmallCapcom|LP}} | ||
| Line 790: | Line 793: | ||
| subtitle = | | subtitle = | ||
| image = SFxT_Asuka_5MP.png | | image = SFxT_Asuka_5MP.png | ||
| caption = | | caption = | ||
| image2 | | image2 = SFxT_Asuka_5LK.png | ||
| caption2 | | caption2 = | ||
| linkname = link_name | | linkname = link_name | ||
| data = | | data = | ||
{{AttackData-SFxT | {{AttackData-SFxT | ||
| command = {{Icon-SmallCapcom|MP}} [[File:---.png]] {{Icon-SmallCapcom|LK}} | | command = {{Icon-SmallCapcom|MP}} [[File:---.png]] {{Icon-SmallCapcom|LK}} | ||
| Line 819: | Line 822: | ||
| subtitle = | | subtitle = | ||
| image = SFxT_Asuka_5MK.png | | image = SFxT_Asuka_5MK.png | ||
| caption = | | caption = | ||
| image2 = SFxT_Asuka_2MP.png | | image2 = SFxT_Asuka_2MP.png | ||
| caption2 = | | caption2 = | ||
| linkname = link_name | | linkname = link_name | ||
| data = | | data = | ||
{{AttackData-SFxT | {{AttackData-SFxT | ||
| command = {{Icon-SmallCapcom|MK}} [[File:---.png]] {{SmallMotion|d}} + {{Icon-SmallCapcom|MP}} | | command = {{Icon-SmallCapcom|MK}} [[File:---.png]] {{SmallMotion|d}} + {{Icon-SmallCapcom|MP}} | ||
| Line 848: | Line 851: | ||
| subtitle = | | subtitle = | ||
| image = SFxT_Asuka_4MP.png | | image = SFxT_Asuka_4MP.png | ||
| caption = | | caption = | ||
| linkname = link_name | | linkname = link_name | ||
| data = | | data = | ||
{{AttackData-SFxT | {{AttackData-SFxT | ||
| command = {{SmallMotion|b}} + {{Icon-SmallCapcom|MP}} | | command = {{SmallMotion|b}} + {{Icon-SmallCapcom|MP}} | ||
| Line 875: | Line 878: | ||
| subtitle = | | subtitle = | ||
| image = SFxT_Asuka_4MP.png | | image = SFxT_Asuka_4MP.png | ||
| caption = | | caption = | ||
| image2 = SFxT_Asuka_4MP_MK.png | | image2 = SFxT_Asuka_4MP_MK.png | ||
| caption2 = | | caption2 = | ||
| linkname = link_name | | linkname = link_name | ||
| data = | | data = | ||
{{AttackData-SFxT | {{AttackData-SFxT | ||
| command = {{SmallMotion|b}} + {{Icon-SmallCapcom|MP}} [[File:---.png]] {{Icon-SmallCapcom|MK}} | | command = {{SmallMotion|b}} + {{Icon-SmallCapcom|MP}} [[File:---.png]] {{Icon-SmallCapcom|MK}} | ||
| subtitle = | | subtitle = | ||
| damage = 60 | | damage = 60 | ||
| Line 904: | Line 907: | ||
| subtitle = | | subtitle = | ||
| image = SFxT_Asuka_4MP.png | | image = SFxT_Asuka_4MP.png | ||
| caption = | | caption = | ||
| image2 = SFxT_Asuka_4MP_2MK.png | | image2 = SFxT_Asuka_4MP_2MK.png | ||
| caption2 = | | caption2 = | ||
| linkname = link_name | | linkname = link_name | ||
| data = | | data = | ||
{{AttackData-SFxT | {{AttackData-SFxT | ||
| command = {{SmallMotion|b}} + {{Icon-SmallCapcom|MP}} [[File:---.png]] {{SmallMotion|d}} + {{Icon-SmallCapcom|MK}} | | command = {{SmallMotion|b}} + {{Icon-SmallCapcom|MP}} [[File:---.png]] {{SmallMotion|d}} + {{Icon-SmallCapcom|MK}} | ||
| subtitle = | | subtitle = | ||
| damage = 90 | | damage = 90 | ||
| Line 933: | Line 936: | ||
| subtitle = | | subtitle = | ||
| image = SFxT_Asuka_6MK.png | | image = SFxT_Asuka_6MK.png | ||
| caption = | | caption = | ||
| linkname = link_name | | linkname = link_name | ||
| data = | | data = | ||
{{AttackData-SFxT | {{AttackData-SFxT | ||
| command = {{SmallMotion|f}} + {{Icon-SmallCapcom|MK}} | | command = {{SmallMotion|f}} + {{Icon-SmallCapcom|MK}} | ||
| Line 960: | Line 963: | ||
| subtitle = | | subtitle = | ||
| image = SFxT_Asuka_6MK.png | | image = SFxT_Asuka_6MK.png | ||
| caption = | | caption = | ||
| image2 = SFxT_Asuka_6MK_MP.png | | image2 = SFxT_Asuka_6MK_MP.png | ||
| | | caption2 = | ||
| linkname = link_name | | linkname = link_name | ||
| data = | | data = | ||
{{AttackData-SFxT | {{AttackData-SFxT | ||
| command = {{SmallMotion|f}} + {{Icon-SmallCapcom|MK}} [[File:---.png]] {{Icon-SmallCapcom|MP}} | | command = {{SmallMotion|f}} + {{Icon-SmallCapcom|MK}} [[File:---.png]] {{Icon-SmallCapcom|MP}} | ||
| Line 989: | Line 992: | ||
| subtitle = | | subtitle = | ||
| image = SFxT_Asuka_6MK.png | | image = SFxT_Asuka_6MK.png | ||
| caption = | | caption = | ||
| image2 = SFxT_Asuka_4MP_2MK.png | | image2 = SFxT_Asuka_4MP_2MK.png | ||
| | | caption2 = | ||
| linkname = link_name | | linkname = link_name | ||
| data = | | data = | ||
{{AttackData-SFxT | {{AttackData-SFxT | ||
| command = {{SmallMotion|f}} + {{Icon-SmallCapcom|MK}} [[File:---.png]] {{SmallMotion|d}} + {{Icon-SmallCapcom|MK}} | | command = {{SmallMotion|f}} + {{Icon-SmallCapcom|MK}} [[File:---.png]] {{SmallMotion|d}} + {{Icon-SmallCapcom|MK}} | ||
| Line 1,018: | Line 1,021: | ||
| subtitle = | | subtitle = | ||
| image = SFxT_Asuka_3HK.png | | image = SFxT_Asuka_3HK.png | ||
| caption = | | caption = | ||
| linkname = link_name | | linkname = link_name | ||
| data = | | data = | ||
{{AttackData-SFxT | {{AttackData-SFxT | ||
| command = {{SmallMotion|df}} + {{Icon-SmallCapcom|HK}} | | command = {{SmallMotion|df}} + {{Icon-SmallCapcom|HK}} | ||
| Line 1,045: | Line 1,048: | ||
| subtitle = | | subtitle = | ||
| image = SFxT_Asuka_3HK.png | | image = SFxT_Asuka_3HK.png | ||
| caption = | | caption = | ||
| linkname = link_name | | linkname = link_name | ||
| data = | | data = | ||
{{AttackData-SFxT | {{AttackData-SFxT | ||
| command = {{SmallMotion|df}} + {{Icon-SmallCapcom|HK}} [[File:---.png]] {{SmallMotion|df}} + {{Icon-SmallCapcom|HK}} | | command = {{SmallMotion|df}} + {{Icon-SmallCapcom|HK}} [[File:---.png]] {{SmallMotion|df}} + {{Icon-SmallCapcom|HK}} | ||
| Line 1,072: | Line 1,075: | ||
| subtitle = | | subtitle = | ||
| image = SFxT_Asuka_3HK.png | | image = SFxT_Asuka_3HK.png | ||
| caption = | | caption = | ||
| linkname = link_name | | linkname = link_name | ||
| data = | | data = | ||
{{AttackData-SFxT | {{AttackData-SFxT | ||
| command = {{SmallMotion|df}} + {{Icon-SmallCapcom|HK}} [[File:---.png]] {{SmallMotion|df}} + {{Icon-SmallCapcom|HK}} [[File:---.png]] {{SmallMotion|df}} + {{Icon-SmallCapcom|HK}} | | command = {{SmallMotion|df}} + {{Icon-SmallCapcom|HK}} [[File:---.png]] {{SmallMotion|df}} + {{Icon-SmallCapcom|HK}} [[File:---.png]] {{SmallMotion|df}} + {{Icon-SmallCapcom|HK}} | ||
| Line 1,096: | Line 1,099: | ||
{{MoveData | {{MoveData | ||
| name = Kariashi Shiranui | | name = Kariashi Shiranui | ||
| input = | | input = HK during Leg Cutter | ||
| subtitle = | | subtitle = | ||
| image = SFxT_Asuka_3HK_HK.png | | image = SFxT_Asuka_3HK_HK.png | ||
| caption = | | caption = | ||
| linkname = link_name | | linkname = link_name | ||
| data = | | data = | ||
{{AttackData-SFxT | {{AttackData-SFxT | ||
| command = {{SmallMotion|df}} + {{Icon-SmallCapcom|HK}} ([[File:---.png]] {{SmallMotion|df}} + {{Icon-SmallCapcom|HK}} [[File:---.png]] {{SmallMotion|df}} + {{Icon-SmallCapcom|HK}}) [[File:---.png]] {{Icon-SmallCapcom|HK}} | | command = {{SmallMotion|df}} + {{Icon-SmallCapcom|HK}} ([[File:---.png]] {{SmallMotion|df}} + {{Icon-SmallCapcom|HK}} [[File:---.png]] {{SmallMotion|df}} + {{Icon-SmallCapcom|HK}}) [[File:---.png]] {{Icon-SmallCapcom|HK}} | ||
| Line 1,121: | Line 1,124: | ||
}} | }} | ||
=== Normal Throws === | === Normal Throws === | ||
{{MoveData | {{MoveData | ||
| Line 1,128: | Line 1,131: | ||
| subtitle = | | subtitle = | ||
| image = SFxT_Asuka_LPLK.png | | image = SFxT_Asuka_LPLK.png | ||
| caption = | | caption = | ||
| linkname = link_name | | linkname = link_name | ||
| data = | | data = | ||
{{AttackData-SFxT | {{AttackData-SFxT | ||
| command = {{Icon-SmallCapcom|LP}} + {{Icon-SmallCapcom|LK}} | | command = {{Icon-SmallCapcom|LP}} + {{Icon-SmallCapcom|LK}} | ||
| Line 1,155: | Line 1,158: | ||
| subtitle = | | subtitle = | ||
| image = SFxT_Asuka_4LPLK.png | | image = SFxT_Asuka_4LPLK.png | ||
| caption = | | caption = | ||
| linkname = link_name | | linkname = link_name | ||
| data = | | data = | ||
{{AttackData-SFxT | {{AttackData-SFxT | ||
| command = {{SmallMotion|b}} + {{Icon-SmallCapcom|LP}} + {{Icon-SmallCapcom|LK}} | | command = {{SmallMotion|b}} + {{Icon-SmallCapcom|LP}} + {{Icon-SmallCapcom|LK}} | ||
| Line 1,181: | Line 1,184: | ||
{{MoveData | {{MoveData | ||
| name = Exorcisor | | name = Exorcisor | ||
| input = hcb+ | | input = hcb+P | ||
| subtitle = | | subtitle = | ||
| image = SFxT_Asuka_63214P.png | | image = SFxT_Asuka_63214P.png | ||
| caption = | | caption = | ||
| linkname = link_name | | linkname = link_name | ||
| data = | | data = | ||
{{AttackData-SFxT | {{AttackData-SFxT | ||
| command = {{SmallMotion|hcb}} + {{Icon-SmallCapcom|LP}} | | command = {{SmallMotion|hcb}} + {{Icon-SmallCapcom|LP}} | ||
| Line 1,245: | Line 1,248: | ||
| subtitle = | | subtitle = | ||
| image = SFxT_Asuka_63214P_P.png | | image = SFxT_Asuka_63214P_P.png | ||
| caption = | | caption = | ||
| linkname = link_name | | linkname = link_name | ||
| data = | | data = | ||
{{AttackData-SFxT | {{AttackData-SFxT | ||
| command = {{SmallMotion|hcb}} + {{Icon-SmallCapcom| | | command = {{SmallMotion|hcb}} + {{Icon-SmallCapcom|P}} [[File:---.png]] {{Icon-SmallCapcom|P}} | ||
| subtitle = | | subtitle = | ||
| damage = 40 | | damage = 40 | ||
| Line 1,272: | Line 1,275: | ||
| subtitle = | | subtitle = | ||
| image = SFxT_Asuka_63214P_P_6P.png | | image = SFxT_Asuka_63214P_P_6P.png | ||
| caption = | | caption = | ||
| linkname = link_name | | linkname = link_name | ||
| data = | | data = | ||
{{AttackData-SFxT | {{AttackData-SFxT | ||
| command = {{SmallMotion|hcb}} + {{Icon-SmallCapcom| | | command = {{SmallMotion|hcb}} + {{Icon-SmallCapcom|P}} [[File:---.png]] {{Icon-SmallCapcom|P}} [[File:---.png]] {{SmallMotion|f}} + {{Icon-SmallCapcom|P}} | ||
| subtitle = | | subtitle = | ||
| damage = 40,40 | | damage = 40,40 | ||
| Line 1,299: | Line 1,302: | ||
| subtitle = | | subtitle = | ||
| image = SFxT_Asuka_63214PP.png | | image = SFxT_Asuka_63214PP.png | ||
| caption = | | caption = | ||
| linkname = link_name | | linkname = link_name | ||
| data = | | data = | ||
{{AttackData-SFxT | {{AttackData-SFxT | ||
| command = {{SmallMotion|hcb}} + {{Icon-SmallCapcom| | | command = {{SmallMotion|hcb}} + {{Icon-SmallCapcom|2P}} | ||
| subtitle = | | subtitle = | ||
| damage = 50 | | damage = 50 | ||
| Line 1,323: | Line 1,326: | ||
{{MoveData | {{MoveData | ||
| name = Mist Palm Thrust EX | | name = Mist Palm Thrust EX | ||
| input = P during Exorcisor | | input = P during EX Exorcisor | ||
| subtitle = | | subtitle = | ||
| image = SFxT_Asuka_63214PP_P.png | | image = SFxT_Asuka_63214PP_P.png | ||
| caption = | | caption = | ||
| linkname = link_name | | linkname = link_name | ||
| data = | | data = | ||
{{AttackData-SFxT | {{AttackData-SFxT | ||
| command = {{SmallMotion|hcb}} + {{Icon-SmallCapcom| | | command = {{SmallMotion|hcb}} + {{Icon-SmallCapcom|2P}} [[File:---.png]] {{Icon-SmallCapcom|P}} | ||
| subtitle = | | subtitle = | ||
| damage = 40 | | damage = 40 | ||
| Line 1,350: | Line 1,353: | ||
{{MoveData | {{MoveData | ||
| name = Raging Storm EX | | name = Raging Storm EX | ||
| input = f+P during Mist Palm Thrust | | input = f+P during EX Mist Palm Thrust | ||
| subtitle = | | subtitle = | ||
| image = SFxT_Asuka_63214PP_P_6P.png | | image = SFxT_Asuka_63214PP_P_6P.png | ||
| caption = | | caption = | ||
| linkname = link_name | | linkname = link_name | ||
| data = | | data = | ||
{{AttackData-SFxT | {{AttackData-SFxT | ||
| command = {{SmallMotion|hcb}} + {{Icon-SmallCapcom| | | command = {{SmallMotion|hcb}} + {{Icon-SmallCapcom|2P}} [[File:---.png]] {{Icon-SmallCapcom|P}} [[File:---.png]] {{SmallMotion|f}} + {{Icon-SmallCapcom|P}} | ||
| subtitle = | | subtitle = | ||
| damage = 40,40 | | damage = 40,40 | ||
| Line 1,377: | Line 1,380: | ||
{{MoveData | {{MoveData | ||
| name = Double Lift Kicks | | name = Double Lift Kicks | ||
| input = | | input = f,d,df+K | ||
| subtitle = | | subtitle = | ||
| image = SFxT_Asuka_623K.png | | image = SFxT_Asuka_623K.png | ||
| caption = | | caption = | ||
| linkname = link_name | | linkname = link_name | ||
| data = | | data = | ||
{{AttackData-SFxT | {{AttackData-SFxT | ||
| command = {{SmallMotion|dp}} + {{Icon-SmallCapcom|K}} | | command = {{SmallMotion|dp}} + {{Icon-SmallCapcom|K}} | ||
| Line 1,404: | Line 1,407: | ||
{{MoveData | {{MoveData | ||
| name = Double Lift Kicks EX | | name = Double Lift Kicks EX | ||
| input = | | input = f,d,df+KK | ||
| subtitle = | | subtitle = | ||
| image = SFxT_Asuka_623KK.png | | image = SFxT_Asuka_623KK.png | ||
| caption = | | caption = | ||
| linkname = link_name | | linkname = link_name | ||
| data = | | data = | ||
{{AttackData-SFxT | {{AttackData-SFxT | ||
| command = {{SmallMotion|dp}} + {{Icon-SmallCapcom|2K}} | | command = {{SmallMotion|dp}} + {{Icon-SmallCapcom|2K}} | ||
| Line 1,434: | Line 1,437: | ||
| subtitle = | | subtitle = | ||
| image = SFxT_Asuka_41236K.png | | image = SFxT_Asuka_41236K.png | ||
| caption = | | caption = | ||
| linkname = link_name | | linkname = link_name | ||
| data = | | data = | ||
{{AttackData-SFxT | {{AttackData-SFxT | ||
| command = {{SmallMotion|hcf}} + {{Icon-SmallCapcom|LK}} | | command = {{SmallMotion|hcf}} + {{Icon-SmallCapcom|LK}} | ||
| Line 1,495: | Line 1,498: | ||
| subtitle = | | subtitle = | ||
| image = SFxT_Asuka_41236KK.png | | image = SFxT_Asuka_41236KK.png | ||
| caption = | | caption = | ||
| linkname = link_name | | linkname = link_name | ||
| data = | | data = | ||
{{AttackData-SFxT | {{AttackData-SFxT | ||
| command = {{SmallMotion|hcf}} + {{Icon-SmallCapcom|2K}} | | command = {{SmallMotion|hcf}} + {{Icon-SmallCapcom|2K}} | ||
| Line 1,519: | Line 1,522: | ||
{{MoveData | {{MoveData | ||
| name = Falling Rain | | name = Falling Rain | ||
| input = | | input = f,d,df+P | ||
| subtitle = | | subtitle = | ||
| image = SFxT_Asuka_623P.png | | image = SFxT_Asuka_623P.png | ||
| caption = | | caption = | ||
| linkname = link_name | | linkname = link_name | ||
| data = | | data = | ||
{{AttackData-SFxT | {{AttackData-SFxT | ||
| command = {{SmallMotion|dp}} + {{Icon-SmallCapcom|P}} | | command = {{SmallMotion|dp}} + {{Icon-SmallCapcom|P}} | ||
| Line 1,546: | Line 1,549: | ||
{{MoveData | {{MoveData | ||
| name = Falling Rain EX | | name = Falling Rain EX | ||
| input = | | input = f,d,df+PP | ||
| subtitle = | | subtitle = | ||
| image = SFxT_Asuka_623PP.png | | image = SFxT_Asuka_623PP.png | ||
| caption = | | caption = | ||
| linkname = link_name | | linkname = link_name | ||
| data = | | data = | ||
{{AttackData-SFxT | {{AttackData-SFxT | ||
| command = {{SmallMotion|dp}} + {{Icon-SmallCapcom| | | command = {{SmallMotion|dp}} + {{Icon-SmallCapcom|2P}} | ||
| subtitle = | | subtitle = | ||
| damage = 180 | | damage = 180 | ||
| Line 1,576: | Line 1,579: | ||
| subtitle = | | subtitle = | ||
| image = SFxT_Asuka_41236P.png | | image = SFxT_Asuka_41236P.png | ||
| caption = | | caption = | ||
| linkname = link_name | | linkname = link_name | ||
| data = | | data = | ||
{{AttackData-SFxT | {{AttackData-SFxT | ||
| command = {{SmallMotion|hcf}} + {{Icon-SmallCapcom|P}} | | command = {{SmallMotion|hcf}} + {{Icon-SmallCapcom|P}} | ||
| Line 1,603: | Line 1,606: | ||
| subtitle = | | subtitle = | ||
| image = SFxT_Asuka_41236PP.png | | image = SFxT_Asuka_41236PP.png | ||
| caption = | | caption = | ||
| linkname = link_name | | linkname = link_name | ||
| data = | | data = | ||
{{AttackData-SFxT | {{AttackData-SFxT | ||
| command = {{SmallMotion|hcf}} + {{Icon-SmallCapcom| | | command = {{SmallMotion|hcf}} + {{Icon-SmallCapcom|2P}} | ||
| subtitle = | | subtitle = | ||
| damage = 200 | | damage = 200 | ||
| Line 1,630: | Line 1,633: | ||
| subtitle = | | subtitle = | ||
| image = SFxT_Asuka_63214K.png | | image = SFxT_Asuka_63214K.png | ||
| caption = | | caption = | ||
| image2 = SFxT_Asuka_63214K_charge.png | | image2 = SFxT_Asuka_63214K_charge.png | ||
| caption2 = Charge | | caption2 = Charge | ||
| linkname = link_name | | linkname = link_name | ||
| data = | | data = | ||
{{AttackData-SFxT | {{AttackData-SFxT | ||
| command = {{SmallMotion|hcb}} + {{Icon-SmallCapcom|K}} | | command = {{SmallMotion|hcb}} + {{Icon-SmallCapcom|K}} | ||
| Line 1,645: | Line 1,648: | ||
| recovery = 27 | | recovery = 27 | ||
| advHit = +2 | | advHit = +2 | ||
| advBlock = | | advBlock = -1 | ||
| jp = 3 | | jp = 3 | ||
| jc = 1 | | jc = 1 | ||
| Line 1,659: | Line 1,662: | ||
| subtitle = | | subtitle = | ||
| image = SFxT_Asuka_63214KK.png | | image = SFxT_Asuka_63214KK.png | ||
| caption = | | caption = | ||
| linkname = link_name | | linkname = link_name | ||
| data = | | data = | ||
{{AttackData-SFxT | {{AttackData-SFxT | ||
| command = {{SmallMotion|hcb}} + {{Icon-SmallCapcom|2K}} | | command = {{SmallMotion|hcb}} + {{Icon-SmallCapcom|2K}} | ||
| Line 1,672: | Line 1,675: | ||
| recovery = 39 | | recovery = 39 | ||
| advHit = float | | advHit = float | ||
| advBlock = | | advBlock = -21 | ||
| jp = 4,4 | | jp = 4,4 | ||
| jc = 0,4 | | jc = 0,4 | ||
| Line 1,681: | Line 1,684: | ||
}} | }} | ||
=== Super Combos === | === Super Combos === | ||
{{MoveData | {{MoveData | ||
| Line 1,688: | Line 1,691: | ||
| subtitle = | | subtitle = | ||
| image = SFxT_Asuka_63214KKK.png | | image = SFxT_Asuka_63214KKK.png | ||
| caption = | | caption = | ||
| linkname = link_name | | linkname = link_name | ||
| data = | | data = | ||
{{AttackData-SFxT | {{AttackData-SFxT | ||
| command = {{SmallMotion|hcb}} + {{Icon-SmallCapcom|3K}} | | command = {{SmallMotion|hcb}} + {{Icon-SmallCapcom|3K}} | ||
| Line 1,715: | Line 1,718: | ||
| subtitle = | | subtitle = | ||
| image = SFxT_Asuka_236MPMK.png | | image = SFxT_Asuka_236MPMK.png | ||
| caption = | | caption = | ||
| linkname = link_name | | linkname = link_name | ||
| data = | | data = | ||
{{AttackData-SFxT | {{AttackData-SFxT | ||
| command = {{SmallMotion|qcf}} + {{Icon-SmallCapcom|MP}} + {{Icon-SmallCapcom|MK}} | | command = {{SmallMotion|qcf}} + {{Icon-SmallCapcom|MP}} + {{Icon-SmallCapcom|MK}} | ||
Latest revision as of 01:08, 27 September 2022
Introduction
Ideal Team Position: Anchor
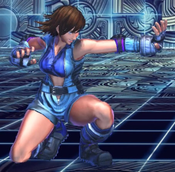
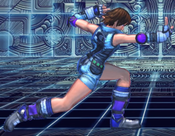
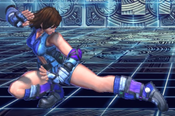
Asuka is a rushdown character that does not want to be on the defense. On ![]() she has great mixups ranging from ambiguous cross-ups to
she has great mixups ranging from ambiguous cross-ups to ![]() and
and ![]() guesses, all which lead to great meterless damage and another
guesses, all which lead to great meterless damage and another ![]() or can be combed to supers/cross-arts. Asuka's combos come from a mix of Tekken Chains and Links that with practice and muscle memory, are easy to get down. Her BnB is very usefull because it can be used as a hit-confirm to cut off the combo and make it safe.
or can be combed to supers/cross-arts. Asuka's combos come from a mix of Tekken Chains and Links that with practice and muscle memory, are easy to get down. Her BnB is very usefull because it can be used as a hit-confirm to cut off the combo and make it safe.
While overheads existed within the Street Fighter franchise long before this game came out, no game in the series placed such a high commodity on comboable overheads like this one. Instead of overheads being used simply to break an opponent’s guard, Asuka’s overheads are used as combo starters that lead to big damage and hard knockdowns. She also has a command standing low, f+mk, that is easily confirmable into a target combo that also leads to big meterless damage. This high-low game of Asuka, along with a command grab to keep opponents continuously wary of her approach, makes her up-close game extremely dangerous. Her f+LK, LP target combo has a very large hitbox, air crush properties, and quick startup that leads to yet another combo option, giving her a weapon against airborne opponents. Her j.HP can hit from either side of her body and has a high highbox, giving her a powerful crossup tool that helps her get in and start her mix-ups. To compensate for her strong offense, Asuka herself is not particularly mobile, as her jump is slow and easy to react to while her forward movement is susceptible to opponents with good ground options. She has particular difficulties against zoners as her main way around fireballs, her lunging elbow rekka (hcb+P) does not have particularly long window of fireball invincibility and none below her waist. However, if she can pair herself with a point character that overcome her mobility deficits, and tag her in once they’re in appropriate position...Asuka can ensure that she continues to get plenty of students for her father’s dojo.
| Strengths | Weaknesses |
|---|---|
|
|
| Asuka | |
|---|---|
| Health | 950 |
| Ground Movement | |
| Forward walk speed | 40 |
| Back walk speed | 25 |
| Forward dash duration | 17 |
| Back dash duration | 8,10,8 |
| Jumping | |
| Prejump duration | 4 |
| Neutral jump duration | 35 |
| Diagonal jump duration | 35 |
| Neutral super jump duration | 35 |
| Diagonal super jump duration | 35 |
| Misc. | |
| Charge Cancel Delay (Normal/EX) | 5 |
Move Analysis
Normal Moves
Unique Attacks
Normal Throws
Special Moves
Super Combos
The Basics
N/A
Advanced Strategy
N/A

