Callie Rose (talk | contribs) |
Callie Rose (talk | contribs) No edit summary |
||
| Line 1,413: | Line 1,413: | ||
* Should opponents try to roll through the super, jump over it, or are already in the air, Hibiki will automatically execute the first hit once she meets their vertical plane. The super will end after this first hit, as the rave chain can only be executed against grounded opponents. | * Should opponents try to roll through the super, jump over it, or are already in the air, Hibiki will automatically execute the first hit once she meets their vertical plane. The super will end after this first hit, as the rave chain can only be executed against grounded opponents. | ||
}} | }} | ||
} | }] | ||
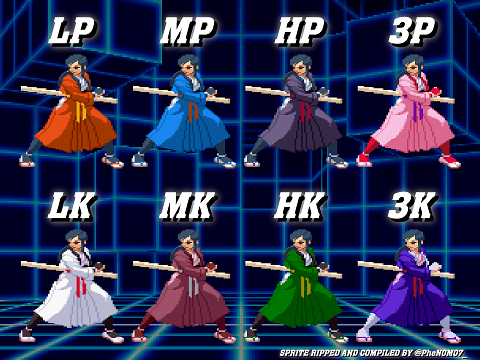
== Colors == | == Colors == | ||
| Line 1,775: | Line 1,421: | ||
{{Navbox-CvS2}} | {{Navbox-CvS2}} | ||
[[Category:Capcom vs SNK 2]] | [[Category:Capcom vs SNK 2]] | ||
[[Category:Hibiki]] | |||
Revision as of 01:20, 7 July 2022
Introduction
Story
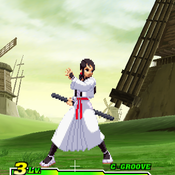
Hibiki Takane (Japanese: 高嶺響, Takane Hibiki) is a character from SNK's The Last Blade fighting game series, first appearing in the 1998 release The Last Blade 2.
A young girl with a calm and shy personality, Hibiki is thrust into a quest for vengeance. Her father, Genzou Takane, was a retired swordsmith. One day, an evil silver-haired man compelled Genzou to fashion a sword against his will. After completing the task, Genzou fell gravely ill, telling Hibiki on his deathbed that this was the silver-haired man's fault. In his last words to his daughter, Genzou said that while he "cannot approve of such actions," Hibiki should "go find that man and the sword. The thing that I saw, what I felt...even you must understand." Hibiki reluctantly heeded her father's final words, packing her sword Kodama and leaving the family home.
Hibiki uses the Musō Shinden-ryū branch of the Iaido fighting style. Standing with Kodama sheathed at all times, Hibiki draws it with quick distance slashes, running attacks, and counter-attack techniques. Though a young girl, Hibiki does not shy away from violence when necessary, even going as far as blaming defeated opponents for their own deaths. Despite this, she still has a strong sense of justice, having no qualms of vanquishing evil, particularly in the pursuit of seeking vengeance for her father.
Before her appearance in Capcom vs. SNK 2, Hibiki appeared in two games from The Last Blade series: Her debut in The Last Blade 2 (1998) and The Last Blade: Beyond the Destiny (2000) for Neo Geo Pocket Color. Both games have since been rereleased to modern consoles. Perhaps as a result of her popularity from CvS2, in 2021 SNK made Hibiki a DLC crossover character for Samurai Shodown (2019), with her representing The Last Blade series as a whole. She has been thought as a female equivalent of Ukyo Tachiban from the Samurai Shodown series, sharing a similar demeanor and sword-drawing techniques.
Gameplay
With her far-reaching pokes and special attacks, plus extremely damaging super combo potential, Hibiki is high-tier character. She is primarily a zoner that is at her best at a distance from her opponents, away from the effective range of the majority of the rest of the cast. Coupled with her movement options to help control space, her very strong anti-air attacks, and the threat of her counter, approaching Hibiki can be very difficult. Once zoning dominance has been established, Hibiki can use her quickness and deceptive special moves to approach and attack up close with her BnB combos or confirming into super moves.
Hibiki performs very well against much of the top-tier in CvS2. However, her playstyle requires at least some proximity to inflict big damage to opponents. Due to her limited options in that range she will quickly run out of options in prolonged or forced close combat. She can escape situations well with roll cancel Running Slash, which will cross through opponents and quickly go under jumping ones. Without RCs in K-Groove, which is a very popular groove for her, practical escape paths become more risky.
Even so, some of the advantages Hibiki has over the rest of the cast are strong. Hibiki has a special dodge (available to her in all grooves; her dodge has different properties than the S-Groove subsystem Dodge) that also has unique movement options, setting up guaranteed dead body crossups and instant air attacks in the corners. Her jumping HK comes out directly below her and Running Slash attacks can cross up on wakeup, creating ambiguous 50/50 situations. Her mid/upper counter stance can juggle into a super for free damage. Her primary super combo, a "rave" style super, can be stopped to add extra damage to the end of the rave on hit, or to create mixup options on block.
And she has the coolest super in the game. So there's that.
Groove Selection
Best - K/A: K-Groove and A-Groove are the two most powerful Grooves in the game, and Hibiki has strong options in both, but sacrifices something in exchange. K-Hibiki is the most popular, as Rage is very beneficial on a character who relies on pokes for damage so much. A solid hit from a Raged K-Hibiki can lead to a Rave Super combo, which does massive damage, and makes her up close game much scarier as well. You lose access to rolls however, which is a big loss for Hibiki who relies on roll cancel for reversal purposes. A-Hibiki gets her highest possible damage with her strong Custom Combo, and access to rolls for RC Running Slash or RC Distance Slash. You lose out on the mobility of K-Groove however, and on the powerful buffs Rage gives her.
Useful - N/C/P: N-Hibiki gets the mobility of K-Hibiki plus the rolls of A-Hibiki, but has a seriously lower damage ceiling, making her punish game a lot worse. N-Hibiki plays a lot more of a fundamental zoning game than the other two, since her punishes just don't hurt as much. C-Hibiki gets consistent access to her supers for punishes, and a decent level 2 combo, but still doesn't reach the damage of K or A-Groove, and since C-Groove has many similar tools to A-Groove, it just becomes a bit irrelevant to A-Hibiki. P-Hibiki gets surprisingly consistent punishes from parry, and parries in general can be beneficial for a zoner who wants to punish approaches. She never really gets a super to make her damage scary, however.
Worst - S: S-Hibiki gets very little in comparison. Charging isn't too big of an issue, but it leaves her unsafe and vulnerable in neutral, where she could make much more headway by spamming 5MP or 2MP, or waiting for a chance to anti-air. This makes her much more weak to rushdown as a whole, and while her defense isn't terrible, you would rather keep them under your control. S-Grooves dodge is very redundant, as Hibiki's own dodge special is a much better version of it. Infinite level 1's makes her punishes hurt a bit more, but is otherwise pretty useless, and the lack of any other benefits that can't be found in other Grooves means there's not much reason to play S-Hibiki.
|
Hibiki is a powerful zoner with amazing normals and long reach with her sword. She also has stellar up close mixups and high damage, and great defense with her dodge and RC Distance Slashes. She just can't have it all at once. Hibiki's best Grooves are K-Groove and A-Groove. |
|
| Pros | Cons |
|
|
Moves List
System & Subsystem Mechanics
Dashes & Run
Roll
Dodge & Dodge Attacks
Guard Cancel Counter Attack & Movement
Throws
Far Standing Normals
5LP
| Damage | Stun | Cancel | Guard | Parry | Startup | Active | Recovery | Total | Adv Hit | Adv Block | Invul |
|---|---|---|---|---|---|---|---|---|---|---|---|
| 200 | _ | RF/SP/SU | H/L | H/L | 3 | 4 | 8 | 15 | +5 | +5 | - |
A quick jab with the elbow.
| |||||||||||
5MP
| Damage | Stun | Cancel | Guard | Parry | Startup | Active | Recovery | Total | Adv Hit | Adv Block | Invul |
|---|---|---|---|---|---|---|---|---|---|---|---|
| 800 | _ | SU | H/L | H | 6 | 4 | 17 | 27 | +3 | +3 | - |
Hibiki draws her sword straight out to arm's length.
| |||||||||||
5HP
| Damage | Stun | Cancel | Guard | Parry | Startup | Active | Recovery | Total | Adv Hit | Adv Block | Invul |
|---|---|---|---|---|---|---|---|---|---|---|---|
| 1000 | _ | X | H/L | H | 7 | 4 | 41 | 52 | -15 | -15 | - |
Hibiki takes a large, arcing swipe in the air in front of and above her head. HK is your de facto anti-air button, although whether you use it standing far, standing close, or crouching will depending on the trajectory of the incoming character.
| |||||||||||
5LK
| Damage | Stun | Cancel | Guard | Parry | Startup | Active | Recovery | Total | Adv Hit | Adv Block | Invul |
|---|---|---|---|---|---|---|---|---|---|---|---|
| 300 | _ | SP/SU | H/L | H/L | 5 | 8 | 7 | 20 | +2 | +2 | - |
A low kick that looks more like a quick step.
| |||||||||||
5MK
| Damage | Stun | Cancel | Guard | Parry | Startup | Active | Recovery | Total | Adv Hit | Adv Block | Invul |
|---|---|---|---|---|---|---|---|---|---|---|---|
| 700 | _ | X | H/L | H | 13 | 3 | 28 | 44 | Down | -8 | - |
Hibiki pivots on her forward foot, spins around, and steps forward to attack with the butt of her scabbard.
| |||||||||||
5HK
| Damage | Stun | Cancel | Guard | Parry | Startup | Active | Recovery | Total | Adv Hit | Adv Block | Invul |
|---|---|---|---|---|---|---|---|---|---|---|---|
| 1100 | _ | X | H/L | H | 12 | 4 | 40 | 56 | -8 | -8 | - |
Hibiki takes a big swing of her sword directly in front of her.
| |||||||||||
Close Standing Normals
cl5LP
| Damage | Stun | Cancel | Guard | Parry | Startup | Active | Recovery | Total | Adv Hit | Adv Block | Invul |
|---|---|---|---|---|---|---|---|---|---|---|---|
| 200 | _ | RF/SP/SU | H/L | H/L | 3 | 4 | 8 | 15 | +5 | +5 | - |
A quick jab with the elbow. One of your two primary point-blank quick hitters and BnB combo starters, the other being crouching LK.
| |||||||||||
cl5MP
| Damage | Stun | Cancel | Guard | Parry | Startup | Active | Recovery | Total | Adv Hit | Adv Block | Invul |
|---|---|---|---|---|---|---|---|---|---|---|---|
| 800 | _ | SP/SU | H/L | H | 4 | 4 | 18 | 26 | +2 | +2 | - |
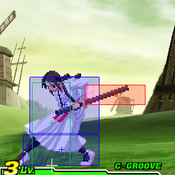
Hibiki draws her sword at the hip for a quick slash.
| |||||||||||
cl5HP
| Damage | Stun | Cancel | Guard | Parry | Startup | Active | Recovery | Total | Adv Hit | Adv Block | Invul |
|---|---|---|---|---|---|---|---|---|---|---|---|
| 1000 | _ | SP*/SU | H/L | H | 3 | 8 | 41 | 52 | -17 | -17 | - |
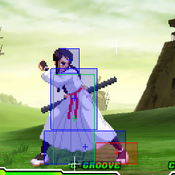
Hibiki draws her sword straight up in front of her and over her head. One of the most powerful anti-air normal attacks in CvS2, coming out in only three frames and covering a HUGE area in front of and above Hibiki's hurtbox. It also has a special property that allows Hibiki to continue the attack with a second downward strike. (See the Command Normals section for more info.)
| |||||||||||
cl5LK
| Damage | Stun | Cancel | Guard | Parry | Startup | Active | Recovery | Total | Adv Hit | Adv Block | Invul |
|---|---|---|---|---|---|---|---|---|---|---|---|
| 300 | _ | SP/SU | H/L | H/L | 5 | 8 | 7 | 20 | +2 | +2 | - |
A low kick that looks more like a quick step.
| |||||||||||
cl5MK
| Damage | Stun | Cancel | Guard | Parry | Startup | Active | Recovery | Total | Adv Hit | Adv Block | Invul |
|---|---|---|---|---|---|---|---|---|---|---|---|
| 800 | _ | X | H/L | H | 5 | 6 | 11 | 22 | +6 | +6 | - |
Hibiki shoves her scabbard into the opponent's gut. Her tried and true meaty attack on the opponent's wakeup.
| |||||||||||
cl5HK
| Damage | Stun | Cancel | Guard | Parry | Startup | Active | Recovery | Total | Adv Hit | Adv Block | Invul |
|---|---|---|---|---|---|---|---|---|---|---|---|
| 1300 | _ | SP/SU | L | L | 8 | 6 | 27 | 41 | -9 | -9 | - |
Hibiki draws at the hip, but this time thrusts the sword down at an angle toward the opponent's feet. The main starter for Hibiki's big punishes and can be a useful tool as a part of Hibiki's mixup game.
| |||||||||||
Crouching Normals
2LP
| Damage | Stun | Cancel | Guard | Parry | Startup | Active | Recovery | Total | Adv Hit | Adv Block | Invul |
|---|---|---|---|---|---|---|---|---|---|---|---|
| 400 | _ | SP/SU | H/L | H/L | 4 | 5 | 12 | 21 | +3 | +3 | - |
Hibiki quickly draws her sword at arm's length while kneeling. The quickest and safest poke from distance in Hibiki's arsenal.
| |||||||||||
2MP
| Damage | Stun | Cancel | Guard | Parry | Startup | Active | Recovery | Total | Adv Hit | Adv Block | Invul |
|---|---|---|---|---|---|---|---|---|---|---|---|
| 700 | _ | SU | H/L | H/L | 5 | 4 | 19 | 28 | +1 | +1 | - |
Hibiki quickly (but not as quickly as crouching LP) draws her sword at arm's length while kneeling.
| |||||||||||
2HP
| Damage | Stun | Cancel | Guard | Parry | Startup | Active | Recovery | Total | Adv Hit | Adv Block | Invul |
|---|---|---|---|---|---|---|---|---|---|---|---|
| 1100 | _ | X | H/L | H/L | 5 | 4 | 32 | 41 | -6 | -6 | - |
Hibiki draws her sword low from her knees and takes a big upward slash from the ground to above her head. Her second-best anti-air button after close HP.
| |||||||||||
2LK
| Damage | Stun | Cancel | Guard | Parry | Startup | Active | Recovery | Total | Adv Hit | Adv Block | Invul |
|---|---|---|---|---|---|---|---|---|---|---|---|
| 200 | _ | RF/SP/SU | L | L | 3 | 4 | 10 | 17 | +3 | +3 | - |
Hibiki extends her leg and slides out her foot for a quick grounded kick attack. One of your two primary point-blank quick hitters and BnB combo starters, the other being standing LP.
| |||||||||||
2MK
| Damage | Stun | Cancel | Guard | Parry | Startup | Active | Recovery | Total | Adv Hit | Adv Block | Invul |
|---|---|---|---|---|---|---|---|---|---|---|---|
| 700 | _ | SU | L | L | 5 | 6 | 20 | 31 | -6 | -6 | - |
Hibiki takes her scabbard and drives it into the ground in front of her.
| |||||||||||
2HK
| Damage | Stun | Cancel | Guard | Parry | Startup | Active | Recovery | Total | Adv Hit | Adv Block | Invul |
|---|---|---|---|---|---|---|---|---|---|---|---|
| 1100 | _ | X | L | L | 8 | 4 | 34 | 46 | Down | -8 | - |
Hibiki sweeps her sword across the ground.
| |||||||||||
Air Normals
8LP
| Damage | Stun | Cancel | Guard | Parry | Startup | Active | Recovery | Total | Adv Hit | Adv Block | Invul |
|---|---|---|---|---|---|---|---|---|---|---|---|
| 500 | _ | - | H | H | 3 | 16 | - | - | - | - | - |
Hibiki draws her sword and swings downward.
| |||||||||||
8MP
| Damage | Stun | Cancel | Guard | Parry | Startup | Active | Recovery | Total | Adv Hit | Adv Block | Invul |
|---|---|---|---|---|---|---|---|---|---|---|---|
| 700 | _ | - | H | H | 3 | 8 | - | - | - | - | - |
Hibiki draws her sword and swings further downward.
| |||||||||||
8HP
| Damage | Stun | Cancel | Guard | Parry | Startup | Active | Recovery | Total | Adv Hit | Adv Block | Invul |
|---|---|---|---|---|---|---|---|---|---|---|---|
| 1200 | _ | - | H | H | 5 | 4 | - | - | - | - | - |
Hibiki draws her sword from down low and takes a big swing upwards in front of her.
| |||||||||||
8LK
| Damage | Stun | Cancel | Guard | Parry | Startup | Active | Recovery | Total | Adv Hit | Adv Block | Invul |
|---|---|---|---|---|---|---|---|---|---|---|---|
| 400 | _ | - | H | H | 4 | 18 | - | - | - | - | - |
Hibiki angles the tip of her foot down at an angle.
| |||||||||||
8MK
| Damage | Stun | Cancel | Guard | Parry | Startup | Active | Recovery | Total | Adv Hit | Adv Block | Invul |
|---|---|---|---|---|---|---|---|---|---|---|---|
| 700 | _ | - | H | H | 5 | 8 | - | - | - | - | - |
Hibiki thrusts her scabbard forward.
| |||||||||||
8HK
| Damage | Stun | Cancel | Guard | Parry | Startup | Active | Recovery | Total | Adv Hit | Adv Block | Invul |
|---|---|---|---|---|---|---|---|---|---|---|---|
| 1100 | _ | - | H | H | 9 | 4 | - | - | - | - | - |
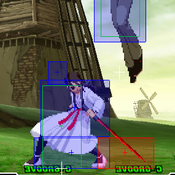
Hibiki swings her sword underneath her with enough force to cause her to flip around before landing. This attack is a critical part of her close-up mixup game.
| |||||||||||
Command Normals
Special Moves
Distance Slash
Beckoning (Running) Slash
Piercing Moon Pounce (Overhead)
Melding Being Blade (Counter)
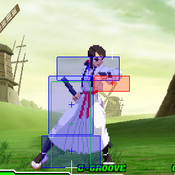
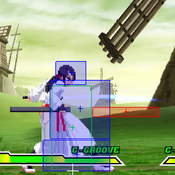
| Version | Damage | Stun | Cancel | Guard | Parry | Startup | Active | Recovery | Total | Adv Hit | Adv Block | Invul |
|---|---|---|---|---|---|---|---|---|---|---|---|---|
| Any K |
600 | _ | - | - | - | 4 | 18 | 22 | 44 | Juggle | - | - |
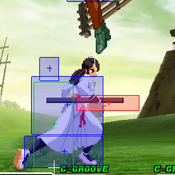
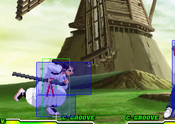
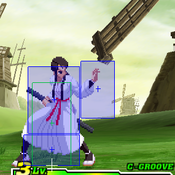
Hibiki holds up her palm, ready to catch an attacking opponent. Catches mid/high normals, and physical special attacks.
| ||||||||||||
Narrow Escape (Dodge)
Essential Crunch
Supers
Heavenly Spirit of Victory (Dash)
No Fear Feint (Blackout)
| Version | Damage | Stun | Cancel | Guard | Parry | Startup | Active | Recovery | Total | Adv Hit | Adv Block | Invul |
|---|---|---|---|---|---|---|---|---|---|---|---|---|
| Level 3/MAX Only |
5500 (*800) | 0 | - | H/L | H/L | 4 | 8 | 41 | 53 | Down (*-21) | -21 | 22 Full |
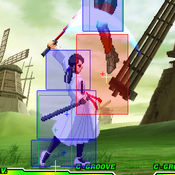
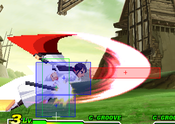
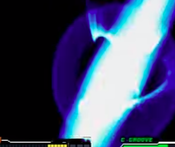
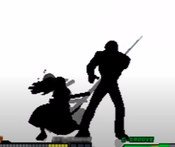
Hibiki draws her sword with a flash so bright it blacks out the screen. Only the sword slash is visible, followed by silhouettes of both characters on a white background. After a moment of silence, the opponent suddenly receives massive damage before Hibiki sheathes her sword. This is arguably the coolest-looking super in CvS2, especially if Hibiki wins a round with it!
| ||||||||||||
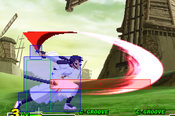
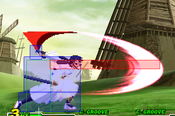
Going My Way (Rave)
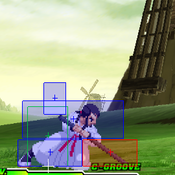
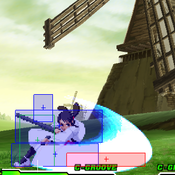
{{MoveData
| name = Going My Way
| subtitle = aka Rave Super
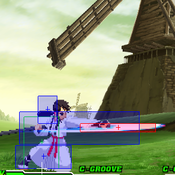
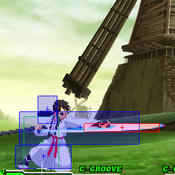
| input = 632146+K… / hcb,f+K…![]()
![]() +
+ ![]()
...followed by a Root sequence
| image = CvS2_Hibiki_super_rave_1.png
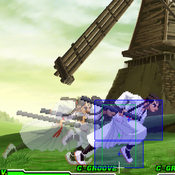
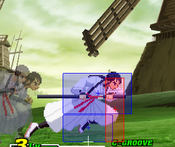
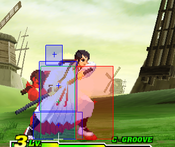
| caption = The initial run up...
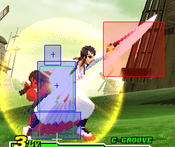
| image2 = CvS2_Hibiki_super_rave_2.png
| caption2 = ...and the first hit
| linkname = SuperRave
| data =
! Version
! height="25px" | Damage
! Stun
! Cancel
! Guard
! Parry
! Startup
! Active
! Recovery
! Total
! Adv Hit
! Adv Block
! Invul
|-
! All versions are Level 3/MAX Only
Root 1![]()
![]() +
+ ![]() , then
, then
![]()
![]()
![]()
![]() ....
....![]() ..
..![]() ..
..![]()
![]()
![]() +
+![]() | height="25px"| 5500
| 0
| -
| H/L
| H/L
| 4 + runup + 3
| 4
| 45
| 56+
| +3 (*Down)
| -17
| 22 Full
|-
| height="25px"| 5500
| 0
| -
| H/L
| H/L
| 4 + runup + 3
| 4
| 45
| 56+
| +3 (*Down)
| -17
| 22 Full
|-
| colspan="13" style="width:100%; text-align:left; vertical-align:top;" |
- Basically useless. No real opportunity to interrupt the chain and combo into more damage, and therefore it does the least total potential damage of the three roots.
- Though a sequence of 10 button presses, it will register as an 11 hit combo due to the final attack being a rapid succession of two Distance Slashes.
- Only useful as a show-off combo when assured of a KO and round win... but even then, Root 3 does it better!
|-
|-
! Root 2![]()
![]() +
+ ![]() , then
, then
![]()
![]()
![]()
![]() ....
....![]() ..
..![]() ..
..![]()
![]()
![]() +
+![]() | height="25px"| 5300
| 0
| -
| H/L
| H/L
| 4 + runup + 3
| 4
| 45
| 56+
| +3 (*Down)
| -17
| 22 Full
|-
| height="25px"| 5300
| 0
| -
| H/L
| H/L
| 4 + runup + 3
| 4
| 45
| 56+
| +3 (*Down)
| -17
| 22 Full
|-
| colspan="13" style="width:100%; text-align:left; vertical-align:top;" |
- This is the main chain for extracting maximum damage out of the super combo. Always use it, on hit or on block.
- When going through the button sequence, there is a two-beat (approximately!) pause between the 4th and 5th button presses, then briefer pauses after the 5th and 6th buttons. (The execution notation above shows the relative length of these pauses with "...." and "..") The other buttons should be pressed one after the other in steady succession. Once you understand the timing, execution is trivial.
- For maximum damage, DO NOT finish off Root 1 with
 +
+ unless you know it will kill and you are going for a flashy/Finest KO
 - Always stop the chain after the 8th button (MK). After this hit, Hibiki will be at a significant frame advantage. You will want to use this to add on more damage than what the natural end of the chain would have given you. Pause a brief moment to allow the game to recognize you've stopped the rave (but not too long that the opponent recovers from hitstun) then execute a standard punish combo, close HK into crossthrough Beckoning Slash into MP (for damage/stun) or HP (for knockdown/oki) Distance Slash.
- Or, if you are in S-Groove (with red health) or N-Groove (with your 3rd stock available) you can substitute the Distance Slash with a Heavenly Spirit of Victory super coming back the other way for the fancy "Level 4" super combo worth about 1000 more damage. Always do this in S-Groove if you can; for N-Groove, your current game situation will determine if the extra damage is worth burning your last stock, or if it'd be better to save it to quickly build up to another Level 3 opportunity.
- If the super is blocked, there is still an opportunity for damage. The 4th hit of the chain resembles Hibiki's overhead, although it doesn't need to be blocked high while a part of the rave. However, if you instead input a standard overhead attack (623+K) instead of the next button of the rave chain, you can catch out an opponent's lazy blocking. Should they wise up to this and block high, you can instead hit low, preferably with the similar-animating close HK, and get a consolation combo that way. Note that this mixup is most effective only at this point in the chain because of natural pause in the rave sequence that can disguise an incoming non-rave attack. Trying a similar mixup at any other point will make what you are attempting obvious!
|-
|-
! Root 3![]()
![]() +
+ ![]() , then
, then
![]()
![]()
![]()
![]()
![]()
![]()
![]() | height="25px"| 4200
| 0
| -
| H/L (*L)
| H/L (*L)
| 4 + runup + 3
| 4
| 45
| 56+
| +3 (*Juggle)
| -17
| 22 Full
|-
| height="25px"| 4200
| 0
| -
| H/L (*L)
| H/L (*L)
| 4 + runup + 3
| 4
| 45
| 56+
| +3 (*Juggle)
| -17
| 22 Full
|-
| colspan="13" style="width:100%; text-align:left; vertical-align:top;" |
- Purely a show-off chain for ending the round with a flashy KO, given its poor damage in comparison to the other two roots.
- Unlike the other roots, the button input timing does not require any pauses. Just hit the next button in the sequence right away, all the way through.
- The final hit of this shortened chain is a close HP slash that pops the opponent into the air for an additional juggle hit of your choice. C, P, and K-Grooves can only perform a normal or special attack (Beckoning Slash would be the best) to add more damage. However, as with Root 2, S and N-Groove may be able to perform a Level 1 Heavenly Spirit of Victory for an easy-mode "Level 4" super. This does not do more damage than the full Root 2 path, but it's a lot more showoffy!
- Although the initial hits can be blocked high or low, the 6th hit of Root 3 is a low sweep and must be blocked low. This is relatively useless information, as you won't do this chain if they blocked the initial hit, and even if you did there is no reason they wouldn't be crouch blocking.
General Information
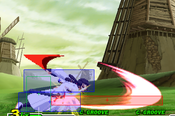
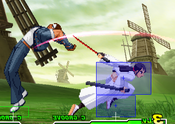
Hibiki charges toward the opponent, unleashing a barrage of rapid attacks. A rave-style super, it requires a button press or command input for each hit of the super combo. Hibiki has three variations, or "roots," of Going My Way, each requiring a different sequence of buttons to perform.
(*) Frame data is for the initial hit of the super only. Noted additional properties are for events during or after the full rave chain as noted.
- This super move is a reference to Hibiki's Speed style chain combos from The Last Blade 2.
- This is the super you want to land, if you can help it. It can do the most damage by far of all of Hibiki's moves, and is up there with the most damaging regular super combos of the entire game. This is because like other rave supers in CvS2, the sequence can (and should!) be interrupted to tack on additional normal and special attacks. (See Root 2, above.)
- The first hit in the rave sequence (LP in all roots) should be pressed as Hibiki is auto-executing the first automatic hit of the combo (visually, a close HP). There is no need to hold down or re-hit the initial kick button that activated the super. Additional hits will follow in the root path of your choosing and with the proper timing.
- The super can be confirmed into with up to 3 crouching LKs, or using a close HK opener when punishing with it.
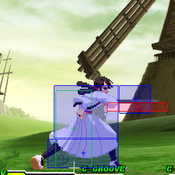
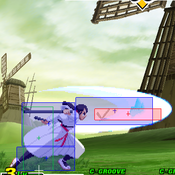
- It can be executed just about anywhere on screen. Hibiki will run up to the opponent until making contact with them to start the rave chain.
- You can take advantage of the startup invincibility to run through fireballs or distance attacks after the super flash, though attempt with caution. If they recover before you get there, you may be screwed!
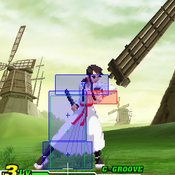
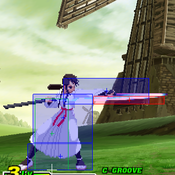
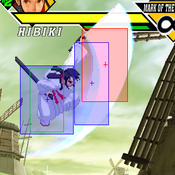
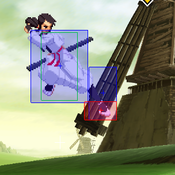
- Should opponents try to roll through the super, jump over it, or are already in the air, Hibiki will automatically execute the first hit once she meets their vertical plane. The super will end after this first hit, as the rave chain can only be executed against grounded opponents.
|- }]

