Callie Rose (talk | contribs) mNo edit summary |
RagingStormX (talk | contribs) |
||
| Line 362: | Line 362: | ||
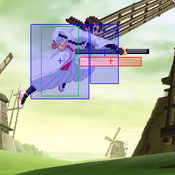
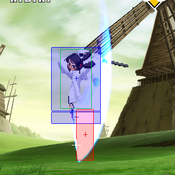
* With few character exceptions, this move (and her other HP anti-airs) will completely shut down any standard jump-in attempts, especially versus C, S, and N-Groove players. | * With few character exceptions, this move (and her other HP anti-airs) will completely shut down any standard jump-in attempts, especially versus C, S, and N-Groove players. | ||
* It is easy to be over-reliant on this button. Watch out for jumping A-Groove activations, K-Groove Just Defends, P-Groove parries, and characters with air-to-ground super moves; they can severely punish Hibiki if they execute well or guess right. | * It is easy to be over-reliant on this button. Watch out for jumping A-Groove activations, K-Groove Just Defends, P-Groove parries, and characters with air-to-ground super moves; they can severely punish Hibiki if they execute well or guess right. | ||
* (*)The recovery of close HP is cancellable into the downward slash or a special move, but only in a small window. You can mitigate some of these anti-anti-air tactics, particularly the K air JDs, by cancelling into Beckoning (Running) Slash to get out of the situation before you can be punished. The timing is difficult, however. | * (*)The recovery of close HP is cancellable into the downward slash or a special move, but only in a small window. You can mitigate some of these anti-anti-air tactics, particularly the K air JDs, by cancelling into Beckoning (Running) Slash or Dodge to get out of the situation before you can be punished. The timing is difficult, however. | ||
}} | }} | ||
}} | }} | ||
Revision as of 05:29, 6 July 2022
Introduction
Story
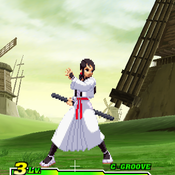
Hibiki Takane (Japanese: 高嶺響, Takane Hibiki) is a character from SNK's The Last Blade fighting game series, first appearing in the 1998 release The Last Blade 2.
A young girl with a calm and shy personality, Hibiki is thrust into a quest for vengeance. Her father, Genzou Takane, was a retired swordsmith. One day, an evil silver-haired man compelled Genzou to fashion a sword against his will. After completing the task, Genzou fell gravely ill, telling Hibiki on his deathbed that this was the silver-haired man's fault. In his last words to his daughter, Genzou said that while he "cannot approve of such actions," Hibiki should "go find that man and the sword. The thing that I saw, what I felt...even you must understand." Hibiki reluctantly heeded her father's final words, packing her sword Kodama and leaving the family home.
Hibiki uses the Musō Shinden-ryū branch of the Iaido fighting style. Standing with Kodama sheathed at all times, Hibiki draws it with quick distance slashes, running attacks, and counter-attack techniques. Though a young girl, Hibiki does not shy away from violence when necessary, even going as far as blaming defeated opponents for their own deaths. Despite this, she still has a strong sense of justice, having no qualms of vanquishing evil, particularly in the pursuit of seeking vengeance for her father.
Before her appearance in Capcom vs. SNK 2, Hibiki appeared in two games from The Last Blade series: Her debut in The Last Blade 2 (1998) and The Last Blade: Beyond the Destiny (2000) for Neo Geo Pocket Color. Both games have since been rereleased to modern consoles. Perhaps as a result of her popularity from CvS2, in 2021 SNK made Hibiki a DLC crossover character for Samurai Shodown (2019), with her representing The Last Blade series as a whole. She has been thought as a female equivalent of Ukyo Tachiban from the Samurai Shodown series, sharing a similar demeanor and sword-drawing techniques.
Gameplay
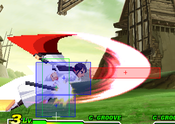
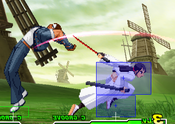
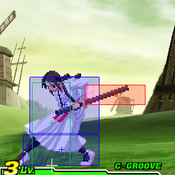
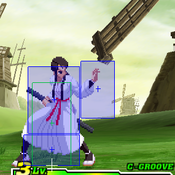
With her far-reaching pokes and special attacks, plus extremely damaging super combo potential, Hibiki is high-tier character. She is primarily a zoner that is at her best at a distance from her opponents, away from the effective range of the majority of the rest of the cast. Coupled with her movement options to help control space, her very strong anti-air attacks, and the threat of her counter, approaching Hibiki can be very difficult. Once zoning dominance has been established, Hibiki can use her quickness and deceptive special moves to approach and attack up close with her BnB combos or confirming into super moves.
Hibiki performs very well against much of the top-tier in CvS2. However, her playstyle requires at least some proximity to inflict big damage to opponents. Due to her limited options in that range she will quickly run out of options in prolonged or forced close combat. She can escape situations well with roll cancel Running Slash, which will cross through opponents and quickly go under jumping ones. Without RCs in K-Groove, which is a very popular groove for her, practical escape paths become more risky.
Even so, some of the advantages Hibiki has over the rest of the cast are strong. Hibiki has a special dodge (available to her in all grooves; her dodge has different properties than the S-Groove subsystem Dodge) that also has unique movement options, setting up guaranteed dead body crossups and instant air attacks in the corners. Her jumping HK comes out directly below her and Running Slash attacks can cross up on wakeup, creating ambiguous 50/50 situations. Her mid/upper counter stance can juggle into a super for free damage. Her primary super combo, a "rave" style super, can be stopped to add extra damage to the end of the rave on hit, or to create mixup options on block.
And she has the coolest super in the game. So there's that.
Groove Selection
Best - K/A: K-Groove and A-Groove are the two most powerful Grooves in the game, and Hibiki has strong options in both, but sacrifices something in exchange. K-Hibiki is the most popular, as Rage is very beneficial on a character who relies on pokes for damage so much. A solid hit from a Raged K-Hibiki can lead to a Rave Super combo, which does massive damage, and makes her up close game much scarier as well. You lose access to rolls however, which is a big loss for Hibiki who relies on roll cancel for reversal purposes. A-Hibiki gets her highest possible damage with her strong Custom Combo, and access to rolls for RC Running Slash or RC Distance Slash. You lose out on the mobility of K-Groove however, and on the powerful buffs Rage gives her.
Useful - N/C/P: N-Hibiki gets the mobility of K-Hibiki plus the rolls of A-Hibiki, but has a seriously lower damage ceiling, making her punish game a lot worse. N-Hibiki plays a lot more of a fundamental zoning game than the other two, since her punishes just don't hurt as much. C-Hibiki gets consistent access to her supers for punishes, and a decent level 2 combo, but still doesn't reach the damage of K or A-Groove, and since C-Groove has many similar tools to A-Groove, it just becomes a bit irrelevant to A-Hibiki. P-Hibiki gets surprisingly consistent punishes from parry, and parries in general can be beneficial for a zoner who wants to punish approaches. She never really gets a super to make her damage scary, however.
Worst - S: S-Hibiki gets very little in comparison. Charging isn't too big of an issue, but it leaves her unsafe and vulnerable in neutral, where she could make much more headway by spamming 5MP or 2MP, or waiting for a chance to anti-air. This makes her much more weak to rushdown as a whole, and while her defense isn't terrible, you would rather keep them under your control. S-Grooves dodge is very redundant, as Hibiki's own dodge special is a much better version of it. Infinite level 1's makes her punishes hurt a bit more, but is otherwise pretty useless, and the lack of any other benefits that can't be found in other Grooves means there's not much reason to play S-Hibiki.
|
Hibiki is a powerful zoner with amazing normals and long reach with her sword. She also has stellar up close mixups and high damage, and great defense with her dodge and RC Distance Slashes. She just can't have it all at once. Hibiki's best Grooves are K-Groove and A-Groove. |
|
| Pros | Cons |
|
|
Moves List
System & Subsystem Mechanics
Dashes & Run
Roll
Dodge & Dodge Attacks
Guard Cancel Counter Attack & Movement
Throws
Far Standing Normals
5LP
| Damage | Stun | Cancel | Guard | Parry | Startup | Active | Recovery | Total | Adv Hit | Adv Block | Invul |
|---|---|---|---|---|---|---|---|---|---|---|---|
| 200 | _ | RF/SP/SU | H/L | H/L | 3 | 4 | 8 | 15 | +5 | +5 | - |
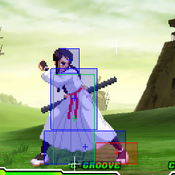
A quick jab with the elbow.
| |||||||||||
5MP
| Damage | Stun | Cancel | Guard | Parry | Startup | Active | Recovery | Total | Adv Hit | Adv Block | Invul |
|---|---|---|---|---|---|---|---|---|---|---|---|
| 800 | _ | SU | H/L | H | 6 | 4 | 17 | 27 | +3 | +3 | - |
Hibiki draws her sword straight out to arm's length.
| |||||||||||
5HP
| Damage | Stun | Cancel | Guard | Parry | Startup | Active | Recovery | Total | Adv Hit | Adv Block | Invul |
|---|---|---|---|---|---|---|---|---|---|---|---|
| 1000 | _ | X | H/L | H | 7 | 4 | 41 | 52 | -15 | -15 | - |
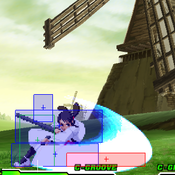
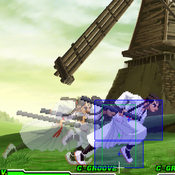
Hibiki takes a large, arcing swipe in the air in front of and above her head. HK is your de facto anti-air button, although whether you use it standing far, standing close, or crouching will depending on the trajectory of the incoming character.
| |||||||||||
5LK
| Damage | Stun | Cancel | Guard | Parry | Startup | Active | Recovery | Total | Adv Hit | Adv Block | Invul |
|---|---|---|---|---|---|---|---|---|---|---|---|
| 300 | _ | SP/SU | H/L | H/L | 5 | 8 | 7 | 20 | +2 | +2 | - |
A low kick that looks more like a quick step.
| |||||||||||
5MK
| Damage | Stun | Cancel | Guard | Parry | Startup | Active | Recovery | Total | Adv Hit | Adv Block | Invul |
|---|---|---|---|---|---|---|---|---|---|---|---|
| 700 | _ | X | H/L | H | 13 | 3 | 28 | 44 | Down | -8 | - |
Hibiki pivots on her forward foot, spins around, and steps forward to attack with the butt of her scabbard.
| |||||||||||
5HK
| Damage | Stun | Cancel | Guard | Parry | Startup | Active | Recovery | Total | Adv Hit | Adv Block | Invul |
|---|---|---|---|---|---|---|---|---|---|---|---|
| 1100 | _ | X | H/L | H | 12 | 4 | 40 | 56 | -8 | -8 | - |
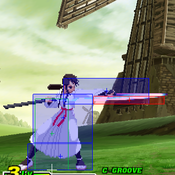
Hibiki takes a big swing of her sword directly in front of her.
| |||||||||||
Close Standing Normals
cl5LP
| Damage | Stun | Cancel | Guard | Parry | Startup | Active | Recovery | Total | Adv Hit | Adv Block | Invul |
|---|---|---|---|---|---|---|---|---|---|---|---|
| 200 | _ | RF/SP/SU | H/L | H/L | 3 | 4 | 8 | 15 | +5 | +5 | - |
A quick jab with the elbow. One of your two primary point-blank quick hitters and BnB combo starters, the other being crouching LK.
| |||||||||||
cl5MP
| Damage | Stun | Cancel | Guard | Parry | Startup | Active | Recovery | Total | Adv Hit | Adv Block | Invul |
|---|---|---|---|---|---|---|---|---|---|---|---|
| 800 | _ | SP/SU | H/L | H | 4 | 4 | 18 | 26 | +2 | +2 | - |
Hibiki draws her sword at the hip for a quick slash.
| |||||||||||
cl5HP
| Damage | Stun | Cancel | Guard | Parry | Startup | Active | Recovery | Total | Adv Hit | Adv Block | Invul |
|---|---|---|---|---|---|---|---|---|---|---|---|
| 1000 | _ | SP*/SU | H/L | H | 3 | 8 | 41 | 52 | -17 | -17 | - |
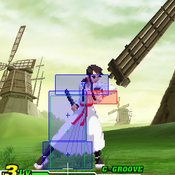
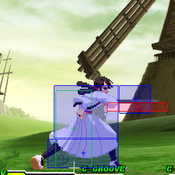
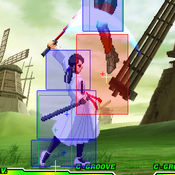
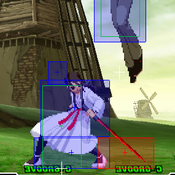
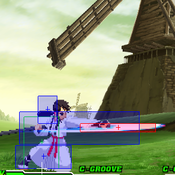
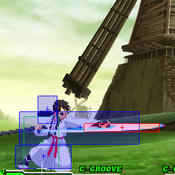
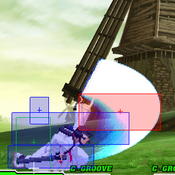
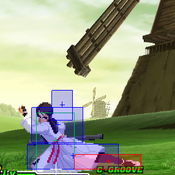
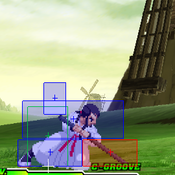
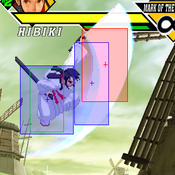
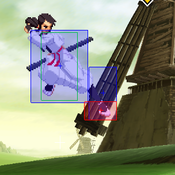
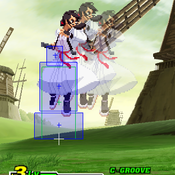
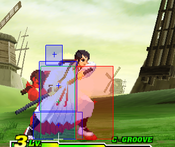
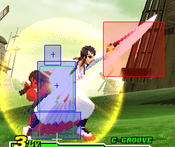
Hibiki draws her sword straight up in front of her and over her head. One of the most powerful anti-air normal attacks in CvS2, coming out in only three frames and covering a HUGE area in front of and above Hibiki's hurtbox. It also has a special property that allows Hibiki to continue the attack with a second downward strike. (See the Command Normals section for more info.)
| |||||||||||
cl5LK
| Damage | Stun | Cancel | Guard | Parry | Startup | Active | Recovery | Total | Adv Hit | Adv Block | Invul |
|---|---|---|---|---|---|---|---|---|---|---|---|
| 300 | _ | SP/SU | H/L | H/L | 5 | 8 | 7 | 20 | +2 | +2 | - |
A low kick that looks more like a quick step.
| |||||||||||
cl5MK
| Damage | Stun | Cancel | Guard | Parry | Startup | Active | Recovery | Total | Adv Hit | Adv Block | Invul |
|---|---|---|---|---|---|---|---|---|---|---|---|
| 800 | _ | X | H/L | H | 5 | 6 | 11 | 22 | +6 | +6 | - |
Hibiki shoves her scabbard into the opponent's gut. Her tried and true meaty attack on the opponent's wakeup.
| |||||||||||
cl5HK
| Damage | Stun | Cancel | Guard | Parry | Startup | Active | Recovery | Total | Adv Hit | Adv Block | Invul |
|---|---|---|---|---|---|---|---|---|---|---|---|
| 1300 | _ | SP/SU | L | L | 8 | 6 | 27 | 41 | -9 | -9 | - |
Hibiki draws at the hip, but this time thrusts the sword down at an angle toward the opponent's feet. The main starter for Hibiki's big punishes and can be a useful tool as a part of Hibiki's mixup game.
| |||||||||||
Crouching Normals
2LP
| Damage | Stun | Cancel | Guard | Parry | Startup | Active | Recovery | Total | Adv Hit | Adv Block | Invul |
|---|---|---|---|---|---|---|---|---|---|---|---|
| 400 | _ | SP/SU | H/L | H/L | 4 | 5 | 12 | 21 | +3 | +3 | - |
Hibiki quickly draws her sword at arm's length while kneeling. The quickest and safest poke from distance in Hibiki's arsenal.
| |||||||||||
2MP
| Damage | Stun | Cancel | Guard | Parry | Startup | Active | Recovery | Total | Adv Hit | Adv Block | Invul |
|---|---|---|---|---|---|---|---|---|---|---|---|
| 700 | _ | SU | H/L | H/L | 5 | 4 | 19 | 28 | +1 | +1 | - |
Hibiki quickly (but not as quickly as crouching LP) draws her sword at arm's length while kneeling.
| |||||||||||
2HP
| Damage | Stun | Cancel | Guard | Parry | Startup | Active | Recovery | Total | Adv Hit | Adv Block | Invul |
|---|---|---|---|---|---|---|---|---|---|---|---|
| 1100 | _ | X | H/L | H/L | 5 | 4 | 32 | 41 | -6 | -6 | - |
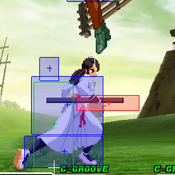
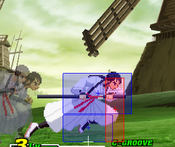
Hibiki draws her sword low from her knees and takes a big upward slash from the ground to above her head. Her second-best anti-air button after close HP.
| |||||||||||
2LK
| Damage | Stun | Cancel | Guard | Parry | Startup | Active | Recovery | Total | Adv Hit | Adv Block | Invul |
|---|---|---|---|---|---|---|---|---|---|---|---|
| 200 | _ | RF/SP/SU | L | L | 3 | 4 | 10 | 17 | +3 | +3 | - |
Hibiki extends her leg and slides out her foot for a quick grounded kick attack. One of your two primary point-blank quick hitters and BnB combo starters, the other being standing LP.
| |||||||||||
2MK
| Damage | Stun | Cancel | Guard | Parry | Startup | Active | Recovery | Total | Adv Hit | Adv Block | Invul |
|---|---|---|---|---|---|---|---|---|---|---|---|
| 700 | _ | SU | L | L | 5 | 6 | 20 | 31 | -6 | -6 | - |
Hibiki takes her scabbard and drives it into the ground in front of her.
| |||||||||||
2HK
| Damage | Stun | Cancel | Guard | Parry | Startup | Active | Recovery | Total | Adv Hit | Adv Block | Invul |
|---|---|---|---|---|---|---|---|---|---|---|---|
| 1100 | _ | X | L | L | 8 | 4 | 34 | 46 | Down | -8 | - |
Hibiki sweeps her sword across the ground.
| |||||||||||
Air Normals
8LP
| Damage | Stun | Cancel | Guard | Parry | Startup | Active | Recovery | Total | Adv Hit | Adv Block | Invul |
|---|---|---|---|---|---|---|---|---|---|---|---|
| 500 | _ | - | H | H | 3 | 16 | - | - | - | - | - |
Hibiki draws her sword and swings downward.
| |||||||||||
8MP
| Damage | Stun | Cancel | Guard | Parry | Startup | Active | Recovery | Total | Adv Hit | Adv Block | Invul |
|---|---|---|---|---|---|---|---|---|---|---|---|
| 700 | _ | - | H | H | 3 | 8 | - | - | - | - | - |
Hibiki draws her sword and swings further downward.
| |||||||||||
8HP
| Damage | Stun | Cancel | Guard | Parry | Startup | Active | Recovery | Total | Adv Hit | Adv Block | Invul |
|---|---|---|---|---|---|---|---|---|---|---|---|
| 1200 | _ | - | H | H | 5 | 4 | - | - | - | - | - |
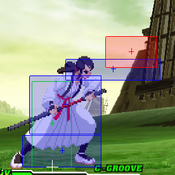
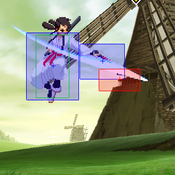
Hibiki draws her sword from down low and takes a big swing upwards in front of her.
| |||||||||||
8LK
| Damage | Stun | Cancel | Guard | Parry | Startup | Active | Recovery | Total | Adv Hit | Adv Block | Invul |
|---|---|---|---|---|---|---|---|---|---|---|---|
| 400 | _ | - | H | H | 4 | 18 | - | - | - | - | - |
Hibiki angles the tip of her foot down at an angle.
| |||||||||||
8MK
| Damage | Stun | Cancel | Guard | Parry | Startup | Active | Recovery | Total | Adv Hit | Adv Block | Invul |
|---|---|---|---|---|---|---|---|---|---|---|---|
| 700 | _ | - | H | H | 5 | 8 | - | - | - | - | - |
Hibiki thrusts her scabbard forward.
| |||||||||||
8HK
| Damage | Stun | Cancel | Guard | Parry | Startup | Active | Recovery | Total | Adv Hit | Adv Block | Invul |
|---|---|---|---|---|---|---|---|---|---|---|---|
| 1100 | _ | - | H | H | 9 | 4 | - | - | - | - | - |
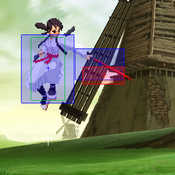
Hibiki swings her sword underneath her with enough force to cause her to flip around before landing. This attack is a critical part of her close-up mixup game.
| |||||||||||
Command Normals
Special Moves
Distance Slash
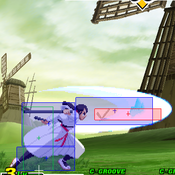
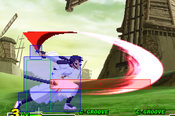
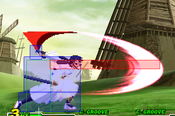
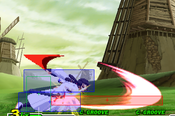
Beckoning (Running) Slash
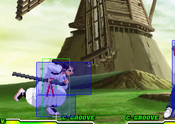
Piercing Moon Pounce (Overhead)
Melding Being Blade (Counter)
| Version | Damage | Stun | Cancel | Guard | Parry | Startup | Active | Recovery | Total | Adv Hit | Adv Block | Invul |
|---|---|---|---|---|---|---|---|---|---|---|---|---|
| Any K |
600 | _ | - | - | - | 4 | 18 | 22 | 44 | Juggle | - | - |
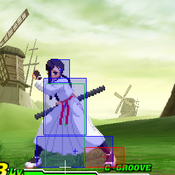
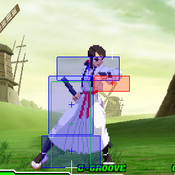
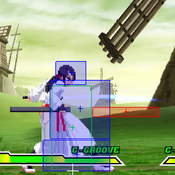
Hibiki holds up her palm, ready to catch an attacking opponent. Catches mid/high normals, and physical special attacks.
| ||||||||||||
Narrow Escape (Dodge)
Essential Crunch
Supers
Heavenly Spirit of Victory (Dash)
No Fear Feint (Blackout)
| Version | Damage | Stun | Cancel | Guard | Parry | Startup | Active | Recovery | Total | Adv Hit | Adv Block | Invul |
|---|---|---|---|---|---|---|---|---|---|---|---|---|
| Level 3/MAX Only |
5500 (*800) | 0 | - | H/L | H/L | 4 | 8 | 41 | 53 | Down (*-21) | -21 | 22 Full |
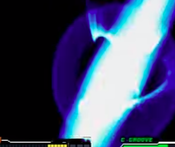
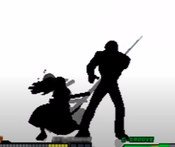
Hibiki draws her sword with a flash so bright it blacks out the screen. Only the sword slash is visible, followed by silhouettes of both characters on a white background. After a moment of silence, the opponent suddenly receives massive damage before Hibiki sheathes her sword. This is arguably the coolest-looking super in CvS2, especially if Hibiki wins a round with it!
| ||||||||||||
Going My Way (Rave)
Combos
Meterless Combos
The Bread and Butter (BnB) Combo
The classic Hibiki combo.
cr.LK×3, cr.LP xx MP Distance Slash for 2200 Damage, 22 Stun
- Always use MP for the Distance Slash instead of LP version. It does 100 more damage, 1 more stun, and recovers more quickly.
- You can replace any of the cr.LKs with standing LPs and the combo will still chain, but the standing LP obviously doesn't hit low and doesn't come out any faster than the crouching LK.
- If starting the combo at a further distance, you will only be able to get in two or one cr.LKs instead of all three.
- cr.LP alone should generally always be followed by MP Distance Slash for a free attack/guard bar damage.
The Punish Combo
Have all day to land some big damage without using meter? Here you go.
cl.HK xx HP Beckoning Slash (crossthrough) xx HP Distance Slash for 3400 Damage, 34 Stun
Close![]() xx
xx![]() +
+![]() (crossthrough to opposite side)
(crossthrough to opposite side) ![]() +
+![]()
Remember that once you cross through the opponent with a Beckoning Slash, the input direction flips. QCB on the left of the opponent and QCF on the right of the opponent is the same absolute input (214).
There are some variations on the Punish Combo depending on the length of your opening and your end goal.
- The startup for close HK is 8 frames. If you do not have that long, start with close HP (3 frames) or close MP (4 frames), although these hit high. If you need a quick punish that starts low, you can open with (only) one crouching LK (3 frames), but the cancel window is very short!
- For 100 more damage and 1 more stun, end with an MP Distance Slash instead. However, you are trading that for the knockdown you get with HP Distance Slash, when Hibiki can engage with oki tactics and further possible damage. Use either as desired.
- Remember to make sure Hibiki crosses through the opponent by holding down HP for a beat on the Beckoning Slash input, especially in the corners. The HK starter will give you plenty of time to do that.
The Meaty BnB
When you need something a little more meatier for the oki game, starting the BnB with MK instead of the crouching LKs will do the trick.
cl.MK, cr.LK, cr.LP xx MP Distance Slash for 2600 Damage, 26 Stun
- Requires a 3 frame link from MK to cr.LK, or more if off a late meaty hit or counter hit.
- This combo string can be used in a frame trap situation by delaying the cr.LK attack a moment after close MK.
The Wakeup Reversal
An excellent option whether you're waking up, or they are.
Roll Cancel HP Beckoning Slash (crossthrough) HP Distance Slash for 2100 Damage, 21 Stun
RC![]() +
+![]() (crossthrough to opposite side)
(crossthrough to opposite side) ![]() +
+![]()
- Offensively, this is a strong part of Hibki's oki confusion game. Which side are you going to hit the opponent on? If you don't know, maybe they won't, either!
- Doesn't necessarily need to be roll cancelled if using it offensively, but if doing so remember that the RC adds frames before the attack so adjust your timing accordingly.
- Defensively, this is Hibiki's "Get Out of Jail Free" card. If trapped in the corner, being able to consistently pull off a roll cancelled reversal Beckoning Slash is a godsend.
- If it hits, you get a free punish combo. If it's blocked, you get out of the corner anyway. (If you miss the reversal RC, you get punished. Try to avoid that.)
- Be sure to hold HP for a moment just to be sure you'll be crossing through the opponent. The RC invincibility will cover you.
Combos With Meter
Into Going My Way (Rave)
Punisher combo: cl.HK xx Going My Way Super Root 2, interrupt chain after MK, cl.HK xx HP Beckoning Slash (crossthrough) xx HP Distance Slash for 7616 damage, 47 stun
- Your big mistake punisher into a Level 3. Great damage, HUGE stun damage, and great setups after. If you hit this, you've got a great chance at the win or at least a comeback.
- You can use an MP Distance Slash at the end of this combo for about 100 more damage and 1 more stun, but is usually not worth it due to losing the knockdown and setups from it that the HP Distance Slash provides.
Confirm combo: cr.LK×3 xx Going My Way Super Root 2, interrupt chain after MK, cl.HK xx HP Beckoning Slash (crossthrough) xx HP Distance Slash for 6632 damage, 40 stun
- This is how you will normally be confirming into the rave super, fishing for an opening to catch the opponent low.
- If starting a bit further away, you will only be able to get out and confirm off of two LKs.
- To execute this smoothly, hit the first (one or) two LKs as normal, then start the HCB/63214 sequence so that the last crouching LK comes out during the down directions of the input motion. Finish executing the super with forward and a kick button.
- You can use an MP Distance Slash at the end of this combo for about 60 more damage and 1 more stun, but is usually not worth it due to losing the knockdown and setups from it that the HP Distance Slash provides.
S-Groove and N-Groove Only: cl.HK xx Going My Way Super Root 2, interrupt chain after MK, cl.HK xx HP Beckoning Slash (crossthrough) xx Heavenly Spirit of Victory Level 1 for 8825 damage, 36 stun (or open with cr.LK×3 for 8603 damage, 29 stun)
- If you still have a Level 1 super in your pocket after using the meter for the Level 3, you can add on a dash super at the end to do about 1000 more damage than with a Distance Slash.
- This is a no-brainer to always do in S-Groove. In N-Groove, you must decide if the extra 1000 damage now is worth trading away the chance to build up another stock of your meter quickly for a new Level 3 attempt.
N-Groove Only 60-Stun Punish Combo, Requires all 3 Stocks: Pop Stock, j.HP, cl.HK xx Going My Way Super Root 3, interrupt chain after 7th Button (2nd LK), Pop Stock, cl.HK xx HP Beckoning Slash (crossthrough) MP Distance Slash into Stun; j.HP, cl.HK xx HP Beckoning Slash (crossthrough) MP Distance Slash for 12667 Damage
(Root 3 is good for something after all!)
- It's possible, but requires you to get a free jump-in combo, then ridiculous execution precision and timing on your part. If you can somehow land it, as a Ratio 2 it will easily kill all Ratio 1 characters, will kill low health Ratio 2 characters (Akuma, Morrigan, etc.), and be a 95% combo against the rest of them!
- The jump-in HP starter and MP Distance Slash are both required to get up to 60 stun. If you end with an HP Distance Slash, you will it will be only 59 stun!
- The activation timing into the close HK xx Beckoning Slash is the key to this working. If you do the seven buttons in the rave chain quickly (but not as fast as possible) the timing for the activation and the close HK is almost done with the same rhythm.
- If successful, this combo will do 9254 damage before the stun. If you've made it this far, feel free to skip the j.HP starter on the stunned opponent; you'll still get nearly 12000 damage because you're still activated and you're doing 20% more damage, counteracting the heavy combo scaling.
- Here's a video of it: https://youtu.be/OtgtaN7mU_w?t=23
Into Heavenly Spirit of Victory (Dash)
- Confirm off of BnB Opener
Level 1: cr.LK, cr.LP xx Heavenly Spirit of Victory for 2900 Damage
Level 2: cr.LK×2, cr.LP xx Heavenly Spirit of Victory for 4300 Damage
Level 3: cr.LK×3, cr.LP xx Heavenly Spirit of Victory for 5900 Damage
The higher level super available, the more crouching LKs you can add before the LP into super. This combo is most practical for C-Groove players to confirm into easy Level 2s. Some Japanese Hibiki players that appear on regular streams prefer to combo into Level 3 with this super instead of Going My Way for some reason.
- After Punishing with cl.HK xx Beckoning Slash
Level 1: 4600 Damage - This is an excellent amount of damage for a Level 1 off an easy punish.
Level 2: 5800 Damage
Level 3: 7200 Damage
- After a Melding Being Blade (Counter)
Level 1: 2900 Damage - Compare to a follow-up Beckoning Slash, which corner carries and does 2000 total damage without meter.
Level 2: 4100 Damage
Level 3: 5500 Damage
- After a Piercing Moon Pounce (Overhead)
Level 1: 3100 Damage - Compare to cancelling into MP Distance Slash, which does 2000 total damage without meter.
Level 2: 4300 Damage
Level 3: 5700 Damage
Into No Fear Feint (Blackout)
- Punisher combo: cl.HK xx No Fear Feint for 6800 Damage
Not the most damage off of a close HK punish, but certainly the most flashy! Use to punctuate a round win if you're not sure the raw super will get you there.
- In the corner after a Melding Being Blade (Counter) for 6100 Damage
The primary punisher after a successful counter with Hibiki's back to the corner. There is a specific but relatively large window the super must come out for a successful hit. Way too early or too late, it will whiff. Slightly too early, it will hit with the tip of the super hitbox and only do 1400 total damage.
- Away from the corner after a Melding Being Blade (Counter) for 6100 Damage
A much more risky proposition, as this requires a dash up or delicate runup to get into position before executing the super input. Basically impossible to miss early, so if done as quickly as possible, and done cleanly, it should hit every time. Consider doing a Level 3 Heavenly Spirit of Victory Dash super off the counter instead for a much safer and more reliable 5500 total damage.
A-Groove Custom Combos
Information for this section comes from Gunter's Custom Combo Collection guide on his Google Drive space. For the full guide, complete with video, go to https://tinyurl.com/HibikiCCs.
Ground
Her traditional Ground CC utilizes her Beckoning Slash to bring her closer after cr.HPs (and cr.LPs, after the 8th hit scales damage to the minimum) push her too far away.
You can technically juggle with Beckoning Slashes as well, and as with all juggling CCs, it offers a little more leeway on timing, However, also similar to other juggling CCs, it’s also less damaging than her grounded CC.
Technically, Hibiki has a jumping CC. It’s really only useful after a counter, but good to know. (See #Other section, below.)
Anti-Air
Hibiki’s MP Distance Slash is fast and puts them in a knockdown state, so it’s her best option as the initial hit of an anti-air CC. Again, she can technically follow with jumping hits, but the damage is low.
The better option is to follow the MP Distance Slash with another MP Distance Slash to create distance, and then follow with Beckoning Slashes to the corner.
Blocked
Hibiki’s traditional Ground CC can be used as a Blocked CC, but there are other options you can do from there. If you land a Piercing Moon Pounce overhead, which must be blocked high, you can transition into the Ground CC. If you sneak in a Kick throw, you can juggle with an MP Distance Slash afterwards.
There’s also a super-advanced mixup involving a Beckoning Slash going through the opponent, canceling into a Narrow Escape dodge/Essential Crunch backhop to hit them if they are crouching, and continuing with hits as she returns to the ground.
Other
- Hibiki can start a custom combo after a Kick throw, so activating and doing the Kick throw is an unblockable custom starter.
- For more damage, activate after the Kick throw, but the timing is very strict.
- Two options for CCs after a Melding Being Blade counter: 1) Follow with MP Distance Slash into MP Beckoning Slash to the corner, then freestyle. 2) Follow with superjump(air activate, j.HP, j.HP, j.MK), another superjump with 3 j.HPs, then freestyle. The ground slashes option is more like the anti-air CC, but the jumping hits give you more leeway with timing.
- Use the invincibility to go through a fireball/projectile with a Beckoning Slash after activating. (You can retaliate a blocked Sagat Hotfoot super in the same way.)
- Blocking a Blanka Ball leads to a free CC, with different results depending on the timing of the first hit.
- Blocking an Iori sweep and a Honda Headbutt leads to a free CC, beginning with a MP Beckoning Slash.
- Against C/P/S Grooves Dan and Rolento, you can CC after a combo near the corner due to the Dan/Rolento OTG bug.
- Any of the sneaky moves from the Blocked section can be used to reset damage if a Ground CC connects. A Piercing Moon Pounce overhead is the easiest.
(Old Wiki Information)
For R1 Damage I referenced Buk's System's Guide (-18%)
Since the damage output on most of her CC's as an R1 do pitiful damage, it's practically mandatory that you master usage of her Resets to make her worth it as a user
It should also be noted that upon finishing these CC's following up with knockdown mixups is cake and highly recommended, and by those alone following a CC you can take a round because after all the Resets are in the end another mixup.
CC, (close RHx2, c.HP xx qcb+LP)x2, (c.LPx4, c.HP xx qcb+LP)x2, c.LPx4, c.HK xx super:
7892 damage (R2)
6471.44 damage (R1)
Very respectable damage. This generic ground CC is your "big punisher CC" and also the CC to use when you activate randomly. First hits hitting low is nice too, but I find that it's a little too slow to use as trip guard anti-air.
CC, qcf+MP, qcb+LP, qcb+MPx3, qcf+MP, c.LK (whiff), (jump HPx5)x2, super:
6864 damage (R2)
5268.48 damage (R1)
This is your anti-air CC. The beauty of this CC is that you can anti-air somebody from REALLY far away on reaction and get a whole CC out of it. Is Blanka jumping up and down? Kill it. Blanka low jumping up and down? Kill it. Did you just block a Bison psycho crusher (or Blanka ball)? Kill it. Sak whiffing dive kicks? Kill it. You get the point.
kick throw, CC, qcf+MP, qcb+MPx4, qcf+MP, c.LK (whiff), (jump HPx5)x2, super:
6812 damage (R2)
5585.84 damage (R1)
This is lovely. Guaranteed CC after a midscreen throw. You can also activate, THEN throw and combo off of that for a bit less damage. Still worth it, though, and pretty much guaranteed to work several times on everybody before they start catching on. And then when they start trying to jump out you do a low move and go into the ground CC...
CC, jump HKx4, c.HP, then go into generic ground CC:
7760 damage (R2)
6363.2 damage (R1)
Overhead CC on big characters. Works on characters Eagle-sized and taller. Also handy as an easy reset mid-CC, or if you went for a low hitting CC and they blocked.
Eagle sized logically would mean while crouching
Referenced from Buk's system's guide->Eagle, Zangief, Sagat, Geese, Chang & Raiden
CC, qcb+LP, c.HP, (qcb+LP, c.HPx2)x2, (c.LPx4, c.HP, qcb+LP)x2, c.LPx4, c.HK, super:
7672 damage (R2)
6291.04 damage (R1)
Whiff punisher CC. Also works as one of the best anti-projectile CCs in the game. Hibiki can be really far away from the fireball thrower and still get a CC off of it.
To get an idea how far this can connect imagine the opponent in the corner and you opposite corner and dash forward.
Counter, CC
The damage for CC's off this varies. If you're midscreen, you could probably get away with the anti-air CC. If you're in the corner and throw them there just go for [j.HPx5]xN, super.
CC Resets
qcb+mp, just as you pass through and past the opponent KKK ~ b+K, you will hop back over the opponent. j.HK, j.MP, c.LK into ground CC.
While normally used when the opponent blocks your CC, it can also be used mid-CC to reset the combo meter.
--Can be avoided standing, in which case you mixup after the dodge with either a low attack or kickthrow
Dodge KKK, d.mk
Also a mixup following the dodge on the 1st reset. If they stand, go low with d.mk and continue the CC.
---This is a good alternative if the opponent stands to avoid the 1st Reset. Probably better than the next since the kickthrow takes a lot of time from the meter.
Dodge KKK, kick throw
Another followup to the dodge on the 1st Reset, it suffers in comparison due to the time (and hence damage) it takes from CC's, and it effectively nukes the chances for further resets.
---This is mashable of course, but for mixups it's there.
s.HK xx dp+k continue CC
Getto old-school reset. s.HK has enough hit-stun so that the similar looking dp+k will counter-hit jabs/shorts. It will catch people trying to jump out as a nice bonus.
--This is roll-able (hence RC, lvl 3, dp reversable). The timing fortunately IS strict. It is of course blockable standing if they see it coming.
d.HK, qcb+P, continue CC
Sweep then cross them up with the qcb+P Beckoning Slash and continue with the generic Ground CC.
---It's a crossup.
Advanced Strategy
System & Subsystem Mechanics Strategy
Dashes & Run
Roll & Dodge
Small Jump
Throws
Guard Cancel Attack & Movement
Groove-Specific Strategy
C-Groove
In C-Groove
Against C-Groove
A-Groove
In A-Groove
Against A-Groove
P-Groove
In P-Groove
Against P-Groove
S-Groove
In S-Groove
Against S-Groove
N-Groove
In N-Groove
Against N-Groove
K-Groove
In K-Groove
Against K-Groove
Character Matchups
| #Akuma | #Balrog | #Blanka | #Cammy | #Chun-Li | #Dan | #Dhalsim | #Eagle |
| #E.Honda | #Guile | #Ken | #Kyosuke | #M.Bison | #Maki | #Morrigan | #Rolento |
| #Ryu | #Sagat | #Sakura | #Vega | #Yun | #Zangief | #Evil Ryu | #Shin Akuma |
| #Athena | #Benimaru | #Chang | #Geese | #Haohmaru | #Hibiki | #Iori | #Joe |
| #Kim | #King | #Kyo | #Mai | #Nakoruru | #Raiden | #Rock | #Rugal |
| #Ryo | #Todo | #Yamazaki | #Terry | #Vice | #Yuri | #Orochi Iori | #God Rugal |
Capcom Characters
Akuma
Balrog (Boxer)
Blanka
How much this matchup favors Hibiki very dependent on what groove Blanka is using.
- C-Groove Blanka is 7/3 for Hibiki. Blanka's jump-ins are completely neutered by Hibiki's anti-airs, so if it's ground game vs. ground game, Hibiki is at a decisive advantage.
- A-Groove Blanka is closer to 5/5. Having the threat of an activation as a counter tactic to Hibiki's anti-airs and ground mixups will force you to be a little more honest with your attacks, especially in the corners where A-Blanka can do a lot of damage very quickly.
- K-Groove Blanka is 2/8 against Hibiki. With Just Defends and far-reaching Small Jump attacks, Blanka becomes an absolute monster up close, allowing him to attack Hibiki vertically as well as on the ground without fear. Blanka Balls become safer for Blanka due to being able to JD a frame early, and he can punish a Distance Slash with a Level 3 super (as in other grooves with Level 3 capability). This safety in mobility gives him a higher probability of getting into position to land crossups, rage throws and supers. Some of this difficulty can be mitigated with an A- or K- Hibiki's set of options.
In general, Hibiki should primarily focus on denying Blanka optimal spacing for hops, crossup hops, and Blanka Ball pressure. Sometimes this means getting close to Blanka, within MP poke range (though this largely depends on his groove and meter situation) but generally that means staying back and fishing for punishes with Beckoning Slash/run mixups as they try to build meter with neutral jump attacks and (RC) Electricity.
Blanka pressure strings will often end with cr.HP or cr.HK once he gets pushed out of range. This is an opportunity for a counter attack, using a Narrow Escape dodge into cr.LP xx MP Distance Slash. You may also consider using the cr.LP poke as a chance to run in closer and start Hibiki's own pressure game, such as using her overhead.
Cammy
Cammy rushes Hibiki to death with her close s.HP following a knockdown. When that happens Hibiki's options are exceedingly limited outside CC activation or counter-attacks (a plus for C/N/K grooves) since she lacks a good reversal outside RC run slash. She ends up blocking the Fierces or getting thrown.
-Never let Cammy score that knockdown, hence never leting her get close enough to work that s.HP, unless you've taken the initiative with a knockdown of your own, then feel free to mix-up.
-You can anti-air fairly freely between s.HP or counters
-Keep a close eye on your openings, especially vs P/K Cammy
-Don't try any forward slashes if she has a lvl 3 stored, though if you're feeling gutsy you could aim for a qcf+HP while she's dancing back and forth.
Chun-Li
Dan
Dhalsim
Eagle
E. Honda
Guile
Ken
Kyosuke
M. Bison (Dictator)
A very tough matchup for Hibiki, especially in A-Groove. Bison can simply react to any HIbiki forward movement with Scissor Kicks, immediately shutting down any Beckoning Slash/run-in mixups from distance and often leading to a fence painting. His Devil's Reverse stomp and follow-up attacks will trade or beat Hibiki's close HP anti-air, and he can also punish a whiff from afar if he cancels it in some situations.
Take great care with Distance Slashes and the BnB combo. Bison can punish any MP Distance Slash with Scissor Kicks unless it is done at the maximum possible distance. In BnBs, spread out the cr.LKs as much as possible (link them instead of rapid fire them, basically) to push back away from Bison as far as the combo will let you get away with.
Maki
Morrigan
Rolento
Rolento's mobility can easily frustrate Hibiki players. He is one of the few characters that can quickly deny her zoning position and setups necessary to maintain it. He can also punish a Distance Slash with a Level 3 Tripwire super, making it hard to use effectively.
The most effective strategy against a mobile Rolento is to approach frequently and aggressively, mixing Beckoning Slashes with standing/crouching MP pokes and aggressive run-ins and running jumps. Rolento players will rarely sit and wait as you approach them, which you can use to your advantage by having them guess wrong or baiting them to retreat into the corner, only to attack them when they try jumping out of it. One of the most unexpected things you can do is to simply run right at Rolento as he neutral jumps into the air, as he is usually looking to throw out a knife. When he does, you get a free punish combo when he lands. Be wary of his sliding cr.HK, which Rolento players will rely on to stop you from advancing.
Ryu
Sagat
Sakura
Sak's got too much going for her for A-Hibiki to try to challenge her up close without meter. While both have nice mixups when they've got the intiative, this match is best done at range. In particular, just barely past the reach of her s.HK.
At that range you can prepare yourself for a drawn out match.
-Hibiki can d.HP whiffed Sak's s.HK's, RC Fireballs
-counter RC Hurricane Kicks
-use d.LP xx qcf+MP to keep her out
-anti-airs are pretty solid vs Sak, but don't get too predictable when she has bar. That as well as including her dive kick give her unique setups for her CC's.
-You don't want to whiff anything. Sak's roll at 112 [27/4R] is not quite Iori fast, but its fast enough to punish all of Hibiki's whiffs outside s.MP, d.MP, d.LP. Her mixups are strong enough that vs Hibiki it's practically guaranteed that you'll at the very least loose 1/3 of your guardbar if you let her land her BnB once. Watch your openings.
-Sak's normal anti-airs are susceptible to Hibiki's ambiguous j.hk crossup attempts. You can beat her close s.HP or d.HP between good distancing and varying the timing of the hits.
-Sakura lacks naturally invicible attacks outside CC activation, so she's highly vulnerable to Hibiki activating point blank (for her that's a mixup in itself) and throwing or just throw and activate.
-Vs Sak's who end their CC's with HK hurricane kicks to super you can grab her with Hibiki's counter during that gap between the 1st and last hits of the hurricane kick.
Vega (Claw)
Provided A-Hibiki is put in the user position, and starts this matchup with either a full bar or close to it activation helps her dearly; if she lands her CC at all he's done. Otherwise, this matchup typically goes to Vega.
She could try to play it defensive, but typically the match will result in Vega whittling away at Hibiki's life.
-His pokes pretty much own hers. Particularly d.mp. At the range where this move hits, give or take, is where Vega wants to be fighting Hibiki, or just about anyone really.
-His anti-airs (s.HK, airthrow, jump back mashing)are solid.
-Vega's fast enough to take advantage of all her openings
Fortunately her s.HP seems to work just fine as anti-air, though a low jumping Vega would give her fits.
Seems like the only way Hibiki can kill Vega is to knockdown, get up close and mixup 'till Vega dies. Keep in mind he's a charge character so crossup run slashes/shortjump mixups are golden. The problem is landing that initial knockdown. Her only moves that give her that are qcf+HP, s.MK, d.HK, and her kickthrow. Vega's not too likely to give her the opportunity to land the latter 3, so she's dependant almost entirely on qcf+HP, which he can easily take advantage of if she's too predictable.
There's of course landing her CC, which sets up her mixups nicely.
Vega likes to jump straight up. A lot. If he does you could nail him as he comes down with RC run slash/forward slash, or anti-air CC.
Yun
Zangief
SNK Characters
Athena
Benimaru
Chang
Geese
Haohmaru
Hibiki
A very strange matchup for Hibiki, since everything you can do from distance, they can do from the same distance! Groove mechanics notwithstanding, this matchup becomes all about who can most effectively use their mixups once they manage to get into range.
Except against P- and K-Groove, Hibiki can punish an opposing MP Distance Slash with a reversal LP Beckoning Slash. (This means the opposing Hibiki can punish your MP Distance Slash with their own LP Beckoning Slash!)
Iori
Joe
Kim
The angle of Kim's jump is such that he can literally go over Hibiki's cl.HP anti-air. Using the button as an AA is still possible, but must be done a little later than usual and risks trading with Kim's strong jumping attacks.
King
Kyo
Mai
Nakoruru
Raiden
Rock
Rugal
Ryo
Todo
Yamazaki
Terry
Vice
Yuri
Boss Characters
Evil Ryu
Riot of Blood (Orochi) Iori
Shin Akuma
Ultimate (God) Rugal
Notes & Additional Resources
Videos and Other Links
Hibiki Video Guide by Master Luke. https://www.youtube.com/watch?v=XQNAirzus9M
A great visual summary of all of the basics.
Tricks of the Trade - Hibiki by DJ-B13. https://www.youtube.com/watch?v=361Qfn6c2k4
From a classic series of CvS2 video guides. Be forewarned that many things the Tricks videos are completely unrealistic or impractical against a competent opponent, but watching it will still give you a fair general summary of character gameplay.
Quote Translations
Bugs & Glitches
No Fear Feint Unsafe on Hit?!?
After landing a No Fear Feint (Blackout) super, there is a rare circumstance where Hibiki will enter her special win pose even though the round has not ended and the character she "killed" is still alive!
This can only happen against K-Groove opponents when they have very specific health and meter levels. Their meter needs to be full enough so that getting hit by the super will fill it and activate rage. The amount of health they must have should be low enough that the super would otherwise kill them, but high enough that so that after the 12.5% defensive bonus kicks in, they will survive.
To put approximate numbers on this, assuming both are Ratio 2 characters and there are no other groove buffs in the equation, if the opponent is on the verge of raging and has less than 5500 health (the damage of the super) but more than 4813 health (damage received after raging), the bug will trigger.
When this happens, Hibiki will execute the super as normal and enter her special win pose. However, there is no KO flash on the screen, and the win pose animation still has the red "shadow" of a Level 3 super. By the time she finishes and snaps back to a ready stance, the opponent has already recovered!
This appears to happen as a result of the game failing to account for the rage defensive bonus when calculating if Hibiki needs to enter the win pose, which actually starts at the same time as the KO frame (that never happens).
Should this bug occur, Hibiki will be at an approximate frame disadvantage of -8. Given that the opponent will have activated rage, there is ample time for them to respond with a Level 3 super punish of their own! Bummer, dude.
This is a bug that Hibiki players should be aware of, but one so rare you may only see it two or three times in your lifetime. It's alright to worry about this potentially happening should a K-Groove opponent's meter and life bars start to line up—especially in a tournament situation!—but odds are you're going to be fine. If you have the opportunity to land a No Fear Feint, don't hesitate!
This bug is easily replicated:
- In a standard versus match, choose N-Groove, R2 Hibiki, and any other R2 character. (Use N-Groove to avoid any super damage meter bonuses. You can also use P-Groove, but the meter takes longer to fill.)
- The opponent's team should be K-Groove R1 Yun, plus another R3 character.
- Start the round and have the other player taunt to fill your meter up, as needed. Do not taunt to fill Yun's meter.
- Perform exactly two raw No Fear Feint supers.
- The first one will put the health and super meters exactly where they need to be for the second to trigger the bug.
Beckoning Slash/Dash Super Post-KO Meter Drain
This bug only occurs on early builds of the Japanese arcade version of CvS2.
If Hibiki wins a round with a passthrough Beckoning Slash, the game will still detect inputs for a follow-up Distance Slash or Heavenly Spirit of Victory super. Should the super come out, Hibiki will LOSE meter after the KO!
Once a round ends, health and groove meters will normally freeze. However, the early Naomi JP builds of the game have the infamous Post-KO Meter Build Glitch that allows players to continue to build meter on whiffed medium and heavy normals before the character enters their win pose. It turns out that the "Meter Build" glitch is only half accurate since meter can also be used and lost during this window... including the meter that is necessary for a post-KO Dash Super.
If you are playing on the JP arcade cabinet, and it has a a version of CvS2 that allows post-KO meter building, use extreme caution if winning a round with Beckoning Slash. Although you will get meter for performing the Distance Slash post-KO, you will lose a lot more if you accidentally input the super or the game recognizes your Distance Slash attempts as one. It's best practice to just take your hands off the stick immediately at the KO.
They fixed the post-KO meter bug on US arcade versions and the console versions, so in them go ahead and show off that post-KO super.

