Callie Rose (talk | contribs) No edit summary |
Callie Rose (talk | contribs) No edit summary |
||
| Line 67: | Line 67: | ||
}} | }} | ||
== Far Normals == | |||
=== <span class="invisible-header">5LP</span> === | === <span class="invisible-header">5LP</span> === | ||
{{MoveData | {{MoveData | ||
| Line 406: | Line 405: | ||
}} | }} | ||
== Crouching Normals == | |||
=== <span class="invisible-header">2LP</span> === | === <span class="invisible-header">2LP</span> === | ||
{{MoveData | {{MoveData | ||
| Line 578: | Line 576: | ||
}} | }} | ||
== Jumping Normals == | |||
=== <span class="invisible-header">jLP</span> === | === <span class="invisible-header">jLP</span> === | ||
{{MoveData | {{MoveData | ||
| Line 691: | Line 689: | ||
}} | }} | ||
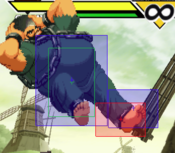
== <span class="invisible-header">jMK</span> == | |||
{{MoveData | {{MoveData | ||
| name = Jump Forward | | name = Jump Forward | ||
| Line 747: | Line 745: | ||
}} | }} | ||
== Command Normals == | |||
=== <span class="invisible-header">Hit and Run</span> === | === <span class="invisible-header">Hit and Run</span> === | ||
{{MoveData | {{MoveData | ||
| Line 776: | Line 774: | ||
}} | }} | ||
== Throws == | |||
=== <span class="invisible-header">Hagan Geki</span> === | === <span class="invisible-header">Hagan Geki</span> === | ||
{{MoveData | {{MoveData | ||
| Line 851: | Line 849: | ||
}} | }} | ||
== Special Moves == | |||
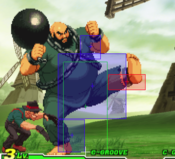
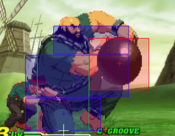
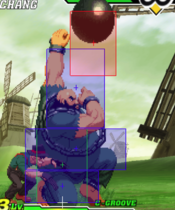
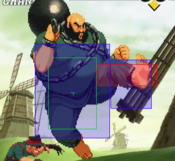
=== <span class="invisible-header">Tekkyu Daikaiten</span> === | |||
{{MoveData | |||
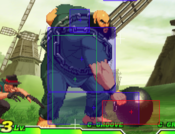
| name = Tekkyu Daikaiten | |||
| input = Mash P, PPP to cancel | |||
| subtitle = Ball Spin | |||
| image = CVS2_Chang_PPP.PNG | |||
| caption = Yes, the active data is real | |||
| linkname = Tekkyu Daikaiten | |||
| data = | |||
{{AttackData-CvS2 | |||
| version = Mash {{Icon-Capcom|LP}} | |||
| subtitle = | |||
| damage = 1100 | |||
| stun = 0 | |||
| cancel = {{Icon-Capcom|P}}{{Icon-Capcom|P}}{{Icon-Capcom|P}} to cancel | |||
| guard = Mid | |||
| parry = High | |||
| startup = 5 | |||
| active = 5~130 | |||
| recovery = 32 | |||
| total = 167 | |||
| advHit = -DWN | |||
| advBlock = -4 | |||
| invul = None | |||
}} | |||
{{AttackData-CvS2 | |||
| header = no | |||
| version = Mash {{Icon-Capcom|MP}} | |||
| subtitle = | |||
| damage = 1100 | |||
| stun = 0 | |||
| cancel = {{Icon-Capcom|P}}{{Icon-Capcom|P}}{{Icon-Capcom|P}} to cancel | |||
| guard = Mid | |||
| parry = High | |||
| startup = 5 | |||
| active = 5~190 | |||
| recovery = 32 | |||
| total = 227 | |||
| advHit = -DWN | |||
| advBlock = -4 | |||
| invul = None | |||
}} | |||
{{AttackData-CvS2 | |||
| header = no | |||
| version = Mash {{Icon-Capcom|HP}} | |||
| subtitle = | |||
| damage = 1100 | |||
| stun = 0 | |||
| cancel = {{Icon-Capcom|P}}{{Icon-Capcom|P}}{{Icon-Capcom|P}} to cancel | |||
| guard = Mid | |||
| parry = High | |||
| startup = 5 | |||
| active = 5~250 | |||
| recovery = 32 | |||
| total = 287 | |||
| advHit = -DWN | |||
| advBlock = -4 | |||
| invul = None | |||
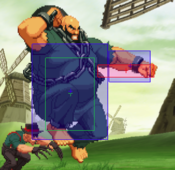
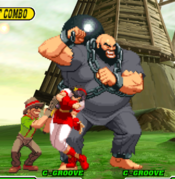
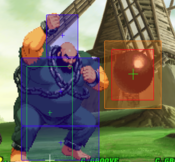
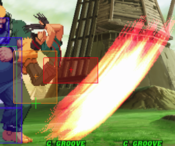
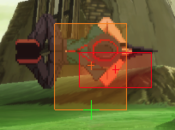
| description = Chang spins his wrecking ball above his head for an unreasonably long time. You can cancel these at any point by pressing all 3 punches. Great specials for neutral, anti-air, anti-zoning, combos, pressure, you name it. In neutral, these function as hard to contest active tools that Chang can cancel at any point and block. They're hard to hit while Chang is spinning, and since you can't always tell when he cancels them, punishing the recovery is hard. They also delete projectiles, and good Chang players will roll cancel these (input as {{Icon-Capcom|HP}}, {{Icon-Capcom|MP}}, {{Icon-Capcom|LP}}, {{Icon-Capcom|LP}}+{{Icon-Capcom|LK}}, {{Icon-Capcom|HP}}) to make them fully invulnerable and even more annoying. In pressure you can use these to chip opponents out, and get a mixup as a scared opponent won't challenge them. If roll cancelled, there's very little they can do about this. Also, these function as meterless combo enders from Chang's 2LP and 2HP. | |||
}} | |||
}} | |||
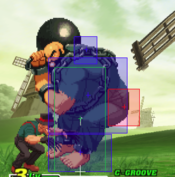
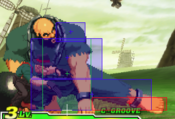
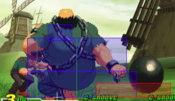
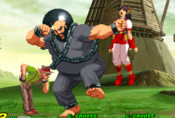
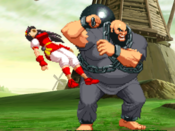
=== <span class="invisible-header">Tekkyu Funsai Geki</span> === | |||
{{MoveData | |||
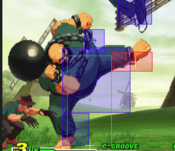
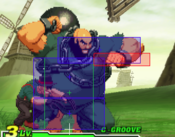
| name = Tekkyu Funsai Geki | |||
| input = [4]6P | |||
| subtitle = Ball Throw | |||
| image = CVS2_Chang_46P_First.PNG | |||
| caption = The Windup | |||
| image2 = CVS2_Chang_46P_Second.PNG | |||
| caption2 = The Toss | |||
| linkname = | |||
| data = | |||
{{AttackData-CvS2 | |||
| version = Charge {{Motion|b}},{{Motion|f}}+{{Icon-Capcom|LP}} | |||
| subtitle = | |||
| damage = 1500 | |||
| stun = 15 | |||
| cancel = None | |||
| guard = Mid | |||
| parry = High | |||
| startup = 36 | |||
| active = 4 | |||
| recovery = 32 | |||
| total = 72 | |||
| advHit = -DWN | |||
| advBlock = -12 | |||
| invul = 7~22 (Full) | |||
}} | |||
{{AttackData-CvS2 | |||
| header = no | |||
| version = Charge {{Motion|b}},{{Motion|f}}+{{Icon-Capcom|MP}} | |||
| subtitle = | |||
| damage = 1600 | |||
| stun = 16 | |||
| cancel = None | |||
| guard = Mid | |||
| parry = High | |||
| startup = 38 | |||
| active = 4 | |||
| recovery = 32 | |||
| total = 74 | |||
| advHit = -DWN | |||
| advBlock = -12 | |||
| invul = 7~24 (Full) | |||
}} | |||
{{AttackData-CvS2 | |||
| header = no | |||
| version = Charge {{Motion|b}},{{Motion|f}}+{{Icon-Capcom|HP}} | |||
| subtitle = | |||
| damage = 1700 | |||
| stun = 17 | |||
| cancel = None | |||
| guard = Mid | |||
| parry = High | |||
| startup = 40 | |||
| active = 4 | |||
| recovery = 32 | |||
| total = 76 | |||
| advHit = -DWN | |||
| advBlock = -12 | |||
| invul = 7~26 (Full) | |||
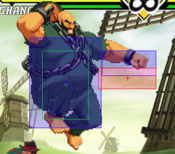
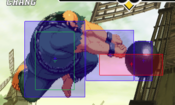
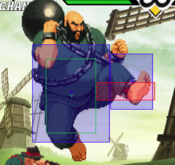
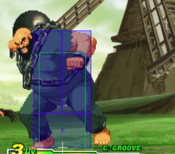
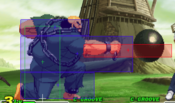
| description = Chang reels back and tosses the wrecking ball. Not much use really: the invincibility is short and isn't reversal, and the long startup makes it hard to punish anything with it. Functional fireball punish when you have charge, but needs to be done with a bit of specific timing, and you would rather RC Ball Spin for that if you can. Very risky on whiff, and pretty bad on block as well. Avoid using these often. | |||
}} | |||
}} | |||
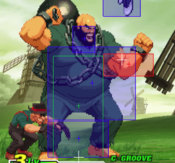
Chang's | === <span class="invisible-header">Dai Hakai Nage</span> === | ||
{{MoveData | |||
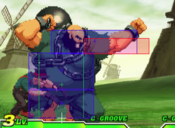
| name = Dai Hakai Nage | |||
| input = 632146P | |||
| subtitle = Command Grab | |||
| image = CVS2_Chang_632146P.PNG | |||
| caption = | |||
| linkname = Dai Hakai Nage | |||
| data = | |||
{{AttackData-CvS2 | |||
| version = {{Motion|63214}}{{Motion|f}}+{{Icon-Capcom|LP}} | |||
| subtitle = | |||
| damage = 200x7+800 | |||
| stun = 0 | |||
| cancel = None | |||
| guard = Grab | |||
| parry = Grab | |||
| startup = 5 | |||
| active = 1 | |||
| recovery = 20 | |||
| total = 26 | |||
| advHit = -DWN | |||
| advBlock = Grab | |||
| invul = None | |||
}} | |||
{{AttackData-CvS2 | |||
| header = no | |||
| version = {{Motion|63214}}{{Motion|f}}+{{Icon-Capcom|MP}} | |||
| subtitle = | |||
| damage = 200x7+900 | |||
| stun = 0 | |||
| cancel = None | |||
| guard = Grab | |||
| parry = Grab | |||
| startup = 5 | |||
| active = 1 | |||
| recovery = 20 | |||
| total = 26 | |||
| advHit = -DWN | |||
| advBlock = Grab | |||
| invul = None | |||
}} | |||
{{AttackData-CvS2 | |||
| header = no | |||
| version = {{Motion|63214}}{{Motion|f}}+{{Icon-Capcom|HP}} | |||
| subtitle = | |||
| damage = 200x7+1000 | |||
| stun = 0 | |||
| cancel = None | |||
| guard = Grab | |||
| parry = Grab | |||
| startup = 5 | |||
| active = 1 | |||
| recovery = 20 | |||
| total = 26 | |||
| advHit = -DWN | |||
| advBlock = Grab | |||
| invul = None | |||
| description = Chang grabs the opponent and slams them around a comical amount of times. Damaging and useful command grab, as while it isn't the fastest in the game, Choi pressure makes it much more of a threat. The LP version does the least damage, but has 88 pixels of range. The MP version has 80 pixels, and the HP version does the most damage but only has 72 pixels of range. You'll usually stick to the LP version for punishes and the HP version for mixups. Punishing with this isn't bad, as it gives a good knockdown and does alright damage. | |||
}} | |||
}} | |||
=== <span class="invisible-header">Tatsumaki Shippuzan</span> === | |||
{{MoveData | |||
| name = Tatsumaki Shippuzan | |||
| input = 63214K | |||
| subtitle = Spin, Tornado | |||
| image = CVS2_Chang_63214K.PNG | |||
| caption = | |||
| linkname = Tatsumaki Shippuzan | |||
| data = | |||
{{AttackData-CvS2 | |||
| version = {{Motion|63214}}+{{Icon-Capcom|LK}} | |||
| subtitle = | |||
| damage = 400x2 | |||
| stun = 4x2 | |||
| cancel = None | |||
| guard = Mid | |||
| parry = High | |||
| startup = 4 | |||
| active = Traveling | |||
| recovery = 34 | |||
| total = 38 | |||
| advHit = -DWN | |||
| advBlock = +2 | |||
| invul = None | |||
}} | |||
{{AttackData-CvS2 | |||
| header = no | |||
| version = {{Motion|63214}}+{{Icon-Capcom|MK}} | |||
| subtitle = | |||
| damage = 300x3 | |||
| stun = 3x3 | |||
| cancel = None | |||
| guard = Mid | |||
| parry = High | |||
| startup = 6 | |||
| active = Traveling | |||
| recovery = 32 | |||
| total = 38 | |||
| advHit = -DWN | |||
| advBlock = +4 | |||
| invul = None | |||
}} | |||
{{AttackData-CvS2 | |||
| header = no | |||
| version = {{Motion|63214}}+{{Icon-Capcom|HK}} | |||
| subtitle = | |||
| damage = 300x4 | |||
| stun = 3x4 | |||
| cancel = None | |||
| guard = Mid | |||
| parry = High | |||
| startup = 8 | |||
| active = Traveling | |||
| recovery = 36 | |||
| total = 44 | |||
| advHit = -DWN | |||
| advBlock = +6 | |||
| invul = None | |||
| description = Choi runs forward and spins his way up into the sky. The different versions send Choi up at different angles, with the LK being a bit closer to Chang and the HK being farther away. Key special for Chang, and largely the basis of Choi pressure as a whole. This move is quite plus on block, and the rising active hitbox catches a lot of escape routes. You really want them to block this, as you can go in and do a mixup or get pressure/chip damage. Has only one drawback in that it's a long total duration where you can't use Choi, but the chip is usually worth it and Choi recovers fast enough to still continue pressure usually. Also a solid tool to cover Chang's approach in neutral, anti-air, zone with, etc etc etc. Very versatile and powerful special, use and abuse this. | |||
}} | |||
}} | |||
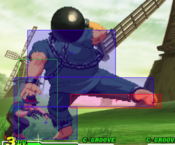
=== <span class="invisible-header">Shisso Kuretsuzan</span> === | |||
{{MoveData | |||
| name = Shisso Kuretsuzan | |||
| input = 623K | |||
| subtitle = Slash | |||
| image = CVS2_Chang_623K.PNG | |||
| caption = | |||
| linkname = Shisso Kuretsuzan | |||
| data = | |||
{{AttackData-CvS2 | |||
| version = {{Motion|623}}+{{Icon-Capcom|LK}} | |||
| subtitle = | |||
| damage = 1100 | |||
| stun = 11 | |||
| cancel = None | |||
| guard = Mid | |||
| parry = High | |||
| startup = 23 | |||
| active = Traveling | |||
| recovery = 15 | |||
| total = 38 | |||
| advHit = -DWN | |||
| advBlock = +23 | |||
| invul = None | |||
}} | |||
{{AttackData-CvS2 | |||
| header = no | |||
| version = {{Motion|623}}+{{Icon-Capcom|MK}} | |||
| subtitle = | |||
| damage = 1200 | |||
| stun = 12 | |||
| cancel = None | |||
| guard = Mid | |||
| parry = High | |||
| startup = 23 | |||
| active = 23~40 | |||
| recovery = 15 | |||
| total = 38~78 | |||
| advHit = -DWN | |||
| advBlock = +23 | |||
| invul = None | |||
}} | |||
{{AttackData-CvS2 | |||
| header = no | |||
| version = {{Motion|623}}+{{Icon-Capcom|HK}} | |||
| subtitle = | |||
| damage = 1300 | |||
| stun = 13 | |||
| cancel = None | |||
| guard = Mid | |||
| parry = High | |||
| startup = 23 | |||
| active = 23~55 | |||
| recovery = 15 | |||
| total = 38~93 | |||
| advHit = -DWN | |||
| advBlock = +23 | |||
| invul = None | |||
| description = Chang sends Choi running forward. The LK version is a fixed distance move, but the MK and HK versions will either activate once in proximity of the opponent or run to a fixed distance. LK is right in front of Chang, MK is halfscreen, HK is fullscreen. The other extremely useful summon. Functions almost like a fireball, as Choi runs forward and threatens to catch the opponent while Chang can sit back for a bit or approach behind him. VERY plus on block, and recover fast, making them good in Choi pressure. Only a single hit however, and much worse at catching jumps and buttons since the hitbox around Choi isn't as big or active. Use these to zone, approach, and run another mixup. | |||
}} | |||
}} | |||
=== <span class="invisible-header">Hisho Kuretsuzan</span> === | |||
{{MoveData | |||
| name = Hisho Kuretsuzan | |||
| input = 41236K | |||
| subtitle = Dive | |||
| image = CVS2_Chang_41236K.PNG | |||
| caption = | |||
| linkname = Hisho Kuretsuzan | |||
| data = | |||
{{AttackData-CvS2 | |||
| version = {{Motion|41236}}+{{Icon-Capcom|LK}} | |||
| subtitle = | |||
| damage = 1000 | |||
| stun = 10 | |||
| cancel = None | |||
| guard = Mid | |||
| parry = High | |||
| startup = 36 | |||
| active = Traveling | |||
| recovery = 2 (Landing) | |||
| total = 38+ | |||
| advHit = +68~ | |||
| advBlock = +68~ | |||
| invul = None | |||
}} | |||
{{AttackData-CvS2 | |||
| header = no | |||
| version = {{Motion|41236}}+{{Icon-Capcom|MK}} | |||
| subtitle = | |||
| damage = 1100 | |||
| stun = 11 | |||
| cancel = None | |||
| guard = Mid | |||
| parry = High | |||
| startup = 36 | |||
| active = Traveling | |||
| recovery = 2 (Landing) | |||
| total = 38+ | |||
| advHit = +68~ | |||
| advBlock = +68~ | |||
| invul = None | |||
}} | |||
{{AttackData-CvS2 | |||
| header = no | |||
| version = {{Motion|41236}}+{{Icon-Capcom|HK}} | |||
| subtitle = | |||
| damage = 1200 | |||
| stun = 12 | |||
| cancel = None | |||
| guard = Mid | |||
| parry = High | |||
| startup = 36 | |||
| active = Traveling | |||
| recovery = 2 (Landing) | |||
| total = 38+ | |||
| advHit = +70~ | |||
| advBlock = +70~ | |||
| invul = None | |||
| description = A strange special where Choi jumps to the wall behind Chang and then dives forward, drilling his claws into the opponent. Situationally useful, but because of the far backward movement it's a lot harder to use in pressure. It leaves a much larger gap than the other two summon specials, which gives your opponent a better chance to escape. It also only hits once, and doesn't do much in the way of chip damage or guard damage. Instead, use this when Chang is in the corner as an escape, or as a way to bully people respecting the other two summons too much. This is also the only summon that won't knock down, so you can combo this into a super or a 2HK or 3HP. | |||
}} | |||
}} | |||
== Supers == | |||
Choi's Moves: | Choi's Moves: | ||
Revision as of 03:12, 23 June 2022
Introduction
Story
Chang Koehan and Choi Bounge are a pair of convicted felons from South Korea who, one day, escaped from prison easily. While they had no issue from the police, the justice warrior Kim Kaphwan defeated them swiftly. In an effort to rehabilitate them, he started his Rehabilitation Process, where he would teach them to use their skills for justice and not for crime. Also, he would teach them taekwondo. Neither Chang nor Choi are fans of this idea, and constantly look to escape their harsh teacher. However, Kim's teachings are taking hold. Chang has mellowed out from a terrifying criminal to a silly and goofy man, and Choi has went from unbearable to just mildly unpleasant. In the KOF series, both character's can perform Kim's signature Hienzan, however they don't bring this skill to CvS2.
Gameplay
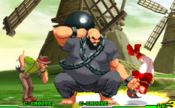
Chang and Choi are likely one of the most unique characters in CvS2. They are two characters at once, making them almost comparable to puppet archetype characters like Zato-1. Chang is the one you pilot, and he does all the normal moves and half the specials. Chang himself is a big body character, who is very slow but has massive health and huge normals. He can control space with his wrecking ball, and has a fast command grab. On his own he isn't too special, but when you add Choi he becomes much scarier. Choi only handles half of the specials, a throw, and a super, but when Choi does his moves you only get stuck in a short animation as Chang. This allows you to move in while Choi is hitting, leading to very scary mixups and guard crush strings.
Choi pressure and mixup doesn't save Chang from being so big and slow however, and while he isn't bad on his own, he really relies on getting the opponent to block his pressure and start his mixups. With his lacking combo potential and slow movement, this is easier said than done. Choi pressure is also not always possible. It really only gets scary if they're in the corner, and Choi has to be close by or else the move will have more startup. Still, if you're able to pilot around their weaknesses, Chang and Choi give you a unique experience in CvS2, and are regarded as generally high-mid tiers.
Groove Selection
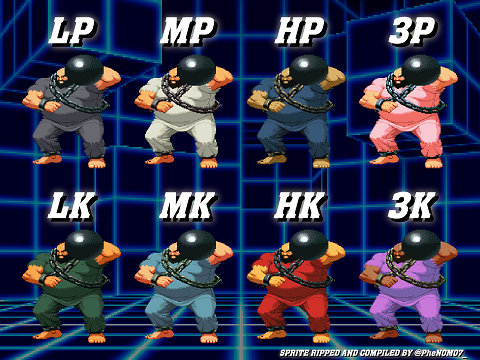
Chang and Choi are surprisingly versatile between Grooves. Generally, C-Chang and N-Chang are considered his strongest Grooves. C-Chang gets strong neutral, and consistent access to his supers. While Chang struggles to get consistent knockdowns meterless, his super helps with this a lot, and Choi super is very strong as a way to chip out opponents and force mixups. His level 2 to level 1 cancel does insane damage as well, making it a much scarier punish. Roll also gives him RC Ball and RC Choi specials, which are very useful. N-Groove maintains his access to supers and rolls, but gives him extra movement ability which greatly enhances his mixup. In exchange, he loses the high damage level 2 cancel and access to airblock.
K-Chang, A-Chang, and S-Chang are all very viable Grooves as well. K-Chang loses roll and consistent super access for scarier movement, and JD lets him punish things using his command grab or super more often. Rage can be scary, as Chang's damage becomes much more respectable, but you lose access to rolls and basically never use Choi super. A-Chang never supers in general, but gets access to one of the highest damage CC's in the game, and has a lot of versatile ways to use it. CC mixed with Choi pressure is especially scary, but you sacrifice using supers at all. S-Chang gets as many supers as he wants at low health, and this isn't a huge risk for a top tier health character. He can safely charge in neutral as well, and throwing out Choi can cover his charge making it much safer than the usual S-Groove character. Infinite Choi super is scary, but you lose out on consistent meter gain and have to deal with S-Groove mechanics in general.
P-Chang is much, much worse in comparison. Parries are useful, but they are the only benefit, and Chang isn't a scary punish character so they don't benefit him much at all. Lack of supers, weak meter build, and no real defensive or offensive options besides parry makes P-Chang easily the worst.
|
Chang and Choi are a unique tanky summon/puppet character, with Chang piloting and Choi giving assists. Powerful mixups, guard crush strings, and scary pressure mixed with tanky defense and big buttons make them scary. You have to deal with Chang's slow movement and poor combo potential however. Chang and Choi's best Groove is C-Groove, but they are very Groove friendly |
|
| Pros | Cons |
|
|
Far Normals
5LP
5MP
5HP
5LK
5MK
5HK
Close Normals
clLP
clMP
clHP
clLK
clMK
5HK
Crouching Normals
2LP
2MP
2HP
2LK
2MK
2HK
Jumping Normals
jLP
jMP
jHP
jLK
jMK
jHK
Command Normals
Hit and Run
Throws
Hagan Geki
Kusari Jime
Special Moves
Tekkyu Daikaiten
Tekkyu Funsai Geki
Dai Hakai Nage
Tatsumaki Shippuzan
Shisso Kuretsuzan
Hisho Kuretsuzan
Supers
Choi's Moves:
Dai Hakai Nage -HCB, f + K- Choi rushes forward and forms a human tornado with spinning claws. A bit slow on the startup but extremely good for pressuring. When Chang is calling Choi to execute this special, there is a slight moment where he stands there, unable to move or defend, so should not be used blindly.
Hishou Kuuretsu Zan -HCF + K- Choi jumps forward, parallel to the ground and becomes a human arrow. Again, slight moment when Chang is calling for Choi where he's vulnerable.
Hishou Shissou Zan -DP + K- Choi rushes forward, jumps into the air and then slashes. Again, slight moment when Chang is calling for Choi where he's vulnerable.
While very apparent, it's good to know that all of Chang's specials are based off of punch while Choi's are based off of kick.
Super Moves
Tekkyuu Dai Bousou -QCF, HCB + P- Chang rushes forward and on connect, begins to ravage his target with blow after blow from his iron ball. Does 5200 damage at level 3. WARNING: Leaves Chang WIDE OPEN when blocked. When blocked, Chang bumps into the target and falls over clumsily (-47!!!). Do not throw this out blindly as you will be punished severely. Can be comboed into using c.mp/c.mk/s.mk/c.fp and acts like Iori's rush super as in it sucks you in.
Shin! Chouzetsu Tatsumaki Shinkuu Zan -HCB, HCB + K- Choi rushes forward and does a much stronger version of his Dai Hakai Nage. Its primary use is for breaking guard and chip damage. Useless otherwise because of heavy, heavy startup. Extremely abusable in S-Groove and after knockdowns.
The Basics
Combos
BnB
Mash c.lp
This is by far, the easiest combo in the game to do as you only push one button, and you push it as fast as possible. Does around 1700 damage. Usually two punches and then the spinning ball will come out.
Punisher Combo:
j.hk, s.hk(close), spinning ball
This can only really be used off a dizzy or a huge mess up on your opponents part. Chang only has one special cancellable normal that's not a short or jab, and it's s.hk(close).
Super Combos:
c.lp, c.lp, c.lk, qcf hcb+p
This is the most reliable way to land chang's super w/o relying on randomness or a huge mess up by your opponent. A fairly easy combo to pull off, it helps to hold down c.lk and then execute the super using mk.
