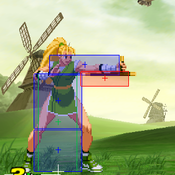
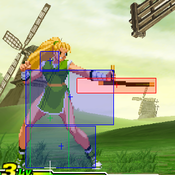
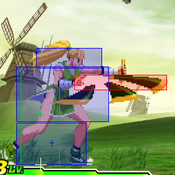
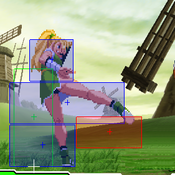
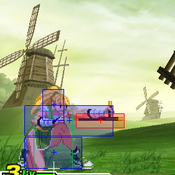
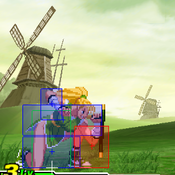
Capcom vs SNK 2/Maki: Difference between revisions

From SuperCombo Wiki
Line 715: Line 715:
{{MoveData
{{MoveData
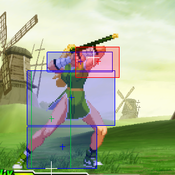
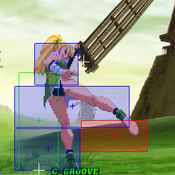
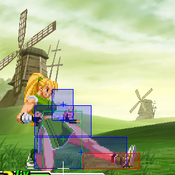
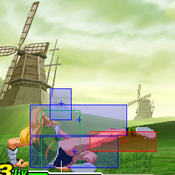
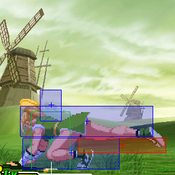
| name    = Jumping Forward  
| name    = Jumping Forward  
| input    = 8MK
| input    = 8MK / j.MK
| subtitle = Jumping Medium Kick
| subtitle = Jumping Medium Kick
| image    = CvS2_Maki_8mk.png
| image    = CvS2_Maki_8mk.png
Line 744: Line 744:
{{MoveData
{{MoveData
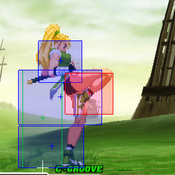
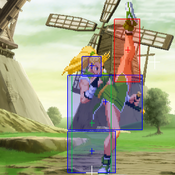
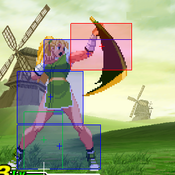
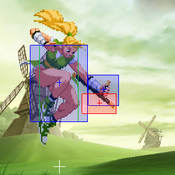
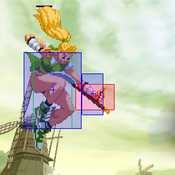
| name    = Jumping Roundhouse
| name    = Jumping Roundhouse
| input    = 8HK  
| input    = 8HK / j.HK
| subtitle = Jumping Heavy Kick
| subtitle = Jumping Heavy Kick
| image    = CvS2_Maki_8hk.png
| image    = CvS2_Maki_8hk.png

Revision as of 02:24, 1 December 2021

Introduction

Character Profile

Maki Genryusai is a character from Capcom's Final Fight series, first appearing in 1993's Final Fight 2.

Maki is a ninja trained in Bushinryu, the same style as the 37th Bushinryu Master Genryusai and Guy, her childhood friend. Genryusai and Maki's sister/Guy's fiancée Rena were kidnapped by Metro City's Mad Gear gang and their leader Retu. Maki teamed up with Haggar and Carlos and searched the world. After defeating Rolento in Italy, he told them that the kidnapped pair were held in Japan. After kicking Retu out a window, seemingly to his death, Genryusai and Rena were rescued. Guy and Rena soon married, turning Guy into Maki's brother-in-law.

Later, after Genryusai's death, Zeku ascended to become the 38th Bushinryu Master. He continued to train Guy, eventually making Guy strong enough to defeat him and watch him become the 39th Bushinryu Master.

This turn of events annoyed Maki, who believed she was stronger than Guy. For several years, Maki searched for Guy to try to take the title of Bushinryu master. When she found him, he was in the middle of dealing with Shadaloo. Seeing her opportunity, the two started to fight. However, the fight was interrupted by the appearance of Shadaloo leader M.Bison. Maki rushed off to fight Bison, but was soon overwhelmed by the full might of Bison's Psycho Power. As he was about to deliver the final blow, Guy intervened and caused to Bison to retreat. Irritated, Maki thanked Guy for saving her and admitted she's not strong enough to become master yet, but says she will defeat Guy the next time they meet.

Gameplay Overview & Strategy Summary

Maki is a specialist mid-tier character that relies on Bushin-style speed and deception to set up most of her attacks. Her array of movement and jumping options on the ground and against the wall can control spacing like few other characters, making it easy to keep away from opponents. Her anti-air attacks are outstanding, including her 3K Suicide Spin special move; it is instantly invincible at what is effectively the press of a button, though it costs a bit of Maki's health to perform.

In close quarters, Maki primarily uses mixups and confuses opponents with frame traps, throws, and the threat of a quick overhead. Maki's punch throw has the second largest range in the game (60px instead of the normal 54px), allowing her to do more with her block strings but still get a tick throw in. Cancelling attacks into her forward (or backward) command run can reset block string pressure, launch Maki into her leaping overhead attack, or even allow you to buffer into her 720 command grab super—on the ground or in the air.

Maki's kick super is ridiculously damaging, especially in K-Groove. However, it can be very difficult to confirm into, requiring either a delicate buffer or extremely tight links. In general, this super is used to punish a mistake or bad guess by the opponent, generated by your mixups. Being able to recognize these punish opportunities and then land a quick super cancel off of crouching MK or close/far standing HP is very important to maximize damage potential with Maki.

Though a mid-tier character, Maki matches up well against many high-tier characters in CvS2. She usually wins the positioning game in neutral due to her movement options, and can shutdown most top-tier nonsense and even A-Groove activations with selective use of Suicide Spin. Despite this, Maki struggles on account of having a difficult time converting meter into big damage, especially against experienced players who can react to mixups. Most of the damage she inflicts against opponents will be accumulated from light pokes, heavy single-hit strikes, and throws. Without an easy and reliable super confirm, all the work you do can be undone by an easy and reliable super confirm by your opponent.

Maki is most effective in C, N, and K-Grooves, though each have pros and cons. In K-Groove, the offensive bonus gained from rage can really add up, though it's giving up roll cancel Reach Punch, which Maki benefits greatly from. That becomes an option in N-Groove, as does the extra damage gained from popping a stock; however, Maki's level 1 720 command grab super is rather useless, as it can be jumped out of after the super flash. This is mitigated in C-Groove, where Level 2 supers and a dead-body hop become available, though at the cost of her regular run which can aid in her deception/mixup game.

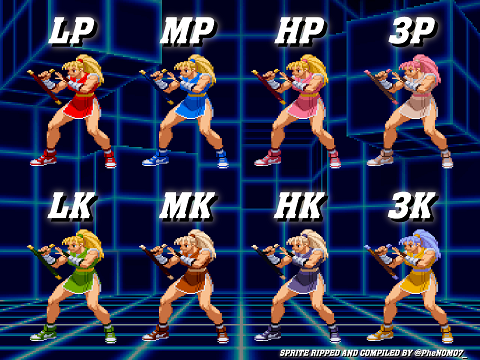
Character Color Selection

Maki CvS2 colors.png

Character Data

Health (at Ratio 2) 14000 Just Below Average
Stun 70 Average
Stun Duration +0f Normal
Guard Guage Recovery Rate Fast Type Best
Dash Length 113 pixels
Dash Duration
Dash Height 22.5 Dead Body & Ground Fireball Hop
Run Speed 9.0 Very Fast
Roll Distance 120 pixels Average
Roll Duration 27f Standard/Universal
Roll Recovery Frames 2u+4f Average
Wakeup Speed compared to Ryu 0f Normal

Moves List

System & Subsystem Mechanics

Dashes & Run

Roll

Dodge & Dodge Attacks

Guard Cancel Counter Attack & Movement

Throws

Normal Moves

Far Standing Normals

Far Standing Jab
Far Light Punch
far 5LP / far LP
CvS2 Maki 5lp.png
Version Damage Stun Cancel Guard Parry Startup Active Recovery Total Adv Hit Adv Block Invul
Far Lp.png 300 3 RF/SP/SU H/L H/L 3 4 8 15 +3 +3 -

A quick, high poke with Maki's tonfa.

  • TBA

5MP

Far Standing Strong
Far Medium Punch
far 5MP / far MP
CvS2 Maki 5mp.png
Version Damage Stun Cancel Guard Parry Startup Active Recovery Total Adv Hit Adv Block Invul
Far Mp.png 900 9 SU H/L H 6 6 20 32 -4 -4 -

Maki extends her arm and pokes out with the tip of her tonfa at hip level.

  • TBA

5HP

Far Standing Fierce
Far Heavy Punch
far 5HP / far HP
CvS2 Maki 5hp.png
Version Damage Stun Cancel Guard Parry Startup Active Recovery Total Adv Hit Adv Block Invul
Far Hp.png 1200 12 SU H/L H 6 4 38 48 -14 -14 -

Maki takes a full swing with her tonfa across her body at hip level, reaching a far distance out in front of her.

  • TBA

5LK

Far Standing Short
Far Light Kick
far 5LK / far LK
CvS2 Maki 5lk.png
Version Damage Stun Cancel Guard Parry Startup Active Recovery Total Adv Hit Adv Block Invul
Far Lk.png 400 4 SU H/L H/L 5 6 8 19 +3 +3 -

Maki kicks her foot out low and to the side.

  • TBA

5MK

Far Standing Forward
Far Medium Kick
far 5MK / far MK
CvS2 Maki 5mk.png
Version Damage Stun Cancel Guard Parry Startup Active Recovery Total Adv Hit Adv Block Invul
Far Mk.png 800 8 SU H/L H 6 6 16 28 ±0 ±0 -

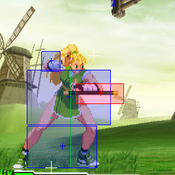
Maki leans back and extends her leg out horizontally, hitting with her foot.

  • TBA

5HK

Far Standing Roundhouse
Far Heavy Kick
far 5HK / far HK
CvS2 Maki 5hk.png
Version Damage Stun Cancel Guard Parry Startup Active Recovery Total Adv Hit Adv Block Invul
Far Hk.png 1100 11 SU H/L H 6 6 21 37 -3 -3 -

Maki rotates a leg high into the air, kicking the space in front of her head.

  • TBA

Close Standing Normals

cl5LP

Close Standing Jab
Close Light Punch
cl5LP / cl.LP
CvS2 Maki CL 5lp.png
Version Damage Stun Cancel Guard Parry Startup Active Recovery Total Adv Hit Adv Block Invul
Close Lp.png 300 3 RF/SP/SU H/L H/L 3 4 8 15 +3 +3 -

A quick, high poke with Maki's tonfa.

  • TBA

cl5MP

Close Standing Strong
Close Medium Punch
cl5MP / cl.MP
CvS2 Maki CL 5mp.png
Version Damage Stun Cancel Guard Parry Startup Active Recovery Total Adv Hit Adv Block Invul
Close Mp.png 800 8 SP/SU H/L H 5 6 11 22 +5 +5 -

Maki thrusts her elbow and butt of her tonfa out from her hip.

  • TBA

cl5HP

Close Standing Fierce
Close Heavy Punch
cl5HP / cl.HP
CvS2 Maki CL 5hp.png
Version Damage Stun Cancel Guard Parry Startup Active Recovery Total Adv Hit Adv Block Invul
Close Hp.png 1100 11 SP/SU H/L H 6 4 28 38 -8 -8 -

Maki swings upward with her elbow and butt of her tonfa, hitting above the shoulders.

  • TBA

cl5LK

Close Standing Short
Close Light Kick
cl5LK / cl.LK
CvS2 Maki CL 5lk.png
Version Damage Stun Cancel Guard Parry Startup Active Recovery Total Adv Hit Adv Block Invul
Close Lk.png 400 4 SU H/L H/L 5 6 8 19 +3 +3 -

Maki kicks her foot out low and to the side.

  • TBA

cl5MK

Close Standing Forward
Close Medium Kick
cl5MK / cl.MK
CvS2 Maki CL 5mk.png
Version Damage Stun Cancel Guard Parry Startup Active Recovery Total Adv Hit Adv Block Invul
Close Mk.png 700 7 SP/SU H/L H 5 4 17 26 -1 -1 -

Maki delivers a rising knee to the mid-section.

  • TBA

cl5HK

Close Standing Roundhouse
Close Heavy Kick
cl5HK / cl.HK
CvS2 Maki CL 5hk.png
Version Damage Stun Cancel Guard Parry Startup Active Recovery Total Adv Hit Adv Block Invul
Close Hk.png 1200 12 SU H/L H 5 4 31 40 -11 -11 -

Maki kicks straight up and HIGH into the air, well above her head.

  • TBA

Crouching Normals

2LP

Crouching Jab
Crouching Light Punch
2LP / cr.LP
CvS2 Maki 2lp.png
Version Damage Stun Cancel Guard Parry Startup Active Recovery Total Adv Hit Adv Block Invul
D.pngLp.png 300 3 RF/SP/SU H/L H/L 3 4 8 15 +3 +3 -

A quick poke with the tip of Maki's tonfa at knee level.

  • TBA

2MP

Crouching Strong
Crouching Medium Punch
2MP / cr.MP
CvS2 Maki 2mp.png
Version Damage Stun Cancel Guard Parry Startup Active Recovery Total Adv Hit Adv Block Invul
D.pngMp.png 900 9 SP/SU H/L L 6 4 13 23 +7 +7 -

Maki thrusts the butt of her tonfa straight down into the ground in front of her, hitting low.

  • TBA

2HP

Crouching Fierce
Crouching Heavy Punch
2HP / cr.HP
CvS2 Maki 2hp.png
Version Damage Stun Cancel Guard Parry Startup Active Recovery Total Adv Hit Adv Block Invul
D.pngHp.png 1000 10 SU H/L H/L 6 8 19 33 -1 -1 -

Maki stands up and spins her tonfa around her hand into the air, hitting above and in front of her.

  • TBA

2LK

Crouching Short
Crouching Light Kick
2LK / cr.LK
CvS2 Maki 2lk.png
Version Damage Stun Cancel Guard Parry Startup Active Recovery Total Adv Hit Adv Block Invul
D.pngLk.png 300 3 SP/SU L L 3 4 9 16 +4 +4 -

Maki extends her leg and thrusts her foot out against the ground, kicking low.

  • TBA

2MK

Crouching Forward
Crouching Medium Kick
2MK / cr.MK
CvS2 Maki 2mk.png
Version Damage Stun Cancel Guard Parry Startup Active Recovery Total Adv Hit Adv Block Invul
D.pngMk.png 800 8 SU L L 6 6 17 29 ±0 ±0 -

Maki half-swings her leg out low against the ground, hitting at distance.

  • TBA

2HK

Crouching Roundhouse
Crouching Heavy Kick
2HK / cr.HK
CvS2 Maki 2hk.png
Version Damage Stun Cancel Guard Parry Startup Active Recovery Total Adv Hit Adv Block Invul
D.pngHk.png 1100 11 SU L L 7 4 27 38 Down -7 -

Maki fully sweeps out her leg low to the ground.

  • TBA

Jumping Normals

8LP

Jumping Jab
Jumping Light Punch
8LP / j.LP
CvS2 Maki 8lp.png
Version Damage Stun Cancel Guard Parry Startup Active Recovery Total Adv Hit Adv Block Invul
U.pngLp.png 600 6 SP/SU H H 4 22 - - - - -

A downward, angled poke with the tip of Maki's tonfa.

  • TBA

8MP

Jumping Strong
Jumping Medium Punch
8MP / j.MP
CvS2 Maki 8mp.png
Version Damage Stun Cancel Guard Parry Startup Active Recovery Total Adv Hit Adv Block Invul
U.pngMp.png 900 9 SP/SU H H 3 8 - - - - -

A downward, angled poke with the tip of Maki's tonfa.

  • TBA

8HP

Jumping Fierce
Jumping Heavy Punch
8HP / j.HP
CvS2 Maki 8hp.png
Version Damage Stun Cancel Guard Parry Startup Active Recovery Total Adv Hit Adv Block Invul
U.pngHp.png 1200 12 SU H H 7 6 - - - - -

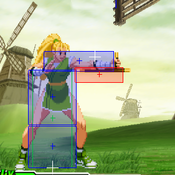
Maki swings her tonfa hard and straight down, hitting with the tip end.

  • TBA

8LK

Jumping Short
Jumping Light Kick
8LK / j.LK
CvS2 Maki 8lk.png
Version Damage Stun Cancel Guard Parry Startup Active Recovery Total Adv Hit Adv Block Invul
U.pngLk.png 500 5 SP/SU H H 4 22 - - - - -

Maki kicks her leg up at a high angle, hitting above her head.

  • TBA

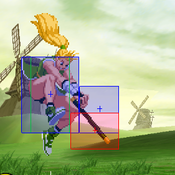
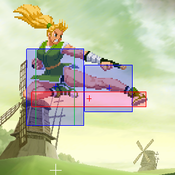
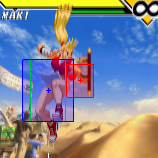
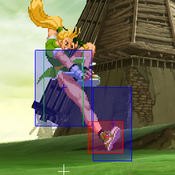
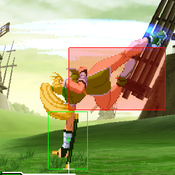
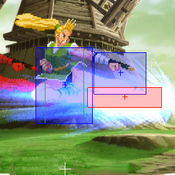
8MK

Jumping Forward
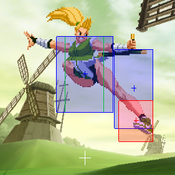
Jumping Medium Kick
8MK / j.MK
CvS2 Maki 8mk.png
Version Damage Stun Cancel Guard Parry Startup Active Recovery Total Adv Hit Adv Block Invul
U.pngMk.png 800 8 SU H H 5 8 - - - - -

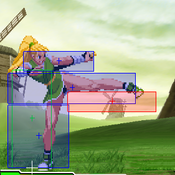
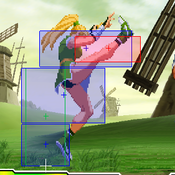
Maki kicks out her leg in front of her for a classic jump-in attack

  • TBA

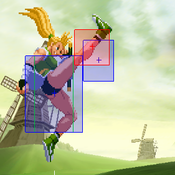
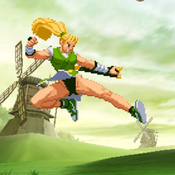
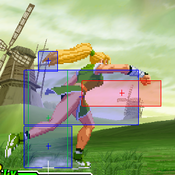
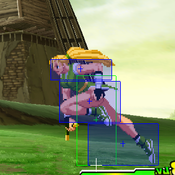
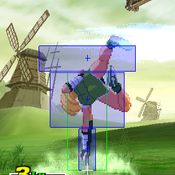
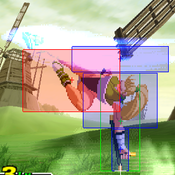
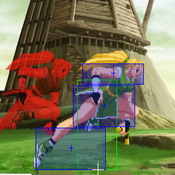
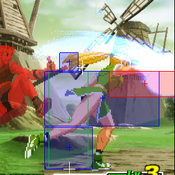
8HK

Jumping Roundhouse
Jumping Heavy Kick
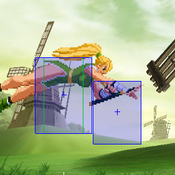
8HK / j.HK
CvS2 Maki 8hk.png
Version Damage Stun Cancel Guard Parry Startup Active Recovery Total Adv Hit Adv Block Invul
U.pngHk.png 1100 11 SU H H 6 6 - - - - -

Maki swings her leg hard, kicking below and in front of her.

  • TBA

Command Normals

BushinK

Bushin Chain
The Classic Bushin Combo
LP, MP, HP,
HK or 2HP (d.HP)
Version Damage Stun Cancel Guard Parry Startup Active Recovery Total Adv Hit Adv Block Invul
1st Hit
Lp.png...
300 3 - H/L H/L 3 4 8 - +3 +3 -
2nd Hit
...Mp.png...
500 (800 Total) 5 (8 Total) - H/L H/L 6 4 27 - +4 +4 -
3rd Hit
...Hp.png...
600 (1400 Total) 6 (14 Total) - H/L H/L 6 4 27 - -7 -7 -
Version Damage Stun Cancel Guard Parry Startup Active Recovery Total Adv Hit Adv Block Invul
Kick Finisher
...Hk.png
700 (2100 total) 7 (21 total) - H/L H/L 6 6 21 - -3 -3 -

Maki attacks with a series of chained hits.

  • TBA
Version Damage Throw Range Startup Active Recovery Total Invul
Throw Finisher
...D.png+Hp.png
1000 (2400 Total) 60px 0 1 13 - -

Maki attacks with a series of chained hits, ending with a the opponent being tossed up into the air and to the ground.

  • TBA

Airbrake

Elbow Drop
"The Airbrake"
In air, 2MP / j.d.MP
CvS2 Maki airbrake.png
Version Damage Stun Cancel Guard Parry Startup Active Recovery Total Adv Hit Adv Block Invul
In air, D.png+ Mp.png 800 8 - H H 9 Until landing - - - - -

Maki raises her tonfa in front of her while in the air, slowing her forward momentum.

  • TBA

Special Moves

Genko

Genko
Distance Punch
236+P / qcf+P
CvS2 Maki genko.png
Version Damage Stun Cancel Guard Parry Startup Active Recovery Total Adv Hit Adv Block Invul
LP
Qcf.png + Lp.png
1100 11 - H/L H 14 4 33 51 Down -9 -
MP
Qcf.png + Mp.png
1200 12 - H/L H 14 4 33 51 Down -9 -
HP
Qcf.png + Hp.png
1300 13 - H/L H 14 4 33 51 Down -9 -

Maki steps into a far-reaching haymaker punch.

  • The only differences between the button strength versions is damage dealt (HP does the most) and range (HP covers the furthest). Always use the HP version for the best of both!
  • TBA

Hayagake

Hayagake
Command Run
236+K, K / qcf+K, K
CvS2 Maki comrun.png
Start the command run...
CvS2 Maki runslide.png
...and attack low with a slide!
CvS2 Maki runoverhead.png
...or surprise with an overhead!
Version Damage Stun Cancel Guard Parry Startup Active Recovery Total Adv Hit Adv Block Invul
Run Starter
Qcf.png + K.png
0 - - - - 0 up to 60 22 up to 82 - - -

Maki begins a forward run, eventually skidding to a stop if no other commands are input.

  • TBA
Run Stop
Qcf.png + K.png, Lk.png
0 - - - - - - 22 - - - -

Maki skids to a complete stop.

  • TBA
Low Slide
Qcf.png + K.png, Mk.png
1300 13 - L L 12 9 28 49 Down -17 -

Maki slides low to grab the opponent, picks them up, then body slams them back down.

  • TBA
Overhead
Qcf.png + K.png, Hk.png
1600 16 - H H 24 8 20 52 Down -1 -

Maki leaps up and hits the opponent with a high attack, following up with an overhead suplex.

  • TBA

Saka Hayagake

Saka Hayagake
Command Back Run
214+K, K / qcb+K, K
CvS2 Maki backcomrun.png
...nur dnammoc eht tratS
Version Damage Stun Cancel Guard Parry Startup Active Recovery Total Adv Hit Adv Block Invul
Back Run Starter
Qcb.png + K.png
0 - - - - 0 up to 60 22 up to 82 - - -

Maki begins a backwards run, eventually skidding to a stop if no other commands are input.

  • TBA
Run Stop
Qcb.png + K.png, Lk.png
0 - - - - - - 22 - - - -

Maki skids to a complete stop.

  • TBA
Forward Super Jump
Qcb.png + K.png, Mk.png
- - - - - 9 - - - - - -

Maki quickly changes direction and launches into a forward super jump.

  • TBA
Backward Super Jump
Qcb.png + K.png, Hk.png
- - - - - 4 - - - - - -

Maki uses her backwards momentum to super jump away from the opponent.

  • TBA

Tengu Daoshi

Tengu Daoshi
Command Air Throw
in air, 41236+P / hcf+P
CvS2 Maki airthrow.png
Version Damage Throw Range Startup Active Recovery Total Invul
LP
in air, Hcf.png + Lp.png
1900 (500+1400) 56px Horizontal, 70~82px Vertical 4 1 Landing + 1 - -
MP
in air, Hcf.png + Mp.png
2000 (500+1500) 52px Horizontal, 70-82px Vertical 4 1 Landing + 1 - -
HP
in air, Hcf.png + Hp.png
2100 (500+1600) 48px Horizontal, 70-82px Vertical 4 1 Landing + 1 - -

Maki grabs the opponent out of the air, then slams them against the wall and down to the wall.

  • TBA

Hassoukyaku

Hassoukyaku
Wall Jumps/Attacks
in air, against wall:
214+P or K / qcb+P or K
CvS2 Maki walljump 1.png
Stall with LK, Jump with LP
CvS2 Maki walljump 2.png
Grab a standing opponent with MP/HP
CvS2 Maki walljump 3.png
Hit a crouching opponent with MK/HK
Version Damage Stun Cancel Guard Parry Startup Active Recovery Total Adv Hit Adv Block Invul
Wall Jump
in air, on wall Qcb.png + Lp.png
- - - - - 10 - - - - - -

Maki does a horizontal jump off the wall.

  • TBA
Version Damage Throw Range Startup Active Recovery Total Invul
Grab Close to Wall
in air, on wall Qcb.png + Mp.png
1300 42px Horizontal, 50-70px Vertical 26 Until Landing 21 - -

Maki lunges with outstretched arms to grab an opponent closer to the wall and performs an overhead suplex on them.

  • TBA
Version Damage Throw Range Startup Active Recovery Total Invul
Grab Far from Wall
in air, on wall Qcb.png + Hp.png
1300 42px Horizontal, 50-70px Vertical 26 Until Landing 21 - -

Maki lunges with outstretched arms to grab an opponent further from the wall and performs an overhead suplex on them.

  • TBA
Version Damage Stun Cancel Guard Parry Startup Active Recovery Total Adv Hit Adv Block Invul
Stall and Drop
in air, on wall Qcb.png + Lk.png
- - - - - 12 Until Landing 5 - - - -

Maki drops straight down from the wall.

  • TBA
Version Damage Stun Cancel Guard Parry Startup Active Recovery Total Adv Hit Adv Block Invul
Kick Down Close to Wall
in air, on wall Qcb.png + Mk.png
1200 12 - - - 14 Until Landing 23 - Down ±0* -

Maki jumps down nearer the wall with a downward-angled kick.

  • TBA
Version Damage Stun Cancel Guard Parry Startup Active Recovery Total Adv Hit Adv Block Invul
Kick Down Far from Wall
Qcb.png + Hk.png
1200 12 - - - 14 Until Landing 23 - Down ±0* -

Maki jumps down nearer the wall with a downward-angled kick.

  • TBA

Reppukyaku

Reppukyaku
"Suicide Spin"
KKK / 3K
CvS2 Maki 3k 1.png
Invincibility on Demand!
CvS2 Maki 3k 2.png
Maki actually spins around...
CvS2 Maki 3k 3.png
...and attacks behind her
Version Damage Stun Cancel Guard Parry Startup Active Recovery Total Adv Hit Adv Block Invul
K.pngK.pngK.png 1200 (-600 to Maki)* 12 - H/L H, H 10 4, then multiple hits 59+ 100 Down** -66 11 Full

Maki digs the the tip of her tonfa into the ground, swings her legs up into the air, and pivots around the tonfa with a sustained spinning kick attack.

  • TBA

Supers

Bushin Gouraiha

Bushin Gouraiha
The Punch Super
236236+P / qcf,qcf+P
CvS2 Maki psuper.png
First hit of the super
Version Damage Stun Cancel Guard Parry Startup Active Recovery Total Adv Hit Adv Block Invul
Level 1
Qcf.pngQcf.png + Lp.png
2400 0 - H/L H/L 5:4 - 39 - Down -26 9 Full
Level 2
Qcf.pngQcf.png + Mp.png
3200 0 - H/L H/L 5:4 - 49 - Down -37 15 Full
Level 3
Qcf.pngQcf.png + Hp.png
5600 0 - H/L (L*) H/L (L*) 5:4 - 58 - Down -47 23 Full

Maki unleashes a series of rapid attacks.

  • TBA

Tesshinhou

Tesshinhou
The Kick Super
236236+K, then K /
qcf,qcf+K, then K
CvS2 Maki ksuper 1.png
It's like the Command Run, so...
CvS2 Maki ksuper 2.png
...press any K again to fire away...
CvS2 Maki ksuper 3.png
... and finish them off!
Version Damage Stun Cancel Guard Parry Startup Active Recovery Total Adv Hit Adv Block Invul
Run Startup
Qcf.pngQcf.png + K.png
0 - - - - 4:4 60 25 93 - - Varies by Level
Level 1
Qcf.pngQcf.png + Lk.png, then K.png
2200 0 - H/L H/L 8 19 29 56 Down -6 8 Full (from Startup)
Level 2
Qcf.pngQcf.png + Mk.png, then K.png
3600 0 - H/L H/L 8 19 29 56 Down -6 14 Full (from Startup)
Level 3
Qcf.pngQcf.png + Hk.png, then K.png
6600 0 - H/L (*H) H/L (*H) 8 19 48 75 Down -28 22 Full (from Startup)

Maki runs forward then leaps forward with a sustained kick attack. At Level 3, she finishes the attack with a haymaker punch.

  • TBA

Ajaratengu

Ajaratengu
"The 720"
(in air) 720+P
CvS2 Maki 720.png
Version Damage Throw Range Startup Active Recovery Total Invul
Level 1
360.png360.png + Lp.png
2900 58px 4:4 1 24 33 5 Full
Level 2
360.png360.png + Mp.png
4100 58px 4:4 1 24 33 14 Full
Level 3
360.png360.png + Hp.png
5900 58px 4:4 1 24 33 22 Full
Air Level 1
in air, 360.png360.png + Lp.png
3200 56px Horizontal, 70~82px Vertical 4:4 1 Landing + 1 - 5 Full
Air Level 2
in air, 360.png360.png + Mp.png
4500 52px Horizontal, 70~82px Vertical 4:4 1 Landing + 1 - 14 Full
Air Level 3
in air, 360.png360.png + Hp.png
6300 48px Horizontal, 70~82px Vertical 4:4 1 Landing + 1 - 22 Full

Maki grabs the opponent out of the air and slams them from wall to wall before ending with a suplex to the ground.

  • TBA

Combos

Meterless Combos

Maki has very few natural combos. The meterless options available to her are generally sub-optimal and have some disadvantages. Without meter, the majority of damage will come from single pokes adding up, big hits (sweeps, air attacks, suprise slides, overheads) and throws. Still, there are opportunities to get more than a few hits in when the opportunity presents itself.

Into Bushin Chains

Into Genko (Distance Punch)

Into Suicide Spin

Links and Counter Hits

Combos With Meter

Into Bushin Gouraiha (Punch Super)

Into Tesshinhou (Kick Super)

A-Groove Custom Combos

Information for this section comes from Gunter's Custom Combo Collection guide on his Google Drive space. For the full guide, complete with video, go to https://tinyurl.com/MakiCCs.

Ground

Anti-Air

Blocked

Other

Advanced Strategy

System & Subsystem Mechanics Strategy

Dashes & Run

Roll & Dodge

Small Jump

Throws

Guard Cancel Attack & Movement

Groove-Specific Strategy

C-Groove

Cvs2 C-Groove Label.png
CVS2 CGrooveBar.png


In C-Groove


Against C-Groove

A-Groove

Cvs2 A-Groove Label.png
CVS2 AGrooveBar.png


In A-Groove


Against A-Groove

P-Groove

Cvs2 P-Groove Label.png
CVS2 PGrooveBar.png


In P-Groove


Against P-Groove

S-Groove

Cvs2 S-Groove Label.png
CVS2 SGrooveBar.png


In S-Groove


Against S-Groove

N-Groove

Cvs2 N-Groove Label.png
CVS2 NGrooveBar.png


In N-Groove


Against N-Groove

K-Groove

Cvs2 K-Groove Label.png
CVS2 KGrooveBar.png


In K-Groove


Against K-Groove

Character Matchups

Capcom Characters
Akuma Balrog (Boxer) Blanka Cammy Chun-Li Dan Dhalsim Eagle
E.Honda Guile Ken Kyosuke M.Bison (Dictator) Maki Morrigan Rolento
Ryu Sagat Sakura Vega (Claw) Yun Zangief Evil Ryu Shin Akuma
SNK Characters
Athena Benimaru Chang Geese Haohmaru Hibiki Iori Joe
Kim King Kyo Mai Nakoruru Raiden Rock Rugal
Ryo Todo Yamazaki Terry Vice Yuri Orochi Iori God Rugal

Capcom Characters

Akuma


Balrog (Boxer)


Blanka


Cammy


Chun-Li


Dan


Dhalsim


Eagle


E. Honda


Guile


Ken


Kyosuke


M. Bison (Dictator)


Maki


Morrigan


Rolento


Ryu


Sagat


Sakura


Vega (Claw)


Yun


Zangief

SNK Characters

Athena


Benimaru


Chang


Geese


Haohmaru


Hibiki


Iori


Joe


Kim


King


Kyo


Mai


Nakoruru


Raiden


Rock


Rugal


Ryo


Todo


Yamazaki


Terry


Vice


Yuri

Boss Characters

Evil Ryu


Riot of Blood (Orochi) Iori


Shin Akuma


Ultimate (God) Rugal
Match-ups

CvS2 Wiki Navigation

General
Controls
Notation
HUD
Glossary
System
Roll Cancel
Combo
CvS2 Versions
Netplay/ Training
FAQ
Grooves
Groove Overview
Groove Subsystems
C-Groove
A-Groove
P-Groove
S-Groove
N-Groove
K-Groove
Capcom Characters
Akuma (Gouki)
Balrog (Boxer)
Blanka
Cammy
Chun-Li
Dan
Dhalsim
Eagle
E.Honda
Guile
Ken
Kyosuke
Maki
M. Bison (Dictator)
Morrigan
Rolento
Ryu
Sagat
Sakura
Vega (Claw)
Yun
Zangief
SNK Characters
Athena
Benimaru
Chang
Geese
Haohmaru
Hibiki
Iori
Joe
Kim
King
Kyo
Mai
Nakoruru
Raiden
Rock
Rugal
Ryo
Terry
Todo
Vice
Yamazaki
Yuri
Boss Characters
Shin Akuma
Ultimate Rugal
Evil Ryu
Orochi Iori