(→Throw) |
(→623X) |
||
| Line 683: | Line 683: | ||
|Adv. Hit= KND | |Adv. Hit= KND | ||
|Adv. Guard= -76 | |Adv. Guard= -76 | ||
|description= Best Mauru AA and | |description= Best Mauru AA and the best DP in the entire game, you want to react with this against jump ins, because of the invibility since frame one that last for 23F you are able to punish most Jump ins for good damage | ||
*Hits on 18/20F of super flash | *Hits on 18/20F of super flash | ||
*1~23F: invincible. | *1~23F: invincible. | ||
Revision as of 12:11, 10 October 2021
Introduction
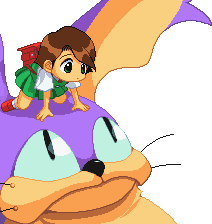
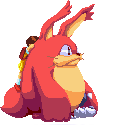
Mauru (Marurun) is a big animal living in the woods, who understands human words to some degree. Likes fruit and singing. Met Mugi, a little girl, when she was lost and crying alone in the woods.
Mauru is a very simple character. He is considered to be the worst character in the whole game while having some very good practical damage but extremely commital options, Mauru posesses a few decent normals to play footsies with and an amazing throw that can lead into his unblockable super or Death frames set ups. Mauru oftens struggles to win neutral and get in, most character can shut down his pressure at most ranges, He requires to be at melee range to be effective but doesn't have the means to do so.
| Strengths | Weaknesses |
|---|---|
|
|
| Mauru | |
|---|---|
| Character Data | |
| Forward Run Duration | 105F to cross stage |
| Back Step Duration | 34 frames (1~34F: invincible) |
| Pre-jump Frames | 3 frames |
| Jump Duration | 46 frames |
| Landing Frames | 5 frames |
| Jump Height Apex | 123 |
| Forward Jump Distance | 119 |
| Backward Jump Distance | 118 |
| Back Step Distance | 96 |
| Knockdown Recovery | 25 frames |
| Chain Series | Solo Heavy Series |
Move List
Standing Normals
5A
| Damage | Guard | Dizzy | Cancel | ||
|---|---|---|---|---|---|
| 14 | Mid | 5 | y | ||
| Startup | Active | Recovery | Adv. Hit | Adv. Guard | |
| 5 | 4 | 5 | +8 | +1 | |
| |||||
5B
| Damage | Guard | Dizzy | Cancel | ||
|---|---|---|---|---|---|
| 37 | Mid | 25 | n | ||
| Startup | Active | Recovery | Adv. Hit | Adv. Guard | |
| 7 | 5 | 12 | +8 | -2 | |
|
Fast but has more recovery so is more recomended to use as an anti air on reaction, due to the vertical space it covers unlike 5A
| |||||
5C
| Damage | Guard | Dizzy | Cancel | ||
|---|---|---|---|---|---|
| 18 | Mid | 10 | y | ||
| Startup | Active | Recovery | Adv. Hit | Adv. Guard | |
| 4 | 2 | 6 | +9 | +1 | |
|
This is your main normal to cancel in specials when you have the meter.
| |||||
5D
| Damage | Guard | Dizzy | Cancel | ||
|---|---|---|---|---|---|
| 44 | Mid | 25 | n | ||
| Startup | Active | Recovery | Adv. Hit | Adv. Guard | |
| 7 | 6 | 24 | KND | -15 | |
|
Excelent tool as a combo finisher due to the Knockdown, easier combo finsher at most ranges when you don't have any meter. Moves like Arina J.D are likely to win against this move and other AA like 5B making it not a reliable AA in some MU.
| |||||
Crouching Normals
2A
| Damage | Guard | Dizzy | Cancel | ||
|---|---|---|---|---|---|
| 13 | Low | 5 | y | ||
| Startup | Active | Recovery | Adv. Hit | Adv. Guard | |
| 5 | 2 | 6 | +9 | +1 | |
| |||||
2B
| Damage | Guard | Dizzy | Cancel | ||
|---|---|---|---|---|---|
| 33 | Low | 0 | n | ||
| Startup | Active | Recovery | Adv. Hit | Adv. Guard | |
| 15 | 4 | 20 | KND | -9 | |
|
You are mostly using this normal after a 8B to be able to do it on time.
| |||||
2C
| Damage | Guard | Dizzy | Cancel | ||
|---|---|---|---|---|---|
| 17 | Low | 5 | n | ||
| Startup | Active | Recovery | Adv. Hit | Adv. Guard | |
| 6 | 4 | 7 | KND | +1 | |
| |||||
2D
| Damage | Guard | Dizzy | Cancel | ||
|---|---|---|---|---|---|
| 40 | Low | 10 | n | ||
| Startup | Active | Recovery | Adv. Hit | Adv. Guard | |
| 9 | 16 | 17 | KND | -18 | |
|
This is your Sweep, it will high profile lows in a lot of situations.
| |||||
Air Normals
J.A
| Damage | Guard | Dizzy | Cancel | ||
|---|---|---|---|---|---|
| 14 | high | 5 | n | ||
| Startup | Active | Recovery | Adv. Hit | Adv. Guard | |
| 7 | Gnd | - | - | - | |
| |||||
J.B
| Damage | Guard | Dizzy | Cancel | ||
|---|---|---|---|---|---|
| 37 | high | 5 | n | ||
| Startup | Active | Recovery | Adv. Hit | Adv. Guard | |
| 9 | 12 | GND | - | - | |
| |||||
J.C
| Damage | Guard | Dizzy | Cancel | ||
|---|---|---|---|---|---|
| 8~9 | high | 5 | n | ||
| Startup | Active | Recovery | Adv. Hit | Adv. Guard | |
| 7 | - | GND | - | - | |
|
When you use this move you want to pressure the opponent, by mixing a basic jab string into your grab or command grab, doing command grab right way or if it isn't point blank and the opponent is respecting it you to much do belly flop.
| |||||
J.D
| Damage | Guard | Dizzy | Cancel | ||
|---|---|---|---|---|---|
| 44 | high | 5 | n | ||
| Startup | Active | Recovery | Adv. Hit | Adv. Guard | |
| 11 | 4 | GND | - | - | |
| |||||
Command Normals
6.B
| Damage | Guard | Dizzy | Cancel | ||
|---|---|---|---|---|---|
| 18+37 | Mid | 45 | - | ||
| Startup | Active | Recovery | Adv. Hit | Adv. Guard | |
| 24 | 6 | 25 | - WSL | -15 | |
| |||||
8.B
| Damage | Guard | Dizzy | Cancel | ||
|---|---|---|---|---|---|
| 37 | High | 25 | n | ||
| Startup | Active | Recovery | Adv. Hit | Adv. Guard | |
| 11 | 6 | GND | - - | - - | |
|
This one of your main neutral tools against characters like Slash or Tesse.
| |||||
8.C
| Damage | Guard | Dizzy | Cancel | ||
|---|---|---|---|---|---|
| 18 | High | 5 | n | ||
| Startup | Active | Recovery | Adv. Hit | Adv. Guard | |
| 5 | GND | - - | - - | - - | |
| |||||
Universal Mechanics
Throw
| Damage | Guard | Dizzy | Cancel | ||
|---|---|---|---|---|---|
| 52 | Thw | 0 | - | ||
| Startup | Active | Recovery | Adv. Hit | Adv. Guard | |
| 1 | 1 | - | KND | - | |
|
This grab will always throw the opponent to the corner no matter where Mauru grabs you, when you get grab is when his game starts. in Waku there is a bug regarding frame data that we call Dead frames (see System), when certain grabs in the game are tech see Arina, Slash, Fernandez and Mauru in the corner those char at exception of Slash gets a 45+ frames of advantage which will lets them time an attack to hit you in your soft throw animation, no matter where in the screen you are if you tech the throw against mauru you are going to eat a lot of damage and being put in a KND situation where Mauru can starts his Oki. When Mauru has 1 bar of meter and throws someone he can do an unblockable setup with his HaraHara where most characters are unable to escape, the timing from when doing his Hara can be different depending on Character and what Mauru did before. Mauru Throws is the best in the game and part of his core gameplay.
| |||||
Air Throw
| Damage | Guard | Dizzy | Cancel | ||
|---|---|---|---|---|---|
| 52 | Thw | 0 | - | ||
| Startup | Active | Recovery | Adv. Hit | Adv. Guard | |
| 1 | 1 | - | KND | - | |
| |||||
Command Grab
| Damage | Guard | Dizzy | Cancel | ||
|---|---|---|---|---|---|
| 66 | Thw | 0 | - | ||
| Startup | Active | Recovery | Adv. Hit | Adv. Guard | |
| 1 | 1 | - | KND | - | |
|
This is one of your main mixing tool when the opponent is afraid of pressing buttons, you can link a 5A and EX DP on Tesse in the corner
| |||||
Universal Overhead
| Damage | Guard | Dizzy | Cancel | ||
|---|---|---|---|---|---|
| 37 | High | 5 | - | ||
| Startup | Active | Recovery | Adv. Hit | Adv. Guard | |
| 24 | 2 | 23 | 0 | -10 | |
| |||||
Pursuit
| Damage | Guard | Dizzy | Cancel | ||
|---|---|---|---|---|---|
| 44 | Mid | 0 | - | ||
| Startup | Active | Recovery | Adv. Hit | Adv. Guard | |
| 50 | 3 | 40 | KND | -38 | |
| |||||
Rissing attack
| Damage | Guard | Dizzy | Cancel | ||
|---|---|---|---|---|---|
| 37 | High | 20 | - | ||
| Startup | Active | Recovery | Adv. Hit | Adv. Guard | |
| 15 | 6 | 24 | KND | -15 | |
| |||||
Super mode
| Damage | Guard | Dizzy | Cancel | ||
|---|---|---|---|---|---|
| 37 | Mid | 50 | - | ||
| Startup | Active | Recovery | Adv. Hit | Adv. Guard | |
| 16 | 9 | 9 | KND | -9 | |
|
Mauru Super Mode is the only Super Mode in vanilla Waku that is pretty much safe in almost any situation (Fernandes SM is +1 on block), besides being -9 on block it also pushbacks the opponent meaning that unless the opponent makes a read they aren't punishing Mauru. Amazing neutral tool, can be used as his most safe AA, Mauru in Super Mode is another beast, the damage buff will convert his damage in easy 60% meterless jump in combos, Mauru trully shines once this mechanic is being used a lot.
| |||||
Special Moves
623X
| 236A | Damage | Guard | Dizzy | Cancel | ||
|---|---|---|---|---|---|---|
| 59 | Mid | 30 | - | |||
| Startup | Active | Recovery | Adv. Hit | Adv. Guard | ||
| 19 | 2 (2) 10 | 28 | KND | -18 | ||
| ||||||
| 236B | Damage | Guard | Dizzy | Cancel | ||
| 66 | Mid | 45 | - | |||
| Startup | Active | Recovery | Adv. Hit | Adv. Guard | ||
| 21 | 14 | 32 | KND | -20 | ||
| ||||||
| 236AB ES: "Guruguru Punch" |
Damage | Guard | Dizzy | Cancel | ||
| 106 | Mid | 40 | - | |||
| Startup | Active | Recovery | Adv. Hit | Adv. Guard | ||
| 2 | 15 | 33 | WSL | -21 | ||
| ||||||
623X
| 623A | Damage | Guard | Dizzy | Cancel | ||
|---|---|---|---|---|---|---|
| 29+30 | Mid | 20 | - | |||
| Startup | Active | Recovery | Adv. Hit | Adv. Guard | ||
| 6 | 3 (3) 1 | 36 | KND | -24 | ||
| ||||||
| 623B | Damage | Guard | Dizzy | Cancel | ||
| 22 | Mid | 30 | - | |||
| Startup | Active | Recovery | Adv. Hit | Adv. Guard | ||
| 8 | 3(3)3(3)3 | 49 | KND | -49 | ||
| ||||||
| 623AB ES: "Bunbun Copter" |
Damage | Guard | Dizzy | Cancel | ||
| 100 | Mid | 45 | - | |||
| Startup | Active | Recovery | Adv. Hit | Adv. Guard | ||
| 6‼0 | - | 74 | KND | -76 | ||
|
Best Mauru AA and the best DP in the entire game, you want to react with this against jump ins, because of the invibility since frame one that last for 23F you are able to punish most Jump ins for good damage
| ||||||
214X
| 214C | Damage | Guard | Dizzy | Cancel | ||
|---|---|---|---|---|---|---|
| 59 | High | 50 | - | |||
| Startup | Active | Recovery | Adv. Hit | Adv. Guard | ||
| 17 | 5 | 59 | KND | -49 | ||
| ||||||
| 214D | Damage | Guard | Dizzy | Cancel | ||
| 66 | High | 50 | - | |||
| Startup | Active | Recovery | Adv. Hit | Adv. Guard | ||
| 17 | 5 | 67 | KND | -57 | ||
This move is just the C version but being a bit more minus, you're going to be catch even using the C version so is better to just use this button instead | ||||||
| 214CD ES: "Body Press" |
Damage | Guard | Dizzy | Cancel | ||
| 104 | High | 35 | - | |||
| Startup | Active | Recovery | Adv. Hit | Adv. Guard | ||
| 5‼4 | 7 (12) 8 | 71 | KND | -58 | ||
|
this Move is a bit worse if blocked than the D version but hits double, mostly used in combos and you can chipp kill someone with it. An Actual useful move
| ||||||
Air Special Moves
623X
| J.623A | Damage | Guard | Dizzy | Cancel | ||
|---|---|---|---|---|---|---|
| 29+30 | Mid | 20 | - | |||
| Startup | Active | Recovery | Adv. Hit | Adv. Guard | ||
| 6 | 3 (3) 1 | 36 | GND | -24 | ||
| ||||||
| J.623B | Damage | Guard | Dizzy | Cancel | ||
| 22 | Mid | 30 | - | |||
| Startup | Active | Recovery | Adv. Hit | Adv. Guard | ||
| 8 | 3(3)3(3)3 | 49 | GND | -49 | ||
| ||||||
| J.623AB ES: "Kuchuun Bunbun Copter" |
Damage | Guard | Dizzy | Cancel | ||
| 100 | Mid | 45 | - | |||
| Startup | Active | Recovery | Adv. Hit | Adv. Guard | ||
| 6‼0 | - | 74 | KND | -76 | ||
| ||||||
DokiDoki
DokiDoki
| Damage | Guard | Dizzy | Cancel | ||
|---|---|---|---|---|---|
| 14~15 | Mid | 5 | - | ||
| Startup | Active | Recovery | Adv. Hit | Adv. Guard | |
| 8‼0 | - | 23 | KND | -23 | |
| |||||
HaraHara
HaraHara
| Damage | Guard | Dizzy | Cancel | ||
|---|---|---|---|---|---|
| 190 | - | 5 | - | ||
| Startup | Active | Recovery | Adv. Hit | Adv. Guard | |
| 103 | - | 64 | KND | - | |
| |||||


