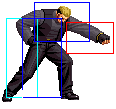
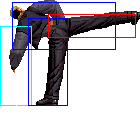
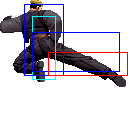
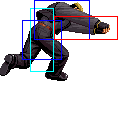
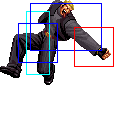
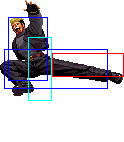
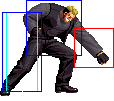
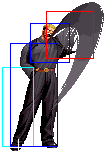
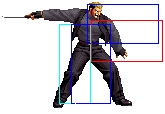
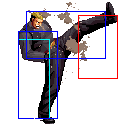
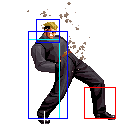
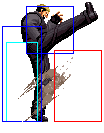
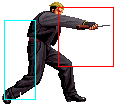
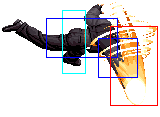
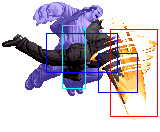
The King of Fighters 2002/Yamazaki

From SuperCombo Wiki
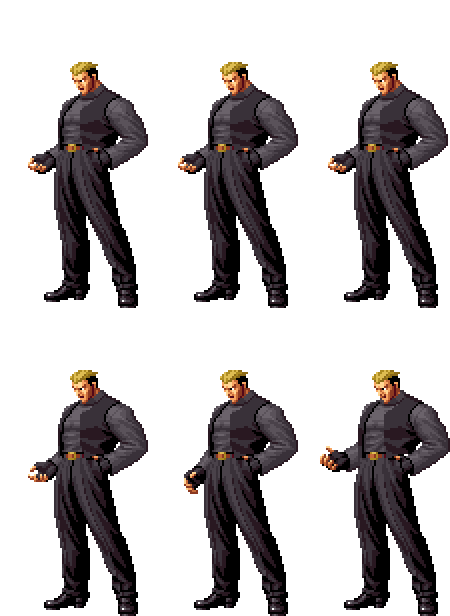
Yamazaki02 stance.gif

General Info

Crouch height: Low
Jump: 4/34/1
Hop: 4/25/1
Dash: 3/10~∞/3
Backdash: 3/18/3
Wakeup: 19 frames
Recovery roll: 27 frames

Stand Crouch Jump Grab Run
Yamazaki02 stand.png Yamazaki02 crouch.png Yamazaki02 jump.png Yamazaki02 grab.png Yamazaki02 run.png

Colors

Snka.gif Snkb.gif Snkc.gif Snkd.gif
Yamazaki02 colorA.png Yamazaki02 colorB.png Yamazaki02 colorC.png Yamazaki02 colorD.png

Movelist

Frames Advantage Cancel Block Hitbox Notes
Standing Close
Snka.gif 3/5/5 +2/+0 C,S,Su HL
Yamazaki02 clA.png
Snkb.gif 4/4/7 +1/-1 R,C,S,Su L
Yamazaki02 clB.png
Snkc.gif 2/3+3/22 -8/-10 C,S,Su HL
Yamazaki02 clC1.png
Yamazaki02 clC2.png
Snkd.gif 5/3*7/16 -3/-5 C,S,Su HL
Yamazaki02 clD1.png
Yamazaki02 clD2.png
Only first hit is cancellable
Standing Far
Snka.gif 6/5/7 0/-2 HL
Yamazaki02 stA.png
Snkb.gif 5/4/9 -1/-3 R HL
Yamazaki02 stB.png
Snkc.gif 13/5/26 -11/-13 HL
Yamazaki02 stC.png
Snkd.gif 9/6/26 -12/-14 HL
Yamazaki02 stD.png
Snkc.gif + Snkd.gif 16/8/18 KD/-4 S,Su HL
Yamazaki02 stCD.png
Crouching
Snka.gif 6/5/7 0/+2 R,C,S,Su HL
Yamazaki02 crA.png
Snkb.gif 5/5/7 0/-2 R L
Yamazaki02 crB.png
Snkc.gif 6/3+3/24 -10/-12 C,S,Su HL
Yamazaki02 crC1.png
Yamazaki02 crC2.png
Snkd.gif 8/12/18 KD/-12 C,S,Su L
Yamazaki02 crD.png
Jump
Snka.gif 2/11/- -/- H
Yamazaki02 jA.png
Snkb.gif 5/9/- -/- H
Yamazaki02 jB.png
Snkc.gif 4/3+3/- -/- H
Yamazaki02 jC1.png
Yamazaki02 jC2.png
Snkd.gif 7/9/- -/- H
Yamazaki02 jD.png
Snkc.gif + Snkd.gif 11/4/- KD/- HL
Yamazaki02 jCD.png
Neutral Jump
Snka.gif 2/11/- -/- H
Yamazaki02 jA.png
Snkb.gif 5/7/- -/- H
Yamazaki02 juB.png
Snkc.gif 11/7/- -/- H
Yamazaki02 juC.png
Snkd.gif 7/7/- -/- H
Yamazaki02 juD.png
Hop
Snka.gif 2/11/- -/- H
Yamazaki02 jA.png
Snkb.gif 5/9/- -/- H
Yamazaki02 jB.png
Snkc.gif 4/3+3/- -/- H
Yamazaki02 jC1.png
Yamazaki02 jC2.png
Snkd.gif 7/9/- -/- H
Yamazaki02 jD.png
Command Normals

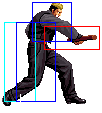
f + Snka.gif

12/3(2)5/24 -9/-11 H
Yamazaki02 fA1.png
Yamazaki02 fA2.png
f + Snka.gif
(cancel)
12/3(2)5/24 -9/-11 S,Su HL
Special Moves
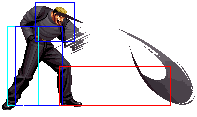
qcb + Snka.gif 3+8/3(1)5/29 -18/-20 Fo HL
Yamazaki02 qcbA1.png
Yamazaki02 qcbA2.png
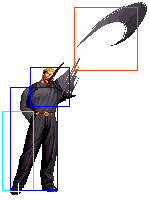
Hebi Tsukai (Joudan) - qcb + A (can be held)
  • An appendage comes out of Yamazaki's sleeve, moving diagonally upwards. The second hit will always whiff on non-airborne opponents.
  • First hit juggles on airborne opponents, second hit knocks down.
  • Second hit technically counts as a fireball, but this has no practical uses.
  • Works well as an anti-air from far away though fairly difficult to anti-air hyper hops
  • Can be delayed by holding the attack button (3 frames startup), can be held for 0 to 480 frames, and cancelled by hitting D (recovery: 16 frames)
  • Free cancellable out of on both hits
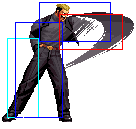
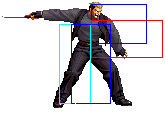
qcb + Snkb.gif 3+5/3*4/31 -11/-17 Fo HL
Yamazaki02 qcbB1.png
Yamazaki02 qcbB2.png
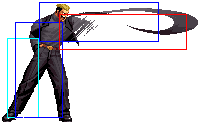
Hebi Tsukai (Chuudan) - qcb + B (can be held)
  • Similar to his qcb + A, except this move comes out horizontally about half screen length.
  • Does 23 frames of hitstun, but regular 17 frames of blockstun.
  • Hard knockdown if it hits an opponent in the air.
  • Can be delayed by holding the attack button (3 frames startup), can be held for 0 to 480 frames, and cancelled by hitting D (recovery: 16 frames)
  • Extremely good for punishing hard to punish moves like Yamazaki dp + C, Kim qcb + D, Iori qcb + P, etc
  • If it hits a grounded opponent, it doesn't knock them down.
  • Whiffs against low crouching opponents, such as K', Andy(not hitstun), Joe, Athena, Kensou, Chin(not hitstun), Benimaru, Mai, Yuri, Yashiro(not hitstun), Chris, Iori, Mature, Vice, Yamazaki(not hitstun), Billy(not hitstun), Kim(not hitstun), Choi, Kula, Angel
  • Free cancellable out of on both hits
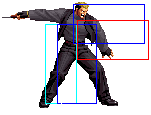
qcb + Snkc.gif 3+9/3*3/30 -15/-17 Fo HL
Yamazaki02 qcbC1.png
Yamazaki02 qcbC2.png
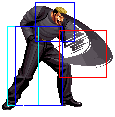
Hebi Tsukai (Gedan) - qcb + C (can be held)
  • Same as his qcb + B, except this move comes out diagonally downwards reaching about half screen
  • Does 17 frames of hitstun, 15 frames of blockstun.
  • if it hits a grounded opponent, it doesn't knock them down
  • Can be delayed by holding the attack button (3 frames startup), can be held for 0 to 480 frames, and cancelled by hitting D (recovery: 16 frames)
  • comes out slightly slower than qcb + A and qcb + B, thus not comboable from weak attacks
  • Free cancellable out of on both hits.
dp + Snka.gif 11/2(13)3/28 KD/-12 Fi,Fo, Su (1st hit) HL
Yamazaki02 dpA1.png
Yamazaki02 dpA2.png
Sabaki no Aikuchi - dp + P
  • Yamazaki takes out his knife and slashes the opponent multiple times
  • dp + A does two hits, dp + C does 4 hits
  • dp + A does 18 frames of blockstun, instead of regular 17 frames. dp + C does regular 17 frames of blockstun.
  • each hit of dp + A does more damage than each hit of dp + C but overall dp + C does more damage
  • supercancellable on the first hit. Use dp + A for supercancels since the first hit does more damage and moves him forward more, otherwise the DM may not combo afterwards
  • free cancellable into
  • free cancellable out of on all hits. The last hit of dp + P knocks the opponent back with no juggle opportunities after, so free cancelling on the last hit will not work in combos
dp + Snkc.gif 13/2(10)3(9)2(13)3/30 KD/-15 Fi,Fo, Su (1st hit) HL
Yamazaki02 dpC1.png
Yamazaki02 dpC2.png
Yamazaki02 dpC3.png
Yamazaki02 dpC4.png
dp + Snkb.gif 14/3(7)3+4/26 KD/-15 Fi,Fo, Su (1st hit) HL,H
Yamazaki02 dpB1.png
Yamazaki02 dpB2.png
Yakiire - dp + B
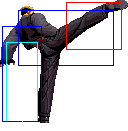
  • Yamazaki does a vertical high kick, then hits you with the back of his boot as his leg comes down
  • hard knockdown on the second hit
  • overhead on the second hit
  • Will sometimes hit the second hit meaty by a single frame at point blank range, in which case the advantage on block is -14.
  • free cancellable into
  • free cancellable out of on both hits. The move you cancel into will only connect if cancelled on the first hit
Yamazaki02 dpB3.png
dp + Snkd.gif 12/6/25 +4/-13 Fi,Fo,qcb + P/B HL
Yamazaki02 dpD.png
Sunakake - dp + D
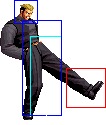
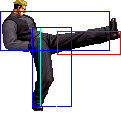
  • Yamazaki does a vertical high kick, not as high as his dp + B. This move only does one hit
  • cancellable into qcb + P/B
  • 34 frames of hitstun. If you cancel into qcb + P/B and then cancel that move with D, you can combo after it. The move also makes crouching opponents stand up for the next hit
  • free cancellable into
  • free cancellable out of
qcf + Snka.gif 8/3*3/30 -13/-15 Fi, Fo HL
Yamazaki02 qcfA1.png
Yamazaki02 qcfA2.png
Bai Gaeshi (Kyuushuu/Dan Hassha) - qcf + P
  • Yamazaki waves his hand upwards. Works as anti-air, but not that fast
  • qcf + A can absorb projectiles while qcf + C absorbs them and sends back a red projectile that negates other projectiles (Fireball framedata: 5/-/29.
  • not a particularly useful move aside from reflecting certain hard to get around projectiles like Mature's
  • free cancellable into
  • free cancellable out of
qcf + Snkc.gif 8/3*3/34 -17/-19 Fi, Fo HL
Yamazaki02 qcfC1.png
Yamazaki02 qcfC2.png

hcf + Snkb.gif

2/49/10 Fi
Yamazaki02 hcfK.png
Sadomazo - hcf + K
  • Yamazaki sticks out his tongue. If he is hit during this stance, he performs an unblockable counter uppercut (Framedata: 12/12/17, startup and active frames are invincible).
  • hcf + B makes him stay in his pose for less time than his hcf + D. There is no reason to use the hcf + D
  • counters any mid/high normal attack, very few low attacks (such as Iori/Seth's sweep), and almost all special attacks, including DMs and HSDMs. It cannot reverse some special moves such as Maxima's qcb + P (this will get you counterwired). It cannot reverse throws
  • depending on what move is countered, it is possible for the opponent to recover first and roll out the way or counterattack
  • supercancellable and free cancellable out of if the counter activates, though the super will only connect if there was a counterhit
  • free cancellable into
hcf + Snkd.gif 4/73/14 Fi
hcb,f + Punch.gif 0/1/10+25 KD Grab
Yamazaki02 hcbfP.png
Bakudan Pachiki - hcb f + P
  • Instant command grab that does good damage
  • Active frame and 10 frames of recovery can be counterhit.
  • hard knockdown
DMs
qcf + Snka.gif + Snkb.gif + Snkc.gif + Snkd.gif 3/31/85 -
Yamazaki02 qcfABCD.png
Akumu...soshite kyouki - qcf + ABCD
  • Yamazaki runs up to the opponent, takes out his knife and stabs them.
  • Framedata is the run, once in range, the attacks is: 11/9/0.
  • unblockable
  • this move is unstoppable unless he is hit before the flash of the super. It will beat everything on wakeup except possibly throws
  • Yamazaki recovers extremely fast - so fast that if the opponent rolled the knife stab, Yamazaki has more than enough time to combo them on their recovery
  • hard knockdown on the last hit
qcfx2+Snka.gif 4/4*5(12)18/28 KD/-45 HL
Yamazaki02 qcfx2A1.png
Yamazaki02 qcfx2P2.png
Guillotine - qcfx2+P
  • Invincibility: Startup, Upper body invincibility: Active frames.
  • There is a gap before the last hit, because the final hit does not connect on the opponent on the first frame. Block disadvantage if final hit is blocked: -28 (A version), -30 (C version).
  • Yamazaki does an uppercut into the air. He comes down, grabs the opponent by the neck and drags them across the screen
  • the first hit acts as an anti-air. It is possible for the first hit to connect but the remaining hits to miss. If he misses the neck grab, he will not perform the rest of the move and is open to attack
  • hard knockdown on the last hit, giving enough time to set up a variety of mixups on wakeup
Yamazaki02 qcfx2P3.png
qcfx2+Snkc.gif 4/4*5(12)18/30 KD/-47 HL
Yamazaki02 qcfx2C1.png
Yamazaki02 qcfx2P2.png
Yamazaki02 qcfx2P3.png

hcbx2+Punch.gif

0/1/5+34 KD Grab
Yamazaki02 hcbx2P.png
Drill - hcbx2+P
  • Yamazaki performs an instant grab.
  • Can be counterhit during active frame and 5 frames of recovery.
  • as the opponent is on the floor, before Yamazaki has actually begun attacking, you can mash the punch buttons to get different versions of the move to come out. The amount of damage the move does is dependent on how fast you mashed
SDMs
qcfx2+Snka.gif + Snkc.gif 4/4*5(11)15/28 KD/-25 HL
Yamazaki02 qcfx2AC1.png
Yamazaki02 qcfx2AC2.png
Guillotine - qcfx2+AC
  • acts the same as his qcfx2+P DM version but does more damage.
  • Last hit can be ducked under, but it's impossible to actually escape the last hit with anything but a reversal. Therefore disadvantage given is if all hits are blocked.
  • Invincible during startup, upper body invincible during first active period.
Yamazaki02 qcfx2AC3.png
hcbx2+Snka.gif + Snkc.gif 0/1/5+32 KD Grab
Yamazaki02 hcbx2P.png
Drill - hcbx2+AC
  • Instant throw, acts like his hcbx2+P DM version but does more damage
  • Can be counterhit during active frame and 5 frames of recovery.
  • as the opponent is on the floor, before Yamazaki has actually begun attacking, you can mash the punch buttons to get different versions of the move to come out. More mashing results in higher damaging versions of the move
HSDM
hcbx2+Snkb.gif + Snkd.gif 20/1/19 KD Grab
Yamazaki02 HSDM.png
...!! - hcbx2+BD
  • Invincible: frame 8-18.
  • does alot of damage but not comboable

Short Movelist

  • f + A (Overhead if not cancelled into.)


  • qcf + P (A: Negate projectiles.) (C: Reflect projectiles.)


  • dp + P


  • qcb + A/B/C (May charge.) (C: Low (2).)
    • D (Cancel. Only during startup/charge.)


  • hcb f + P (Throw. 0 frame startup.)


  • hcf + K (Counter: non-low.)


  • dp + B (Overhead (2).)


  • dp + D
    • qcb + A/B/C (Same move as qcb + A/B/C. Only on hit/block.)


  • DM qcf + ABCD (Unblockable.)


  • DM qcf qcf + P


  • DM hcb hcb + P (Throw. 0 frame startup.)
    • Mash P (Increase move level from 1 up to 4, which increase its hit/damage. Only on hit.)


  • SDM qcf qcf + AC


  • SDM hcb hcb + AC (Throw. 0 frame startup.)
    • Mash P (Increase move level from 1 up to 4, which increase its hit/damage. Only on hit.)


  • HSDM hcb hcb + BD (Throw.)

Notes

Cancellable moves

  • Close: A, B, C, D (1)
  • Far: -
  • Crouch: A, C, D


  • CD is cancellable into specials and DMs.


  • f + A (1-2) is cancellable only when you cancel into it.

Super cancellable moves

  • dp + P (1)
  • hcf + K (If triggered.)

Free cancellable into moves

  • dp + P
  • dp + B
  • dp + D
  • qcf + P
  • hcf + K

Free cancellable out-of moves

  • f + A
  • qcb + A/B/C
  • dp + P
  • dp + B
  • dp + D
  • qcf + P
  • hcf + K (If triggered.)

Moves with Invincibility

??

Moves with autoguard

(none)

Other Notes

  • cl.B is a low attack.


  • D throw is a backturned hard knockdown

Combos

Basic Combos

  • cr.B, cr.A x 2 > qcb + B {25%}


  • (cl.B x 2) / (cr.B, cr.A) >
    • DM hcb hcb + P > mash P {1 stock}
    • DM qcf qcf + P {1 stock}
    • hcf f + P
    • qcb + B


  • cl.C / cr.C >
    • dp + A (1) >>
      • DM hcb hcb + P > mash P {2 stocks}
      • DM qcf qcf + P {2 stocks}
    • DM hcb hcb + P > mash P {1 stock}
    • DM qcf qcf + P {1 stock}
    • hcf f + P {30%}
    • dp + C {30%}
    • dp + D > qcb + B {25%}
    • f + A > qcb + B/C {30%}


  • dp + D > qcb + B (hold) > D,
    • cr.C > qcb + B {30%}
    • dp + A (1) >> qcf qcf + P {45%} {2 stocks}


  • Counterhit: hcf + K,
    • qcb + A {30%}
    • DM qcf qcf + P {40%} {1 stock}


  • f + A (2) / cl.D (2) >> BC, DM hcb hcb + P / DM qcf qcf + P {2 stocks}

Buffer as: f + A (2) / cl.D (2) >> hcb hcb + BC / qcf qcf + BC

Maxmode

  • cl.C >> BC, run, cl.C >
    • (dp + C (3) >> dp + B (1) >>) X 2 >>
      • dp + A (1) >> (S)DM qcf qcf + P/AC {80%/95%} {100% with jumpin)
    • dp + A (1) >> dp + B (1) >> dp + D > qcb + B (hold) > D, dp + B (1) >> dp + C (2) >> dp + B (1) >> dp + D > qcb + B (hold) > D, dp + A (1) >> DM qcf qcf + P {100%}
    • dp + B (1) >> dp + D > qcb + B (hold) > D, dp + B (1) >> dp + A (1) >> dp + B (1) >> dp + D > qcb + B (hold) > D, dp + B (1) >> dp + D > qcb + B (hold) > D, dp + B, DM qcf + ABCD (on opponent's wakeup) {90%} {100% with jumpin}

Strategies

  • Yamazaki doesn't really build stock too fast, as his main zoning weapon, qcb + P/B, hardly increases his stock bar when used. Since a lot of his gameplay involves landing the qcf + ABCD and the fact that his max combos do huge amounts of damage, it is best to keep him as the second or third character.
  • Yamazaki has great poking normals. His crouch B and crouch A, especially his crouch A, are very good. After poking the opponent a lot with a combination of these pokes, most opponents will probably be tempted to use a jump attack or possibly some special move once they are out of range of the pokes. Thus, you want to mixup your crouch B and crouch A pokes with far A. Far A has very good range (moreso than his crouch A), comes out very fast and stuffs ANY jump attempts the opponent makes, as well as many special moves that the opponent might try after getting poked. qcb + B is probably a better poke when it comes to range and damage as well as mindgames, but it can be punished severely if the opponent predicts you will use it. In addition, qcb + B whiffs against some crouching opponents, so it shouldn't be used as often. Stick to far A's, staying just outside of the range of your opponent's best pokes.
  • To punish anything that isn't right in front of you, use qcb + B. This move can punish moves that are generally deemed to be unpunishable on block, such as Yamazaki's dp + C, Kim's qcb + D and Iori's qcb + A. Punish everything else (such as rush DMs, and other very punishable moves) with Close C combos, since Yamazaki's close C is relatively fast.
  • Always use hcf + K ON REACTION to something the opponent does that is counterable. Do qcb + A immediately after the counter in case it happens to counterhit, as it will combo. If you have good reaction ability, you can hit qcb + A or qcfx2+P on counterhit, although it should be done as early as possible. Not that it is possible for the opponent to evade the counter in some cases, like if the opponent recovered fast enough to be able to roll before Yamazaki's uppercut connects. Some characters can hit Yamazaki with very fast rising moves (such as Iori's dp + C) or invincible moves (such as Whip's qcb hcf + P) right before the uppercut connects, but rarely will this situation occur.
  • cr.C is a fairly solid anti-air, has respectable range and is cancellable. This is a great normal to abuse on the ground as well. A good trick is to cancel it into the qcb + B, then hold and cancel, greatly reducing the recovery time. In addition, if the opponent happens to roll while you are doing the crouch C, you can use the qcb + B trick while whiffing the crouch C, to prevent the opponent from punishing you. The qcb + B trick is also good if you did the crouch C expecting the opponent to jump, and he didn't.
  • Yamazaki has many options when the opponent is waking up. The most guaranteed option for damage is to use his qcf + ABCD DM. The move is unstoppable if it is timed as a meaty attack just as they get up. It will beat out all fast reversal moves on wakeup except possibly throws. The only option is for the opponent to roll the first frame of their wakeup. If the opponent does happen to roll, Yamazaki recovers first from the whiffed DM and can immediately throw (using the normal f + C/D throw, hcb f + P or hcbx2+P).

His hop D is a great high priority jump attack since it hits very low to the ground and the fact that it is so vertical allows him to land right above the opponent, evading or outprioritizing anti-air attempts assuming they were able to get it off. If they blocked it, you can either do the qcf + ABCD DM, a series of crouch B, crouch A and far A pokes, or a close C immediately cancelled with qcb + BD. Jumping backwards and hitting D the moment you leave the ground, acts as an instant overhead. This can be used either on wakeup, or immediately after landing from a forward hop D.

dp + D cancelled into qcb + BD is yet another option. Due to the extremely fast recovery of this move, you can follow this up with a run up throw (hcb f + P or hcbx2+P) or a crouch C, qcb + B(cancelled with D if the crouch C was blocked).

His Close B hits low and is cancellable. If the opponent gets hit and was crouching, cancel it to hcb f + P for a combo and a hard knockdown. If the opponent was not crouching, then you should do a crouch AA, qcb + B combo. If the close B is blocked, you should either do a series of crouch A's and far A's or cancel to qcf + ABCD or cancel to f + A, qcb + BD. It is possible for the opponent to get hit by the f + A even if they blocked the close B. If the f + A does hit, then cancel to qcb + C. You can also try cancelling into the f + A late, such that it keeps it's overhead property. If that overhead hits, you can go for a BC combo.
Game Navigation

General
Controls
Notation
HUD
Glossary
System
FAQ
Characters
Andy
Angel
Athena
Benimaru
Billy Kane
Blue Mary
Chang
Chin
Choi
Chris
Clark
Daimon
Iori
Joe
K'
K9999
Kensou
Kim
Kula
Kyo
Leona
Mai
Mature
Maxima
May Lee
Ralf
Ramon
Robert
Ryo
Seth
Shermie
Takuma
Terry
Vanessa
Vice
Whip
Yamazaki
Yashiro
Yuri
Secret/Orochi Characters
Kusanagi
Orochi Chris
Orochi Shermie
Orochi Yashiro