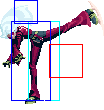
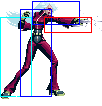
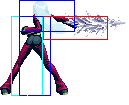
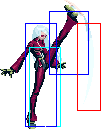
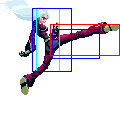
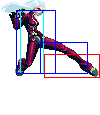
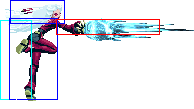
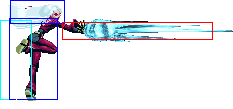
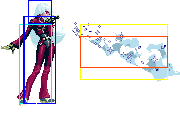
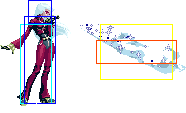
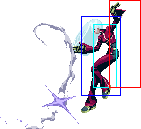
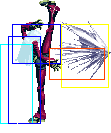
General Info
Sometimes K' likes to dress up. It doesn't make him less of a man.The stepsister/fangirl/lover of Kai Dash
Crouch height: Low
Jump: 4/34/1
Hop: 4/25/1
Dash: 3/10~∞/3
Backdash: 3/14/3
Wakeup: 19 frames
Recovery roll: 25 frames
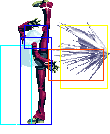
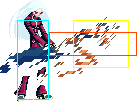
| Stand | Crouch | Jump | Grab | Run |
|---|---|---|---|---|

|

|

|
Colors
Movelist
| Frames | Advantage | Cancel | Block | Hitbox | Notes | ||||
|---|---|---|---|---|---|---|---|---|---|
| Standing Close | |||||||||
| 5/4/8 | 0/-2 | R,C,S,Su | HL | ||||||
| 6/3/12 | -3/-5 | R,C,S,Su | HL | ||||||
| 3/3(9)6/21 | -7/-9 | C,S,Su | HL | ||||||
| 6/2(3)4/20 | -4/-6 | C,S,Su | HL | First hit does 27 frames of hitstun and no knockback. | |||||
| Standing Far | |||||||||
| 5/4/13 | -5/-7 | R,C,S,Su | HL | ||||||
| 3/6/9 | -3/-5 | R,C,S,Su | HL | ||||||
| 13/7/32 | -25/-27 | C,S,Su | HL | ||||||
| 8/3(11)3/16 | +1/-1 | HL | |||||||
| 11/6/39 | KD/-23 | S,Su | HL | ||||||
| Crouching | |||||||||
| 6/4/11 | -3/-5 | R,C,S,Su | HL | ||||||
| 4/3/9 | 0/-2 | R,C,S,Su | L | ||||||
| 4/11/24 | -15/-17 | C,S,Su | HL | ||||||
| 7/7/27 | KD/-15 | C,S,Su | L | ||||||
| Jump | |||||||||
| 6/7/- | -/- | H | |||||||
| 8/7/- | -/- | H | |||||||
| 9/7/- | -/- | H | |||||||
| 6/5/- | -/- | H | |||||||
| 16/6/- | KD/- | HL | |||||||
| Neutral Jump | |||||||||
| 6/7/- | -/- | H | |||||||
| 8/7/- | -/- | H | |||||||
| 9/7/- | -/- | H | |||||||
| 7/5/- | -/- | H | |||||||
| Hop | |||||||||
| 3/7/- | -/- | H | |||||||
| 6/5/- | -/- | H | |||||||
| 6/4/- | -/- | H | |||||||
| 15/5/- | -/- | H | |||||||
| Command Normals | |||||||||
| f + |
17/21/22 | KD/-25 | Su | HL | Hard knockdown, counterwire | ||||
| f + |
12/21/22 | -23/-25 | S,Su | HL | |||||
| df + |
9/12/18 | KD/-12 | L | Will go under some fireballs | |||||
| df + |
17/2(2)2(4)2(4)4/22 | KD/-8 | HL | Hard knockdown, counterwire | |||||
| Special Moves | |||||||||
| qcf + |
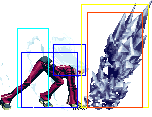
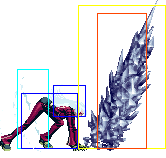
18/-/7+18 | KD/+4 | HL | Diamond Breath - qcf + P
| |||||
| qcf + |
35/-/10+9 | +27/+10 | HL | ||||||
| dp + |
5/2[6]6/14+23 | KD/-33 | HL | Crow Bites - dp + P
| |||||
| dp + |
2/2(8)9/32+27 | KD/-50 | HL | ||||||
| qcb + |
7/2+2+4/21 | KD/-11 | HL | 3. Counter Shell - qcb + P
| |||||
| qcb + (reflect) |
9/ - /28 | KD/-11 | HL | ||||||
| qcb + |
13/5/7+12 | -5/-7 | HL | Ray Spin - qcb + K
| |||||
| qcb + |
14/3(13)3/2+15 | KD/-2 | HL | ||||||
| > f + |
9/2(1)-/34 | KD/-5 | HL | Stand - f + B (after qcb + K)
| |||||
| > f + |
7/12/23 | KD/-17 | L | Sit - f + D (after qcb + K)
| |||||
| DM | |||||||||
| qcfx2+ |
1+10/ - /56 | KD/- | HL | Diamond Edge - qcfx2+P
| |||||
| SDMs | |||||||||
| hcbx2+ |
4+10/ - /45 | KD/-22 | HL | Freeze Execution - hcbx2+AC
| |||||
| hcfx2+ |
1+9/ - /26 | -/- | Grab | (tiger-kneed) |
La * Cachora - hcfx2+BD(air)
| ||||
| HSDM | |||||||||
| 1+14/9/22 | KD/-13 | H | Freeze Completion - AC BD ABC
| ||||||
Short Movelist
- f + A (Counterwire if not cancelled into.)
- df + B (Low.)
- df + C (Counterwire (3).)
- qcf + P
- dp + P
- qcb + P (Reflect projectiles. Counterwire.)
- qcb + K
- f + B
- f + D (Low.)
- DM qcf qcf + P
- SDM hcb hcb + AC (Hit anywhere on the screen (2nd part).)
- SDM air hcf hcf + BD (Throw. Removes one stock from the opponent.)
- HSDM AC BD ABC (Overhead.)
Notes
Cancellable moves
- Close: A, B, C (1-2), D (2)
- Far: A, B, C
- Crouch: A, B, C, D
- f + A is cancellable to DMs, and can be cancelled into specials if cancelled into.
Super cancellable moves
- qcb + K > f + B (1)
- qcb + K > f + D
- dp + C (1)
Free cancellable into moves
??
Free cancellable out-of moves
??
Moves with Invincibility
??
Moves with autoguard
(none)
Other Notes
- C throw is mashable.
- st.D does more hit stun than a regular hard attack.
Combos
Kula's cl.D (1) has extra hitstun, allowing Kula to Max Cancel it and follow with a hyperhop C into practically any combo listed. It's not practical but technically possible, though I didn't want to list it as a possible starter since it will make things messy.
Basic Combos
- (cl.C (1) > f + A) / cl.C (2) >
- HSDM AC BD ABC {Max Mode + 1 stock}
- SDM hcb hcb + AC {Max Mode + 1 stock}
- DM qcf qcf + P (Far from the corner.) {1 stock}
- qcb + B > f + D,
- dp + C {30-32%}
- qcb + P {25-27%}
- dp + A
- qcf + A,
- qcb + B, (Corner.)
- > f + B, qcb + D, cr.C (Timing required.) {45%}
- dp + C {34%}
- qcb + C (Timing required. Must delay the qcb + B) {32%}
- qcb + B, (Corner.)
- dp + C (Standing.)
- dp + A
- df + B (Only after cl.C (2))
- df + C (Only after cl.C (2))
About (cl.C (1) > f + A) / cl.C (2): cl.C (1) > f + A deals more damage (~+??%), but is unsafe and you need to be closer. At point blank and in the corner you may use cl.C (2) > f + A as started (~+??% than cl.C (2)).
- cr.B x 2, st.B >
- dp + C (Standing.) {30%}
- dp + C (1) >> DM qcf qcf + P (Far from the corner.) {52%} {2 stocks}
- df + B {19%}
- Counterhit: qcb + C,
- superjump CD {24%}
- run qcb + B, dp + C {32%}
Max Mode
- (cl.C (1) > f + A) / cl.C (2) >> BC, run, cl.C (1) >
- f + A >
- SDM hcb hcb + AC {55-70%} {3 stocks}
- HSDM AC BD ABC {75%} {3 stocks}
- dp + C (1) > qcf + A, HSDM AC BD ABC (Corner) {83%} {3 stocks}
- dp + C (1) >> qcb + D > f + B, SDM hcb hcb + AC (Standing Yamazaki & outside corner.) {70%} {3 stocks}
- df + C (2) >> dp + C (1) >> qcb + B > f + D, dp + C (1) >> qcb + C {50%} {2 stocks}
- f + A >
Combos Notes
- (cl.C (1) > f + A) / cl.C (2) > qcb + B > f + D, dp + C {30-32%} {0 stocks}
This is Kula's most basic combo, that does decent damage for no meter, as well as building about 2/3 of a stock. The reason why I've listed two different starters is that while cl.C (1) > f + A does more damage than cl.C (2), you can't try to confirm on the f + A because that move is punishable if not cancelled out of. If the combo is started from a jump attack, then it's not hard to hit confirm into the f + A.
- (cl.C (1) > f + A) / cl.C (2) > qcb + B > f + D, qcb + P {25-27%} {0 stocks}
Very similar to the combo above except ending with qcb + P. It does slightly less damage but since qcb + P is a hard knockdown, it allows Kula to setup some meaty traps on wakeup. They are explained in the strategy section.
- cr.B x 2, st.B > dp + C {30%} {0 stocks}
This is a decent combo from her weak attack pokes but has one problem - it can be punished on hit by a number of characters. The second hit of dp + C also whiffs against a number of crouching characters. Refer to the strategy section for more information about this.
- cr.B x 2, st.B > df + B {19%} {0 stocks}
This is a safe but less damaging version of the above combo. Use this one if you don't have meter to supercancel the dp + C and the opponent can punish it on hit, or if the opponent's low crouch will make the second hit of dp + C whiff.
- cr.B x 2, st.B > dp + C (1) >> DM qcf qcf + P {52%} {2 stocks}
This is one of Kula's best combos because it allows her to do big damage off of her low attacks. It's a combo that must be mastered as a Kula player. The supercancel after dp + C must be done very quick, since it comes out fast and has very few cancel frames. Also keep in mind that this combo shouldn't be used in the corner because the DM will do only one hit for small damage, as opposed to the usual 4 hits from midscreen.
- (cl.C (1) > f + A) / cl.C (2) >> BC, run, cl.C (1) > f + A > SDM hcb hcb + AC {55-70%} {3 stocks}
This is your most damaging midscreen combo. The reason the damage varies so much is that the SDM does different damage depending on where Kula and the opponent are on the screen. If Kula is in the corner and the opponent is not, this combo will do 70%.
- (cl.C (1) > f + A) / cl.C (2) >> BC, run, cl.C (1) > f + A > HSDM AC BD ABC {75%} {3 stocks}
This is similar to the above combo but does more damage for the same amount of stock. If you have a chance for the SDM combo, but have low enough health to execute the HSDM, there's no reason to use that combo over this one. Just keep in mind that Kula needs to be closer to the opponent after hitting the f + A for the HSDM to combo after it, making it a harder (but not impossible) combo to do off a jump attack.
- (cl.C (1) > f + A) / cl.C (2) >> BC, run, cl.C (1) > df + C (2) >> dp + C (1) >> qcb + B > f + D, dp + C (1) >> qcb + C {50%} {2 stocks}
This max combo does more damage than her no stock combos but generally isn't worth unless they will barely die from it. Make sure to cancel the df + C after the second hit since thet third hit knocks down and can't be juggled from.
- Standing Yamazaki & outside corner: (cl.C (1) > f + A) / cl.C (2) >> BC, run, cl.C (1) > f + A > dp + C (1) >> qcb + D > f + B, SDM hcb hcb + AC {70%} {3 stocks}
This combo only works on Yamazaki because Yamazaki has a large hitstun hitbox in the air, and it shouldn't be done in the corner, though it will still work if Yamazaki is taken to the corner as long as Kula isn't close to the corner as well. The timing is not strict, just do the SDM hcb hcb + AC immediately after Kula has recovered from her f + B.
- Counterhit: qcb + C, superjump CD {24%} {0 stock}
Superjump CD is a basic followup after a counterwire qcb + C. You can land and do qcf + C which will connect as a meaty if they recovery roll.
- Counterhit: qcb + C, run qcb + B, dp + C {32%} {0 stock}
This is a slightly more situational combo that does a bit more damage but doesn't setup anything afterwards. If Kula is too far from the edge of the screen that the opponent bounces off of, then she won't be able to run up and land qcb + B in time. At many distances though, it's possible.
Corner Combos Notes
- Point blank: cl.C (2) > f + A > qcf + A, qcb + B > f + B, qcb + D, cr.C {45%} {0 stock}
A very damaging combo that requires no stock and builds one full stock. Kula must be very close to the opponent when she starts this combo, and it can't be started from a jump attack either, otherwise the f + A will whiff. If a jump attack is used, you will have to resort to a slightly less damaging version of the combo that uses only one hit of close C.
- (cl.C (1) > f + A) / cl.C (2) > qcf + A, qcb + B, dp + C {34%} {0 stocks}
This is the combo to use if Kula is not as close to the opponent as possible, or if a jump attack was used.
- (cl.C (1) > f + A) / cl.C (2) > qcf + A, delayed qcb + B > f + B, qcb + C {32%} {0 stocks}
This is a harder version of the combo above that will result in roughly the same damage but with a hard knockdown. If the qcb + B is not delayed, then the f + B will whiff.
- (cl.C (1) > f + A) / cl.C (2) >> BC, run, cl.C (1) > f + A > dp + C (1) > qcf + A, HSDM AC BD ABC {83%} {3 stocks}
This is one of Kula's most damaging combos. Inputting qcf + A after dp + C would give you a supercancel, so instead you can input the shortcut dp + C, A. After the qcf + A, the HSDM must be immediately executed or it will whiff.
Strategies
Overview
Kula is a fairly strong character that in most cases, can take control of a match very well with her great pokes like far B. She builds meter very well and has damaging combos that require no meter, making her an ideal character to put first on a team. Her combos won't exceed 4 stocks, except in some extreme situations which are uncommon and very hard to pull off anyways. She has a number of relatively bad matchups, mainly against grapplers.
| Strengths | Weaknesses |
|---|---|
|
|
Offense and Pressure
Kula has a number of useful jump attacks that work for air to ground purposes. Her jump C and jump D have almost the same purpose except that jump D has a longer vertical hitbox, allowing it to hit from higher up (although she won't be able to combo afterwards). Jump CD also works for both air to ground and air to air, though it comes out slower and some characters can crouch underneath it. Her crouch B is one of the best low pokes in the game, and is actually faster than Iori's. There is one problem however, that makes them not as powerful as they could have been - she has a df + B slide. This means it isn't possible run while holding downforward, then hit df + B to do an instant crouch B. Instead, you will have to pause your run (which takes a few frames) to crouch, then do the crouch B. This limits her ability to pressure with run forward lows. Technically it is still possible but not as easy or as quick. The poke you're going to be using the most is her far B, which happens to be one of the best pokes in the game for a number of reasons. It comes out fast, has good range with a fairly large hitbox, can be cancelled into and builds a lot of meter. In fact, Kula's weak attacks build more meter than the majority of the cast.
st.B Attack Strings
After the st.B, Kula has a number of options:
- slight walk forward, then st.B
The walk forward should only be a few pixels, just enough to put her back into range for the far B connect.
- repeated st.B at that spot
At the spot that the opponent is, pretty much any pokes he does will get stuff by her crouch B. If he jumps from that spot, then depending on the spacing, the far B will either hit them as they are leaving the ground, or they will be able to into the air but Kula will recover way before their jump attack can connect. Some players might decide to roll in, which would be a bad choice since Kula will definitely recover first and can punish them with any combos.
- qcb + B
With qcb + B, you can either cancel the far B into it, or execute it after the far B has recovered. This change in timing, along with inconsistent timings of far B's, will confuse the opponent further. qcb + B is punishable midscreen by some characters, if it's executed too close to the opponent. The ideal spacing to make it safe is to cancel it at the range that you would be at after opponent was hit by or blocked a far B. Otherwise, characters with instant command grabs, as well as very fast normals (Kim close C) will be able to punish it regardless of whether she decides to followup or not. In the corner, it isn't safe to use qcb + B from that range because she will land right in throw range. You'll have to throw it out from even further away, well out of far B range. Far B into qcb + B is not a combo, but there is a slight gap in which if the opponent tries to jump, poke or reversal in between, they will get hit. Hit confirming qcb + B into her f + D is very important. You don't want to do the f + D followup on block since you will be severely punished for it. You also don't want to miss out on opportunities to do damage in case it does hit.
- qcf + A
There is a small gap in between the far B and qcf + A in which if they do anything, they will get hit. Some reversals, such as Kim's B flash kick, can counter it unless spaced so that the tip of her far B connects. Unlike the usage of qcb + B which can be cancelled from far B or just done by itself, it isn't advisable to do qcf + A by itself because the opponent can superjump and counterhit her. They can't really punish it on reaction but they can predict it. If the opponent rolls between the far B and qcf + A, Kula would recover first and be able to throw them, though doing an attack aside from a throw would be risky. qcf + A is more useful in the corner because she can juggle after it for some decent damage.
Other Attack Strings
- Corner: cl.C (2) > f + A > qcf + A
Don't use this string if the opponent has stock, since they can guard roll and punish you. If the opponent tries to jump out after the f + A, or does anything but roll, they will get hit by the qcf + A, which will start the corner juggle. Kula can't be punished if they roll since she recovers first. She can punish a roll with far B hit confirmed into whatever combo, preferably into supercancelled dp + C. The qcf + A can be avoided with no punishment by rolling backwards.
- Corner: cl.C (2) > f + A > qcf + C
Don't use this string if the opponent has stock, for the same reason as the string above. This string should be used less often than the one above because it's more punishable, but can lead to a bigger reward if used right. The general reaction of most players when expecting a qcf + A is to roll forward. In the first string listed above, rolls can be punished though not for much damage unless the opponent has stock. You might even want to purposely not punish their roll after qcf + A, to make them think that it is a decent escape. If they roll expecting a qcf + A, and you do qcf + C instead, it will catch the roll and allow Kula to run forward into a full combo. If they rolled backwards expecting the qcf + A, they will also get hit. The problem is this string can be punished on anticipation in two ways. Opponent can roll forward
- Corner: cl.C (1) > qcf + A > cl.C (1) > qcf + A, ...
Generally speaking, don't use this string if the opponent has stock since they could punish you. You might be able to get away with just one repetition of close C (1), qcf + A since the opponent might not be ready to guard roll the first hit (either that or they might be expecting another string that would require guard rolling later to punish).
The first hit of close C doesn't push Kula back and neither does her qcf + A, so in theory this string can be done infinitely without Kula being pushed back out of range. After the qcf + A, she has a frame advantage, so the actual punish point here is between the cancel from close C to qcf + A and some characters don't have the tools to punish this. I wouldn't recommend continuously repeating this string, so after qcf + A, consider executing some other kind of corner string or jump attack or perhaps no string at all. You can also do a qcb + P after, which can counterwire if they decided to do some non-instant attack afterwards. Beware of grapplers, they can throw between the string easily.
- Jump attack forward, hop back D / hyperhop back D
Kula's jump D is an instant overhead but only if hopping or hyperhopping. It's timing and spacing is also pretty tight, so you can't land the instant overhead after say, a crouch B.
- cr.D > df + B
This string is only effective as a surprise so it should be used very rarely. Kula's main choice for low attacks is her crouch B, to the point where players may forget that her crouch D has more range and also hits low. The df + B also hits low and will connect at the very tip, making it safe on block.
Options on the opponent's wakeup
Unfortunately, Kula has only one practical move that allows for enough time to setup a mixup before they get up. The rest of her knockdown moves, such as df + B, dp + A, dp + C and qcf + A, all knock the opponent too far or Kula doesn't recover fast enough compared to the opponent. The main thing you're going to be able to do after these moves is to just run forward and get to your preferred spacing, which is usually far B range.
- After qcb + P
- Midscreen, Kula has enough time to run forward and do a jump attack, as well as an empty jump into low. Safe jumping is technically possible but there isn't any reliable way to time it.
- in the corner, Kula has more time to setup an offense. Aside from the options listed for midscreen, she can also backdash and immediately do a qcf + A, which will connect as a meaty. She can also backdash into qcf + C, which won't connect as a meaty but Kula will recover first.
- in the corner, she can also do an instant overhead hopback D. She also has enough time to perform some fakeouts before executing it (such as empty jumps and whiffing low attacks).
- If Kula lands qcb + P such that the opponent is thrown into the corner but Kula is not in the corner herself (though close enough that her qcf + C ice breath would reach them), then she can do it as a meaty. Characters get up at different speeds but in most cases, a whiffing stand CD cancelled into qcf + C, will make it hit on top of them when they get up.
- qcb + P (counterwire)
- after the counterwire, you can do an immediate superjump CD, then a qcf + C upon landing. If they recovery roll, then the qcf + C will connect as a meaty. If that hits, you can combo after it with a superjump D. This setup should be used rarely, so that it's more of a surprise when you do a meaty qcf + C on them after jump CD.
Combo Resets
Kula has a number of combo resets, where she can either run under afterwards or do a meaty qcf + C.
- Opponent in corner & Kula far from the corner: ... qcb + K > f + D, cl.C (1) > qcf + C
Technically this setup works midscreen but if it hits, Kula is too far away to followup. It doesn't work if Kula and the opponent are both in the corner since the qcf + C whiffs. The best use is when the opponent is in the corner and Kula isn't, so when the qcf + C hits, she can followup with a full combo. Also, if it's blocked, Kula will be close enough to take advantage of the blockstun.
- Corner: ... qcf + A, st.B, qcf + C
If qcf + A connects, you can combo a far B and cancel to qcf + C, in which it will connect as a meaty. This setup is especially useful if your qcf + A connected but you weren't ready to input the followup combo. Far B is fast and easy connect after qcf + A.
- Midscreen: ... qcb + K > f + D, cr.C >> BC, run underneath, cl.C ...
This is a nice trick that is surprisingly hardly ever used in matches. In most cases, if you use it rarely, the opponent will be caught off guard by it. The run after the BC should be done immediately, otherwise you won't make it to the other side. From there, you can hit confirm into either cl.C (2) > SDM hcb hcb + AC or cl.C (2) > dp + C (1) >> qcb + B > f + D >> dp + C (1) > qcb + P.
Anti-airing and Defense
Kula has a number of anti-airs moves that cover a variety of different situations.
- If the opponent is coming down in front of you, you can counter them with her dp + C. They must be in front of her and not say, directly above her, because her dp + C travels diagonally upwards with a lot of horizontal range. Her dp + C can also trade, sending the opponent vertically into the air. Kula can recover first and combo afterwards (usually with jump CD).
- If the opponent is jumping in such a way that they will land directly over you and possibly cross up, then crouch C will deal with it. It's preferable to input it as early as you can, because her hair has a decent vertical hitbox and stays out for a while.
- qcb + P is an interesting anti-air that will come in handy if the opponent is hopping/hyper hopping from close range. In most cases it will counterwire the opponent, allowing Kula to followup with a combo.
Options on your own wakeup
- Kula's qcb + B is a very good reversal because it actually has upperbody and lowerbody startup invincibility. The upperbody invincibility doesn't last very long, but the lowerbody invincibility remains until she lands.
- If you predict a low attack, then qcb + B is the ideal counter. Keep in mind though that some characters have crouch B's that go underneath her qcb + B, such as K' and Andy.
- Against mid attacks, qcb + B can still be an option but it depends on how meaty the normal is and when it was done. If for example, Clark does a close C when Kula gets up, qcb + B will go through the first hit but the later frames of the second hit will hit her out of it.
- Keep in mind that if you mispredict that they will attack, then Kula's qcb + B can be punished by some characters regardless of whether she follows up or not (such as character's with one frame grabs).
- dp + A can be used as a slightly faster, more invincibile but riskier reversal move. Just prepare to be comboed hard if it's blocked.
- Don't use dp + C as a reversal unless you are going to supercancel it. Refer to the section below which discusses the risks of using her dp + C (not just as reversals but also in combos).
The risks of Kula's dp + C
Aside from the severe punishment you would receive if her dp + C whiffs or is blocked, if Kula hits a grounded character with a dp + C, the opponent can punish Kula afterwards with certain moves by recovery rolling and doing a reversal. The characters and their moves that can punish her are:
- Clark: hcf + K, (S)DM hcb hcb + P/AC
- Ralf: hcf + K
- Vice: hcb f + P, (S)DM hcb hcb + K/BD
- Daimon: hcb f + P, (S)DM hcb hcb + P/AC
- Mary: HSDM db qcf uf u d + BD
- Yamazaki: hcb f + P, (S)DM hcb hcb + P/AC
- Athena: dp + P
- Orochi Yashiro: hcb f + P, (S)DM hcb hcb + P/AC
- Maxima: hcf + K, (S)DM hcb hcb + K/BF
- Shermie: hcf + P, (S)DM hcb hcb + P/AC, HSDM qcf qcf + BD
- Ramon: hcf + P, (S)DM hcb hcb + P/AC
- Iori: cl.C (if by the corner), dp + C
- Kim: cl.C (if by the corner)
- Kyo: cl.C (if by the corner), dp + A, dp + C (only one hit, bad idea), df + D
- Kula: dp + C
- K': cr.A, dp + A (second hit only)
- Chang: hcb f + P, cl.B, cr.A
- Whip: forward + cl.B (if you just do B from that spot midscreen, you will get st.B)
- Ryo: cr.C (close enough that cancelling to DM qcf hcb + P will combo)
This means that not only do you have to avoid using combos that end in dp + C while opponent is grounded, but you can't reversal with it unless you're going to supercancel into DM qcf qcf + P. Keep in mind that these counters mentioned above only work when the opponent was hit while grounded - if you do a juggle combo into dp + C, or use it for anti-air, then she is safe.
In addition, there are many characters in which, if dp + C hits them while they are crouching, the first hit will connect (not knocking them down) and the second hit will whiff. The crouching characters in which both hits connect are:
Maxima, Whip, Robert, Takuma, Daimon, Yamazaki, Billy, Chang, Seth, Ramon
This means that not only do you have to make sure that the opponent isn't crouching when you are going to do the combo, but also if the opponent is going to use a low attack on your wakeup when you decide to reversal. Luckily, Kula has a useful reversal move, qcb + B, that's invincible to low attacks on startup.
Players and videos to check out
Japanese player RF's performance at Evo2005 is one that everyone should check out if they are thinking of picking up Kula. His calmness, perfect spacing of pokes, execution and overall awareness is exactly what is needed to be a good Kula player. The video is here:


