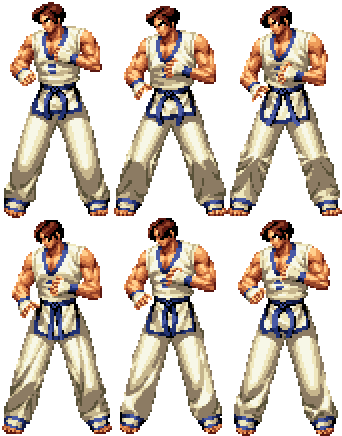
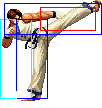
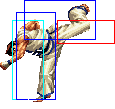
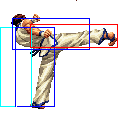
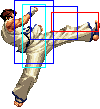
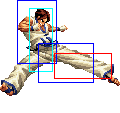
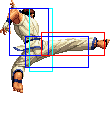
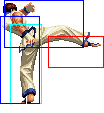
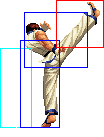
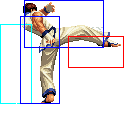
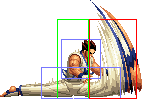
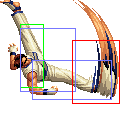
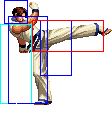
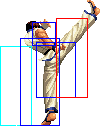
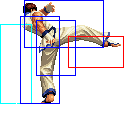
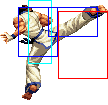
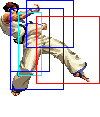
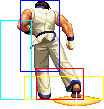
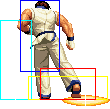
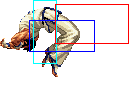
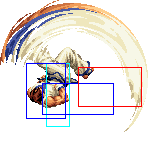
General Info
Crouch height: Low
Jump: 4/35/1
Hop: 4/26/1
Dash: 3/10~∞/3
Backdash: 3/19/3
Wakeup: 21 frames
Recovery roll: 28 frames
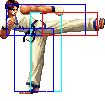
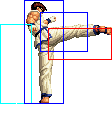
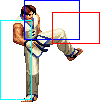
| Stand | Crouch | Jump | Grab | Run |
|---|---|---|---|---|

|

|

|
|
Colors

|

|

|

|
Movelist
Short Movelist
- f + B (Overhead (2) if not cancelled into.)
- qcb + P
- uf + K
- d + K (Overhead.)
- qcb + P (Properties are based on the button used in the first input.)
- qcb + P (Properties are based on the button used in the first input.) (1st input A: Overhead (2).)
- uf + K
- qcb + K
- (d) u + K
- d + D (Only after D version. Overhead.)
- d d + K (Low. Negates projectiles.)
- air qcf + K
- d + K (Only during bounce after hit/block.)
- DM qcf qcf + K
- DM qcb db f + K
- SDM air qcb db f + BD
- HSDM qcb db f + ABCD (Throw. 0 frame startup.)
Notes
Cancellable moves
- Close: A, B, C (2), D (1-2)
- Far: -
- Crouch: A, C, D
- Jump: A
- f + B (2) is cancellable only when you cancel into it.
Super cancellable moves
- qcb + B
- (d) u + D (1)
- d d + K
- qcb + A > qcb + P > qcb + P (2)
- qcb + C > qcb + P > qcb + P (2)
- qcb + P > uf + K
Free cancellable into moves
??
Free cancellable out-of moves
??
Moves with Invincibility
??
Moves with autoguard
(none)
Other Notes
- C throw is a backturned hard knockdown. D throw is a backturned soft knockdown.
Combos
Kim has many many possible combos and it's difficult to list them all. In addition to the jump attack being option, you should also keep in mind that in place of close C, you can substitute crouch B, crouch A as well (especially in the max combos if the opponent has blocked before the activation and you want to do a low mixup into a max cancel combo. Also note that you can do a meaty close D (just the second hit) before the majority of the combos listed here.
Basic Combos
- cl.C (2) >
- HSDM qcb db f + ABCD {Max Mode + 1 stock}
- DM qcf qcf + D, (Close.) {1 stock}
- DM qcb db f + K [53%] {+1 stock}
- (d) u + D > d + D (Timing required.) {48%}
- (d) u + B [37%]
- j.CD > air qcf + B (Miss, it's just to build meter.) [37%]
- (d) u + D (1) >> DM qcf qcf + D (Timing required.) {+2 stocks}
- DM qcb db f + K {72%} {+1 stock}
- (d) u + D > d + D (Timing required.) {70%}
- ...
- BC, SDM air qcb db f + BD (Timing Required.) {+2 stocks}
- BC, qcb + C x 3 >> SDM qcb db f + BD (Corner. Timing Required. Except against Yamazaki, must delay the last qcb + C.) {+3 stocks}
- DM qcb db f + K [39%] {1 stock}
- qcb + C > uf + D > d + D (Close.) [33%]
- qcb + D {20%}
- qcb + B >>
- DM qcb db f + K {50%} {2 stocks}
- DM qcf qcf + D, (Point blank.) {2 stocks}
- DM qcb db f + K {+1 stock}
- (d) u + D > d + D (Timing required.) {60%}
- ...
- cr.B, cr.A >
- HSDM qcb db f + ABCD {Max Mode + 1 stock}
- DM qcb db f + K (Point blank.) {1 stock}
- DM qcf qcf + D, ... (Close.)
- qcb + C > uf + D > d + D [29%]
- (d) u + B
- f + B (2) >> BC, DM qcb db f + K / (DM qcf qcf + K, ...) {2+ stocks}
Buffer as: f + B (2) >> qcb db f + BC / (qcf qcf + BC, ...)
Max Mode
- cl.C (2) / f + B (2) >> run, {2 stocks}
- cl.C (2) >
- DM qcb db f + K {40%}
- HSDM qcb db f + ABCD {55%} {+1 stock}
- DM qcf qcf + D,
- DM qcb db f + K {55%} {+1 stock}
- (d) u + D > d + D (Timing required.) {53%}
- ...
- qcb + C x 2 >>
- qcb + D >> (d) u + D > d + D {45%}
- qcb + B >> DM qcf qcf + D, (Corner) {+1 stock}
- DM qcb db f + K {+1 stock}
- (d) u + D > d + D (Timing required.)
- (d) u + D (1) >> DM qcf qcf + D, (d) u + D > d + D (Timing required.) {85-90%} {+2 stocks}
- ...
- qcb + C x 3 >> SDM air qcb db f + BD {70-75%} {+2 stocks}
- cl.C (1) > qcb + A x 3 (3) >> qcb + B >>
- DM qcf qcf + D, {+1 stock}
- DM qcb db f + K {78%} {+1 stock}
- (d) u + D > d + D (Timing required.) {76%}
- ...
- SDM air qcb db f + BD (Glitch combo, must input SDM as qcb db f + ABCD then D one frame after.) {70-75%} {+2 stocks}
- DM qcf qcf + D, {+1 stock}
- cl.C (2) >
Combos Notes
- cl.C (2) > qcb + C > uf + D > d + D [33%] {0 stocks}
Kim's most important combo, for a few reasons. It does good damage for a b&b, it does a hard knockdown allowing for a very good mixup after and the combo starts from cl.C, which is by far his best normal due to it's speed and priority. Note that if the cl.C does not hit close enough, then the uf + D part of the combo will miss and you will likely get punished.
- cr.B, cr.A > qcb + C > uf + D > d + D [29%] {0 stocks}
Another very important combo, useful for anti-airing people that jump in with horizontal attacks, as well as high/low mixups and dash up low attacks.
- cl.C (2) > DM qcf qcf + D,
- DM qcb db f + K [53%] {2 Stocks}
- (d) u + D > d + D {48%} {1 stock}
- (d) u + B [37%] {1 stock}
- j.CD > air qcf + B (Miss, it's just to build meter.) [37%] {1 stock}
It might seem pointless to use the DM qcb hcf + K as the D flash kick ((d) u + D > d + D) and the DM end in a hard knockdown and the DM only does 5% more damage. Note that hitting the D flash kick is much harder (requires it to be done when opponent is fairly low to the ground) and depending on how far the DM qcf qcf + D connected, you might not be in range for that D flash kick. Use the j.CD (cancelled into air qcf + B for meter) or a B flash kick in case you are out of range for the D flash kick and either don't have meter or want to save the meter.
- cl.C (2) > qcb + D {20%} {0 stocks}
Some things can be punished with close C but Kim can't get close enough to fully combo the qcb + C > uf + K > d + K chains. In that case, use qcb + D for less damage.
- cl.C (2) > DM qcb db f + K [39%] {1 stock}
Use this combo in the same situation as you would use the combo above with qcb + D, except this one does much more damage. It's very important to learn to hit confirm this one, as it's very useful for run up close C pressure.
- cr.B, cr.A > DM qcf qcf + D,
- DM qcb db f + K {50%} {2 Stocks}
- (d) u + D > d + D {48%} {1 stock}
This combo gives good damage off of a low B requires some practice to get down. To make it easier to input the d + B, d + A > qcf qcf + D part, you can input the shortcut d + B, qcf d + A, qcf + D.
- cl.C (2) / f + B (2) >> run, cl.C (2) > DM qcf qcf + D,
- DM qcb db f + K {55%} {3 Stocks}
- (d) u + D > d + D {53%} {2 stock}
This is a high damage combo that takes up 2-3 stocks. Use it when you are fairly close to the opponent when the f + B connects, giving enough time to run forward such that DM qcf qcd + D will be in range after hitting close C.
- cl.C (2) / f + B (2) >> run, cl.C (2) >
- DM qcb db f + K {40%} {2 stocks}
- HSDM qcb db f + ABCD {55%} {3 stocks}
Use this combo if your f + B hit from far away, since you won't be able to run in close enough that your DM qcf qcf + D super will connect after a close C.
- cl.C (2) > qcb + B >> DM qcb db f + K {50%} {2 stocks}
Use this combo only your close C doesn't hit close enough for a DM qcf qcf + D super to combo after it, and that the extra damage on the qcb + B is required to kill the opponent (or some other circumstances where the extra damage would be worth the extra stock wasted in supercancelling).
- Point blank: cl.C (2) > qcb + B >> DM qcf qcf + D, (d) u + D > d + D {60%} {2 stocks}
This is mainly a punish combo, or off a crossup since if Kim is not right in front of the opponent, then either the supercancelled DM or the D flash kick will whiff.
- cl.C (2) / f + B (2) >> BC, run, cl.C (2) > qcb + C x 2 >> qcb + D >> (d) u + D > d + D {45%} {2 stocks}
This is a basic max combo that does not end with a DM. It does a bit less damage than other two stock combos but has the advantage of Kim staying in maxmode and having the potential to combo off his f + B afterwards.
- cl.C (2) / f + B (2) >> BC, run, cl.C (1) > qcb + A x 3 (3) >> qcb + B >> DM qcf qcf + D,
- DM qcb db f + K {78%} {4 Stocks}
- (d) u + D > d + D {76%} {3 stock}
This is probably Kim's best practical midscreen combo. Close C must be cancelled after the first hit, or else the rest of the third hit of qcb + A x 3 won't connect. qcb + A x 3 must also be cancelled on the third hit and not the fourth, otherwise the qcb + B won't connect.
- cl.C (2) / f + B (2) >> BC, run, cl.C (1) > qcb + C x 3 >> SDM air qcb db f + BD {70-75%} {4 stocks}
In terms of damage, amount of meter used and difficulty, there is no reason to use this combo over some of the others listed above.
- cl.C >> DM qcf qcf +D, (d) u + D (1) >> DM qcf qcf + D
- DM qcb db f + K {72%} {4 Stocks}
- (d) u + D > d + D {70%} {3 stock}
This combo will only fully connect if the close C was comboed into from very close range. To supercancel his D flash kick into qcf qcf + K, you can use the shortcut (d) qcf uf + D, qcf + D. This also makes Kim walk forward a slight bit before executing the flash kick, which is also necessary for this combo to work.
- cl.C (2) / f + B (2) >> BC, run, cl.C (1) qcb + A x 3 (3) >> qcb + B >> SDM air qcb db f + BD {70-75%} {4 stocks}
Input SDM as qcb db f + ABCD then D one frame after. This is a glitched combo that is not easy to do and for flash purposes only.
- f + B (2) >> BC, DM qcb db f + K / (DM qcf qcf + K, ...) {2+ stocks}
Buffer as: f + B (2) >> qcb db f + BC / (qcf qcf + BC, ...)
- cl.C (2) > DM qcf qcf + D, BC, SDM air qcb db f + BD {3 stocks}
Corner Combos Notes
- cl.C (2) / f + B (2) >> BC, run, cl.C (2) > qcb + C x 2 >> qcb + B >> DM qcf qcf + D,
- DM qcb db f + K {4 stocks}
- (d) u + D > d + D {3 stocks}
A pretty good corner max combo that does very good damage. Not difficult to perform and is very practical.
- cl.C (2) / f + B (2) >> BC, run, cl.C (2) > qcb + C x 2 >> qcb + B >> DM qcf qcf + D, (d) u + D (1) >> DM qcf qcf + D, (d) u + D > d + D {85-90%} {5 stocks}
This combo is actually not that difficult to do and if you include the jump attack, it will do about 90-100% damage. Use this if it's round 5, otherwise you might want to do a slightly less damaging combo to save your meter for the next round.
- cl.C (2) > qcb + B >> DM qcf qcf + D, BC, qcb + C x 3 >> SDM qcb db f + BD {95%} (5 stocks)
Against Yamazaki, this combo works easily. Against others, it will only work if the third qcb + C is delayed.
- cl.C (2) > DM qcf qcf + D,
- ((d) u + D (1) >> DM qcf qcf + D) x 2,
- (d) u + D > d + D {85%} {5 stocks}
- ((d) u + D (1) >> DM qcf qcf + D) x 2,
There are better cost efficient combos to use so use this one just for flash.
Strategies
Overview
Kim is definitely one of the best characters in the game, and I'd rate him on the highest tier alongside Athena, Billy and Choi. He is very offensively oriented, and requires some decent execution ability to be able to execute most of his combos. To fully master Kim's stomp glitch pressure, the player will need very good execution and lots of practice.
Kim works well in any order - first, second or third. If he has no meter (or one stock), he can utilize the stomp glitch which makes his rushdown even more dangerous. In addition, he can make full use of some strings when the opponent has no stock. As a character with stock, he can do huge damage off of almost everything, including his f + B overhead, which is why he is a great character wherever he is placed on the team.
| Strengths | Weaknesses |
|---|---|
|
|
Pressuring
The Kick Chains - Kim's most important attack string
One of the first things any Kim player needs to learn how to execute and use the close C, qcb + C, uf + K, d + K combo/attack string. On block, it causes a lot of damage on the guardcrush bar, effectively guard crushing in 3-4 repetitions. The string itself, when not delayed, is safe against many characters that don't have very fast normals or one frame grabs, but by delaying uf + K and d + K hits in the string, you can reduce the recovery of the final hit and push Kim back enough to be out of range of those punishes.
The only main disadvantage to delaying the uf + K and d + K is that it gives the opponent a window to pull out a fast reversal attack in between. At the same time though, delaying the moves results in mindgames. You can decide to do close C, qcb + C, then wait a fair bit, making the opponent think you might not even followup, or to bait them into doing one.
Also keep in mind that if the opponent has stock, then they can punish the string if they guard roll the qcb + C and you continue by doing uf + K. If they have meter, you should stop after the close C or the qcb + C and try to bait out a guard roll, in which you can do a meaty close C on top of them when they come out of the guard roll or get away if they are using a grappler.
If a guard crush occurs on the last hit of the chain, the d + D followup, then it is possible to hit them with a close C combo before they can recover.
Other Tools
A great tool for Kim to get into range where he can start/continue pressuring, is his hyper hop C. The hitbox is very wide, covering grounded opponents as well as opponents trying to jump at you or away from you. It's very difficult to deal with. To best make use of this, Kim should do it early in the jump since the move itself has some startup delay.
The other great pressuring tool is his run up close C. It has a 2 frame startup and a large activation range (meaning that Kim has to be further than normal in order for the far C to come out instead of close C). The run up is a useful frame trap after they have blocked a poke such as crouch B, crouch A or far A.
Kim's f + B overhead is a big threat for a number of reasons. His pressure strings involve jumpins, fast dash in close C's and low attacks, and a fast overhead, all of which can lead to high damage combos.
Kim's best crossup move is jump A, as it has a large hitbox behind him. Aside from the many uses of this jump attack on the opponent's wakeup, it also comes in handy a lot during superjumps over the opponent after they have blocked some pokes.
So to summarize some of the options he has for pressure:
- st.A, hh.C
This keeps the pressure on them after doing a far A, especially if they think the pressure has ended after your far A and want to either jump away or jump towards you.
- crB / cr.A / st.A, run, cl.C
Very useful frame trap, especially if you can hit confirm the cl.C after into D. qcb db f + K
- cr.B, cr.A, run, C throw
This is useful when you think the opponent feels afraid. Run forward and then hit b + C, in order to do a normal throw as fast as possible from a run. If you screw it up, a cl.C / st.C will come out, which isn't really a bad thing.
- cr.B x 1-2, f + B
You can either do one or two crouch B's, followed by his f + B overhead. They will generally not want to move if you have imposed fear into them using the frame traps with close C.
- cr.B, cr.A > f + B (Delayed cancel.)
This setup is different than the above. If crouch A is cancelled in it's later frames, then f + B comes out as if it was not cancelled into. This is the "late cancel" glitch.
- cl.C (2) > f + B (Delayed cancel.)
This is similar to the above except uses close C. close C must be cancelled during the late frames of the move, making it come out as an uncancelled f + B overhead rather than a cancelled into f + B (which is not an overhead and comes out slow). Practice is needed until you get down this time. If the overhead does connect, Kim can cancel into maxmode and run forward to perform a high damage max combo.
- cl.C > d d + D
This is a complimentary setup to the above one, ending in a low stomp instead. It only works if Kim is standing right next to the opponent, otherwise the d d + D stomp will whiff. If the opponent is aware of the fact that Kim can do big damage off the close C, delayed f + B setup, then they will probably block high by default, in which case this setup with the stomp will more likely hit. Watch out if the opponent has stock to guard roll, as whiffing the stomp is not safe.
- j.C / j.D, f + B
It's preferable that the jump attack didn't hit early, to give you more frame advantage in landing the f + B overhead. This is a dangerous setup since Kim can do a lot of damage off fast low attacks upon landing, which can make players reluctant to consider blocking high after a jump attack.
The Stomp Glitch
Kim has a glitch that involves his d d + B stomp. He can cancel it instantly into a neutral stance but only if he has less than 2 stocks. To do it, you have to cancel the stomp into qcb hcf + K. If you have less than 2 stocks, Kim will flash white and go into a neutral stance. If he has 2 stocks or more, he will supercancel into the qcb hcf + K DM. Here is a link that demonstrates the glitch:
http://www.youtube.com/watch?v=DFtJTH2eOJ0
After the cancel, the best thing to do is to either hyper hop C or run forward with an attack. Ideally, if you want to keep up the pressure, you want to cancel the stomp from normals that have minimal pushback, such as crouch A. You can also just do the stomp by themselves, though it's pretty difficult to perform a running stomp.
The stomp glitch is also useful for avoiding CD counters since Kim can go to neutral and block it. Better yet, he can roll immediately after it to punish the CD counter, though this is pretty risky to do randomly.
Masters of the stomp glitch tend to put Kim first, because he starts out with no stock and the opponent has no stock, making his pressure even stronger. I personally don't think Kim is more dangerous with meter than without and would rather put him second or third with a character such as Kula making a good first character. One particular useful setup, for minimal damage, is d d + B -> glitch -> f + B, which sets up a low attack into an overhead.
When the opponent is waking up
Many of Kim's moves (of which are practical to be used either by themselves or in combos) end with a hard knockdown that can lead to a many options on the opponent's wakeup. Generally speaking, especially midscreen, you want to end your combos the qcb + C, uf + K, d + K chain or the combo ending with the D flash kick. Both of these will allow enough time setup a crossup, among many other things.
General Wakeup Options
After almost every single hard knockdown, you will be able to walk/run forward and jump at them. It's important to learn the timings of the walks/runs before jumping to avoid messing up your trajectories and whiffing jump attacks. Some moves have setups that either work exactly from the point and instant when Kim recovers, while others can be timed by executing placeholder moves right before (rolls, jabs, etc) so that there is no timing error. Those are explained in the headings below entitled "Midscreen" This section is regarding general options/setups that will work anywhere.
- f + B overhead is a great option on the opponent's wakeup because of it's speed and the amount of damage you can do off it from max cancelling out. It can be spaced pretty well outside throw range and still have the opportunity to combo after it, since Kim's close C is so fast and can come out from relatively far away.
- Kim's crouch D sweep is great because of it's speed, range, the amount of frames it stays out active and especially it's low to the ground hitbox. The low hitbox can beat or go underneath a number of reversals, assuming they would even attempt one from that range. It's generally not a good idea to sweep after a hard knockdown because there's many better setups (listed below) that give much better reward. Sweep is generally useful to be thrown out at max range after they had been knocked down by a move that can be recovery rolled, such as a sweep, jump CD, CD counter, etc.
- crouch D whiff cancel to f + B is a nasty trick, especially if you've been using lots of meaty sweeps already and the opponent is observant. Since the f + B overhead was cancelled from a whiff, it keeps all of it's uncancelled properties as opposed to coming out as a cancelled version of the move (which is inferior in pretty much every way).
- stand CD is one of the better meaty attacks in the game, though not as good as Whip's stand CD. The move's hitbox stays out for many frames and the hitbox itself is long, projecting well beyond the point in which Kim is considered to be standing.
- This is important if we take for example, Iori's dp + C. Suppose Kim does a stand CD from a distance such that it hits on top of Iori as he is getting up. Yes, Iori can cleanly beat Kim's stand CD with his dp + C but what happens is that the first hit connects, putting Kim into hitstun. The hitstun animation gets triggered at the location in which Kim was standing when he stuck out his long foot, which is a fairly big distance compared to where Iori was standing when he did the dp. The remainder of the hits of his dp + C never reach Kim, so while Kim is in hitstun, he doesn't get knocked down from the dp + C and can run up and punish Iori's whiffed dp. Take note which characters have reversals that are invincible but don't knock the opponent down on the first hit (Iori dp + C, Kyo dp + C, etc). Kim's stand CD will beat out any reversals that don't have startup invincibility such Athena's dp + A.
- If the stand CD counterhits the opponent, you can cancel into qcb hcf + K DM though it's usually risky to do it since it's hard to confirm if a counterhit occurred. If the opponent decides to do a wakeup DM, then it's much easier because there's really only 3 outcomes possible: 1) the DM beats the stand CD 2) the DM trades with the stand CD and 3) the stand CD counterhits the DM and your DM comes out after.
- The stand CD also has great guard crushing ability. 5 consecutive blocked CDs will guard crush the opponent, compared to 13 stand CDs from Iori to do the same. Since it can beat so many moves, they will either get hit by it, or block it. Technically they can decide to do a reversal roll on wakeup, but if you did your stand CD as a meaty, you will recover before their roll finishes, allowing you to punish with a throw or close C.
- f + B -> d d + BC -> max combo. This is a more specialized setup and shouldn't be done often but is quite tricky to block. By inputting d d + BC after the f + B, it will execute the maxmode activation after f + B and a stomp on the same frame. Better yet, if the overhead connects, the stomp after the activation combos and it is pretty tricky to block this setup entirely. After the stomp, you can free cancel into qcb + B or qcb + D and continue the max combo from there. Note that for the stomp to connect in this setup, the f + B overhead must be done at point blank range.
Midscreen
- after qcb + C > uf + K > d + K chain
- For combos ending in the qcb + C, uf + K, d + K chain, the faster you execute that chain, the less distance there will be between you and the opponent, which will affect your crossup setups. This is because delaying the hits results in the opponent getting pushed back further (as opposed to doing the next hit and cancelling some of the pushback).
- If they are executed as fast as possible, then Kim is in perfect range of an ambigious crossup using a normal jump A or jump D. Depending on how late you hit the attack button while in the air, Kim will either sometimes crossup and sometimes not. The reason is that, his jump trajectory might initially be going over the opponent but if the jump attack is hit early, it will hit them from the front and push the opponent slightly back, making it so that the trajectory that would have initially went over the opponent, now slightly fails to do so. Also keep in mind that if you hit the jump attack early, you won't be able to combo after it, though in most cases they will probably get confused and block the wrong way when he lands. If the kick chains were delayed, then Kim can still use a normal jump attack but he will have to walk forward a bit in order to space the crossup to look ambigious.
- If the chains were delayed, you can do a superjump A from that initial spot and have it crossup. Using any other jump attack in this situation isn't recommended, since his jump A has the biggest crossup hitbox and it is likely you will whiff if you use any other jump attack. It is possible to move back a slight bit before starting the superjump, still giving it the opportunity to crossup but making it look more ambigious.
- You can use empty jumps into hit confirmed crouch B, crouch A combo. Make sure the jump trajectory you use matches the appropriate jump you would use if you were trying to do a crossup attack (see the above section on jumping depending on whether you have delayed the chains or not). Generally speaking, if someone knows they are in a tough crossup situation, they will usually be thinking about how to block the crossup and might get caught off guard when no jump attack comes out and you do a low B right after.
Keep in mind that if you are doing an empty superjump that switches sides, the crouch B, crouch A, qcb + C, uf + K, d + K chain will usually not fully connect due to a spacing issue (the uf + K will whiff). In this case, it's recommended to use crouch B, crouch A, qcb + Cx2.
- After (d) u + D > d + D
- This move sets up a hard knockdown with similar timing and spacing to a delayed qcb + C, uf + K, d + K chain. You can walk forward and do a normal jump attack. You can also use superjump A from the initial spot, with an optional walk back to make it look more ambigous.
- After DM qcb db f + K
- You aren't perfectly spaced after landing qcb hcf + K to be able to jump from the initial spot and hit a crossup. However, you can still perfectly time and space one by immediately doing normal roll forward, followed immediately by a superjump. This will space and time the crossup perfectly against most characters (tested on Iori, who gets up fairly slow, as well as Ralf who gets up the fastest).
- After d d + D
- You are in perfect normal jump range for a crossup, though you have to wait a slight bit before jumping against most characters. Against Ralf, Yuri, Athena, the jump has to be done immediately (just hold upforward during the stomp). Against any other characters, you can walk back a very slight bit before starting your jump, making it look more ambigious. It is also possible to delay the hit of the jump attack itself, which will also affect whether Kim switches sides or not.
- Rolling is a very good option after landing the stomp. The roll should be executed immediately, followed by a close C. Rolling from that spot will not make Kim switch sides, but if he walks what seems to be just one pixel forward before rolling, he will switch sides. Practice this setup until the slight walk forward is not noticable. Also note that against Kim, you will have to delay the roll since he seems to get up slow after getting hit with a stomp.
Corner with back turned
Kim is probably the most dangerous characters when the opponent's back is turned in the corner, because of a glitch. If you do a superjump A, C or D when they are getting up, they will generally have to block by holding the "wrong" direction. For instance, if the opponent is in the right corner, facing in the right direction, he will have to block the jump attack by holding left. This also means his input directions for wakeup counters are reversed, and if he executes the reversal properly, he will do it but facing the wrong way (into the corner). Reversals that don't have a hitbox that reaches behind their character will end up whiffing their reversal attack the wrong way.
- If you time your jump attack a bit later, then the opponent's inputs will reverse back to normal, which makes this glitch even more annoying to deal with. It's generally impossible to determine how you have to block, though in most cases if they superjump into the corner, I would choose to block as if my controls were reversed.
- Suppose that the opponent has successfully blocked your jump attack by holding left (based on the example used previously). If you immediately do close C upon landing, the opponent will be stuck in blockstun and can continue to hold left to block your attack, even though you have landed on the left side of them. So instead, after they block the jump attack, you can try waiting a slight bit, then doing your close C, which will force them to switch their block from left to right. Make things more confusing by using crouch B in place of close C, which will require the opponent to block from left to downright.
- X (still need to do more testing) It seems that if you hop or hyper hop forward instead of superjump, that it is less likely for the opponent's directions to be reversed when their back is turned. This can be used if the opponent is expecting the usual superjump that will reverse his directions.
- To further add to the mixups, you can do an empty superjump into close C or low B. This makes the opponent not only have to react to whether you did a superjump (as opposed to some other kind of jump) but also if you did any attack at all before landing.
- If the opponent decides to roll out of the corner when you've jumped in, then you'll be able to land and punish the roll before they recover. Make sure you're ready to punish this on reaction because it's not uncommon for people to want to roll out of a back turned situation and they might eventually try it hoping you aren't looking for it.
- If the opponent is hit with a combo while their back is turned, they don't combo into his qcb hcf + K DM. The reason is that this DM will "fix" their back turned state to make them face normally, which isn't desirable. Best recommended to end the combos with the qcb + C uf + K d + K chains or D flash kick, which will give the knockdown and keep their back turned.
Combo Resets
Kim has some interesting combo resets that he can apply after landing a DM qcf qcf + D.
- Midscreen: ... DM qcf qcf + D, hh.C, run underneath, cl.C / cr.B
The hyper hop should be executed immediately, though the jump attack itself should be delayed until Kim starts descending in his jump, so that he ends up landing much before the opponent lands. This is a useful setup, since if executed correctly, Kim will just barely be able to run underneath as the opponent falls. If the opponent is aware of the setup, you can stop your run at the very last moment, not switching sides. You can also switch sides, then block and bait out a reversal or a roll, the latter which would be a popular decision if they respect the ambiguity of the setup.
- ... DM qcf qcf + D, run underneath cl.A, hj.A (or hj.D in corner)
The point of this setup is that after the close A, the opponent will be coming down, while you superjump after them. What will happen is that Kim will jump further than they land, crossing up midscreen. If Kim is in the corner (with the opponent not in the corner) when he lands the DM, then after the run under close A, the opponent will be in the corner and facing the wrong way. This basically sets up the corner backturned crossup glitch.
Kim's keepaway and defensive options
Kim has great defensive options for many different situations. He has a number of anti-airs to choose from, the most effective ones being qcf qcf + D and B flash kick ((d) u + B). Sitting there while holding down to charge or buffering qcf motions for the DM is painfully obvious and not going to make anyone who's paying attention, want to jump, so you'll need to disguise those charges and buffers.
- jumping backwards while doing air qcf + B dive kicks is a great way to build meter for Kim. It's also quite safe, provided you are being careful in your spacing of the dive kicks relative to the opponent's position. These can be used to bait out jumpins as they'll eventually want to advance on you to stop you from building meter. You can either buffer the B flash kick or qcf qcf qcf + D during the dive kicks.
- just jumping/hopping straight up can bait some opponents to think that if they jump as you're coming down, you aren't going to be able to do anything but block. Charge the moment you leave the ground so you're ready to flash kick them on reaction as you land. DM qcf qcf + K probably won't come in handy if you're using this method of baiting, because of how slow it is. They would likely jump while you're still in the air coming down, which means by the time you land, doing a DM won't be able to hit them out of the air.
- stand CD is probably his best defensive option with many applications. The move itself has to be used pre-emptively, meaning you aren't going to be reacting with this move. Throw it out at such a distance that if the opponent superjumped from their initial spot, they would not end up crossing over you. If they jumped at roughly the same time you did the stand CD, they will land on it. If they react to the startup of your stand CD and jump afterwards, they aren't going to land on it because the hit frames would have ended. In that case, you can whiff cancel your stand CD on reaction into qcf qcf + D. If you don't whiff cancel it, you'll likely get punished.
- another less useful option is to use his jump B to intercept jump attacks on reaction. His jump B has a 3 frame startup and has a hitbox that extends diagonally downwards and upwards, making it ideal for air to air situations. Hitting with this can also setup a possibility where you can land first and be able to run underneath, switching sides.
When Kim is waking up
Kim has many useful reversals but you really need to know their properties. You also need to be able to react to whether the opponent's jump is a safe jump (jumps in which by the time your reversal comes out, they would land and be able to block it in time).
- If the opponent does a safe jump, your best bet is probably to block since your reversals won't come out in time. If you think he is going to block the moment he lands, you can instead do a reversal f + C throw. If your throw comes out just a bit before he lands, a 2 frame close C will come out instead - otherwise you will throw. The close C coming out in that situation is very useful because it also beats any attempts of the opponent doing empty jumps into low attacks. Watch out if the opponent has landed before Kim has gotten a chance to get up because if you try to do a f + C throw and mistime, he might catch you with a meaty normal. The meaty normal will also beat a reversal close C.
- If someone attempts a jump attack that doesn't look like a safe jump, or a crossup, a B flash kick can be an option here as it also hits a bit behind Kim (though there are some instances where you can whiff if they are trying to crossup). Keep in mind that certain jump attacks, such as Clark/Ralf's jump CD, can beat Kim's B flash kick. If they are doing this, you might have to respect it and block, or perhaps roll away. qcf qcf + D is not recommended in this situation as it's too slow.
- If the opponent is standing in front of you, there are a couple of things to note - there are some characters, such as Leona, Iori, Choi, Angel, etc that have certain low moves (generally their crouch B's) that will go underneath Kim's B flash kick, making it whiff entirely. In addition, meaty low attacks such as crouch D's, can beat the DM qcf qcf + K. Finally, the D flash kick has trouble "picking up" many crouching characters off the floor, meaning that the first hit will connect but the rest will whiff, unless you supercancel the first hit (preferably to the DM qcf qcf + D which is much safer and results in more damage).
- If you are getting up with Kim with your back turned, and the opponent does a deep jump attack, there is nothing reliable that Kim can reversal with to get out of the situation. D flash kick, B flash kick, qcf qcf + K and qcb db f + K all end up going the wrong way, completely missing the opponent. The B flash kick has a secondary hit that hits behind him but that hit comes out late and will probably connect after the opponent has landed from their jump, and even if it does hit them, it doesn't knockdown so the opponent will be able to combo you even if they got hit.
In the end, you just have to know your opponent. Generally, you should try to limit the amount of risky guesses but do enough to keep the opponent honest to the point where they might want to second guess applying pressure on you.
