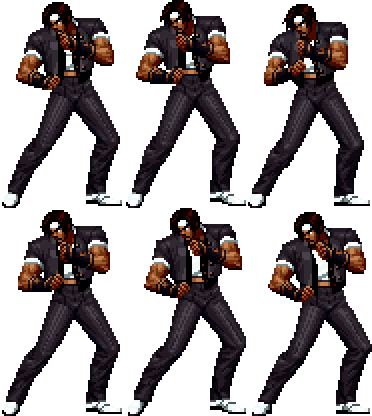
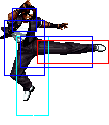
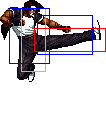
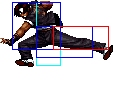
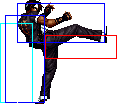
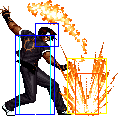
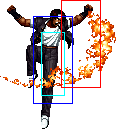
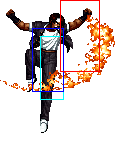
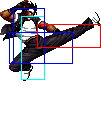
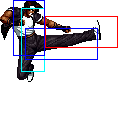
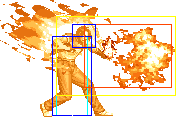
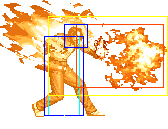
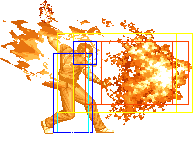
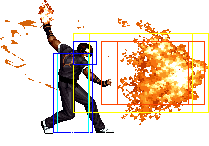
General Info
Kyo's Puerto Rican cousin. He's super angry pretty much all the time.
Crouch height: Medium
Jump: 4/31/1
Hop: 4/23/1
Dash: 3/10~∞/3
Backdash: 3/15/3
Wakeup: 26 frames
Recovery roll: 23 frames
How to select Kusanagi
At the character select screen, put the cursor on Kyo and enter in these inputs:
![]()
![]()
![]()
![]()
![]()
![]()
![]()
![]()
The portrait of Kyo will instead be Kusanagi, press the respective button for that color.
| Stand | Crouch | Jump | Grab | Run |
|---|---|---|---|---|

|

|

|

|
Colors

|

|

|

|
Movelist
Normals
Short Movelist
- air d + C
- f + B (Overhead (2) if not cancelled into.)
- df + D (Low.)
- qcf + P
- dp + P
- qcb + P (Counter: ground normals (during startup).)
- qcf + K
- K
- hcb + K
- rdp + K
- DM qcb hcf + P (May charge.)
- SDM qcb hcf + AC (May charge.)
- HSDM qcf qcf + AC
Notes
Cancellable moves
- Close: A, B, C, D
- Far: A, C
- Crouch: A, B (Only on dp + A, and on Max Mode, cancel even on dp + A, cost a little of the Max Mode bar.), C, D
- CD is cancellable into specials and DMs.
- f + B (2) is cancellable only when you cancel into it.
Super cancellable moves
- dp + P (1)
Free cancellable into moves
- dp + P
- rdp + K
- qcf + K
Free cancellable out-of moves
- f + B
- df + D
- dp + P (1)
- hcb + K (1)
- qcb + P
Moves with Invincibility
??
Moves with autoguard
- dp + P (startup.)
Other Notes
- cl.B is a low attack.
- st.D can evade low attacks.
- cl.C > f + B does not combo against Leona, Ralf, Clark, Benimaru, Robert, Kensou
- D throw is a hard knockdow.
- Kusanagi's df + D hits further horizontally than Kyo's, so the second hit will rarely whiff
Combos
Basic Combos
- cr.B, cr.A >
- HSDM qcf qcf + AC [67.7%] {Max Mode + 1 stock}
- df + D [19.5%]
- rdp + B (Standing.) [14.8%]
- dp + A [11.0%]
- cl.C >
- HSDM qcf qcf + AC [72.3%] {Max Mode + 1 stock}
- qcf + D > D (Very close.)
- DM qcb hcf + C [43.5%] {1 stock}
- SDM qcb hcf + AC (Timming required to do full hits.) [47.1%] {Max Mode + 1 stock}
- rdp + B, dp + C (Corner. Timming required.) [36.4%]
- hcb + D (Timming required.) [30.7%]
- run, rdp + D (Timming required.) [32.7%]
- hj.CD (Timming required.) [27.1%]
- qcf + B > B, dp + C (Corner.)
- f + B (2) > (Very close.)
- DM qcb hcf + C (Charge slightly. Timing required.) [46.6%] {1 stock}
- rdp + D (Standing.) (Out of the corner last hit will miss.) [35.3% or 29.4%]
- hcb + D [32.7%]
- DM qcb hcf + C (Charge slightly. Timing required.) [38.3%] {1 stock}
- rdp + D (Standing.) [28.1%]
- hcb + D [25.5%]
- qcf + P [19.4%]
- df + D [22.3%]
- rdp + B (Standing.) [18.9%]
- dp + A [14.5%]
Max Mode
- cl.C > f + B (1) >> BC, run, cl.C > f + B (2) > hcb + K (1) >> dp + C (1) > qcf + D > D, {2 stocks}
- hcb + K (1) > rdp + D {53%}
- (S)DM qcb hcf + P/AC {70%/??} {+0/1 stock}
- SDM qcb hcf + AC (2), dp + C (Corner. Timming required.) {90%} {+1 stock}
On standing opponents usually, omit the two f + B.
- cl.C > df + D (2) >> BC, DM qcb hcf + C (Charge slightly. Timing required.) {50%} {2 stocks}
If cr.B, cr.A is used instead of cl.C, then DM doesn't combo.
Max Mode Bypass
- f + B / df + D >> BC, {2 stocks}
- hcb + B [30%]
- hcb + B (1) >>
- qcf + D > D,
- DM qcb hcf + P/AC [54.5%]
- SDM qcb hcf + AC (Timming required to do full hits.) [60.4%] {+1 stock}
- dp + C (1) >> qcf + D > D, ...
- qcf + D > D,
- DM qcb hcf + C (Charge slightly. Timing required.) [49.7%]
Buffer as: f + B / df + D >> hcb + BC / qcb hcf + BC
Damage above is based on f + B as starter.
Strategies
Kusanagi is a very versatile character. He has a great zoning fireball, one of the best anti-airs in the game, useful counters, a good high/low mixup game and damaging combos.
Kusanagi's keepaway game is quite strong. His fireballs have decent recovery, and if you can force the opponent to jump over them, you have a free anti-air with dp + C. Of course, you don't want to be predictable with them, otherwise the opponent will jump over them the instant you throw them, which most likely won't give Kusanagi enough time to anti-air. Make sure that you have a distance between you and your opponent equal to that of high jump or longer. Toss a slow one and begin running forward. If they jump, immediately dp + C, toss another fireball and repeat until you get right up to them. if they roll, you can try to hit them with a df + D if they were rolling from far away. If they rolled right in front of you, you can land any combo starting with close C. If they stand there, then the opponent basically let you get in, so you can now change to Kusanagi's offensive game, which is quite solid as well.
His f + B is an extremely good move, especially if it is not cancelled into. The first hit comes out fairly fast, and the second hit is an overhead. This move also does a lot of damage by itself, almost 20% if both hits connect. The best thing about it though, is it's ability to guardcrush if not cancelled into. Assuming the opponent has a full guardcrush meter, the following attack strings will lead to guardcrush:
1. hop d + C, f + B, hop d + C, f + B(guard crush on second hit), BC, run up and combo
2. f + B, hop d + C, f + B, hop B, close C(guard crush), (f + B, BC, run up max combo)/(qcf + DD, qcb hcf + P)
The f + B is also a good poke, which has the potential to stop jumpins that are in front of him (but not too high), or stopping hops. Using this move, as well as far B pokes, can usually get most people to jump, which means free dp + C anti-air.
The hop d + C is a fairly high priority jump attack with crossup potential and can guardcrush fairly well (although nowhere near as good as his f + B). It block stuns fairly well too, allowing you to followup with f + B, a hyper hop B which will be difficult for the opponent to punish, or mixup with a crouch B, crouch A, df + D. Not that the df + D is fairly safe if both hits are blocked, but if the last one whiffs, or the opponent guard rolls it, he can be punished.
Another useful mixup is to use close B, f + B. As explained in the system section of the faq, if you cancel a normal late, into a command move, the command move does not lose it's properties but does not gain the cancellable property. Since his close B hits low and is cancellable, you can do close B, late cancel f + B. Not only will the opponent have to block low, then high, but the f + B being blocked will aid you in the guardcrush process. This can further be mixed up by cancelling the close B to f + B normally, letting you cancel the f + B to qcf + P or qcf + DD. Be careful when cancelling to qcf + P, you don't want to execute the qcf + P fireball if they guard rolled through at some point during the string. The Close B/Close C, f + B, qcf + DD can be useful at times because the first hit whiffs and the second hit connects a bit late. It works great as a surprise and is difficult to punish without just anti-airing it as it comes out. In addition, if the last hit of qcf + DD connects, you can combo hcb + D or qcf hcb + C.
When Kusanagi is on the defensive, he should be readying a dp + C in case the opponent jumps. The autoguard on the dp + P is just too good. As long as Kusanagi is not high in the air when he makes contact with the opponent's jump attack, all high priority moves will be cleanly beaten by the autoguard. In addition, the autoguard will blast through Yuri air fireballs, as usually it is difficult to counter Yuri when she is jumping forward with an air fireball, landing in front of you. It's also great against high priority, hard to counter moves such as Billy's f + A, Kim/Choi qcf + K(air) and Andy's hcf + K, assuming you have the reaction speed to see it coming and counter.
Jumping backwards with C or D is also quite advantageous against people who do multiple jump attacks in a row or are jumping over you attempting to crossup. Jump C comes out faster than Jump D, but lacks horizontal range.
His qcb + P counters should not be taken lightly. If the opponent loves to poke, such as Kula users with crouch B and far B, then qcb + P will counter them, forcing them to think twice about sticking out pokes. If the counter does not activate but the opponent blocks the uppercut punch, he is almost always safe (with the exception of some characters, like Leona who can punish him on block with a crouch D). The punch attack can also beat out high priority moves such as jump CDs, but it should not be used on reaction to counter them, because Kusanagi has to have his elbow extended (or perhaps almost extended) for this invincibility to actually work. As long as you are within range of the move not whiffing, it is reasonably safe to attempt the qcb + P if they are poking alot. This move should not be spammed, as whiffing it can get you punished by run-in combos.
His df + D should be used to punish whiffed normals and other fairly difficult to punish moves, since it comes out very fast and does decent damage.
On wakeup, he should always be readying a dp motion. If they do some move on the ground and you see it, immediately do a dp + A. If they lift off the ground, do a dp + C. The reason dp + C is not used if the opponent is on the ground, is because dp + C doesn't knock down on the first hit. Regardless, the autoguard on his dp + P will allow him to go through all of these attacks. The only exception to using dp + C on the ground is when you are in maxmode for whatever reason. In that case, you can cancel a wakeup dp + C into qcf + DD and followup with a combo. Of course, if the opponent moves out of the way making the dp + C whiff, then you can't cancel to qcf + DD and should expect to get comboed.
