Introduction
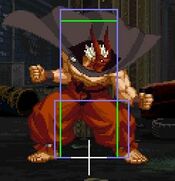
Grant is the mid boss in MOTW. If you're playing against the computer, you will end up facing him no matter what, but depending on how well (or poorly) you perform in the game (winning grade) he may end up being the last boss.
He is considered by many to be the most brain dead (easiest) character in the game. Many believe that he can be picked up in mere minutes and become a character that can compete on any level. He is called cheap, ridiculous, overpowered, and at times some call for him being banned from competitive play due to being 'over powered.'
While Grant is one of the most powerful characters in the game, he has to play cautious. If he just goes all out and rushes blindly he will end up losing against seasoned players. He may seem all mighty to many players out there, but he is not as bad as he is made out to be.
| Pros | Cons |
|---|---|
|
|
Character Colors
Move List
Esoterics
Frame Data Source: https://w.atwiki.jp/garoumow/pages/31.html
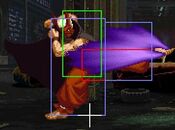
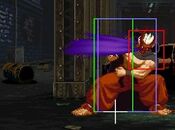
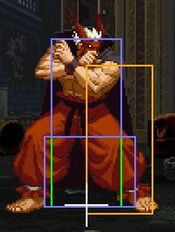
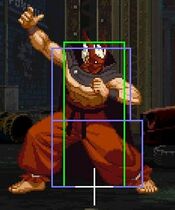
Legend:
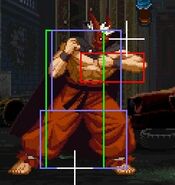
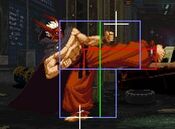
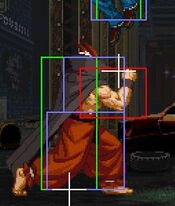
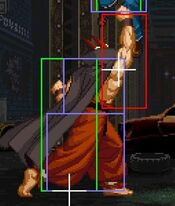
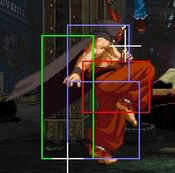
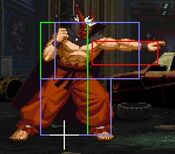
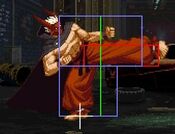
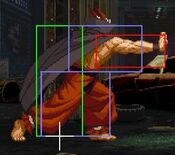
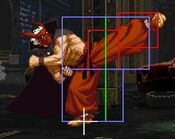
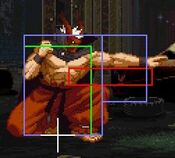
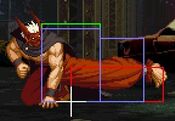
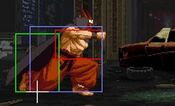
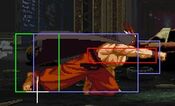
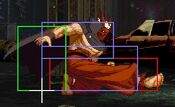
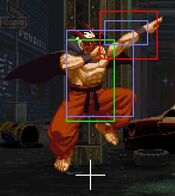
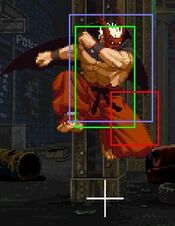
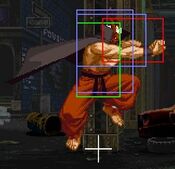
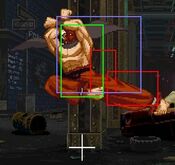
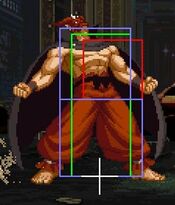
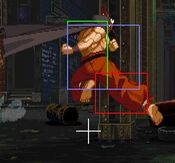
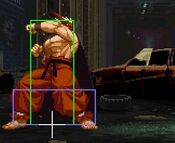
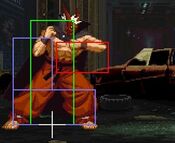
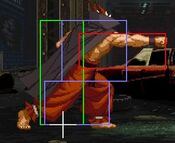
- Hit Box: Area that will hit the opponent
- Hurt Box: Area where you can get hit. A move is invincible if the Hurt Box is absent.
- Throw Box/Range: Active throw frames and range. Your opponent will be thrown in this field if not in block or hit stun.
- Projectile Box: Hit box on a projectile attack.
- Guard/Counter Box: The Guard Box or Counter Box. This appears when blocking or using a counter move.
- Push Box: Has no bearing on hurt/hit boxes. Just allows characters to not pass through each other.
- Command = the input for the attack.
- Start Up = How many start up frames a move/attack has.
- Hit = When the attack hits.
- Block = When the attack is blocked.
- + signifies how many advantage frames the attacker has.
- - signifies how many disadvantage frames the attacker has.
- KD means the attack will knock the opponent down.
Close Standing Normals
| Damage | Guard | Startup | Active | Recovery | Total |
|---|---|---|---|---|---|
| 5 | Mid | 3 | 4 | 5 | 12 |
| Hit Adv | Block Adv | Cancel on Hit | Cancel on Block | Guard Crush Value | |
| +6 | +6 | X | X | 4 | |
|
Standing jab. | |||||
| Damage | Guard | Startup | Active | Recovery | Total |
|---|---|---|---|---|---|
| 11 | Mid | 8 | 3 | 30 | 41 |
| Hit Adv | Block Adv | Cancel on Hit | Cancel on Block | Guard Crush Value | |
| -12 | -12 | X | X | 6 |
| Damage | Guard | Startup | Active | Recovery | Total |
|---|---|---|---|---|---|
| 11 | Mid | 9 | 3 | 13 | 25 |
| Hit Adv | Block Adv | Cancel on Hit | Cancel on Block | Guard Crush Value | |
| +5 | +5 | X | X | 8 |
Far Standing Normals
| Damage | Guard | Startup | Active | Recovery | Total |
|---|---|---|---|---|---|
| 6 | Mid | 6 | 4 | 7 | 17 |
| Hit Adv | Block Adv | Cancel on Hit | Cancel on Block | Guard Crush Value | |
| +4 | +4 | X | X | 6 |
| Damage | Guard | Startup | Active | Recovery | Total |
|---|---|---|---|---|---|
| 14 | Mid | 9 | 5 | 22 | 36 |
| Hit Adv | Block Adv | Cancel on Hit | Cancel on Block | Guard Crush Value | |
| -6 | -6 | X | X | 6 | |
|
Is also a good anti air, and a great overall poke from max distance. It beats out many moves and pokes in the game, deals a lot of damage for a normal, and also deals a fair amount of guard crush damage. | |||||
| Damage | Guard | Startup | Active | Recovery | Total |
|---|---|---|---|---|---|
| 14 | Mid | 14 | 5 | 20 | 39 |
| Hit Adv | Block Adv | Cancel on Hit | Cancel on Block | Guard Crush Value | |
| KD | -4 | X | X | 10 | |
|
Makes a good anti air if timed correctly, but should not be abused, since it is very easy to bait. This move is Grants most common kara-canceled move since it inches him forward allowing for his special attack to go slightly further. It has pretty bad recover and can be punished by the entire cast. | |||||
Crouching Normals
| Damage | Guard | Startup | Active | Recovery | Total |
|---|---|---|---|---|---|
| 5 | Low | 4 | 4 | 6 | 14 |
| Hit Adv | Block Adv | Cancel on Hit | Cancel on Block | Guard Crush Value | |
| +5 | +5 | X | X | 4 |
| Damage | Guard | Startup | Active | Recovery | Total |
|---|---|---|---|---|---|
| 6 | Low | 5 | 3 | 10 | 18 |
| Hit Adv | Block Adv | Cancel on Hit | Cancel on Block | Guard Crush Value | |
| +2 | +2 | X | X | 4 |
| Damage | Guard | Startup | Active | Recovery | Total |
|---|---|---|---|---|---|
| 7, 7 | Low | 10 | 1, (1), 3 | 38 | 53 |
| Hit Adv | Block Adv | Cancel on Hit | Cancel on Block | Guard Crush Value | |
| -20 | -20 | X | X | 10, 10 | |
|
This attack shouldn't be used too often. it has pretty bad recovery and Grant cannot link anything after it. It has horrible recovery on hit and block. Its a decent poke from afar as its his longest reaching attack, but many characters can punish it. Grant players will want to use this as little as possible. | |||||
| Damage | Guard | Startup | Active | Recovery | Total |
|---|---|---|---|---|---|
| 11 | Low | 8 | 4 | 31 | 43 |
| Hit Adv | Block Adv | Cancel on Hit | Cancel on Block | Guard Crush Value | |
| KD | -14 | X | X | 5 |
Jumping Normals
| Damage | Guard | Startup | Active | Recovery | Total |
|---|---|---|---|---|---|
| 6 | High | 3 | 11 | - | - |
| Hit Adv | Block Adv | Cancel on Hit | Cancel on Block | Guard Crush Value | |
| - | - | ◯ | ◯ | 4 | |
|
Is great for beating people who love to do air specials. It can beat out everything in the air, as long as Grant remains under the opponent. The attack is angled at 45° so there's a good chance it will whiff if the oppnent is leveled with Grant. | |||||
| Damage | Guard | Startup | Active | Recovery | Total |
|---|---|---|---|---|---|
| 6 | High | 3 | 10 | - | - |
| Hit Adv | Block Adv | Cancel on Hit | Cancel on Block | Guard Crush Value | |
| - | - | ◯ | ◯ | 4 |
| Damage | Guard | Startup | Active | Recovery | Total |
|---|---|---|---|---|---|
| 11 | High | 7 | 6 | - | - |
| Hit Adv | Block Adv | Cancel on Hit | Cancel on Block | Guard Crush Value | |
| - | - | ◯ | ◯ | 5 | |
|
A good air-to-air. It takes longer to come out than his weaker air attacks, but its worth it, just be sure to time it right and you will be set. Once Grant hits with this, he has the opportunity to play some ground mind games since he can dash under, or to the exact spot his opponent will land leading to an ambiguous cross up. He can also do a 0 Frame super, which if timed right can be unblockable if the opponent doesn't know how to counter it. | |||||
| Damage | Guard | Startup | Active | Recovery | Total |
|---|---|---|---|---|---|
| 11 | High | 6 | 6 | - | - |
| Hit Adv | Block Adv | Cancel on Hit | Cancel on Block | Guard Crush Value | |
| - | - | ◯ | ◯ | 5 | |
|
A great attack to use if your opponent loves to jump in from far away. instant jump back D will beat just about every air attack in the game. try to bait your opponent into jumping by using his ground normals and locking them down until the opponent feels they have to jump in and then stick this out. | |||||
Command Normals
| Damage | Guard | Startup | Active | Recovery | Total |
|---|---|---|---|---|---|
| 10 | Mid | 12 | 4 | 26 | 42 |
| Hit Adv | Block Adv | Cancel on Hit | Cancel on Block | Guard Crush Value | |
| KD | -9 | X | X | 12 | |
|
Grants 'Chest Hump' attack. This is rarely used outside of the corner for juggle purposes. If it connects it will lead to a free special/super. Note: This move cannot be feint canceled. Earlier versions of the game are used for many combo videos, and in it Grant is able to FC this attack. He does not have an infinite | |||||
| Damage | Guard | Startup | Active | Recovery | Total |
|---|---|---|---|---|---|
| 11 | Overhead | 21 | 11 | 11 | 43 |
| Hit Adv | Block Adv | Cancel on Hit | Cancel on Block | Guard Crush Value | |
| -3 | +3 | X | X | 5 |
| Damage | Guard | Startup | Active | Recovery | Total |
|---|---|---|---|---|---|
| 6, 6 | Mid | 8 | 3, (5), 5 | 22 | 43 |
| Hit Adv | Block Adv | Cancel on Hit | Cancel on Block | Guard Crush Value | |
| -8 | -2 | ◯ (1st hit) | X | 3, 3 | |
| |||||
| Damage | Guard | Startup | Active | Recovery | Total |
|---|---|---|---|---|---|
| - | Mid | 16 | - | - | - |
| Hit Adv | Block Adv | Cancel on Hit | Cancel on Block | Guard Crush Value | |
| KD | -15 | X | X | 10 x 3 | |
|
Grant's TOP attack is pretty strong. For some characters, two blocked TOP attacks will Guard Crush. His TOP attack hits up to 3 times. Overall, his TOP attack is a great poke for once in a while, can even work as a anti-air at times. Just remember to use it wisely and don't become predictable with it. Grant's reliance on meter and his turtling playstyle benefit greatly from being in TOP. Placing the TOP at the beginning of his lifebar is the best choice. | |||||
Throws
| Damage | Guard | Startup | Active | Recovery | Total |
|---|---|---|---|---|---|
| 14 | - | 1 | - | - | - |
| Hit Adv | Block Adv | Cancel on Hit | Cancel on Block | Guard Crush Value | |
| +33 | - | - | - | - | |
|
Grant's normal throw. | |||||
Feint Cancels
| Damage | Guard | Startup | Active | Recovery | Total |
|---|---|---|---|---|---|
| - | - | - | - | - | - |
| Hit Adv | Block Adv | Cancel on Hit | Cancel on Block | Guard Crush Value | |
| - | - | - | - | - |
| Damage | Guard | Startup | Active | Recovery | Total |
|---|---|---|---|---|---|
| - | - | - | - | - | - |
| Hit Adv | Block Adv | Cancel on Hit | Cancel on Block | Guard Crush Value | |
| - | - | - | - | - |
Special Moves
Super Moves
| S Power | Damage | Guard | Startup | Active | Recovery | Total |
|---|---|---|---|---|---|---|
| 31 | Mid | 11 | - | - | - | |
| Hit Adv | Block Adv | Cancel on Hit | Cancel on Block | Guard Crush Value | ||
| KD | -11 | X | X | 20 | ||
| ||||||
| P Power | Damage | Guard | Startup | Active | Recovery | Total |
| 45 | Mid | 9 | - | - | - | |
| Hit Adv | Block Adv | Cancel on Hit | Cancel on Block | Guard Crush Value | ||
| KD | -11 | X | X | 30 | ||
| ||||||
| S Power | Damage | Guard | Startup | Active | Recovery | Total |
|---|---|---|---|---|---|---|
| 39 | Mid | 0 | - | - | - | |
| Hit Adv | Block Adv | Cancel on Hit | Cancel on Block | Guard Crush Value | ||
| KD | -2 | X | X | 1 × 13, 3 | ||
| ||||||
| P Power | Damage | Guard | Startup | Active | Recovery | Total |
| 55 | Mid | 0 | - | - | - | |
| Hit Adv | Block Adv | Cancel on Hit | Cancel on Block | Guard Crush Value | ||
| KD | -2 | X | X | 1 x 13, 5 | ||
| ||||||
Combos
Note: damage is based on the majority of the cast. All combos will do slightly less on Grant and Tizoc but slightly more on Jenet, Hotaru and Hokutomaru
- Close
 , c
, c
 ,
,  +
+  49 damage
 - s
 , c
, c
 ,
,  +
+  45 damage
 - c

 ,
,  +
+  42 damage
 - Close s/c
 , c
, c
 ,
,  +
+  43 damage
 - close
 ,
,  +
+  (break)
  ,
,  +
+  35 damage
 - close
 ,
,  +
+  (break)
  +
+  25 damage
  ,
,  +
+  +
+  ,
,  +
+  ,
,  +
+  35 damage
Corner Only
 +
+  ,
,  +
+  ,
,  +
+  33 damage
 ,
,  +
+  +
+  , (
, ( +
+  )x3,
)x3,  ,
,  +
+  71 damage
 ,
,  +
+  +
+  , (
, ( +
+  )x4,
)x4,  ,
,  +
+  79 damage
 ,
,  +
+  +
+  , (
, ( +
+  )x4,
)x4,  +
+  ,
,  +
+  61 damage
- jump
 , s
, s ,
,  ,
,  +
+  54 damage
 - jump
 , s
, s ,
,  ,
,  +
+  69 damage
 - s
 , c
, c , c
, c ,
,  ,
,  +
+  48 damage
 - s
 , c
, c , c
, c ,
,  ,
,  +
+  63 damage
 - close
 ,
,  +
+  (break) (
 +
+  )x3
)x3  ,
,  +
+  65 damage
Anywhere
- Crouching/Standing A, Crouching A (link)-->QCFx2+K [36%-48%]
- Jumping D-->Standing B-->QCFx2+K [42.5%-55%]
- F, B, F+P-->DF+C-->QCF+B [32%]
- F, B, F+P-->DF+C-->QCFx2+P [40%-48%]
- Down+D in the air-->QCFx2+K [38%-50%]
- This is a rather difficult combo to do since you need to be at a certain distance to combo off the dive kick. You could be lucky though and counter hit the opponent with a dive kick.
- Standing B, Crouching A (link)-->QCFx2+K [36.5%-50%]
Corner only
- F, B, F+P-->DF+C 3 times-->QCFx2+A [52%]
- F, B, F+P-->DF+C 4 times-->QCFx2+C [66%]
- F, B, F+P-->DF+C 4 times-->F, D, DF+C (2 hits), then Down+D [50%]
- Jumping C/D-->Standing D-->QCFx2+K [45%-57.5%]
- Standing A 2 times, Crouching A-->QCFx2+K [38%-50%]
- Crouching A 3 times-->QCFx2+K [38%-50%]
- Standing B-->Crouching A 2 times-->QCFx2+K [40%-52.5%]
- Jumping C/D-->Standing A-->F, D, DF+C, Break-->DF+C 3 times-->F, D, DF+C, then D+K [46%]
Basic Strategy
Gameplay Overview
Grant is a very unique character in MOTW. He cannot feint cancel any of his attacks, which means he has to work a bit harder for combo damage, relying on links and resets. He can be played like a tank since he has several good pokes. He can control space around him on the ground and in the air, plus he can run away pretty easily against half of the cast. grant with meter becomes a completely different character, the fear of his supers will generally change how an opponent fights against him, plus once he has meter it becomes easier for him to rush an opponent down. The lack of feint cancels doesn't hurt him at all since he would be pretty broken if he did have them.
A good way to sum up grants gameplay is to play him as if you were playing Street Fighter. Once you have meter, either continue playing him the same or begin rushing the opponent down.
One issue Grant has is no low that he can combo after. His only low attacks are c![]() and c
and c![]() and he can't combo after either, unless he does a meaty c
and he can't combo after either, unless he does a meaty c![]() on wake up. He doesn't have many options for overheads either. The best is instant jump back
on wake up. He doesn't have many options for overheads either. The best is instant jump back ![]() . His
. His ![]() +
+![]() , like all others, comes out way to slow and can be seen from a mile away. His
, like all others, comes out way to slow and can be seen from a mile away. His ![]() ,
, ![]() ,
, ![]() +
+ ![]() is very slow and doesn't always catch the opponent, but its good to throw out once in a blue moon.
is very slow and doesn't always catch the opponent, but its good to throw out once in a blue moon.
Grant's winning strategy is simple: Stay in TOP. This is more important than meter building, more important than run away, and more important than mixups. Focusing on this single task is priority #1. Since you placed TOP in the beginning of his bar like you should, this means a lot of patience right in the beginning of the game through the end of the match. The benefit of TOP, such as health regeneration, greater damage, and faster meter, turns the match clock into an advantage for you and a disadvantage for the opponent. Remember that even if you are doing nothing, you are continuing to win.
In gameplay, Grant's "sweetspot" is just outside of sweep range. You want to be close enough to punish anything on reaction with a short jump D, but still be outside of general footsie or poke range. Make the opponent come to you.
When in the corner, one of Grant's major weaknesses comes out, namely his lack of solid anti-air. Having a single stock of meter overcomes this weakness. Grant's punch super is rather slow to execute, but comes with an amazing amount of invulnerability. Keep a stock of meter handy as much as possible to discourage and punish those who try to put a blind rush down on you in the corner.
When not in the corner, using a punch super as an anti-air isn't as effective. Instead, use a jump back D to knock them down. If hits or they JD, you can continue to keep the match at an standstill. Mix things up by adding in a divekick inplace of, or after, the j.D.
Advanced Tactics
In-depth video lecture on Grant. Please use the timestamps to navigate the topics.
Matchup Notes
Favorable - Unfavorable -
Tizoc (The Griffon Mask)
Overall Grant's easiest match up. Grants pokes beat out almost all of Tizoc's pokes and attacks. Grant will want to stay about one character distance away from Tizoc so a mash happy Tizoc player doesn't get a grab or super. Grants s![]() , short hop back
, short hop back ![]() are great ways to keep Tizoc players at bay, and will beat out Tizoc's short hop
are great ways to keep Tizoc players at bay, and will beat out Tizoc's short hop ![]() /
/![]() . A Max distance c
. A Max distance c ![]() is also a nice poke, but if done too close, Tizoc can dash in grab. Watch out for Tizoc's who abuse his
is also a nice poke, but if done too close, Tizoc can dash in grab. Watch out for Tizoc's who abuse his ![]() +
+ ![]()
![]() feint, which has full upper body invincibility.
feint, which has full upper body invincibility.
B. Jenet
Quite possibly Grant's hardest match up. Grant has to play very safe since Jenet's pokes can beat out pretty much everything Grant does. Staying out of the corner is also key when fighting against Jenet. Her lock down strings work even better on the big characters, and once an experienced Jenet player has you there, it could very well be game over. Grants far ![]() can beat out Jenet's dive kick, so can his
can beat out Jenet's dive kick, so can his ![]() ,
,![]() +
+ ![]() super. He can also jump
super. He can also jump ![]() /
/![]() /
/![]() her out of it. A short hop
her out of it. A short hop ![]() will work best for the
will work best for the ![]() dive kick, while the jump back
dive kick, while the jump back ![]() /
/![]() will work better for a
will work better for a ![]() dive kick. Shy away from using his
dive kick. Shy away from using his ![]() +
+ ![]() against her since she can punish it easily on block.
against her since she can punish it easily on block. ![]() +
+ ![]() is much more safe.
is much more safe.
Terry Bogard
Grant wins this matchup about 6-4.
Terry's C Burning Knuckle is a common way of closing the distance with Terry. If it is blocked and not JD'ed, do not try to poke! A brake'd Power Dunk will interupt it every time. If you JD'ed the Burning Knuckle, then a c.A is safe to throw out.
Terry has little answer to a repeated dp+C, late d+D. You NEED meter for this match, you need to keep Terry out, and you need control the clock. A runaway strategy can accomplish all of these.
Terry wants to get into point blank range and feint combo you to death. Watch how he gets in, and know Grant's counter to it:
- Burning Knuckle: JD, then c.A
- Overhead Kick: Block, then kick super
- Jump in: jump away j.D, or punch super
- A+B evasion attack: Let it hit, reversal kick super
- f,f+C: d+AB xx kick super
- Power Dunk: block, kick super
