Introduction
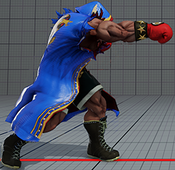
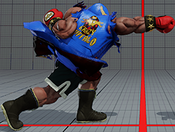
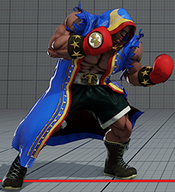
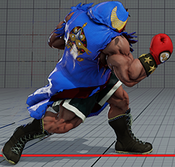
About Balrog
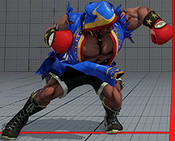
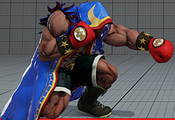
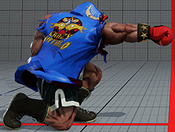
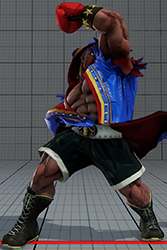
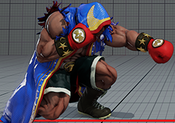
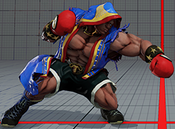
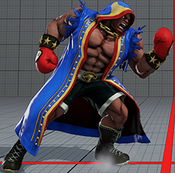
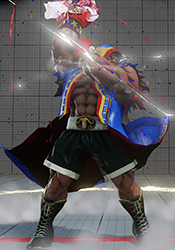
A disgraced boxing champion, Balrog joined Shadaloo in search of more riches. Disatisfied with his role in the organization, Balrog searches for things to steal as he leaves S.I.N., and finds a young boy (Ed). Convinced he'll be of use to him in the future, Balrog leaves S.I.N. and Shadaloo behind to seek further riches.
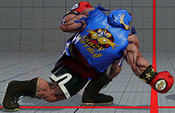
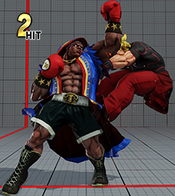
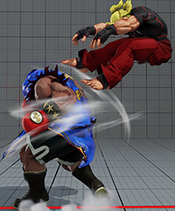
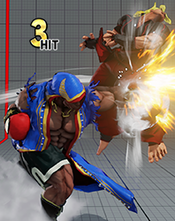
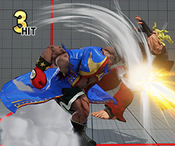
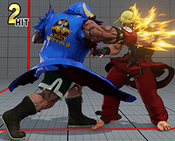
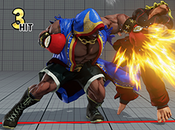
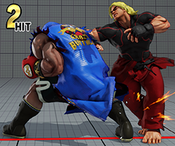
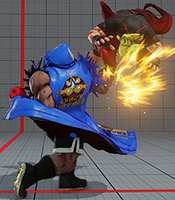
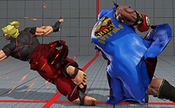
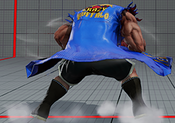
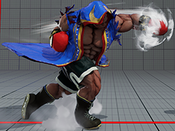
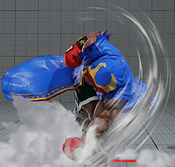
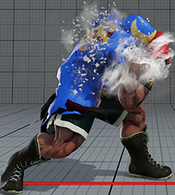
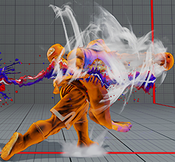
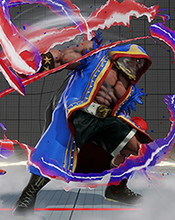
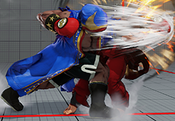
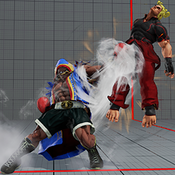
Balrog focuses on aggressive play and annoying his opponents. His trademark dash punches can quickly close the distance to punish any opponent attempting to walk forward or whiffing buttons, and once in he can force the opponent to play his game with his great + on block buttons and crush counters. His V-Skill 1 and Critical Art also allows him to easily deal with projectiles, while his V-Skill 2 lets him make his dash punches multi-hitting and safe, making his approach even easier. However Balrog is a fairly straight-forward character; he does not have many setups, his lows aren't very threatening without V-Trigger, and he doesn't have many mixups in general which can make opening up opponents difficult. He is also the only character in the game with no cross up button. If you like simple, aggressive bruisers then Balrog is a great choice.
| Strengths | Weaknesses |
|---|---|
|
|
Final Patch
Players to Watch
| Balrog | |
|---|---|
| Vitals | |
| Life Points | 1025 |
| Stun Points | 1050 |
| V-Gauge Points | |
| V-Trigger 1 | 900 |
| V-Trigger 2 | 600 |
| Ground Movement | |
| Forward Walk Speed | 4.8 |
| Backward Walk Speed | 3 |
| Forward Dash Speed | 17 |
| Backward Dash Speed | 24 |
| Forward Dash Distance | 131.9 |
| Backward Dash Distance | 106.1 |
| Backdash CH Frames | 3-10 |
| Jumping | |
| Back Jump Speed | 47(4+39+4) |
| Neutral Jump Speed | 47(4+39+4) |
| Forward Jump Speed | 46(3+39+4) |
| Forward Jump Distance | 206.7 |
| Backward Jump Distance | 163.8 |
| Throws | |
| Throw Hurtbox | 0.35 |
| Throw Range | 0.85 |
Frame Data & Descriptions are provided by FATOnline.
|
| SFV Frame Data Glossary | |
|---|---|
| Active |
How many frames a move remains active (can hurt opponents) for. |
| Attack |
Attack level is L for low attacks (must be blocked crouching), H is for High attacks (which can be blocked high or low) and M for overhead (must be blocked standing). T is for throw attacks (which cannot be blocked). |
| Cancel options |
Available cancel options.
|
| Confirm windows |
Hit confirm windows written as Specials & CAs/Target Combos/V-Trigger. Notation may denote V-Skill only cancel windows in Specials.
|
| Crush Counter |
Crush Counter hit advantage written as opponent state, frame advantage, and v-gauge gain on hit. |
| Damage |
Attack damage on hit. Notation may denote multi-hit or "sweet spot" damage values on certain frames. |
| Hit/Block |
These are frame advantage values when the attack hits or is blocked. If the number is positive, then the move will end before the defender can act again. If the number is negative, the defender will be able to act before the attacker and maybe even punish. KD refers to knockdown on hit.
|
| Knockdown |
Knockdown advantage against Normal, Quick Rise and Back Rise wake up options. |
| Recovery |
How many frames it takes for a move to finish after it's been active. |
| Startup |
How many frames it takes before the move becomes 'active' or have a hit box. The last startup frame and the first active frame are the same frame, meaning all values are written as Startup + 1. |
| Stun |
Amount of stun added to the opponent's stun bar on hit. |
Normals
Stand LP
| Startup | Active | Recovery | Hit |
|---|---|---|---|
| 4 | 2 | 7 | 5 |
| Damage | Stun | Attack | Block |
| 30 | 70 | H | 3 |
Stand MP
| Startup | Active | Recovery | Hit | ||
|---|---|---|---|---|---|
| 5 | 4 | 13 | 2 | ||
| Damage | Stun | Attack | Block | ||
| 70 | 100 | H | 0 | ||
| |||||
Stand HP
| Startup | Active | Recovery | Hit | ||
|---|---|---|---|---|---|
| 12 | 3 | 18 | 0 | ||
| Damage | Stun | Attack | Block | ||
| 80 | 150 | H | -3 | ||
| |||||
Stand LK
| Startup | Active | Recovery | Hit |
|---|---|---|---|
| 3 | 2 | 8 | 2 |
| Damage | Stun | Attack | Block |
| 30 | 70 | H | 1 |
Stand MK
| Startup | Active | Recovery | Hit |
|---|---|---|---|
| 6 | 3 | 12 | 5 |
| Damage | Stun | Attack | Block |
| 60 | 100 | H | 2 |
Stand HK
| Startup | Active | Recovery | Hit | ||
|---|---|---|---|---|---|
| 9 | 3 | 18(22) | 7 | ||
| Damage | Stun | Attack | Block | ||
| 80 | 150 | H | 3 | ||
| |||||
Crouch LP
| Startup | Active | Recovery | Hit | ||
|---|---|---|---|---|---|
| 4 | 3 | 7 | 4 | ||
| Damage | Stun | Attack | Block | ||
| 30 | 70 | H | 3 | ||
| |||||
Crouch MP
| Startup | Active | Recovery | Hit |
|---|---|---|---|
| 6 | 3 | 12 | 4 |
| Damage | Stun | Attack | Block |
| 60 | 100 | H | 2 |
Crouch HP
| Startup | Active | Recovery | Hit | ||
|---|---|---|---|---|---|
| 8 | 5 | 22 | -1 | ||
| Damage | Stun | Attack | Block | ||
| 90 (80) | 150 | H | -5 | ||
| |||||
Crouch LK
| Startup | Active | Recovery | Hit |
|---|---|---|---|
| 4 | 3 | 8 | 4 |
| Damage | Stun | Attack | Block |
| 20 | 70 | L | 1 |
Crouch MK
| Startup | Active | Recovery | Hit |
|---|---|---|---|
| 7 | 2 | 17 | 2 |
| Damage | Stun | Attack | Block |
| 60 | 100 | L | -2 |
Crouch HK
| Startup | Active | Recovery | Hit |
|---|---|---|---|
| 8 | 2 | 26 | KD |
| Damage | Stun | Attack | Block |
| 100 | 150 | L | -14 |
Jump LP
| Startup | Active | Recovery | Hit |
|---|---|---|---|
| 4 | 6 | - | - |
| Damage | Stun | Attack | Block |
| 40 | 70 | M | - |
Jump MP
| Startup | Active | Recovery | Hit |
|---|---|---|---|
| 5 | 3 | - | - |
| Damage | Stun | Attack | Block |
| 70 | 100 | M | - |
Jump HP
| Startup | Active | Recovery | Hit |
|---|---|---|---|
| 7 | 4 | - | - |
| Damage | Stun | Attack | Block |
| 90 | 150 | M | - |
Jump LK
| Startup | Active | Recovery | Hit |
|---|---|---|---|
| 3 | 8 | - | - |
| Damage | Stun | Attack | Block |
| 40 | 70 | M | - |
Jump MK
| Startup | Active | Recovery | Hit |
|---|---|---|---|
| 6 | 5 | - | - |
| Damage | Stun | Attack | Block |
| 70 | 100 | M | - |
Jump HK
| Startup | Active | Recovery | Hit |
|---|---|---|---|
| 9 | 4 | - | - |
| Damage | Stun | Attack | Block |
| 90 | 150 | M | - |
Target Combos
Hard Lead In
| Startup | Active | Recovery | Hit | ||
|---|---|---|---|---|---|
| 6+6 | 4 | 20 | KD | ||
| Damage | Stun | Attack | Block | ||
| 60*36 (96) | 100*72 (172) | H | -8 | ||
| |||||
Hard KKB
| Startup | Active | Recovery | Hit | ||
|---|---|---|---|---|---|
| - | - | 31 | KD | ||
| Damage | Stun | Attack | Block | ||
| 60*36 (96) | 100*72 (172) | H | -17 | ||
| |||||
OTB
| Startup | Active | Recovery | Hit | ||
|---|---|---|---|---|---|
| - | - | 50 | KD | ||
| Damage | Stun | Attack | Block | ||
| 60*36 (96) | 100*72 (172) | H | -36 | ||
| |||||
Hard Smasher
| Startup | Active | Recovery | Hit | ||
|---|---|---|---|---|---|
| 6+6+21 | 2 | 23 | KD | ||
| Damage | Stun | Attack | Block | ||
| 60*36*48 (144) | 100*72*96 (268) | H | -8 | ||
| |||||
Hard Pressure
| Startup | Active | Recovery | Hit | ||
|---|---|---|---|---|---|
| 6+6+26 | 2 | 22 | KD | ||
| Damage | Stun | Attack | Block | ||
| 60*36*48 (144) | 100*72*96 (268) | M | -8 | ||
| |||||
Under Impact 1
| Startup | Active | Recovery | Hit | ||
|---|---|---|---|---|---|
| 3+6 | 3 | 16 | 1 | ||
| Damage | Stun | Attack | Block | ||
| 30*36 (66) | 70*63 (133) | H | -7 | ||
| |||||
Under Impact 2
| Startup | Active | Recovery | Hit | ||
|---|---|---|---|---|---|
| 3+6+8 | 2 | 22 | KD | ||
| Damage | Stun | Attack | Block | ||
| 30*36*66 (122) | 70*63*80 (213) | H | -8 | ||
| |||||
Stomping Combo
| Startup | Active | Recovery | Hit | ||
|---|---|---|---|---|---|
| 7+10 | 3 | 20 | 2 | ||
| Damage | Stun | Attack | Block | ||
| 60*36 (96) | 100*72 (172) | L*L | -7 | ||
| |||||
Throws
Dirty Bomber
| Startup | Active | Recovery | Hit |
|---|---|---|---|
| 5 | 3 | 17 | KD |
| Damage | Stun | Attack | Block |
| 140 | 150 | - | - |
Dirty Shot
| Startup | Active | Recovery | Hit |
|---|---|---|---|
| 5 | 3 | 17 | KD |
| Damage | Stun | Attack | Block |
| 130 | 200 | - | - |
Special Moves
LP Dash Straight
| Startup | Active | Recovery | Hit | ||
|---|---|---|---|---|---|
| 10(12) | 4 | 22 | 2 | ||
| Damage | Stun | Attack | Block | ||
| 90 | 150 | H | -4 | ||
| |||||
MP Dash Straight
| Startup | Active | Recovery | Hit | ||
|---|---|---|---|---|---|
| 12(16) | 4 | 20 | 2 | ||
| Damage | Stun | Attack | Block | ||
| 100 | 150 | H | -4 | ||
| |||||
HP Dash Straight
| Startup | Active | Recovery | Hit | ||
|---|---|---|---|---|---|
| 19(25) | 4 | 19 | 2 | ||
| Damage | Stun | Attack | Block | ||
| 110 | 150 | H | -4 | ||
| |||||
EX Dash Straight
| Startup | Active | Recovery | Hit | ||
|---|---|---|---|---|---|
| 9(22) | 6 | 29 | KD | ||
| Damage | Stun | Attack | Block | ||
| 80*70 (150) | 50*150 (200) | H | 1 | ||
| |||||
LK Dash Grand Blow
| Startup | Active | Recovery | Hit | ||
|---|---|---|---|---|---|
| 17 | 2 | 26 | KD | ||
| Damage | Stun | Attack | Block | ||
| 80 | 150 | L | -7 | ||
| |||||
MK Dash Grand Blow
| Startup | Active | Recovery | Hit | ||
|---|---|---|---|---|---|
| 18(22) | 2 | 26 | KD | ||
| Damage | Stun | Attack | Block | ||
| 90 | 150 | L | -7 | ||
| |||||
HK Dash Grand Blow
| Startup | Active | Recovery | Hit | ||
|---|---|---|---|---|---|
| 19(25) | 2 | 26 | KD | ||
| Damage | Stun | Attack | Block | ||
| 100 | 150 | L | -7 | ||
| |||||
EX Dash Grand Blow
| Startup | Active | Recovery | Hit | ||
|---|---|---|---|---|---|
| 11(19) | 2 | 23 | KD | ||
| Damage | Stun | Attack | Block | ||
| 140 | 200 | L | -2 | ||
| |||||
LK Screw Smash
| Startup | Active | Recovery | Hit | ||
|---|---|---|---|---|---|
| 10 | 5 | 25 | KD | ||
| Damage | Stun | Attack | Block | ||
| 100 | 150 | H | -10 | ||
| |||||
MK Screw Smash
| Startup | Active | Recovery | Hit | ||
|---|---|---|---|---|---|
| 13 | 5 | 26 | KD | ||
| Damage | Stun | Attack | Block | ||
| 100 | 150 | H | -10 | ||
| |||||
HK Screw Smash
| Startup | Active | Recovery | Hit | ||
|---|---|---|---|---|---|
| 23 | 5 | 25 | KD | ||
| Damage | Stun | Attack | Block | ||
| 100 | 150 | H | -10 | ||
| |||||
EX Screw Smash
| Startup | Active | Recovery | Hit | ||
|---|---|---|---|---|---|
| 12 | 5 | 29 | KD | ||
| Damage | Stun | Attack | Block | ||
| 160 | 200 | H | -17 | ||
| |||||
TAP lvl 1
| Startup | Active | Recovery | Hit | ||
|---|---|---|---|---|---|
| 26(30) | 2 | 22 | 2 | ||
| Damage | Stun | Attack | Block | ||
| 100 | 150 | H | -2 | ||
| |||||
TAP lvl 2
| Startup | Active | Recovery | Hit | ||
|---|---|---|---|---|---|
| 26(30) | 2 | 22 | 2 | ||
| Damage | Stun | Attack | Block | ||
| 120 | 150 | H | -2 | ||
| |||||
TAP lvl 3
| Startup | Active | Recovery | Hit | ||
|---|---|---|---|---|---|
| 26(30) | 2 | 22 | 3 | ||
| Damage | Stun | Attack | Block | ||
| 140 | 150 | H | -2 | ||
| |||||
TAP lvl 4
| Startup | Active | Recovery | Hit | ||
|---|---|---|---|---|---|
| 26(30) | 2 | 22 | KD | ||
| Damage | Stun | Attack | Block | ||
| 160 | 200 | H | -2 | ||
| |||||
TAP lvl 5
| Startup | Active | Recovery | Hit | ||
|---|---|---|---|---|---|
| 26(30) | 2 | 22 | KD | ||
| Damage | Stun | Attack | Block | ||
| 180 | 200 | H | -2 | ||
| |||||
TAP lvl 6
| Startup | Active | Recovery | Hit | ||
|---|---|---|---|---|---|
| 26(30) | 2 | 22 | KD | ||
| Damage | Stun | Attack | Block | ||
| 200 | 200 | H | -2 | ||
| |||||
TAP lvl 7
| Startup | Active | Recovery | Hit | ||
|---|---|---|---|---|---|
| 26(30) | 2 | 22 | KD | ||
| Damage | Stun | Attack | Block | ||
| 230 | 300 | H | -2 | ||
| |||||
TAP lvl 8
| Startup | Active | Recovery | Hit | ||
|---|---|---|---|---|---|
| 26(30) | 2 | 22 | KD | ||
| Damage | Stun | Attack | Block | ||
| 260 | 300 | H | -2 | ||
| |||||
TAP lvl 9
| Startup | Active | Recovery | Hit | ||
|---|---|---|---|---|---|
| 26(30) | 2 | 22 | KD | ||
| Damage | Stun | Attack | Block | ||
| 290 | 300 | H | -2 | ||
| |||||
TAP lvl 10
| Startup | Active | Recovery | Hit | ||
|---|---|---|---|---|---|
| 26(30) | 2 | 22 | KD | ||
| Damage | Stun | Attack | Block | ||
| 370 | 400 | H | 7 | ||
| |||||
Critical Arts
Gigaton Blow
| Startup | Active | Recovery | Hit | ||
|---|---|---|---|---|---|
| 8 | 10 | 60 | KD | ||
| Damage | Stun | Attack | Block | ||
| 340 (330) | - | H | -45 | ||
| |||||
Taunts
Taunt
| Startup | Active | Recovery | Hit |
|---|---|---|---|
| - | - | 61 | - |
| Damage | Stun | Attack | Block |
| - | - | - | - |
V-System
V-Skill 1
KKB
| Startup | Active | Recovery | Hit | ||
|---|---|---|---|---|---|
| - | - | 29 | - | ||
| Damage | Stun | Attack | Block | ||
| - | - | H | - | ||
| |||||
KKB > Buffalo Swing
| Startup | Active | Recovery | Hit | ||
|---|---|---|---|---|---|
| 11+7 | 2 | 21 | 2 | ||
| Damage | Stun | Attack | Block | ||
| 50 | 100 | H | -4 | ||
| |||||
KKB > Buffalo Pressure
| Startup | Active | Recovery | Hit | ||
|---|---|---|---|---|---|
| 11+17 | 3 | 19 | 5 | ||
| Damage | Stun | Attack | Block | ||
| 50 | 100 | M | -7 | ||
| |||||
V-Skill 2
FFB
| Startup | Active | Recovery | Hit | ||
|---|---|---|---|---|---|
| - | - | 50 | - | ||
| Damage | Stun | Attack | Block | ||
| - | - | - | - | ||
| |||||
LP Dash Straight (V-Skill 2)
| Startup | Active | Recovery | Hit | ||
|---|---|---|---|---|---|
| 10(12) | 4 | 22 | KD | ||
| Damage | Stun | Attack | Block | ||
| 30x3 (90) | 30x2*40 (100) | H | 2 | ||
| |||||
MP Dash Straight (V-Skill 2)
| Startup | Active | Recovery | Hit | ||
|---|---|---|---|---|---|
| 12(16) | 4 | 22 | KD | ||
| Damage | Stun | Attack | Block | ||
| 30x2*40 (100) | 30x2*40 (100) | H | 2 | ||
| |||||
HP Dash Straight (V-Skill 2)
| Startup | Active | Recovery | Hit | ||
|---|---|---|---|---|---|
| 19(25) | 4 | 22 | KD | ||
| Damage | Stun | Attack | Block | ||
| 30x2*50 (110) | 30x2*40 (100) | H | 2 | ||
| |||||
EX Dash Straight (V-Skill 2)
| Startup | Active | Recovery | Hit | ||
|---|---|---|---|---|---|
| 9(22) | 6 | 29 | KD | ||
| Damage | Stun | Attack | Block | ||
| 20x2*40*20x2*40 (160) | 10x2*40*10x2*40 (120) | H | 4 | ||
| |||||
V-Trigger 1
Crazy Rush
| Startup | Active | Recovery | Hit | ||
|---|---|---|---|---|---|
| 1 | - | 6 | - | ||
| Damage | Stun | Attack | Block | ||
| - | - | - | - | ||
| |||||
Charging Buffalo (stage 1) (vt)
| Startup | Active | Recovery | Hit | ||
|---|---|---|---|---|---|
| 12 | 6 | 17 | 2 | ||
| Damage | Stun | Attack | Block | ||
| 30 | 100 | H | -2 | ||
| |||||
Charging Buffalo (stage 2) (vt)
| Startup | Active | Recovery | Hit | ||
|---|---|---|---|---|---|
| 12 | 6 | 16 | 2 | ||
| Damage | Stun | Attack | Block | ||
| 40 | 100 | H | -2 | ||
| |||||
Charging Buffalo (stage 3) (vt)
| Startup | Active | Recovery | Hit | ||
|---|---|---|---|---|---|
| 12 | 6 | 15 | 2 | ||
| Damage | Stun | Attack | Block | ||
| 50 | 100 | H | -2 | ||
| |||||
Final Charging Buffalo (vt)
| Startup | Active | Recovery | Hit | ||
|---|---|---|---|---|---|
| 17 | 6 | 29 | KD | ||
| Damage | Stun | Attack | Block | ||
| 90 | 100 | H | -13 | ||
| |||||
EX Charging Buffalo (stage 1) (vt)
| Startup | Active | Recovery | Hit | ||
|---|---|---|---|---|---|
| 11 | 6 | 18 | KD | ||
| Damage | Stun | Attack | Block | ||
| 70 | 100 | H | -2 | ||
| |||||
EX Final Charging Buffalo (vt)
| Startup | Active | Recovery | Hit | ||
|---|---|---|---|---|---|
| 11 | 6 | 18 | KD | ||
| Damage | Stun | Attack | Block | ||
| 70 | 100 | H | -2 | ||
| |||||
Charging Buffalo (stage 1) (V-Skill 2) (vt)
| Startup | Active | Recovery | Hit | ||
|---|---|---|---|---|---|
| 12 | 6 | 17 | KD | ||
| Damage | Stun | Attack | Block | ||
| 60 | 80 | H | 0 | ||
| |||||
Charging Buffalo (stage 2) (V-Skill 2) (vt)
| Startup | Active | Recovery | Hit | ||
|---|---|---|---|---|---|
| 12 | 6 | 16 | KD | ||
| Damage | Stun | Attack | Block | ||
| 60 | 80 | H | 1 | ||
| |||||
Charging Buffalo (stage 3) (V-Skill 2) (vt)
| Startup | Active | Recovery | Hit | ||
|---|---|---|---|---|---|
| 12 | 6 | 15 | KD | ||
| Damage | Stun | Attack | Block | ||
| 70 | 80 | H | 2 | ||
| |||||
Final Charging Buffalo (V-Skill 2) (vt)
| Startup | Active | Recovery | Hit | ||
|---|---|---|---|---|---|
| 17 | 6 | 29 | KD | ||
| Damage | Stun | Attack | Block | ||
| 130 | 190 | H | 2 | ||
| |||||
EX Charging Buffalo (stage 1) (V-Skill 2)) (vt)
| Startup | Active | Recovery | Hit | ||
|---|---|---|---|---|---|
| 11 | 6 | 18 | KD | ||
| Damage | Stun | Attack | Block | ||
| 70 | 100 | H | -1 | ||
| |||||
EX Final Charging Buffalo (V-Skill 2) (vt)
| Startup | Active | Recovery | Hit | ||
|---|---|---|---|---|---|
| 11 | 6 | 18 | KD | ||
| Damage | Stun | Attack | Block | ||
| 70 | 120 | H | -1 | ||
| |||||
Bursting Buffalo (stage 1) (vt)
| Startup | Active | Recovery | Hit | ||
|---|---|---|---|---|---|
| 14 | 5 | 21 | 2 | ||
| Damage | Stun | Attack | Block | ||
| 40 | 50 | H | -2 | ||
| |||||
Bursting Buffalo (stage 2) (vt)
| Startup | Active | Recovery | Hit | ||
|---|---|---|---|---|---|
| 14 | 5 | 21 | 2 | ||
| Damage | Stun | Attack | Block | ||
| 50 | 50 | H | -2 | ||
| |||||
Bursting Buffalo (stage 3) (vt)
| Startup | Active | Recovery | Hit | ||
|---|---|---|---|---|---|
| 14 | 5 | 21 | 2 | ||
| Damage | Stun | Attack | Block | ||
| 60 | 50 | H | -2 | ||
| |||||
Final Bursting Buffalo (vt)
| Startup | Active | Recovery | Hit | ||
|---|---|---|---|---|---|
| 17 | 5 | 38 | KD | ||
| Damage | Stun | Attack | Block | ||
| 100 | 50 | H | -21 | ||
| |||||
EX Bursting Buffalo (stage 1) (vt)
| Startup | Active | Recovery | Hit | ||
|---|---|---|---|---|---|
| 12 | 5 | 19 | KD | ||
| Damage | Stun | Attack | Block | ||
| 80 | 70 | H | -2 | ||
| |||||
EX Final Bursting Buffalo (vt)
| Startup | Active | Recovery | Hit | ||
|---|---|---|---|---|---|
| 12 | 5 | 19 | KD | ||
| Damage | Stun | Attack | Block | ||
| 80 | 70 | H | -2 | ||
| |||||
V-Trigger 2
No Mercy
| Startup | Active | Recovery | Hit | ||
|---|---|---|---|---|---|
| 1 | - | 6 | - | ||
| Damage | Stun | Attack | Block | ||
| - | - | - | - | ||
| |||||
B3
| Startup | Active | Recovery | Hit | ||
|---|---|---|---|---|---|
| 7 | 2 | 60 | KD | ||
| Damage | Stun | Attack | Block | ||
| 200 | 350 | T | - | ||
| |||||
V-Shift
V-Shift
| Startup | Active | Recovery | Hit | ||
|---|---|---|---|---|---|
| 1 | 9 | 22 | - | ||
| Damage | Stun | Attack | Block | ||
| - | - | - | - | ||
| |||||
V-Shift Break
Buffalo Breaker
| Startup | Active | Recovery | Hit | ||
|---|---|---|---|---|---|
| ? | 3 | ? | KD | ||
| Damage | Stun | Attack | Block | ||
| 60 | 0 | H | -2 | ||
| |||||
V-Reversal
Buffalo Headbutt
| Startup | Active | Recovery | Hit | ||
|---|---|---|---|---|---|
| 17 | 3 | 23 | KD | ||
| Damage | Stun | Attack | Block | ||
| 60 | 0 | H | -2 | ||
| |||||

