Street Fighter V/Menat

From SuperCombo Wiki

Introduction

About Menat

Unique Mechanics

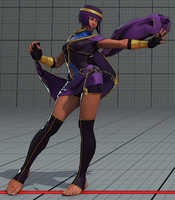
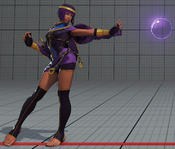
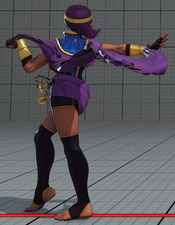
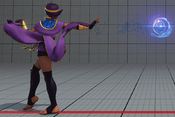
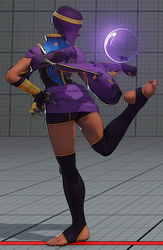
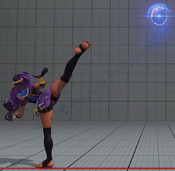
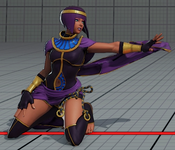
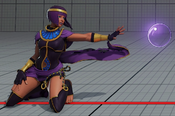
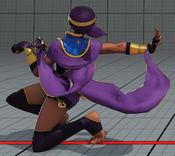
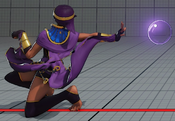
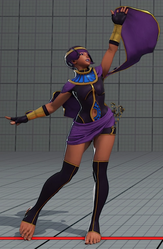
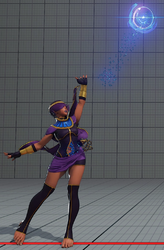
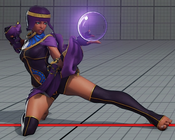
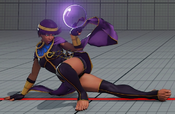
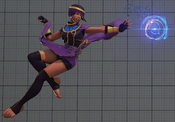
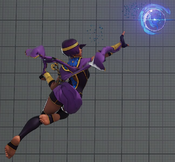
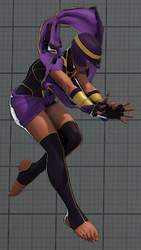
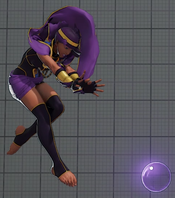
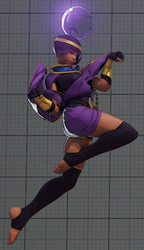
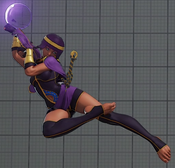
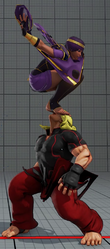
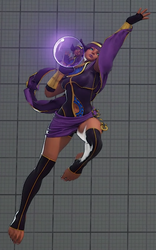
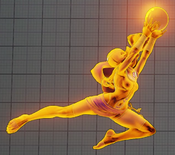
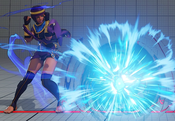
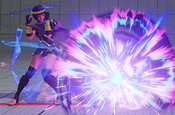
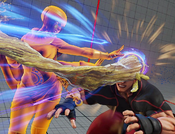
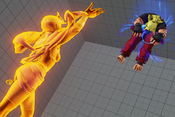
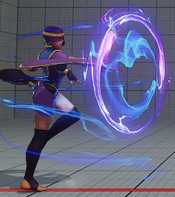
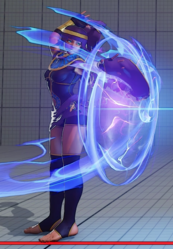
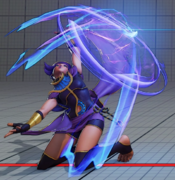
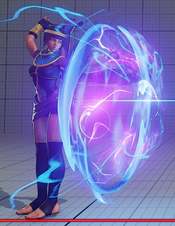
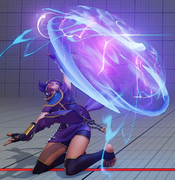
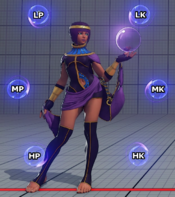
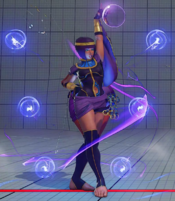
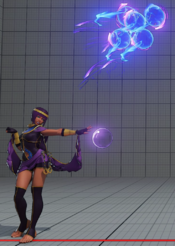
By using her Soul Sphere special, Menat throws her orb forward leaving it somewhere on the screen. LP throws it low, MP mid, HP higher up. After Menat places the orb on screen, all of her punch normals and HK normals will be changed with "orbless" versions, usually resulting in less range but better frame advantage for better combo opportunities. Certain normals with the orb will cause the next attack to be done as the orbless version as well if done immediately after; after a jump HK the orb will float slightly and a follow-up HK will be the no-orb version, letting her get a more damaging jump in combo than she normally would. She can recall the orb at any time, where it can hit opponents on the way back. If Menat is hit while the orb is returning, it loses its hitbox. The orb needs to physically move from its current position back to Menat, meaning it takes longer to get back if Menat is on the other side of the stage from the orb than it does if it's one a forward dash away. For the orb recall, she can also cancel into it from many normals such as 2HK and 6MK which are normally not special cancelable, allowing longer combos.

Final Patch

Players to Watch

  • FluxWaveZ
  • Justin Wong
  • Sako
Menat
SFV-Menat Portrait.jpg
Vitals
Life Points 950
Stun Points 950
V-Gauge Points
V-Trigger 1 3 Bars
V-Trigger 2 2 Bars
Ground Movement
Forward Walk Speed 0.04
Backward Walk Speed 0.032
Forward Dash Speed 20
Backward Dash Speed 24
Forward Dash Distance 1.204
Backward Dash Distance 1.121
Backdash CH Frames 3-11
Jumping
Back Jump Speed 49 (4+41+4)
Neutral Jump Speed 49 (4+41+4)
Forward Jump Speed 48 (3+41+4)
Forward Jump Distance 2.05
Backward Jump Distance 1.845
Throws
Throw Hurtbox 0.25
Throw Range 0.85
SFV Frame Data Glossary
Active

How many frames a move remains active (can hurt opponents) for.

Attack

Attack level is L for low attacks (must be blocked crouching), H is for High attacks (which can be blocked high or low) and M for overhead (must be blocked standing). T is for throw attacks (which cannot be blocked).

Cancel options

Available cancel options.

  • "ch": Chain cancel, refer to description for options.
  • "sp": Special move.
  • "su": Critical art.
  • "vs[1/2]": V-Skill 1 or 2.
  • "vt[1/2]": V-Trigger 1 or 2 activation.
Confirm windows

Hit confirm windows written as Specials & CAs/Target Combos/V-Trigger. Notation may denote V-Skill only cancel windows in Specials.

  • Refers to the amount of time (in frames) you have to cancel into another move from the moment the attack connects with the opponent.
Crush Counter

Crush Counter hit advantage written as opponent state, frame advantage, and v-gauge gain on hit.

Damage

Attack damage on hit. Notation may denote multi-hit or "sweet spot" damage values on certain frames.

Hit/Block

These are frame advantage values when the attack hits or is blocked. If the number is positive, then the move will end before the defender can act again. If the number is negative, the defender will be able to act before the attacker and maybe even punish. KD refers to knockdown on hit.

  • Note that generally, normal counter hits add an additional +2 to hit advantage in SFV.
Knockdown

Knockdown advantage against Normal, Quick Rise and Back Rise wake up options.

Recovery

How many frames it takes for a move to finish after it's been active.

Startup

How many frames it takes before the move becomes 'active' or have a hit box. The last startup frame and the first active frame are the same frame, meaning all values are written as Startup + 1.

Stun

Amount of stun added to the opponent's stun bar on hit.

Normals

5LP
Stand LP
5LP
SFV Menat 5LP.png
Startup Active Recovery Hit
4 2 8 4
Damage Stun Attack Block
20 70 H 3
  • Cancel options: oc sp su vs1 vs2 vt1 vt2
Chains into cr.LK
FATonline.png
5LP (Orb)
Stand LP orb
5LP (Orb)
SFV Menat 5LP (Orb).png
Startup Active Recovery Hit
5 4 7 5(8)
Damage Stun Attack Block
30 70 H 3(6)
  • Cancel options: sp su vs1 vs2 vt1 vt2
Extra range, damage and active frames on orb version
the (x) refers to best-case advantage with spacing
FATonline.png
5MP
Stand MP
5MP
SFV Menat 5MP.png
Startup Active Recovery Hit
5 3 13(16) 4
Damage Stun Attack Block
50 100 H 2
  • Confirm windows:
    • Specials & CA: 16
    • V-Trigger: 16
  • Cancel options: oc sp su vs1 vs2 vt1 vt2
3 frames less recovery on whiff (13f)
FATonline.png
5MP (Orb)
Stand MP orb
5MP (Orb)
SFV Menat 5MP (Orb).png
Startup Active Recovery Hit
6 6 20 -2(3)
Damage Stun Attack Block
60 100 H -8(-3)
  • Confirm windows:
    • V-Trigger: 17
  • Cancel options: vt1 vt2
Extra range, damage and active frames on orb version
the (x) refers to best-case advantage with spacing
FATonline.png
5HP
Stand HP
5HP
SFV Menat 5HP.png
Startup Active Recovery Hit
8 3 19 2
Damage Stun Attack Block
80 150 H -2
  • Confirm windows:
    • Specials & CA: 19
    • V-Trigger: 19
  • Cancel options: oc sp su vs1 vs2 vt1 vt2
FATonline.png
5HP (Orb)
Stand HP orb
5HP (Orb)
SFV Menat 5HP (Orb).png
Startup Active Recovery Hit
12 9 19 -6(2)
Damage Stun Attack Block
80 150 H -10(-2)
  • Crush Counter: Spinning Knockdown, KD Adv, +100 V-Gauge.
  • Knockdown: 82 KD Adv, 33 Quick Rise Adv, 38 Back Rise Adv.
  • Confirm windows:
    • V-Trigger: 19
  • Cancel options: vt1 vt2
Extra range, damage and active frames on orb version
the (x) refers to best-case advantage with spacing
Only builds 100 V-Gauge (1/3rd of a bar) on a Crush Counter instead of the regular 150
FATonline.png
5LK
Stand LK
5LK
SFV Menat 5LK.png
Startup Active Recovery Hit
3 3 10 4
Damage Stun Attack Block
30 70 H 1
  • Cancel options: oc sp su vs1 vs2 vt1 vt2
FATonline.png
5MK
Stand MK
5MK
SFV Menat 5MK.png
Startup Active Recovery Hit
8 3 16 2
Damage Stun Attack Block
60 100 H -2
  • Confirm windows:
    • Specials & CA: *14
    • Notes: *Orb Recall/Explode only
  • Cancel options: oc vt1 vt2
FATonline.png
5HK
Stand HK
5HK
SFV Menat 5HK.png
Startup Active Recovery Hit
9 3 17 7
Damage Stun Attack Block
80 150 H 2
  • Crush Counter: Stagger, 27 Adv, +120 V-Gauge.
  • Confirm windows:
    • Specials & CA: *17
    • V-Trigger: 17
    • Notes: *Orb Recall/Explode only
  • Cancel options: oc vt1 vt2
Hits crouching up close
Forces stand on hit
FATonline.png
5HK (Orb)
Stand HK orb
5HK (Orb)
SFV Menat 5HK (Orb).png
Startup Active Recovery Hit
11 6 23 -4
Damage Stun Attack Block
90 150 H -8
  • Crush Counter: Crumple, C Adv, +120 V-Gauge.
  • Knockdown: 91 KD Adv, 59 Quick Rise Adv, 59 Back Rise Adv.
  • Confirm windows:
    • V-Trigger: 17
  • Cancel options: vt1 vt2
Causes a Crumple state on Crush Counter hit instead of the Stagger state without the orb
If only the orb hitbox Crush Counters, causes a spinning knockdown instead of Crumple
Extra range, damage and active frames on orb version
the (x) refers to best-case advantage with spacing
The ball can hit Abigail standing resulting in +3/-7
FATonline.png
2LP
Crouch LP
2LP
SFV Menat 2LP.png
Startup Active Recovery Hit
4 2 7 4
Damage Stun Attack Block
20 70 H 2
  • Cancel options: oc sp su vs1 vs2 vt1 vt2
FATonline.png
2LP (Orb)
Crouch LP orb
2LP (Orb)
SFV Menat 2LP (Orb).png
Startup Active Recovery Hit
4 4 8 4(7)
Damage Stun Attack Block
30 70 H 2(5)
  • Cancel options: sp su vs1 vs2 vt1 vt2
Extra range, damage and active frames on orb version
the (x) refers to best-case advantage with spacing
FATonline.png
2MP
Crouch MP
2MP
SFV Menat 2MP.png
Startup Active Recovery Hit
6 2 14 4
Damage Stun Attack Block
50 100 H 2
  • Confirm windows:
    • Specials & CA: 14
    • V-Trigger: 14
  • Cancel options: oc sp su vs1 vs2 vt1 vt2
FATonline.png
2MP (Orb)
Crouch MP orb
2MP (Orb)
SFV Menat 2MP (Orb).png
Startup Active Recovery Hit
7 6 13 2(7)
Damage Stun Attack Block
60 100 H -3(2)
  • Confirm windows:
    • Specials & CA: 16
    • V-Trigger: 16
  • Cancel options: sp su vs1 vs2 vt1 vt2
Extra range, damage and active frames on orb version
the (x) refers to best-case advantage with spacing
FATonline.png
2HP
Crouch HP
2HP
SFV Menat 2HP.png
Startup Active Recovery Hit
9 4 18 1
Damage Stun Attack Block
80 150 H -3
  • Crush Counter: Flipping Juggle, J Adv, +150 V-Gauge.
  • Knockdown: 105 KD Adv, 57 Quick Rise Adv, 62 Back Rise Adv.
  • Confirm windows:
    • Specials & CA: 18
    • V-Trigger: 18
  • Cancel options: oc sp su vs1 vs2 vt1 vt2
Forces stand on hit
Crouching hurtbox on frames 1-8
Can only Crush Counter on the 1st active frame and does 10 less damage on subsequent frames
FATonline.png
2HP (Orb)
Crouch HP orb
2HP (Orb)
SFV Menat 2HP (Orb).png
Startup Active Recovery Hit
9 5 19 -1
Damage Stun Attack Block
80 150 H -5
  • Crush Counter: Flipping Juggle, J Adv, +150 V-Gauge.
  • Knockdown: 95 KD Adv, 47 Quick Rise Adv, 52 Back Rise Adv.
  • Confirm windows:
    • Specials & CA: 19
    • V-Trigger: 19
  • Cancel options: sp su vs1 vs2 vt1 vt2
Forces stand on hit
Crouching hurtbox on frames 1-8
Can only Crush Counter on the 1st active frame and does 10 less damage on subsequent frames (including the orb hitbox)
Extra range and active frames on orb version
the (x) refers to best-case advantage with spacing
If just the hitbox on the orb itself connects instead of Menat's hand (like on a standing Abigail) it results in +3/-3 advantage
FATonline.png
2LK
Crouch LK
2LK
SFV Menat 2LK.png
Startup Active Recovery Hit
4 2 9 4
Damage Stun Attack Block
20 70 L 1
  • Cancel options: oc vt1 vt2
Chains into st.LP or cr.LP (with or without orb)
FATonline.png
2MK
Crouch MK
2MK
SFV Menat 2MK.png
Startup Active Recovery Hit
7 3 14 3
Damage Stun Attack Block
50 100 L 2
  • Confirm windows:
    • Specials & CA: 14
    • V-Trigger: 14
  • Cancel options: oc sp su vs1 vs2 vt1 vt2
FATonline.png
2HK
Crouch HK
2HK
SFV Menat 2HK.png
Startup Active Recovery Hit
9 3 25 KD
Damage Stun Attack Block
80 150 L -11
  • Crush Counter: Hard Knockdown, KD Adv, +120 V-Gauge.
  • Knockdown: 65 KD Adv, 16 Quick Rise Adv, 21 Back Rise Adv.
  • Cancel options: oc vt1 vt2
Only builds 100 V-Gauge (1/3rd of a bar) on a Crush Counter instead of the regular 150
FATonline.png
2HK (Orb)
Crouch HK orb
2HK (Orb)
SFV Menat 2HK (Orb).png
Startup Active Recovery Hit
11 3 33 KD
Damage Stun Attack Block
90 150 L -16(-14)
  • Crush Counter: Hard Knockdown, KD Adv, +120 V-Gauge.
  • Knockdown: 57 KD Adv, 8 Quick Rise Adv, 13 Back Rise Adv.
  • Confirm windows:
    • V-Trigger: 15
  • Cancel options: vt1 vt2
Extra range, damage and active frames on orb version
the (x) refers to best-case advantage with spacing
Only builds 100 V-Gauge (1/3rd of a bar) on a Crush Counter instead of the regular 150
FATonline.png
8LP
Jump LP
8LP
SFV Menat 8LP.png
Startup Active Recovery Hit
4 5 - -
Damage Stun Attack Block
30 70 M -
FATonline.png
8LP (Orb)
Jump LP orb
8LP (Orb)
SFV Menat 8LP (Orb).png
Startup Active Recovery Hit
4 5 - -
Damage Stun Attack Block
40 70 M -
Extra range and damage on orb version
FATonline.png
8MP
Jump MP
8MP
SFV Menat 8MP.png
Startup Active Recovery Hit
6 4 - -
Damage Stun Attack Block
60 100 M -
Puts opponent in limited juggle state
FATonline.png
8MP (Orb)
Jump MP orb
8MP (Orb)
SFV Menat 8MP (Orb).png
Startup Active Recovery Hit
8 4 - -
Damage Stun Attack Block
70 100 M -
Extra range and damage on orb version
Puts opponent in limited juggle state
FATonline.png
8HP
Jump HP
8HP
SFV Menat 8HP.png
Startup Active Recovery Hit
13 4 - -
Damage Stun Attack Block
80 150 M -
FATonline.png
8HP (Orb)
Jump HP orb
8HP (Orb)
SFV Menat 8HP (Orb).png
Startup Active Recovery Hit
13 4 - -
Damage Stun Attack Block
90 150 M -
If used late enough into the jump, the orb will not manifest back in Menat's hand fast enough before the next normal is used (the following normal will be without the orb)
Extra range and damage on orb version
Hitbox to hurtbox ratio the best jump-in in all of SFV if timed properly with the Orb
FATonline.png
8LK
Jump LK
8LK
SFV Menat 8LK.png
Startup Active Recovery Hit
4 6 - -
Damage Stun Attack Block
40 70 M -
Can Crossup
FATonline.png
8MK
Jump MK
8MK
SFV Menat 8MK.png
Startup Active Recovery Hit
7 4 - -
Damage Stun Attack Block
60 100 M -
Can Crossup
FATonline.png
8HK
Jump HK
8HK
SFV Menat 8HK.png
Startup Active Recovery Hit
9 4 - -
Damage Stun Attack Block
80 150 M -
FATonline.png
8HK (Orb)
Jump HK orb
8HK (Orb)
SFV Menat 8HK (Orb).png
Startup Active Recovery Hit
9 4 - -
Damage Stun Attack Block
90 150 M -
If used late enough into the jump, the orb will not manifest back in Menat's hand fast enough before the next normal is used (the following normal will be without the orb)
Extra range and damage on ball version
Insane horizontal hitbox range on orb compared to her hurtbox
FATonline.png

Command Normals

3MK
Judgement of Anubis
3MK
SFV Menat 3MK.png
Startup Active Recovery Hit
11 11 18 -6(4)
Damage Stun Attack Block
50 100 L -10(0)
Slight low profile and Projectile invincible on upper body on frames 11-35
Not cancelable in any way
Advantage listed with parentheses format; x(y) - refers to worst(x) to best(y) frame advantage depending on how late into active frames it hits
FATonline.png
6MK
Divine Retribution
6MK
SFV Menat 6MK.png
Startup Active Recovery Hit
27 1(6)1 23 -8 * 1
Damage Stun Attack Block
30*30 50*50 M*M -12 * -7
  • Confirm windows:
    • Specials & CA: *13
    • Notes: *Orb Recall/Explode only
  • Cancel options: oc
Both hits are Overhead
Cancelable into Soul Sphere: Ankh (orb recall) on 1st hit only
FATonline.png
2 or 1 or 3LK (air)
LK Khamun Kick
2 or 1 or 3LK (air)
SFV Menat 2 or 1 or 3LK (air).png
Startup Active Recovery Hit
12 - 9 -2(9)
Damage Stun Attack Block
60 70 H -6(5)
Can be performed from any jump direction
LK Divekick is projectile invincible on legs during entire startup and active frames
Frame advantage varies depending on height / angle
Frame advantage results here are when doing instant air divekicks (if divekick connects higher up, Menat is going to be more - on hit / block)
The (x) refers to best-case advantage with spacing
FATonline.png
2 or 1 or 3MK (air)
MK Khamun Kick
2 or 1 or 3MK (air)
SFV Menat 2 or 1 or 3MK (air).png
Startup Active Recovery Hit
12 - 9 1(9)
Damage Stun Attack Block
60 70 H -2(6)
Can be performed from any jump direction
Not projectile invincible on front of legs like the LK version
Frame advantage varies depending on height / angle
Frame advantage results here are when doing instant air divekicks (if divekick connects higher up, Menat is going to be more - on hit / block)
The (x) refers to best-case advantage with spacing
FATonline.png
2 or 1 or 3HK (air)
HK Khamun Kick
2 or 1 or 3HK (air)
SFV Menat 2 or 1 or 3HK (air).png
Startup Active Recovery Hit
12 - 9 1(9)
Damage Stun Attack Block
60 70 H -2(6)
Can be performed from any jump direction
Not projectile invincible on front of legs like the LK version
Frame advantage varies depending on height / angle
Frame advantage results here are when doing instant air divekicks (if divekick connects higher up, Menat is going to be more - on hit / block)
The (x) refers to best-case advantage with spacing
FATonline.png

Throws

LPLK
Overflowing Nile
Throw
LPLK
SFV Menat LPLK.png
Startup Active Recovery Hit
5 3 17 KD
Damage Stun Attack Block
120 170 T -
  • Knockdown: 77 KD Adv, 18 Quick Rise Adv, 18 Back Rise Adv.
Can walk forward throw loop in the corner if they wake-up with a normal that pushes their grab-box forward (such as Akuma's 3-frame st.LP)
FATonline.png
4LPLK
Pyramid Hopscotch
Back Throw
4LPLK
SFV Menat 4LPLK.png
Startup Active Recovery Hit
5 3 17 KD
Damage Stun Attack Block
140 200 T -
  • Knockdown: 63 KD Adv, 14 Quick Rise Adv, 14 Back Rise Adv.
FATonline.png

Special Moves

623LK
LK Guardian of the Sun
623LK
SFV Menat 623K.png
Startup Active Recovery Hit
6 15 21+30 KD
Damage Stun Attack Block
100 150 H -
  • Knockdown: 65 KD Adv, 16 Quick Rise Adv, 16 Back Rise Adv.
Cannot be performed without the orb in hand
Only hits airborne
Cannot hit crossup
Strike hitbox
Denies backroll on wake-up
Crouching hurtbox during startup
FATonline.png
623MK
MK Guardian of the Sun
623MK
SFV Menat 623K.png
Startup Active Recovery Hit
8 15 21+30 KD
Damage Stun Attack Block
120 150 H -
  • Knockdown: 65 KD Adv, 16 Quick Rise Adv, 16 Back Rise Adv.
Cannot be performed without the orb in hand
Only hits airborne
Cannot hit crossup
Strike hitbox
Denies backroll on wake-up
Crouching hurtbox during startup
FATonline.png
623HK
HK Guardian of the Sun
623HK
SFV Menat 623K.png
Startup Active Recovery Hit
10 15 21+30 KD
Damage Stun Attack Block
140 200 H -
  • Knockdown: 65 KD Adv, 16 Quick Rise Adv, 16 Back Rise Adv.
Cannot be performed without the orb in hand
Only hits airborne
Cannot hit crossup
Strike hitbox
Denies backroll on wake-up
Crouching hurtbox during startup
FATonline.png
623KK
EX Guardian of the Sun
623KK
SFV Menat 623KK.png
Startup Active Recovery Hit
6 15 21+30 KD
Damage Stun Attack Block
150 200 H -
  • Knockdown: 65 KD Adv, 16 Quick Rise Adv, 16 Back Rise Adv.
Fully invincible on frames 5-20
Cannot be performed without the orb in hand
Only hits airborne
Cannot hit crossup
Strike hitbox
Denies backroll on wake-up
Crouching hurtbox during startup
FATonline.png
236K
Soul Spark
236K
SFV Menat 236K.png
Startup Active Recovery Hit
18 10 26 KD
Damage Stun Attack Block
80 150 H 3
  • Knockdown: 122 KD Adv, 63 Quick Rise Adv, 68 Back Rise Adv.
Cannot be performed with the orb in hand (only available when the orb is placed somewhere else on screen)
Projectile hitbox (detonation can nullify 1 hit of projectiles)
A rather sizeable spark triggers around Menat's orb wherever it is placed on the screen
The orb returns to Menat's hand after the explosion
Launches opponent into the air towards Menat in a limited juggle state
The same moves that cancel into the Orb Recall can also be canceled into this Soul Spark move
Cancelable into V-Trigger 2 orb firing and reload
FATonline.png
236KK
EX Soul Spark
236KK
SFV Menat 236KK.png
Startup Active Recovery Hit
28 10 26 KD
Damage Stun Attack Block
80 150 H 3
  • Knockdown: 122 KD Adv, 63 Quick Rise Adv, 68 Back Rise Adv.
Cannot be performed with the orb in hand (only available when the orb is placed somewhere else on screen)
Projectile hitbox (detonation can nullify 1 hit of projectiles)
A rather sizeable spark triggers around Menat's orb wherever it is placed on the screen
The orb does NOT return to Menat's hand after the explosion (unlike the non-EX version)
Launches opponent into the air towards Menat in a limited juggle state
The same moves that cancel into the Orb Recall can also be canceled into this Soul Spark move
Cancelable into V-Trigger 2 orb firing and reload
FATonline.png
236LP
LP Soul Sphere
236LP
SFV Menat 236LP.png
Startup Active Recovery Hit
14 29 24 2
Damage Stun Attack Block
40 70 H -8
  • Cancel options: su
1-hit Projectile hitbox
Cannot hit airborne opponents
Places the ball down on the floor at 50% screen range
Ball dissipates and goes back into Menat's hands if it collides with another projectile during its active frames
FATonline.png
236MP
MP Soul Sphere
236MP
SFV Menat 236MP.png
Startup Active Recovery Hit
14 36 29 1
Damage Stun Attack Block
40 70 H -11
  • Cancel options: su
1-hit Projectile hitbox
Cannot hit airborne opponents
Places the ball above floor at 75% screen range
Ball dissipates and goes back into Menat's hands if it collides with another projectile during its active frames
FATonline.png
236HP
HP Soul Sphere
236HP
SFV Menat 236HP.png
Startup Active Recovery Hit
14 36 22 4
Damage Stun Attack Block
40 70 H -4
  • Cancel options: su
1-hit Projectile hitbox
Cannot hit crouching
Only version of Soul Sphere that can hit airborne opponents
Places the ball above the opponent at full-screen range
Ball dissipates and goes back into Menat's hands if it collides with another projectile during its active frames
Cannot hit crouching
FATonline.png
236LPMP
LPMP Soul Sphere
236LPMP
SFV Menat 236LPMP 1.png
SFV Menat 236LPMP 2.png
Startup Active Recovery Hit
19 23 28 7
Damage Stun Attack Block
30*30 (60) 0 H 3
1-hit Projectile hitbox
Cannot hit airborne opponents
On Hit: Pulls in opponent for a combo extender and puts the ball back in the hands of Menat
On Whiff: Places the ball down on the floor at 50% screen range
Ball does NOT dissipate back into Menat's hands if it collides with other fireballs
FATonline.png
236LPHP
LPHP Soul Sphere
236LPHP
SFV Menat 236LPHP 1.png
SFV Menat 236LPHP 2.png
Startup Active Recovery Hit
10 23 41 KD
Damage Stun Attack Block
20*130 (150) 0*200 H -10
  • Knockdown: 87 KD Adv, 28 Quick Rise Adv, 28 Back Rise Adv.
1-hit Projectile hitbox
Cannot hit airborne opponents
On Hit: Knocks down opponent and denies backroll wake-up
On Whiff: Places the ball above floor at 50% screen range
Ball does NOT dissipate back into Menat's hands if it collides with other fireballs
FATonline.png
236MPHP
MPHP Soul Sphere
236MPHP
SFV Menat 236MPHP 1.png
SFV Menat 236MPHP 2.png
Startup Active Recovery Hit
10 23 30 0(KD)
Damage Stun Attack Block
40(150) 70(200) H -9
  • Knockdown: 33 KD Adv, 33 Quick Rise Adv, 33 Back Rise Adv.
  • Cancel options: vs2
2-hit Projectile hitbox
Data shown in parentheses (X) refers to when the orb hits an airborne opponent
Causes a Hard Knockdown (see KDA numbers) when the orb hits an airborne opponent
Only has the canned in follow-up attack animation against airborne opponents (not worth using on grounded opponents)
Places the ball above the opponent at 60% screen range
Ball does NOT dissipate back into Menat's hands if it collides with other fireballs
First hit cancelable into V-Trigger 2 orb firing and reload on hit and block
FATonline.png
236P (recall)
Soul Sphere Ankh
236P (recall)
SFV Menat 236P (recall).png
Startup Active Recovery Hit
5 - 16 14+
Damage Stun Attack Block
40 70 H 3+
1-hit Projectile hitbox
Can collide with another projectile while flying back to Menat
Active frames stop prematurely if Menat is hit by anything before the orb collides with anything on the way back
Pulls the orb back from different angles depending on where it's currently placed on screen
Cannot pull the orb back until the prior fireball has finished its active frames
Vacuums in the opponent on hit/block
Puts airborne opponents into a juggle state (free juggle if this hit is the start of the juggle)
Frame advantage varies greatly (but is always plus on hit / block)
Frame advantage shown is the least amount of advantage possible (if Orb is used while inside their hurtbox)
FATonline.png

Critical Art

236236P
The Nefertem
236236P
SFV Menat 236236P 1.png
SFV Menat 236236P 2.png
Startup Active Recovery Hit
1+3 16 65 KD
Damage Stun Attack Block
10*20x13*60 (330) 0 H -46
  • Knockdown: 8 KD Adv, 8 Quick Rise Adv, 8 Back Rise Adv.
Completely invincible on frames 1-19
Strike hitbox (not a projectile)
Hard Knockdown
Immediately recalls orb to Menat's hand when Super is initiated
Does not disable use of VT1 orbs during recovery, even on block
Has different voice lines depending on what punch button is used to initiate Super
If Super is done with MP, Menat will wink at the end
FATonline.png

Taunts

5PPPKKK
Taunt
5PPPKKK
SFV Menat 5PPPKKK.png
"I sense nervous energy."
Startup Active Recovery Hit
- - 61 -
Damage Stun Attack Block
- - - -
Upper-body Projectile invincible and Throw invincible on frames 44-216
FATonline.png

V-System

V-Skill 1

MPMK (VS1)
Soul Reflect: Kamal
MPMK (VS1)
SFV Menat MPMK (VS1).png
Startup Active Recovery Hit
9 3(8) 25 KD
Damage Stun Attack Block
80 150 - -6
  • Knockdown: 88 KD Adv, 29 Quick Rise Adv, 34 Back Rise Adv.
  • Confirm windows:
    • Specials & CA: *18/**21
    • V-Trigger: 21
    • Notes: *Orb Recall/Explode only, **CA only
  • Cancel options: oc su vt1 vt2
Absorbs 1 hit of projectiles
Can only absorb 1 projectile at a time
3 active frames of strike hitbox
8 active frames reflect
Builds 80 V-Gauge (1/4th bar) when absorbing a projectile
Builds 80/40 V-gauge on hit / block
Much smaller hitboxes than the Orb version of this V-Skill
Safer on block than the Orb version of this V-Skill
Faster recovery and better KDA than the Orb version of this V-Skill
FATonline.png
2MPMK (VS1)
Soul Reflect: Stella
2MPMK (VS1)
SFV Menat 2MPMK (VS1).png
Startup Active Recovery Hit
14 3(15) 22 KD
Damage Stun Attack Block
80 150 - -3
  • Knockdown: 106 KD Adv, 47 Quick Rise Adv, 52 Back Rise Adv.
  • Confirm windows:
    • Specials & CA: *18/**45
    • V-Trigger: 29
    • Notes: *Orb Recall/Explode only, **CA only
  • Cancel options: oc su vt1 vt2
Absorbs 1 hit of projectile
Strike hitbox on frames 14-16
Projectile absorption hitbox on frames 14-21 and again on frames 22-28
Although there are 2 cases of projectile absorption hitboxes, each one only absorb 1 projectile at a time (in theory this can absorb 2 hits of projectiles because of the 2 seperate projectile absorption hitboxes)
Builds 80 V-Gauge (1/4th bar) for each projectile absorbed
Builds 80/40 V-gauge on hit / block
Much smaller hitboxes than the Orb version of this V-Skill
Safer on block than the Orb version of this V-Skill
Faster recovery and better KDA than the Orb version of this V-Skill
FATonline.png
MPMK (VS1) (Orb)
Soul Reflect: Kamal (Orb)
MPMK (VS1) (Orb)
SFV Menat MPMK (VS1) (Orb).png
Startup Active Recovery Hit
9 3(8) 37 KD
Damage Stun Attack Block
80 150 - -18
  • Knockdown: 76 KD Adv, 17 Quick Rise Adv, 22 Back Rise Adv.
  • Confirm windows:
    • Specials & CA: *20
    • V-Trigger: 20
    • Notes: *CA only
  • Cancel options: oc su vt1 vt2
Reflects any non-EX projectiles (even multi-hit ones like Akuma's HP Red Fireball)
Can only reflect 1 projectile at a time
3 active frames of strike hitbox
8 active frames reflect
Does not build any V-gauge when reflecting projectiles
Builds 100/50 V-gauge (hit/block)
Much bigger hitboxes when using the Orb version
Much more negative on block when using the Orb version of the V-Skills
More recovery and worse KDA when using the Orb version of this V-Skill
FATonline.png
2MPMK (VS1) (Orb)
Soul Reflect: Stella (Orb)
2MPMK (VS1) (Orb)
SFV Menat 2MPMK (VS1) (Orb).png
Startup Active Recovery Hit
14 3(15) 35 KD
Damage Stun Attack Block
80 150 - -16
  • Knockdown: 89 KD Adv, 30 Quick Rise Adv, 35 Back Rise Adv.
  • Confirm windows:
    • Specials & CA: *45
    • V-Trigger: 29
    • Notes: *CA only
  • Cancel options: oc su vt1 vt2
Reflects any non-EX projectiles (even multi-hit ones like Akuma's HP Red Fireball)
Strike hitbox on frames 14-16
Projectile reflect hitbox on frames 14-21 and again on frames 22-28
Although there are 2 cases of projectile reflecting hitboxes, each one only reflects 1 projectile at a time (in theory this can reflect 2 seperate projectiles because of the 2 seperate projectile reflect hitboxes)
Builds 100/50 V-gauge on hit / block
Much bigger hitboxes when using the Orb version
Much more negative on block when using the Orb version of the V-Skills
More recovery and worse KDA when using the Orb version of this V-Skill
FATonline.png

V-Skill 2

MPMK (VS2)
Soul Spiral
MPMK (VS2)
SFV Menat MPMK (VS2).png
Startup Active Recovery Hit
19 8 30 KD
Damage Stun Attack Block
70 120 - -20
  • Knockdown: 77 KD Adv, 18 Quick Rise Adv, 23 Back Rise Adv.
  • Confirm windows:
    • Specials & CA: *22
    • V-Trigger: 22
    • Notes: *Orb Recall/Explode and CA only
  • Cancel options: oc sp su vt1 vt2
Builds 60/30 V-gauge (hit/block)
Can only special cancel into Soul Sphere Ankh (recall) and Soul Spark
Juggle Limit / Increase / Start: 1 / 1 / 1
FATonline.png
MPMK (VS2) (Orb)
Soul Spiral (Orb)
MPMK (VS2) (Orb)
SFV Menat MPMK (VS2) (Orb).png
Startup Active Recovery Hit
19 10 22 KD
Damage Stun Attack Block
70 120 - -14
  • Knockdown: 83 KD Adv, 24 Quick Rise Adv, 29 Back Rise Adv.
  • Confirm windows:
    • Specials & CA: *24
    • V-Trigger: 24
    • Notes: *CA only
  • Cancel options: su vt1 vt2
Absorbs 1 hit of projectile
Builds 60/30 V-gauge (hit/block)
Juggle Limit / Increase / Start: 1 / 1 / 1
FATonline.png

V-Trigger 1

HPHK (VT1)
Wisdom of Thoth
HPHK (VT1)
SFV Menat HPHK (VT1).png
Startup Active Recovery Hit
1 - 4 -
Damage Stun Attack Block
20x6 (120) 20x6 (120) - -
3 bar V-Trigger
Duration of 2000 frames (~33 seconds)
Projectile-type attack
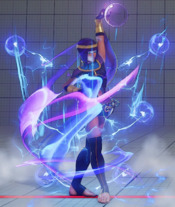
Each orb is assigned to its own button that are released via pressing and releasing said button
The orbs manifest in 9 frames after a button is released
Orbs do not shoot out unless a button is held & released or pressed at least 9 frames into the duration / animation of a NORMAL (does not apply to when inputting special moves, then the corresponding orb will shoot out immediately unless the button is held down)
LP & LK (Highest 2 orbs) can only hit airborne opponents if used from standing position (but crouching and air versions of LP & LK can hit standing)
FATonline.png

V-Trigger 2

HPHK (VT2)
Prophecy of Thoth
HPHK (VT2)
SFV Menat HPHK (VT2).png
Startup Active Recovery Hit
1 - 4 -
Damage Stun Attack Block
- - - -
2 bar V-Trigger
Duration of 2000 frames (~33 seconds)
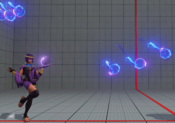
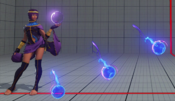
Gives access to a new move, Judgement of Thoth (QCB+P), where Menat sends out the orbs all at once in different arcs depending on strength of punch button
Reload orbs after sending with HP+HK
V-Trigger 2 orbs have a projectile hitbox
FATonline.png
214LP
LP Judgement of Thoth
214LP
SFV Menat 214LP.png
Startup Active Recovery Hit
11 - 26 -
Damage Stun Attack Block
20x6 (120) 20x6 (120) H -
Sends off 6 projectiles all at the same time
Trajectory of the projectiles depends on strength of button used (LP/MP/HP)
Each projectile does 20 damage / stun
Puts airborne opponents into a limited juggle state
Spends 1000 V-Timer (50% V-Timer) when launching the first set of orbs (but does not cost anything to reload or fire the second set of orbs)
FATonline.png
214MP
MP Judgement of Thoth
214MP
SFV Menat 214MP.png
Startup Active Recovery Hit
11 - 26 -
Damage Stun Attack Block
20x6 (120) 20x6 (120) H -
Sends off 6 projectiles all at the same time
Trajectory of the projectiles depends on strength of button used (LP/MP/HP)
Each projectile does 20 damage / stun
This MP version puts airborne opponents into a free juggle state (LP and HP versions put them into a limited juggle state)
Spends 1000 V-Timer (50% V-Timer) when launching the first set of orbs (but does not cost anything to reload or fire the second set of orbs)
FATonline.png
214HP
HP Judgement of Thoth
214HP
SFV Menat 214HP 1.png
SFV Menat 214HP 2.png
Startup Active Recovery Hit
11 - 26 -
Damage Stun Attack Block
20x6 (120) 20x6 (120) H -
Sends off 6 projectiles all at the same time
Trajectory of the projectiles depends on strength of button used (LP/MP/HP)
Each projectile does 20 damage / stun
Puts airborne opponents into a limited juggle state
Spends 1000 V-Timer (50% V-Timer) when launching the first set of orbs (but does not cost anything to reload or fire the second set of orbs)
FATonline.png
HPHK (reload)
Prophecy of Thoth
HPHK (reload)
SFV Menat HPHK (reload).png
Startup Active Recovery Hit
- - 42 -
Damage Stun Attack Block
- - - -
Restocks Menat with 6 orbs again (does not cost any extra V-Timer)
Can only be done after firing off the initial 6 orbs she gains on V-Trigger 2 activation
Takes a total of 42 frames of animation
FATonline.png

V-Shift

5MKHP
V-Shift
5MKHP
SFV Menat 5MKHP.png
Startup Active Recovery Hit
1 9 22 -
Damage Stun Attack Block
- - - -
Shifts back 1.12 range
Fully invincible on frames 1-9 during which time any strike or projectile evaded will trigger a slow-motion effect on frame 11 for both players
Immediately gains full invincibility for the full duration of V-Shift if you successfully evade a strike or projectile on start-up frames 1-9
Throw invincible on frames 1-16 on an empty / raw V-Shift
Counter-Hit state on frames 10-31 on an empty / raw V-Shift
Opponent can still cancel the attack that was V-Shifted as if it had connected (this allows for a lot of shenanigans)
Costs 300 V-Gauge (1 bar) to use and refunds 150 V-Gauge back (1/2 bar) on a successful V-Shift if the slow-mo is triggered
If the V-Shift is successful you can cancel it into a follow-up attack (see V-Shift Break) that's fully invincible and knocks the opponent down on hit
FATonline.png

V-Shift Break

5MKHP
Sistrum of Fortune
5MKHP
SFV Menat 5MKHP break.png
Startup Active Recovery Hit
? 3 ? KD
Damage Stun Attack Block
60 0 H -2
  • Knockdown: 77 KD Adv, 18 Quick Rise Adv, 23 Back Rise Adv.
Fully invincible during startup and active frames
FATonline.png

V-Reversal

6PPP
Left Eye of the Lion
6PPP
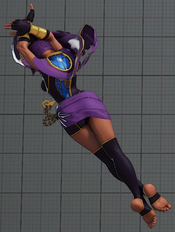
SFV Menat 6PPP.png
Startup Active Recovery Hit
24 17 4 -
Damage Stun Attack Block
- - - -
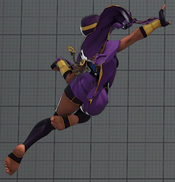
Strike and Projectile invincible during teleport on frames 1-40
Menat can be grabbed during the first 23 frames of startup before she teleports behind the opponent, after that she fully invincible on frames 24 to 40
Vulnerable on the last 4 frames of recovery (frames 41-44)
FATonline.png


SFV Navigation

General
FAQ
Controls
HUD
Glossary
Movement
Offense
Defense
Combos
V-System
Advanced
Game Data
Changelist
Links
Characters
Abigail
Akira
Akuma
Alex
Balrog
Birdie
Blanka
Cammy
Chun-Li
Cody
Dan
Dhalsim
Ed
E.Honda
Falke
F.A.N.G
G
Gill
Guile
Ibuki
Juri
Kage
Karin
Ken
Kolin
Laura
Lucia
Luke
M.Bison
Menat
Nash
Necalli
Oro
Poison
Rashid
Rose
R.Mika
Ryu
Sagat
Sakura
Seth
Urien
Vega
Zangief
Zeku (Old)
Zeku (Young)
Eleven