Introduction
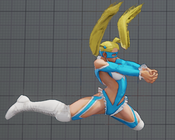
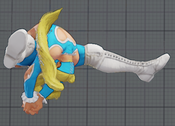
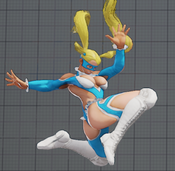
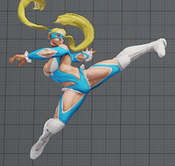
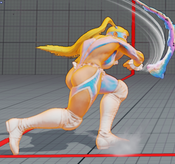
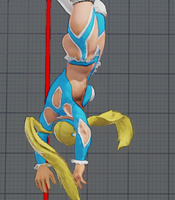
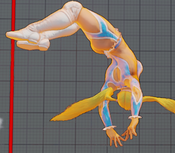
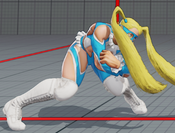
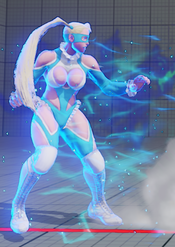
About R. Mika
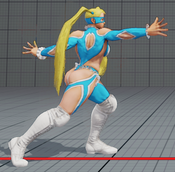
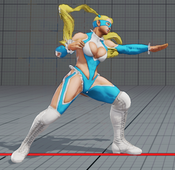
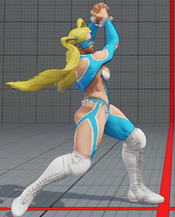
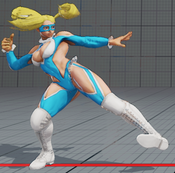
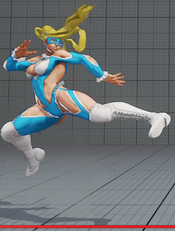
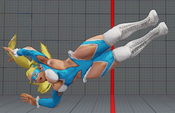
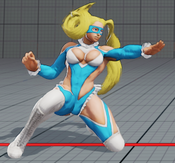
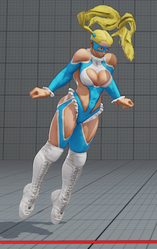
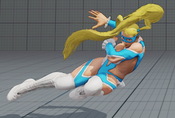
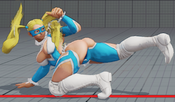
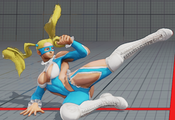
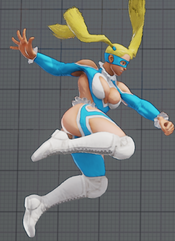
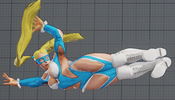
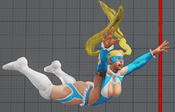
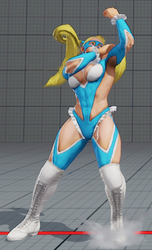
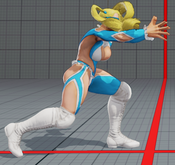
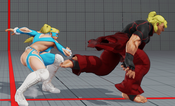
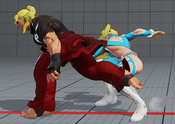
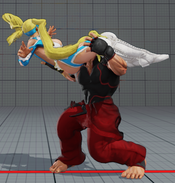
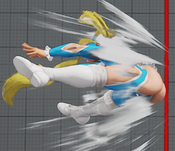
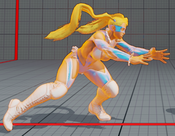
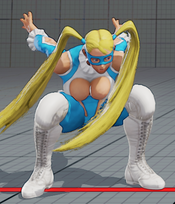
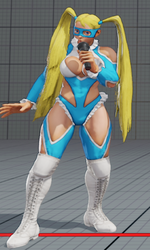
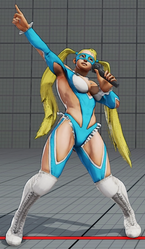
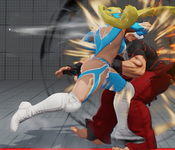
Hailing from Japan, Rainbow Mika is a trained professional women's wrestler, already on her path to stardom.
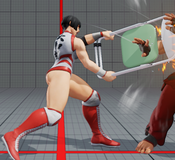
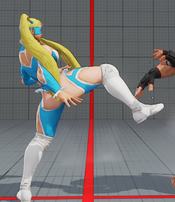
To put it simply. Mika is annoying. She loves harassing the opponent with her great normals, a command grab that loops into itself, and great mobility. Mika has a vast variety of tools to keep the opponent on their toes and make sure they aren't falling asleep. Although her damage output isn't remarkable, this is more than made up for by the fact that her moveset is designed to annoy your opponent with fast and long ranged normals. If you like frustrating your opponent, testing their patience, and overcoming their mentality, then Mika might be just for you.
Final Patch
Players to Watch
- Fuudo
- Luffy
- Nuckledu
| R.Mika | |
|---|---|
| Vitals | |
| Life Points | 950 |
| Stun Points | 1000 |
| V-Gauge Points | |
| V-Trigger 1 | 600 |
| V-Trigger 2 | 900 |
| Ground Movement | |
| Forward Walk Speed | 4.2 |
| Backward Walk Speed | 3 |
| Forward Dash Speed | 18 |
| Backward Dash Speed | 24 |
| Forward Dash Distance | 134.2 |
| Backward Dash Distance | 120 |
| Backdash CH Frames | 3-10 |
| Jumping | |
| Back Jump Speed | 46 (4+38+4) |
| Neutral Jump Speed | 46 (4+38+4) |
| Forward Jump Speed | 45 (3+38+4) |
| Forward Jump Distance | 212.8 |
| Backward Jump Distance | 182.4 |
| Throws | |
| Throw Hurtbox | 0.25 |
| Throw Range | 0.85 |
Frame Data & Descriptions are provided by FATOnline.
|
| SFV Frame Data Glossary | |
|---|---|
| Active |
How many frames a move remains active (can hurt opponents) for. |
| Attack |
Attack level is L for low attacks (must be blocked crouching), H is for High attacks (which can be blocked high or low) and M for overhead (must be blocked standing). T is for throw attacks (which cannot be blocked). |
| Cancel options |
Available cancel options.
|
| Confirm windows |
Hit confirm windows written as Specials & CAs/Target Combos/V-Trigger. Notation may denote V-Skill only cancel windows in Specials.
|
| Crush Counter |
Crush Counter hit advantage written as opponent state, frame advantage, and v-gauge gain on hit. |
| Damage |
Attack damage on hit. Notation may denote multi-hit or "sweet spot" damage values on certain frames. |
| Hit/Block |
These are frame advantage values when the attack hits or is blocked. If the number is positive, then the move will end before the defender can act again. If the number is negative, the defender will be able to act before the attacker and maybe even punish. KD refers to knockdown on hit.
|
| Knockdown |
Knockdown advantage against Normal, Quick Rise and Back Rise wake up options. |
| Recovery |
How many frames it takes for a move to finish after it's been active. |
| Startup |
How many frames it takes before the move becomes 'active' or have a hit box. The last startup frame and the first active frame are the same frame, meaning all values are written as Startup + 1. |
| Stun |
Amount of stun added to the opponent's stun bar on hit. |
Normals
Stand LP
| Startup | Active | Recovery | Hit |
|---|---|---|---|
| 4 | 2 | 7 | 4 |
| Damage | Stun | Attack | Block |
| 30 | 70 | H | 2 |
Stand MP
| Startup | Active | Recovery | Hit |
|---|---|---|---|
| 5 | 2 | 11 | 8 |
| Damage | Stun | Attack | Block |
| 60 | 100 | H | -2 |
Stand HP
| Startup | Active | Recovery | Hit | ||
|---|---|---|---|---|---|
| 7 | 3 | 18 | 2 | ||
| Damage | Stun | Attack | Block | ||
| 90 | 150 | H | -6 | ||
| |||||
Stand LK
| Startup | Active | Recovery | Hit |
|---|---|---|---|
| 4 | 3 | 8 | 2 |
| Damage | Stun | Attack | Block |
| 30 | 70 | H | 1 |
Stand MK
| Startup | Active | Recovery | Hit | ||
|---|---|---|---|---|---|
| 8 | 4 | 15 | 2 | ||
| Damage | Stun | Attack | Block | ||
| 60 | 100 | H | -2 | ||
| |||||
Stand HK
| Startup | Active | Recovery | Hit | ||
|---|---|---|---|---|---|
| 13(12) | 2 | 20 | 2 | ||
| Damage | Stun | Attack | Block | ||
| 90 | 150 | H | -4 | ||
| |||||
Stand HK (hold)
| Startup | Active | Recovery | Hit | ||
|---|---|---|---|---|---|
| 35 | 2 | 20 | 4 | ||
| Damage | Stun | Attack | Block | ||
| 100 | 150 | H | 2 | ||
| |||||
Crouch LP
| Startup | Active | Recovery | Hit |
|---|---|---|---|
| 3 | 2 | 6 | 3 |
| Damage | Stun | Attack | Block |
| 20 | 70 | H | 1 |
Crouch MP
| Startup | Active | Recovery | Hit | ||
|---|---|---|---|---|---|
| 7 | 4 | 16 | 1 | ||
| Damage | Stun | Attack | Block | ||
| 60 | 100 | H | -1 | ||
| |||||
Crouch HP
| Startup | Active | Recovery | Hit | ||
|---|---|---|---|---|---|
| 11 | 6 | 17 | -2 | ||
| Damage | Stun | Attack | Block | ||
| 80 | 150 | H | -6 | ||
| |||||
Crouch LK
| Startup | Active | Recovery | Hit |
|---|---|---|---|
| 4 | 2 | 8 | 3 |
| Damage | Stun | Attack | Block |
| 20 | 70 | L | 1 |
Crouch MK
| Startup | Active | Recovery | Hit | ||
|---|---|---|---|---|---|
| 7 | 4 | 14 | 3 | ||
| Damage | Stun | Attack | Block | ||
| 60 | 100 | H | -2 | ||
| |||||
Crouch HK
| Startup | Active | Recovery | Hit | ||
|---|---|---|---|---|---|
| 12 | 8 | 21 | KD | ||
| Damage | Stun | Attack | Block | ||
| 90 | 150 | L | -12 | ||
| |||||
Jump LP
| Startup | Active | Recovery | Hit |
|---|---|---|---|
| 3 | 5 | - | 6~9 |
| Damage | Stun | Attack | Block |
| 40 | 70 | M | 3~6 |
Jump MP
| Startup | Active | Recovery | Hit | ||
|---|---|---|---|---|---|
| 7 | 5 | - | 12 | ||
| Damage | Stun | Attack | Block | ||
| 60 | 100 | M | 9 | ||
| |||||
Jump HP
| Startup | Active | Recovery | Hit |
|---|---|---|---|
| 8 | 5 | - | 9~15 |
| Damage | Stun | Attack | Block |
| 90 | 150 | M | 6~12 |
Jump LK
| Startup | Active | Recovery | Hit | ||
|---|---|---|---|---|---|
| 4 | 8 | - | 5~9 | ||
| Damage | Stun | Attack | Block | ||
| 40 | 70 | M | 2~6 | ||
| |||||
Jump MK
| Startup | Active | Recovery | Hit |
|---|---|---|---|
| 6 | 5 | - | 11~12 |
| Damage | Stun | Attack | Block |
| 70 | 100 | M | 8~9 |
Jump HK
| Startup | Active | Recovery | Hit |
|---|---|---|---|
| 7 | 7 | - | 12~15 |
| Damage | Stun | Attack | Block |
| 90 | 150 | M | 9~12 |
Command Normals
Divebomb
| Startup | Active | Recovery | Hit | ||
|---|---|---|---|---|---|
| 16 | 7 | 27 | KD | ||
| Damage | Stun | Attack | Block | ||
| 70 | 100 | M | -9(-10) | ||
| |||||
Lady Mika
| Startup | Active | Recovery | Hit | ||
|---|---|---|---|---|---|
| 10 | 3 | 12 | KD | ||
| Damage | Stun | Attack | Block | ||
| 80 | 150 | H | 3 | ||
| |||||
Passion Press
| Startup | Active | Recovery | Hit | ||
|---|---|---|---|---|---|
| 8 | 2 | 20 | 0 | ||
| Damage | Stun | Attack | Block | ||
| 50 | 100 | H | -8 | ||
| |||||
Passion Rope Throw Forward
| Startup | Active | Recovery | Hit | ||
|---|---|---|---|---|---|
| 2 | 2 | 50 | KD | ||
| Damage | Stun | Attack | Block | ||
| 50*27 | 100*0 | H | -40 | ||
| |||||
Passion Rope Throw Backward
| Startup | Active | Recovery | Hit | ||
|---|---|---|---|---|---|
| 2 | 2 | 38 | KD | ||
| Damage | Stun | Attack | Block | ||
| 50*27 | 100*0 | H | -28 | ||
| |||||
Target Combos
Shooting Star Combo
| Startup | Active | Recovery | Hit | ||
|---|---|---|---|---|---|
| 7+8 | 5 | - | KD | ||
| Damage | Stun | Attack | Block | ||
| 60*54 | 100*90 | M*M | - | ||
| |||||
Stomp Chomp
| Startup | Active | Recovery | Hit | ||
|---|---|---|---|---|---|
| 4+4 | 2 | 14 | 1 | ||
| Damage | Stun | Attack | Block | ||
| 30*45 | 70*90 | H*H | -5 | ||
| |||||
Throws
Daydream Headlock
| Startup | Active | Recovery | Hit |
|---|---|---|---|
| 5 | 3 | 17 | KD |
| Damage | Stun | Attack | Block |
| 140 | 200 | T | KD |
Sell Down
| Startup | Active | Recovery | Hit |
|---|---|---|---|
| 5 | 2 | 18 | KD |
| Damage | Stun | Attack | Block |
| 140 | 200 | T | KD |
Special Moves
LP Shooting Peach
| Startup | Active | Recovery | Hit | ||
|---|---|---|---|---|---|
| 10 | 6 | 9+16 | KD | ||
| Damage | Stun | Attack | Block | ||
| 80 | 150 | H | -7 | ||
| |||||
MP Shooting Peach
| Startup | Active | Recovery | Hit | ||
|---|---|---|---|---|---|
| 13 | 10 | 4+19 | KD | ||
| Damage | Stun | Attack | Block | ||
| 90 | 150 | H | -10 | ||
| |||||
HP Shooting Peach
| Startup | Active | Recovery | Hit | ||
|---|---|---|---|---|---|
| 20(16) | 13 | 2+15 | KD | ||
| Damage | Stun | Attack | Block | ||
| 100 | 150 | H | -12 | ||
| |||||
EX Shooting Peach
| Startup | Active | Recovery | Hit | ||
|---|---|---|---|---|---|
| 5 | 5(13)5 | 18(23) | KD | ||
| Damage | Stun | Attack | Block | ||
| 40*40*50 | 20*20*160 | H*H*H | -15 | ||
| |||||
LK Wingless Airplane
| Startup | Active | Recovery | Hit | ||
|---|---|---|---|---|---|
| 5 | 5 | 23+20 | KD | ||
| Damage | Stun | Attack | Block | ||
| 130 | 200 | T | - | ||
| |||||
MK Wingless Airplane
| Startup | Active | Recovery | Hit | ||
|---|---|---|---|---|---|
| 7 | 8 | 20+20 | KD | ||
| Damage | Stun | Attack | Block | ||
| 130 | 200 | T | - | ||
| |||||
HK Wingless Airplane
| Startup | Active | Recovery | Hit | ||
|---|---|---|---|---|---|
| 10 | 11 | 17+20 | KD | ||
| Damage | Stun | Attack | Block | ||
| 130 | 200 | T | - | ||
| |||||
EX Wingless Airplane
| Startup | Active | Recovery | Hit | ||
|---|---|---|---|---|---|
| 5 | 11 | 17+20 | KD | ||
| Damage | Stun | Attack | Block | ||
| 160 | 200 | T | - | ||
| |||||
LP Rainbow Typhoon
| Startup | Active | Recovery | Hit | ||
|---|---|---|---|---|---|
| 5 | 2 | 60 | KD | ||
| Damage | Stun | Attack | Block | ||
| 180(130) | 200 | T | KD | ||
| |||||
MP Rainbow Typhoon
| Startup | Active | Recovery | Hit | ||
|---|---|---|---|---|---|
| 5 | 2 | 60 | KD | ||
| Damage | Stun | Attack | Block | ||
| 190(140) | 200 | T | KD | ||
| |||||
HP Rainbow Typhoon
| Startup | Active | Recovery | Hit | ||
|---|---|---|---|---|---|
| 5 | 2 | 60 | KD | ||
| Damage | Stun | Attack | Block | ||
| 200 | 200 | T | KD | ||
| |||||
EX Rainbow Typhoon
| Startup | Active | Recovery | Hit | ||
|---|---|---|---|---|---|
| 5 | 2 | 60 | KD | ||
| Damage | Stun | Attack | Block | ||
| 240 | 250 | T | KD | ||
| |||||
LK Brimstone
| Startup | Active | Recovery | Hit | ||
|---|---|---|---|---|---|
| 5 | 2 | 60 | KD | ||
| Damage | Stun | Attack | Block | ||
| 120 | 150 | T | KD | ||
| |||||
MK Brimstone
| Startup | Active | Recovery | Hit | ||
|---|---|---|---|---|---|
| 5 | 2 | 60 | KD | ||
| Damage | Stun | Attack | Block | ||
| 130 | 150 | T | KD | ||
| |||||
HK Brimstone
| Startup | Active | Recovery | Hit | ||
|---|---|---|---|---|---|
| 5 | 2 | 60 | KD | ||
| Damage | Stun | Attack | Block | ||
| 140 | 150 | T | KD | ||
| |||||
EX Brimstone
| Startup | Active | Recovery | Hit | ||
|---|---|---|---|---|---|
| 5 | 2 | 60 | KD | ||
| Damage | Stun | Attack | Block | ||
| 180 | 200 | T | KD | ||
| |||||
Critical Arts
Peach Assault
| Startup | Active | Recovery | Hit | ||
|---|---|---|---|---|---|
| 3 | 2 | 51 | KD | ||
| Damage | Stun | Attack | Block | ||
| 360 | 0 | T | - | ||
| |||||
Taunts
Taunt
| Startup | Active | Recovery | Hit |
|---|---|---|---|
| - | - | 61 | - |
| Damage | Stun | Attack | Block |
| - | - | - | - |
V-System
V-Skill 1
Heated Mic Performance lvl 1
| Startup | Active | Recovery | Hit | ||
|---|---|---|---|---|---|
| 75 | 25(29) | 15 | 11 | ||
| Damage | Stun | Attack | Block | ||
| 40 | 100 | H | 4 | ||
| |||||
Heated Mic Performance max
| Startup | Active | Recovery | Hit | ||
|---|---|---|---|---|---|
| 1095 | - | 0 | - | ||
| Damage | Stun | Attack | Block | ||
| - | - | H | - | ||
| |||||
V-Skill 2
Pumped Up!
| Startup | Active | Recovery | Hit | ||
|---|---|---|---|---|---|
| 3 | 10 | 39 | - | ||
| Damage | Stun | Attack | Block | ||
| - | - | - | - | ||
| |||||
Pumped Up! (attack)
| Startup | Active | Recovery | Hit | ||
|---|---|---|---|---|---|
| 5 | 2 | 17(52) | KD | ||
| Damage | Stun | Attack | Block | ||
| 90 | 150 | H | 4 | ||
| |||||
V-Trigger 1
Nadeshiko (Above)
| Startup | Active | Recovery | Hit | ||
|---|---|---|---|---|---|
| 26 | 8 | 7(11) | 33 | ||
| Damage | Stun | Attack | Block | ||
| 100 | 100 | H | 32 | ||
| |||||
Nadeshiko (Above) (hold)
| Startup | Active | Recovery | Hit | ||
|---|---|---|---|---|---|
| 121 | 8 | 10 | 33 | ||
| Damage | Stun | Attack | Block | ||
| 100 | 100 | H | 32 | ||
| |||||
Nadeshiko (Front)
| Startup | Active | Recovery | Hit | ||
|---|---|---|---|---|---|
| 36 | 4 | 7 | KD | ||
| Damage | Stun | Attack | Block | ||
| 100 | 100 | H | 32 | ||
| |||||
Nadeshiko (Front) (hold)
| Startup | Active | Recovery | Hit | ||
|---|---|---|---|---|---|
| 117 | 4 | 10 | KD | ||
| Damage | Stun | Attack | Block | ||
| 100 | 100 | H | 32 | ||
| |||||
Nadeshiko (Behind)
| Startup | Active | Recovery | Hit | ||
|---|---|---|---|---|---|
| 36 | 4 | 7 | KD | ||
| Damage | Stun | Attack | Block | ||
| 100 | 100 | H | 32 | ||
| |||||
Nadeshiko (Behind) (hold)
| Startup | Active | Recovery | Hit | ||
|---|---|---|---|---|---|
| 117 | 4 | 10 | KD | ||
| Damage | Stun | Attack | Block | ||
| 100 | 100 | H | 32 | ||
| |||||
V-Trigger 2
Steel Chair
| Startup | Active | Recovery | Hit | ||
|---|---|---|---|---|---|
| 64 | - | 7 | - | ||
| Damage | Stun | Attack | Block | ||
| 20x3 (60) | 50x3 (150) | H | - | ||
| |||||
Fightin' Dirty
| Startup | Active | Recovery | Hit | ||
|---|---|---|---|---|---|
| - | - | 11 | - | ||
| Damage | Stun | Attack | Block | ||
| 100*60 | 100*100 | H | - | ||
| |||||
Steel Chair (secondary)
| Startup | Active | Recovery | Hit | ||
|---|---|---|---|---|---|
| 104 | - | 46 | - | ||
| Damage | Stun | Attack | Block | ||
| 20x3 (60) | 50x3 (150) | H | - | ||
| |||||
Fightin' Dirty (secondary)
| Startup | Active | Recovery | Hit | ||
|---|---|---|---|---|---|
| - | - | 58 | - | ||
| Damage | Stun | Attack | Block | ||
| 100*60 | 100*100 | H | - | ||
| |||||
V-Shift
V-Shift
| Startup | Active | Recovery | Hit | ||
|---|---|---|---|---|---|
| 1 | 9 | 22 | - | ||
| Damage | Stun | Attack | Block | ||
| - | - | - | - | ||
| |||||
V-Shift Break
Gutsy Lariat
| Startup | Active | Recovery | Hit | ||
|---|---|---|---|---|---|
| ? | 3 | ? | KD | ||
| Damage | Stun | Attack | Block | ||
| 60 | 0 | H | -2 | ||
| |||||
V-Reversal
Peach Gator
| Startup | Active | Recovery | Hit | ||
|---|---|---|---|---|---|
| 17 | 2 | 24 | KD | ||
| Damage | Stun | Attack | Block | ||
| 60 | 0 | H | -2 | ||
| |||||

