Introduction
About E.Honda
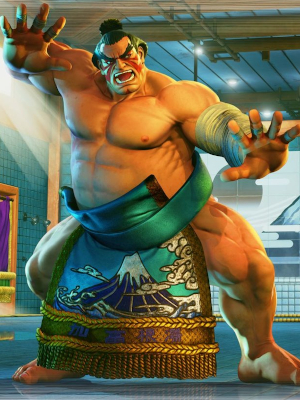
One of the original 8 world warriors joins the fight in season 4.
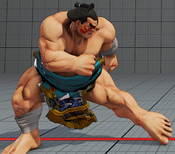
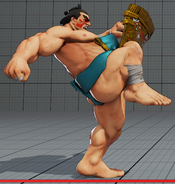
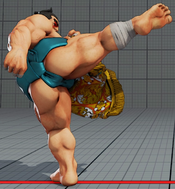
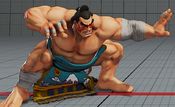
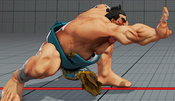
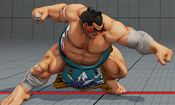
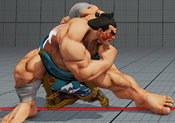
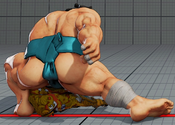
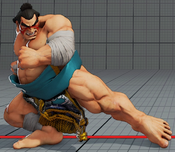
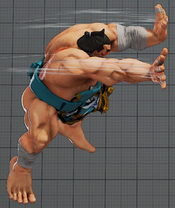
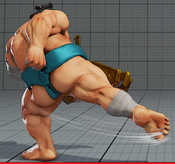
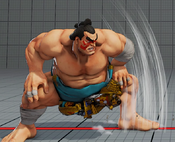
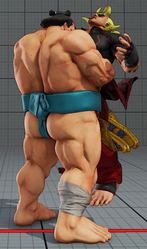
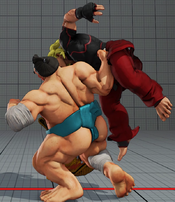
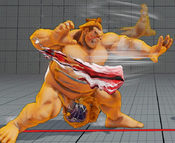
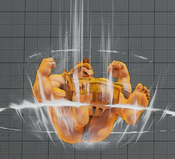
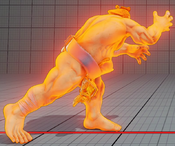
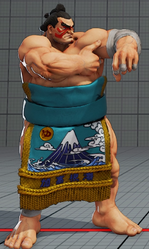
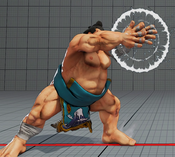
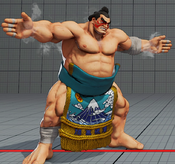
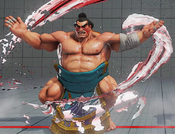
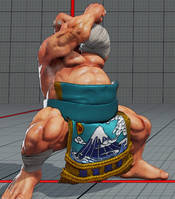
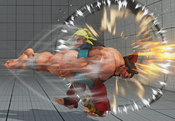
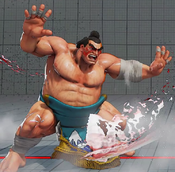
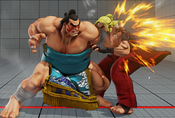
Honda is possibly the most volatile character in the game. His tools, weirdly enough, give him a very skewed matchup chart compared to every other character in the game. He does better against a lot of top tiers than many other characters however, he has more trouble with some mid and low tiers compared to everyone else as well. This makes him the perfect counter pick character, and to accomplish this, he has some amazing buttons and specials. His Hundred Hand Slap is a plus on block, fast move that moves Honda forward, and his EX Sumo Smash allows him to get in easily and continue his obnoxious pressure. The constant threat of his command grab and armor breaking VT1 only adds to his pressure. If you want an incredibly volatile character that has all the tools he needs to be a great counter pick, then check out Honda.
Final Patch
Players to Watch
| E.Honda | |
|---|---|
| Vitals | |
| Life Points | 1050 |
| Stun Points | 1075 |
| V-Gauge Points | |
| V-Trigger 1 | 900 |
| V-Trigger 2 | 600 |
| Ground Movement | |
| Forward Walk Speed | 4.4 |
| Backward Walk Speed | 2.7 |
| Forward Dash Speed | 20 |
| Backward Dash Speed | 24 |
| Forward Dash Distance | 166.1 |
| Backward Dash Distance | 95.1 |
| Backdash CH Frames | 3-10 |
| Jumping | |
| Back Jump Speed | 49(5+40+4) |
| Neutral Jump Speed | 49(5+40+4) |
| Forward Jump Speed | 48(4+40+4) |
| Forward Jump Distance | 208 |
| Backward Jump Distance | 180 |
| Throws | |
| Throw Hurtbox | 0.25 |
| Throw Range | 0.9 |
Frame Data & Descriptions are provided by FATOnline.
|
| SFV Frame Data Glossary | |
|---|---|
| Active |
How many frames a move remains active (can hurt opponents) for. |
| Attack |
Attack level is L for low attacks (must be blocked crouching), H is for High attacks (which can be blocked high or low) and M for overhead (must be blocked standing). T is for throw attacks (which cannot be blocked). |
| Cancel options |
Available cancel options.
|
| Confirm windows |
Hit confirm windows written as Specials & CAs/Target Combos/V-Trigger. Notation may denote V-Skill only cancel windows in Specials.
|
| Crush Counter |
Crush Counter hit advantage written as opponent state, frame advantage, and v-gauge gain on hit. |
| Damage |
Attack damage on hit. Notation may denote multi-hit or "sweet spot" damage values on certain frames. |
| Hit/Block |
These are frame advantage values when the attack hits or is blocked. If the number is positive, then the move will end before the defender can act again. If the number is negative, the defender will be able to act before the attacker and maybe even punish. KD refers to knockdown on hit.
|
| Knockdown |
Knockdown advantage against Normal, Quick Rise and Back Rise wake up options. |
| Recovery |
How many frames it takes for a move to finish after it's been active. |
| Startup |
How many frames it takes before the move becomes 'active' or have a hit box. The last startup frame and the first active frame are the same frame, meaning all values are written as Startup + 1. |
| Stun |
Amount of stun added to the opponent's stun bar on hit. |
Normals
Stand LP
| Startup | Active | Recovery | Hit | ||
|---|---|---|---|---|---|
| 5 | 3 | 9 | 5 | ||
| Damage | Stun | Attack | Block | ||
| 40 | 90 | H | 3 | ||
| |||||
Stand MP
| Startup | Active | Recovery | Hit | ||
|---|---|---|---|---|---|
| 7 | 4 | 13 | 5 | ||
| Damage | Stun | Attack | Block | ||
| 70 | 120 | H | 2 | ||
| |||||
Stand HP
| Startup | Active | Recovery | Hit | ||
|---|---|---|---|---|---|
| 8 | 6 | 22 | -2 | ||
| Damage | Stun | Attack | Block | ||
| 90(80) | 150 | H | -7 | ||
| |||||
Stand LK
| Startup | Active | Recovery | Hit | ||
|---|---|---|---|---|---|
| 4 | 3 | 8 | 4 | ||
| Damage | Stun | Attack | Block | ||
| 40 | 90 | H | 2 | ||
| |||||
Stand MK
| Startup | Active | Recovery | Hit | ||
|---|---|---|---|---|---|
| 5 | 2 | 14 | 7 | ||
| Damage | Stun | Attack | Block | ||
| 60 | 120 | H | 4 | ||
| |||||
Stand HK
| Startup | Active | Recovery | Hit | ||
|---|---|---|---|---|---|
| 8 | 2(1)3 | 21 | 5 | ||
| Damage | Stun | Attack | Block | ||
| 90(80) | 150 | H | 2(-4) | ||
| |||||
Crouch LP
| Startup | Active | Recovery | Hit | ||
|---|---|---|---|---|---|
| 5 | 3 | 9 | 5 | ||
| Damage | Stun | Attack | Block | ||
| 40 | 90 | H | 2 | ||
| |||||
Crouch MP
| Startup | Active | Recovery | Hit | ||
|---|---|---|---|---|---|
| 6 | 3 | 14 | 4 | ||
| Damage | Stun | Attack | Block | ||
| 60 | 120 | H | 2 | ||
| |||||
Crouch HP
| Startup | Active | Recovery | Hit | ||
|---|---|---|---|---|---|
| 10 | 2 | 21(20/26) | 4 | ||
| Damage | Stun | Attack | Block | ||
| 100 | 150 | H | -5 | ||
| |||||
Crouch LK
| Startup | Active | Recovery | Hit | ||
|---|---|---|---|---|---|
| 4 | 2 | 13 | 3 | ||
| Damage | Stun | Attack | Block | ||
| 30 | 90 | L | 0 | ||
| |||||
Crouch MK
| Startup | Active | Recovery | Hit | ||
|---|---|---|---|---|---|
| 6 | 3 | 14 | 5 | ||
| Damage | Stun | Attack | Block | ||
| 60 | 120 | L | -2 | ||
| |||||
Crouch HK
| Startup | Active | Recovery | Hit | ||
|---|---|---|---|---|---|
| 7 | 2(8)2 | 14(17) | KD | ||
| Damage | Stun | Attack | Block | ||
| 100 | 150 | L | -9 | ||
| |||||
Jump LP
| Startup | Active | Recovery | Hit | ||
|---|---|---|---|---|---|
| 4 | 5 | - | - | ||
| Damage | Stun | Attack | Block | ||
| 50 | 90 | M | - | ||
| |||||
Jump MP
| Startup | Active | Recovery | Hit | ||
|---|---|---|---|---|---|
| 6 | 7 | - | - | ||
| Damage | Stun | Attack | Block | ||
| 70 | 120 | M | - | ||
| |||||
Jump HP
| Startup | Active | Recovery | Hit |
|---|---|---|---|
| 7 | 3 | - | - |
| Damage | Stun | Attack | Block |
| 90 | 150 | M | - |
Neutral Jump HP
| Startup | Active | Recovery | Hit | ||
|---|---|---|---|---|---|
| 10 | 5 | - | - | ||
| Damage | Stun | Attack | Block | ||
| 90 | 150 | M | - | ||
| |||||
Jump LK
| Startup | Active | Recovery | Hit | ||
|---|---|---|---|---|---|
| 4 | 9 | - | - | ||
| Damage | Stun | Attack | Block | ||
| 50 | 90 | M | - | ||
| |||||
Jump MK
| Startup | Active | Recovery | Hit | ||
|---|---|---|---|---|---|
| 6 | 4 | - | - | ||
| Damage | Stun | Attack | Block | ||
| 70 | 120 | M | - | ||
| |||||
Jump HK
| Startup | Active | Recovery | Hit |
|---|---|---|---|
| 9 | 6 | - | - |
| Damage | Stun | Attack | Block |
| 90 | 150 | M | - |
Command Normals
Flying Sumo Press
| Startup | Active | Recovery | Hit | ||
|---|---|---|---|---|---|
| 12 | 9 | - | - | ||
| Damage | Stun | Attack | Block | ||
| 70 | 120 | M | - | ||
| |||||
Harai-Geri
| Startup | Active | Recovery | Hit | ||
|---|---|---|---|---|---|
| 12 | 3 | 23(24) | 2 | ||
| Damage | Stun | Attack | Block | ||
| 80 | 150 | H | -7 | ||
| |||||
Chikara-Ashi
| Startup | Active | Recovery | Hit | ||
|---|---|---|---|---|---|
| 21(20) | 6 | 16 | 5 | ||
| Damage | Stun | Attack | Block | ||
| 90 | 120 | H | 4 | ||
| |||||
Target Combos
Tokoshizume
| Startup | Active | Recovery | Hit | ||
|---|---|---|---|---|---|
| 7+20 | 6 | 16 | 5 | ||
| Damage | Stun | Attack | Block | ||
| 70*63 (133) | 100*110 (210) | H | 2 | ||
| |||||
Tsurane Harite
| Startup | Active | Recovery | Hit | ||
|---|---|---|---|---|---|
| 5+7 | 4 | 19 | KD | ||
| Damage | Stun | Attack | Block | ||
| 40*45 (85) | 90*90 (180) | H | -6 | ||
| |||||
Hirate
| Startup | Active | Recovery | Hit | ||
|---|---|---|---|---|---|
| 5+7+16 | 4 | 24 | KD | ||
| Damage | Stun | Attack | Block | ||
| 40*45*56 (141) | 90*90*96 (276) | H | - | ||
| |||||
Throws
Saba-Ori
| Startup | Active | Recovery | Hit |
|---|---|---|---|
| 5 | 3 | 17 | KD |
| Damage | Stun | Attack | Block |
| 130 | 170 | T | - |
Tawara Throw
| Startup | Active | Recovery | Hit | ||
|---|---|---|---|---|---|
| 5 | 3 | 17 | KD | ||
| Damage | Stun | Attack | Block | ||
| 140 | 170 | T | - | ||
| |||||
Special Moves
LP Hundred Hand Slap
| Startup | Active | Recovery | Hit | ||
|---|---|---|---|---|---|
| 7 | 2(4)3(5)3 | 14 | 3(4) | ||
| Damage | Stun | Attack | Block | ||
| 100(110) | 160(170) | H | 2 | ||
| |||||
MP Hundred Hand Slap
| Startup | Active | Recovery | Hit | ||
|---|---|---|---|---|---|
| 17 | 2(3)2(5)2(3)2(5)2 | 14 | 3(4) | ||
| Damage | Stun | Attack | Block | ||
| 110(120) | 170(180) | H | 1 | ||
| |||||
HP Hundred Hand Slap
| Startup | Active | Recovery | Hit | ||
|---|---|---|---|---|---|
| 19 | 2(3)2(3)2(3)2(3)2(3)2(3)2 | 15 | 2(4) | ||
| Damage | Stun | Attack | Block | ||
| 120(130) | 180(190) | H | -2 | ||
| |||||
EX Hundred Hand Slap
| Startup | Active | Recovery | Hit | ||
|---|---|---|---|---|---|
| 16 | 2(3)2(2)2(3)2(3)2(3)2(2)2 | 15 | 4(6) | ||
| Damage | Stun | Attack | Block | ||
| 100(110) | 150(160) | H | -2 | ||
| |||||
LP Sumo Headbutt
| Startup | Active | Recovery | Hit | ||
|---|---|---|---|---|---|
| 10(16) | 3(14) | 10+14(11+15) | KD | ||
| Damage | Stun | Attack | Block | ||
| 120(100) | 180(150) | H | -4 | ||
| |||||
MP Sumo Headbutt
| Startup | Active | Recovery | Hit | ||
|---|---|---|---|---|---|
| 8(14) | 3(19) | 9+14(11+15) | KD | ||
| Damage | Stun | Attack | Block | ||
| 140(110) | 180(150) | H | -7 | ||
| |||||
HP Sumo Headbutt
| Startup | Active | Recovery | Hit | ||
|---|---|---|---|---|---|
| 12(18) | 3(25) | 11+16(~) | KD | ||
| Damage | Stun | Attack | Block | ||
| 160(120) | 180(150) | H | -12 | ||
| |||||
EX Sumo Headbutt
| Startup | Active | Recovery | Hit | ||
|---|---|---|---|---|---|
| 7(14) | 4(22) | 9+23(~) | KD | ||
| Damage | Stun | Attack | Block | ||
| 160(130) | 200(180) | H | -26 | ||
| |||||
LK Sumo Smash
| Startup | Active | Recovery | Hit | ||
|---|---|---|---|---|---|
| 11 | 3(18)6 | 24 | KD | ||
| Damage | Stun | Attack | Block | ||
| 120(100) | 180(160) | H*M | -1(-3) / -3(-5) | ||
| |||||
MK Sumo Smash
| Startup | Active | Recovery | Hit | ||
|---|---|---|---|---|---|
| 13 | 3(19)7 | 24 | KD | ||
| Damage | Stun | Attack | Block | ||
| 120(100) | 180(160) | H*M | -1(-3) / -3(-5) | ||
| |||||
HK Sumo Smash
| Startup | Active | Recovery | Hit | ||
|---|---|---|---|---|---|
| 16 | 3(19)13 | 24 | KD | ||
| Damage | Stun | Attack | Block | ||
| 120(100) | 180(160) | H*M | -2(-3) / -4(-5) | ||
| |||||
EX Sumo Smash
| Startup | Active | Recovery | Hit | ||
|---|---|---|---|---|---|
| 8 | 8(14)10 | 19 | KD | ||
| Damage | Stun | Attack | Block | ||
| 160(140) | 200(180) | H*M | 4(6) / -1(-3) | ||
| |||||
LP Oicho Throw
| Startup | Active | Recovery | Hit | ||
|---|---|---|---|---|---|
| 7 | 2 | 60 | KD | ||
| Damage | Stun | Attack | Block | ||
| 140 | 180 | T | - | ||
| |||||
MP Oicho Throw
| Startup | Active | Recovery | Hit | ||
|---|---|---|---|---|---|
| 7 | 2 | 60 | KD | ||
| Damage | Stun | Attack | Block | ||
| 160 | 180 | T | - | ||
| |||||
HP Oicho Throw
| Startup | Active | Recovery | Hit | ||
|---|---|---|---|---|---|
| 7 | 2 | 60 | KD | ||
| Damage | Stun | Attack | Block | ||
| 180 | 180 | T | - | ||
| |||||
EX Oicho Throw
| Startup | Active | Recovery | Hit | ||
|---|---|---|---|---|---|
| 5 | 3 | 59 | KD | ||
| Damage | Stun | Attack | Block | ||
| 200 | 200 | T | - | ||
| |||||
Critical Arts
Kamigashima
| Startup | Active | Recovery | Hit | ||
|---|---|---|---|---|---|
| 1+8 | 29 | 9+28 | KD | ||
| Damage | Stun | Attack | Block | ||
| 50*(4x27)*12*170 | 0 | H | -22 | ||
| |||||
Taunts
Taunt
| Startup | Active | Recovery | Hit |
|---|---|---|---|
| - | - | 61 | - |
| Damage | Stun | Attack | Block |
| - | - | - | - |
V-System
V-Skill 1
Neko Damashi
| Startup | Active | Recovery | Hit | ||
|---|---|---|---|---|---|
| 12 | 4 | 23 | 3 | ||
| Damage | Stun | Attack | Block | ||
| 60 | 120 | H | -6 | ||
| |||||
V-Skill 2
Sumo Spirit
| Startup | Active | Recovery | Hit | ||
|---|---|---|---|---|---|
| - | - | 50 | - | ||
| Damage | Stun | Attack | Block | ||
| - | - | - | - | ||
| |||||
V-Trigger 1
Onigawara
| Startup | Active | Recovery | Hit | ||
|---|---|---|---|---|---|
| 1 | - | 5 | - | ||
| Damage | Stun | Attack | Block | ||
| - | - | - | - | ||
| |||||
Oni-Daikaku
| Startup | Active | Recovery | Hit | ||
|---|---|---|---|---|---|
| 10 | 3(3)21 | 10+10(11+14) | KD | ||
| Damage | Stun | Attack | Block | ||
| 120(100) | 200 | H | -2 | ||
| |||||
Oni-Daikaku (Hold)
| Startup | Active | Recovery | Hit | ||
|---|---|---|---|---|---|
| 60 | 3(3)21 | 10+10(11+14) | KD | ||
| Damage | Stun | Attack | Block | ||
| 180(160) | 200 | H | 27 | ||
| |||||
Oni-Daikaku (Release)
| Startup | Active | Recovery | Hit | ||
|---|---|---|---|---|---|
| 3 | 3(3)21 | 10+10(11+14) | KD | ||
| Damage | Stun | Attack | Block | ||
| 120(100) | 200 | H | -2 | ||
| |||||
Oni-Muso
| Startup | Active | Recovery | Hit | ||
|---|---|---|---|---|---|
| 3 | 3(3)21 | 10+10(11+14) | KD | ||
| Damage | Stun | Attack | Block | ||
| 120*72*36 (228) | 200*90*90 (380) | H | KD | ||
| |||||
V-Trigger 2
Tajikarao
| Startup | Active | Recovery | Hit | ||
|---|---|---|---|---|---|
| 1 | - | 5 | - | ||
| Damage | Stun | Attack | Block | ||
| - | - | - | - | ||
| |||||
Iwato Biraki
| Startup | Active | Recovery | Hit | ||
|---|---|---|---|---|---|
| 28(17) | 20 | 44 | KD | ||
| Damage | Stun | Attack | Block | ||
| 180 | 200 | T | - | ||
| |||||
V-Shift
V-Shift
| Startup | Active | Recovery | Hit | ||
|---|---|---|---|---|---|
| 1 | 9 | 22 | - | ||
| Damage | Stun | Attack | Block | ||
| - | - | - | - | ||
| |||||
V-Shift Break
Super Sumo Impact
| Startup | Active | Recovery | Hit | ||
|---|---|---|---|---|---|
| ? | 3 | ? | KD | ||
| Damage | Stun | Attack | Block | ||
| 60 | 0 | H | -2 | ||
| |||||
V-Reversal
Raiden-Ho
| Startup | Active | Recovery | Hit | ||
|---|---|---|---|---|---|
| 17 | 2 | 24 | KD | ||
| Damage | Stun | Attack | Block | ||
| 60 | 0 | H | -2 | ||
| |||||
