| Pre-release information
This page is under construction based on pre-release data. Join the SF6 Resource Hub for info on editing. |
Introduction
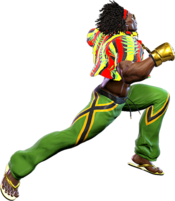
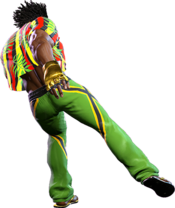
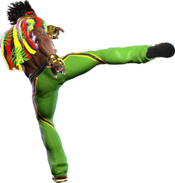
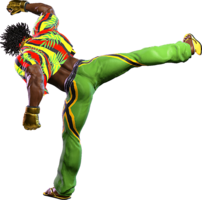
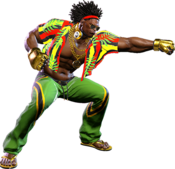
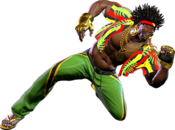
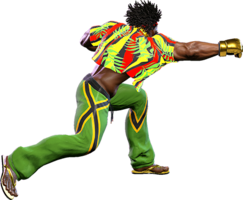
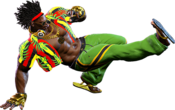
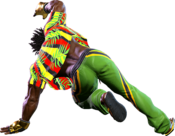
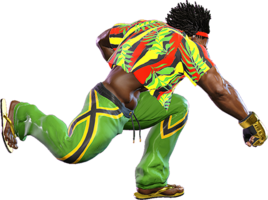
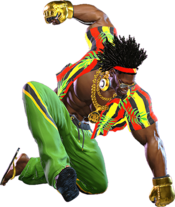
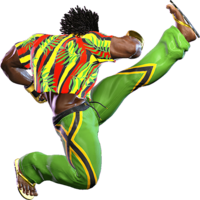
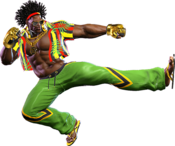
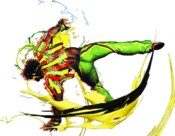
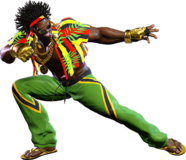
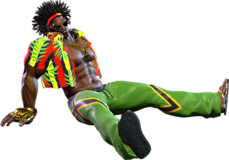
A globally popular dance music superstar, Dee Jay is always ready to have a good time. With a burning love for music and fighting, this Jamaican sensation drives audiences wild with hot new songs and stylish moves.
Dee Jay is a pressure-oriented rushdown character with many ways to set up frame traps or other mixups. His playstyle heavily revolves around feinting, wherein Dee Jay looks like he is approaching or performing a move before ducking away and returning to neutral. Efficient use of feints, his strong pressure buttons, and his excellent Drive Rush can let Dee Jay dance all over the screen like it's nothing.
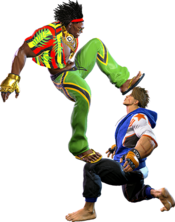
Jus Cool is Dee Jay's primary tool setting up his pressure, and is a very unique special move. Most comparable to Slayer's "Dandy Step" from the Guilty Gear franchise, Jus Cool sways Dee Jay back and allows him to follow up with five unique follow-ups. Jus Cool can be followed up with a low kick that frame traps, an overhead kick that is safe and knocks down on hit, a launching knee swing for anti-airs, and a forwards dash that can be canceled out of with a second sway back. Utilizing all of these follow-ups can be somewhat tricky, but thankfully Dee Jay has numerous excellent pressure normals to help him along. His 5MP is plus, his 6MK is a plus normal that catches jump-outs, and his j.2K allows him to reset pressure with a jump-in attack must faster than other characters. Combining Jus Cool with his close range pressure options allows Dee Jay to mix opponents regardless of where he is on the screen, making him a devastating dance partner to be duking it out with.
Dee Jay's special move selection is rounded out by Air Slasher, a charge fireball that can be used to counter-zone, Jackknife Maximum for anti-airing, and Rolling Sobat to cover ground and either stagger or knock the opponent down. The most notable trait of these three moves, which winds up tying back into his trickiness, is that their light versions are all feints, which allows Dee Jay to bait people into responding for whiff punishes or reset pressure if he is close. To this end, Dee Jay has a lot of very fast movement options; his forward dash and particularly his Drive Rush are incredibly quick, which pairs well with his many lengthy pokes. If Dee Jay manages to get a good hit his damage potential becomes extremely high, as his OD moves all deal incredible damage and his Machine Gun Upper special is one of the highest damage combo enders in the game.
Dee Jay's up close pressure and screen control is very strong, but comes with somewhat of an awkward kit to work with. None of Dee Jay's longer reaching normals are special cancelable, making it difficult for him to meaningfully follow up with pokes. As well, all of his cancelable buttons are stubby, which can result in him dropping combos if the spacing isn't perfect. Armored moves, particularly Drive Impacts, will break right through his longer buttons if he doesn't use them carefully. Additionally, because his primary reversal is Overdrive Jackknife Maximum and he uses a lot of Drive for conversions, Dee Jay generally has a hard time in Burnout. Thus, Dee Jay can be a surprisingly demanding character at high levels of play. While all of the above can make Dee Jay somewhat awkward to play, putting time into using him effectively will carry you very far. If you enjoy cool beats and slick dance moves, do the dancehall ting with Dee Jay.
| Pick if you like: | Avoid if you dislike: |
|---|---|
|
|
Classic & Modern Versions Comparison
| Missing Normals |
|
|---|---|
| Missing Command Normals |
|
| Shortcut-Only Specials |
|
| Assist Combos |
|
| Miscellaneous Changes |
|
| Dee Jay | |
|---|---|
| Vitals | |
| Life Points | 10000 |
| Ground Movement | |
| Forward Walk Speed | 0.043 |
| Backward Walk Speed | 0.032 |
| Forward Dash Speed | 19 |
| Backward Dash Speed | 23 |
| Forward Dash Distance | 1.50 |
| Backward Dash Distance | 0.90 |
| Drive Rush Min. Distance (Throw) | 0.763 |
| Drive Rush Min. Distance (Block) | 2.535 |
| Drive Rush Max Distance | 2.713 |
| Jumping | |
| Jump Speed | 4+38+3 |
| Jump Apex | 2.115 |
| Forward Jump Distance | 1.90 |
| Backward Jump Distance | 1.52 |
| Throws | |
| Throw Range | 0.8 |
| Throw Hurtbox | 0.33 |
Normals
Standing Normals
5LP
| Startup | Active | Recovery | Cancel | Damage | Guard | On Hit | On Block |
|---|---|---|---|---|---|---|---|
| 4 | 3 | 6 | Chn Sp SA TC | 300 | LH | +4 | -1 |
5MP
| Startup | Active | Recovery | Cancel | Damage | Guard | On Hit | On Block |
|---|---|---|---|---|---|---|---|
| 7 | 3 | 13 | TC | 600 | LH | +5 | +2 |
5HP
| Startup | Active | Recovery | Cancel | Damage | Guard | On Hit | On Block |
|---|---|---|---|---|---|---|---|
| 9 | 6 | 18 | Sp SA (close) | 800(700) | LH | +3(+8) | -4(+1) |
5LK
| Startup | Active | Recovery | Cancel | Damage | Guard | On Hit | On Block |
|---|---|---|---|---|---|---|---|
| 5 | 2 | 12 | Sp SA | 300 | LH | +2 | -2 |
5MK
| Startup | Active | Recovery | Cancel | Damage | Guard | On Hit | On Block |
|---|---|---|---|---|---|---|---|
| 9 | 3 | 16 | - | 600 | LH | +6 | -1 |
5HK
| Startup | Active | Recovery | Cancel | Damage | Guard | On Hit | On Block |
|---|---|---|---|---|---|---|---|
| 12 | 3 | 22(26) | - | 800 | LH | +1 | -5 |
Crouching Normals
2LP
| Startup | Active | Recovery | Cancel | Damage | Guard | On Hit | On Block |
|---|---|---|---|---|---|---|---|
| 5 | 3 | 8 | Chn Sp SA | 300 | LH | +4 | -1 |
2MP
| Startup | Active | Recovery | Cancel | Damage | Guard | On Hit | On Block |
|---|---|---|---|---|---|---|---|
| 6 | 4 | 14 | Sp SA | 600 | LH | +4 | -1 |
2HP
| Startup | Active | Recovery | Cancel | Damage | Guard | On Hit | On Block |
|---|---|---|---|---|---|---|---|
| 8 | 2 | 20 | - | 800 | LH | +6 | -2 |
2LK
| Startup | Active | Recovery | Cancel | Damage | Guard | On Hit | On Block |
|---|---|---|---|---|---|---|---|
| 5 | 2 | 10 | Chn | 200 | L | +2 | -2 |
2MK
| Startup | Active | Recovery | Cancel | Damage | Guard | On Hit | On Block |
|---|---|---|---|---|---|---|---|
| 8 | 4 | 19 | - | 700 | L | KD +29 | -6 |
2HK
| Startup | Active | Recovery | Cancel | Damage | Guard | On Hit | On Block |
|---|---|---|---|---|---|---|---|
| 14 | 10 | 15 | - | 900 | L | HKD +33(+42) | -11(-2) |
Jumping Normals
j.LP
| Startup | Active | Recovery | Cancel | Damage | Guard | On Hit | On Block |
|---|---|---|---|---|---|---|---|
| 4 | 7 | 3 land | - | 300 | H | +4(+9) | 0(+5) |
j.MP
| Startup | Active | Recovery | Cancel | Damage | Guard | On Hit | On Block |
|---|---|---|---|---|---|---|---|
| 6 | 4 | 3 land | TC | 700 | H | +10(+11) | +6(+7) |
j.HP
| Startup | Active | Recovery | Cancel | Damage | Guard | On Hit | On Block |
|---|---|---|---|---|---|---|---|
| 9 | 6 | 3 land | - | 800 | H | +8(+15) | +4(+11) |
j.LK
| Startup | Active | Recovery | Cancel | Damage | Guard | On Hit | On Block |
|---|---|---|---|---|---|---|---|
| 4 | 6 | 3 land | - | 300 | H | +6(+9) | +2(+5) |
j.MK
| Startup | Active | Recovery | Cancel | Damage | Guard | On Hit | On Block |
|---|---|---|---|---|---|---|---|
| 8 | 6 | 3 land | - | 500 | H | +9(+13) | +5(+9) |
j.HK
Command Normals
Target Combos
Universal Mechanics
Throws
Forward Throw (LPLK)
| Startup | Active | Recovery | Cancel | Damage | Guard | On Hit | On Block |
|---|---|---|---|---|---|---|---|
| 5 | 3 | 23 | - | 1200 (2040) | T | KD +34 | - |
Back Throw (4LPLK)
| Startup | Active | Recovery | Cancel | Damage | Guard | On Hit | On Block |
|---|---|---|---|---|---|---|---|
| 5 | 3 | 23 | - | 1200 (2040) | T | KD +22 | - |
Drive Moves
Drive Impact (HPHK)
| Startup | Active | Recovery | Cancel | Damage | Guard | On Hit | On Block |
|---|---|---|---|---|---|---|---|
| 26 | 2 | 35 | - | 800 | LH | KD +35 / Wall Splat KD +65 | -3 / Wall Splat HKD +72 |
See Drive Impact
Drive Reversal (6HPHK)
| Startup | Active | Recovery | Cancel | Damage | Guard | On Hit | On Block |
|---|---|---|---|---|---|---|---|
| 20 | 3 | 26(31) | - | 500 recoverable | LH | KD +23 | -6 |
See Drive Reversal
- Full Invuln: 1-22f; Armor Break
Drive Parry (MPMK)
| Startup | Active | Recovery | Cancel | Damage | Guard | On Hit | On Block |
|---|---|---|---|---|---|---|---|
| 1 | 12 or until released | 33(1)(11) | - | - | - | - | - |
See Drive Parry
- Perfect Parry has only 1f recovery, and disables the opponent from canceling their attack
- Perfect Parry vs. projectiles puts you into a fixed 11f recovery
Drive Rush (66)
Taunts
Neutral Taunt (5PPPKKK)
| Startup | Active | Recovery | Cancel | Damage | Guard | On Hit | On Block |
|---|---|---|---|---|---|---|---|
| 264 (total) | - | - | - | - | - | - | - |
Forward Taunt (6PPPKKK)
| Startup | Active | Recovery | Cancel | Damage | Guard | On Hit | On Block |
|---|---|---|---|---|---|---|---|
| 550 (total) | - | - | - | - | - | - | - |
Back Taunt (4PPPKKK)
Special Moves
Move Name (236P)
No results
No results No results No results
Super Arts
Level 1 Super (236236P)
No results
Level 2 Super (214214P)
No results
Level 3 Super ()
CA version grants 500 extra damage
No results
No results


