Introduction
About Zeku
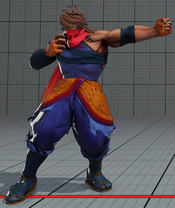
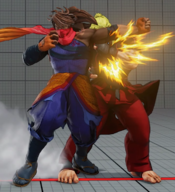
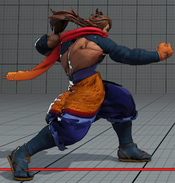
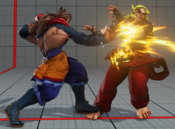
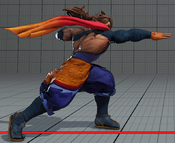
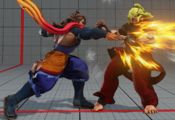
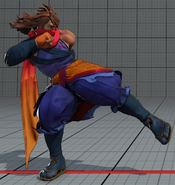
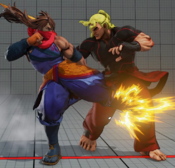
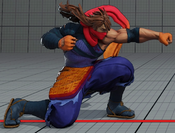
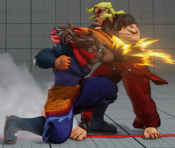
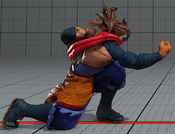
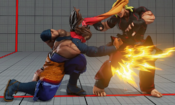
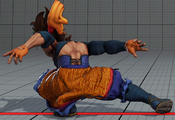
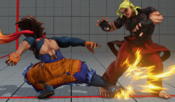
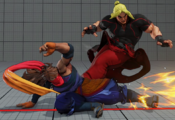
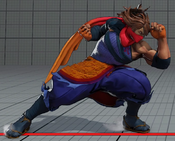
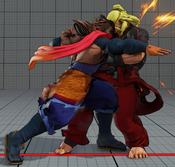
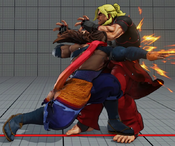
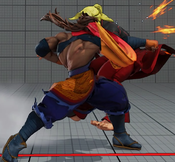
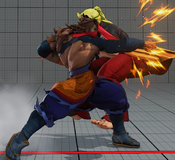
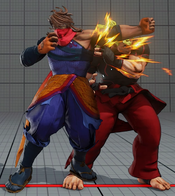
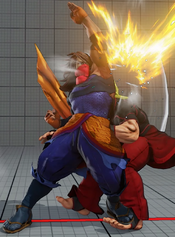
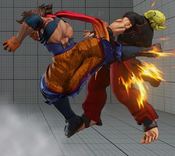
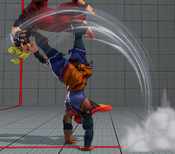
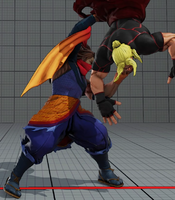
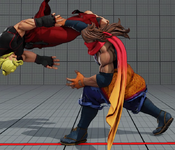
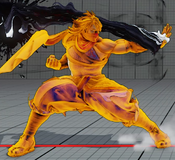
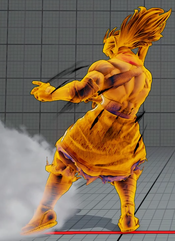
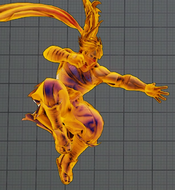
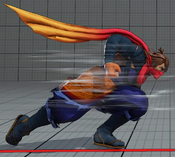
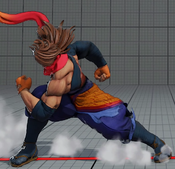
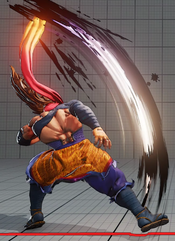
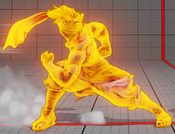
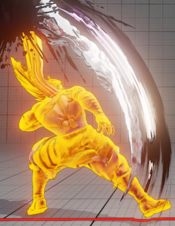
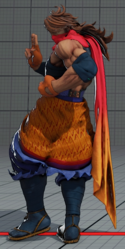
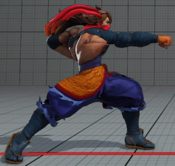
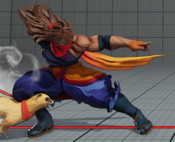
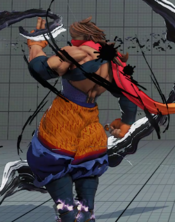
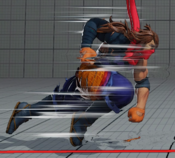
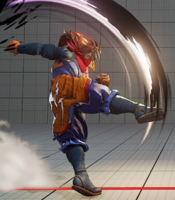
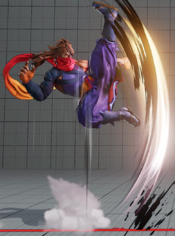
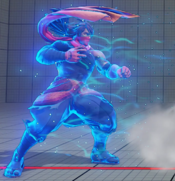
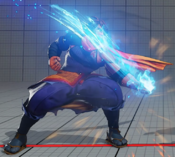
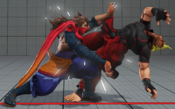
Zeku is two characters in one, with an old form and a young form. The old form excels at long ranged spacing and poking, while the young form is better at pressure and combos. These give you a character who's good at pretty much everything but not all at once. Being strong with Zeku means you have to know when the right moment is to switch to the form best suited for whatever situation they're needed for. Good use of the form swap can throw an opponent off their game, as they'll have to constantly change what they have to watch out for in neutral. This goes for the Zeku player as well, as they'll have to constantly know what to do in neutral based on their form, not to mention memorizing his vast amount of combos and setups for both forms and between the two. If you like a character more complex than most with critical strengths and weaknesses that you'll swap constantly, Zeku could be just for you.
Unique Mechanics
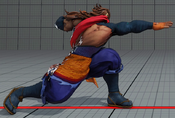
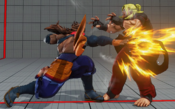
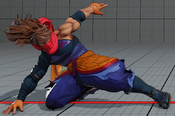
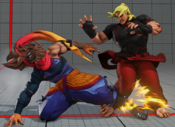
By using his V-Skill 1, VT2, or pressing 22PP, Zeku will change from Old Zeku to Young Zeku. These are two completely different characters with different normals, command normals, and specials. Old Zeku is slower focusing more on spacing and ranged game, Young Zeku is much more offensively focuses. You will always start a round as Old Zeku. Change form can be done off select normals. As old Zeku all grounded normals excluding his command overhead, standing MK / HK, crouching LK, MP and HK. As young Zeku all grounded normals excluding standing MK, HK, command overhead and all crouching kicks.
Final Patch
Players to Watch
- Infexious
- RB
- Unsung
- Wolfkrone
| Zeku (Young) | |
|---|---|
| Vitals | |
| Life Points | 1000 |
| Stun Points | 1000 |
| V-Gauge Points | |
| V-Trigger 1 | 600 |
| V-Trigger 2 | 600 |
| Ground Movement | |
| Forward Walk Speed | 0.054 |
| Backward Walk Speed | 0.035 |
| Forward Dash Speed | 17 |
| Backward Dash Speed | 22 |
| Forward Dash Distance | 1.692 |
| Backward Dash Distance | 1.004 |
| Backdash CH Frames | 3-11 |
| Jumping | |
| Back Jump Speed | 46 (4+38+4) |
| Neutral Jump Speed | 46 (4+38+4) |
| Forward Jump Speed | 45 (3+38+4) |
| Forward Jump Distance | 2.164 |
| Backward Jump Distance | 1.86 |
| Throws | |
| Throw Hurtbox | 0.3 |
| Throw Range | 0.8 |
Frame Data & Descriptions are provided by FATOnline.
|
| SFV Frame Data Glossary | |
|---|---|
| Active |
How many frames a move remains active (can hurt opponents) for. |
| Attack |
Attack level is L for low attacks (must be blocked crouching), H is for High attacks (which can be blocked high or low) and M for overhead (must be blocked standing). T is for throw attacks (which cannot be blocked). |
| Cancel options |
Available cancel options.
|
| Confirm windows |
Hit confirm windows written as Specials & CAs/Target Combos/V-Trigger. Notation may denote V-Skill only cancel windows in Specials.
|
| Crush Counter |
Crush Counter hit advantage written as opponent state, frame advantage, and v-gauge gain on hit. |
| Damage |
Attack damage on hit. Notation may denote multi-hit or "sweet spot" damage values on certain frames. |
| Hit/Block |
These are frame advantage values when the attack hits or is blocked. If the number is positive, then the move will end before the defender can act again. If the number is negative, the defender will be able to act before the attacker and maybe even punish. KD refers to knockdown on hit.
|
| Knockdown |
Knockdown advantage against Normal, Quick Rise and Back Rise wake up options. |
| Recovery |
How many frames it takes for a move to finish after it's been active. |
| Startup |
How many frames it takes before the move becomes 'active' or have a hit box. The last startup frame and the first active frame are the same frame, meaning all values are written as Startup + 1. |
| Stun |
Amount of stun added to the opponent's stun bar on hit. |
Normals
Stand LP
| Normal | Startup | Active | Recovery | Hit | ||
|---|---|---|---|---|---|---|
| 4 | 2 | 9 | 3 | |||
| Damage | Stun | Attack | Block | |||
| 30 | 70 | H | 2 | |||
| ||||||
| V-Trigger 1 | Startup | Active | Recovery | Hit | ||
| 4(11) | 2 | 11 | 1 | |||
| Damage | Stun | Attack | Block | |||
| 30 | 70 | H | -1 | |||
| ||||||
Stand MP
| Normal | Startup | Active | Recovery | Hit | ||
|---|---|---|---|---|---|---|
| 5 | 2 | 16 | 8 | |||
| Damage | Stun | Attack | Block | |||
| 60 | 100 | H | 2 | |||
| ||||||
| V-Trigger 1 | Startup | Active | Recovery | Hit | ||
| 5(12) | 2 | 21 | 1 | |||
| Damage | Stun | Attack | Block | |||
| 50 | 80 | H | -3 | |||
| ||||||
Stand HP
| Normal | Startup | Active | Recovery | Hit | ||
|---|---|---|---|---|---|---|
| 12 | 2 | 20(25) | 2 | |||
| Damage | Stun | Attack | Block | |||
| 80 | 150 | H | -3 | |||
| ||||||
| V-Trigger 1 | Startup | Active | Recovery | Hit | ||
| 12(19) | 2 | 26 | -4 | |||
| Damage | Stun | Attack | Block | |||
| 60 | 100 | H | -8 | |||
| ||||||
Stand LK
| Normal | Startup | Active | Recovery | Hit | ||
|---|---|---|---|---|---|---|
| 4 | 3 | 10 | 4 | |||
| Damage | Stun | Attack | Block | |||
| 40 | 70 | H | -2 | |||
| ||||||
| V-Trigger 1 | Startup | Active | Recovery | Hit | ||
| 5(12) | 4 | 9 | 1 | |||
| Damage | Stun | Attack | Block | |||
| 40 | 70 | H | 0 | |||
| ||||||
Stand MK
| Normal | Startup | Active | Recovery | Hit | ||
|---|---|---|---|---|---|---|
| 7 | 3 | 17 | 2 | |||
| Damage | Stun | Attack | Block | |||
| 60 | 100 | H | -3 | |||
| ||||||
| V-Trigger 1 | Startup | Active | Recovery | Hit | ||
| 8(15) | 4 | 23 | -3 | |||
| Damage | Stun | Attack | Block | |||
| 50 | 80 | H | -8 | |||
| ||||||
Stand HK
| Normal | Startup | Active | Recovery | Hit | ||
|---|---|---|---|---|---|---|
| 12 | 4 | 19(24) | 3 | |||
| Damage | Stun | Attack | Block | |||
| 90 | 150 | H | -2 | |||
| ||||||
| V-Trigger 1 | Startup | Active | Recovery | Hit | ||
| 12(19) | 4 | 25 | -3 | |||
| Damage | Stun | Attack | Block | |||
| 60 | 100 | H | -8 | |||
| ||||||
Crouch LP
| Normal | Startup | Active | Recovery | Hit | ||
|---|---|---|---|---|---|---|
| 3 | 2 | 8 | 4 | |||
| Damage | Stun | Attack | Block | |||
| 20 | 70 | H | 2 | |||
| ||||||
| V-Trigger 1 | Startup | Active | Recovery | Hit | ||
| 3(10) | 2 | 10 | 2 | |||
| Damage | Stun | Attack | Block | |||
| 20 | 70 | H | 0 | |||
| ||||||
Crouch MP
| Normal | Startup | Active | Recovery | Hit | ||
|---|---|---|---|---|---|---|
| 6 | 3 | 14 | 5 | |||
| Damage | Stun | Attack | Block | |||
| 60 | 100 | H | 1 | |||
| ||||||
| V-Trigger 1 | Startup | Active | Recovery | Hit | ||
| 6(13) | 3 | 19 | -2 | |||
| Damage | Stun | Attack | Block | |||
| 50 | 80 | H | -4 | |||
| ||||||
Crouch HP
| Normal | Startup | Active | Recovery | Hit | ||
|---|---|---|---|---|---|---|
| 10 | 3 | 20(25) | 1 | |||
| Damage | Stun | Attack | Block | |||
| 80 | 150 | H | -5 | |||
| ||||||
| V-Trigger 1 | Startup | Active | Recovery | Hit | ||
| 10(17) | 3 | 26 | -5 | |||
| Damage | Stun | Attack | Block | |||
| 60 | 100 | H | -9 | |||
| ||||||
Crouch LK
| Normal | Startup | Active | Recovery | Hit | ||
|---|---|---|---|---|---|---|
| 5 | 2 | 8 | 3 | |||
| Damage | Stun | Attack | Block | |||
| 20 | 70 | L | 2 | |||
| ||||||
| V-Trigger 1 | Startup | Active | Recovery | Hit | ||
| 5(12) | 2 | 10 | 1 | |||
| Damage | Stun | Attack | Block | |||
| 20 | 70 | L | 0 | |||
| ||||||
Crouch MK
| Normal | Startup | Active | Recovery | Hit | ||
|---|---|---|---|---|---|---|
| 7 | 3 | 16 | 2 | |||
| Damage | Stun | Attack | Block | |||
| 50 | 100 | L | -3 | |||
| ||||||
| V-Trigger 1 | Startup | Active | Recovery | Hit | ||
| 8(15) | 3 | 21 | -4 | |||
| Damage | Stun | Attack | Block | |||
| 50 | 80 | L | -8 | |||
| ||||||
Crouch HK
| Normal | Startup | Active | Recovery | Hit | ||
|---|---|---|---|---|---|---|
| 10 | 7 | 20 | KD | |||
| Damage | Stun | Attack | Block | |||
| 90 | 150 | L | -13 | |||
| ||||||
| V-Trigger 1 | Startup | Active | Recovery | Hit | ||
| 10(17) | 11 | 26 | KD | |||
| Damage | Stun | Attack | Block | |||
| 60 | 100 | L | -18 | |||
| ||||||
Crouch HK late hit
| Startup | Active | Recovery | Hit | ||
|---|---|---|---|---|---|
| 17 | 4 | 20 | 3 | ||
| Damage | Stun | Attack | Block | ||
| 60 | 150 | L | -10 | ||
| |||||
Jump LP
| Startup | Active | Recovery | Hit |
|---|---|---|---|
| 5 | 6 | - | - |
| Damage | Stun | Attack | Block |
| 40 | 70 | M | - |
Jump MP
| Startup | Active | Recovery | Hit | ||
|---|---|---|---|---|---|
| 8 | 2 | - | - | ||
| Damage | Stun | Attack | Block | ||
| 60 | 100 | M | - | ||
| |||||
Jump HP
| Startup | Active | Recovery | Hit |
|---|---|---|---|
| 8 | 4 | - | - |
| Damage | Stun | Attack | Block |
| 90 | 150 | M | - |
Jump LK
| Startup | Active | Recovery | Hit | ||
|---|---|---|---|---|---|
| 5 | 6 | - | - | ||
| Damage | Stun | Attack | Block | ||
| 40 | 70 | M | - | ||
| |||||
Jump MK
| Startup | Active | Recovery | Hit | ||
|---|---|---|---|---|---|
| 7 | 4 | - | - | ||
| Damage | Stun | Attack | Block | ||
| 60 | 100 | M | - | ||
| |||||
Jump HK
| Startup | Active | Recovery | Hit |
|---|---|---|---|
| 8 | 4 | - | - |
| Damage | Stun | Attack | Block |
| 90 | 150 | M | - |
Command Normals
Kubi Kudaki
| Startup | Active | Recovery | Hit | ||
|---|---|---|---|---|---|
| 22 | 1*1 | 22 | 1 | ||
| Damage | Stun | Attack | Block | ||
| 40*40 (80) | 50*50 (100) | M*M | -7 | ||
| |||||
Target Combos
Kaeshi Saiha
| Startup | Active | Recovery | Hit | ||
|---|---|---|---|---|---|
| 12+10 | 2 | 25 | KD | ||
| Damage | Stun | Attack | Block | ||
| 80*54 (134) | 150*90 (240) | H*H | -12 | ||
| |||||
Kaeshi Urasaiha
| Startup | Active | Recovery | Hit | ||
|---|---|---|---|---|---|
| 10+9 | 1 | 28 | KD | ||
| Damage | Stun | Attack | Block | ||
| 80*54 (134) | 150*90 (240) | H*H | -10 | ||
| |||||
Kagerou
| Startup | Active | Recovery | Hit | ||
|---|---|---|---|---|---|
| 12+10+14 | 2 | 31 | KD | ||
| Damage | Stun | Attack | Block | ||
| 80*54*40*24 (198) | 150*90*0*120 (360) | H*H*H | - | ||
| |||||
Urakagerou
| Startup | Active | Recovery | Hit | ||
|---|---|---|---|---|---|
| 10+9+14 | 2 | 31 | KD | ||
| Damage | Stun | Attack | Block | ||
| 80*54*40*24 (198) | 150*90*0*120 (360) | H*H*H | - | ||
| |||||
Sekibu No Jin
| Startup | Active | Recovery | Hit | ||
|---|---|---|---|---|---|
| 12+10+30 | - | 35 | KD | ||
| Damage | Stun | Attack | Block | ||
| 80*54 (134) | 150*90 (240) | H*H | - | ||
| |||||
Hakuso No Jin
| Startup | Active | Recovery | Hit | ||
|---|---|---|---|---|---|
| 10+9+30 | - | 35 | KD | ||
| Damage | Stun | Attack | Block | ||
| 80*54 (134) | 150*90 (240) | H*H | - | ||
| |||||
Bushin Soukosou
| Startup | Active | Recovery | Hit | ||
|---|---|---|---|---|---|
| 5+13 | 2 | 24 | -2 | ||
| Damage | Stun | Attack | Block | ||
| 60*45 (105) | 100*72 (172) | H*H | -6 | ||
| |||||
Bushin Gokusanken - Ni
| Startup | Active | Recovery | Hit | ||
|---|---|---|---|---|---|
| 4+5 | 3 | 22 | -3 | ||
| Damage | Stun | Attack | Block | ||
| 30*45 (75) | 70*72 (142) | H*H | -7 | ||
| |||||
Bushin Gokusanken - San
| Startup | Active | Recovery | Hit | ||
|---|---|---|---|---|---|
| 4+5+11 | 4 | 30 | KD | ||
| Damage | Stun | Attack | Block | ||
| 30*45*24*32 (131) | 70*72*40*40 (222) | H*H*H | -11 | ||
| |||||
Bushin Gokusanken - Shu
| Startup | Active | Recovery | Hit | ||
|---|---|---|---|---|---|
| 4+5+11+16 | 7 | 27 | KD | ||
| Damage | Stun | Attack | Block | ||
| 30*45*24*32*56 (187) | 70*72*40*40*70 (292) | H*H*H*H | -16 | ||
| |||||
Bushin Gokusanage
| Startup | Active | Recovery | Hit | ||
|---|---|---|---|---|---|
| 4+5+11+7 | 2 | 29 | KD | ||
| Damage | Stun | Attack | Block | ||
| 30*45*24*70 (169) | 70*72*40*140 (322) | H*H*H*T | - | ||
| |||||
Throws
Tesso
| Startup | Active | Recovery | Hit | ||
|---|---|---|---|---|---|
| 5 | 3 | 17 | KD | ||
| Damage | Stun | Attack | Block | ||
| 140 | 150 | T | - | ||
| |||||
Raiju
| Startup | Active | Recovery | Hit | ||
|---|---|---|---|---|---|
| 5 | 3 | 17 | KD | ||
| Damage | Stun | Attack | Block | ||
| 160 | 200 | T | - | ||
| |||||
Special Moves
Sankagu Tobi
| Startup | Active | Recovery | Hit | ||
|---|---|---|---|---|---|
| - | - | - | - | ||
| Damage | Stun | Attack | Block | ||
| - | - | - | - | ||
| |||||
Hassou Tobi
| Startup | Active | Recovery | Hit | ||
|---|---|---|---|---|---|
| - | - | - | - | ||
| Damage | Stun | Attack | Block | ||
| - | - | - | - | ||
| |||||
Shukumyo
| Startup | Active | Recovery | Hit | ||
|---|---|---|---|---|---|
| - | - | 25 | - | ||
| Damage | Stun | Attack | Block | ||
| - | - | - | - | ||
| |||||
LP Bushin Sho
| Startup | Active | Recovery | Hit | ||
|---|---|---|---|---|---|
| 12 | 6 | 20 | KD | ||
| Damage | Stun | Attack | Block | ||
| 60 | 150 | H | -4 | ||
| |||||
MP Bushin Sho
| Startup | Active | Recovery | Hit | ||
|---|---|---|---|---|---|
| 18 | 6 | 16 | KD | ||
| Damage | Stun | Attack | Block | ||
| 50*40 | 100*50 | H | -2 | ||
| |||||
HP Bushin Sho
| Startup | Active | Recovery | Hit | ||
|---|---|---|---|---|---|
| 24 | 6 | 15 | KD | ||
| Damage | Stun | Attack | Block | ||
| 30*30*60 | 50*50*100 | H | 2 | ||
| |||||
EX Bushin Sho
| Startup | Active | Recovery | Hit | ||
|---|---|---|---|---|---|
| 23 | 6 | 21 | KD | ||
| Damage | Stun | Attack | Block | ||
| 80 | 150 | H | 2 | ||
| |||||
LP Hozanto
| Startup | Active | Recovery | Hit | ||
|---|---|---|---|---|---|
| 12 | 6 | 12(22) | KD | ||
| Damage | Stun | Attack | Block | ||
| 60 | 100 | H | -6 | ||
| |||||
MP Hozanto
| Startup | Active | Recovery | Hit | ||
|---|---|---|---|---|---|
| 22 | 6 | 13 | KD | ||
| Damage | Stun | Attack | Block | ||
| 70 | 100 | H | -6 | ||
| |||||
HP Hozanto
| Startup | Active | Recovery | Hit | ||
|---|---|---|---|---|---|
| 26 | 5 | 15 | KD | ||
| Damage | Stun | Attack | Block | ||
| 90 | 100 | H | -6 | ||
| |||||
EX Hozanto
| Startup | Active | Recovery | Hit | ||
|---|---|---|---|---|---|
| 16 | 4 | 14 | KD | ||
| Damage | Stun | Attack | Block | ||
| 50*50 (100) | 150 | H | -6 | ||
| |||||
LP Bushin Sangoku Otoshi
| Startup | Active | Recovery | Hit | ||
|---|---|---|---|---|---|
| 4 | 2 | 6 | KD | ||
| Damage | Stun | Attack | Block | ||
| 120 | 200 | T | - | ||
| |||||
MP Bushin Sangoku Otoshi
| Startup | Active | Recovery | Hit | ||
|---|---|---|---|---|---|
| 5 | 2 | 6 | KD | ||
| Damage | Stun | Attack | Block | ||
| 130 | 200 | T | - | ||
| |||||
HP Bushin Sangoku Otoshi
| Startup | Active | Recovery | Hit | ||
|---|---|---|---|---|---|
| 6 | 2 | 6 | KD | ||
| Damage | Stun | Attack | Block | ||
| 140 | 200 | T | - | ||
| |||||
EX Bushin Sangoku Otoshi
| Startup | Active | Recovery | Hit | ||
|---|---|---|---|---|---|
| 4 | 2 | 6 | KD | ||
| Damage | Stun | Attack | Block | ||
| 60*100 (160) | 200 | H | - | ||
| |||||
Hayagake
| Startup | Active | Recovery | Hit | ||
|---|---|---|---|---|---|
| 8 | - | - | - | ||
| Damage | Stun | Attack | Block | ||
| - | - | - | - | ||
| |||||
Hayagake EX
| Startup | Active | Recovery | Hit | ||
|---|---|---|---|---|---|
| 7 | - | - | - | ||
| Damage | Stun | Attack | Block | ||
| - | - | - | - | ||
| |||||
Tozetsu
| Startup | Active | Recovery | Hit | ||
|---|---|---|---|---|---|
| 8 | - | 15 | - | ||
| Damage | Stun | Attack | Block | ||
| - | - | - | - | ||
| |||||
Ashikari
| Startup | Active | Recovery | Hit | ||
|---|---|---|---|---|---|
| 8+9 | 9 | 27 | KD | ||
| Damage | Stun | Attack | Block | ||
| 100 | 120 | L | -21 | ||
| |||||
Gekkou
| Startup | Active | Recovery | Hit | ||
|---|---|---|---|---|---|
| 8+22 | 2*2 | 24 | KD | ||
| Damage | Stun | Attack | Block | ||
| 70*50 (120) | 100*50 (150) | M*H | -5 | ||
| |||||
Tozetsu EX
| Startup | Active | Recovery | Hit | ||
|---|---|---|---|---|---|
| 8 | - | 12 | - | ||
| Damage | Stun | Attack | Block | ||
| - | - | - | - | ||
| |||||
Ashikari EX
| Startup | Active | Recovery | Hit | ||
|---|---|---|---|---|---|
| 7+9 | 9 | 27 | KD | ||
| Damage | Stun | Attack | Block | ||
| 130 | 200 | L | -21 | ||
| |||||
Gekkou EX
| Startup | Active | Recovery | Hit | ||
|---|---|---|---|---|---|
| 7+22 | 2*2 | 24 | KD | ||
| Damage | Stun | Attack | Block | ||
| 100*50 (150) | 100x2 (200) | M*H | -2 | ||
| |||||
Critical Arts
Batsuzan Gaisei
| Startup | Active | Recovery | Hit | ||
|---|---|---|---|---|---|
| 4 | 8 | 47 | KD | ||
| Damage | Stun | Attack | Block | ||
| 340 | 0 | H | -33 | ||
| |||||
Taunts
Taunt
| Startup | Active | Recovery | Hit |
|---|---|---|---|
| - | - | 61 | - |
| Damage | Stun | Attack | Block |
| - | - | - | - |
V-System
V-Skill 1
Tenpo Kari
| Startup | Active | Recovery | Hit | ||
|---|---|---|---|---|---|
| 14 | 2 | 31 | KD | ||
| Damage | Stun | Attack | Block | ||
| 50*40 | 150 | H | -7 | ||
| |||||
V-Skill 2
Kuchiyose - Bii
| Startup | Active | Recovery | Hit | ||
|---|---|---|---|---|---|
| 29 | - | 35 | KD | ||
| Damage | Stun | Attack | Block | ||
| 60 | 80 | H | 17(20) | ||
| |||||
V-Trigger 1
Bushinryu Shingekiko
| Startup | Active | Recovery | Hit | ||
|---|---|---|---|---|---|
| 1 | - | 5 | - | ||
| Damage | Stun | Attack | Block | ||
| - | - | - | - | ||
| |||||
Idaten
| Startup | Active | Recovery | Hit | ||
|---|---|---|---|---|---|
| - | - | 25 | - | ||
| Damage | Stun | Attack | Block | ||
| - | - | - | - | ||
| |||||
Bushin Seiryukyaku
| Startup | Active | Recovery | Hit | ||
|---|---|---|---|---|---|
| 14(21) | 5 | 21 | KD | ||
| Damage | Stun | Attack | Block | ||
| 160 | 200 | H | -2 | ||
| |||||
V-Trigger 2
Karura Tenzan
| Startup | Active | Recovery | Hit | ||
|---|---|---|---|---|---|
| 1+5 | 8 | 22+17 | KD | ||
| Damage | Stun | Attack | Block | ||
| 40*20x2*60 (140) | 150 | H | -28 | ||
| |||||
Karura Tenzan (Secondary)
| Startup | Active | Recovery | Hit | ||
|---|---|---|---|---|---|
| 10 | 8 | 22+17 | KD | ||
| Damage | Stun | Attack | Block | ||
| 40*20x2*60 (140) | 100 | H | -28 | ||
| |||||
V-Shift
V-Shift
| Startup | Active | Recovery | Hit | ||
|---|---|---|---|---|---|
| 1 | 9 | 22 | - | ||
| Damage | Stun | Attack | Block | ||
| - | - | - | - | ||
| |||||
V-Shift Break
Habakiri
| Startup | Active | Recovery | Hit | ||
|---|---|---|---|---|---|
| ? | 3 | ? | KD | ||
| Damage | Stun | Attack | Block | ||
| 60 | 0 | H | -2 | ||
| |||||
V-Reversal
Toushi
| Startup | Active | Recovery | Hit | ||
|---|---|---|---|---|---|
| 12 | 2 | 24 | 2 | ||
| Damage | Stun | Attack | Block | ||
| 40 | 0 | H | -2 | ||
| |||||

