Introduction
About Sakura
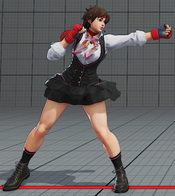
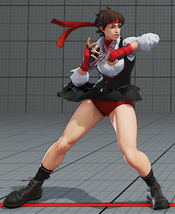
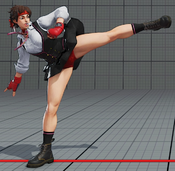
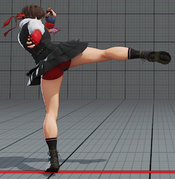
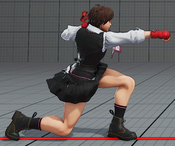
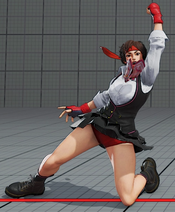
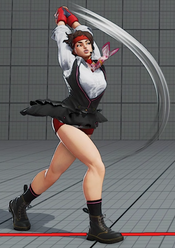
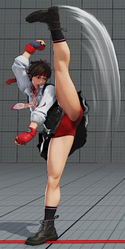
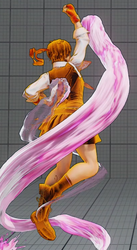
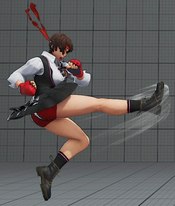
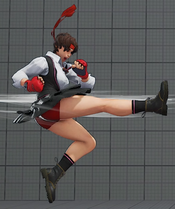
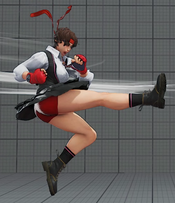
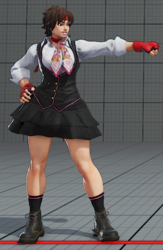
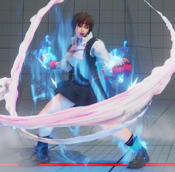
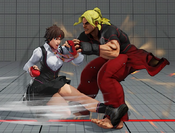
A college student who recently graduated and now has a job, Sakura is Ryu's pupil.
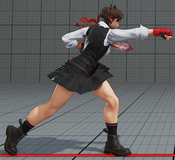
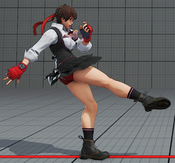
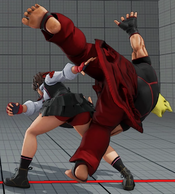
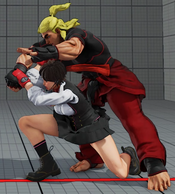
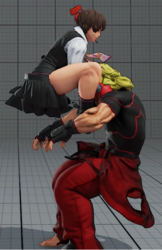
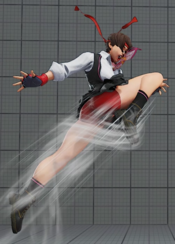
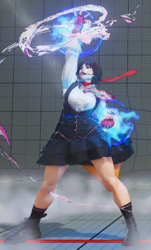
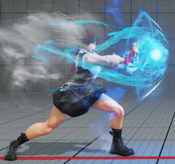
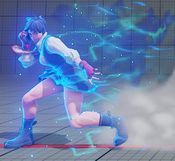
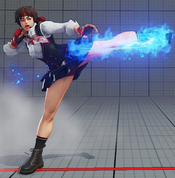
Sakura is a quick, aggressive rushdown character with a lot of safe attacks. With a quick walk-speed and dash, she can "shimmy" well and keep up the pressure and chase her fireballs. Many of her moves are safe on block, as well, allowing you to safely force your opponent to block. To add on, her light moves can easily convert into big damage, allowing her to punish mistakes very well. If you like to play quick, aggressive characters who can get a lot of opportunities on hit or on block, then Sakura is for you.
| Strengths | Weaknesses |
|---|---|
|
|
Final Patch
Players to Watch
- Alex Myers
- ISA
- Nauman
| Sakura | |
|---|---|
| Vitals | |
| Life Points | 975 |
| Stun Points | 1000 |
| V-Gauge Points | |
| V-Trigger 1 | 600 |
| V-Trigger 2 | 600 |
| Ground Movement | |
| Forward Walk Speed | 0.0527 |
| Backward Walk Speed | 0.047 |
| Forward Dash Speed | 16 |
| Backward Dash Speed | 23 |
| Forward Dash Distance | 1.643 |
| Backward Dash Distance | 0.998 |
| Backdash CH Frames | 3-10 |
| Jumping | |
| Back Jump Speed | 46 (4+38+4) |
| Neutral Jump Speed | 46 (4+38+4) |
| Forward Jump Speed | 45 (3+38+4) |
| Forward Jump Distance | 2.128 |
| Backward Jump Distance | 1.824 |
| Throws | |
| Throw Hurtbox | 0.25 |
| Throw Range | 0.8 |
Frame Data & Descriptions are provided by FATOnline.
|
| SFV Frame Data Glossary | |
|---|---|
| Active |
How many frames a move remains active (can hurt opponents) for. |
| Attack |
Attack level is L for low attacks (must be blocked crouching), H is for High attacks (which can be blocked high or low) and M for overhead (must be blocked standing). T is for throw attacks (which cannot be blocked). |
| Cancel options |
Available cancel options.
|
| Confirm windows |
Hit confirm windows written as Specials & CAs/Target Combos/V-Trigger. Notation may denote V-Skill only cancel windows in Specials.
|
| Crush Counter |
Crush Counter hit advantage written as opponent state, frame advantage, and v-gauge gain on hit. |
| Damage |
Attack damage on hit. Notation may denote multi-hit or "sweet spot" damage values on certain frames. |
| Hit/Block |
These are frame advantage values when the attack hits or is blocked. If the number is positive, then the move will end before the defender can act again. If the number is negative, the defender will be able to act before the attacker and maybe even punish. KD refers to knockdown on hit.
|
| Knockdown |
Knockdown advantage against Normal, Quick Rise and Back Rise wake up options. |
| Recovery |
How many frames it takes for a move to finish after it's been active. |
| Startup |
How many frames it takes before the move becomes 'active' or have a hit box. The last startup frame and the first active frame are the same frame, meaning all values are written as Startup + 1. |
| Stun |
Amount of stun added to the opponent's stun bar on hit. |
Normals
Stand LP
| Startup | Active | Recovery | Hit | ||
|---|---|---|---|---|---|
| 4 | 3 | 8 | 4 | ||
| Damage | Stun | Attack | Block | ||
| 30 | 70 | H | 2 | ||
| |||||
Stand MP
| Startup | Active | Recovery | Hit | ||
|---|---|---|---|---|---|
| 5 | 3 | 13 | 7 | ||
| Damage | Stun | Attack | Block | ||
| 60 | 100 | H | 3 | ||
| |||||
Stand HP
| Startup | Active | Recovery | Hit | ||
|---|---|---|---|---|---|
| 9 | 3 | 21 | 3 | ||
| Damage | Stun | Attack | Block | ||
| 80 | 150 | H | -2 | ||
| |||||
Stand LK
| Startup | Active | Recovery | Hit | ||
|---|---|---|---|---|---|
| 4 | 3 | 13 | -1 | ||
| Damage | Stun | Attack | Block | ||
| 30 | 70 | H | -2 | ||
| |||||
Stand MK
| Startup | Active | Recovery | Hit | ||
|---|---|---|---|---|---|
| 8 | 3 | 17(15) | 3 | ||
| Damage | Stun | Attack | Block | ||
| 60 | 100 | H | 1 | ||
| |||||
Stand HK
| Startup | Active | Recovery | Hit | ||
|---|---|---|---|---|---|
| 12 | 2 | 26 | 1 | ||
| Damage | Stun | Attack | Block | ||
| 80 | 150 | H | -4 | ||
| |||||
Crouch LP
| Startup | Active | Recovery | Hit | ||
|---|---|---|---|---|---|
| 3 | 2 | 9 | 3 | ||
| Damage | Stun | Attack | Block | ||
| 20 | 70 | H | 1 | ||
| |||||
Crouch MP
| Startup | Active | Recovery | Hit | ||
|---|---|---|---|---|---|
| 6 | 4 | 13 | 5 | ||
| Damage | Stun | Attack | Block | ||
| 60 | 100 | H | 2 | ||
| |||||
Crouch HP
| Startup | Active | Recovery | Hit | ||
|---|---|---|---|---|---|
| 8 | 5 | 23 | -2 | ||
| Damage | Stun | Attack | Block | ||
| 90 | 150 | H | -5 | ||
| |||||
Crouch LK
| Startup | Active | Recovery | Hit |
|---|---|---|---|
| 4 | 2 | 8 | 3 |
| Damage | Stun | Attack | Block |
| 20 | 70 | L | 0 |
Crouch MK
| Startup | Active | Recovery | Hit | ||
|---|---|---|---|---|---|
| 6 | 2 | 14 | 2 | ||
| Damage | Stun | Attack | Block | ||
| 50 | 100 | L | -3 | ||
| |||||
Crouch HK
| Startup | Active | Recovery | Hit | ||
|---|---|---|---|---|---|
| 8 | 2 | 25 | KD | ||
| Damage | Stun | Attack | Block | ||
| 90 | 150 | L | -13 | ||
| |||||
Jump LP
| Startup | Active | Recovery | Hit |
|---|---|---|---|
| 4 | 6 | - | - |
| Damage | Stun | Attack | Block |
| 40 | 70 | M | - |
Jump MP
| Startup | Active | Recovery | Hit | ||
|---|---|---|---|---|---|
| 6 | 7 | - | - | ||
| Damage | Stun | Attack | Block | ||
| 60 | 100 | M | - | ||
| |||||
Jump HP
| Startup | Active | Recovery | Hit | ||
|---|---|---|---|---|---|
| 8 | 5 | - | - | ||
| Damage | Stun | Attack | Block | ||
| 90 | 150 | M | - | ||
| |||||
Jump LK
| Startup | Active | Recovery | Hit | ||
|---|---|---|---|---|---|
| 4 | 8 | - | - | ||
| Damage | Stun | Attack | Block | ||
| 40 | 70 | M | - | ||
| |||||
Jump MK
| Startup | Active | Recovery | Hit | ||
|---|---|---|---|---|---|
| 7 | 5 | - | - | ||
| Damage | Stun | Attack | Block | ||
| 60 | 100 | M | - | ||
| |||||
Jump HK
| Startup | Active | Recovery | Hit |
|---|---|---|---|
| 10 | 5 | - | - |
| Damage | Stun | Attack | Block |
| 90 | 150 | M | - |
Command Normals
Flower Kick
| Startup | Active | Recovery | Hit | ||
|---|---|---|---|---|---|
| 21 | 2 | 23 | 1 | ||
| Damage | Stun | Attack | Block | ||
| 70 | 100 | M | -7 | ||
| |||||
Furiko Upper
| Startup | Active | Recovery | Hit | ||
|---|---|---|---|---|---|
| 7 | 3 | 26 | -4 | ||
| Damage | Stun | Attack | Block | ||
| 80 | 150 | H | -7 | ||
| |||||
Chin Buster Kick
| Startup | Active | Recovery | Hit | ||
|---|---|---|---|---|---|
| 12 | 3 | 20 | 4 | ||
| Damage | Stun | Attack | Block | ||
| 80 | 150 | H | 2 | ||
| |||||
Throws
Hanakaze
| Startup | Active | Recovery | Hit |
|---|---|---|---|
| 5 | 3 | 17 | KD |
| Damage | Stun | Attack | Block |
| 130 | 150 | T | - |
Sakura Shoulder Throw
| Startup | Active | Recovery | Hit |
|---|---|---|---|
| 5 | 3 | 17 | KD |
| Damage | Stun | Attack | Block |
| 150 | 200 | T | - |
Special Moves
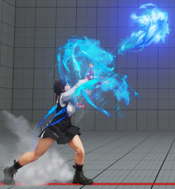
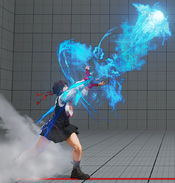
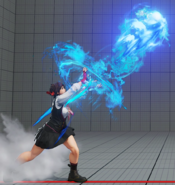
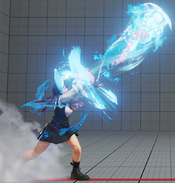
LP Hadoken
| Normal | Startup | Active | Recovery | Hit | ||
|---|---|---|---|---|---|---|
| 15 | 42 | 32 | -2 | |||
| Damage | Stun | Attack | Block | |||
| 50 | 100 | H | -8 | |||
| ||||||
| V-Trigger 1 | Startup | Active | Recovery | Hit | ||
| 14 | - | 28 | KD | |||
| Damage | Stun | Attack | Block | |||
| 20*60 (80) | 150 | H | 1 | |||
| ||||||
MP Hadoken
| Normal | Startup | Active | Recovery | Hit | ||
|---|---|---|---|---|---|---|
| 15 | 49 | 34 | -2 | |||
| Damage | Stun | Attack | Block | |||
| 50 | 100 | H | -8 | |||
| ||||||
| V-Trigger 1 | Startup | Active | Recovery | Hit | ||
| 14 | - | 28 | KD | |||
| Damage | Stun | Attack | Block | |||
| 20*60 (80) | 150 | H | 1 | |||
| ||||||
HP Hadoken
| Normal | Startup | Active | Recovery | Hit | ||
|---|---|---|---|---|---|---|
| 15 | 56 | 36 | -2 | |||
| Damage | Stun | Attack | Block | |||
| 60 | 100 | H | -8 | |||
| ||||||
| V-Trigger 1 | Startup | Active | Recovery | Hit | ||
| 14 | - | 28 | KD | |||
| Damage | Stun | Attack | Block | |||
| 20*60 (80) | 150 | H | 1 | |||
| ||||||
Hadoken lvl 2
| Normal | Startup | Active | Recovery | Hit | ||
|---|---|---|---|---|---|---|
| 41 | - | 30 | KD | |||
| Damage | Stun | Attack | Block | |||
| 40*40 (80) | 150 | H | 3 | |||
| ||||||
| V-Trigger 1 | Startup | Active | Recovery | Hit | ||
| 33 | - | 27 | KD | |||
| Damage | Stun | Attack | Block | |||
| 20*20*60 (100) | 150 | H | 10 | |||
| ||||||
EX Hadoken
| Startup | Active | Recovery | Hit | ||
|---|---|---|---|---|---|
| 14 | - | 31 | KD | ||
| Damage | Stun | Attack | Block | ||
| 50*50 (100) | 150 | H | 1 | ||
| |||||
Tengyo Hadoken
| Normal | Startup | Active | Recovery | Hit | ||
|---|---|---|---|---|---|---|
| 17 | 27 | 29 | KD | |||
| Damage | Stun | Attack | Block | |||
| 60 | 100 | H | 4 | |||
| ||||||
| V-Trigger 1 | Startup | Active | Recovery | Hit | ||
| 15 | 29 | 30 | KD | |||
| Damage | Stun | Attack | Block | |||
| 30*50 (80) | 150 | H | 9 | |||
| ||||||
Tengyo Hadoken lvl 2
| Normal | Startup | Active | Recovery | Hit | ||
|---|---|---|---|---|---|---|
| 39 | 34 | 36 | KD | |||
| Damage | Stun | Attack | Block | |||
| 40*60 (100) | 150 | H | 1 | |||
| ||||||
| V-Trigger 1 | Startup | Active | Recovery | Hit | ||
| 31 | 29 | 24 | KD | |||
| Damage | Stun | Attack | Block | |||
| 30*30*50 (110) | 150 | H | 13 | |||
| ||||||
EX Tengyo Hadoken
| Startup | Active | Recovery | Hit | ||
|---|---|---|---|---|---|
| 15 | 34 | 30 | KD | ||
| Damage | Stun | Attack | Block | ||
| 40*60 (100) | 150 | H | -1 | ||
| |||||
LP Shouoken
| Normal | Startup | Active | Recovery | Hit | ||
|---|---|---|---|---|---|---|
| 4 | 3(1)4 | 26+18 | KD | |||
| Damage | Stun | Attack | Block | |||
| 20*20*60 (100) | 100 | H | -31 | |||
| ||||||
| V-Trigger 2 | Startup | Active | Recovery | Hit | ||
| 4 | 5(1)3(20)4(1)8(2)2 | 26+25 | KD | |||
| Damage | Stun | Attack | Block | |||
| 20x3*10*20*10x5*30 (170) | 200 | H | -33 | |||
| ||||||
MP Shouoken
| Normal | Startup | Active | Recovery | Hit | ||
|---|---|---|---|---|---|---|
| 9 | 3(1)4 | 28+18 | KD | |||
| Damage | Stun | Attack | Block | |||
| 15x3*5*60 (110) | 150 | H | -32 | |||
| ||||||
| V-Trigger 2 | Startup | Active | Recovery | Hit | ||
| 4 | 5(1)3(20)4(1)8(2)2 | 26+25 | KD | |||
| Damage | Stun | Attack | Block | |||
| 20x3*10*20*10x5*30 (170) | 200 | H | -33 | |||
| ||||||
HP Shouoken
| Normal | Startup | Active | Recovery | Hit | ||
|---|---|---|---|---|---|---|
| 14 | 10(1)2 | 34+18 | KD | |||
| Damage | Stun | Attack | Block | |||
| 30x2*5x4*40 (120) | 150 | H | -37 | |||
| ||||||
| V-Trigger 2 | Startup | Active | Recovery | Hit | ||
| 4 | 5(1)3(20)4(1)8(2)2 | 26+25 | KD | |||
| Damage | Stun | Attack | Block | |||
| 20x3*10*20*10x5*30 (170) | 200 | H | -33 | |||
| ||||||
EX Shouoken
| Normal | Startup | Active | Recovery | Hit | ||
|---|---|---|---|---|---|---|
| 4 | 5(1)3(20)10 | 36+18 | KD | |||
| Damage | Stun | Attack | Block | |||
| 10x3*30*10x4*50 (150) | 200 | H | -45 | |||
| ||||||
| V-Trigger 2 | Startup | Active | Recovery | Hit | ||
| 4 | 5(1)3(20)4(1)8(2)2 | 26+25 | KD | |||
| Damage | Stun | Attack | Block | |||
| 20x3*10*20*10x5*30 (170) | 200 | H | -33 | |||
| ||||||
LK Shunpukyaku
| Normal | Startup | Active | Recovery | Hit | ||
|---|---|---|---|---|---|---|
| 17 | 2 | 13+9 | 2 | |||
| Damage | Stun | Attack | Block | |||
| 60 | 150 | H | -2 | |||
| ||||||
| V-Trigger 2 | Startup | Active | Recovery | Hit | ||
| 12 | 2(6)2(7)2 | 4+22(29) | KD | |||
| Damage | Stun | Attack | Block | |||
| 30x4 (120) | 30x3*60 (150) | H | -10 | |||
| ||||||
MK Shunpukyaku
| Normal | Startup | Active | Recovery | Hit | ||
|---|---|---|---|---|---|---|
| 21 | 2(13)2 | 9+15 | 3 | |||
| Damage | Stun | Attack | Block | |||
| 40*40 (70) | 50*100 (150) | H | -6 | |||
| ||||||
| V-Trigger 2 | Startup | Active | Recovery | Hit | ||
| 12 | 2(6)2(7)2 | 4+22(29) | KD | |||
| Damage | Stun | Attack | Block | |||
| 30x4 (120) | 30x3*60 (150) | H | -10 | |||
| ||||||
HK Shunpukyaku
| Normal | Startup | Active | Recovery | Hit | ||
|---|---|---|---|---|---|---|
| 24 | 2(10)2(9)2 | 8+14 | 2 | |||
| Damage | Stun | Attack | Block | |||
| 30*30*40 (100) | 45*45*60 (150) | H | -2 | |||
| ||||||
| V-Trigger 2 | Startup | Active | Recovery | Hit | ||
| 12 | 2(6)2(7)2 | 4+22(29) | KD | |||
| Damage | Stun | Attack | Block | |||
| 30x4 (120) | 30x3*60 (150) | H | -10 | |||
| ||||||
EX Shunpukyaku
| Normal | Startup | Active | Recovery | Hit | ||
|---|---|---|---|---|---|---|
| 15(12) | 2(7)2(7)2 | 4+18 (22) | KD | |||
| Damage | Stun | Attack | Block | |||
| 20x3*60 (120) | 150 | H | -2 | |||
| ||||||
| V-Trigger 2 | Startup | Active | Recovery | Hit | ||
| 12 | 2(6)2(7)2 | 4+22(29) | KD | |||
| Damage | Stun | Attack | Block | |||
| 30x4 (120) | 30x3*60 (150) | H | -10 | |||
| ||||||
LK Airborne Shunpukyaku
| Startup | Active | Recovery | Hit | ||
|---|---|---|---|---|---|
| 13 | 2(10)2 | 16 | KD | ||
| Damage | Stun | Attack | Block | ||
| 100 | 150 | H | -5(-1) | ||
| |||||
MK Airborne Shunpukyaku
| Startup | Active | Recovery | Hit | ||
|---|---|---|---|---|---|
| 13 | 2(10)2 | 16 | KD | ||
| Damage | Stun | Attack | Block | ||
| 100 | 150 | H | -6(-1) | ||
| |||||
HK Airborne Shunpukyaku
| Startup | Active | Recovery | Hit | ||
|---|---|---|---|---|---|
| 13 | 2(10)2 | 16 | KD | ||
| Damage | Stun | Attack | Block | ||
| 100 | 150 | H | -6(0) | ||
| |||||
EX Airborne Shunpukyaku
| Startup | Active | Recovery | Hit | ||
|---|---|---|---|---|---|
| 12 | 2(3)5(2)4(1)5(2)3 | 16 | KD | ||
| Damage | Stun | Attack | Block | ||
| 28x5 (140) | 40x5 (200) | H | - | ||
| |||||
Critical Arts
Sakura Rain
| Normal | Startup | Active | Recovery | Hit | ||
|---|---|---|---|---|---|---|
| 1+5 | - | 71 | KD | |||
| Damage | Stun | Attack | Block | |||
| 330 (250) | 0 | H | -23 | |||
| ||||||
| V-Trigger 1 | Startup | Active | Recovery | Hit | ||
| 1+5 | - | 71 | KD | |||
| Damage | Stun | Attack | Block | |||
| 350 (280) | 0 | H | -23 | |||
| ||||||
Taunts
Taunt
| Startup | Active | Recovery | Hit |
|---|---|---|---|
| - | - | 61 | - |
| Damage | Stun | Attack | Block |
| - | - | - | - |
V-System
V-Skill 1
Haru Kaze
| Startup | Active | Recovery | Hit | ||
|---|---|---|---|---|---|
| 28 | - | 15 | - | ||
| Damage | Stun | Attack | Block | ||
| - | - | - | - | ||
| |||||
Sakura Otoshi
| Startup | Active | Recovery | Hit | ||
|---|---|---|---|---|---|
| 28+11 | 3 | 6 | KD | ||
| Damage | Stun | Attack | Block | ||
| 50 | 40 | M | -3(9) | ||
| |||||
Sakura Otoshi 2nd
| Startup | Active | Recovery | Hit | ||
|---|---|---|---|---|---|
| 5 | 3 | 6 | KD | ||
| Damage | Stun | Attack | Block | ||
| 50*45 (95) | 40*72 (112) | M | -3(9) | ||
| |||||
Sakura Otoshi 3rd
| Startup | Active | Recovery | Hit | ||
|---|---|---|---|---|---|
| 5 | 3 | 5 | KD | ||
| Damage | Stun | Attack | Block | ||
| 50*45*40 (135) | 40*72*96 (208) | M | - | ||
| |||||
Oukakyaku
| Startup | Active | Recovery | Hit | ||
|---|---|---|---|---|---|
| 28+18 | 14 | 11 | 3(12) | ||
| Damage | Stun | Attack | Block | ||
| 80 | 100 | H | -2(7) | ||
| |||||
Kashinfu
| Startup | Active | Recovery | Hit | ||
|---|---|---|---|---|---|
| 28+8 | 3 | 13 | KD | ||
| Damage | Stun | Attack | Block | ||
| 150 | 200 | T | - | ||
| |||||
V-Skill 2
Haru Hayate
| Startup | Active | Recovery | Hit | ||
|---|---|---|---|---|---|
| - | - | 34 | - | ||
| Damage | Stun | Attack | Block | ||
| - | - | - | - | ||
| |||||
Haru Hayate (attack)
| Startup | Active | Recovery | Hit | ||
|---|---|---|---|---|---|
| 21+5 | 5 | 25 | KD | ||
| Damage | Stun | Attack | Block | ||
| 70 | 100 | H | -7 | ||
| |||||
V-Trigger 1
Haru Arashi
| Startup | Active | Recovery | Hit | ||
|---|---|---|---|---|---|
| 1 | - | 5 | - | ||
| Damage | Stun | Attack | Block | ||
| - | - | - | - | ||
| |||||
Sakura Senpu
| Startup | Active | Recovery | Hit | ||
|---|---|---|---|---|---|
| 1 | - | 5 | - | ||
| Damage | Stun | Attack | Block | ||
| - | - | - | - | ||
| |||||
Hogasho
| Startup | Active | Recovery | Hit | ||
|---|---|---|---|---|---|
| 21 | 7 | 17(22) | 9 | ||
| Damage | Stun | Attack | Block | ||
| 80 | 150 | H | 5 | ||
| |||||
V-Trigger 2
V-Shift
V-Shift
| Startup | Active | Recovery | Hit | ||
|---|---|---|---|---|---|
| 1 | 9 | 22 | - | ||
| Damage | Stun | Attack | Block | ||
| - | - | - | - | ||
| |||||
V-Shift Break
Floral Side-Kick
| Startup | Active | Recovery | Hit | ||
|---|---|---|---|---|---|
| ? | 3 | ? | KD | ||
| Damage | Stun | Attack | Block | ||
| 60 | 0 | H | -2 | ||
| |||||
V-Reversal
Floral Spin
| Startup | Active | Recovery | Hit | ||
|---|---|---|---|---|---|
| 17 | 2 | 24 | KD | ||
| Damage | Stun | Attack | Block | ||
| 60 | 0 | H | -2 | ||
| |||||

