| Pre-release information
This page is under construction based on pre-release data. Join the SF6 Resource Hub for info on editing. |
Introduction
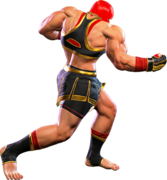
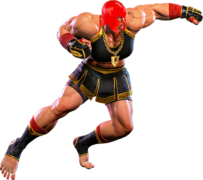
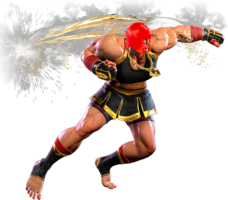
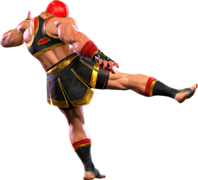
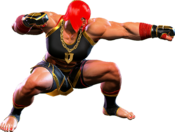
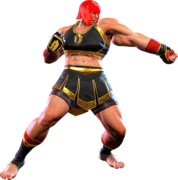
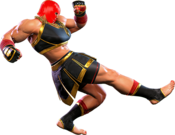
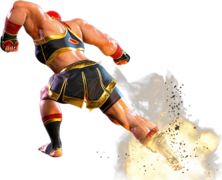
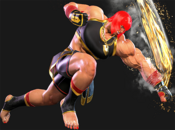
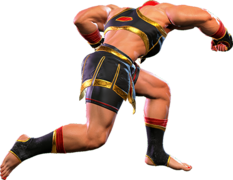
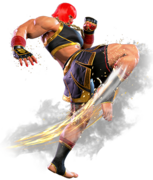
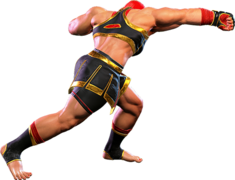
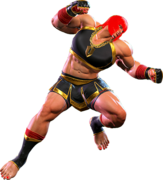
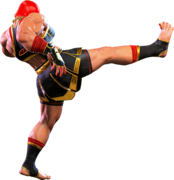
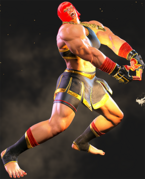
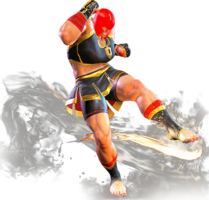
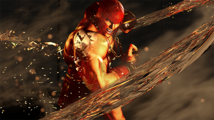
An up-and-coming jewelry designer from Italy who claims ancestry to ancient Greek warriors. As a child, she was inspired by a vision of the Colosseum in its prime. Today, she seeks glory with a smile—and an eye for beauty.
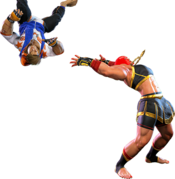
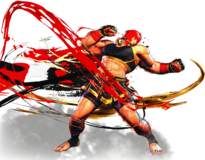
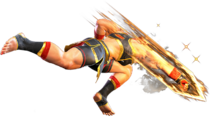
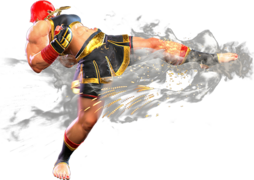
Marisa is a high-damage juggernaut with a variety of far-reaching normals. She excels once she gets her opponent into the corner where there's nowhere to go to escape her onslaught. She also has several moves with armor that allow her to bully through an opponent's attacks, including a unique ability to break Drive Impact attempts easily, as well has having slightly more health than most characters, allowing her to take more hits in a match.
Marisa is able to charge all of her heavy attacks and some of her specials by holding the associated button down. One of her shining normals in this regard is 5HP, a long range punch that leads to good damage, especially when used as a punish counter. Some of her other good normals are 5MP, 2MP, and 5HK, as these are all pokes that are either fast or have great range. Marisa's charged moves also deal significant chip to the opponent's drive bar if they are blocked, and some of them even recover quickly, allowing Marisa to continue pouring pressure on her opponent.
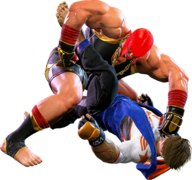
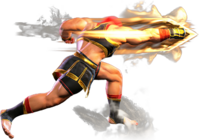
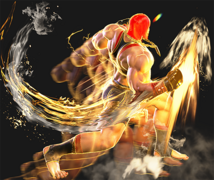
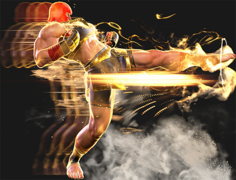
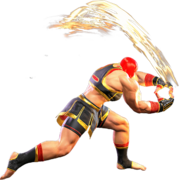
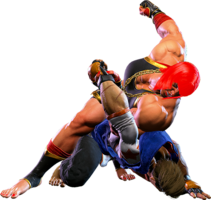
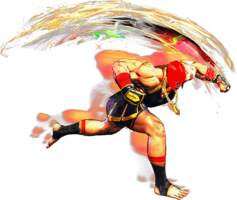
Her special moves are almost all used for getting in and staying in. Gladius is a chargeable straight punch with great damage and upper body armor, which allows her to quite literally punch right through her opponent's attacks. Phalanx is an armored superman punch that's great for going over fireballs or sneaking in after blockstrings to reset pressure, as all versions are plus on block. Quadriga is an extremely long range horizontal step kick with surprising safety, especially when spaced. The EX versions of Phalanx and Quadriga break right through armor, making it a bit difficult to drive impact these moves. She also has Dimachaerus, an uppercut and slam move which grants her a good knockdown to continue her pressure - and a combo extender with the HP version. Obviously, just striking isn't going to open a defensive opponent, which is why she has Scutum, an armored stance with access to an overhead, a low, and quite possibly her most frightening move, a command grab.
Although she has some of the most damaging combos in the game, Marisa's offense can be volatile. Charging a heavy attack can leave a large gap where an opponent can counter or jump away. Some of her moves have armor, but the armor does not protect against low-hitting attacks. She also has very few cancelable normals, and overall lacks tools that other characters have to keep defenders in check, often times relying on pure aggression to break through the opposing players confidence and forcing them into making a bad decision. In addition, her reversal options are extremely weak to throws; even though they are armored, none of them besides her Level 2 and Level 3 super arts have throw invulnerability. Her drive rush combos from lights are incredibly lackluster, that is to say she doesn't have anything other than repeated lights. Because of this, Marisa has a hard time abusing the system mechanics to aid in her offense.
While much of Marisa's offense is fairly straight forward and lacks consistency, she makes up for it in massive damage potential, having some of the highest damaging combos in the game, and a variety of other attacks that can quickly drain an opponent's health and/or drive bar, putting the fear of the gods into her adversaries.
If you like a big strong lady with big strong normals, or you just like hitting things really, really, REALLY hard, then put on your Spartan helmet and charge into battle with Marisa.
| Pick if you like: | Avoid if you dislike: |
|---|---|
|
|
Classic & Modern Versions Comparison
| Missing Normals |
|
|---|---|
| Missing Command Normals |
|
| Shortcut-Only Specials |
|
| Assist Combos |
|
| Miscellaneous Changes |
|
Players to Watch
- Big Bird - (https://twitter.com/Bigbird_fgc)
| Marisa | |
|---|---|
| Vitals | |
| Life Points | 10500 |
| Ground Movement | |
| Forward Walk Speed | 0.039 |
| Backward Walk Speed | 0.027 |
| Forward Dash Speed | 22 |
| Backward Dash Speed | 25 |
| Forward Dash Distance | 1.40 |
| Backward Dash Distance | 0.90 |
| Drive Rush Min. Distance (Throw) | 0.544 |
| Drive Rush Min. Distance (Block) | 1.903 |
| Drive Rush Max Distance | 3.081 |
| Jumping | |
| Jump Speed | 4+38+3 |
| Jump Apex | 2.115 |
| Forward Jump Distance | 1.90 |
| Backward Jump Distance | 1.52 |
| Throws | |
| Throw Range | 0.9 |
| Throw Hurtbox | 0.38 |
| Frame Data Glossary - SF6 | |
|---|---|
| Hitbox Images |
🟥 (Red): Attack hitbox
🟩 (Green): Vulnerable hurtbox that can be hit by strikes/projectiles
🟦 (Blue): Vulnerable throw hurtbox
|
| Active |
How many frames a move remains active (can hurt opponents) for. For projectiles with a maximum active period, a value may be listed in [brackets], but this number is not factored into the move's total frame count.
|
| Cancel |
Available options for canceling one move into another move.
|
| Cancel Hitconfirm Windows |
Hitconfirm reaction windows into Special Moves, Target Combos, and Super Arts.
|
| Damage |
Attack damage on hit. Multi-hit moves may have the damage listed for individual hits as X,Y (or sometimes X*Y). Sometimes a move's damage changes depending on which active frame connects, or on cinematic vs. non-cinematic hits; in this case, multiple values may be listed, and it will be clarified in the move description.
|
| Damage Scaling |
Some moves cause additional damage scaling in combos. Refer to Game Data page for a more detailed breakdown. Scaling Types:
|
| Drive Rush Cancel Advantage |
Refers to the frame advantage when canceling a normal, command normal, or Target Combo into Drive Rush on hit or block (abbreviated as DRC for Drive Rush Cancel). This is calculated at the moment a follow-up attack can be input, not at the moment the character can block or perform movement options. An attack that with DRC +8 on Hit can link into an 8-frame attack, and DRC +4 on Block can create a true blockstring into a 4-frame attack. Note that any DRC on Block worse than +4 cannot form a true blockstring, allowing the opponent to interrupt with an invincible reversal. Most light normals are slightly negative after a DRC on block, meaning the opponent can mash their fastest normal to guarantee a counter-hit (though this requires fast reactions). The attacking character could punish this with Light > DRC into an immediate invincible attack, but this would be an incredibly expensive and high-risk gambit.
|
| Forced Knockdown |
Most airborne command normals, special moves, and Super Arts put the user in a "Forced Knockdown" state. While in this state, an air knockdown will occur when being hit by any attack, even if it would otherwise cause an air reset. As an example, Ryu's 2HP causes an air reset when used as an anti-air. Against a move like Cammy's Hooligan Combination, however, the 2HP puts her into an air knockdown state. This allows Ryu to successfully cancel 2HP into Shoryuken for a juggle, similar to how a Drive Impact wall splat works. Taking advantage of Forced Knockdown juggles is important for dealing with moves like Ken's Dragonlash, Dhalsim's Air Teleport, or Kimberly's 6HK~Hop sequence. Moves that already cause an air knockdown, like most j.MP air-to-airs, will not display the "Forced Knockdown" message.
|
| Guard |
Refers to the direction an attack must be blocked. L is for Low attacks (must be blocked crouching), H is for High attacks/overheads (must be blocked standing), LH is for attacks that can be blocked crouching or standing. T is for Throw attacks which cannot be blocked.
|
| Juggles |
When a character is put into an Air Knockdown state, it is often possible to follow up with a Juggle attack before they hit the ground. In the simplest terms, there are 2 main juggle states:
The following is a more detailed overview of the SF6 juggle system:
Juggle Start (JS): When starting a juggle, the opponent's JC will be set to this value. May be different vs. standing and airborne opponents.
Juggle Increase (JI): When opponent is already in a juggle state, attacks will increase the opponent's JC by this amount.
Juggle Limit (JL): Property of an attack hitbox that determines whether it connects on a juggled opponent. The JL must be ≥ the opponent's JC to hit successfully.
An example to tie everything together:
Drive Rush notes:
More recently, the official definitions used by Capcom are slightly different than these community-designated terms. When reading official patch notes, the following terms are used instead:
|
| On Hit/Block |
These are frame advantage values when the attack hits or is blocked. If the number is positive, then the move will recover before the defender can act again. If the number is negative, the defender will be able to act before the attacker and maybe even punish. KD refers to knockdown on hit, and the listed KD Advantage refers to how many frames the attacker can act before the defender finishes their wakeup animation.
|
| Recovery |
How many frames it takes for a move to finish after the active frames have finished. For projectiles, recovery is considered to begin after the first active frame.
|
| Startup |
How many frames it takes before the move becomes 'active' or have a hit box. The last startup frame and the first active frame are the same frame, meaning all values are written as Startup + 1.
|
| IASA / Actionable Recovery |
Some moves play out an extended recovery animation when no other button/direction is input (for crouching moves, it applies when holding any down direction). These are often referred to as "actionable recovery" frames; in some games, the term IASA (Interruptible As Soon As) refers to the frame that Actionable Recovery begins. Letting the Actionable Recovery frames play out can change the character's position, potentially setting up spacing traps by recovering farther away. For example, Manon 5HP will recover much farther away from the opponent if no input is performed immediately after her recovery; holding back or down-back to block will keep her much closer to the opponent.
|
Normals
Standing Normals
5LP
| Startup | Active | Recovery | Cancel | Damage | Guard | On Hit | On Block |
|---|---|---|---|---|---|---|---|
| 6 | 3 | 11 | TC | 400 | LH | 0 | -2 |
5MP
| Startup | Active | Recovery | Cancel | Damage | Guard | On Hit | On Block |
|---|---|---|---|---|---|---|---|
| 7 | 4 | 15(17) | TC | 700 | LH | +2 | -1 |
5HP
| Startup | Active | Recovery | Cancel | Damage | Guard | On Hit | On Block |
|---|---|---|---|---|---|---|---|
| 12 | 2 | 23 | TC | 1000 | LH | +3 | -3 |
| Startup | Active | Recovery | Cancel | Damage | Guard | On Hit | On Block |
|---|---|---|---|---|---|---|---|
| 23(5) | 2 | 21(22) | TC | 1200 | LH | +7 | +4 |
An approaching downward hook. Not cancellable but has a notable followup like her other 5P buttons plus it can be charged to be + on block/combo on hit.
Charged 5HS is your biggest Punish Counter starter, so be ready to let one rip anytime a blocked reversal presents you with an opportunity to do punish.
5LK
| Startup | Active | Recovery | Cancel | Damage | Guard | On Hit | On Block |
|---|---|---|---|---|---|---|---|
| 6 | 2 | 14 | Sp SA | 400 | LH | 0 | -2 |
A quick shin kick. Marisa's furthest reaching light. Useful as a lower commitment neutral check, particularly against DI with Gladius buffered.
Extremely limited follow-ups even with counter-hits. 214LP can whiff/be blocked if 5LK hits close to the tip.
Despite not being a Low, this move will disrupt Marisa's armored moves like Gladius/Scutum.
5MK
| Startup | Active | Recovery | Cancel | Damage | Guard | On Hit | On Block |
|---|---|---|---|---|---|---|---|
| 11 | 4 | 16 | - | 800 | LH | +4 | -2 |
Marisa kicks in place. A poke with good reach but not much reward as it cannot be cancelled and doesn't move Marisa forward to land other attacks in the case of a punish counter. Still worth using to check the opponent's movement or until you can get in range for 2MP.
5HK
| Startup | Active | Recovery | Cancel | Damage | Guard | On Hit | On Block |
|---|---|---|---|---|---|---|---|
| 15 | 2 | 25 | - | 1000 | LH | +1 | -3 |
| Startup | Active | Recovery | Cancel | Damage | Guard | On Hit | On Block |
|---|---|---|---|---|---|---|---|
| 24(10) | 2 | 25 | - | 1200 | LH | KD +36 | +1 |
Roundhouse. Charged version propels her further forward. Knocks the opponent airborne on Punish Counter for easy follow-up combos.
Crouching Normals
2LP
| Startup | Active | Recovery | Cancel | Damage | Guard | On Hit | On Block |
|---|---|---|---|---|---|---|---|
| 4 | 2 | 10 | Chn Sp SA | 300 | LH | +3 | -3 |
- Marisa's only grounded 4f normal
Standard crouching jab and Marisa's quickest attack. Links into itself and 2LK. Special cancellable so get used to buffering out of this.
2MP
| Startup | Active | Recovery | Cancel | Damage | Guard | On Hit | On Block |
|---|---|---|---|---|---|---|---|
| 8 | 3 | 16 | Sp SA | 700 | LH | +3 | -2 |
2HP
| Startup | Active | Recovery | Cancel | Damage | Guard | On Hit | On Block |
|---|---|---|---|---|---|---|---|
| 9 | 5 | 23 | - | 900 | LH | KD +35 | -6 |
| Startup | Active | Recovery | Cancel | Damage | Guard | On Hit | On Block |
|---|---|---|---|---|---|---|---|
| 21(4) | 6 | 21 | - | 1000 | LH | KD +52 | -3 |
A high uppercut. Your primary anti-air normal. Somewhat slow, so use it sooner than later and be sure not to hold the button as the attack may charge and force you to mistime this.
Charged 2H is primarily combo filler as it leaves the opponent in juggle state.
2LK
| Startup | Active | Recovery | Cancel | Damage | Guard | On Hit | On Block |
|---|---|---|---|---|---|---|---|
| 5 | 3 | 12 | Chn | 300 | L | 0 | -3 |
Your only conventional low combo starter, but a good one at least. Links into itself or 2LP for a special cancel.
2MK
| Startup | Active | Recovery | Cancel | Damage | Guard | On Hit | On Block |
|---|---|---|---|---|---|---|---|
| 9 | 3 | 18 | - | 600 | L | +2 | -2 |
Your go to low poke as it's your only real low poke. Unlike most 2MKs, this cannot be special cancelled, so your only combo options are extremely limited even with counter-hits/drive rush.
Still important to keep opponent movement in check at mid-range or prevent them from just walking back out of your offense.
2HK
| Startup | Active | Recovery | Cancel | Damage | Guard | On Hit | On Block |
|---|---|---|---|---|---|---|---|
| 11 | 3 | 26 | - | 1000 | L | HKD +29 | -11 |
| Startup | Active | Recovery | Cancel | Damage | Guard | On Hit | On Block |
|---|---|---|---|---|---|---|---|
| 20(4) | 3 | 20(23) | - | 1200 | L | HKD +35 | -3 |
Sweep. Moves Marisa forward a bit. Not a particularly great sweep.
Bit on the slower side so be careful using this as a reactionary punish against blocked sweeps: Cammy, Chun, Honda, Kimberly are a few examples that all recover from their blocked sweeps fast enough to block and punish your own.
Jumping Normals
j.LP
| Startup | Active | Recovery | Cancel | Damage | Guard | On Hit | On Block |
|---|---|---|---|---|---|---|---|
| 4 | 7 | 3 land | - | 300 | H | +9(+11) | +6(+8) |
Aerial jab. Your fastest aerial normal, so your best bet for an improvised air-to-air when jumping alongside your opponent.
j.MP
| Startup | Active | Recovery | Cancel | Damage | Guard | On Hit | On Block |
|---|---|---|---|---|---|---|---|
| 7 | 4 | 3 land | TC | 700 | H | +8(+11) | +4(+7) |
j.HP
| Startup | Active | Recovery | Cancel | Damage | Guard | On Hit | On Block |
|---|---|---|---|---|---|---|---|
| 10 | 7 | 3 land | - | 800 | H | +9(+15) | +5(+11) |
| Startup | Active | Recovery | Cancel | Damage | Guard | On Hit | On Block |
|---|---|---|---|---|---|---|---|
| 28(5) | 6 | 3 land | - | 1500 | H | HKD +69(+75) | +12(+18) |
j.LK
| Startup | Active | Recovery | Cancel | Damage | Guard | On Hit | On Block |
|---|---|---|---|---|---|---|---|
| 5 | 10 | 3 land | - | 300 | H | +4(+11) | +1(+8) |
- +5/+8 on hit vs standing or crouching opponents respectively on earliest possible hit.
- 11f on hit when connecting as close to the ground as possible.
- Always + on block when hit from descent.
- Can hit as fuzzy Instant Overhead
Marisa's primary crossup. Consistently confirms into a light combo. Can always link into 4HP if this lands on a crouching opponent, though MP>MP target combo also works if you need extra time to confirm and don't mind spending extra resources.
Also functions as a good anti-crossup for enemies trying to jump behind you frequently due to its speed and hitbox behind her.
j.MK
| Startup | Active | Recovery | Cancel | Damage | Guard | On Hit | On Block |
|---|---|---|---|---|---|---|---|
| 8 | 8 | 3 land | - | 500 | H | +9(+14) | +6(+11) |
Huge range makes this Marisa's best low commitment poke from the air. Can use as an air-to-air or a stray poke from a neutral/back-jump, but Marisa has better options for jump-ins.
j.HK
Command Normals
6MP
| Startup | Active | Recovery | Cancel | Damage | Guard | On Hit | On Block |
|---|---|---|---|---|---|---|---|
| 10 | 2 | 20 | TC | 800 | LH | +2 | -3 |
Marisa's furthest reaching medium poke as it moves her forward. A decent poke/whiff punish normal, especially when combined with drive rush as its forward movement allows for easy followups from 4HP on counthits.
Can be hit confirmed into one of two follow-up target combos.
4HP
| Startup | Active | Recovery | Cancel | Damage | Guard | On Hit | On Block |
|---|---|---|---|---|---|---|---|
| 8 | 2 | 21(24) | Sp SA | 900 | LH | +3 | -1 |
| Startup | Active | Recovery | Cancel | Damage | Guard | On Hit | On Block |
|---|---|---|---|---|---|---|---|
| 20(3) | 2 | 19(24) | Sp SA | 1000 | LH | +13 | +4 |
Lead uppercut. Marisa's most important normal for combos as she's capable of landing pretty much any special after this, including 214H for big and meter efficient damage. Leading into this normal via punish counters and drive rushes is vital for Marisa's combo game.
3HP
| Startup | Active | Recovery | Cancel | Damage | Guard | On Hit | On Block |
|---|---|---|---|---|---|---|---|
| 21 | 2 | 21 | TC | 900 | H | 0 | -3 |
| Startup | Active | Recovery | Cancel | Damage | Guard | On Hit | On Block |
|---|---|---|---|---|---|---|---|
| 28(14) | 2 | 19 | TC | 1000 | H | +5 | +2 |
Your primary overhead. Fairly slow, especially if charged, but offset by being one of the only standing overheads in the game that leave you at an advantage with no meter use.
If Marisa's close enough (near point blank) after landing light Dimachaerus combo, charging into this overhead immediately will land meaty and catch both neutral back-tech. Recovers in time to react to reversal Drive Impact, but loses to OD reversals and being meaty makes it susceptible to a perfect parry.
6HK
| Startup | Active | Recovery | Cancel | Damage | Guard | On Hit | On Block |
|---|---|---|---|---|---|---|---|
| 14 | 4 | 21 | Sp SA TC | 900 | LH | 0 | -3 |
| Startup | Active | Recovery | Cancel | Damage | Guard | On Hit | On Block |
|---|---|---|---|---|---|---|---|
| 27(4~7) | 4 | 19 | Sp SA TC | 1000 | LH | +10 | +3 |
Marisa's longest range special cancelable normal. In combos it serves a very similar function to 4HP.
j.2HP
No results
- Can hit Crossup
- Neutral jump only
Target Combos
5LP~LP
| Startup | Active | Recovery | Cancel | Damage | Guard | On Hit | On Block |
|---|---|---|---|---|---|---|---|
| 14 | 3 | 22 | Sp SA | 600 | LH | -3 | -6 |
Light Punch Target Combo follow-up. Not a true combo unless the first hit was CH. Punishable on block so make sure to cancel into 236LP, which is gapless if the 2nd LP is blocked and a combo if hit.
Small gap between the two light punches make for an easy parry window, so be careful using this too predictably.
5MP~MP
| Startup | Active | Recovery | Cancel | Damage | Guard | On Hit | On Block |
|---|---|---|---|---|---|---|---|
| 14 | 2 | 23 | Sp SA | 600 | LH | -3 | -8 |
Medium Punch target combo follow-up. Unlike her LP/HP target combos, MP>MP does not have a gap between both hits. Similar to LP target combo in that you'll always be throwing this out with the intention of cancelling out of it, usually into a hit confirmed 214PP.
No special cancel is gapless barring 214LP which is heavily punishable.
5HP~HP
| Startup | Active | Recovery | Cancel | Damage | Guard | On Hit | On Block |
|---|---|---|---|---|---|---|---|
| 24 | 3 | 19 | - | 1000 (900) | LH | KD +35 | +2 |
Plus on block target combo. Primarily used to give 5HP a knockdown on normal hit.
It has a 5F gap on block, coupled with 5HP's forward movement it can be difficult to land outside of burnout. Starting this target combo with charged 5HP gives it a 0F gap, but Charged 5HP is more plus and has less pushback so it's not advisable.
6MP~HP
| Startup | Active | Recovery | Cancel | Damage | Guard | On Hit | On Block |
|---|---|---|---|---|---|---|---|
| 11 | 2 | 26 | - | 800 | L | KD +31 | -12 |
Marisa's 1st possible follow-up from 6MP, a punching sweep. Just as punishable as most sweeps, so hit-confirm into this if you intend to use it.
6MP~HK
| Startup | Active | Recovery | Cancel | Damage | Guard | On Hit | On Block |
|---|---|---|---|---|---|---|---|
| 11 | 4 | 23 | SA | 800 | LH | KD +39 / (-21) | -10(-26) |
- Cancellable into Supers
- Whiffs crouching opponents
Marisa's 2nd possible followup from 6MP. Avoid use entirely unless you're able to hit-confirm the initial hit as well as the opponent standing, as this is very punishable otherwise.
3HP~3HP
| Startup | Active | Recovery | Cancel | Damage | Guard | On Hit | On Block |
|---|---|---|---|---|---|---|---|
| 18 | 2 | 24 | - | 900 | H | KD +29 | -12 |
3HP Overhead follow-up. Tacks on 900 damage when used off her overhead. -3 on hit and and very punishable if blocked, making this a High-risk/Low-reward option. Not a good combo option either as it does not hard-knockdown.
6HK~6HK
| Startup | Active | Recovery | Cancel | Damage | Guard | On Hit | On Block |
|---|---|---|---|---|---|---|---|
| 16 | 5 | 25 | - | 1000 | LH | KD +52 | -12 |
A delayable target combo.
OK damage and very unsafe on block. Since 6HK is special cancelable and leads to 214HP, this target combo is often out classed by other routes.
j.MP~MP
Throws
Forward Throw (LPLK)
| Startup | Active | Recovery | Cancel | Damage | Guard | On Hit | On Block |
|---|---|---|---|---|---|---|---|
| 5 | 3 | 23 | - | 1200 (2040) | T | KD +23 | - |
Marisa sweeps the opponent's feet from under them and bashes them in the face.
Can loop in the corner with a dash-in immediately after the throw animation ends. Hold back immediately after the dash for an easy, auto-timed shimmy. HOWEVER Marisa's dash-in leaves enough of a gap for 4f moves to mash out of her throw pressure, so she needs to Drive Rush in if she wants her throw loop guaranteed vs someone mashing a 4f move.
Back Throw (4LPLK)
| Startup | Active | Recovery | Cancel | Damage | Guard | On Hit | On Block |
|---|---|---|---|---|---|---|---|
| 5 | 3 | 23 | - | 1200 (2040) | T | KD +33 | - |
Drive System
Drive Impact (HPHK)
| Startup | Active | Recovery | Cancel | Damage | Guard | On Hit | On Block |
|---|---|---|---|---|---|---|---|
| 26 | 2 | 35 | - | 800 | LH | KD +35 / Wall Splat KD +65 | -3 / Wall Splat HKD +72 |
See Drive Impact
When cancelled from a normal, these are the important blockstring gaps; a gap of N will trade with an N-frame startup attack; [] = Burnout
- -
- Note: gaps of 8f or less cannot be escaped by jumping
Drive Reversal (6HPHK)
| Startup | Active | Recovery | Cancel | Damage | Guard | On Hit | On Block |
|---|---|---|---|---|---|---|---|
| 20 | 3 | 26(31) | - | 500 recoverable | LH | KD +23 | -6 |
See Drive Reversal
- Full Invuln: 1-22f; Armor Break
Drive Parry (MPMK)
| Startup | Active | Recovery | Cancel | Damage | Guard | On Hit | On Block |
|---|---|---|---|---|---|---|---|
| 1 | 12 or until released | 33(1)(11) | - | - | - | - | - |
See Drive Parry
- Perfect Parry has only 1f recovery, and disables the opponent from canceling their attack
- Perfect Parry vs. projectiles puts you into a fixed 11f recovery
Drive Rush (66)
No results
See Drive Rush. Frame data shown in (parentheses) refers to the version used after Parry.
- Notable Drive Rush cancel combo routes:
- Notable Drive Rush cancel blockstring gaps:
Special Moves
Gladius (236P)
| Startup | Active | Recovery | Cancel | Damage | Guard | On Hit | On Block |
|---|---|---|---|---|---|---|---|
| 17 | 4 | 21 | SA3 | 1200 | LH | KD +36 | -5 |
| Startup | Active | Recovery | Cancel | Damage | Guard | On Hit | On Block |
|---|---|---|---|---|---|---|---|
| 30 | 4 | 20 | SA3 (1st) | 1200,1000,200 (2400) | LH | HKD +40 | +4 |
| Startup | Active | Recovery | Cancel | Damage | Guard | On Hit | On Block |
|---|---|---|---|---|---|---|---|
| 19 | 4 | 21 | SA3 | 1400 | LH | KD +36 | -5 |
| Startup | Active | Recovery | Cancel | Damage | Guard | On Hit | On Block |
|---|---|---|---|---|---|---|---|
| 35 | 4 | 20 | SA3 (1st) | 1400,1000,200 (2600) | LH | HKD +40 | +4 |
| Startup | Active | Recovery | Cancel | Damage | Guard | On Hit | On Block |
|---|---|---|---|---|---|---|---|
| 22 | 4 | 21 | SA3 | 1600 | LH | KD +36 | -5 |
| Startup | Active | Recovery | Cancel | Damage | Guard | On Hit | On Block |
|---|---|---|---|---|---|---|---|
| 41 | 4 | 20 | SA3 (1st) | 1600,1000,200 (2800) | LH | HKD +40 | +4 |
| Startup | Active | Recovery | Cancel | Damage | Guard | On Hit | On Block |
|---|---|---|---|---|---|---|---|
| 19 | 4 | 21 | SA2 SA3 | 1700 | LH | KD +36 | -2 |
| Startup | Active | Recovery | Cancel | Damage | Guard | On Hit | On Block |
|---|---|---|---|---|---|---|---|
| 35 | 4 | 20 | SA2 SA3 (1st) | 1700,1000,200 (2900) | LH | HKD +40 | +4 |
- Fully charged version prompts a cinematic follow-up if it connects and forces slump if it trades.
- Grants 1 hit of upper body armor on frame 5 up until 3-6 frames before it becomes active. Armor duration is extended while charging.
- OD version grants upper body armor on frame 1 for the full duration of the move's startup and active frames. Charged OD version has an extra hit of armor while charging.
Armored straight punch that "stabs" the opponent.
The special that makes mashing and DI scary against Marisa, it accomplishes a few things; It lets Marisa end her strings safely, armors through any attacks that would hit the mid or upper body, and is plus on block when fully charged, letting her follow-up with more pressure. It can even be used as an armored anti-air if timed well. Scouting if/how opponents deal with this attack can be key to victory.
Your most damaging combo ender in the corner, but mid-screen Gladius pushes the opponent far, so alternatives may be preferable to maintain some pressure such as 623P/214K.
Dimachaerus (214P)
| Startup | Active | Recovery | Cancel | Damage | Guard | On Hit | On Block |
|---|---|---|---|---|---|---|---|
| 12 | 4 | 30 | SA3 | 600 | LH | -3 | -16 |
| Startup | Active | Recovery | Cancel | Damage | Guard | On Hit | On Block |
|---|---|---|---|---|---|---|---|
| 16 | 4 | 30 | SA3 | 700 | LH | 0 | -16 |
| Startup | Active | Recovery | Cancel | Damage | Guard | On Hit | On Block |
|---|---|---|---|---|---|---|---|
| 22 | 4 | 30 | SA3 | 800 | LH | KD +38 | -16 |
| Startup | Active | Recovery | Cancel | Damage | Guard | On Hit | On Block |
|---|---|---|---|---|---|---|---|
| 16 | 4 | 26 | SA2 SA3 | 600 | LH | KD +42 | -12 |
Your primary anti-air, combo ender for light confirms, and extension tool for most anything else. Extremely punishable if blocked, so make sure to properly confirm into this special. Each version can connect from a button of its corresponding strength (c.LP>(L)Dimachaerus/MP>MP>(M)Dimachaerus). OD version connects from any Medium Cancellable Normals.
Light version is your best anti-air with air invuln and the follow-up leaving the opponent close where Marisa wants them.
Heavy version should be utilized wherever possible as it allows for extensions similar to Overdrive version without the drawback of using Drive Meter.
Dimachaerus Followup (214P~6P)
No results
| Startup | Active | Recovery | Cancel | Damage | Guard | On Hit | On Block |
|---|---|---|---|---|---|---|---|
| 13 | 5 | 23 | - | 600 | LH | KD +58 Bounce | - |
Dimachaerus follow-up. LP and MP versions lead to a hard-knockdown. Heavy and OD versions knock the opponent airborne for combos extensions.
Provides no notable advantages if the follow-up isn't utilized on hit and Marisa cannot follow-up if Dimachaerus is blocked, thus there's no real reason not to buffer into this every time dimachaerus is used.
Phalanx (623P)
| Startup | Active | Recovery | Cancel | Damage | Guard | On Hit | On Block |
|---|---|---|---|---|---|---|---|
| 25 | 6 | 15 land | - | 1500 | LH | KD +42(43) | +2(3) |
| Startup | Active | Recovery | Cancel | Damage | Guard | On Hit | On Block |
|---|---|---|---|---|---|---|---|
| 28 | 6 | 15 land | - | 1600 | LH | KD +42(43) | +2(3) |
| Startup | Active | Recovery | Cancel | Damage | Guard | On Hit | On Block |
|---|---|---|---|---|---|---|---|
| 32 | 6 | 15 land | - | 1700 | LH | KD +42(43) | +2(3) |
| Startup | Active | Recovery | Cancel | Damage | Guard | On Hit | On Block |
|---|---|---|---|---|---|---|---|
| 28 | 6 | 15 land | - | 1400 | LH | KD +70 Tumble (HKD +138 Wall Splat) | +4(5) |
- Armor Startup and Duration vary based on strength.
- L (6f startup/5f active), M (6f/7f), H (9f/6f), OD (5f/7f)
- Overdrive version breaks enemy armor and wallsplats in the corner.
- Hits 1 frame later against crouching opponents making it +3 on crouch block.
Marisa launches herself upward and swings down with a superman punch. A very versatile special as it can serve numerous uses for her: Advancing Poke, Pressure Starter/Reset, a Projectile Read, Combo Ender, and Combo Extension with Overdrive in the corner.
Marisa's best meterless combo ender in the corner for oki due to its 42f knockdown window, allowing for easy safejumps.
Quadriga (236K)
| Startup | Active | Recovery | Cancel | Damage | Guard | On Hit | On Block |
|---|---|---|---|---|---|---|---|
| 20 | 4 | 24 | SA3 | 1400 | LH | KD +35 | -6 |
| Startup | Active | Recovery | Cancel | Damage | Guard | On Hit | On Block |
|---|---|---|---|---|---|---|---|
| 24 | 4 | 22 | SA3 | 1500 | LH | KD +37 | -4 |
| Startup | Active | Recovery | Cancel | Damage | Guard | On Hit | On Block |
|---|---|---|---|---|---|---|---|
| 29 | 4 | 21 | SA3 | 1600 | LH | KD +37 | -3 |
| Startup | Active | Recovery | Cancel | Damage | Guard | On Hit | On Block |
|---|---|---|---|---|---|---|---|
| 24 | 4 | 24 | SA2 SA3 | 1500 | LH | KD +50(68) Wall Splat | -6 |
- Overdrive version Armor Breaks
An approaching Spartan Kick. A very straightforward move used to approach with a poke and not much else. Can be used for some corner combos, but you'll be using OD Phalanx far more often for that purpose.
Light version is quickest but punishable if poorly spaced. Heavy version is slowest but doesn't require spacing to be safe. Overdrive this special to stay safe against DI attempts, but it shares the L version's spacing requirements.
Scutum (214K)
| Startup | Active | Recovery | Cancel | Damage | Guard | On Hit | On Block |
|---|---|---|---|---|---|---|---|
| 3(8) | 26(116) | 26 | - | - | - | - | - |
No results
- Triggers automatically after absorbing attack
- Recovery from this stance leave Marisa in a punish counterable state.
- What can and cannot be armored is determined by hitbox position. Some lows can be absorbed and some mids and even a few overheads can not be absorbed.
Grants Marisa upper body armor. Has two frames of startup, so it loses to any proper meaties on wakeup. Decent for catching approaching specials on reaction or as an anti-air, but care not to be baited and thrown out of this.
| Startup | Active | Recovery | Cancel | Damage | Guard | On Hit | On Block |
|---|---|---|---|---|---|---|---|
| 1 | 28(58) | 29 | - | - | - | - | - |
No results
- Triggers automatically after absorbing attack
- Recovery from this stance leave Marisa in a punish counterable state.
Armors everything including lows. Still loses to grabs though.
Activates immediately, making it an effective reversal option against safejumps. The OD version also has two hits of armor, allowing it to absorb and counter many multi-hitting moves that would beat meterless Scutum.
- NOTE: This is still an armored move; Using it at very low HP will result in death even if a move is armored through.
Tonitrus (214K~P~P)
| Startup | Active | Recovery | Cancel | Damage | Guard | On Hit | On Block |
|---|---|---|---|---|---|---|---|
| 8+15(16) | 3 | 23(25) | TC | 900 | H | +1 | -3 |
| Startup | Active | Recovery | Cancel | Damage | Guard | On Hit | On Block |
|---|---|---|---|---|---|---|---|
| 20 | 3 | 36 | - | 1000 | LH | KD +31 | -21 |
No results No results
- 23f earliest possible startup w/ Scutum Startup included.
Marisa makes a heart shaped double handed punch. Scutum's overhead follow-up and your safest option from it provided your using it as a mix-up opportunity and didn't armor through anything. The 2nd hit must be input immediately, making it near impossible to actually hit confirm, so only use it to close out a round if you have to.
Procella (214K~K)
| Startup | Active | Recovery | Cancel | Damage | Guard | On Hit | On Block |
|---|---|---|---|---|---|---|---|
| 8+16 | 3 | 37 | - | 1200 | L | HKD +22 | -24 |
No results
- 24f earliest possible startup w/ Scutum Startup included.
A cutting sweep that travels forward. Low follow-up from Scutum. Their similar startup make reacting between overhead/low very difficult, but very unsafe if blocked/parried. Additionally, opponents jumping back expecting command grab may end up getting free punish as this propels Marisa toward them, so use this only if you've 100% conditioned the opponent to expect an overhead and they're wary on parrying.
Enfold (214K~LPLK)
| Startup | Active | Recovery | Cancel | Damage | Guard | On Hit | On Block |
|---|---|---|---|---|---|---|---|
| 8+5 | 3 | 54 | - | 2500 (2875) | T | HKD +18 | - |
No results
- Earliest possible startup 13f due to Scutum startup.
Command Grab Followup from Scutum. On the slower side due to needing at least 8f initial startup of Scutum on top of the 5 to activate the grab, so don't go for this without conditioning the opponent to stay put.
Super Arts
Level 1 Super (236236P)
| Startup | Active | Recovery | Cancel | Damage | Guard | On Hit | On Block |
|---|---|---|---|---|---|---|---|
| 19 | 5 | 60 | - | 2200 | LH | KD +14 | -43 |
Armored haymaker Super Art. Invincible on frame 1, fully armored for as long as it's charged until the attack is blocked.
Fairly easy to route into as a combo ender for an easy and relatively cheap 4k damage from most common routes, just mind that it forces a reset to neutral if you're not in the corner. Not especially dependable as a reversal due to its long startup, but good as any other armored callout to some reactable options you'd prefer not to block, such as Ken's Dragonlash or Drive Impact.
Level 2 Super (214214P)
| Startup | Active | Recovery | Cancel | Damage | Guard | On Hit | On Block |
|---|---|---|---|---|---|---|---|
| 9 | 7(33)3 | 59 | - | 3000(2500) | LH | HKD +17 | -44(-77) |
No results
Marisa launches herself upward and slams down on the opponent; No animated super plays out if blocked or 1st hit doesn't connect, but Marisa will still launch the 2nd attack regardless.
Your go to reversal super as it's fully invuln until the first hit. An easy anti-air to buffer into as well since it's close to Dimachaerus' input, your other go-to anti-air.
Can also be used as a more expensive combo ender over SA1 for slightly better damage and positioning to the opponent (Particularly at mid-screen).
Level 3 Super (236236K)
| Startup | Active | Recovery | Cancel | Damage | Guard | On Hit | On Block |
|---|---|---|---|---|---|---|---|
| 13 | 7 | 60 | - | 4000 | LH | HKD +14 | -39(-33) |
| Startup | Active | Recovery | Cancel | Damage | Guard | On Hit | On Block |
|---|---|---|---|---|---|---|---|
| 13 | 7 | 60 | - | 4500 | LH | HKD +14 | -39(-33) |
- Pushes opponent close to corner.
Marisa shoves and clobbers the opponent into a wall.
Big damage super, especially with CA. Usually worth going into even if it doesn't KO since it puts the opponent's back near the corner, though ideally you want to convert at least around 5K minimum when routing into this. If you're already in the corner then routing into this should generally lead to 6k, useful for closing out rounds but the opponent will have more breathing space to escape if this doesn't kill so it's something to consider.
Can be used as a reversal like any SA3, but SA2 is a cheaper option that leaves us with a spare meter to work with if it's successful.
Taunts
Neutral Taunt (5PPPKKK)
| Startup | Active | Recovery | Cancel | Damage | Guard | On Hit | On Block |
|---|---|---|---|---|---|---|---|
| 242 (total) | - | - | - | - | - | - | - |
Forward Taunt (6PPPKKK)
| Startup | Active | Recovery | Cancel | Damage | Guard | On Hit | On Block |
|---|---|---|---|---|---|---|---|
| 85 | [55] | 72 | - | - | - | - | - |
- Active frames refer to 1-hit armor
- 211f total animation
Back Taunt (4PPPKKK)
| Startup | Active | Recovery | Cancel | Damage | Guard | On Hit | On Block |
|---|---|---|---|---|---|---|---|
| 184 (total) | - | - | - | - | - | - | - |


