Introduction
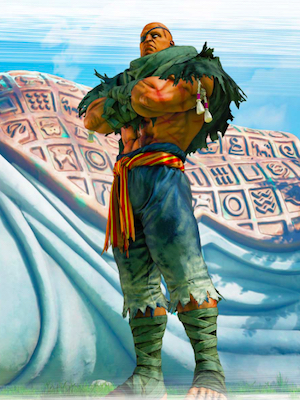
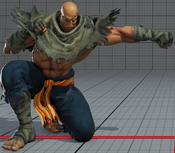
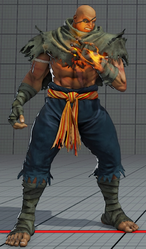
About Sagat
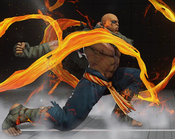
Battling the Satsui No Hado, Sagat seeks to purge it from himself in a similar path as his rival, Ryu.
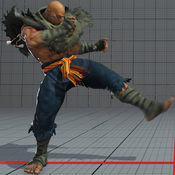
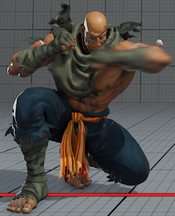
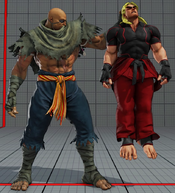
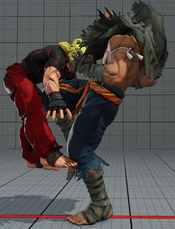
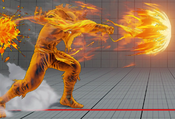
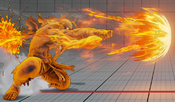
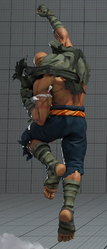
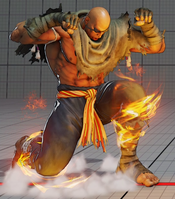
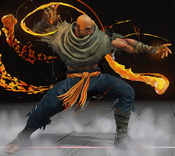
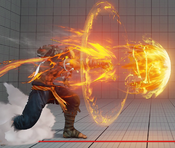
Sagat is still the relentless zoner he always has been. However, with fireballs being much weaker in SFV compared to past games, Sagat has to work a little harder to get his job done. Luckily, he still dominates in the aspect of zoning, despite it being somewhat weaker in this entry. His classic game of fireball/anti air is still very much prominent, and made even scarier with his Angry Scar VS1. Sagat is no slouch when it comes to going in, either. He has some exceptional buttons to use to stab at the opponent, and can unload lethal damage from some basic combos. Due to a substantial amount of great pokes, zoning, and anti airs, Sagat is all about controlling space and keeping your opponent away. Give Sagat a shot if you like keeping the opponent at a distance and punishing them severely for any tiny mistakes.
| Strengths | Weaknesses |
|---|---|
|
|
Unique Mechanic
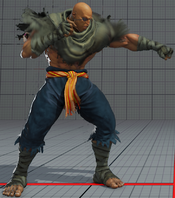
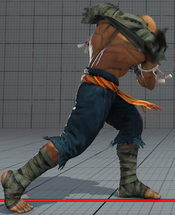
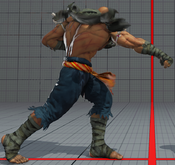
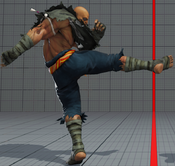
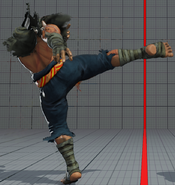
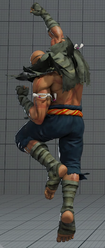
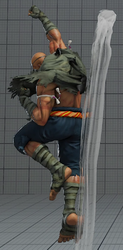
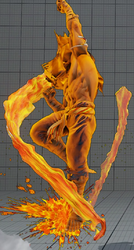
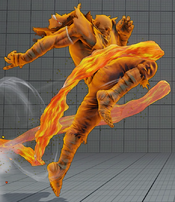
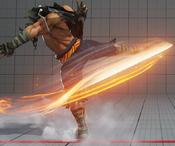
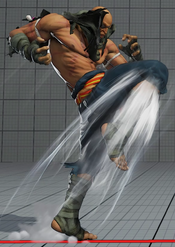
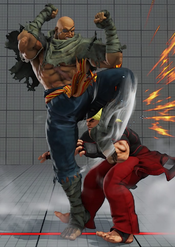
Sagat is able to kara cancel his 6MK and 6HK command normals into any of his special moves. Kara canceling a move increases the startup of a move in exchange for moving forward. 6HK is the faster version and travels shorter than 6MK. Some of his more advanced combos require this; however kara canceling his Tiger Uppercut in particular is useful for anti-airing opponents who are just outside of range to normally hit. It can also be used to move forward and throw fireballs for spacing, or increase the range of a Tiger Knee.
Final Patch
Players to Watch
- Bonchan
- Ryan Hart
-YouTube: https://www.youtube.com/user/ProdigalSonComesHome
- Zaferino
-Twitch: https://www.twitch.tv/zaferino1
- TotalSagat
-YouTube: https://www.youtube.com/channel/UC1jpv-Iqp6hIptIra1BlXuw
| Sagat | |
|---|---|
| Vitals | |
| Life Points | 1025 |
| Stun Points | 1050 |
| V-Gauge Points | |
| V-Trigger 1 | 900 |
| V-Trigger 2 | 600 |
| Ground Movement | |
| Forward Walk Speed | 3.65 |
| Backward Walk Speed | 2.77 |
| Forward Dash Speed | 20 |
| Backward Dash Speed | 24 |
| Forward Dash Distance | 125.4 |
| Backward Dash Distance | 111.5 |
| Backdash CH Frames | 3-10 |
| Jumping | |
| Back Jump Speed | 47 (4+39+4) |
| Neutral Jump Speed | 47 (4+39+4) |
| Forward Jump Speed | 46 (3+39+4) |
| Forward Jump Distance | 179.4 |
| Backward Jump Distance | 171.6 |
| Throws | |
| Throw Hurtbox | 0.25 |
| Throw Range | 0.85 |
Frame Data & Descriptions are provided by FATOnline.
|
| SFV Frame Data Glossary | |
|---|---|
| Active |
How many frames a move remains active (can hurt opponents) for. |
| Attack |
Attack level is L for low attacks (must be blocked crouching), H is for High attacks (which can be blocked high or low) and M for overhead (must be blocked standing). T is for throw attacks (which cannot be blocked). |
| Cancel options |
Available cancel options.
|
| Confirm windows |
Hit confirm windows written as Specials & CAs/Target Combos/V-Trigger. Notation may denote V-Skill only cancel windows in Specials.
|
| Crush Counter |
Crush Counter hit advantage written as opponent state, frame advantage, and v-gauge gain on hit. |
| Damage |
Attack damage on hit. Notation may denote multi-hit or "sweet spot" damage values on certain frames. |
| Hit/Block |
These are frame advantage values when the attack hits or is blocked. If the number is positive, then the move will end before the defender can act again. If the number is negative, the defender will be able to act before the attacker and maybe even punish. KD refers to knockdown on hit.
|
| Knockdown |
Knockdown advantage against Normal, Quick Rise and Back Rise wake up options. |
| Recovery |
How many frames it takes for a move to finish after it's been active. |
| Startup |
How many frames it takes before the move becomes 'active' or have a hit box. The last startup frame and the first active frame are the same frame, meaning all values are written as Startup + 1. |
| Stun |
Amount of stun added to the opponent's stun bar on hit. |
Normals
Stand LP
| Startup | Active | Recovery | Hit | ||
|---|---|---|---|---|---|
| 4 | 3 | 10 | 5 | ||
| Damage | Stun | Attack | Block | ||
| 30 | 70 | H | 4 | ||
| |||||
Stand MP
| Startup | Active | Recovery | Hit | ||
|---|---|---|---|---|---|
| 6 | 2 | 15 | 7 | ||
| Damage | Stun | Attack | Block | ||
| 60 | 100 | H | 3 | ||
| |||||
Stand HP
| Startup | Active | Recovery | Hit | ||
|---|---|---|---|---|---|
| 13 | 3 | 20(18) | 4 | ||
| Damage | Stun | Attack | Block | ||
| 90 | 150 | H | -2 | ||
| |||||
Stand LK
| Startup | Active | Recovery | Hit | ||
|---|---|---|---|---|---|
| 5 | 3 | 10 | 2 | ||
| Damage | Stun | Attack | Block | ||
| 40 | 70 | H | 1 | ||
| |||||
Stand MK
| Startup | Active | Recovery | Hit | ||
|---|---|---|---|---|---|
| 11 | 3 | 16 | 2 | ||
| Damage | Stun | Attack | Block | ||
| 70 | 100 | H | -2 | ||
| |||||
Stand HK
| Startup | Active | Recovery | Hit | ||
|---|---|---|---|---|---|
| 8 | 1*3 | 17(21) | 8 | ||
| Damage | Stun | Attack | Block | ||
| 20*70 (80) | 30*120 | H | -1(-3) | ||
| |||||
Crouch LP
| Startup | Active | Recovery | Hit | ||
|---|---|---|---|---|---|
| 4 | 2 | 11 | 3 | ||
| Damage | Stun | Attack | Block | ||
| 30 | 70 | H | 1 | ||
| |||||
Crouch MP
| Startup | Active | Recovery | Hit | ||
|---|---|---|---|---|---|
| 7 | 3 | 15(14) | 3 | ||
| Damage | Stun | Attack | Block | ||
| 65 | 100 | H | 1 | ||
| |||||
Crouch HP
| Startup | Active | Recovery | Hit | ||
|---|---|---|---|---|---|
| 10 | 4 | 18 | 2 | ||
| Damage | Stun | Attack | Block | ||
| 90 | 150 | H | -1 | ||
| |||||
Crouch LK
| Startup | Active | Recovery | Hit | ||
|---|---|---|---|---|---|
| 5 | 3 | 9 | 3 | ||
| Damage | Stun | Attack | Block | ||
| 30 | 70 | L | 2 | ||
| |||||
Crouch MK
| Startup | Active | Recovery | Hit | ||
|---|---|---|---|---|---|
| 9 | 3 | 16 | 1 | ||
| Damage | Stun | Attack | Block | ||
| 60 | 100 | L | -4 | ||
| |||||
Crouch HK
| Startup | Active | Recovery | Hit |
|---|---|---|---|
| 12 | 2 | 27 | KD |
| Damage | Stun | Attack | Block |
| 100 | 150 | L | -14 |
Jump LP
| Startup | Active | Recovery | Hit |
|---|---|---|---|
| 5 | 4 | - | - |
| Damage | Stun | Attack | Block |
| 40 | 70 | M | - |
Jump MP
| Startup | Active | Recovery | Hit | ||
|---|---|---|---|---|---|
| 5 | 2(1)2 | - | KD | ||
| Damage | Stun | Attack | Block | ||
| 30*30 | 40*40 | M | - | ||
| |||||
Jump HP
| Startup | Active | Recovery | Hit | ||
|---|---|---|---|---|---|
| 9 | 4 | - | - | ||
| Damage | Stun | Attack | Block | ||
| 90 | 150 | M | - | ||
| |||||
Jump LK
| Startup | Active | Recovery | Hit | ||
|---|---|---|---|---|---|
| 4 | 6 | - | - | ||
| Damage | Stun | Attack | Block | ||
| 40 | 70 | M | - | ||
| |||||
Jump MK
| Startup | Active | Recovery | Hit |
|---|---|---|---|
| 6 | 6 | - | - |
| Damage | Stun | Attack | Block |
| 60 | 100 | M | - |
Jump HK
| Startup | Active | Recovery | Hit | ||
|---|---|---|---|---|---|
| 12 | 5 | - | - | ||
| Damage | Stun | Attack | Block | ||
| 90 | 150 | M | - | ||
| |||||
Command Normals
Tiger Heavy Elbow
| Startup | Active | Recovery | Hit | ||
|---|---|---|---|---|---|
| 24 | 2 | 21 | 1 | ||
| Damage | Stun | Attack | Block | ||
| 80 | 150 | H | -7 | ||
| |||||
Step High Kick
| Startup | Active | Recovery | Hit | ||
|---|---|---|---|---|---|
| 16 | 3 | 23 | 5 | ||
| Damage | Stun | Attack | Block | ||
| 90 | 150 | H | 3 | ||
| |||||
Step Low Kick
| Startup | Active | Recovery | Hit | ||
|---|---|---|---|---|---|
| 19 | 2 | 23 | 3 | ||
| Damage | Stun | Attack | Block | ||
| 70 | 100 | L | -2 | ||
| |||||
Throws
Tiger Hang
| Startup | Active | Recovery | Hit | ||
|---|---|---|---|---|---|
| 5 | 3 | 17 | KD | ||
| Damage | Stun | Attack | Block | ||
| 130 | 150 | T | - | ||
| |||||
Tiger Swing
| Startup | Active | Recovery | Hit | ||
|---|---|---|---|---|---|
| 5 | 3 | 17 | KD | ||
| Damage | Stun | Attack | Block | ||
| 130 | 200 | T | - | ||
| |||||
Special Moves
LP Tiger Shot
| Startup | Active | Recovery | Hit | ||
|---|---|---|---|---|---|
| 13 | - | 27 | 2 | ||
| Damage | Stun | Attack | Block | ||
| 70 | 100 | H | 1 | ||
| |||||
MP Tiger Shot
| Startup | Active | Recovery | Hit | ||
|---|---|---|---|---|---|
| 13 | - | 27 | 2 | ||
| Damage | Stun | Attack | Block | ||
| 70 | 100 | H | 1 | ||
| |||||
HP Tiger Shot
| Startup | Active | Recovery | Hit | ||
|---|---|---|---|---|---|
| 13 | - | 27 | 2 | ||
| Damage | Stun | Attack | Block | ||
| 70 | 100 | H | 1 | ||
| |||||
EX Tiger Shot
| Startup | Active | Recovery | Hit | ||
|---|---|---|---|---|---|
| 11 | - | 27 | KD | ||
| Damage | Stun | Attack | Block | ||
| 50*50 | 75*75 | H | 6 | ||
| |||||
LK Grand Tiger Shot
| Startup | Active | Recovery | Hit | ||
|---|---|---|---|---|---|
| 13 | - | 31 | 0 | ||
| Damage | Stun | Attack | Block | ||
| 60 | 100 | H | -4 | ||
| |||||
MK Grand Tiger Shot
| Startup | Active | Recovery | Hit | ||
|---|---|---|---|---|---|
| 13 | - | 31 | 0 | ||
| Damage | Stun | Attack | Block | ||
| 60 | 100 | H | -4 | ||
| |||||
HK Grand Tiger Shot
| Startup | Active | Recovery | Hit | ||
|---|---|---|---|---|---|
| 13 | - | 31 | 0 | ||
| Damage | Stun | Attack | Block | ||
| 60 | 100 | H | -4 | ||
| |||||
EX Grand Tiger Shot
| Startup | Active | Recovery | Hit | ||
|---|---|---|---|---|---|
| 11 | - | 31 | KD | ||
| Damage | Stun | Attack | Block | ||
| 40*40 | 75*75 | H | -2 | ||
| |||||
LP Tiger Uppercut
| Startup | Active | Recovery | Hit | ||
|---|---|---|---|---|---|
| 4(3) | 9 | 31+17 | KD | ||
| Damage | Stun | Attack | Block | ||
| 130(110) | 150(120) | H | -39 | ||
| |||||
MP Tiger Uppercut
| Startup | Active | Recovery | Hit | ||
|---|---|---|---|---|---|
| 6(5) | 9 | 31+17 | KD | ||
| Damage | Stun | Attack | Block | ||
| 130(110) | 150(120) | H | -39 | ||
| |||||
HP Tiger Uppercut
| Startup | Active | Recovery | Hit | ||
|---|---|---|---|---|---|
| 8(7) | 9 | 32+16 | KD | ||
| Damage | Stun | Attack | Block | ||
| 130(110) | 150(120) | H | -39 | ||
| |||||
EX Tiger Uppercut
| Startup | Active | Recovery | Hit | ||
|---|---|---|---|---|---|
| 4(3) | 2*2*1*1*1*2 | 32+20 | KD | ||
| Damage | Stun | Attack | Block | ||
| 60*20x5 (160) | 90*11 | H | -38(-39) | ||
| |||||
LK Tiger Knee Crush
| Startup | Active | Recovery | Hit | ||
|---|---|---|---|---|---|
| 12(7) | 7 | 8+12(8+15) | KD | ||
| Damage | Stun | Attack | Block | ||
| 80 | 150 | H | -5(1) | ||
| |||||
MK Tiger Knee Crush
| Startup | Active | Recovery | Hit | ||
|---|---|---|---|---|---|
| 14(9) | 9 | 9+9(9+11) | KD | ||
| Damage | Stun | Attack | Block | ||
| 90 | 150 | H | -7(1) | ||
| |||||
HK Tiger Knee Crush
| Startup | Active | Recovery | Hit | ||
|---|---|---|---|---|---|
| 20(15) | 11 | 7+10(7+14) | KD | ||
| Damage | Stun | Attack | Block | ||
| 100 | 150 | H | -7(3) | ||
| |||||
EX Tiger Knee Crush
| Startup | Active | Recovery | Hit | ||
|---|---|---|---|---|---|
| 14(9) | 9 | 7+11 | KD | ||
| Damage | Stun | Attack | Block | ||
| 40*20x2*80 (160) | 200 | H | -5(3) | ||
| |||||
Critical Arts
Tiger Rampage
| Startup | Active | Recovery | Hit | ||
|---|---|---|---|---|---|
| 1+6 | 6 | 61 | KD | ||
| Damage | Stun | Attack | Block | ||
| 340 | 0 | H | -42 | ||
| |||||
Taunts
Taunt
| Startup | Active | Recovery | Hit |
|---|---|---|---|
| - | - | 61 | - |
| Damage | Stun | Attack | Block |
| - | - | - | - |
V-System
V-Skill 1
Angry Charge
| Startup | Active | Recovery | Hit | ||
|---|---|---|---|---|---|
| - | - | 50 | - | ||
| Damage | Stun | Attack | Block | ||
| - | - | - | - | ||
| |||||
LP Tiger Uppercut (V-Skill 2)
| Startup | Active | Recovery | Hit | ||
|---|---|---|---|---|---|
| 4(3) | 9 | 31+12 | KD | ||
| Damage | Stun | Attack | Block | ||
| 160(140) | 180(150) | H | -34 | ||
| |||||
V-Skill 2
Hanuman Charge
| Startup | Active | Recovery | Hit | ||
|---|---|---|---|---|---|
| - | - | 50 | - | ||
| Damage | Stun | Attack | Block | ||
| - | - | - | - | ||
| |||||
MP Tiger Uppercut (V-Skill 2)
| Startup | Active | Recovery | Hit | ||
|---|---|---|---|---|---|
| 6(5) | 9 | 31+12 | KD | ||
| Damage | Stun | Attack | Block | ||
| 160(140) | 180(150) | H | -34 | ||
| |||||
HP Tiger Uppercut (V-Skill 2)
| Startup | Active | Recovery | Hit | ||
|---|---|---|---|---|---|
| 8(7) | 9 | 32+11 | KD | ||
| Damage | Stun | Attack | Block | ||
| 160(140) | 180(150) | H | -34 | ||
| |||||
EX Tiger Uppercut (V-Skill 2)
| Startup | Active | Recovery | Hit | ||
|---|---|---|---|---|---|
| 4(3) | 2*2*1*1*1*2 | 32+20 | KD | ||
| Damage | Stun | Attack | Block | ||
| 80*20x5 (180) | 100*130 | H | -38(-39) | ||
| |||||
LK Tiger Knee Crush (V-Skill 2)
| Startup | Active | Recovery | Hit | ||
|---|---|---|---|---|---|
| 12(7) | 7 | 8+11(8+15) | KD | ||
| Damage | Stun | Attack | Block | ||
| 80 | 150 | H | 0(6) | ||
| |||||
MK Tiger Knee Crush (V-Skill 2)
| Startup | Active | Recovery | Hit | ||
|---|---|---|---|---|---|
| 14(9) | 9 | 9+7(9+11) | KD | ||
| Damage | Stun | Attack | Block | ||
| 90 | 150 | H | -2(6) | ||
| |||||
HK Tiger Knee Crush (V-Skill 2)
| Startup | Active | Recovery | Hit | ||
|---|---|---|---|---|---|
| 20(15) | 11 | 7+8(7+14) | KD | ||
| Damage | Stun | Attack | Block | ||
| 100 | 150 | H | -2(8) | ||
| |||||
EX Tiger Knee Crush (V-Skill 2)
| Startup | Active | Recovery | Hit | ||
|---|---|---|---|---|---|
| 14(9) | 9 | 7+9 | KD | ||
| Damage | Stun | Attack | Block | ||
| 40*20x2*80 (160) | 200 | H | 0(8) | ||
| |||||
V-Trigger 1
Tiger Charge
| Startup | Active | Recovery | Hit | ||
|---|---|---|---|---|---|
| 1 | - | 4 | - | ||
| Damage | Stun | Attack | Block | ||
| - | - | - | - | ||
| |||||
Tiger Cannon
| Startup | Active | Recovery | Hit | ||
|---|---|---|---|---|---|
| 17 | - | 32 | KD | ||
| Damage | Stun | Attack | Block | ||
| 20x4*40 (120) | 30x5 (150) | H | 10 | ||
| |||||
V-Trigger 2
Tiger Assault
| Startup | Active | Recovery | Hit | ||
|---|---|---|---|---|---|
| 1 | - | 4 | - | ||
| Damage | Stun | Attack | Block | ||
| - | - | - | - | ||
| |||||
Tiger Spike (level 1)
| Startup | Active | Recovery | Hit | ||
|---|---|---|---|---|---|
| 9+11(12+11) | 2 | 29 | KD | ||
| Damage | Stun | Attack | Block | ||
| 100 | 150 | H | -8 | ||
| |||||
Tiger Spike (level 2)
| Startup | Active | Recovery | Hit | ||
|---|---|---|---|---|---|
| 13+11(39+11) | 2 | 20 | KD | ||
| Damage | Stun | Attack | Block | ||
| 100 | 150 | H | -6 | ||
| |||||
Tiger Spike (level 3)
| Startup | Active | Recovery | Hit | ||
|---|---|---|---|---|---|
| 50 | 2 | 19 | KD | ||
| Damage | Stun | Attack | Block | ||
| 140 | 200 | H | 25(GB) | ||
| |||||
Tiger Rush
| Startup | Active | Recovery | Hit | ||
|---|---|---|---|---|---|
| 13 | 5 | 19 | KD | ||
| Damage | Stun | Attack | Block | ||
| 40*40 | 150 | H | -6 | ||
| |||||
V-Shift
V-Shift
| Startup | Active | Recovery | Hit | ||
|---|---|---|---|---|---|
| 1 | 9 | 22 | - | ||
| Damage | Stun | Attack | Block | ||
| - | - | - | - | ||
| |||||
V-Shift Break
Tiger Tornado
| Startup | Active | Recovery | Hit | ||
|---|---|---|---|---|---|
| ? | 3 | ? | KD | ||
| Damage | Stun | Attack | Block | ||
| 60 | 0 | H | -2 | ||
| |||||
V-Reversal
Tiger Revenge
| Startup | Active | Recovery | Hit | ||
|---|---|---|---|---|---|
| 17 | 2 | 24 | KD | ||
| Damage | Stun | Attack | Block | ||
| 60 | - | H | -2 | ||
| |||||
