Introduction
About Chun-Li
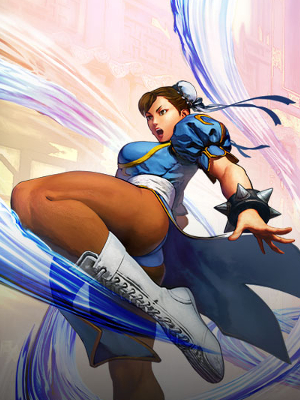
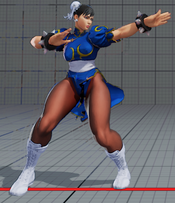
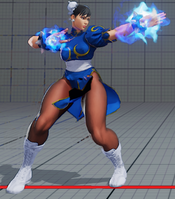
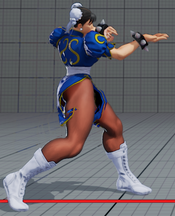
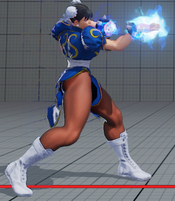
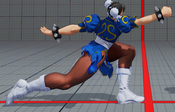
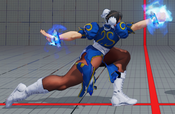
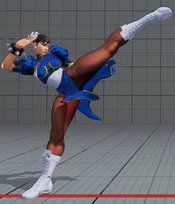
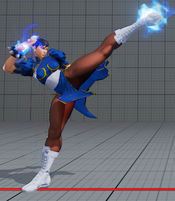
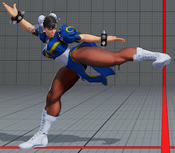
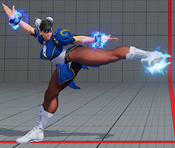
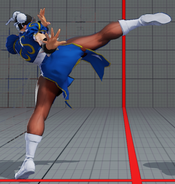
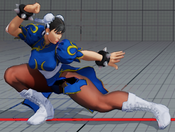
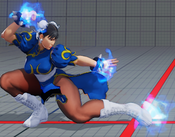
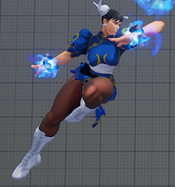
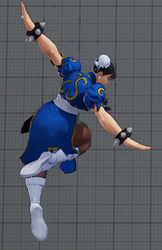
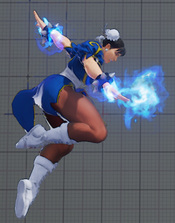
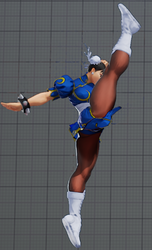
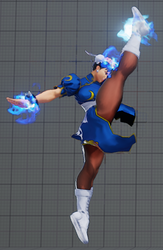
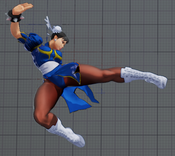
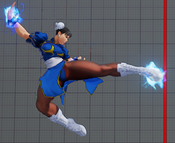
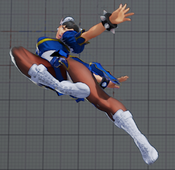
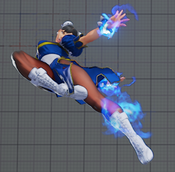
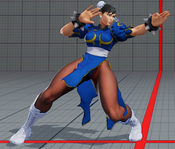
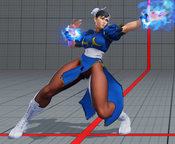
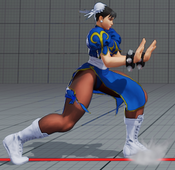
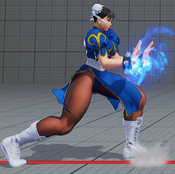
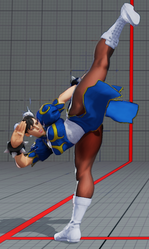
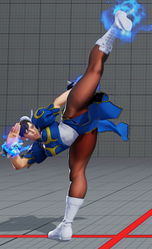
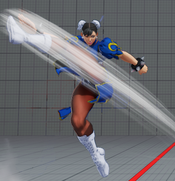
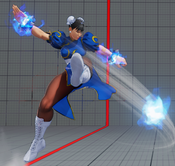
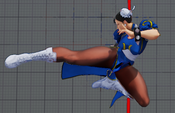
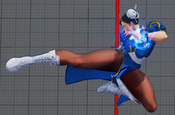
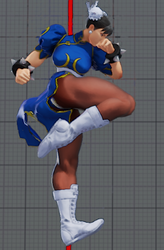
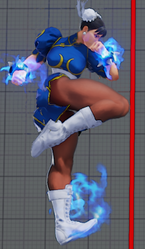
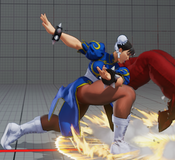
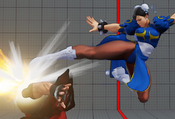
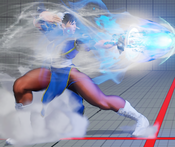
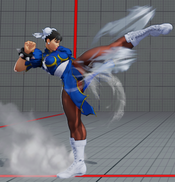
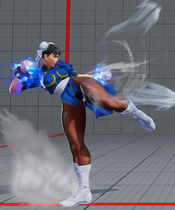
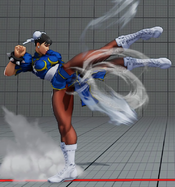
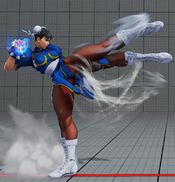
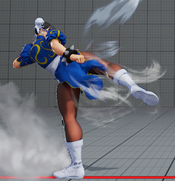
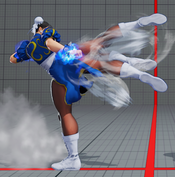
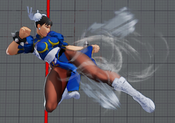
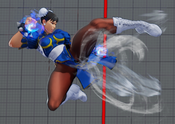
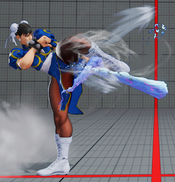
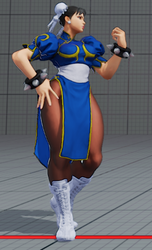
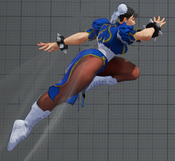
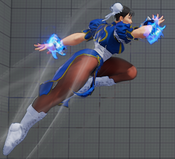
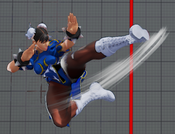
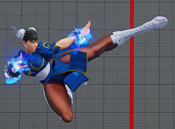
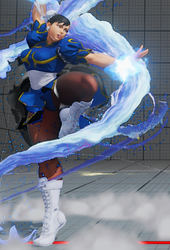
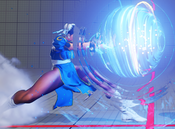
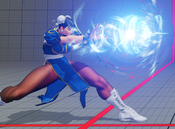
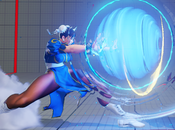
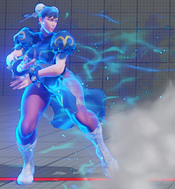
The first lady of fighting games, chun is another one of the more beginner-friendly characters in the game, as well as one of the consistently better characters in the game. Chun is your classic "Footsies" character - focusing on a patient neutral game where one attempts to control the space around him, poke in the opponent's space while simultaniously punish the opponent if they get into your space. Chun has great normals, both pokes, anti airs, and ways to punish the opponent for whiffing attacks or not blocking your incoming pokes. This is the core to chun's game, and is how you will play with her most of the time. Chun is also not limited with defensive options, having a 3f normal, and an EX DP (spinning bird kick), as well excellent moves to punish with after v-shift. Chun also has a great walk speed and solid dashes, which are important in the footsies game since it allows you to walk back and forth and control more space respectively. While chun is excellent in a lot of ways, she struggles in dealing with certain aspects that certain characters can definitely abuse agaist her. One notable one is dealing with variable air approaches, as each of her anti airs can only work in certain angles or situations, so ebing able to mix it up can give chun quite a lot of trouble. Another problem that chun li has is to approach the opponent when they are stalling away for a timeout when they have a significant life lead - while chun has a good mobility, her apporaching options are quite linear, eventually boiling down to dashing or jumping, both of which can be countered by the majority of the cast if they pay attention for them. all in all, chun is a solid character in most areas, but shines in the neutral game. A key to playing chun is to be patient, looking for the opponent to do a mistake and not always rushing to be the one to take the intiative. It's still important, however, to learn and utilize chun's solid offensive game and not forget about her strong v-triggers.
| Strengths | Weaknesses |
|---|---|
|
|
Final Patch
Players to Watch
- Humanbomb
- Ludovic
- MOV
- Punk
- Valmaster
| Chun-Li | |
|---|---|
| Vitals | |
| Life Points | 975 |
| Stun Points | 1000 |
| V-Gauge Points | |
| V-Trigger 1 | 600 |
| V-Trigger 2 | 900 |
| Ground Movement | |
| Forward Walk Speed | 5.35 |
| Backward Walk Speed | 3.4 |
| Forward Dash Speed | 15 |
| Backward Dash Speed | 21 |
| Forward Dash Distance | 142.4 |
| Backward Dash Distance | 123.5 |
| Backdash CH Frames | 3-10 |
| Jumping | |
| Back Jump Speed | 49 (4+41+4) |
| Neutral Jump Speed | 49 (4+41+4) |
| Forward Jump Speed | 48 (3+41+4) |
| Forward Jump Distance | 205 |
| Backward Jump Distance | 184.5 |
| Throws | |
| Throw Hurtbox | 0.3511 |
| Throw Range | 0.8461 |
Frame Data & Descriptions are provided by FATOnline.
|
| SFV Frame Data Glossary | |
|---|---|
| Active |
How many frames a move remains active (can hurt opponents) for. |
| Attack |
Attack level is L for low attacks (must be blocked crouching), H is for High attacks (which can be blocked high or low) and M for overhead (must be blocked standing). T is for throw attacks (which cannot be blocked). |
| Cancel options |
Available cancel options.
|
| Confirm windows |
Hit confirm windows written as Specials & CAs/Target Combos/V-Trigger. Notation may denote V-Skill only cancel windows in Specials.
|
| Crush Counter |
Crush Counter hit advantage written as opponent state, frame advantage, and v-gauge gain on hit. |
| Damage |
Attack damage on hit. Notation may denote multi-hit or "sweet spot" damage values on certain frames. |
| Hit/Block |
These are frame advantage values when the attack hits or is blocked. If the number is positive, then the move will end before the defender can act again. If the number is negative, the defender will be able to act before the attacker and maybe even punish. KD refers to knockdown on hit.
|
| Knockdown |
Knockdown advantage against Normal, Quick Rise and Back Rise wake up options. |
| Recovery |
How many frames it takes for a move to finish after it's been active. |
| Startup |
How many frames it takes before the move becomes 'active' or have a hit box. The last startup frame and the first active frame are the same frame, meaning all values are written as Startup + 1. |
| Stun |
Amount of stun added to the opponent's stun bar on hit. |
Normals
Stand LP
| Normal | Startup | Active | Recovery | Hit | ||
|---|---|---|---|---|---|---|
| 4 | 2 | 8 | 5 | |||
| Damage | Stun | Attack | Block | |||
| 30 | 70 | H | 2 | |||
| ||||||
| V-Trigger 1 | Startup | Active | Recovery | Hit | ||
| 4 | 5 | 5 | 6 | |||
| Damage | Stun | Attack | Block | |||
| 40 | 70 | H | 2 | |||
| ||||||
Stand MP
| Normal | Startup | Active | Recovery | Hit | ||
|---|---|---|---|---|---|---|
| 5 | 3 | 9 | 6 | |||
| Damage | Stun | Attack | Block | |||
| 60 | 100 | H | 3 | |||
| ||||||
| V-Trigger 1 | Startup | Active | Recovery | Hit | ||
| 5 | 3 | 9 | 8 | |||
| Damage | Stun | Attack | Block | |||
| 70 | 100 | H | 3 | |||
| ||||||
Stand HP
| Normal | Startup | Active | Recovery | Hit | ||
|---|---|---|---|---|---|---|
| 11 | 2 | 18 | 0 | |||
| Damage | Stun | Attack | Block | |||
| 80 | 150 | H | -4 | |||
| ||||||
| V-Trigger 1 | Startup | Active | Recovery | Hit | ||
| 11 | 4 | 18 | 2 | |||
| Damage | Stun | Attack | Block | |||
| 90 | 150 | H | -5 | |||
| ||||||
Stand LK
| Normal | Startup | Active | Recovery | Hit | ||
|---|---|---|---|---|---|---|
| 5 | 3 | 7 | 1 | |||
| Damage | Stun | Attack | Block | |||
| 40 | 70 | H | -3 | |||
| ||||||
| V-Trigger 1 | Startup | Active | Recovery | Hit | ||
| 5 | 4 | 6 | 1 | |||
| Damage | Stun | Attack | Block | |||
| 50 | 70 | H | -3 | |||
| ||||||
Stand MK
| Normal | Startup | Active | Recovery | Hit | ||
|---|---|---|---|---|---|---|
| 8 | 3 | 15 | 2 | |||
| Damage | Stun | Attack | Block | |||
| 70 | 100 | H | -2 | |||
| ||||||
| V-Trigger 1 | Startup | Active | Recovery | Hit | ||
| 8 | 4 | 14 | 4 | |||
| Damage | Stun | Attack | Block | |||
| 80 | 100 | H | -2 | |||
| ||||||
Stand HK
| Normal | Startup | Active | Recovery | Hit | ||
|---|---|---|---|---|---|---|
| 12 | 3 | 16 | 1 | |||
| Damage | Stun | Attack | Block | |||
| 90 | 150 | H | -2 | |||
| ||||||
| V-Trigger 1 | Startup | Active | Recovery | Hit | ||
| 12 | 3 | 16 | 1 | |||
| Damage | Stun | Attack | Block | |||
| 100 | 150 | H | -2 | |||
| ||||||
Crouch LP
| Normal | Startup | Active | Recovery | Hit | ||
|---|---|---|---|---|---|---|
| 4 | 3 | 5 | 5 | |||
| Damage | Stun | Attack | Block | |||
| 30 | 70 | H | 2 | |||
| ||||||
| V-Trigger 1 | Startup | Active | Recovery | Hit | ||
| 4 | 4 | 4 | 6 | |||
| Damage | Stun | Attack | Block | |||
| 40 | 70 | H | 2 | |||
| ||||||
Crouch MP
| Normal | Startup | Active | Recovery | Hit | ||
|---|---|---|---|---|---|---|
| 10 | 9 | 18 | -3 | |||
| Damage | Stun | Attack | Block | |||
| 60 | 100 | L | -8 | |||
| ||||||
| V-Trigger 1 | Startup | Active | Recovery | Hit | ||
| 10 | 9 | 18 | -2 | |||
| Damage | Stun | Attack | Block | |||
| 70 | 100 | L | -8 | |||
| ||||||
Crouch HP
| Normal | Startup | Active | Recovery | Hit | ||
|---|---|---|---|---|---|---|
| 7 | 2(10)2 | 17 | 2 | |||
| Damage | Stun | Attack | Block | |||
| 50*40 | 100*50 | H*H | -5 | |||
| ||||||
| V-Trigger 1 | Startup | Active | Recovery | Hit | ||
| 7 | 2(10)2 | 14 | 2 | |||
| Damage | Stun | Attack | Block | |||
| 65*45 | 100*50 | H*H | -2 | |||
| ||||||
Crouch LK
| Normal | Startup | Active | Recovery | Hit | ||
|---|---|---|---|---|---|---|
| 3 | 2 | 8 | 2 | |||
| Damage | Stun | Attack | Block | |||
| 20 | 70 | L | -1 | |||
| ||||||
| V-Trigger 1 | Startup | Active | Recovery | Hit | ||
| 3 | 3 | 7 | 4 | |||
| Damage | Stun | Attack | Block | |||
| 30 | 70 | L | -1 | |||
| ||||||
Crouch MK
| Normal | Startup | Active | Recovery | Hit | ||
|---|---|---|---|---|---|---|
| 6 | 2 | 16 | 2 | |||
| Damage | Stun | Attack | Block | |||
| 50 | 100 | L | -2 | |||
| ||||||
| V-Trigger 1 | Startup | Active | Recovery | Hit | ||
| 6 | 2 | 14 | 4 | |||
| Damage | Stun | Attack | Block | |||
| 60 | 100 | L | -2 | |||
| ||||||
Crouch HK
| Normal | Startup | Active | Recovery | Hit | ||
|---|---|---|---|---|---|---|
| 8 | 3 | 24 | KD | |||
| Damage | Stun | Attack | Block | |||
| 90 | 150 | L | -12 | |||
| ||||||
| V-Trigger 1 | Startup | Active | Recovery | Hit | ||
| 8 | 4 | 23 | KD | |||
| Damage | Stun | Attack | Block | |||
| 100 | 150 | L | -12 | |||
| ||||||
Jump LP
| Normal | Startup | Active | Recovery | Hit |
|---|---|---|---|---|
| 3 | 5 | - | - | |
| Damage | Stun | Attack | Block | |
| 40 | 70 | M | - | |
| V-Trigger 1 | Startup | Active | Recovery | Hit |
| 3 | 5 | - | - | |
| Damage | Stun | Attack | Block | |
| 50 | 70 | M | - |
Jump MP
| Normal | Startup | Active | Recovery | Hit | ||
|---|---|---|---|---|---|---|
| 6 | 4 | - | - | |||
| Damage | Stun | Attack | Block | |||
| 60 | 100 | M | - | |||
| ||||||
| V-Trigger 1 | Startup | Active | Recovery | Hit | ||
| 6 | 4 | - | - | |||
| Damage | Stun | Attack | Block | |||
| 70 | 100 | M | - | |||
| ||||||
Jump HP
| Normal | Startup | Active | Recovery | Hit | ||
|---|---|---|---|---|---|---|
| 6 | 4(2)4 | - | - | |||
| Damage | Stun | Attack | Block | |||
| 50*50 | 100*50 | M*M | - | |||
| ||||||
| V-Trigger 1 | Startup | Active | Recovery | Hit | ||
| 6 | 4(2)4 | - | - | |||
| Damage | Stun | Attack | Block | |||
| 55*55 | 100*50 | M*M | - | |||
| ||||||
Jump LK
| Normal | Startup | Active | Recovery | Hit | ||
|---|---|---|---|---|---|---|
| 4 | 7 | - | - | |||
| Damage | Stun | Attack | Block | |||
| 40 | 70 | M | - | |||
| ||||||
| V-Trigger 1 | Startup | Active | Recovery | Hit | ||
| 4 | 7 | - | - | |||
| Damage | Stun | Attack | Block | |||
| 50 | 70 | M | - | |||
| ||||||
Jump MK
| Normal | Startup | Active | Recovery | Hit | ||
|---|---|---|---|---|---|---|
| 6 | 5 | - | - | |||
| Damage | Stun | Attack | Block | |||
| 60 | 100 | M | - | |||
| ||||||
| V-Trigger 1 | Startup | Active | Recovery | Hit | ||
| 6 | 5 | - | - | |||
| Damage | Stun | Attack | Block | |||
| 70 | 100 | M | - | |||
| ||||||
Jump HK
| Normal | Startup | Active | Recovery | Hit | ||
|---|---|---|---|---|---|---|
| 7 | 6 | - | - | |||
| Damage | Stun | Attack | Block | |||
| 90 | 150 | M | - | |||
| V-Trigger 1 | Startup | Active | Recovery | Hit | ||
| 7 | 6 | - | - | |||
| Damage | Stun | Attack | Block | |||
| 100 | 150 | M | - | |||
| ||||||
Neutral Jump HK
| Normal | Startup | Active | Recovery | Hit | ||
|---|---|---|---|---|---|---|
| 7 | 5 | - | - | |||
| Damage | Stun | Attack | Block | |||
| 90 | 150 | M | - | |||
| ||||||
| V-Trigger 1 | Startup | Active | Recovery | Hit | ||
| 7 | 5 | - | - | |||
| Damage | Stun | Attack | Block | |||
| 100 | 150 | M | - | |||
| ||||||
Command Normals
Tsuitotsuken
| Normal | Startup | Active | Recovery | Hit | ||
|---|---|---|---|---|---|---|
| 7 | 2 | 12 | 3 | |||
| Damage | Stun | Attack | Block | |||
| 65 | 100 | H | 0 | |||
| ||||||
| V-Trigger 1 | Startup | Active | Recovery | Hit | ||
| 7 | 3 | 11 | 4 | |||
| Damage | Stun | Attack | Block | |||
| 75 | 100 | H | 0 | |||
| ||||||
Hakkei
| Normal | Startup | Active | Recovery | Hit | ||
|---|---|---|---|---|---|---|
| 7 | 5 | 13(18) | 3 | |||
| Damage | Stun | Attack | Block | |||
| 90 | 150 | H | 2 | |||
| ||||||
| V-Trigger 1 | Startup | Active | Recovery | Hit | ||
| 7 | 7 | 11 | 6 | |||
| Damage | Stun | Attack | Block | |||
| 100 | 150 | H | 2 | |||
| ||||||
Senenshu
| Normal | Startup | Active | Recovery | Hit | ||
|---|---|---|---|---|---|---|
| 26 | 2 | 16 | 2 | |||
| Damage | Stun | Attack | Block | |||
| 70 | 100 | M | -2 | |||
| ||||||
| V-Trigger 1 | Startup | Active | Recovery | Hit | ||
| 26 | 2 | 16 | 4 | |||
| Damage | Stun | Attack | Block | |||
| 80 | 100 | M | -2 | |||
| ||||||
Tenkukyaku
| Normal | Startup | Active | Recovery | Hit | ||
|---|---|---|---|---|---|---|
| 8 | 5 | 13 | 2 | |||
| Damage | Stun | Attack | Block | |||
| 80 | 150 | H | 0 | |||
| ||||||
| V-Trigger 1 | Startup | Active | Recovery | Hit | ||
| 8 | 5 | 13 | 2 | |||
| Damage | Stun | Attack | Block | |||
| 90 | 150 | H | 0 | |||
| ||||||
Yokusenkyaku
| Normal | Startup | Active | Recovery | Hit | ||
|---|---|---|---|---|---|---|
| 18 | 5 | 13(18) | 2 | |||
| Damage | Stun | Attack | Block | |||
| 80 | 150 | H | -2 | |||
| ||||||
| V-Trigger 1 | Startup | Active | Recovery | Hit | ||
| 18 | 5 | 13(18) | 4 | |||
| Damage | Stun | Attack | Block | |||
| 90 | 150 | H | -2 | |||
| ||||||
Kakurakukyaku
| Normal | Startup | Active | Recovery | Hit | ||
|---|---|---|---|---|---|---|
| 34 | 7 | 6 | 6(10) | |||
| Damage | Stun | Attack | Block | |||
| 80 | 150 | M | 2(6) | |||
| ||||||
| V-Trigger 1 | Startup | Active | Recovery | Hit | ||
| 34 | 7 | 6 | 7 | |||
| Damage | Stun | Attack | Block | |||
| 90 | 150 | M | 3 | |||
| ||||||
Yosokyaku
| Normal | Startup | Active | Recovery | Hit | ||
|---|---|---|---|---|---|---|
| 5+4+5 | 4 | 4 | - | |||
| Damage | Stun | Attack | Block | |||
| 40*50*60 (150) | 60x3 (180) | M | - | |||
| ||||||
| V-Trigger 1 | Startup | Active | Recovery | Hit | ||
| 5+4+5 | 4 | 4 | - | |||
| Damage | Stun | Attack | Block | |||
| 40*50*60 (150) | 60x3 (180) | M | - | |||
| ||||||
Throws
Koshuto
| Startup | Active | Recovery | Hit |
|---|---|---|---|
| 5 | 3 | 17 | KD |
| Damage | Stun | Attack | Block |
| 120 | 150 | T | KD |
Tenshin Shushu
| Startup | Active | Recovery | Hit |
|---|---|---|---|
| 5 | 3 | 17 | KD |
| Damage | Stun | Attack | Block |
| 140 | 200 | T | KD |
Special Moves
Sankaku Tobi
| Startup | Active | Recovery | Hit | ||
|---|---|---|---|---|---|
| - | - | - | - | ||
| Damage | Stun | Attack | Block | ||
| - | - | - | - | ||
| |||||
LP Kikoken
| Normal | Startup | Active | Recovery | Hit | ||
|---|---|---|---|---|---|---|
| 13 | - | 33 | 0 | |||
| Damage | Stun | Attack | Block | |||
| 60 | 100 | H | -6 | |||
| ||||||
| V-Trigger 1 | Startup | Active | Recovery | Hit | ||
| 13 | - | 33 | 0 | |||
| Damage | Stun | Attack | Block | |||
| 60 | 100 | H | -6 | |||
| ||||||
MP Kikoken
| Normal | Startup | Active | Recovery | Hit | ||
|---|---|---|---|---|---|---|
| 11 | - | 34 | -1 | |||
| Damage | Stun | Attack | Block | |||
| 60 | 100 | H | -5 | |||
| ||||||
| V-Trigger 1 | Startup | Active | Recovery | Hit | ||
| 11 | - | 34 | -1 | |||
| Damage | Stun | Attack | Block | |||
| 60 | 100 | H | -5 | |||
| ||||||
HP Kikoken
| Normal | Startup | Active | Recovery | Hit | ||
|---|---|---|---|---|---|---|
| 9 | - | 35 | -1 | |||
| Damage | Stun | Attack | Block | |||
| 60 | 100 | H | -4 | |||
| ||||||
| V-Trigger 1 | Startup | Active | Recovery | Hit | ||
| 9 | - | 35 | -1 | |||
| Damage | Stun | Attack | Block | |||
| 60 | 100 | H | -4 | |||
| ||||||
EX Kikoken
| Normal | Startup | Active | Recovery | Hit | ||
|---|---|---|---|---|---|---|
| 11 | - | 27 | 4 | |||
| Damage | Stun | Attack | Block | |||
| 40*60 | 0*100 | H*H | 1 | |||
| ||||||
| V-Trigger 1 | Startup | Active | Recovery | Hit | ||
| 11 | - | 27 | 4 | |||
| Damage | Stun | Attack | Block | |||
| 50*70 | 0*100 | H*H | 1 | |||
| ||||||
LK Hyakuretsukyaku
| Normal | Startup | Active | Recovery | Hit | ||
|---|---|---|---|---|---|---|
| 5 | 2(5)2(6)2(6)2 | 20 | 4 | |||
| Damage | Stun | Attack | Block | |||
| 15x4 (60) | 20x4 (80) | H | -8 | |||
| ||||||
| V-Trigger 1 | Startup | Active | Recovery | Hit | ||
| 5 | 2(5)2(6)2(6)2 | 20 | 4 | |||
| Damage | Stun | Attack | Block | |||
| 15x3*25 (70) | 20x4 (80) | H | -8 | |||
| ||||||
MK Hyakuretsukyaku
| Normal | Startup | Active | Recovery | Hit | ||
|---|---|---|---|---|---|---|
| 11 | 2(4)2(4)2(4)2(4)2 | 20 | 3 | |||
| Damage | Stun | Attack | Block | |||
| 16x5 (80) | 25x4*20 (120) | H | -9 | |||
| ||||||
| V-Trigger 1 | Startup | Active | Recovery | Hit | ||
| 11 | 2(4)2(4)2(4)2(4)2 | 20 | 3 | |||
| Damage | Stun | Attack | Block | |||
| 16x4*26 (90) | 25x4*20 (120) | H | -9 | |||
| ||||||
HK Hyakuretsukyaku
| Normal | Startup | Active | Recovery | Hit | ||
|---|---|---|---|---|---|---|
| 14 | 2(3)2(3)2(3)2(3)2(3)2 | 22 | KD | |||
| Damage | Stun | Attack | Block | |||
| 15x5*25 (100) | 20x6 (120) | H | -12 | |||
| ||||||
| V-Trigger 1 | Startup | Active | Recovery | Hit | ||
| 14 | 2(3)2(3)2(3)2(3)2(3)2 | 22 | KD | |||
| Damage | Stun | Attack | Block | |||
| 15x5*35 (110) | 20x6 (120) | H | -12 | |||
| ||||||
EX Hyakuretsukyaku
| Normal | Startup | Active | Recovery | Hit | ||
|---|---|---|---|---|---|---|
| 5 | 2(3)2(3)2(3)2(3)2(3)2(11)2(3)2(3)2(3)2 | 19 | KD | |||
| Damage | Stun | Attack | Block | |||
| 10x9*50 (140) | 200 | H | -2 | |||
| ||||||
| V-Trigger 1 | Startup | Active | Recovery | Hit | ||
| 5 | 2(3)2(3)2(3)2(3)2(3)2(11)2(3)2(3)2(3)2 | 19 | KD | |||
| Damage | Stun | Attack | Block | |||
| 10x9*60 (150) | 200 | H | -2 | |||
| ||||||
LK Air Hyakuretsukyaku
| Normal | Startup | Active | Recovery | Hit | ||
|---|---|---|---|---|---|---|
| 8 | 2(5)2(3)2(5)2 | 12 | 0(4) | |||
| Damage | Stun | Attack | Block | |||
| 70 | 20x4 (80) | H | -5(-2) | |||
| ||||||
| V-Trigger 1 | Startup | Active | Recovery | Hit | ||
| 8 | 2(5)2(3)2(5)2 | 12 | 0(3) | |||
| Damage | Stun | Attack | Block | |||
| 70 | 20x4 (80) | H | -5(-2) | |||
| ||||||
MK Air Hyakuretsukyaku
| Normal | Startup | Active | Recovery | Hit | ||
|---|---|---|---|---|---|---|
| 10 | 2(2)2(4)2(4)2(2)2 | 12 | 1(4) | |||
| Damage | Stun | Attack | Block | |||
| 90 | 20x5 (100) | H | -4(-2) | |||
| ||||||
| V-Trigger 1 | Startup | Active | Recovery | Hit | ||
| 10 | 2(2)2(4)2(4)2(2)2 | 12 | 1(3) | |||
| Damage | Stun | Attack | Block | |||
| 16x5 (80) | 20x5 (100) | H | -4(-2) | |||
| ||||||
HK Air Hyakuretsukyaku
| Normal | Startup | Active | Recovery | Hit | ||
|---|---|---|---|---|---|---|
| 12 | 2(4)2(3)2(4)2(2)2(2)2 | 12 | -4(-1) | |||
| Damage | Stun | Attack | Block | |||
| 100 | 20x6 (120) | H | -6(-4) | |||
| ||||||
| V-Trigger 1 | Startup | Active | Recovery | Hit | ||
| 12 | 2(4)2(3)2(4)2(2)2(2)2 | 12 | -4(-1) | |||
| Damage | Stun | Attack | Block | |||
| 16x5*20 (100) | 20x6 (120) | H | -6(-4) | |||
| ||||||
EX Air Hyakuretsukyaku
| Normal | Startup | Active | Recovery | Hit | ||
|---|---|---|---|---|---|---|
| 6 | 2(1)2(2)2(3)2(1)2(2)2(3)2 | 12 | KD | |||
| Damage | Stun | Attack | Block | |||
| 23x6*22 (160) | 30x7 (210) | H | -13 | |||
| ||||||
| V-Trigger 1 | Startup | Active | Recovery | Hit | ||
| 6 | 2(1)2(2)2(3)2(1)2(2)2(3)2 | 12 | KD | |||
| Damage | Stun | Attack | Block | |||
| 25x6*20 (170) | 30x7 (210) | H | -13 | |||
| ||||||
LK Spinning Bird Kick
| Normal | Startup | Active | Recovery | Hit | ||
|---|---|---|---|---|---|---|
| 9 | 2(1)2(4)2(5)2(3)2 | 24 | KD | |||
| Damage | Stun | Attack | Block | |||
| 25*15x3*40 (110) | 20*25x3*105 (200) | H | -6 | |||
| ||||||
| V-Trigger 1 | Startup | Active | Recovery | Hit | ||
| 9 | 2(1)2(4)2(5)2(3)2 | 24 | KD | |||
| Damage | Stun | Attack | Block | |||
| 25*15x3*50 (120) | 20*25x3*105 (200) | H | -6 | |||
| ||||||
MK Spinning Bird Kick
| Normal | Startup | Active | Recovery | Hit | ||
|---|---|---|---|---|---|---|
| 15 | 2(1)2(4)2(4)2(3)2(6)2(5)2 | 24 | KD | |||
| Damage | Stun | Attack | Block | |||
| 35*11x5*40 (130) | 30*20x5*70 (200) | H | -8 | |||
| ||||||
| V-Trigger 1 | Startup | Active | Recovery | Hit | ||
| 15 | 2(1)2(4)2(4)2(3)2(6)2(5)2 | 24 | KD | |||
| Damage | Stun | Attack | Block | |||
| 35*11x5*50 (140) | 30*20x5*70 (200) | H | -8 | |||
| ||||||
HK Spinning Bird Kick
| Normal | Startup | Active | Recovery | Hit | ||
|---|---|---|---|---|---|---|
| 19 | 2(1)2(4)2(4)2(4)2(5)2(4)2(5)2(5)2 | 24 | KD | |||
| Damage | Stun | Attack | Block | |||
| 21*12x7*45 (150) | 20x8*40 (200) | H | -8 | |||
| ||||||
| V-Trigger 1 | Startup | Active | Recovery | Hit | ||
| 19 | 2(1)2(4)2(4)2(4)2(5)2(4)2(5)2(5)2 | 24 | KD | |||
| Damage | Stun | Attack | Block | |||
| 21*12x7*55 (160) | 20x8*40 (200) | H | -8 | |||
| ||||||
EX Spinning Bird Kick
| Normal | Startup | Active | Recovery | Hit | ||
|---|---|---|---|---|---|---|
| 5 | 7(1)4(1)4(1)2 | 35 | KD | |||
| Damage | Stun | Attack | Block | |||
| 25x4*50 (150) | 30x4*80 (200) | H | -20 | |||
| ||||||
| V-Trigger 1 | Startup | Active | Recovery | Hit | ||
| 5 | 7(1)4(1)4(1)2 | 35 | KD | |||
| Damage | Stun | Attack | Block | |||
| 25x4*60 (160) | 30x4*80 (200) | H | -20 | |||
| ||||||
Critical Arts
Hoyokusen
| Startup | Active | Recovery | Hit | ||
|---|---|---|---|---|---|
| 5 | - | 35 | KD | ||
| Damage | Stun | Attack | Block | ||
| 330 | 0 | H | -20 | ||
| |||||
Taunts
Taunt
| Startup | Active | Recovery | Hit |
|---|---|---|---|
| - | - | 61 | - |
| Damage | Stun | Attack | Block |
| - | - | - | - |
V-System
V-Skill 1
Rankyaku
| Normal | Startup | Active | Recovery | Hit | ||
|---|---|---|---|---|---|---|
| 11 | 6 | 36+6 | KD | |||
| Damage | Stun | Attack | Block | |||
| 40 | 50 | H | -24 | |||
| ||||||
| V-Trigger 1 | Startup | Active | Recovery | Hit | ||
| 11 | 6 | 36+6 | KD | |||
| Damage | Stun | Attack | Block | |||
| 50 | 50 | H | -24 | |||
| ||||||
Souseikyaku
| Normal | Startup | Active | Recovery | Hit | ||
|---|---|---|---|---|---|---|
| 22+12 | 6 | 4 | - | |||
| Damage | Stun | Attack | Block | |||
| 100 | 120 | H | - | |||
| ||||||
| V-Trigger 1 | Startup | Active | Recovery | Hit | ||
| 22+12 | 6 | 4 | - | |||
| Damage | Stun | Attack | Block | |||
| 100 | 120 | H | - | |||
| ||||||
V-Skill 2
Hazanshu
| Startup | Active | Recovery | Hit | ||
|---|---|---|---|---|---|
| 27 | 3 | 14(20) | 4 | ||
| Damage | Stun | Attack | Block | ||
| 80 | 120 | H | -4 | ||
| |||||
V-Trigger 1
Renkiko
| Startup | Active | Recovery | Hit | ||
|---|---|---|---|---|---|
| 1 | - | 4 | - | ||
| Damage | Stun | Attack | Block | ||
| - | - | - | - | ||
| |||||
V-Trigger 2
Kikosho
| Startup | Active | Recovery | Hit | ||
|---|---|---|---|---|---|
| 7 | 24 | 7 | KD | ||
| Damage | Stun | Attack | Block | ||
| 20x4*40 (120) | 150 | H | 2 | ||
| |||||
Kikosho (release)
| Startup | Active | Recovery | Hit | ||
|---|---|---|---|---|---|
| 16 | 12 | 16 | KD | ||
| Damage | Stun | Attack | Block | ||
| 20x2*40 (80) | 100 | H | -2 | ||
| |||||
Kikosho (hold)
| Startup | Active | Recovery | Hit | ||
|---|---|---|---|---|---|
| 49 | 24 | 7 | KD | ||
| Damage | Stun | Attack | Block | ||
| 20x4*40 (120) | 150 | H | 18(GB) | ||
| |||||
V-Shift
V-Shift
| Startup | Active | Recovery | Hit | ||
|---|---|---|---|---|---|
| 1 | 9 | 22 | - | ||
| Damage | Stun | Attack | Block | ||
| - | - | - | - | ||
| |||||
V-Shift Break
Ensenbu
| Startup | Active | Recovery | Hit | ||
|---|---|---|---|---|---|
| ? | 3 | ? | KD | ||
| Damage | Stun | Attack | Block | ||
| 60 | 0 | H | -2 | ||
| |||||
