| Line 400: | Line 400: | ||
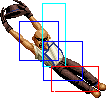
* Choi leaps to the wall specified, or to the wall behind him if _d u+K was used. If K is held until he touches the wall, he will perform Houkou Tenkan. He can do the Houkou Tenkan (any direction + P/K) up to three more times after that | * Choi leaps to the wall specified, or to the wall behind him if _d u+K was used. If K is held until he touches the wall, he will perform Houkou Tenkan. He can do the Houkou Tenkan (any direction + P/K) up to three more times after that | ||
* if B was held, Choi will do the Houkou Tenkan at a 45 degree angle off the wall. If D was held, he will do it horizontally | * if B was held, Choi will do the Houkou Tenkan at a 45 degree angle off the wall. If D was held, he will do it horizontally | ||
| | |- | ||
== | |colspan="9" align="center"| '''DMs''' | ||
|- | |||
! <br>hcbx2+[[image:snka.gif]]<br><br> | |||
|align="center"| | |||
|align="center"| | |||
|align="center"| | |||
|align="center"| HL | |||
|rowspan="2" colspan="3" | [[image:Choi02_hcbx2P.png|center]] | |||
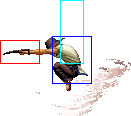
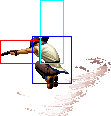
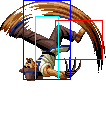
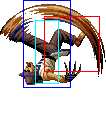
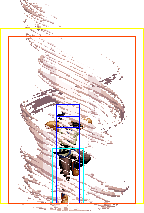
|rowspan="2"| '''Shin! Chouzetsu Tatsumaki Shinkuu Zan - hcbx2+P''' | |||
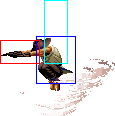
* Choi can move backwards and forward during the tornado | * Choi can move backwards and forward during the tornado | ||
* has some startup delay and invincibility but he can still be hit the moment the tornado begins to appear. However, once it has completely enveloped Choi, it is not possible to hit him aside of some very few moves, such as Kula's SDM | * has some startup delay and invincibility but he can still be hit the moment the tornado begins to appear. However, once it has completely enveloped Choi, it is not possible to hit him aside of some very few moves, such as Kula's SDM | ||
| Line 409: | Line 415: | ||
* hard knockdown on all hits | * hard knockdown on all hits | ||
* negates normal and DM projectiles | * negates normal and DM projectiles | ||
|- | |||
! hcbx2+[[image:snkc.gif]] | |||
2. Hou'ou Kyaku - qcf hcb+K | |align="center"| | ||
|align="center"| | |||
|align="center"| | |||
|align="center"| HL | |||
|- | |||
! <br>qcf,hcb+[[image:snkb.gif]]<br><br> | |||
|align="center"| | |||
|align="center"| | |||
|align="center"| | |||
|align="center"| HL | |||
|rowspan="2" colspan="3" | [[image:Choi02_qcfhcbK.png|center]] | |||
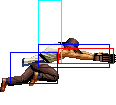
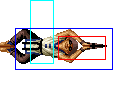
|rowspan="2"| '''Hou'ou Kyaku - qcf,hcb+K''' | |||
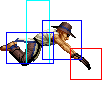
* Choi runs forward quickly and if he connects he will do a series of attacks | * Choi runs forward quickly and if he connects he will do a series of attacks | ||
* if it's blocked or misses, he will fall down and can be punished easily | * if it's blocked or misses, he will fall down and can be punished easily | ||
|- | |||
! qcf,hcb+[[image:snkd.gif]] | |||
|align="center"| | |||
|align="center"| | |||
|align="center"| | |||
|align="center"| HL | |||
|} | |||
=== SDMs === | === SDMs === | ||
Revision as of 06:17, 3 October 2013
General Info
Crouch height: Low
Colors

|

|

|

|
Movelist
SDMs
1. Hou'ou Kyaku - qcf hcb+BD
- same properties as his qcf hcb+K DM version, but does way more damage, a bit over 50% of a life bar
HSDMs
1. Shakushi - hcfx2+AC(air)
- Choi disappears, then attacks 7 times in random locations on the screen. All hits except the last one (when Choi reappears) put the opponent into a jugglable state
- it is very difficult to evade this super because of Choi's randomness. It can also crossup very easily especially if your opponent is in the middle of the screen
- Choi can easily be hit out of this move while he has disappeared, using various attacks including rising uppercuts and even standing jabs. However, it's not guaranteed to always work
Notes
- cancellable normals are close A, far A, crouch A, close B, close C, crouch C, jump C
- CD is cancellable into specials and DMs
Combos
Anywhere
1. [Jump attack] Crouch BB, far A, qcf hcb+K - 35%
This is easily Choi's most useful combo which MUST be learned if one is considering being a Choi player. The far A, qcf hcb+K part of the combo can be input with the shortcut qcf+A, hcb+K.
2. Crouch C, qcf hcb+K - 40%
Used for punishing and for hit confirming the crouch C poke (which isn't hard since it has many cancel frames).
3. [Jump attack] Crouch BB, BC, Crouch C, qcf hcb+BD - 65%
Tricky combo. It must be input as Crouch BB, Crouch C~B, qcf hcb+BD. The combo does huge damage and is not hard to hit confirm.
4. jump C, qcf+B(air) - 20%
Not damaging but a very useful combo. Depending on the spacing, it is possible to combo a far A after landing from qcf+B(and a DM after that as well, though not that easy).
5. f+B, [far A], qcf hcb+B - 35%
After f+B, far A and qcf hcb+B are links that are about 1-2 frames tight. It's much easier to do a reversal special move/super than it is to do a reversal normal, so the far A is listed as optional.
6. Close D, BC, Crouch C, qcf hcb+BD - 75%
This is strictly a combo to use when someone has missed a laggy move(super or dp). Can't really be comboed after a jump attack.
7. HSDM, jump CD - % varies
This combo doesn't always work. If one of the last hits (but not the very last hit since that puts the opponent into an unjugglable state) connects and the opponent happens to be in range, Choi can combo a superjump CD after.
Corner
1. _d u+D/_b f+P, f+P, f+P, f+P, _d u+C - 48%
Technically this combo can be started very far away from the corner and if executed fully, will take the opponent to the corner. The _d u+C won't combo outside the corner.
Strategies
Matchup Information
Billy
- Countering crouch A and hcf+P
At a distance, Choi can spam crouch C whiff cancels into _d u+D. If Billy sticks out crouch A or hcf+A, crouch C will beat it. If Billy doesn't do it, CHoi will whiff the crouch C but immediately fly away to safety such that Billy would be unable to punish.
- Evading Billy's f+A
Choi's crouching and crouch blocking hitbox allows him to crouch under both hits of Billy's f+A, which is arguably Billy's best attack. On reaction, punish with crouch C into DM combo.
